

Page 1
REFRIGERATOR
INSTRUCTION MANUAL
Model No.:
FR-061(SLK)
FR-143WH/BL
GR/MY
FR-153SL
Internal light (model FR-143WH/BL/GR/MY, FR-153SL)
The internal ligth will automatically switch ON or OFF whenever the refrigerator door is opened or closed.
1. Changing the internal light bulb.
1) Disconnect the refrigerator from the main supply by removing the plug.
2) Replace the bulb with one of the correct type and size(15watt SES E 14 Base)
The light bulb is not covered by our warranty.
■
Blowing Agent : CYCLO - PENTANE
Page 2
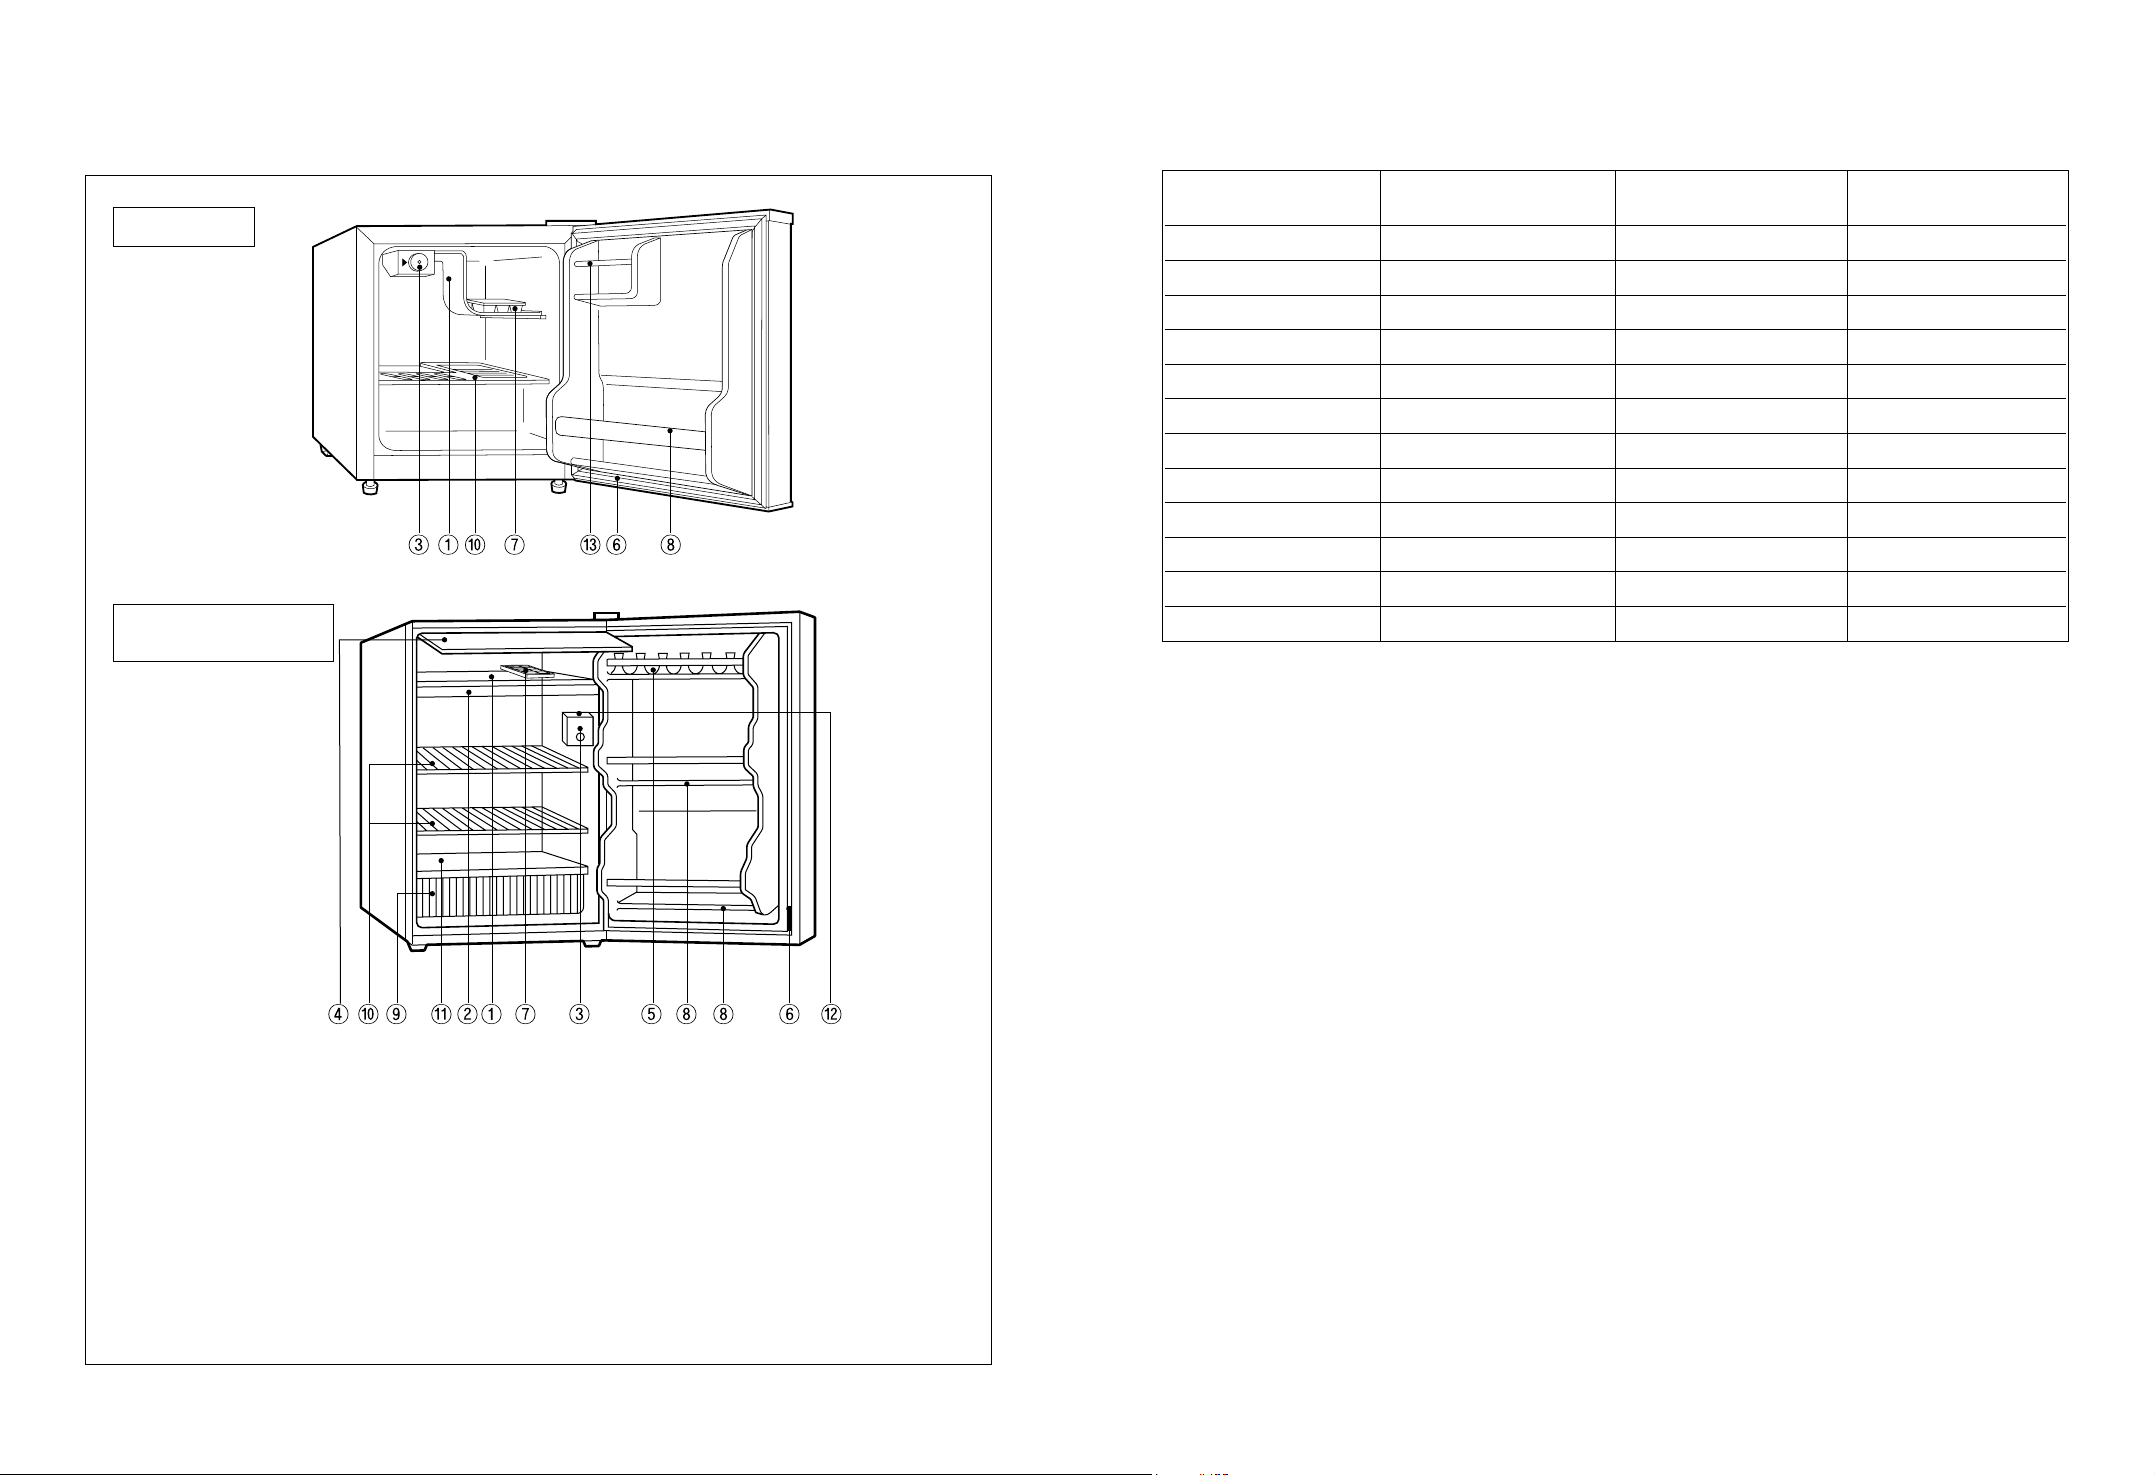
Features of the r efrigerators.
Technical data
■
FR-061(SLK)
■
FR-143WH/BL/GR/MY
FR-153SL
FR-061(SLK)
Gross capacity litres/cu.ft. 59 / 2.1 140 / 4.9
Net capacity litres/cu.ft. 45 / 1.6 122/ 4.3
Height mm/inches 511 / 20.1 858/ 33.8
width mm/inches 440 / 17.3 480/18.9
Depth mm/inches 452 / 17.8 531/ 20.9
Net weight K-gram 18 31
Energy consumption Per 24 hrs. 0.52 KWh 0.56 KWh.
Voltage AC 50Hz 220/ 240 volt 220/ 240 volt
Fuse rating BS 1363 13 Amp 13 Amp
Max. current watts 80 80
Light bulb type SES (E 14 base) – 15 watt
Refrigerant R 134A Charge 55 grams Charge 105 grams
This refrigerator complies with the European Low Voltage Directive (73/23/EEC), EMC Directive
(89/336/EEC) (92/31/EEC) and the CE Marking Directive (93/68/EEC).
FR-143WH/BL/GR/MY
FR-153SL
1. Freezer compartment
2. Defrost drip tray(use of Defrost Only)
3. Temperature control
4. Freezer bom door
5. Egg rack
6. Magnetic door seal
7. Ice cuve tray
Our policy is one of continuous development and for this reason we reserve the right to change specifications
without prior notice.
8.Bottle rack(s)
9.Salad crisper bin
10. Shelf
11. Crisper lid
12. Internal light
13. Butter/cheese compartment
1
7
Page 3
Top hinge
Hinge cover
Plug button
Bottom hinge
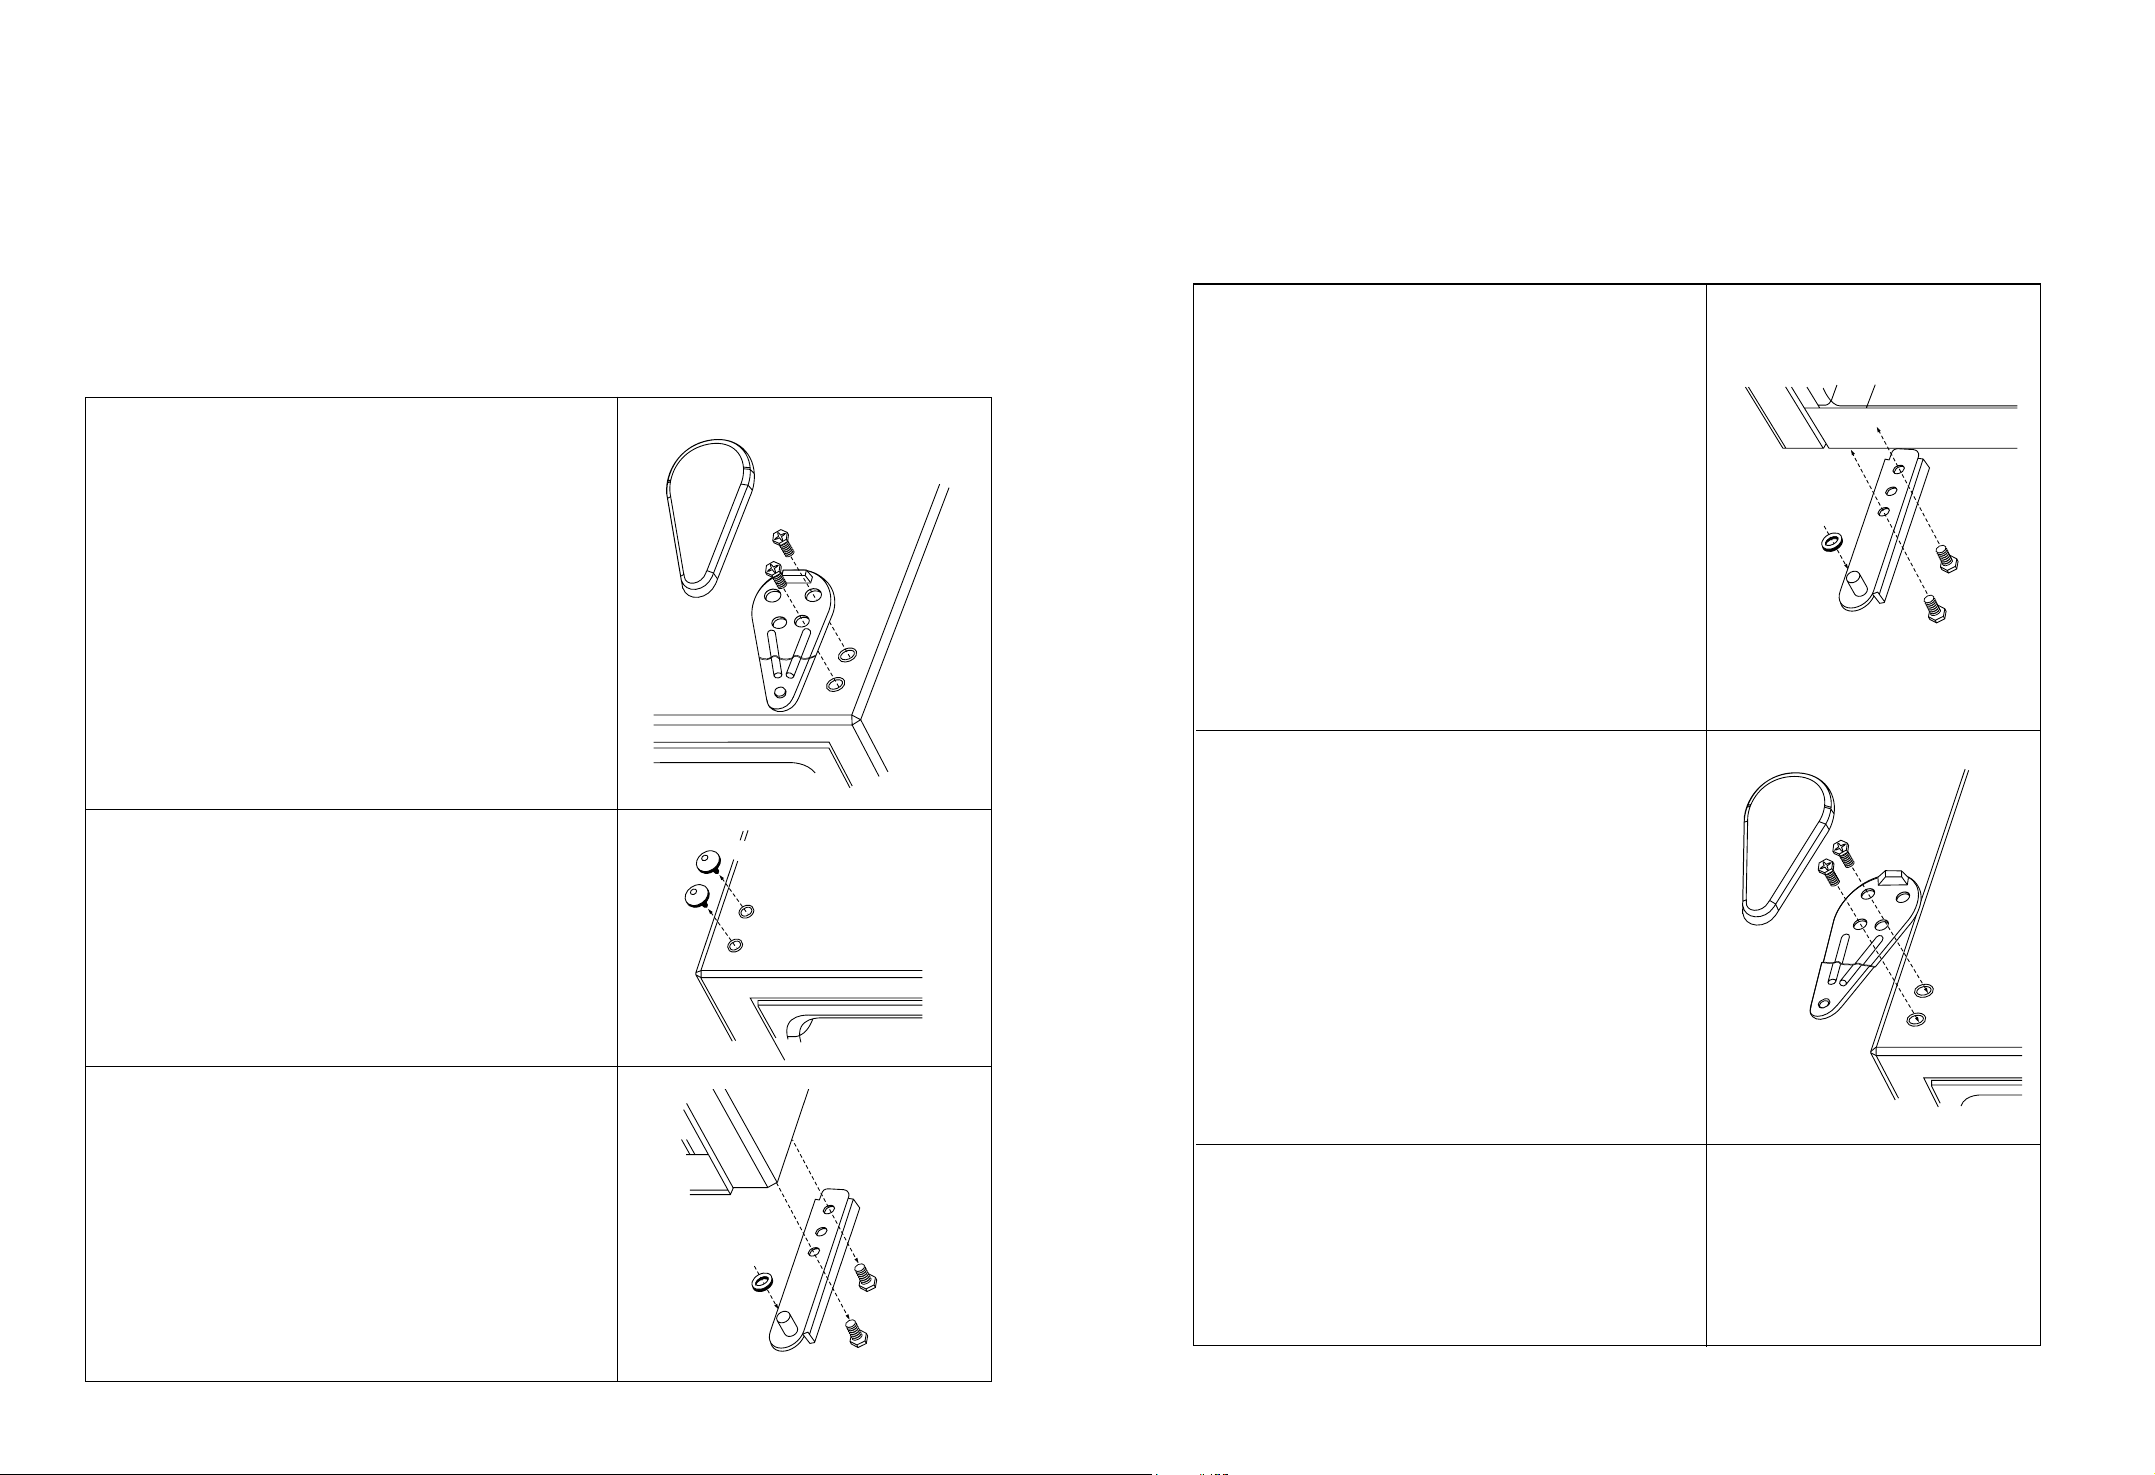
CHANGING THE REVERSIBLE DOOR
Only : FR-143WH/BL/GR/MY, FR-153SL
This refrigerator has been built with the door hinges on the right.
If you wish to change the opening direction, follow the instruction below:
• Unplug the refrigerator from its electrical outlet.
• Empty everything in the refrigerator, including shelves, food, etc.
1. Remove the hinge cover on the right top of the
cabinet.
2. Remove the two screws (using a ratchet tool with a
8MM socket) that hold the top hinge to the cabinet.
Keep these screws for later use.
3. Lift the top hinge straight up to free the pin from the
socket on the top of the door.
4. Lift the door and place it on a padded surface to
prevent scratching it.
5. Remove the plug buttons from the upper left holes
as illustrated and transfer them to the uncovered
holes at the right side. Be sure to press the plug
buttons firmly into the holes.
7. Insert the bottom hinge at the left side using the two
screws previously removed in step 6.
NOTE: Do not tighten screws.
8. Stand the cabinet.
9. Replace the door making sure the bottom socket
enters the bottom hinge pin.
Be sure washer is in place.
10. While holding the door in the closed position,
secure the top hinge at the left side using the two
screws previously removed at the beginning in
step 2.
Do not tighten the screws until the top of the door
is leveled with the top cabinet.
11. Replace the hinge cover .
6. Lay the cabinet on its side down on the floor .
Remove the two screws that hold the bottom hinge
to the cabinet using a 10MM socket. Keep these
screws and washer for later use.
12. T ools required:
-8MM & 10MM socket-ratchet.
-Putty knife or thin-blade screwdriver.
109
 Loading...