

Daewoo DMP-2000 Service Manual

S er v ice M a nua l
Digital Multi Player
Model: DMP-2000
S/ M No. : OSMP200001
May. 2005
C a ution
: In this Manua l, s ome parts can be changed for improving,
their performance without notice in the parts lis t.

2 Ver1.0
Table of Contents
I. Functionality Test
z Test tools and devices……………………………………………………………....3
z Introduction of functional buttons………………………………………….…… 3
z Test procedure……………………………………………………………..……... 4
II. Troubleshooting
z Unable to turn power on……………………………………………………….……6
z Malfunction after power on………………………………………………….………6
z Abnormal LCD display………………………………………………………………7
z Abnormal video………………………………………………………………………7
z Abnormal flashing……………………………………………………………………7
z Unable to charge battery……………………………………………………………8
z Abnormal voice recording and replaying………………………………………….8
z Inaccurate date and time……………………………………………………………8
z Button pressing malfunction……………………………...………………………...8
III. Software Updating
z Software updating………………………………………...…………………………8
IV. Disassembling
z Disassembling ……………………………………...……………………………….9
V. Parts List
z Parts List……………………………………………………………………………11
VI. Tools
z Tools …………………………………………………………..……………………14
3 Ver1.0
I. Functionality Test
1. Test tools and devices
SD Card, TV, Computer, AC Adapter, TV Cable, USB Cable, Earphone.
2. Introduction of functional buttons
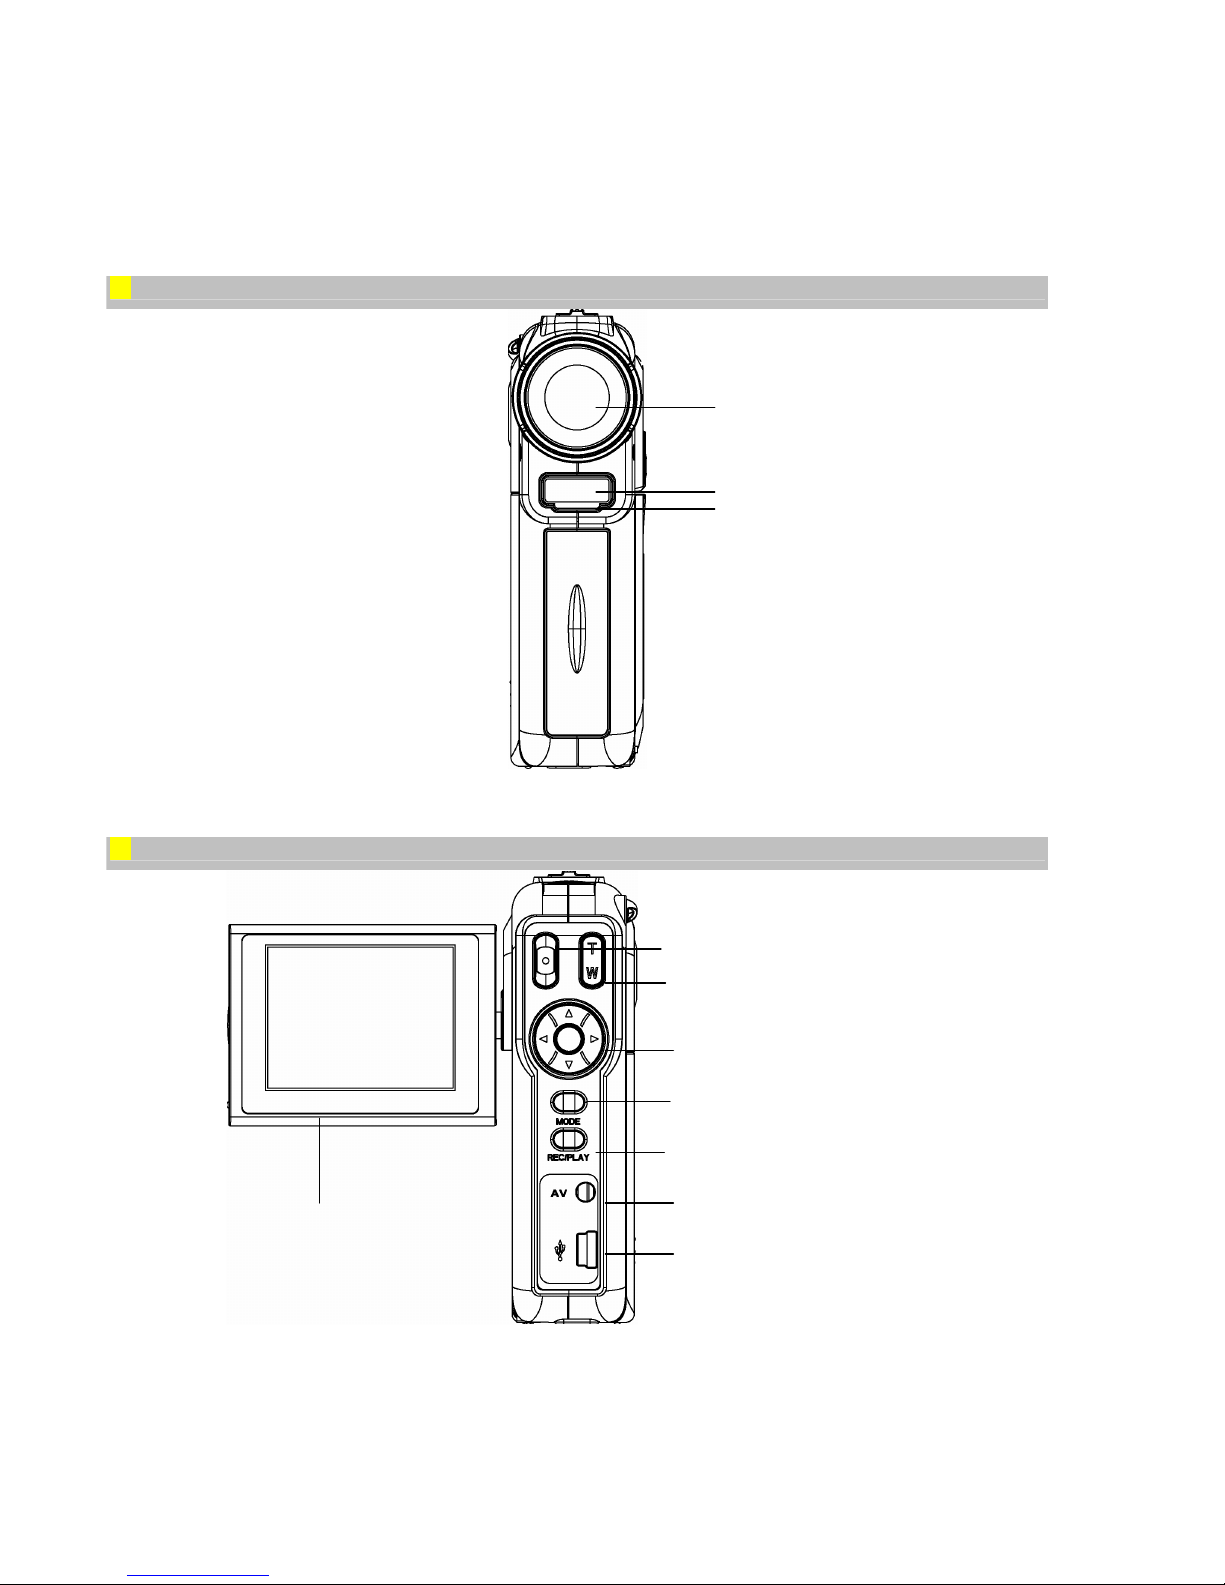
★Front View
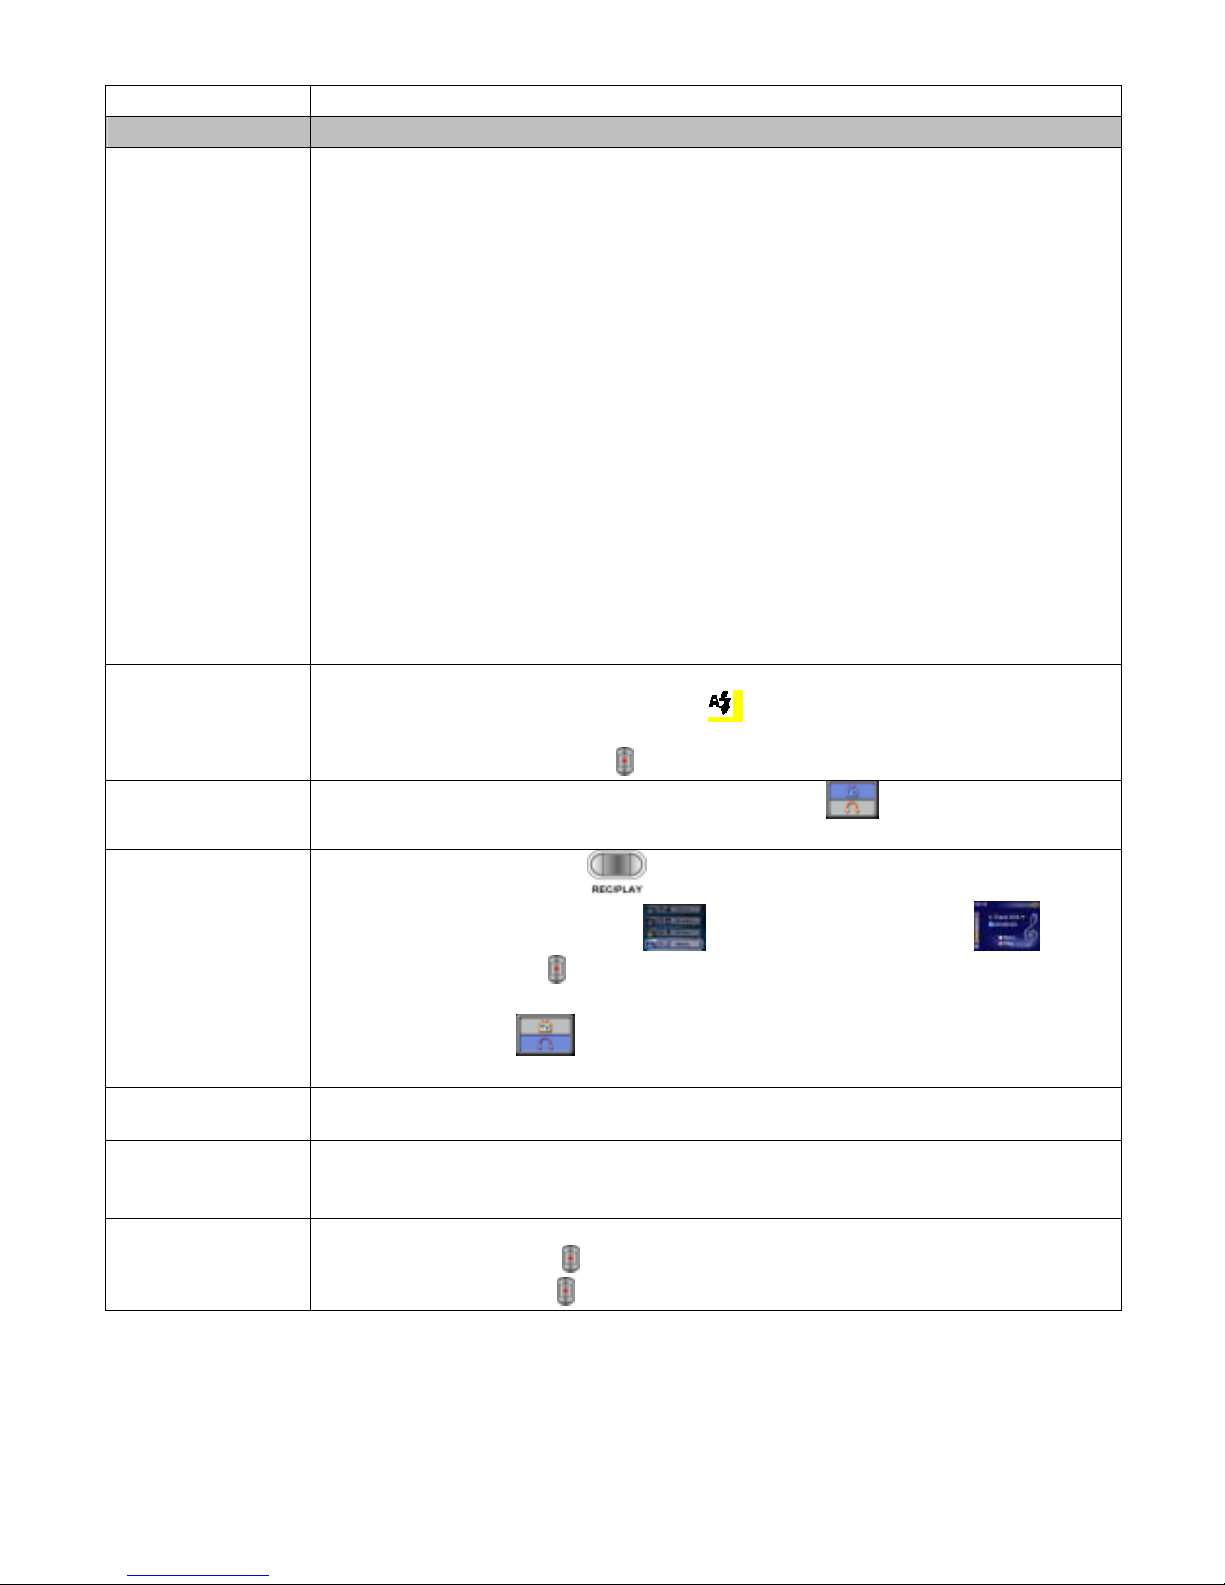
★Rear View/ Key Pad Illustration
Flash
Mini USB/Adaptor Port
Earphone/AV out Port
REC/PLAY Button
Mode Button
Direction Button
Tele-Wide Button
Shutter Button
LTPS LCD Panel
Lens
Self-Timer LED

4 Ver1.0
★Side View
★Top/ Bottom View
3. Test procedure
Test Item Test Procedure
Power supply
system
A. Install Li-Ion battery and press Power Button, watch if
the LCD normal.
B. Press Power Button to turn off the power and close
the LCD Panel, and then open the LCD Panel to see if
the LCD Panel display is normal.
Speaker
Strap
eyelet
LCD Panel
Cover
Power Button
Macro
Switch
Microphon
e
Tripod
Mount
5 Ver1.0
Test Item Test Procedure
Button functions A. Press Power Button to turn the power on, test the functions of all buttons.
Direction Button:
Right button: Flash AUTO/OFF
Left button: Self-Timer ON/OFF
Up button: Invalid
Down button: LCD Information ON/OFF
Enter button: Menu ON
REC/PLAY button:
Switch between Record Mode and Playback Mode.
MODE button:
Press the MODE button to switch between Movie, Picture, and Voice
Record Mode
Tele-Wide button:
Digital Zoom in and out.
Shutter button:
Start to take movie, picture, or record voice.
Macro switch:
Switch between Macro Mode, Portrait Mode, and Normal Mode.
Flash function Press MODE Button and then press the right button on the Direction Button to
test the flash. LCD display will show ( ) sign indicating the flash is under
charging. After the sign stops flashing, the flash light will go off when
pressing the Shutter Button( ) to shoot picture.
TV function
After plugging AV Cable, LCD display will show ( ), then select TV key,
the output will be sent to TV.
MP3 play function
A. Press REC/Play Button( ) to enter the function manu, use Up/Down
Button to select Music Option (
). After entering MP3 play ( )mode
press Shutter Button(
) to play music through the speaker.
B. To use the earphone listen to MP3 music, plug in the earphone first, LCD
display will show ( ) and then select Earphone to listen the music through
earphone.
USB function Plug in USB Cable, listen to the power on sound from the speaker and watch
the LED on the five-direction button to flash, the connection to PC is then ready.
Battery charging
function
Plug AC adapter, the Self Timer LED will stay on or flash, the battery is under
charging if flashing, fully charged if staying on. Press power button to check if
LCD Panel display is normal.
Voice recording
function
A. Press MODE button to switch to Voice Record Mode.
B. Press shutter button ( ) to record voice.
C. Press shutter button ( ) again to stop.
 Loading...