

Page 1
S/M No : OSDMK40001
Model : DM-K40
Caution
: In this Manual, some parts can be changed for improving, their
performance without notice in the parts list.
Dec . 2004
Page 2

Table of Contents
Daewoo DM-K40 Service Manual
General Section …………………………………………………………………. 2
Cautions/Warnings
page
Safe Warnings
Precautions
Software Upgrade
Circuit Diagram and Component Layout ……………………………………… 5
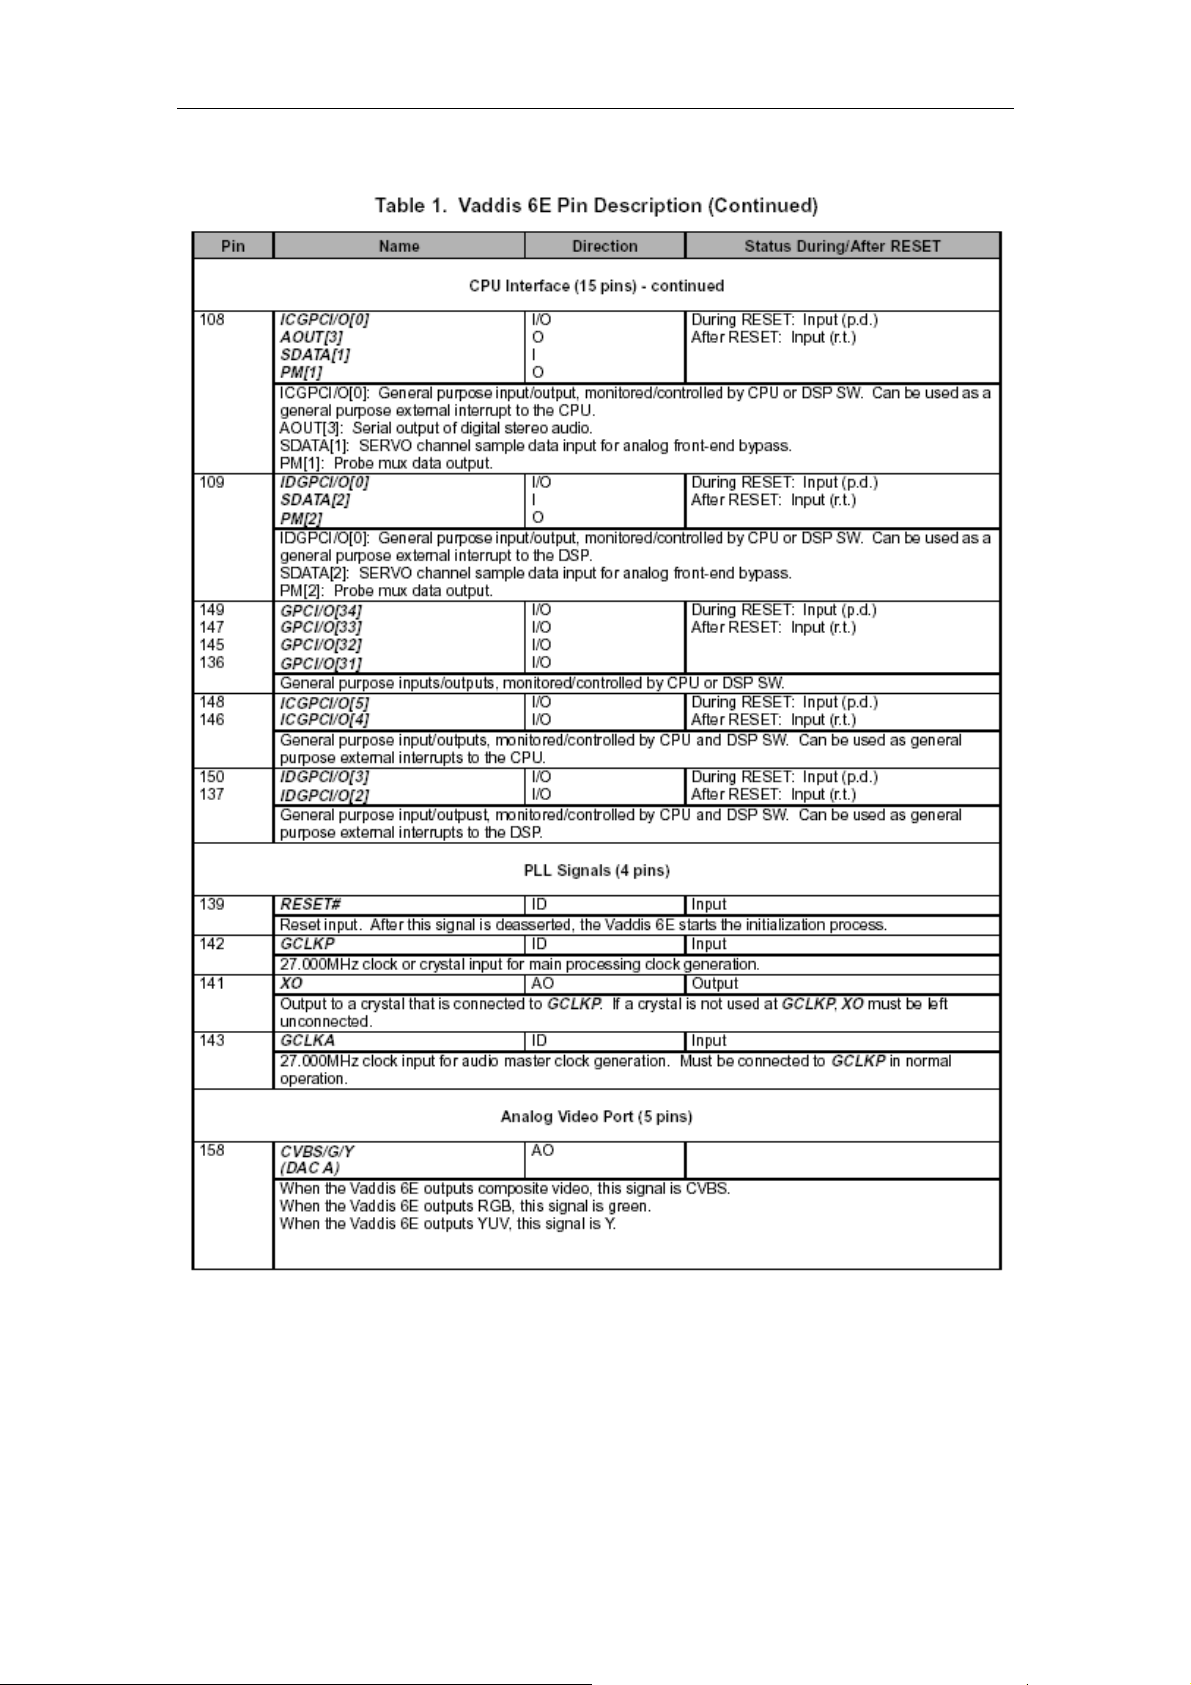
MPEG IC Block Diagrams
Power supply Circuit Diagram and Component Layout
MPEG Circuit Diagram and Component Layout
Front panel Circuit Diagram and Component Layout
Servicing Procedures ……………………………………………………………. 28
Power Supply Trouble Service Flow Chart
Read Disc Trouble Service Flow Chart
Video Trouble Service Flow Chart
Composite Analogy Audio Trouble Service Flow Chart
Digital Audio Trouble Service Flow Chart
Front Control Trouble Service Flow Chart
Remote Control Trouble Service Flow Chart
Parts List
Power parts list
MEPG parts list
Front panel parts list
……………………………………………………………….. 36
Page 1
Page 3
1. General Section
Daewoo DM-K40 Service Manual
1.1.
Cautions/Warnings
1.1.1. Product Safety Notice
Parts marked with the symbol in the schematic diagram have
critical characteristics.
Use ONLY replacement pares recommended by the manufacturer. It is
recommended that the unit be operated from a suitable DC supply or
batteries during initial check out procedures.
1.1.2. Leakage Current Check/Resistance Check
Before returning the unit to the customer, make sure you make
either (1) a leakage current check or (2) a line to insulated
resistance check.
If the leakage current exceeds 0.5 milliamps, or if the resistance
from chassis to either side of the power cord is less than 240 K
ohms, the unit is defective.
WARNING: DO NOT return the unit to the customer until the
problem or located and corrected.
1.2. Safe Warnings
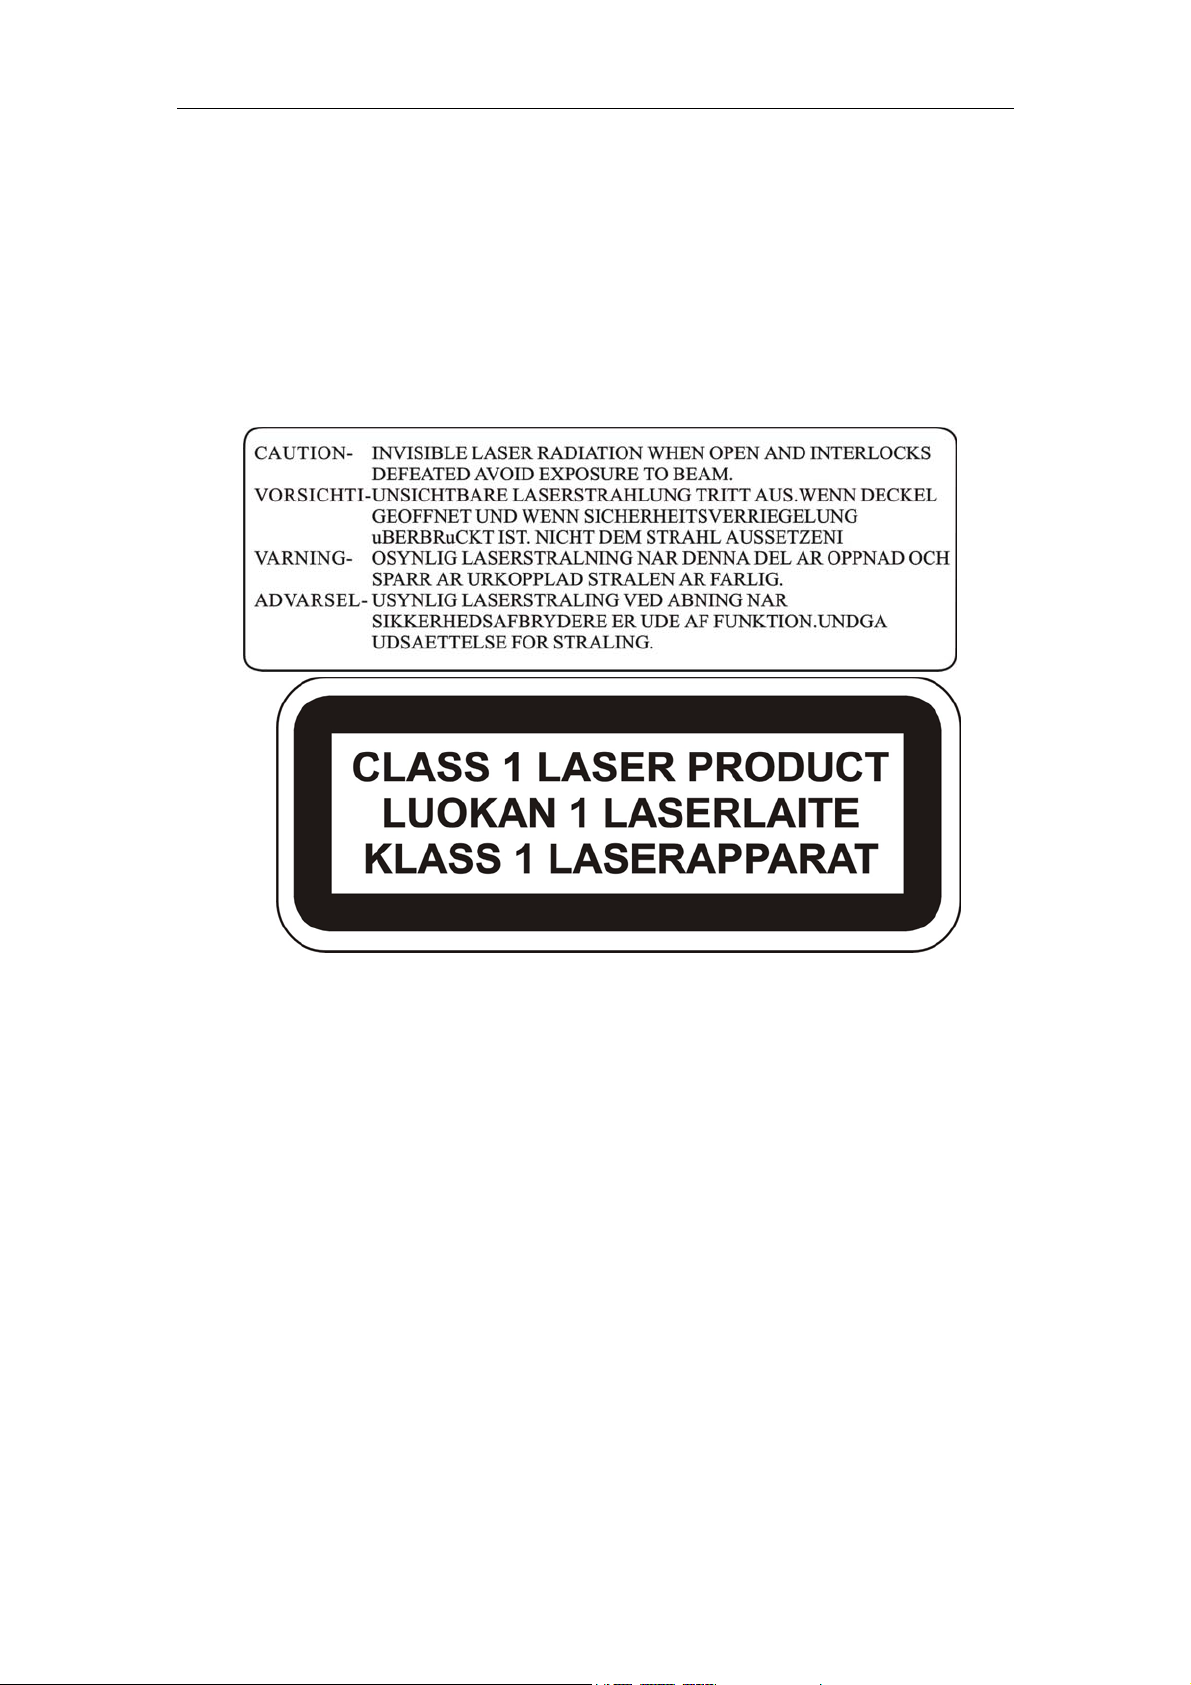
1.2.1. Protection of Eyes from Laser Beam
To protect eyes from invisible laser beam during servicing
DO NOT LOOK AT THE LASER BEAM
Page 2
Page 4
Daewoo DM-K40 Service Manual
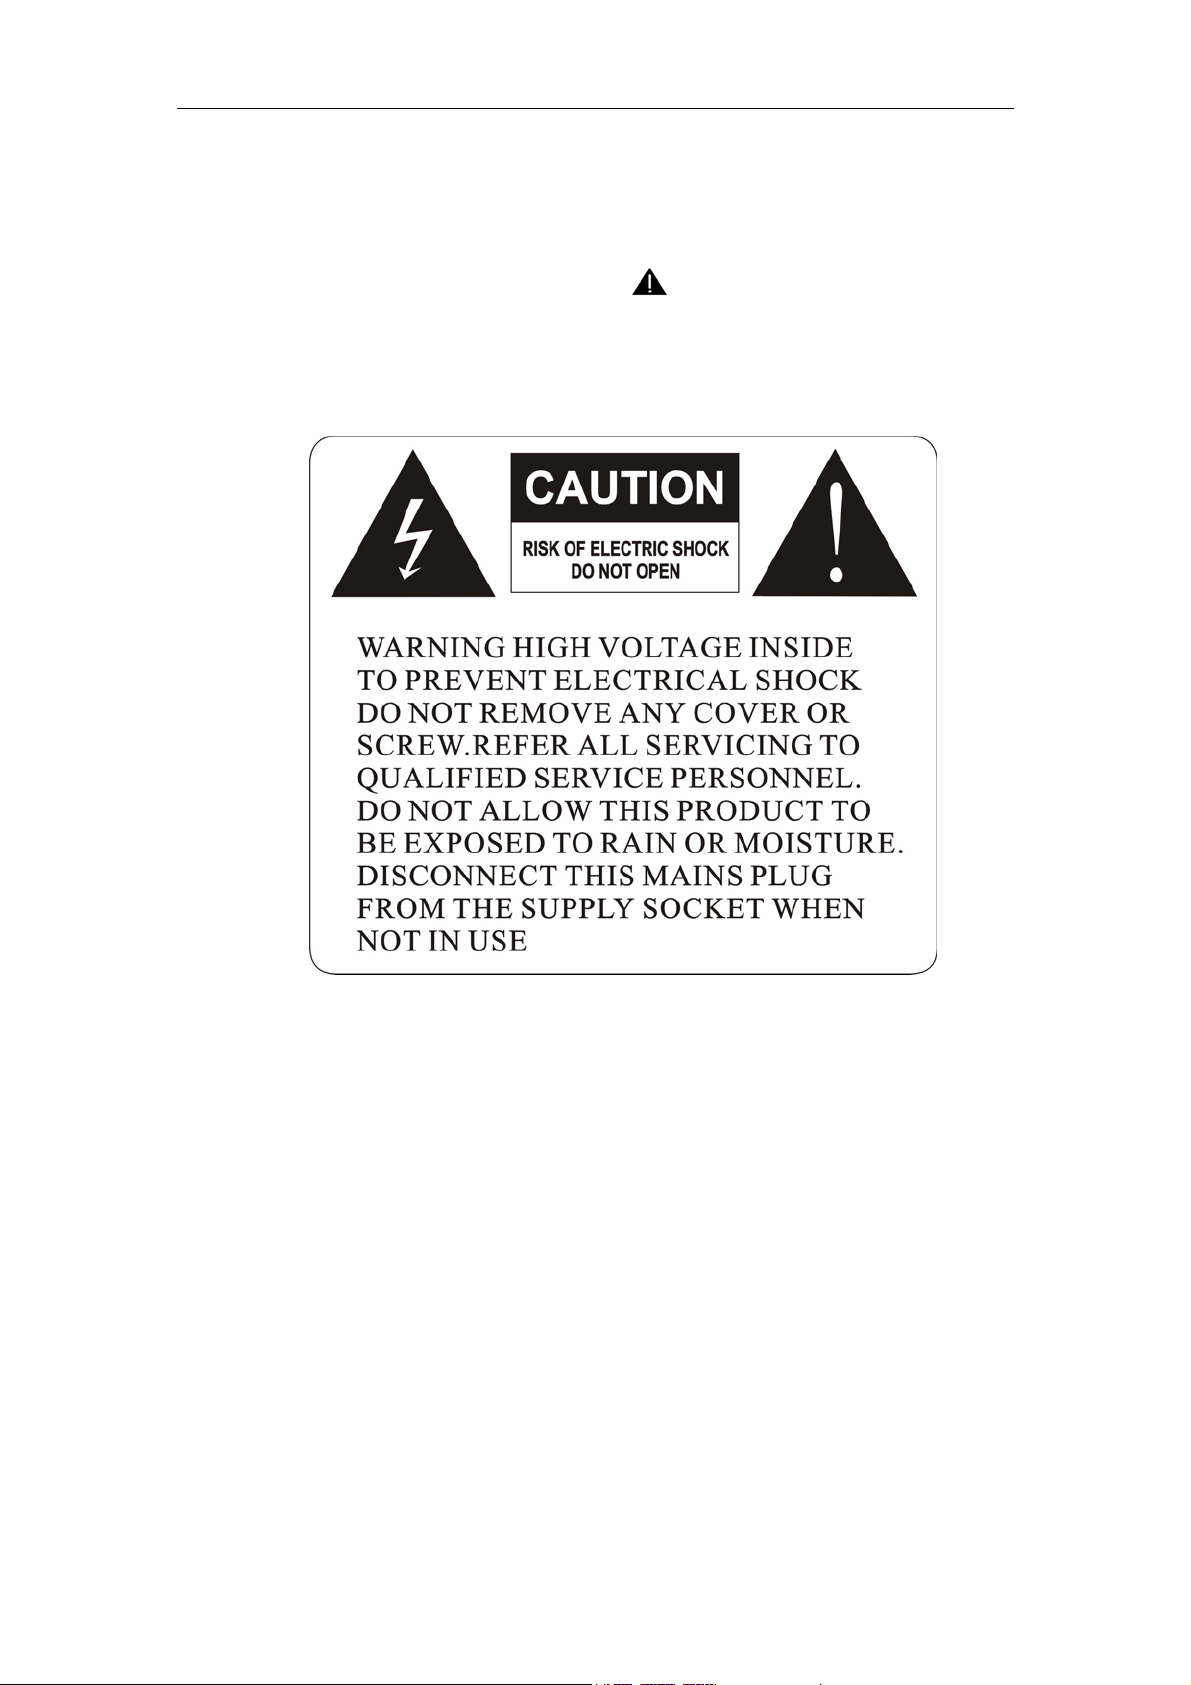
1.2.2. Laser Caution
CAUTION
Adjusting the knobs, switches, and controls, etc. or taking actions
not specified herein may result in a harmful emission of laser
beams. This CD Changer must be adjusted and repaired only by
qualified service personnel.
Laser symbol:
THIS IS COMPACT DISC PLAYER IS CLASSIFIED AS A CLASS 1 LASER
PRODUCT.
THE LASS 1 LASER PRODUCT LABEL IS LOCATED ON THE REAR EXTERIOR.
1.3. Precautions
1.3.1. ESD Precautions in Repairing
1.3.1.1. Do not apply excessive pressure on the mechanical
parts (moving pares), including the Pickup Block, as
extremely high mechanical precision or required in these
parts.
1.3.1.2. When soldering the microprocessor and signal
processing IC’s, use a ceramic soldering iron or a soldering
iron whose metal part is grounded since they are not
resistant to static electricity.
1.3.1.3. When removing the solder or soldering the laser shorting
lands for the Pickup Block, use a ceramic soldering iron or
a soldering iron whose metal part is grounded since the
Page 3
Page 5

Daewoo DM-K40 Service Manual
laser diode or not resistant to static electricity.
1.3.2. DVD Loading Unit Precautions when handling the Mechanism
Block
1.3.2.1. Do not loosen any screws in the Pickup Block.
1.3.2.2. Do not adjust any screws in the Mechanism Block except
for “Tilt Adjust Screws”, as they are adjusted precisely at
the factory.
1.3.2.3. Replacement of the Pickup Block is impossible. Always
replace the Traverse Ass’y when the Pickup Block needed
to be replaced. Do not touch the lens or lens holder of the
Pickup Block.
1.3.2.4. The Guide Rails of the Pickup Block are greased. Take
care when handing.
1.3.2.5. When you try to slide the Pickup Block, do not press or
pull it directly. Always turn the dive gears with your fingers.
1.3.2.6. Be sure that the anti-slipping rubber on the turntable or
clean. If there is dust or it is greasy, clean the part with the
liquid that contains 50% each of alcohol and water.
1.3.2.7.
When removing the Mechanism P.C.B. Ass’y, you need to
short-circuit the laser diode shorting lands beforehand.
1.4. Software Upgrade
You can upgrade DVD Player using the software we provide as following step:
― Creating a software upgrade CD
― Use only a new CD-R/CD-RW(not an erased one).
― Give the CD a name of your choice(e.g. version and unit name).
― Burn the unpacked documents on the CD-R/CD-RW.
― The root directory(uppermost level) of the software upgrade CD
Attention: If a failure should occur during the software upgrade (e.g. a mains failure), it
may happen that the units function and a restart of the upgrade function are no longer
possible. If this should be the case, you must replace the intergraded FLASH ICs with
preprogrammed ICs (see corresponding spare parts list).
─ Insert the upgrade CD (see corresponding spare parts list) and observe the hints on
the display and on the screen of the TV set.
─ Carry out an initialization of the set.
Displaying the Software Version Number
― Press one after the other the “STOP” and “EJECT” buttons on the unit.
― Press the“OSD” with the remote control.
― Using the cursor buttons on the remote control, select the software version “MICRO
Version” or “CUSTOMER VERSION” .The respective software version number then is
displayed
Page 4
Page 6
Daewoo DM-K40 Service Manual
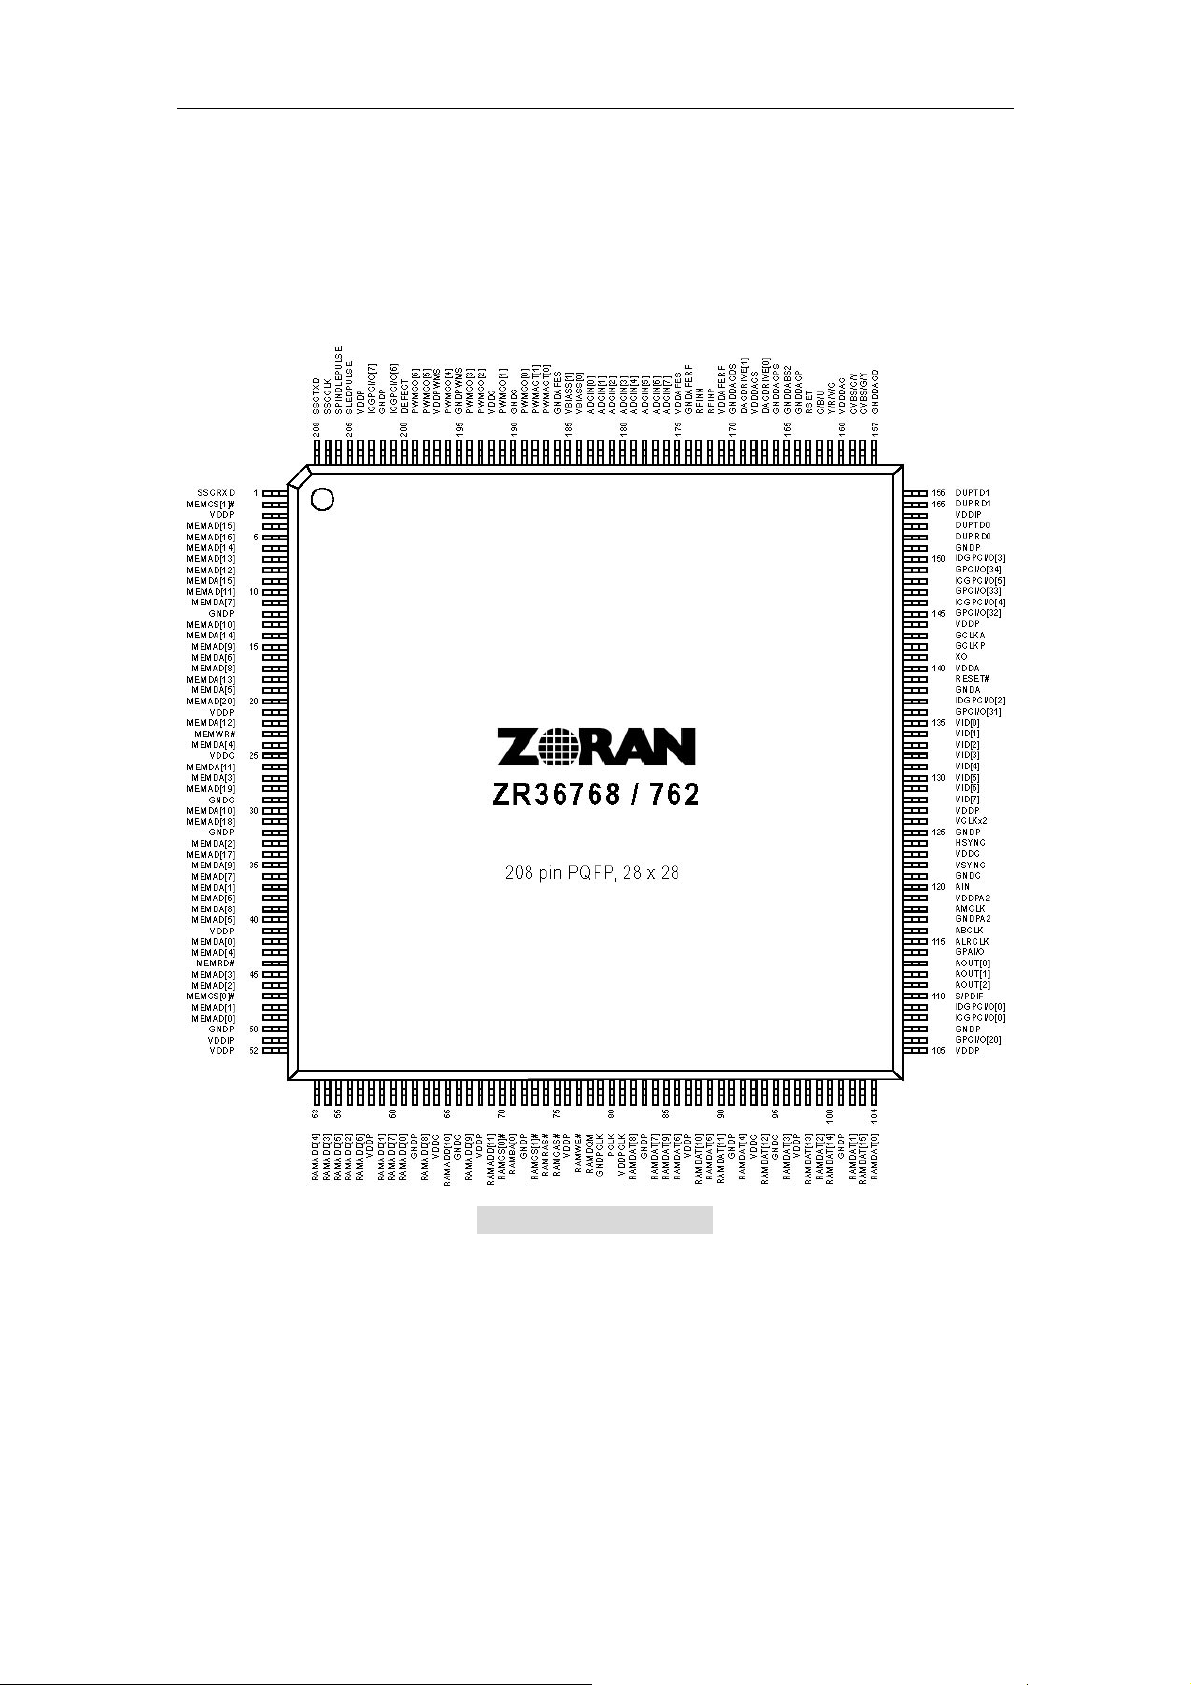
2. Circuit Diagram and Component Layout
2.1. MPEG IC Block Diagrams
Fig. 2-1 ZR36768/762
Page 5
Page 7
Daewoo DM-K40 Service Manual
Fig. 2-2 DRC block diagram
Fig.2-3 CSTP block diagram
Page 6
Page 8
Daewoo DM-K40 Service Manual
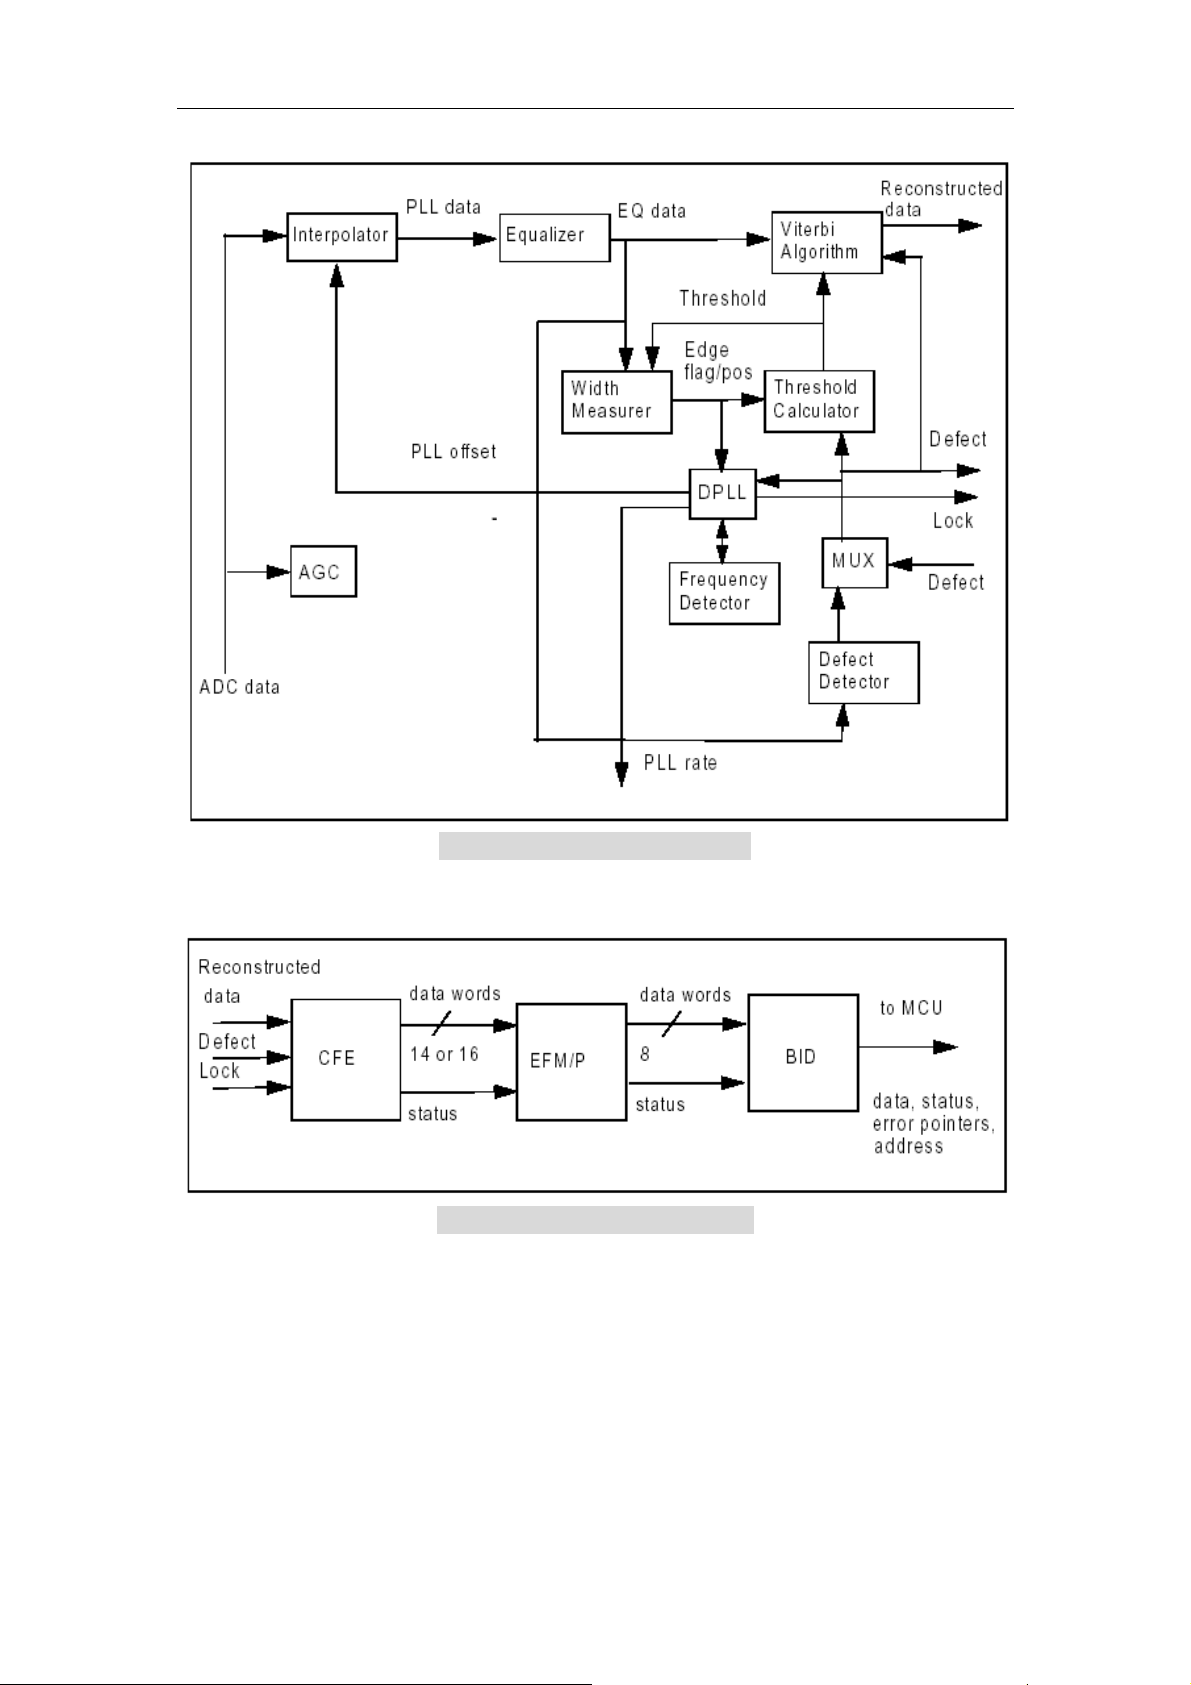
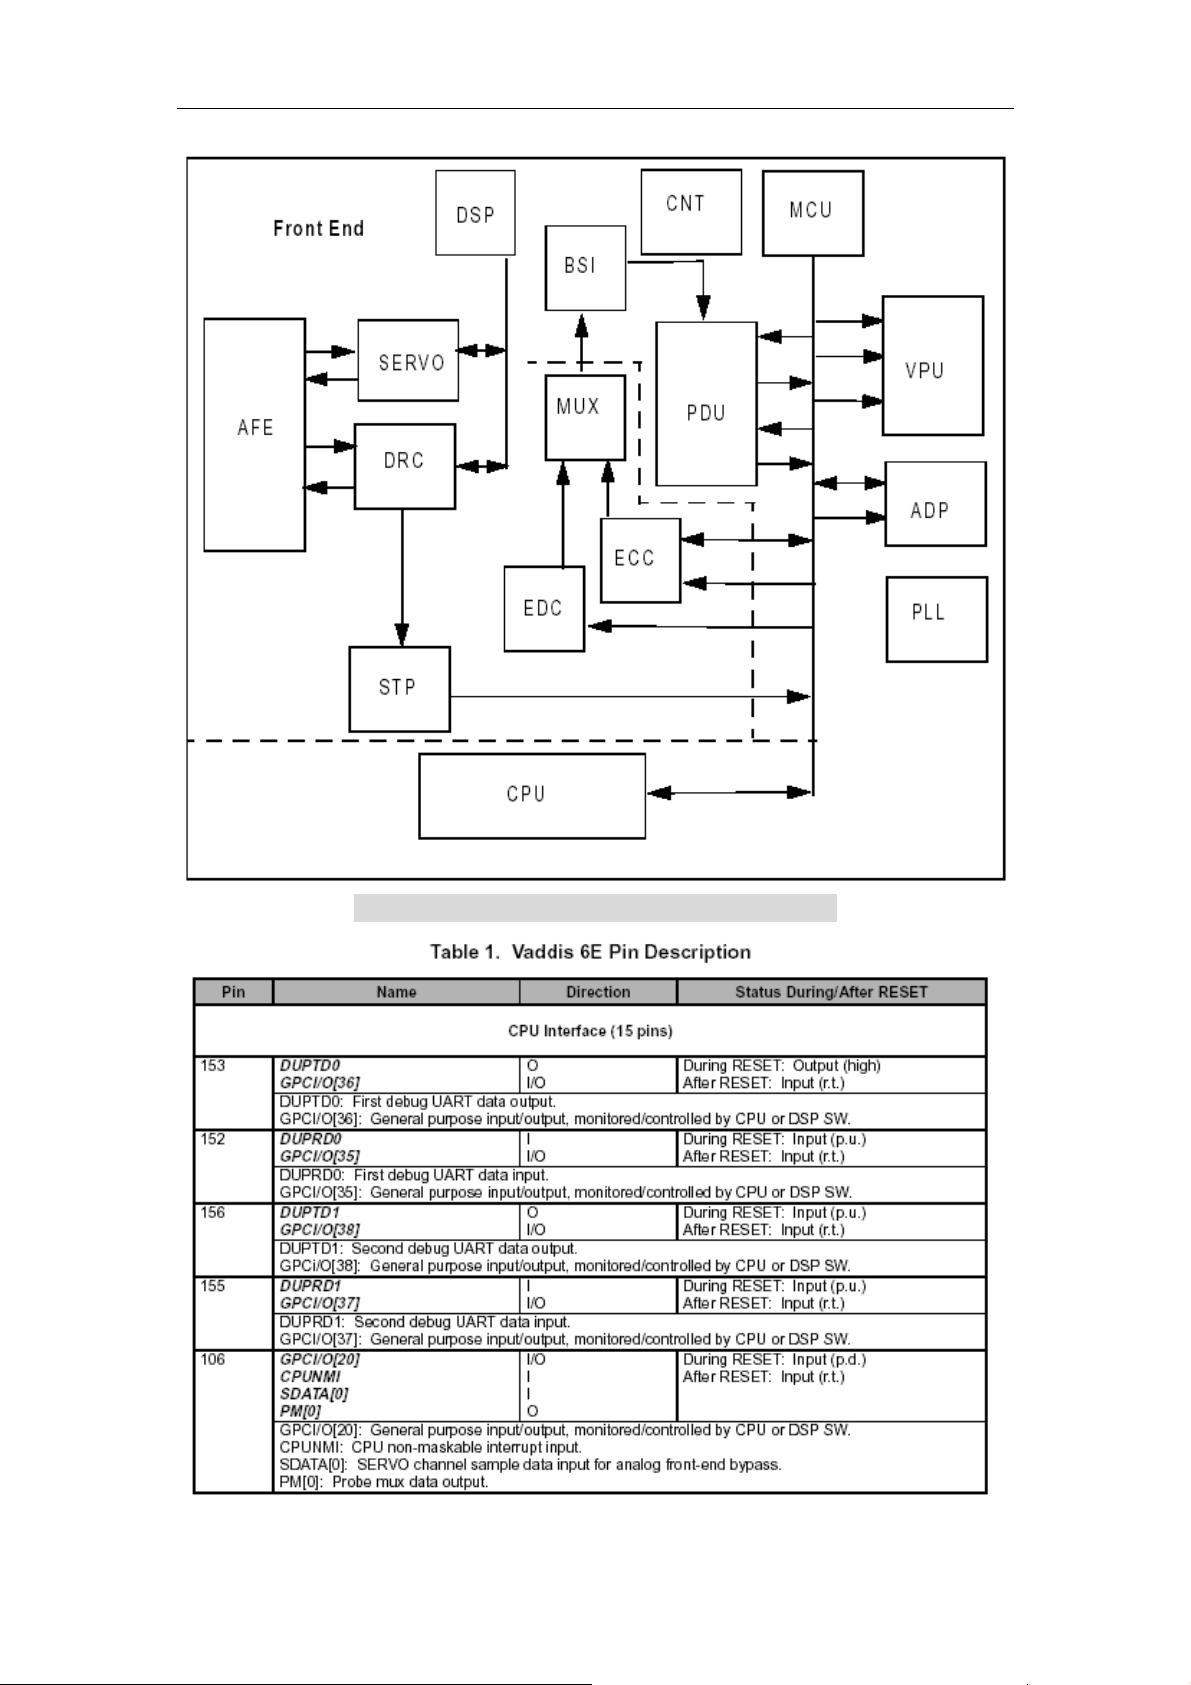
Fig.2-4 Vaddis ZR36768/762 block diagram
Page 7
Page 9
Daewoo DM-K40 Service Manual
Page 8
Page 10
Daewoo DM-K40 Service Manual
Page 9
Page 11
Daewoo DM-K40 Service Manual
Page 10
Page 12
Daewoo DM-K40 Service Manual
Page 11
Page 13
Daewoo DM-K40 Service Manual
Page 12
Page 14
Daewoo DM-K40 Service Manual
Page 13
Page 15

Daewoo DM-K40 Service Manual
Page 14
Page 16

Daewoo DM-K40 Service Manual
Page 15
Page 17

Daewoo DM-K40 Service Manual
Page 16
Page 18

Daewoo DM-K40 Service Manual
Page 17
Page 19

Daewoo DM-K40 Service Manual
Page 18
Page 20

Daewoo DM-K40 Service Manual
Page 19
Page 21
Daewoo DM-K40 Service Manual
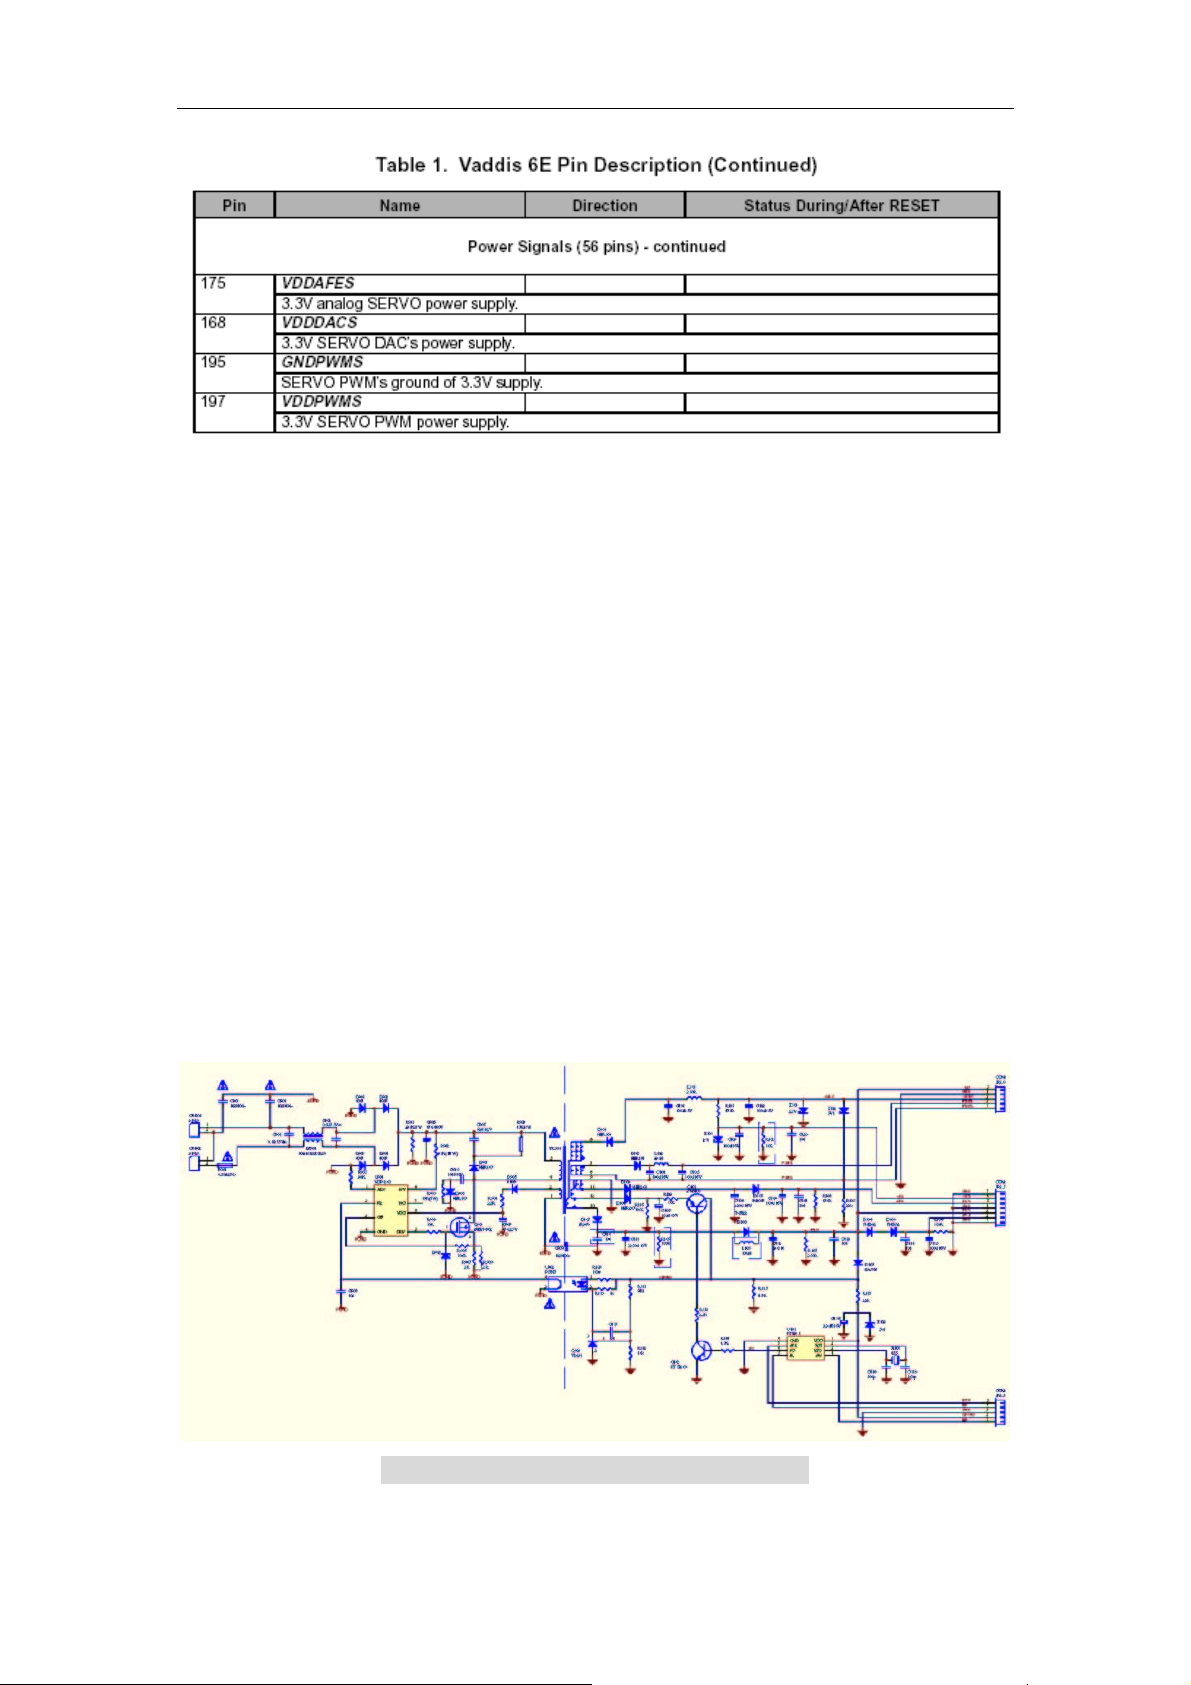
2.2.Power supply Circuit Diagram and Component Layout
Fig 2-5 Power Supply Circuit Diagram
Page 20
Page 22

Daewoo DM-K40 Service Manual
Fig 2-6 Power Supply Assembly Drawing
Fig 2-7 Power Supply Composite
Page 21
Page 23

Daewoo DM-K40 Service Manual
2.3. MPEG Circuit Diagram and Component Layout
2.3.1. MPEG Circuit Diagram
Fig 2-8 ZR36762/ZR36768&SDRAM
Fig2-9 RF AMPLIFIER&DRIVER
Page 22
Page 24

Daewoo DM-K40 Service Manual
Fig 2-10 AUDIO&VIDEO FILTER
Fig 2-11 MEMORY
Page 23
Page 25

Daewoo DM-K40 Service Manual
Fig 2-12 POWER&AV PORT
Page 24
Page 26

Daewoo DM-K40 Service Manual
2.3.2. MPEG Assembly Drawing (Fig 2-13)
Page 25
Page 27

Daewoo DM-K40 Service Manual
2.3.3. MPEG Composite (Fig 2-14)
Page 26
Page 28
Daewoo DM-K40 Service Manual
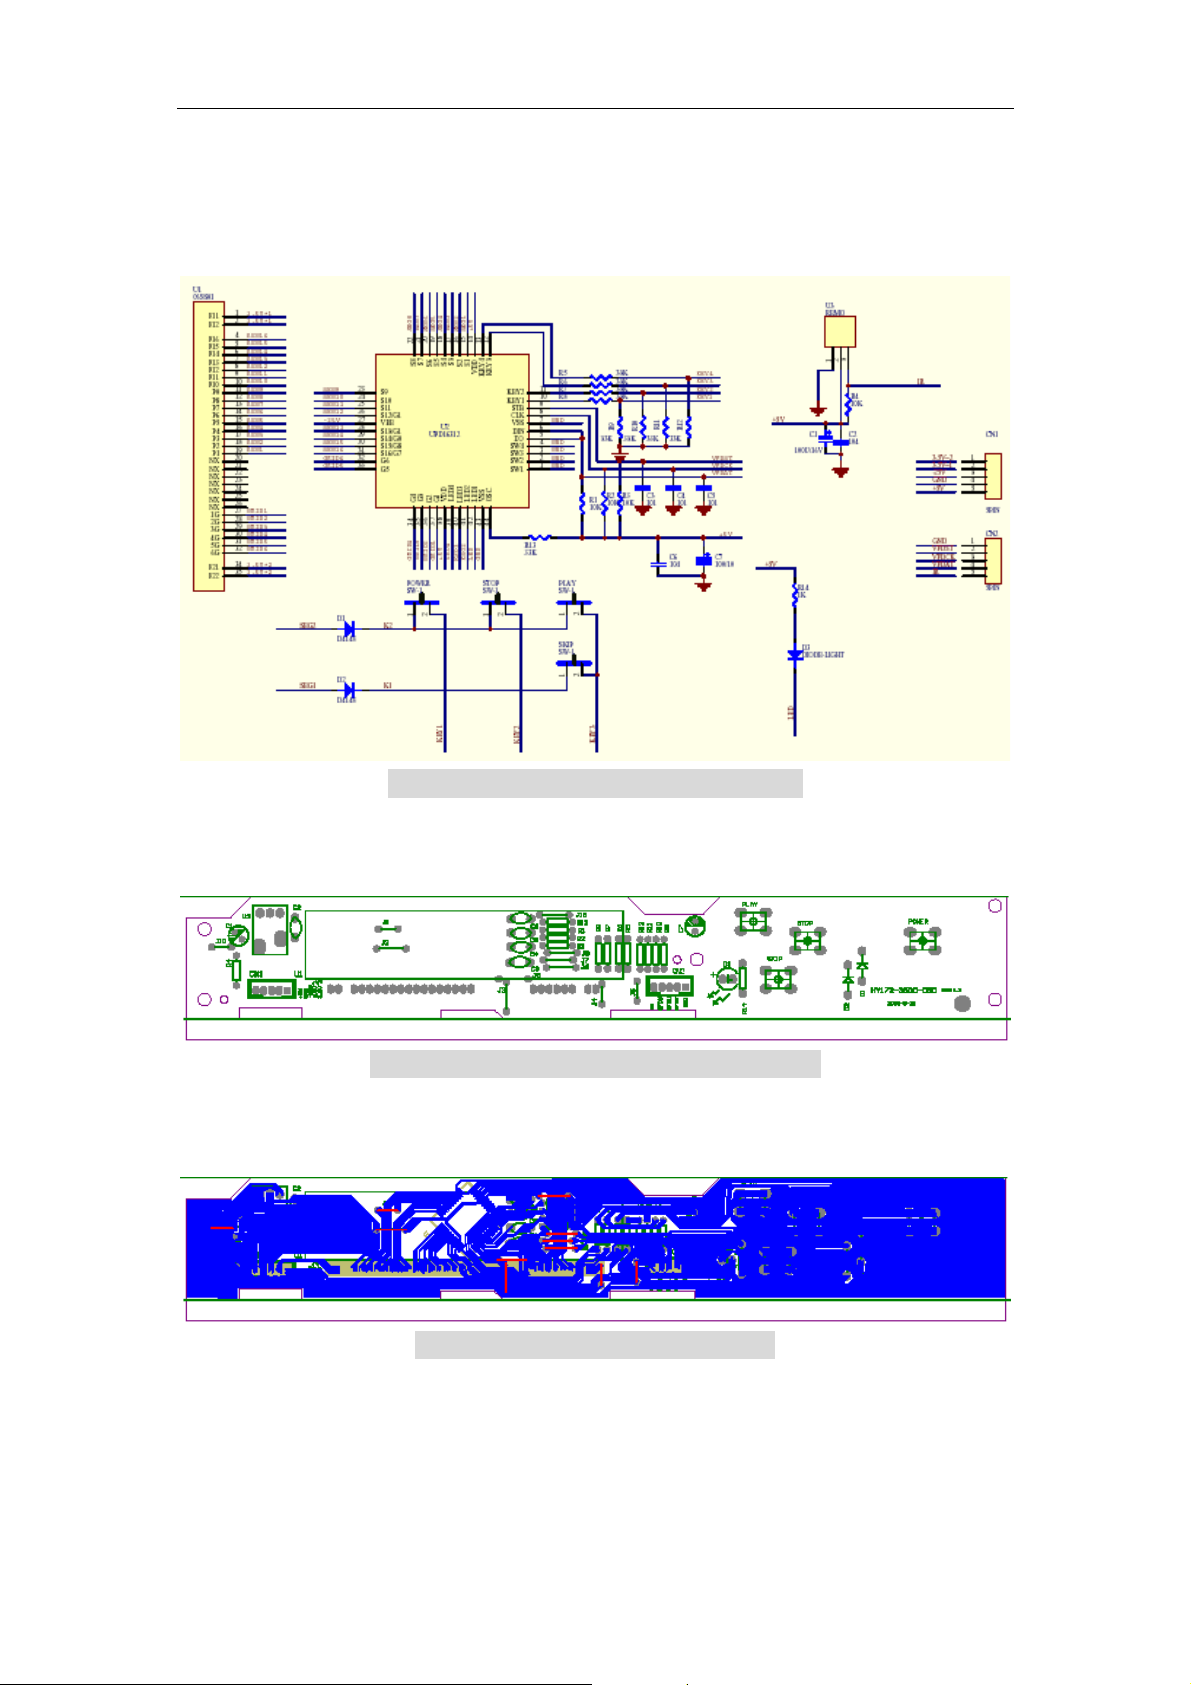
2.4. Front panel Circuit Diagram and Component Layout
Fig 2-16 Front Panel Circuit Diagram
Fig 2-17 Front Panel Assembly Drawing
Fig 2-18 Front Panel Composite
Page 27
Page 29

Daewoo DM-K40 Service Manual
3. Servicing Procedures
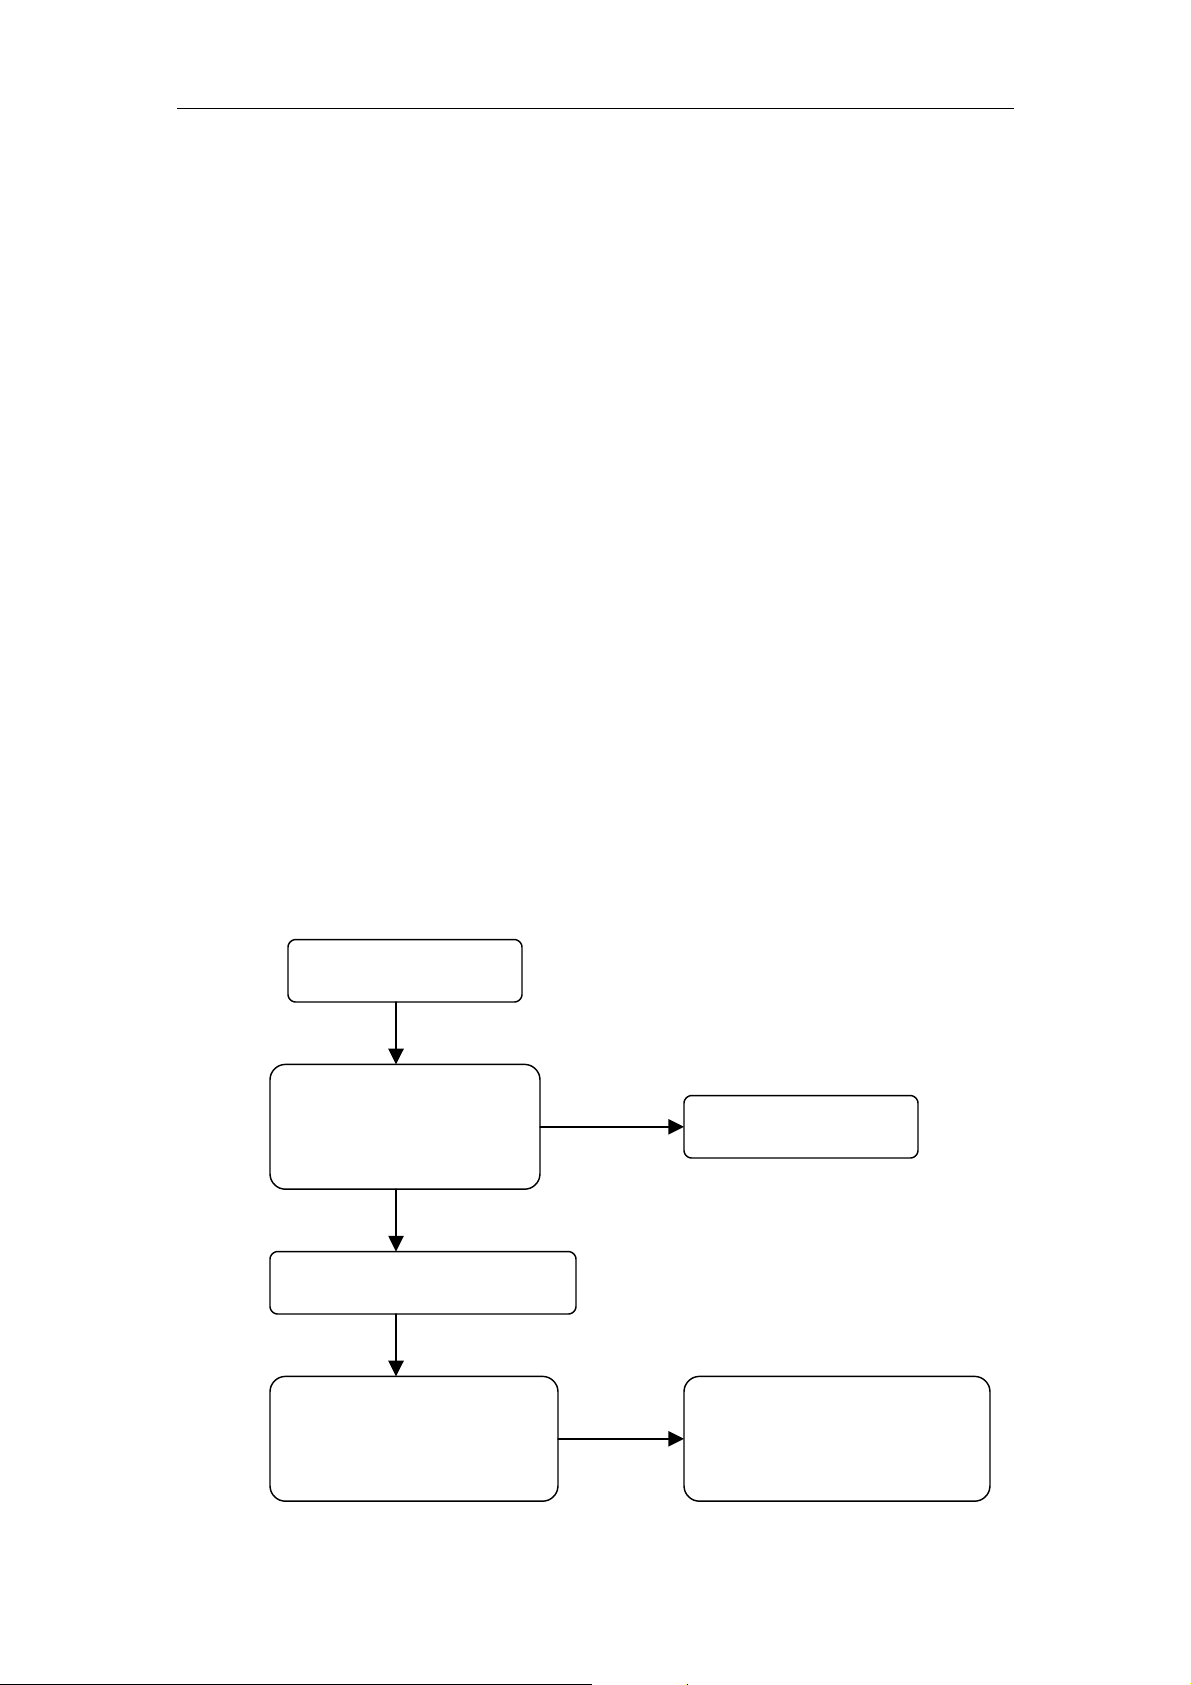
3.1. Power Supply Trouble Service Flow Chart
Power Supply
Block Trouble
Check F901 Condition Replace F901
OK
Check F901 NG
Pin4/Pin6/ Pin8 Replace F901
Condition
OK
Check on D101/D102/
D103/D104/D105
Output Voltage Condition
NG
Check on Q103 Pin1 NG
Replace Q103
Voltage Condition 2~5V
NG
Replace U302 Replace TR901
OK
Check CON1~4
Output Voltage
NG
NG
OK
Page 28
Page 30
Daewoo DM-K40 Service Manual
3.2. Read Disc Trouble Service Flow Chart
Read disc problem in a DVD player is a very complicated issue that
may involve complex issues. This problem is not only relation to the
electronic circuit, but also very much relation to the operation
environment.
DVD loading unit is a very complicate part that contains big number of
ESD components, which require specific equipment, tools and
technique to repair; in general, service technician is not suggested to
disassemble the DVD loading unit. It is suggest proving the trouble
and replacing the complete DVD loading unit, instead of repairing the
DVD loading unit in local workshop.
It is suggested to prove the faulty of a DVD loading unit by
replacement by a good DVD loading unit.
Before checking the "NO Disc" Trouble, ensure excluding the
following possibilities:
The test disc is damage.
AC power supply voltage dropped below the minimum required
level.
DVD disc region code and color system is not matching to the
DVD player or system setting.
Moisture condensed inside the unit. (Power on the unit, without
disc loaded, for 1/2 to 2 hours).
Service Flow Chart
Read DISC Trouble
Check DVD LOADER NG
Replace Connector
Connector Condition
OK
Replace DVD Loading Unit
NG
Check the MEPG ATAPI Check the other Parts by
I/F Interface Circuit Replacement Method
Page 29
Page 31

Daewoo DM-K40 Service Manual
3.3. Video Trouble Service Flow Chart
3.3.1. Composite Video Trouble Service Flow Chart
Composite Video Trouble
NG
Check “SETUP” Item See “User Manual”
OK
NG
Check Y1 Output Signal Replace Y1 Parts
OK
NG
Check C128/R106 Signal Replace C128/U1/R106
OK
NG
Check C130 Signal Replace C130/L9
OK
OK
Check CN8 Pin Signal Check External Set
NG
Replace CN8
Page 30
Page 32
Daewoo DM-K40 Service Manual
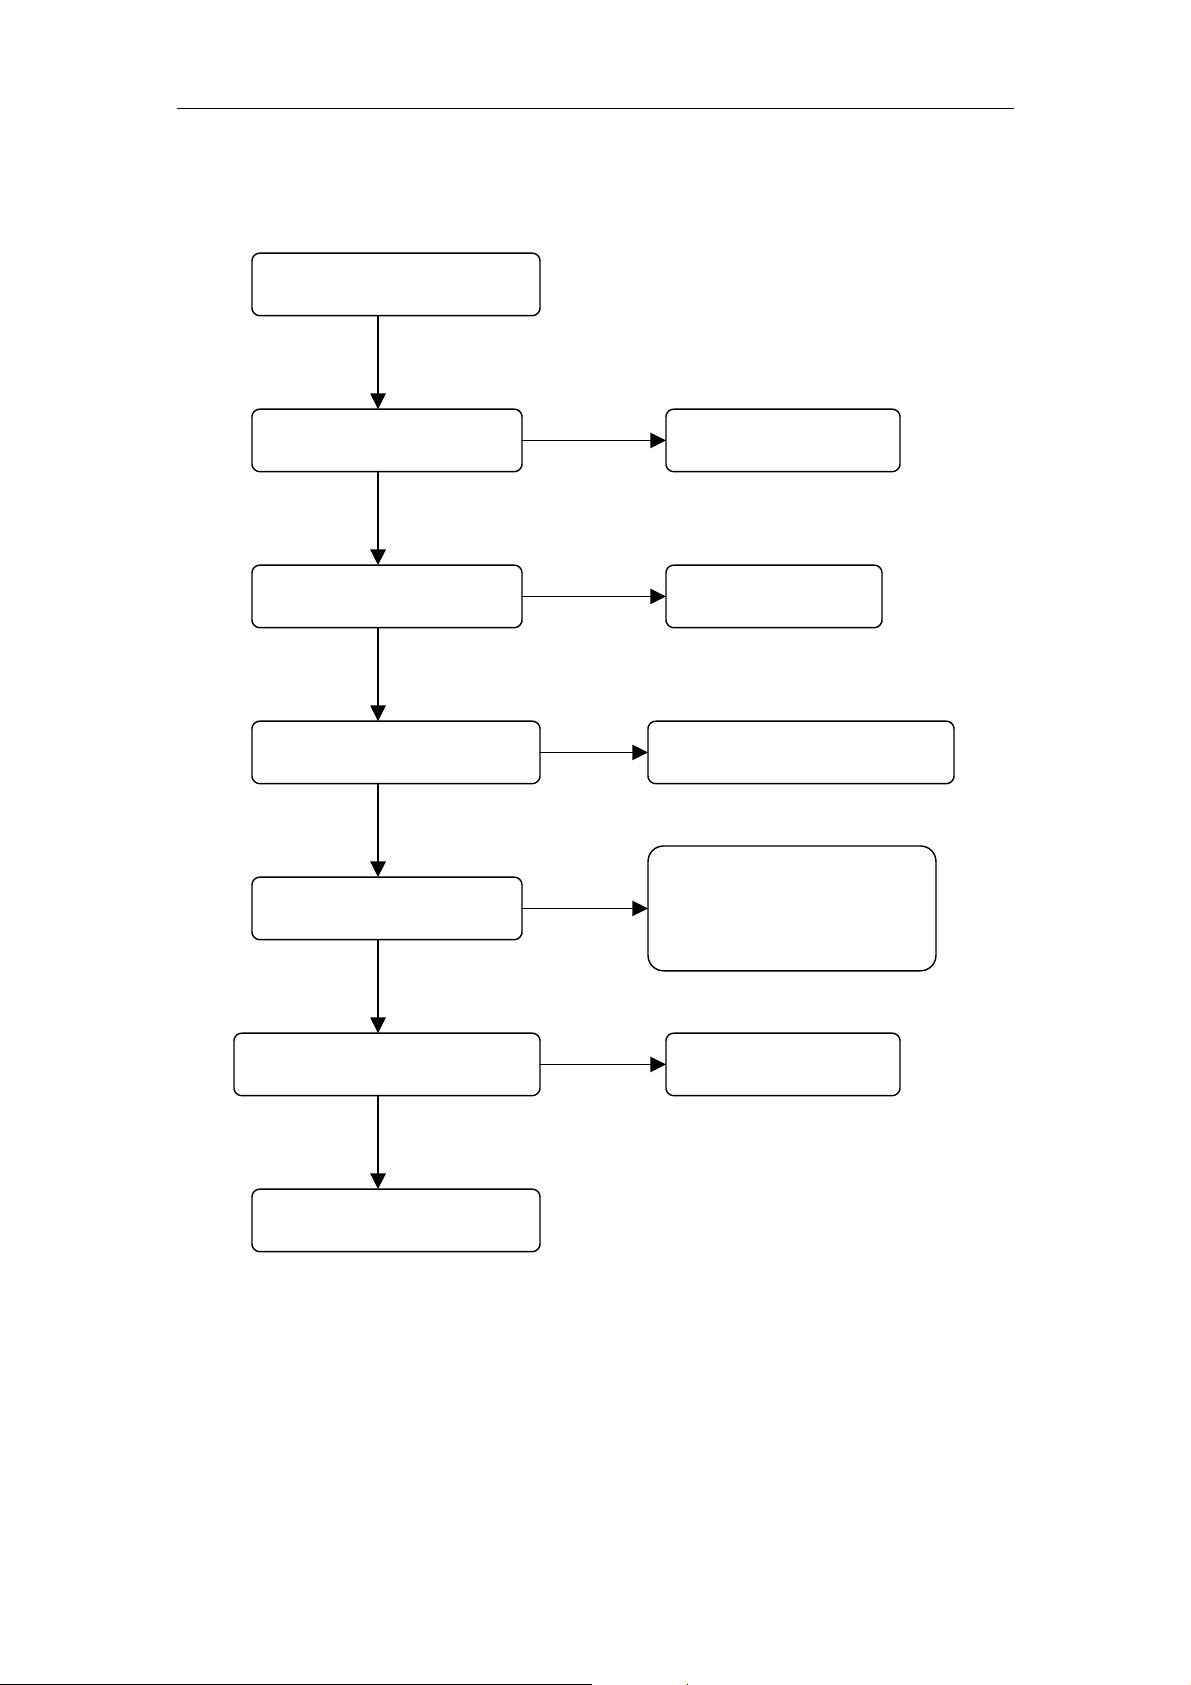
3.3.2. S-Video Trouble Service Flow Chart
Composite Video Trouble
NG
Check “SETUP” Item See “User Manual”
OK
NG
Check Y1 Output Signal Replace Y1 Parts
OK
NG
Check C122/C125 Signal Replace C122/C125 or U1
OK
NG
Replace C124/L7/R104
Check C124/C127 Signal
or C127/L8/R105
OK
NG
Check CN17 Signal Check External Set
OK
Replace CN17
Page 31
Page 33

Daewoo DM-K40 Service Manual
3.4. Composite Analogy Audio Trouble Service Flow Chart
Composite Analogy Audio Trouble
NG
Check R8 Signal Replace U1
OK
NG
Check U10 Pin1~3 Signal Replace U1
OK
NG
Check U10 Pin7 +5V Check Power Supply
OK
NG
Check U10 Pin5/8 Signal Replace U10
OK
NG Check U11 between
Check U11 Pin2/6 Signal
Pin2/6 and Pin3/5 Parts
OK
NG
Check U11 Pin4/8 +/-12V Check Power Supply
OK
NG
Check U11 Pin1/7 Signal Replace U11
OK
Check Q15/Q16 Mute Parts
Page 32
Page 34

Daewoo DM-K40 Service Manual
3.5. Digital Audio Trouble Service Flow Chart
Digital Audio Trouble
NG
Check “SETUP” Item See “User Manual”
OK
NG
Check U5 Pin9 Signal Replace U1
OK
NG
Check U5 Pin8 Signal ReplaceU5
NG
OK
CheckR130 Signal Check External Set
OK
NG
Check C147 Replace C147
OK
NG
Check R132 Replace R132/R133/C148
OK
Check External Set
Page 33
Page 35

Daewoo DM-K40 Service Manual
3.6. Front Control Trouble Service Flow Chart
Front Control Trouble
NG
Check between CN1 and CN903 Connection
OK Replace
Check between CN2 and CON2 Connection
NG
OK
NG
Check U2 Pin14/27/38Voltage See: 3.1
Check U2 OK
OK Replace VFD
SEG Signal
NG
OK
Check U1 Pin1/2/34/35 Voltage Replace U2
NG
Replace U1
Page 34
Page 36

Daewoo DM-K40 Service Manual
3.7. Remote Control Trouble Service Flow Chart
Remote Control Trouble
NG NG
Check Remote Control Replace Battery Replace Control
OK
NG
Check U3 Pin2 Voltage Check Power Supply
OK
NG
Check U3 Pin3 Output Signal Replace U3
OK
NG
Check U1 Pin201 Input Signal Replace L23
OK
Replace U1
Page 35
Page 37

Daewoo DM-K40 Service Manual
4. Parts List
4.1. Power parts list
NO. PART NO. DESCRIPTION QTY LOCATION
Ca rbon Resistor
1 M2R1130330433110 RT14-1/4W-30K-J 1 R905
2 M2R1139330433110 RT14-1/4W-39K-J 1 R902
3 M2R1110030433110 RT14-1/4W-10R-J 2 R908 R118
4 M2R1120130433110 RT14-1/4W-200R-J 2 R107,L101
5 M2R1110230433110 RT14-1/4W-1K-J 1 R110
6 M2R1110330433110 RT14-1/4W-10K-J 3 R111,R112,R102
7 M2R1122330433110 RT14-1/4W-22k-J 1 R105
8 M2R1110130433110 RT14-1/4W-100R-J 3 R108,R109,R906
9 M2R1122030433110 RT14-1/4W-22R-J 1 R904
10 M2R1147130433110 RT14-1/4W-470R- J 2 R101,R104
11 M2R112R 030433110 RT14-1/4W-2R- J 2 R907,R909
12 M2R1110530233110 RT15-1/2W-1M-J 1 R900
13 M2R8833430133110 RYG1-1W-330K-J 1 R901
14 M2R8827330133110 RYG1-1W-27K-J 1 R903
15 M2R8810330133110 RYG1-1W-10K-J 1 R910
16 M2I00SS2N60B0000 SS2N60B TO220 1 Q 901
AC Porcelain C apacitor
17 M2C1102G54000022 C T7-400VAC-102M 3 C903,C904,C909
18 M2C1104F84000022 CT81-50V- 104-Z 5 C107,C113,C114,C117,C120
19 M2C1151M84000022 CT81-1000V-151-Z 1 C910
20 M2C1103L84000022 CT81-500V-103-Z 2 C908 C121
21 M2C1472M89000022 CT81-1000V-472-Z 1 C906
Electrolytic Capacitor
Diode
)
)
℃
)
)
)
1 C905
5 D901,D902,D903,D904,D106
1 D906
1 Z101
1 Z104
1 Z102
22 M2C2476K 59163222 CD293-47U-400V -M-105
23 M2C2107T59061222 CD288-35V-100U-M 2 C101,C102
24 M2C2107B 59051122 CD288-16V-100U -M 5 C103,C104,C105,C109,C115
25 M2C2337B 59081222 CD288-16V-330U -M 1 C108
26 M2C2228C 59051122 CD288-10V-2200U -M 1 C111
27 M2C2476E59051122 CD288-25V-47U-M 1 C907
28 M2C2337C 59051122 CD288-10V-330U -M 1 C112
29 M2C5104F49000022 0.1uFK-275VAC 2 C901,C902
30 M2D1IN4007220000 1N4007-(DO-41A
31 M2D1HER107220000 HER107 2 D907,D908
32 M2D1IN4148110000 1N4148-(DO-35
33 M2D1HER104220000 HER104 3 D101,D102,D103,
34 M2D10SR360220000 SR360 1 D105
35 M2D1IN5392220000 1N5392 2 D108,D109
36 M2D1BZX12V220000 BZX-12V -1/2W-(DO-35
37 M2D1BZX22V220000 BZX-22V -1/2W-(DO-35
38 M2D1BZX5V1220000 BZX-5V 1-1/2W-(DO-35
39 M2H20000L0710000 L071-10uH 1 L105
Page 36
Page 38

Daewoo DM-K40 Service Manual
NO. PART NO. DESCRIPTION QTY LOCATION
40 M2H4LGA33UHK0307 LGA0307-33uH-K 1 L 102
41 M2H20BC202290000 BC-20229 1 LF901
IC
42 M2ILTV8170000000 LTV817 1 U902
43 M2I000T L43100100 TL431A TO92 1 Q103
44 M2I0N CP1200P 6000 NCP1200P 60 1 U901
45 M2U110T0A5250V00 T0.5A 250V 1 F901
M2P3300000520000
46
46 M2T11EEL193883B0 EEL19-3883B 1 TR901
47 M2P 2200000VH3000 VH-3 1 CN 901
48 M2P 220000VH3B000 VH-3-B 1 CN 902
49 M2P 000000PH5A000 PH-5A 1 CN 903
50 M2P 0000TJC35A000
51 *************** J-10mm 4 JP1,JP3,JP 4
52 *************** J-5mm 1 JP6
53 M2A00GDP31400001 GDP-314 2 GDP 1,GDP2
54 M2B000H Y31509C24 HY315-1200- 09C VER 2.4 1 94V0 PCB
5*20 2 F901
Transformer
Jack
TJC3-5A
PCB
1 CN 904
Page 37
Page 39

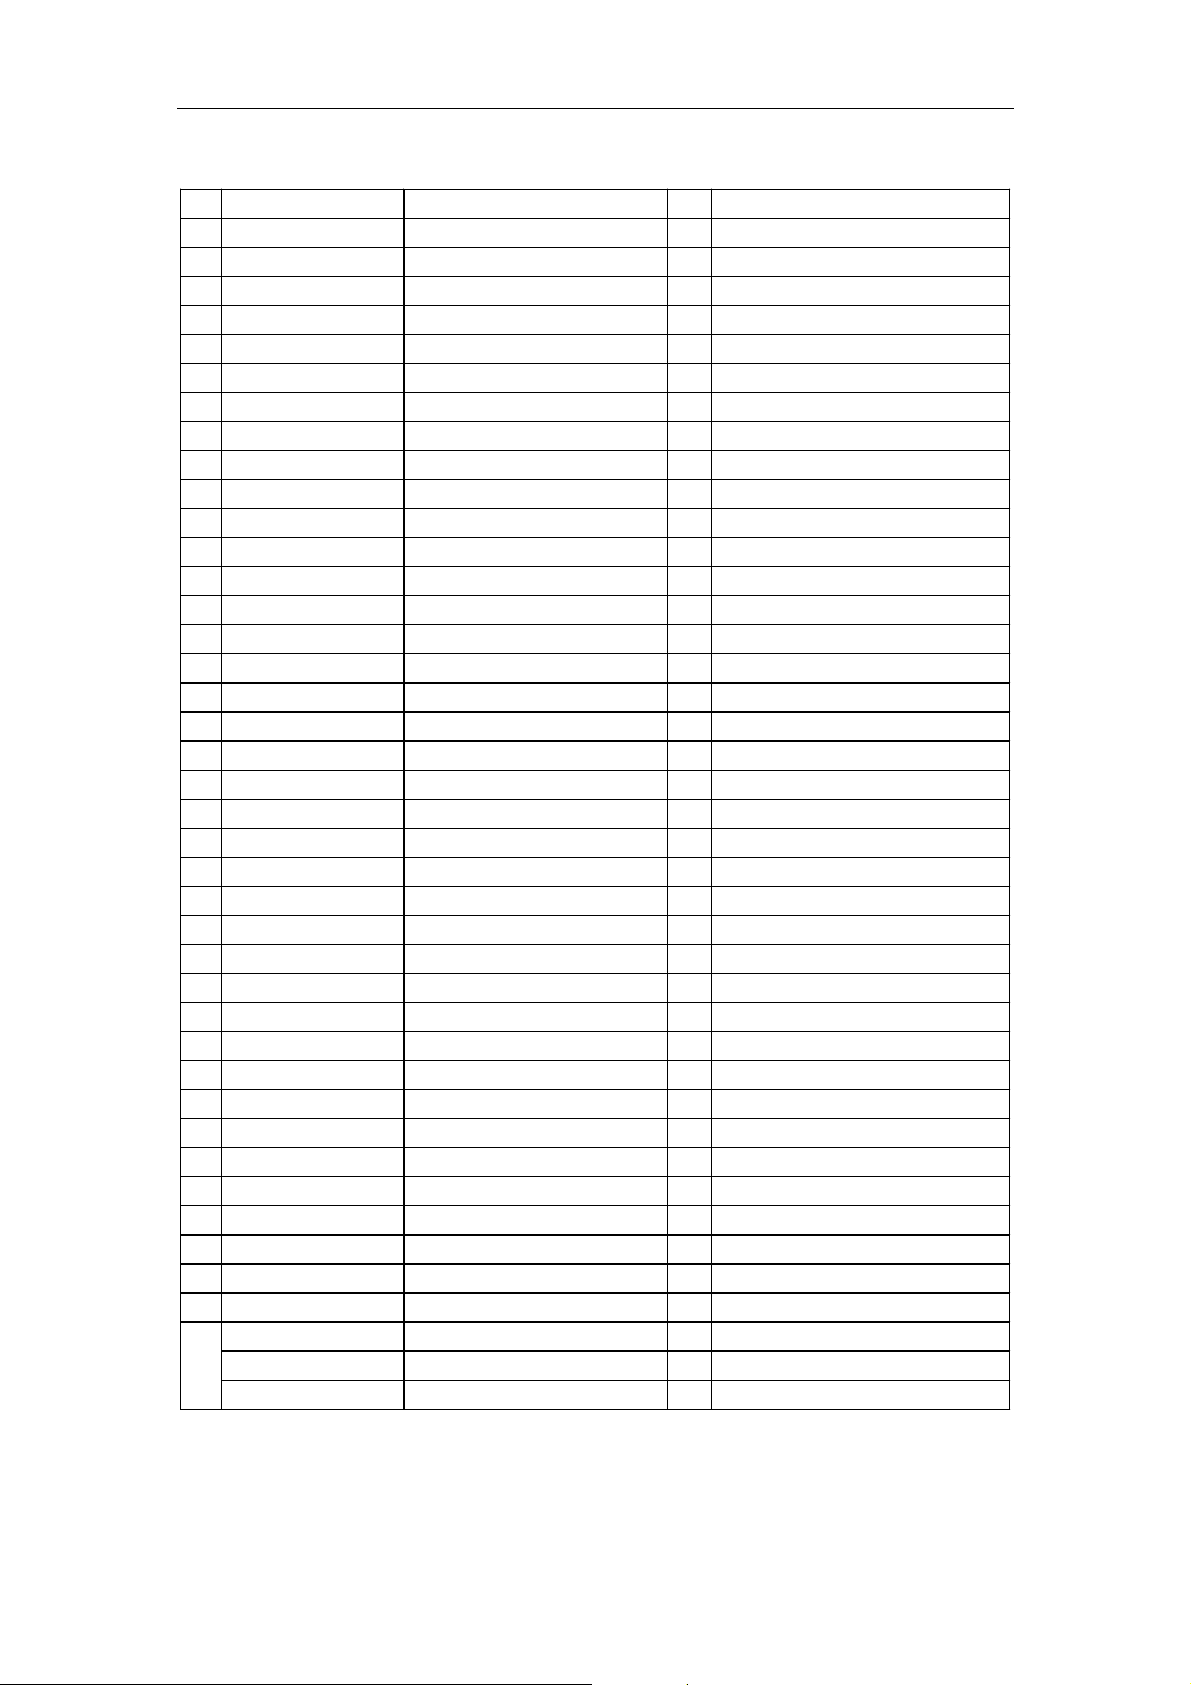
4.2. MEPG parts list
Daewoo DM-K40 Service Manual
NO. PART NO.
1 M2R001R030811000 RC-05K1R0JT 5 R66 R67 R68 R69 R140
2 M2R0010030811000 RC-05K100JT 1 R1
3 M2R0010130811000 RC-05K101JT 4 R5 R82 R83 R84
4 M2R0033130811000 RC-05K331JT 1 R130
5 M2R0010230811000 RC-05K102JT 2 R6 R7
6 M2R0000031000000 RC-03K000OT 10 R11 R21 R22 R23 R41
6* M2R0039231000000 RC-03K392JT 4 R86,R87,R88,R89
7 M2R0010031000000 RC-03K100JT 3 R96 R100 R101
8 M2R0022031000000 RC-03K220JT 2 R29 R26
9 M2R0033031000000 RC-03K330JT 5 R8 R9 R10 R12 R13
10 M2R0056031000000 R C-03K560JT 1 R138
11 M2R0062031000000 R C-03K620JT 4 R90 R99 R102 R103
12 M2R0075031000000 R C-03K750JT 1 R3
13 M2R0010131000000 R C-03K101JT 1 R125
14 M2R0012131000000 R C-03K121JT 1 R137
15 M2R0015131000000 R C-03K151JT 1 R19
16 M2R0022131000000 R C-03K221JT 7 R27 R28 R51 R52 R53 R56 R132
17 M2R0039131000000 R C-03K391JT 1 R20
18 M2R0047131000000 R C-03K471JT 3 R78 R79 R131
19 M2R0056131000000 R C-03K561JT 2 R110 R117
20 M2R0010231000000 R C-03K102JT 6 R133 R139 R141 R142 R104 R106
21 M2R0013231000000 R C-03K132JT 3 R38 R39 R40
22 M2R0033231000000 R C-03K332JT 3 R48 R109 R115
23 M2R0047231000000 R C-03K472JT 20 R2 R4 R15 R24 R25 R30 R34
24 M2R0051231000000 R C-03K512JT 1 R81
25 M2R0056231000000 R C-03K562JT 6 R57 R58 R59 R75 R76 R77
26 M2R0068231000000 R C-03K682JT 1 R64
27 M2R0091231000000 R C-03K912JT 1 R35
28 M2R0010331000000 R C-03K103JT 11 R43 R60 R63 R73 R74
29 M2R0011331000000 R C-03K113JT 3 R44 R62 R71
30 M2R0012331000000 R C-03K123JT 1 R42
31 M2R0013331000000 R C-03K133JT 1 R36
32 M2R0015331000000 R C-03K153JT 1 R17
DESCRIPTION
Chip Resistor
QTY
R85 R72 R121 R65
R70
R49 R50 R 97 R105 R111 R112 R118
R119 R126 R127 R128 R129
R80 R91 R 93 R98 R107 R114
LOCATION
Page 38
Page 40

Daewoo DM-K40 Service Manual
NO. PART NO.
33 M2R0018331000000 R C-03K183JT 2 R108 R116
34 M2R0022331000000 R C-03K223JT 2 R45 R46
35 M2R0033331000000 R C-03K333JT 1 R92
36 M2R0047331000000 R C-03K473JT 1 R61
37 M2R0010431000000 R C-03K104JT 2 R18 R95
38 M2R0010531000000 R C-03K105JT 1 R47
39 M2R9947030899004 R CML08W470JT 1 RN1
40 M2R9975030899004 R CML08W750JT 1 RN2
41 M2C0120F30060300 CC-0603CG120JN500T 4 C120 C123 C126 C129
42 M2C0220F30060300 CC-0603CG220JN500T 2 C2 C3
43 M2C0330F30060300 CC-0603CG330JN500T 1 C45
44 M2C0101F30060300 CC-0603CG101JN500T 9 C85 C92 C134 C139 C102
45 M2C0151F30060300 CC-0603CG151JN500T 4 C119 C122 C125 C128
46 M2C0161F30060300 CC-0603CG161JN500T 4 C121 C124 C127 C130
47 M2C0221F30060300 CC-0603CG221JN500T 1 C60
48 M2C0471F30060300 CC-0603CG471JN500T 1 C73
49 M2C0561F30060300 CC-0603CG561JN500T 3 C71 C84 C93
50 M2C0102F44060300 CC-0603B102K500NT 16 C4 C74 C75 C76 C77 C78 C79 C80
51 M2C0222F44060300 CC-0603B222K500NT 4 C41 C42 C43 C44
52 M2C0272F44060300 CC-0603B272K500NT 1 C63
53 M2C0472F44060300 CC-0603B472K500NT 1 C88
54 M2C0562F44060300 CC-0603B562K500NT 3 C68 C69 C70
55 M2C0682F44060300 CC-0603B682K500NT 1 C58
56 M2C0273F54060300 CC-0603F273M500NT 2 C91 C87
57 M2C0223F54060300 CC-0603F223M500NT 1 C59
58 M2C0333F54060300 CT-0603F333M500NT 1 C81
59 M2C0104F84060300 CC-0603F104Z500NT 66 C6 C8 C10 C12 C13
DESCRIPTION
Chip Row Resistor
Chip Capacitor
QTY
C103 C104 C105 C148
C83 C108 C109 C100 C133 C137 C138 C142
C14 C15 C16 C17 C18
C19 C20 C22 C23 C24
C25 C26 C27 C29 C30
C31 C32 C33 C34 C35
C36 C37 C38 C40 C46
C47 C48 C49 C50 C51
C56 C57 C61 C62 C64
C66 C67 C72 C82 C86
C90 C94 C95 C98 C115
C117 C136 C141 C143 C149
LOCATION
Page 39
Page 41
Daewoo DM-K40 Service Manual
NO. PART NO.
60 M2C2475F89051122 CD11-50V-4.7UF-M 1 C65
61 M2C2106E57051122 CD11-25V-10UF-M 3 C1 C131 C132
62 M2C2107B57051122 CD11-16V-100UF-M 24 C5 C7 C9 C11 C21 C166
63 M2C2477C89081222 CD11-10V-470UF-M 4 C106 C107 C144 C164
64 M2C2108B59101622 CD11-16V-1000UF-M 1 C114
65 M2H0500M02U70805 L0805-2.7UH-500MA-K 1 L1
66 M2H0500M010U0603 L0603-10uH-500MA-K 2 L3 L4
67 M2HL500M070R0805 L0805-500MA-70R 1 L13
68 M2HL500M070R0603 L0603-500MA-70R 10 L23 L24 L25 L26 FB1 L2
FB3 FB4 L20 FB2
69 M2H4LGA1UH1J0307 LGA0307-1.1UH-K 4 L6 L7 L8 L9
M2H1RH3560083560 RH3.5*6*0.8
70
71 M2D1IN4148110000 1N4148-(DO-35
72 M2D1IN4007220000 1N4007-(DO-41A) 4 D15 D16 D10 D11
74 M2D1BZX5V1220000 BZX-5V1-1/2W-(DO-35) 1 Z1
75 M2D1BZX6V8220000 BZX-6V8-1/2W-(DO-35) 10 Z2,Z3,Z4,Z5,Z6,Z7
M2Q02SK301800000
76
M2Q000D130400000
77
M2Q02SB113200000
78
M2Q100S8050D2200
79
80 M2Q100S8550D2200 S8550D-(TO-92) 2
M2Q100A101502200
81
M2L1127M00003000
82
M2I0ZR36762E0000 Zoran ZR36762-PQFP208(E0) 1 U1
83
M2I0ZR36762B2000 Zoran ZR36762-PQFP208(B2) 1 U1
M2I0ZR36762V0000 Zoran ZR36762-PQFP208(V0) 1 U1
2SK3018-(SOT-18) 3
KTD1304-(SOT-23) 3
2SB1132-(SOT-89) 2
S8050D-(TO-92) 2
2SA1015GR(TO-92) 8
27.000MHz-30ppm-THIRD-20PF 1
DESCRIPTION
Electrolytic Capacitor
Chip Inductor
Chip Bead
Color loop Inductor
Ferrite Bead
Diode
)
Transistor
Crystal
IC
QTY
C152 C154 C155 C157 C160
C146 C162 C147 C101 C97
C28 C39 C89 C99 C150 C96
C153 C156 C158 C159 C52 C55
C116 C118 C161 C151 C113 C145
L12 L15
2
5 D1 D2 D3 D4 D5
Z8,Z9,Z10,Z11
Q1 Q2 Q3
Q15 Q16 Q18
Q5 Q4
Q9 Q8
Q6 Q7
Q10 Q11 Q12 Q13 Q14 Q24 Q25 Q26
Y1
LOCATION
,
Page 40
Page 42

Daewoo DM-K40 Service Manual
NO. PART NO.
84 M2I0ZR3670700000
M2I029LV80007000 MBM29LV800BA-70 PFCN
M2I039VF80000000 SST 39VF800A-70-4C-EK-TSO P48
M2I039VF80000001
85
M2I0M29W80070000 M29W800DT-TSOP48
M2ITE28F160C0000
M2I039VF80090000
M2I029W800B70000
M2IM12L16161A000 M12L16161A-7T
86
M2IVT36171600000 VT361716T-6AA
M2ITM50S11600000 TM50S116T-7
87 M2I0CS4334K00000 CS4334K-SOIC8 1 U10
88 M2IAZ1117H330000 AZ1117H-3.3V-(SOT-223) 1 U13
89 M2IAZ11170000000 AZ1117H-ADJ(SOT-223) 1 U14
90 M2I000D595400000 D5954-HSO P28 1 U7
91 M2IAZ4558AM00000 AZ4558AM-SO8 1 U11
92 M2I00078L0500100 78L05-(TO-92) 1 U9
M2I0L7805CV00100 L7805CV
94
M2I074HC14D00000 74HC14D-SO14
95
M2I0GP1F32T00100 GP1F553TZ/554TZ
96
M2I0MC3407200000 MC34072-SO8
97
M2IPT44720000000 PT4472 1
98 M2P0000TJC35A000 TJC3-5A 1 CN1
99 M2P88FPC24005000 JP24-05M 1 CN3
100 M2P000000PH5A000 PH-5A 1 CN5
101 M2P00000PH6AB000 PH-6A-B 1 CN2
102 M2P000000PH6A000 PH-6A 1 CN4
103 M2P000000PH8A000 PH-8A 1 CN15
103 M2P660000S4KB000 S-4KB 1 CN17
105 M2P11000RCA1A000 RCA-1A-CO AX 1 CN9
106 M2P11AV684120003 AV6-8.4-12-03 1 CN8
107 M2B100HY629AS013 HY629A-762-0S0 VER1.3 1 PCB
Zoran ZR36707-PQFP64 1 U6
SST 39VF800-70-4C-EK-TSOP48
TE28F160C3BD70
SST 39VF800-90-4C-EK-TSOP48
M29W800DB-70N
DESCRIPTION
Jack
PCB
QTY
1
1
1
1
1
1
1
2
2
2
1
1
1
1
U4
U4
U4
U4
U4
U4
U4
U2 U3
U2 U3
U2 U3
U12
U5
CN6
U18
U18
LOCATION
Page 41
Page 43

Daewoo DM-K40 Service Manual
4.3. Front panel parts list
NO. PART NO. DESCRIPTON QTY LOCATION
M2R1110330633110 RT13-1/ 6W-10K-±5% 4
1
M2R1133330633110 RT13-1/ 6W-33K-±5% 9 R5 R6 R7 R8 R9 R10 R11 R12 R13
2
M2R1115230633110 RT13-1/ 6W-1K5-±5% 1 R14
3
M2C2107B89050722 SM-16V-100uF- M 2 C1,C7
4
M2C1101F44000022 CC1- 50V-101-K 3 C3,C4,C5
5
M2C1104F84000022 CT81-50V-104-Z 2 C2,C6
6
M2D11N4148110000 1N4148 2 D1,D2
7
M2D100374N220000 LT0374N-43-M1 1 D3
8
M2I00PT6312B0000 PT6312B-QFP44 1
9
M2G11NHV06SS9100
10
M2G00FH811806350
11
****************
12
****************
M2IAT13812B00000 AT138BST-12M2 1
13
14 M2S00KAO06060501 KAO-6*6*5( 230g)
15 M2B000HY17200S12 HY172-3500-0S0 VER1.2
16 M2V11121NL200103 WH121N-2-A10K-F15
17 M2B0HYDVD3500010 HY3500-XNVOL VER1.0
Carbon Resistor
R1 R2 R3 R4
Electrolytic Capacitor
Porcelain Capacitor
Diode
IC
U2
VFD
06SS91 1 U1
81*18-0635 1 U1
JP-5MM 4 J1 J4 J5 J10
JP-7.5MM 7 J2 J3 J6 J7 J8 J9 J15
IR
U3
Jiggle Switch
4 PLAY POWER STOP SKIP_FOR
1
2
PCB
1
Page 42
Page 44

DA E WOO E LE C TR O NIC S C O R P .
686 , A HY E ON-D ONG , MAP O-G U,
S E OUL , K OR E A.
C .P .O. B OX 800 3 S E OU L K OR E A
P R INT E D DAT E : DE C 2004
 Loading...