

Page 1
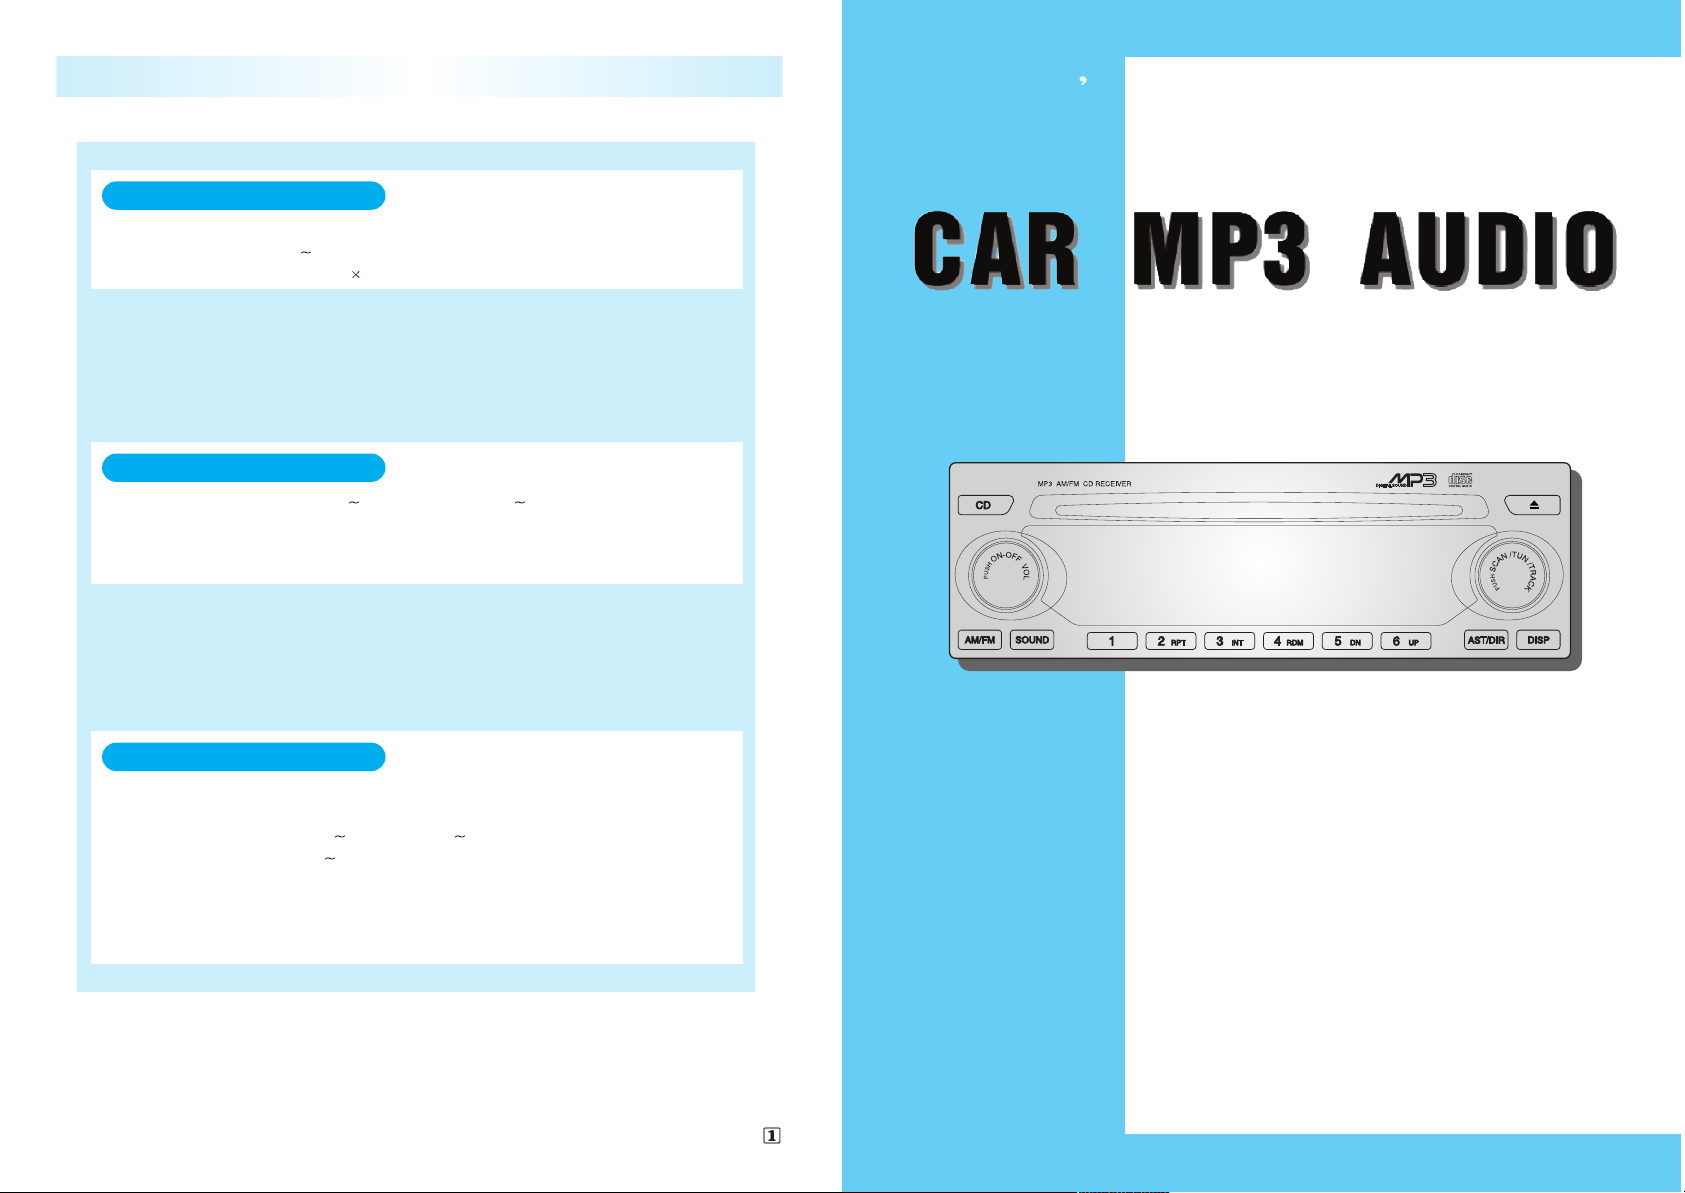
- Ergonomic design with multi-dot VFD
- High-power output (45W x 4ch)
- 18-station preset tuning FM-12,AM-6
- Automatic Tuning Function
- CD(MP3) Play/Pause Function
- Repeat/Intro/Random Function
- MP3 folder/track search Function
- MP3 file name scroll display Function
- CD Changer Control : Option
OWNER S MANUAL AGC-3106WM
Part No : 96612556
Rated output power
Tuning range
System
DISC
RPM
Frequency response
T.H.D
Dynamic Range
S/N Ratio
Channel separation
FM : 87.5 108.0 MHz / AM : 531 1602kHz
COMPACT DISC DIGITAL AUDIO SYSTEM
60dB COMPACT DISC (12cm STD. DISC)
1.2m/S
1.4m/S (200rpm 500rpm)
20Hz 20kHz
0.1%
85dB
70dB
FM : 4dBu S/N:30dB / AM:24dBu S/N:20dB
FM : 60dB / AM:50dB
FM : 35dB
Usable sensitivity
S/N Ratio
Stereo separation
Speaker impedance
4 8 OHM (4 SPEAKER)
DC 14.4V (NEGATIVE GROUND)
45WATTS
4CH = 180WATTS
Power requirement
SPECIFICATIONS
CD,CDC SECTION
COMPACT DISC (12cm DISC)
RADIO SECTION
GENERAL SECTION
CAR MP3 AUDIO
AGC-3106WM
050221
Page 2
TABLE OF CONTENTS
FRONT PANEL
Vacuum Fluorecent Display (VFD)
GENERAL OPERATION
RADIO OPERATION
CD PLAYER OPERATION
MP3 PLAYER OPERATION
CD CHANGER OPERATION
SPECIFICATION
1
2
5
7
9
10
13
Before you use the audio system, read these directions
thoroughly.
Becoming familiar with these directions will help you
obtain the best performance from your vehicle
s audio
system.
Repeat Play (6) :
To repeatedly listen to the current track, press the
2/RPT button (6).
RPT is displayed in VFD and the current track will be played back repeatedly until this
function is cancelled.
To cancel this function, press this buttononce again.
Track Introduction (6) :
To quickly and conveniently scan the track, use the 3/INT button (6).
INTRO will be displayed in VFD and the audio system will play the first 10 seconds of
each track.
When the player reaches the desired track, press this button again and normal play will
resume.
Random Play (6) :
To play a CD disc in random order, press 4/RDM button (6).
RDM will be displayed in VFD and the audio system play CD disc in random order.
To cancel this function, press this button once again.
Disc Up / Down Button (6) :
To select the disc in ascending order, press 6/UP button. Then the disc s number
selected will appear on the V.F.D.
To select the disc in descending order, press
5/DN button. Then the disc s number
selected will appear on the V.F.D.
13
Page 3
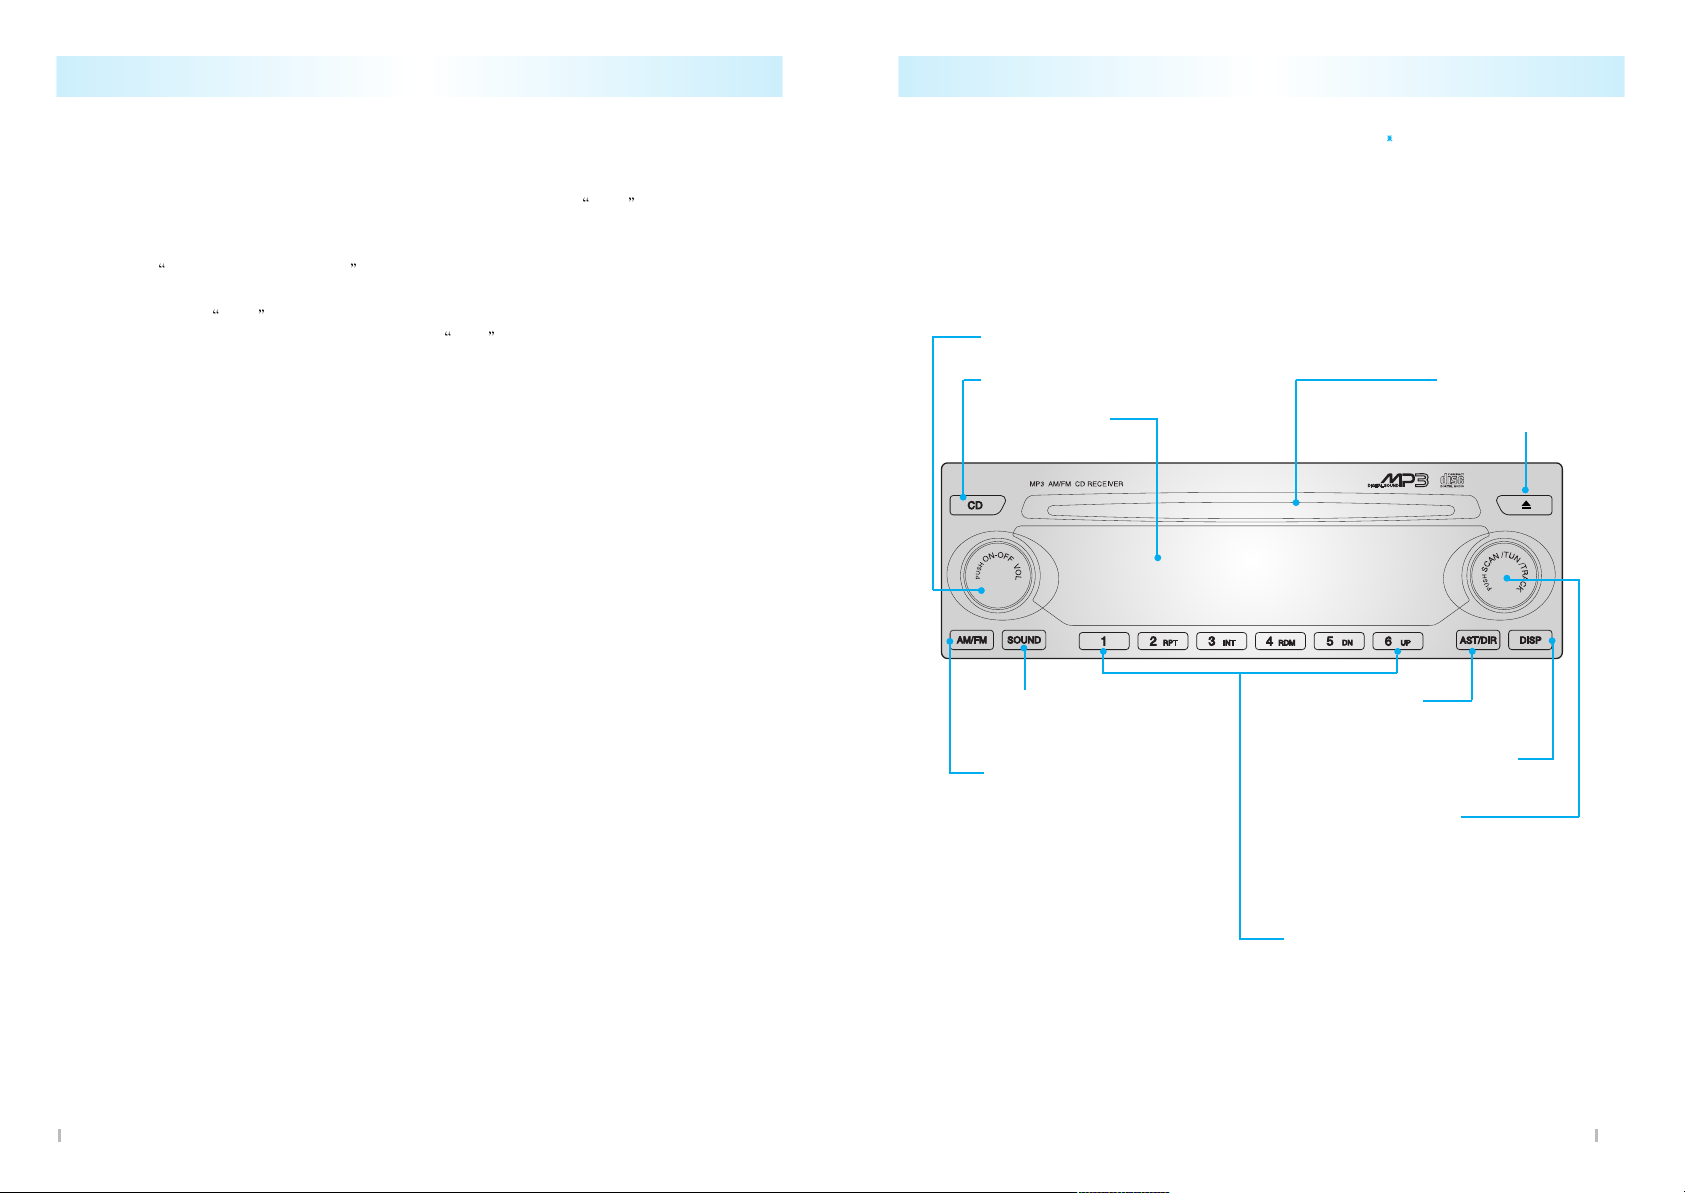
FRONT PANEL
7. CD(MP3) Play&Pause button
3. Radio on &
Band Selection button
2. Sound mode
Selection button
1. Power on/off & Volume Control button
4. Tune up/down &
Track Search button
- Seek tuning
- Scan tuning
- Manual tuning
8. CD(MP3) disc Slot
11. VFDisplay
5. Auto-store&
AST Band Selection button
9. Disc Eject button
10. CD(MP3) Display mode
Selection button
CD Changer is Optional item.
6. Preset station buttons (1~6)
- Repeat Play button (preset #2)
- Introduction button (preset #3)
- Random Play button (preset#4)
- CDC Disc Down & Up button (preset#5,6)
1
CD CHANGER OPERATION (0ption)
CD changer is operated by main unit.
1. Press the power button on the main unit to turn the audio system on.
2. If the disc is already inserted inside the CD changer, press the
CDC button. (7)
It starts playback at the beginning of the track which you listened to before.
3. If the disc is not inserted yet, load the disc in the magazine.
(Refer to
How to change the disc )
CD changer will check the discs automatically and it will be ready to play.
Then, press the CDC button to play. It starts playback from No. 1 disc.
4. To operate CDC while operating radio, press
CDC button if the disc is already inserted
inside the CD changer.
CD Changer Play (7) :
To play the CD Changer while operating the radio, press this button if the disc is already
inserted in the CD changer.
The mode is transferred to the CD changer and the CDC is played back from the track
where it is stopped.
If the disc is not in the CD changer, the mode is not changed to the CD changer when you
press this button.
Track up & down (4) :
Track up & down rotary knob (4) allows you to make quick selections from your playing disc.
1. To play the next track, rotate this knob clockwise less than 1 second.
Each time you rotate the knob, the disc will skip to the next track.
2. To play the previous track, rotate this knob counterclockwise less than 1 second.
Each time you rotate the knob, the disc will skip to the previous track.
Cue & Review (4):
This function allows desired point-search within a track at a faster than normal playback
speed.
1. To search the desired point of a track, rotate this knob (4) with holding it. the audio level
is reduced and the disc will play faster than normal playback speed.
When the disc reaches the desired point, release the knob and normal play will resume.
2. To cue (forward) the track, rotate this knob clockwise and to review (backward) the track,
counterclockwise.
12
Page 4

Vacuum Fluorecent Display (VFD)
2
Introduction function
indicator
Repeat function indicator
FM stereo on indicator
Weak FM signal indicator
MP3 disc play indicator
Disc-inserted indicator
Radio mode indicator
Mode indicator ( CD/MP3/Radio)
Overall contents display
MP3 play mode indicator
- Directory of the disc only
Random
function
indicator
MP3 play mode indicator
- All of the disc
Equalizer mode indicator
CD changer is installed in the boot. Up to 6 discs can be stored in the magazine of CD
changer. A selection of tracks from 6 discs stored In the disc magazine can be made and
automatically played in the order of your preference.
CD CHANGER OPERATION (0ption)
How to Change the disc
To Remove :
1. Open the sliding door of the CD changer to the right until it
is completely latched.
2. Press the eject button on the CD changer and remove the magazine.
3. Remove the magazine.
4. Pull a tray out of the magazine by using a tray button.
5. Remove the disc from the tray and insert the tray into the magazine.
CAUTION !
CD Changer can be damaged.
Insert magazine firmly not to slip out
while driving.
Close the sliding door completely.
Labeled surface upward
11
CD hanger is controlled by Main Unit.
CD hanger is Optional item.
To Load :
1. Put the disc on a tray with its label side upward.
2. Insert the tray into the magazine.
3. Push the magazine into the CD changer until it is locked and click sound is heard.
4. After loading the magazine, close the sliding door completely to the left.
Page 5

GENERAL OPERATION
Power / Volume Control Knob(1)
Power On (1): Press this knob to activate the audio system.
The radio, CD, MP3 signal will appear on the VFD.
Power Off (1): Press this knob again to turn the system off.
All signals on the VFD will disappear.
3
Audio system can be operated with ignition key in ACC or ON position.
Audio system can be activated by :
- Pressing the power/volume control knob.
- Inserting disc.
- Pressing the AM/FM button.
- Pressing the CD button, if a disc in the unit.
When ejecting the disc, mode is automatically transferred to previous mode.
How to Adjust the Sound (2)
Sound Mode Selection (2):
To select the desired sound mode, press sound mode selector button (2).
The sound mode indicator and numeric signal will appear on the VFD.
Each time you press this knob, the sound mode changes as follows;
BAS -> TRE -> FAD -> BAL -> EQ -> LOUD -> VOL -> BAS
When the desired mode is selected, adjust by rotating the power/volume control knob. (1)
After adjusting, the VFD will return to the original display after 5 seconds.
Volume Control (1):
Rotate power/volume control knob (1) clockwise to increase the volume and
counterclockwise to decrease the volume. The volume level will appear as a numeric signal
on the VFD. After adjusting, the VFD will return to the original display after 5 seconds.
MP3 PLAYER OPERATION
Insert MP3 disc to play the compressed Audio format : MP3.
Audio system assist various disc format. (Masked CD/CD-R/CD-RW)
MP3 disc is played at the same manner of the audio CD disc.
(Load/Eject/Play & Pause/RPT/INT/RDM)
[ Note ]
Playability may depend on the type of CD-R/CD-RW used, CD surface condition, CD
writer performance and condition and or software used.
When inserting CD-ROM disc without MP3 files, the unit displays ERROR 06 and
returns to the previous mode.
MP3 file name Display
If disc has loaded, audio system will detect the type of disc either audio disc or MP3 disc
and it will be displayed on the VFD if detected disc is MP3, the file name will be displayed
on VFD in scrolled manner from the right to the left side.
Directory Mode Selection button (5) :
1. Press this button (5) to repeatedly play the directory of the current played MP3 file.
[DIR] will be displayed on the VFD.
2. Press this button again to play overall MP3 files of the disc.
[ALL will be displayed on the VFD.
MP3 file up & down (4) :
1. To play the next MP3 file, rotate this knob clockwise.
Each time you rotate the knob, the disc will skip to the next file.
2. To play the previous MP3 file, rotate this knob counterclockwise.
Each time you rotate the knob, the disc will skip to the previous file.
Directory up & down (6) :
1. To search desired directory, press 5/DN or 6/UP button.
2. Directory name will be displayed on The VFD.
3. After reaches the desired directory, Audio system will automatically starts playing from
the first MP3 file of the directory.
10
Audio system assist multi-session recorded disc.
Page 6

GENERAL OPERATION
Bass Control (1):
Bass control is used to adjust the bass (low frequency) sound quality.
1. Select the bass control mode using the sound mode selector button (2).
2. When
BAS appears, rotate volume control knob (1) clockwise to increase the bass
(low frequency) and counterclockwise to decrease it.
The bass level will appear as a numeric signal.
0 indicates the mid-point sound level.
The highest bass level is +5 and the lowest -5 .
3. After adjusting, the display will return to full audio system information in about 5 sec.
Treble Control (1):
Treble control is used to adjust the treble (high frequency) sound quality.
1. Select the treble control mode using the sound mode selector button (2).
2. When
TRE appears, rotate volume control knob (1) clockwise to increase the treble
(high frequency) and counterclockwise to decrease it.
The treble level will appear as a numeric signal.
0 indicates the mid-point sound level.
The highest treble level is
+5 and the lowest -5 .
3. After adjusting, the display will return to full audio system information in about 5 seconds.
4
Cue & Review (4):
This function allows desired point-search within a track at a faster than normal playback
speed.
1. To search the desired point of a track, rotate this knob (4) with holding it. the audio level
is reduced and the disc will play at a rate of 6 times faster than normal playback speed.
When the disc reaches the desired point, release the knob and normal play will resume.
2. To cue (forward) the track, rotate this knob clockwise and to review (backward) the track,
counterclockwise.
Repeat Play (6):
To repeatedly listen to the current track, press the
2/RPT button (6).
RPT is displayed in VFD and the current track will be played back repeatedly until this
function is cancelled.
To cancel this function, press this button once again.
Track Introduction (6):
To quickly and conveniently scan the track, use the 3/INT button (6).
INTRO will be displayed in VFD and the audio system will play the first 10 seconds of
each track.
When the player reaches the desired track, press this button again and normal play will
resume.
Random Play (6):
To play a CD disc in random order, press 4/RDM button (6).
RDM will be displayed in VFD and the audio system play CD disc in random order.
To cancel this function, press this button once again.
9
Page 7

Fader Control (1):
Fader control adjusts the volume separation between the front & rear speakers.
1. Select the fader control mode using the sound mode selector button ( 2).
2. When
FAD appears, rotate volume control knob (1) clockwise to decrease the volume
of the rear speakers.
Fader level display will change from
FRONT 01 up to FRONT 15 .
3. To decrease the volume of the front speakers, rotate volume control knob(1) counter-
clockwise.
The fader level display will change from REAR 01 up to REAR 15 .
4. When the fader level display shows
0 , volume is centered between front and rear
speakers.
5. After adjusting, the display will return to full audio system information in about 5seconds.
Balance Control (1):
Balance control is used to adjust the separation between left and right speakers.
1. Select the balance control mode using the sound mode selector button (2).
2. When BAL indicator appears, rotate volume control knob (1) clockwise to decrease the
volume of the left speakers.
The balance level signal will change from
RIGHT 01 to RIGHT 15 .
3. To decrease the volume of the right speakers, rotate volume control knob counterclock-
wise.
The balance level signal will change from LEFT 01 up to LEFT 15 .
4. When
0 appears, output is centered between left and right speakers.
5. After adjusting, the display will return to full audio system information in about 5seconds.
EQ (Sound Style) Control (1):
Select one of the pre-defined EQ (sound styles).
1. Select the EQ control mode using the sound mode selector button (2).
2. When EQ OFF appears, rotate volume control knob (1) clockwise or counterclockwise
to change the EQ (sound style).
* Each time you rotate volume knob (1), EQ mode changes as follows;
CLASSIC -> POP -> ROCK -> JAZZ -> VOICE -> CLASSIC
3. After adjusting, the display will return to full audio system information in about 5seconds.
5
CD PLAYER OPERATION
1. Press the power knob (1) to activate the audio system.
2. Insert a CD disc into the disc slot (8) label side upwards.
Audio system playing the first track Automatically.
3. If a CD disc is already inserted in the disc slot, press the
CD button.
Audio system will play the last track you listened to.
4. To eject the CD disc, press the CD eject button (9).
If the ejected disc is not taken out of the disc slot within 10 seconds, the CD disc will
automatically loaded again.
5. After the CD disc is ejected, the audio system will change to the previous mode (radio or
CDC if possible).
8
Play & Pause (7):
Press the play knob (7) to play CD disc. Pressing again this knob (7) in the playback mode
will cause the audio system to enter in to the CD pausing mode.
In the pause mode, sound is not heard.
Track up & down (4):
Track up & down rotary knob (4) allows you to make quick selections from your CD disc.
1. To play the next track, rotate this knob clockwise less than 1 second.
Each time you rotate the knob, the disc will skip to the next track.
2. To play the previous track, rotate this knob counterclockwise less than 1 second.
Each time you rotate the knob, the disc will skip to the previous track.
At power off & on, CD play the last position.
Page 8

RADIO OPERATION
1. Press the power knob (1) or AM/FM button to active the audio system.
2. Press the
AM/FM button (3) to select the desired band.
Band changes as follows;
FM1 -> FM2 -> AM -> FM1
3. Tune in the desired station using seek tuning (4), scan tuning (4), manual tuning (4),
preset button (6) or auto store function (5).
4. To hear the preset station stored on the preset buttons, use the preset button.
5. To turn the radio on while operating CD (MP3) player, press the
AM/FM button.
How to Tune in the Station
Seek Tuning (4):
Use the seek rotary knob (4) to quickly search for a receivable station.
To search for the next receivable higher station, rotate the seek knob clockwise and hold it
more than 1second.
To search for the previous receivable lower station, rotate the seek knob counterclockwise
and hold it more than 1second.
Scan Tuning (4):
Press the scan button (4) to quickly search for a receivable station and introduce each
station 5 seconds.
Manual Tuning (4):
Rotate the rotary knob (4) less than 1 second clockwise or counterclockwise to increase or
decrease the frequency.
The frequency of the AM band changes 9KHz each time and the frequency of the FM band
changes 100KHz each time.
Preset tuning (6):
To select the desired preset station stored on the preset buttons in FM1, FM2, FM-A, AM,
AM-A band, press the corresponding preset button for less than 1 second.
6
How to Store the Stations
Auto store (5):
The
AST button (5) enables stations to be stored automatically.
Press the AST button more than 1second.
This combines in one operation with the selection and storage of 6 strong stations in the
region.
If no station is found the frequencies may remained as they were before.
After the storage of 6 strong stations in the region, automatically start preset-scan.
Manual memory (6):
Use the preset buttons to store the desired station in AM, FM1, FM2 band.
1. Select the desired band using the band selection button (3).
2. Tune in the desired station using tuning Rotary knob (4)
3. Press the corresponding preset button ( 1 ~ 6 ) that you want to store.
7
Audio system have special Auto store band in AM & FM.
 Loading...