

Page 1
MODELS: DYF30BFBPL, DYF30BFBPR, DYF30BFBSL, DYF30BFBSR, DYF30BFTSL, DYF30BFTSR,
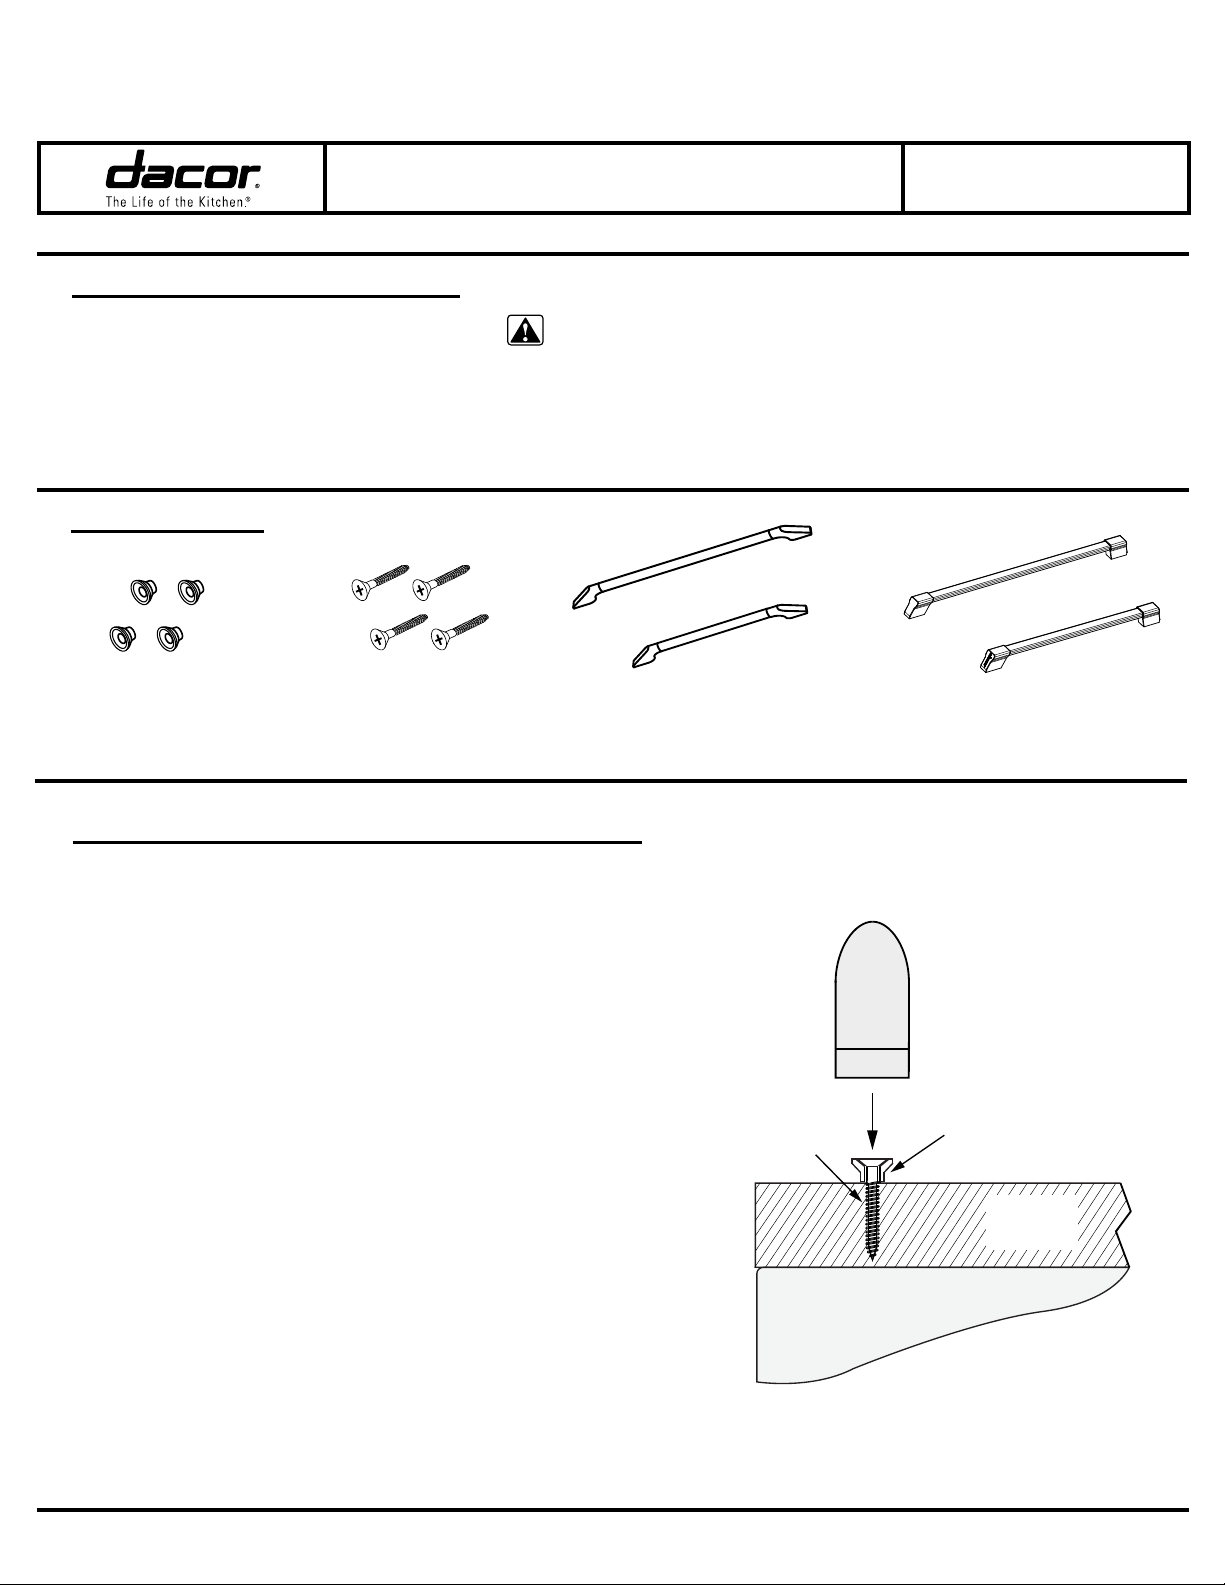
Handle
Appliance
door/drawer
Custom
panel
Mounting
stud
Wood
screw
DYF36BFBPL, DYF36BFBPR, DYF36BFBSL, DYF36BFBSR, DYF36BFTSL, DYF36BFTSR
Epicure® and Pro Style Refrigerator
Handle Kits, PN ADYFxxH2y*
Tools and Materials Required
The following items are not provided with the
kit and are required for proper installation.
• 3/32” hex wrench
• Electric drill with 3/32” drill bit
Parts Included
Handle Mounting
Studs** (4)
#10 Wood Screws** (4)
INSTALLATION
INSTRUCTIONS
* xx = refrigerator width (30” or 36”), y = handle style E for Epicure P for Pro
CAUTION: To avoid damage to the refrigerator or handle
components, use power tools only for drilling pilot holes
in the custom panel . Use hand tools only for handle disassembly and assembly.
OR
Epicure style Pro style
Handles, 1 Long, 1 Short
** Required for model DYF30BFBPL, DYF30BFBPR DYF36BFBPL and DYF36BFBPR refrigerators only
Installation notes for custom panel models
Models DYF30BFBPL, DYF30BFBPR DYF36BFBPL and DYF36BFBPR
Before installing the custom panels, you need to install the handle
studs included with this kit using the included #10 screws. See
the refrigerator installation instructions for complete custom panel
construction information. The screws included with the kit are
designed to accommodate the panels thicknesses specified in the
refrigerator installation instructions ( 3/4” to 1 1/8”). See diagram.
Stud Mounting, Custom Panel Style
Refrigerators - Top View
Part No. 108873 Rev. B
Page 2
Refrigerator Handle Kit Installation Instructions
Steps 1 through 4 apply to models DYF30BFBPL, DYF30BFBPR, DYF36BFBPL and
DYF36BFBPR, only.
STEP 1 Custom panel models: Construct the custom panels according to the
specications in the refrigerator installation instructions.
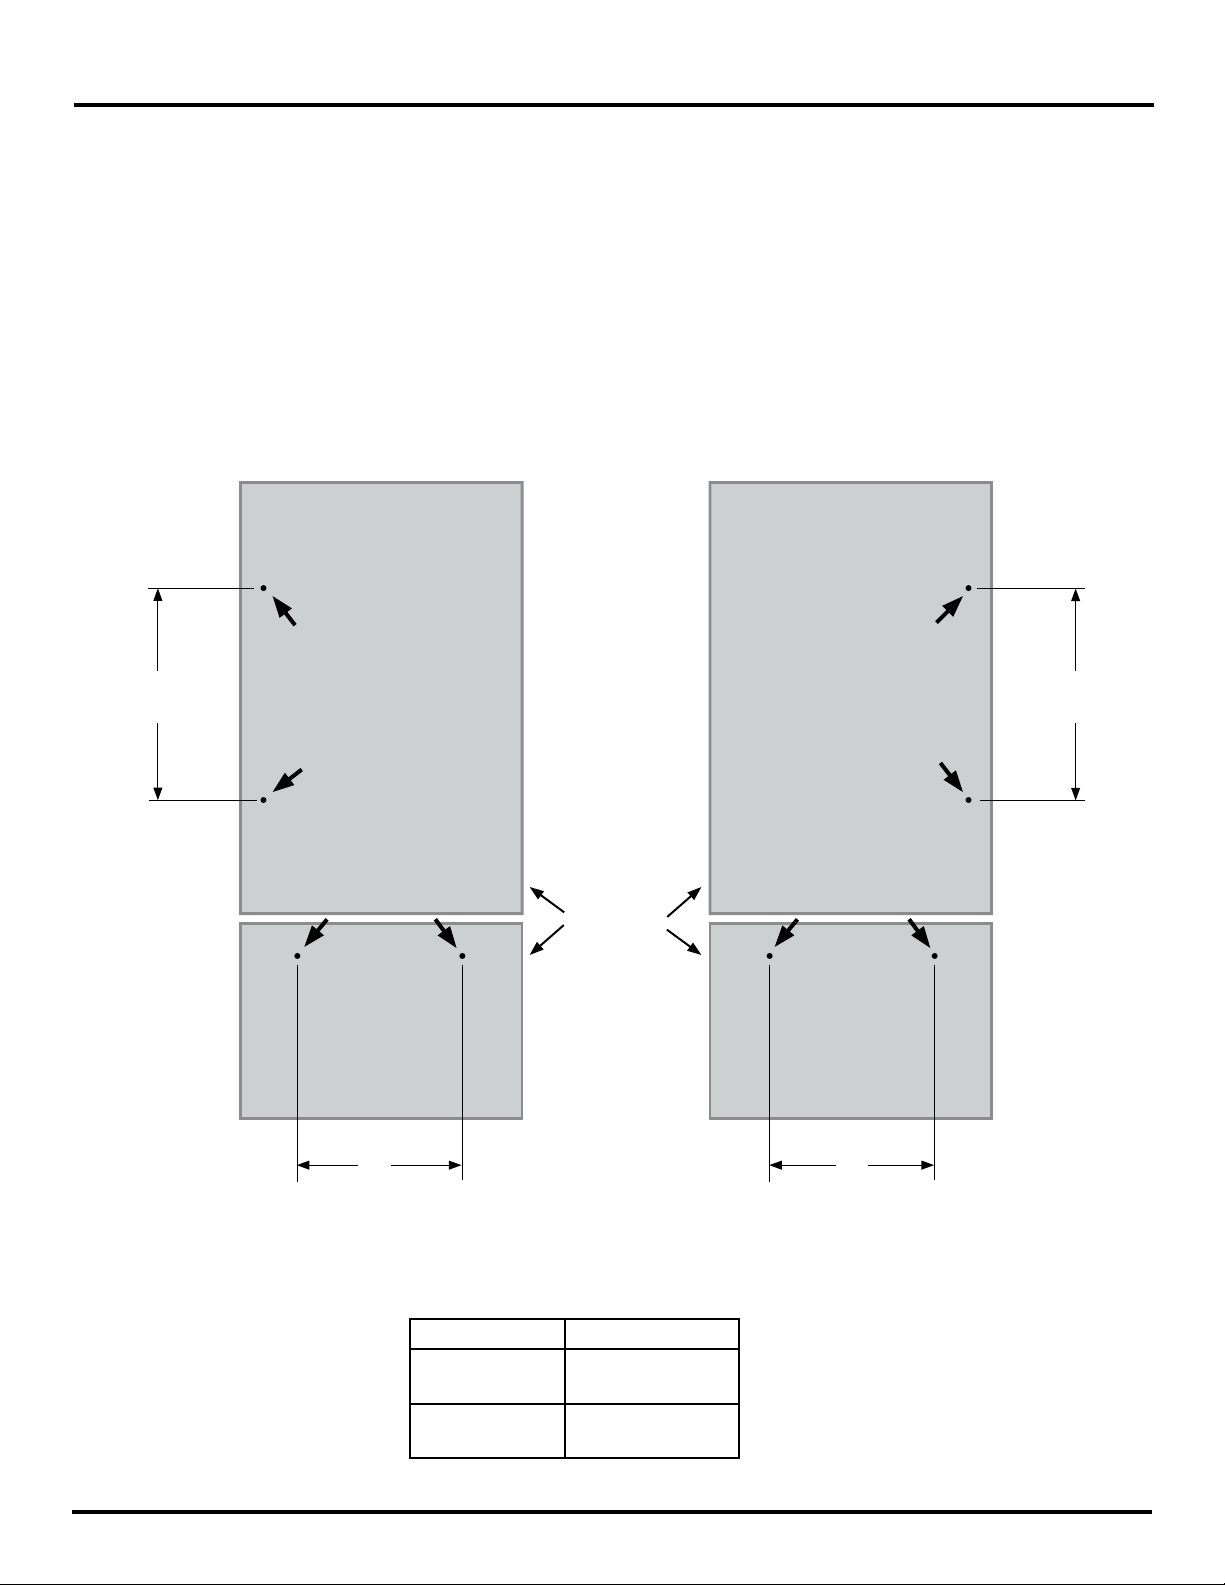
STEP 2 Custom panel models: Drill four (4) pilot holes (2 for the refrigerator door
and 2 for the freezer drawer) using a 3/32” drill bit. The required spacing
for proper t are shown below.
35 7/16”
(89.9 cm)
A A
Handle Mounting Stud Locations
Custom Panel Models with Hinges on Right
35 7/16”
(89.9 cm)
Custom
panels
Handle Mounting Stud Locations
Custom Panel Models with Hinges on Left
Kit A
ADYF30H2F/P
ADYF36H2F/P
23 1/2”
(59.8 cm)
29 1/2”
(74.8 cm)
Page 2
Page 3

Refrigerator Handle Kit Installation Instructions
STEP 3 Custom panel models: Install the four (4) han-
dle mounting studs in the locations of the pilot
holes drilled in step 2.
STEP 4 Custom panel models: Install the custom pan-
els on the refrigerator according to the refrigerator installation instructions.
STEP 5 Models without custom panels: Using a
3/32” hex wrench, loosen the set screws at
the ends of the existing handles. Remove the
handles. See diagrams below.
Set screw
holes
Stud installation - Custom Panel Models
Set screw
hole
Set screw
holes
Set screw
hole
Set screw
holes
Pro Style Handle RemovalEpicure Style Handle Removal
Page 3
Page 4

STEP 6 Place the new handles over the mounting studs. Tighten the set screws at the
ends of the handles into place using a 3/32” hex wrench.
Set screw
Set screw
holes
holes
Set screw
Set screw
holes
holes
Pro Style Handle InstallationEpicure Style Handle Installation
Dacor ● 14425 Clark Avenue, City of Industry, CA 91745 ● Phone: (800) 793-0093 ● Fax: (626) 403-3130 ● www.dacor.com
 Loading...