

Page 1
DK10BKCMB2
Flip Book Stand
Assembly Instructions
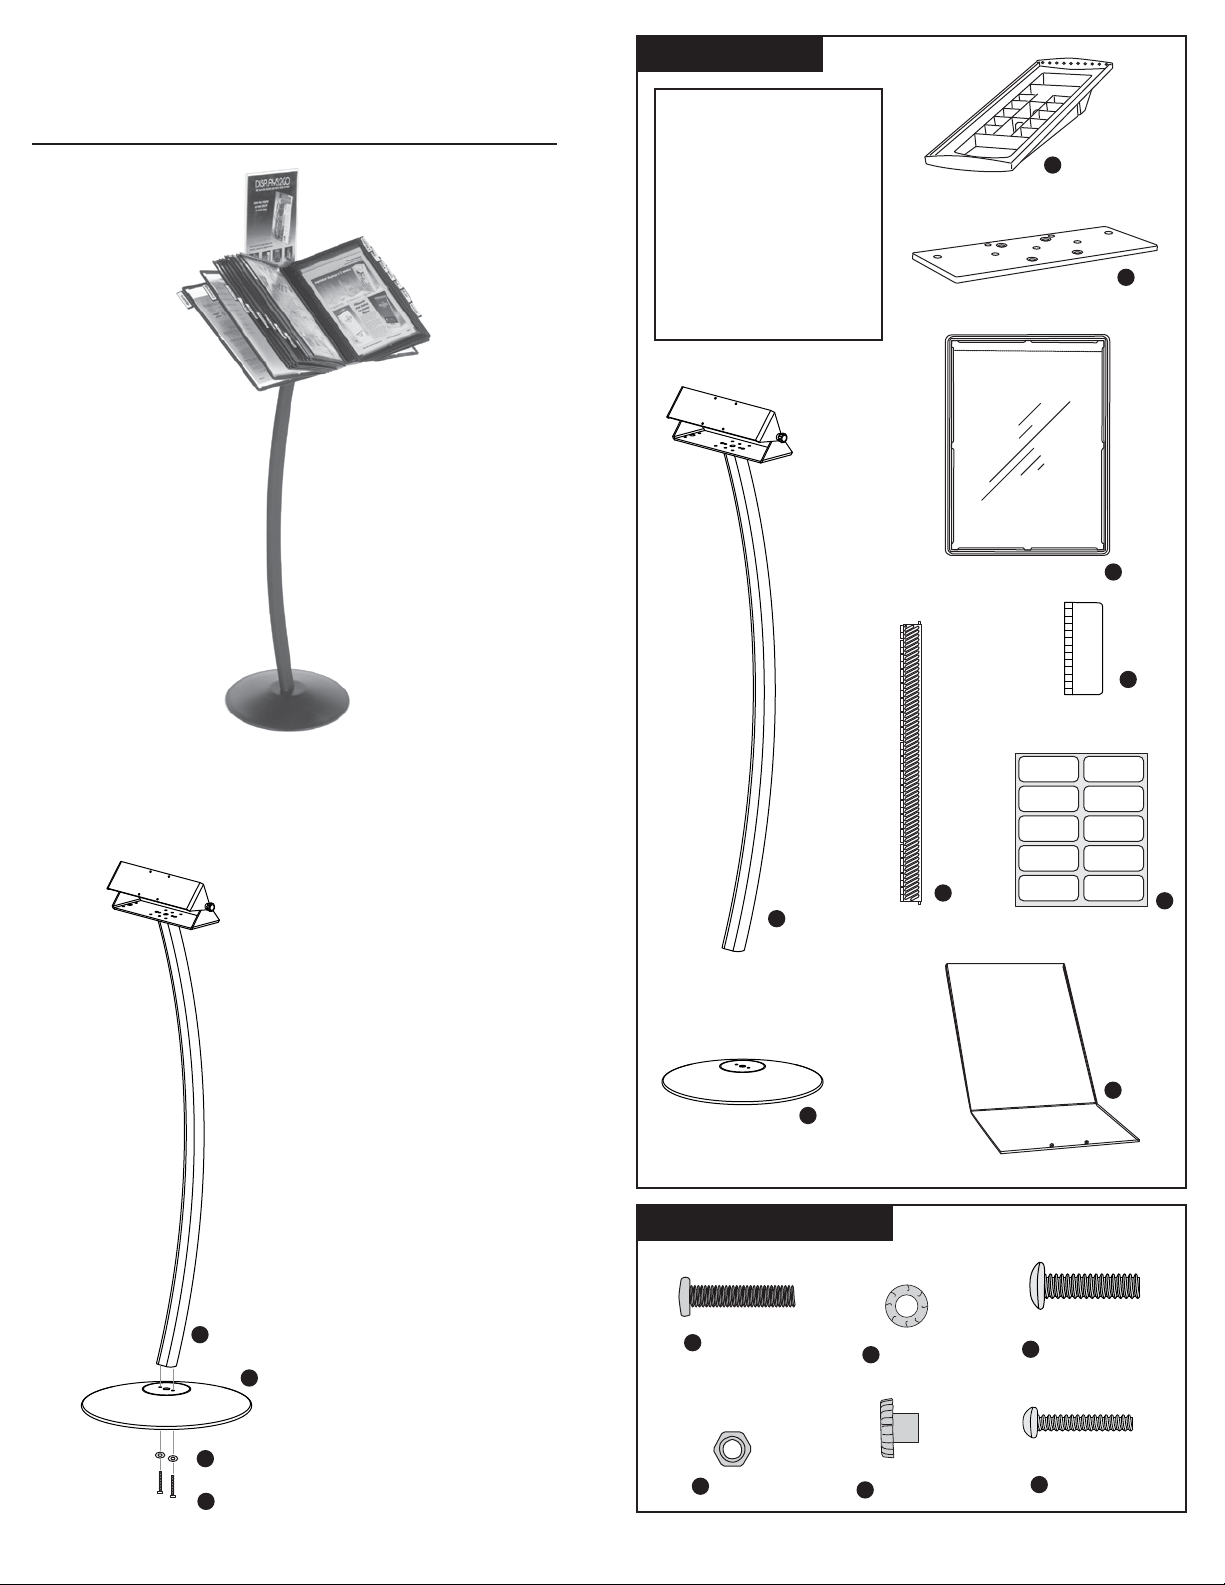
Parts
A (x1) - Pole & Tilt Bracket
B (x1) - Base
C (x2) - Flip Book Holder
D (x1) - Bracket Plate
E (x20) - Page Sleeve
F (x20) - Sleeve Tab
G (x20) - Page Hinge
H (x4) - 10 Tab Labels
I (x1) - Graphics Holder
C
(x2) Flip Book Holder
D
(x1) Bracket Plate
Step 1: Pole & Base Assembly
a. Align the holes in the bottom of the
pole bracket assembly (A) with the holes
at the top of the base (B).
b. Insert M4 screw (a) through lock
washer (b) and thread through base (B)
to matching hole in pole assembly (A).
Repeat for other hole.
c. Tighten screws using a philips
screw driver.
A
(x1) Pole & Tilt Bracket
(x1) Base
(x20) Page Hinge
B
(x20) Page Sleeve
(x20) Sleeve Tab
G
(x4) 10 Tab Labels
E
F
H
I
(x20) Page Sleeve
Hardware
(x4)
(x2)
c
f
M6
(phillips)
Button Cap
(hex)
(x2)
A
B
b
a
M4
a
(phillips)
Hex Nut
d
(x2)
b
(x4)
e
Lock
Washer
Thumb Nut
Page 2

Step 2: Sleeve Mount Assembly
d
C
f
D
a. Insert the Button Cap screws (f)
into the bracket plate (D) as shown below.
f
D
b. Place the hex nut (d) into the fitted
slot on the flip book holders (C) as shown
d
C
c
I
e
e. Align the two holes on the sign holder(I) with the
back two screws(f) under the mounting bracket(A)
and push sign frame(I) into position.
I
c. Secure the flip book holders (C) to the
bracket plate (D) using the M6 (c) screws.
Tighten the screws with a philips
A
e. Tighten thumb nuts(e) on to the button cap
screws(f) securing the bracket plate (D),
sign holder (I), and flip book holder (C) into position.
screwdriver securing the holder in place.
C
D
c
d. Align the screws (f) protruding from
the bottom of the bracket plate with the
holes on the tilt bracket (A) and move
into place.
D
A
Step 3: Sleeve Assembly & Mounting
a. To attach page hinge (G) to page
sleeve (F) slide the page hinge up along
the side of the page sleeve so it grips the
outside edge.
b. To attach sleeve tabs (F) start at
the bottom or top of the outside eged
of the page sleeve(E) and slide the tab
to its desired position along the edge.
E
F
f
e
c. To attach the assembled sleves to the flip book holders
insert the peg located on the end of the page hinge into
the holes located on the top and bottom lips of the flip
book holder. you will need to bend the page hing slightly
to allow for insertion.
C
C
G
G
E
E
G
Step 4: Inserting Graphics
a. To insert graphic into pagfe sleve simply
slide through slit in sleeve.
G
E
G
 Loading...