

Page 1

CZURTECH CO., LTD.
Website http://www.czur.com
E-mail [email protected]
Skype [email protected]
Room 1701, Oriental Science and Technology Building, No.16, Keyuan Road,
Nanshan District, Shenzhen, China.
USER MANUAL
(ET Series)
Page 2

Chapter I Introduction
1.1 Product Summary ......................................................................2
1.2 Product Dimensions ...................................................................2
1.3 Product Appearance ..................................................................3
1.4 Product Specifications ...............................................................5
1.5 Packaging and Accessories ........................................................5
Chapter II Operation Guidelines
2.1 Scanning Preparation ................................................................6
2.2 Work Mode ...............................................................................7
2.2.1 Computer Mode (USB-PC) ..................................................7
2.2.2 Wi-Fi Mode .......................................................................7
2.2.3 Visual Presenter Mode (HDMI) ............................................8
2.3 Hardware Update ......................................................................9
2.4 Restore Factory Settings ...........................................................9
Chapter III Frequently Asked Questions and Troubleshooting
3.1 PC Mode(USB) Problems ...........................................................9
3.2 Wi-Fi Mode(Smart phone) Problems ...........................................11
3.3 Visual Presenter Mode(HDMI) Problems ................................... ..12
Chapter IV Terms of Service
4.1 After Sale Service and Guarantee .............................................12
4.2 Warranty Process ...................................................................13
4.3 Contact Information .................................................................13
Contents
Page 3
Chapter I Introduction
1.1 Product Summary
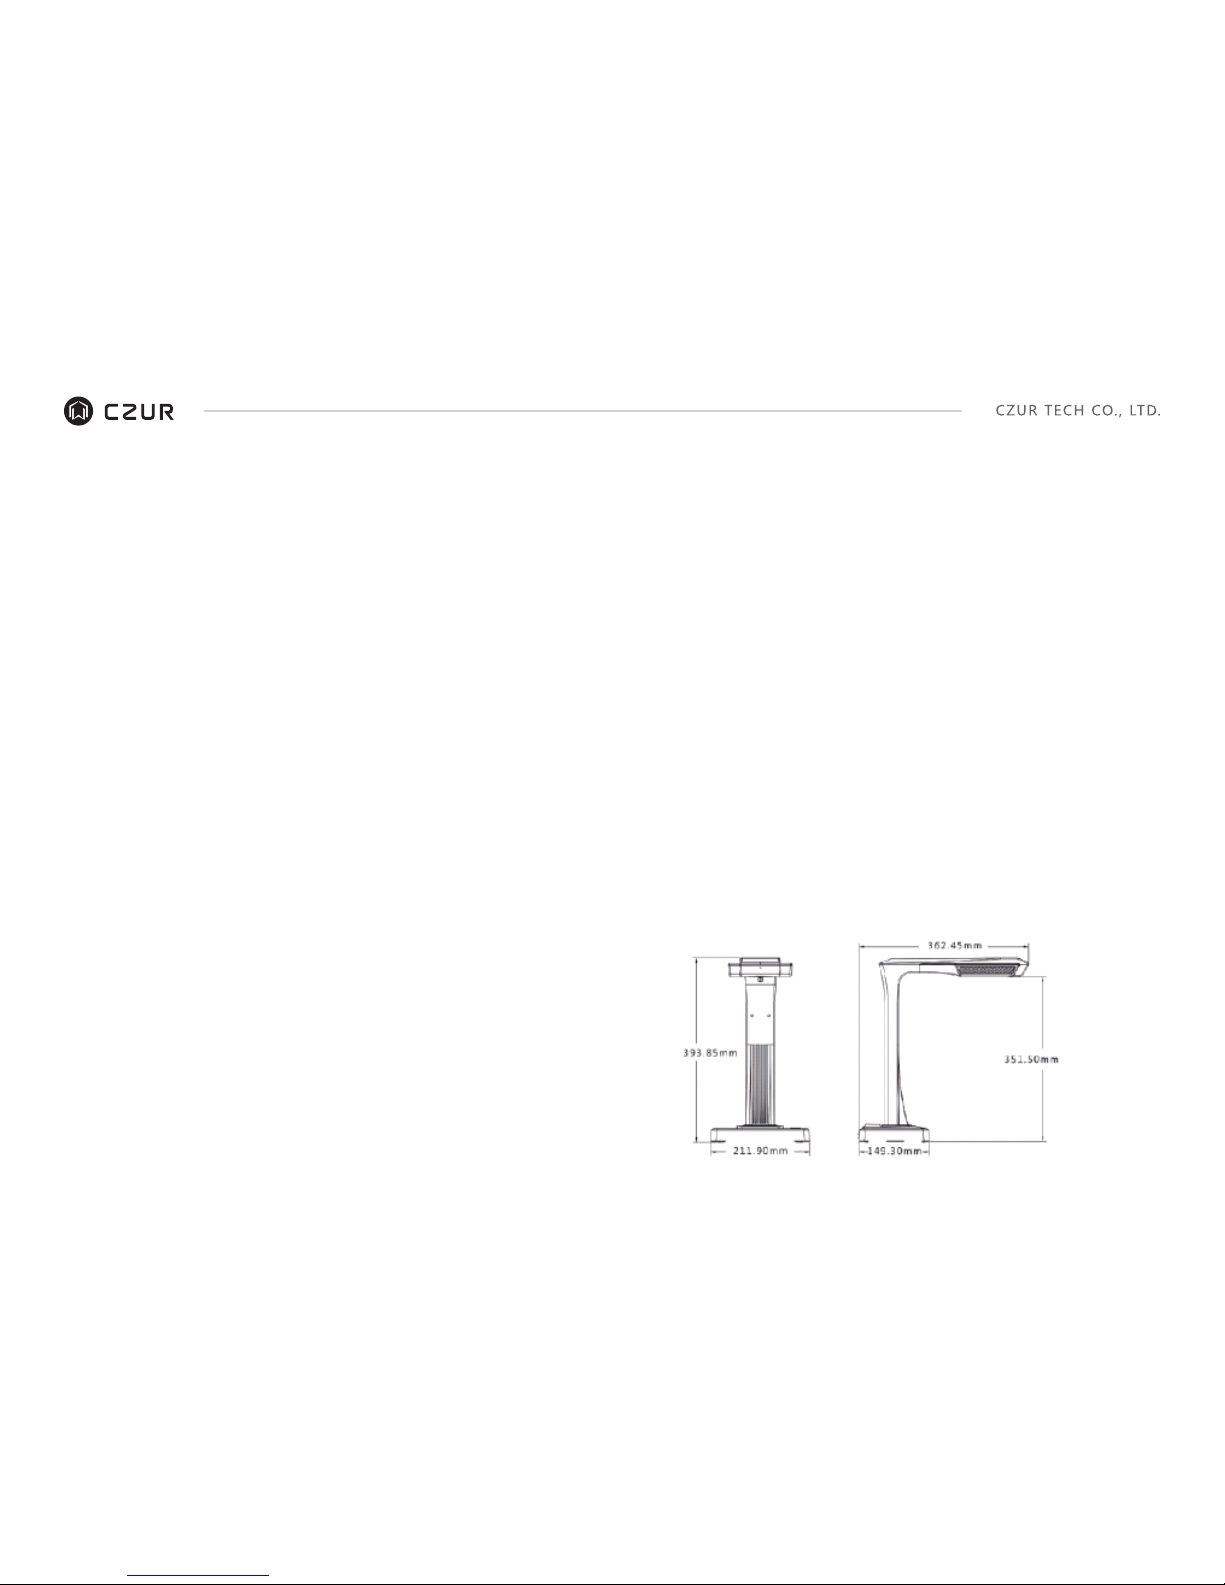
1.2 Product Dimensions
The CZUR scanner is a new type of intelligent scanner whose foremost
features are its extremely high scanning speed, its ability to recognize
and correct for curved, incorrectly positioned, or soiled pages, and its
ability to quickly and easily convert scanned pages to more useful formats
(PDF, searchable PDF, TIFF, or text documents.)
It can operate as a scanner when connected to either a PC (by a USB
cable), or to a smart phone (by an app over a Wi-Fi connection.) Or, via
HDMI cable (not included), it can provide input to visual display device.
The scanner can, using built-in algorithms, automatically handle pages
otherwise difficult or very time-consuming to scan. For example, it can
automatically flatten the curved pages of open books (using laser lines),
erase fingerprints, automatically split double pages into two, and correct
pages incorrectly positioned. This allows large books to be scanned and
archived very quickly.
It’s a completely new approach to scanning and can save hours of time
scanning either simple or complex tasks of document digitizing, archiving,
and sharing. It is unlike any scanner in its price range.
2
Page 4
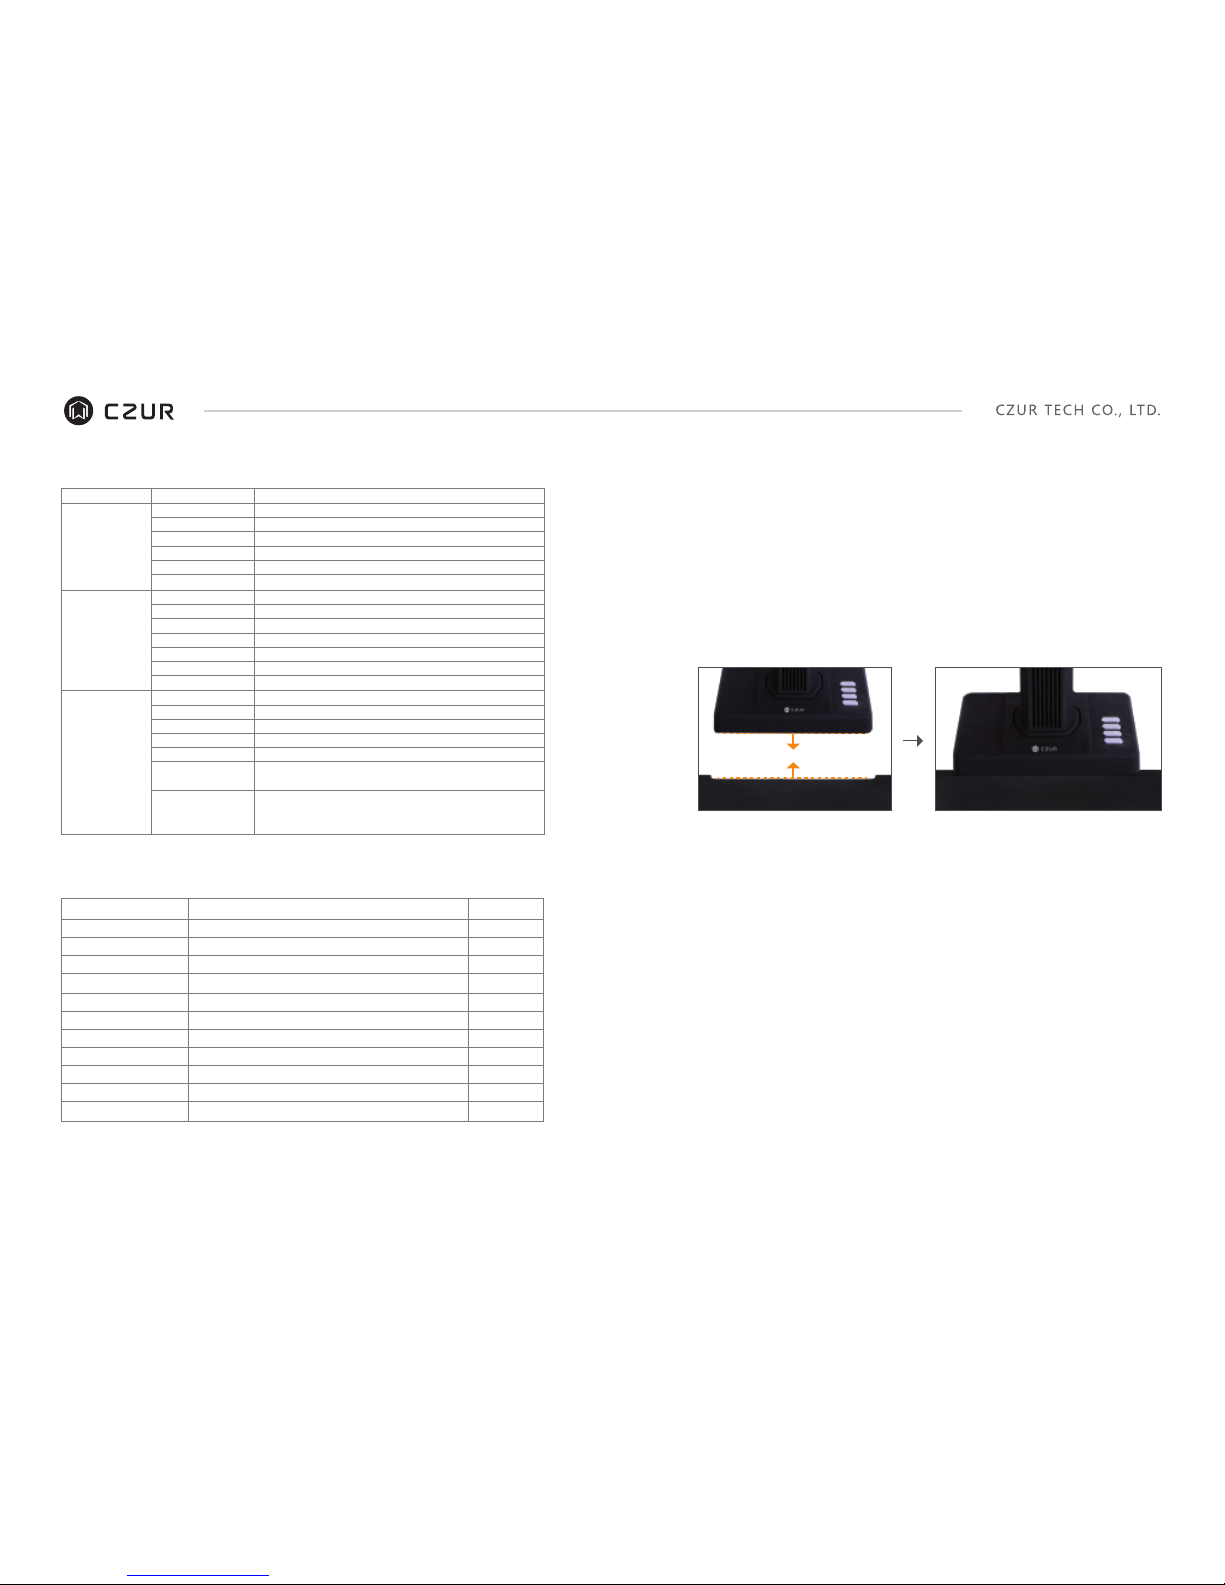
Place the scanner on a surface (table, desk, or counter) large enough to fit the pages
you plan to scan or display.
Plug either the Hand Button or Foot Pedal into the scanner' s USB port (in the back of
the base).
Spread the black pad under the scanner' s head. Ensure that the gap of the "black
document pad" aligned with device.
1.
2.
3.
Check the LCD on the head portion to see if the black document pad covers the entire
screen and ensure that the desk surface or random edges are not included within the
scan. (it is extremely important to make sure that the black document pad covers the
entire screen properly to help the smart algorithm carries out its calculations and
ensure image processing is carried out properly).
Special reminders
4.
5.
When scanning larger projects (such as books or multiple documents), we
recommend using the Computer Mode (USB-PC) and connecting to the foot pedal
to make the scanning process more efficient. Using a computer during scanning
will provide additional editing functions to improve the quality and professionalism
of the scanned and processed images. Wi-Fi Mode is suitable for scanning
documents with only a few pages and require only a little or no editing or additional
processing.
Avoid scanning documen ts in pl aces ne ar windows or e nvironm ents with stron g
lighting. Excessively bright ambient lighting will affect the brightness of the ET laser
lines and negatively affect scanning results.
When scanning books, the 3 laser lines of the ET scanner must be on the curved
pages. Failure to do so will negatively affect scanning results.
1)
2)
3)
Chapter II Operation Guidelines
2.1 Scanning Preparation
1.4 Product Specifications
Model
Pixel
Resolution
Speed
Format
Video for mat
Picture format
Processor
DDR
Flash
Laser rays
LCD
MIC
Smart scan
Visual pr esenter
Wi-Fi
Cloud service
OCR
SDK
Software function
System
Type
Basic
characteristics
Onfiguration
parametes
Specific
functions
ET16
16M
4608*3456
≈1.5S
≤A3
MJPG
JPG、PDF
32 MIPS CPU
1Gbit
2G Byte
3 laser rays
√
√
support
support
support,2.4Hz
support
support
support
flattening curve,erasing fingerprint,smart paging,correction
position,edge cutting,auto scanning.
XP/Win 7/Win 8/Win 10,
32bit/64bit;
Mac OS 10.11 and above
1.5 Packaging and Accessories
Item
Scanner
Hand button
Foot pedal
USB cable
AC/DC power adapter
Black document pad
Specific finger cots
CD-ROM
User manual
Quality certificate
Warra nty card
Specification
CZUR smart scanner
USB interface,1.2M
USB interface,2.0M
USB interface,1.5M
Input AC :100-240V-50/60HZ 0.6A output DC:9V/2A
530*401*2.0MM
Left hand big & small; Right hand big & small
CD-R,D=120MM
Color printing,72.25*105MM
White card, 55x90MM 250g
Art paper, 120x100MM 210g
Amount (pcs)
1
1
1
1
1
1
4
1
1
1
1
5 6
Page 5
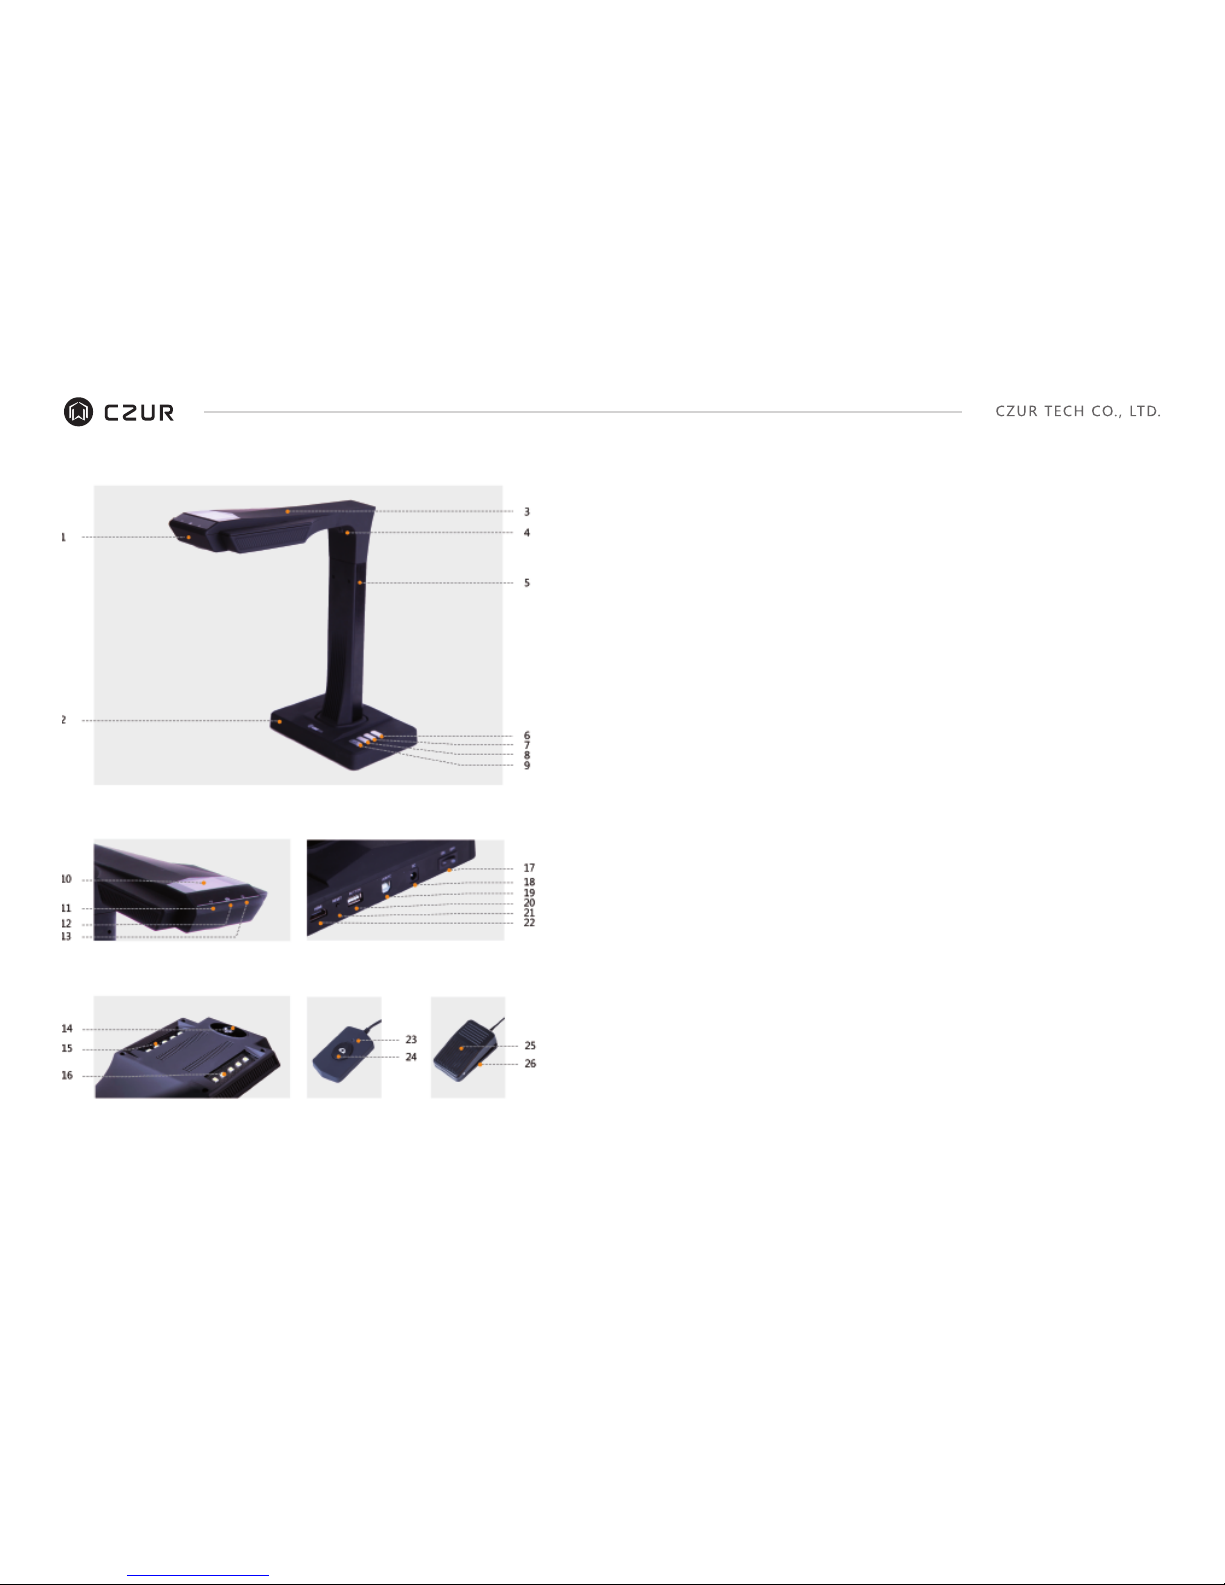
CZUR Scanner
LCD
Top C asin g Hand
Button
Foot
Pedal
Interface
Microphone
Base
Top c as in g
Laser light
Vert ic al ba r
LED brightness(high/low)
Zoom in (+) (HDMI mode only)
Zoom out (-) (HDMI mode only)
Scan(start next scan)(see Note A below)
LCD (see LCD Notes below)
Wi-Fi indicator light (see Note B below)
Scan indicator light (see Note C below)
Power indicator light (White)
HD CMOS camera
Bank of LED lights
Bank of LED lights
Power on/off switch
DC 9V 2A,AC volt 100-240V 50/60Hz
To US B ca bl e fo r co mp ut er c on n ec ti on
USB port for Foot Pedal or Hand Button
Reset Button (see Reset Button Notes below)
HDMI interface- for Visual Presenter
Hand Button light “Scan in progress”
Hand Button (to start next scan)
Foot Pedal cover
Foot Pedal base
1.
2.
3.
4.
5.
6.
7.
8.
9.
10.
11.
12.
13.
14.
15.
16.
17.
18.
19.
20.
21.
22.
23.
24.
25.
26.
Notes
In Wi-Fi mode, press and hold Scan button for 3 seconds to quickly release your
account from the scanner.
Green & blue lights flash. Wait for sound.
Red light on = scanning (don’t flip page). Red light off = scan is complete.
A.
B.
C.
LCD Notes
LCD= Liquid Crystal Diaplay, a type of flat-panel display screen.
In HDMI mode, screen is off.
When connected to a PC, displays if uploading or not to the PC.
When using a smart phone, shows if connected or not and if uploading to the
cloud or not.
·
·
·
·
Reset Button Notes
Short Press = Retry Connection. Searches for Wi-Fi connection to smart
phone (green light flashes.)
Long Press (hold for 6 seconds) = Reset. Erases Wi-Fi name & password;
waits for 10-second long tone; green & blue lights flash alternately.
·
·
1.3 Product Appearance
3 4
Page 6
When HDMI connection has been established, the Wi-Fi mode will be automatically
switched off.
When USB connection has been established, both HDMI and Wi-Fi modes will be
automatically switched off.
When the device is not connected via USB or HDMI, the device will revert to Wi-Fi
mode.
1.
2.
3.
There are 3 ET modes: (1) USB, (2) HDMI, and (3) Wi-Fi. The sequence of
priority is USB > HDMI > Wi-Fi.
Please wear the special finger cots provided with the ET scanner when holding
down the pages during the scanning process to ensure that the finger removal
function works properly. Failure to wear the finger cots would affect the finger
removal algorithm.
When scanning, review your own needs and select the proper processing modes of
either [Flat Single Page] or [Facing Pages].
4)
5)
2.2.1 Computer Mode (USB-PC)
– to control the scanner from a PC and store the scannings on its disk
Install the CZUR software on the PC. Get the CZUR software either from the
enclosed CD, or from the website: http://www.czur.com →Support → ET
Series.(Mac OS only supports downloading from website)
Attach the USB cable from the scanner base to the PC. Turn everything on.
Open CZUR software, which offers you three choices: Scan-Export-Batch. For
more details, please go to http://www.czur.com → Support → ET Series, choose
“CZUR Scanner Software Instruction” .
·
·
·
2.2.3 Visual Presenter Mode (HDMI)
Usage authority application.
Log into your account on the “CZUR Cloud” App. Then choose “Device
Manage” and “Apply” to apply usage authority for your device.
·
2.2 Work Mode
Plug in power adapter, and connect device with projector, TV or
electronic whiteboard via HDMI cable. In HDMI mode, device should be
disconnected with USB cable (PC).
·
7 8
Open CZUR scanner App and log into your account.
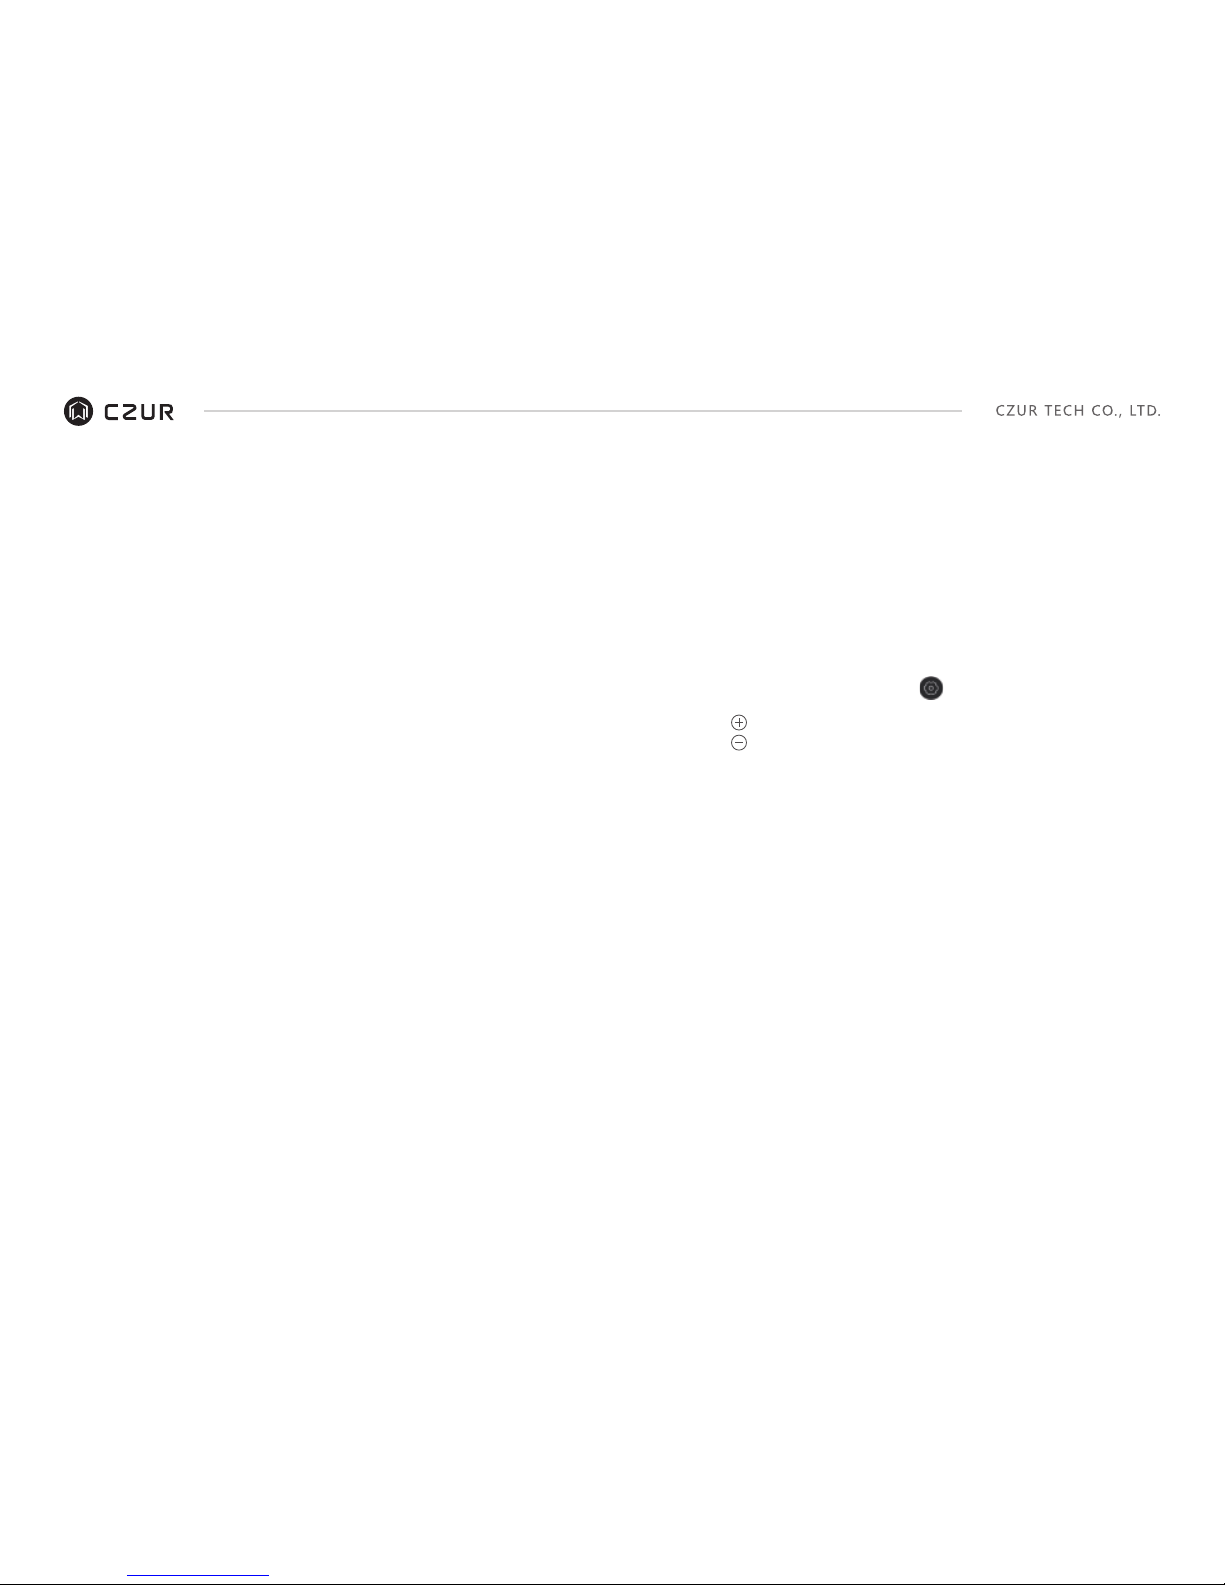
Go to “Device Manage” and select icon.
then:
“ ” to add this other account to this device.
“ ” to remove the user from sharing this device.
“Unbind device” to unbind administrator authority for this device.
“Transfer device” to change administrator authority for this device.
a.
b.
c.
You r a ccou nt wil l a ut om ati cal ly b e r ele ase d fr om Wi- Fi mo de if yo u d on’ t
upload any scanned images or perform any other operation for 15 minutes.
Other shared users can then apply for usage authority with their own Cloud
account .
To qu ic kl y re le as e You r ac co un t f ro m Wi -F i mo de , pr es s an d ho ld t he s ca n
button on the base of the scanner for 3 seconds. The TFT screen will display
“Completed” and usage authority for your device will be released – so other
users can apply for usage authority with their own account.
a.
b.
2.2.2 Wi-Fi Mode
– to control the scanner from a smart phone and store the scans in the
CZUR Cloud (http://www.czur.cc)
Download and install the ” CZUR Cloud” app on your smart phone. Get the app
either from Apple’s App Store, Google’s Play Store, by searching the web for
“CZUR Cloud,” or by using this link: http://www.czur.com/app2 .
·
Register and login in the App. press “device manage” , then press ” Bind up/use
a new ET” . Use your smart phone to scan the “QR code” under the scanner
and follow the online instructions.
Input Wi-Fi name, password (only support 2.4G Wi-Fi) and follow the online
instructions to finish networking setup.
When green light is on (Wi-Fi indicator), it means CZUR connects to router
successfully. Also you can see “Connecting to CZUR…”” Connected” on the TFT
screen. However, if TFT screen shows “Disconnected” , it means CZUR fail to
connect to “CZUR Cloud” server, please check your network.
To co nn ec t yo ur s ca nn er t o an ot he r ac co un t, d o the fo ll ow in g. N ot e th at t he
scanner can be connected to only one account at a time, but that account can
be alternated.
·
·
·
Usage authority release.·
Page 7
– Scanned images are distorted, the font is twisted, or there are other
distortions.
Possible faulty power connection. Make sure the power supply actually
has power, the adapter is properly connected, and the power switch is
turned to On.
Sticky on/off switch. Turn the on/off switch on and off a few times.
Wrong firmware upgrade. You may have applie d an incorrect scanner
hardware upgrade. Contact CZUR customer service.
– Unable to turn the scanner on. The LCD screen and power indicator
light are dark.
3.1 PC Mode (USB) Problems
– The software cannot be installed
·
·
·
The software will only work on a Windows XP,7, 8, or 10 System and some
Mac OS system. Or you may have entered the wrong scanner serial number.
Check the scanner serial number underneath the base. Note that there is no
number 1 (one) in the serial number.
Anti-virus software may be interfering. Lower your anti-virus or firewall’s
security level – or disengage it while installing the CZUR software. Then
reengage it.
Faulty software download. Download the software again & make sure it
·
·
·
– When first using the software, nothing shows in the preview frame, and
I am unable to scan.
Make sure all USB connections are firm – especially between the scanner
and the PC.
Make sure the PC’s “Device Manager” recognizes the scanner. If you see a
yellow exclamation mark with an “Unknown Device” indication, right click it to
update the drive – or disable and then re-enable device, and then retry the
software.
Enter "device manager" , then disable the other "scanner" "control" "camera"
driver
Try r est arti ng t he P C o r us ing a di ffer ent one .
·
·
·
·
– Serial number errors.
The scanner’s serial number is underneath the base. Note that there is no
number 1 (one) in the serial number.
·
Chapter III Frequently Asked Questions and Troubleshooting
Power on CZUR, enter visual presenter mode automatically.
If projector or TV is without signal, switch “signal source” , choose
HDMI port.
Function
[Zoom out] and[Zoom in]button have six levels 12 times to zoom the
displayed screen.
Adjust the object/ document to show the correct orientation on the
displayed screen.
·
·
Go to the website http://www.czur.com/ and click “Support” . Choose the
proper ET series and download “Device upgrade package” . Follow the
online rules to upgrade hardware carefully.
Attention: Please download the corresponding series upgrade package,
and see the upgrade instructions carefully before upgrade, otherwise it
may cause unpredictable problem.
2.3 Hardware Update
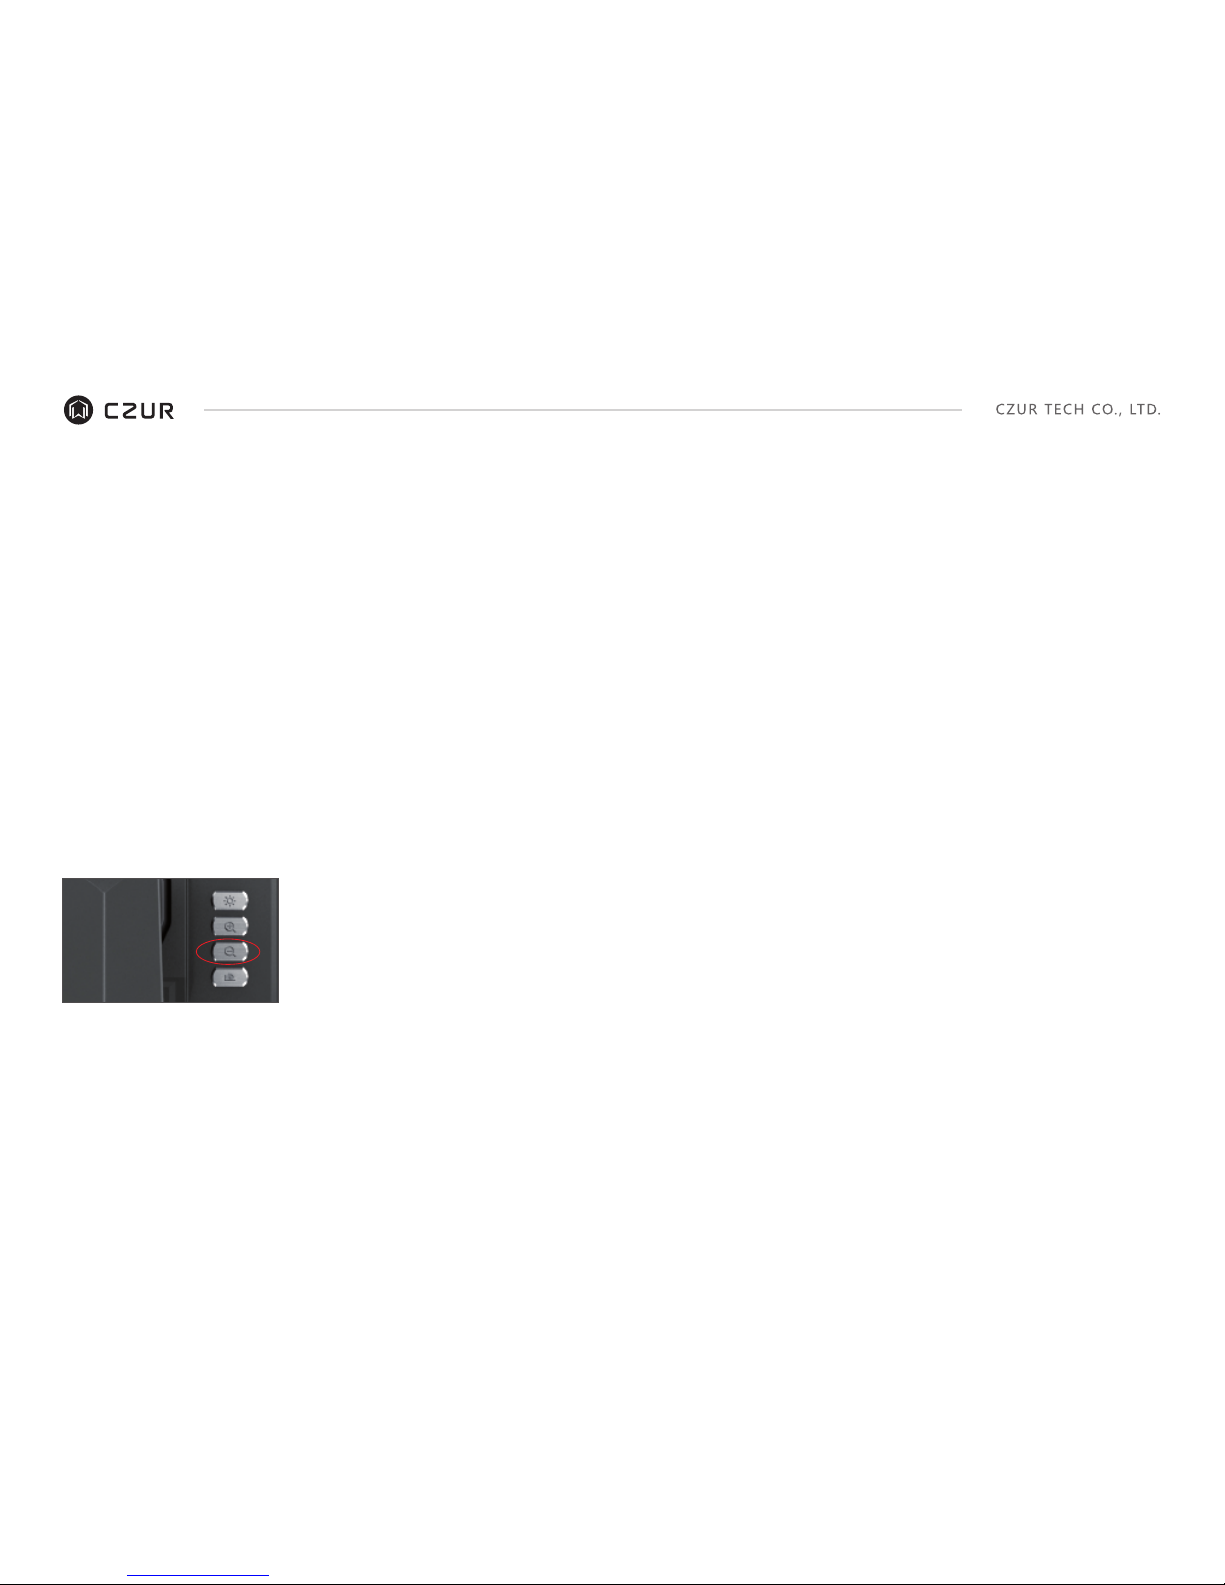
Plug in power adapter, then press and hold the[Zoom out]button for around 3
seconds. Then you can see that TFT screen shows “Initializing...” . Restore
factory setting finishes when TFT screen shows “Initialized” .
[Zoom out] button
2.4 Restore Factory Settings
9 10
Page 8

4.1 After Sale Service and Guarantee
3.2 Wi-Fi Mode (Smart phone) Problems
– The first time I use it, I am unable to connect to the Wi-Fi network.
The matte black background pad may be misaligned. Make sure it’s
positioned properly under the scanner head. You cannot scan what won’t fit
within the boundaries of this pad.
What you want to scan may be too big. It must fit within the boundaries of the
matte black pad.
There might be interfering items in the preview area. Make sure none of the
following are there: your hand, the Hand Button’s cord, your mobile phone, a
pen, etc. Only the document to be scanned should be in the scanning
preview area – to allow the algorithms to work properly.
·
·
·
– I am unable to scan.
Make sure the USB and HDMI cables are disconnected from the PC and the
video display device.
Check the network connection: if the green light is on, it means the scanner
is connected to the Cloud. If not, try to reconnect the device to the network
by pressing the reset button in the back of the base once quickly. The green
light will flash on and off while it again tries to make a connection.
If the Cloud and your scanner are not connected, make sure your Wi-Fi
network is available.
Check the connection by pressing the scan button once. If the TFT screen
shows “Ready” and “User name,” it means you are connected to the “CZUR
cloud.” Also, log into your CZUR cloud App, choose “Device Manager” , then
press ” Apply” .
A bl ue li gh t o n mea ns it ’s transmitting scanned images to the cloud.
·
·
·
·
·
·
Make sure the USB cable between the scanner and the computer is NOT
connected.
Make sure the HDMI cable is connected from the scanner to the video
display device. Make sure those connections are firm.
Change another HDMI cable or other display devices
All after sales policy of this product shall be subject to the laws and
regulations of the country of sales.
The scope of warranty covers the ET16 device, the adapter, the hand button,
and the foot pedal. Consumables and external appearances are not covered
by the warranty.
When sending in the product for repairs, please complete the Warranty Card
and contact us or our local agent.
We apolo gize for not is suing no tices fo r subsequent up grades o r versio n
updates of the product. This Company reserves the right of final decision on
the interpretation of the above articles.
Warra nty sco pe e xcep tio n:
·
·
·
·
·
This product may only be used in areas where surrounding temperature is
less than 45℃.
Failures or damages caused by incorrect installation or using the product
in environments that exceed the specified work conditions (for examples,
in places that are too hot or too humid).
Damages caused by using components not from this Company or when
the user attempts to replace components by himself / herself.
·
·
·
3.3 Visual Presenter Mode (HDMI) Problems
– My visual presenter device isn’t recognized by the projector or TV.
Disconnect the USB cable from the computer and the HDMI cable from the
video display device. It won’t work in Wi-Fi Mode if those cables are
attached.
Wait for the fla shin g g reen lig ht t o g o off . I t fl ashe s wh ile loo king for a
connection. A steady green light on means it found that connection.
Make sure your Wi-Fi name and password are correct.
You r ph ysi ca l rout er ma y be f aul ty. Re sta rt it or u se a d iffe ren t on e.
·
·
·
·
Chapter IV Terms of Service
11
12
Dear user, thank you for using the smart scanner manufactured by our
company. To protect your legal rights, please peruse and comply with the
following standards and reminders.
Page 9
4.2 Warranty Process
Please send email to us or contact us online to confirm the malfunction
initially.
Disassemble the device and post the faulty parts together with the filled out
warranty card to company.
CZUR Tech will finish the maintenance according to the warranty card in two
days and return parts to the customer.
Note: one War rant y Card
can be used for four times.
·
·
·
4.3 Contact Information
Get technical support and information by following ways.
CZUR TECH CO., LTD.
Website http://www.czur.com/
E-mail [email protected]
Skype [email protected]
Room 1701, Oriental Science and Technology Building, No.16, Keyuan Road,
Nanshan District, Shenzhen, China.
Room 1404, Building A, Chuangye Mansion, 32th Huoju Road, High-tech
District, Dalian, China.
Damages caused by natural disasters, accidents, or human factors.
Damages caused by inappropriate storage (including damages caused by
rats or liquid infiltration) .
Failures or damages caused by unauthorized repairs, modifications, or
abuse carried out by the user.
Damages caused by repairs carried out by unauthorized repair centers.
Other errors and failures caused by software installation or software
settings, or problems and failures caused by computer viruses.
·
·
·
·
·
13
 Loading...