

Page 1

Comfort II
User Manual
Comfort, the Intelligent Home System
Page 2

Page 3

Comfort II User Manual
Section 1 Getting Started
Introduction to Comfort
Getting to Know Your Keypad
Indicators
One-Touch Buttons
Function Keys
Emergency Keys (2-key combinations)
Volume Control
Sounds
...................................................
................................................
..............................................
.....................................................
Trouble Conditions
Comfort Voice Menus
By Keypad
By Local Telephone
By Remote Telephone
Program Menu
Tips for Signing In on the Telephone
Navigating the Voice Menu
Important Notice
Test Regularly
Safety Instructions
Fire Safety in the Home
Fire Safety Audit
Family Escape Planning
EN50131 Compliance (Europe)
About Firmware
.................................................
..............................................
...........................................
..............................................
............................................
.............................................
.....................................
...........................................
...........................................
.......................................
..........................................
........................................
...................................
..........................................
......................................
.......................................
............................
...............................
...........................
...........................
................................
Section 2 The Security System
Arming the Security System
Away Mode
Night Mode
Day Mode
Vacation Mode
.................................................
.................................................
..................................................
..............................................
................................
......................
1
1
2
5
6
7
8
8
8
9
10
10
10
11
11
12
12
14
14
14
14
14
15
16
16
17
17
17
17
18
18
Page 4

Comfort II User Manual
Force-Arming
Arming from the Telephone
Security Off / Stop Alarm
Bypassing Zones
Changing Your Code
Security Safeguards
Duress Code
Sign In Tamper
Engineer Access Restriction
Programming Telephone Numbers
Allowing Engineer Access
Event Log
Recording an Alarm Message
Changing Date and Time
...............................................
...................................
...................................
............................................
.......................................
........................................
................................................
.............................................
...................................
.........................
...................................
...................................................
...............................
...................................
Section 3 What To Do During An Alarm
Turning off the Alarm
Alarm Verification
Alarm History (User Menu 3,2)
Event log (F5, or User Menu 3,3)
Voice Station (User Menu 5)
Dial-out to Voice Phone
SMS (Short Message Service)
Dial-out to Central Monitoring Station
Section 4 Home Control Menu
Keypad Shortcut to Home Control
Home Control Menu by Telephone
Section 5 The Answering Machine
Greeting Message
Record Greeting Message
Adding and Removing Users
0 - Erase Users
.......................................
...........................................
................................
..............................
..................................
.....................................
..............................
......................
.....................
..........................
.........................
...............
...........................................
.....................................
................................
.............................................
.........
18
19
19
20
20
21
21
21
21
22
23
24
25
25
26
26
26
26
26
26
27
28
29
30
30
31
32
32
32
33
33
Page 5

Comfort II User Manual
1 - Add User
2 - Delete User
Recording a Memo Message
User Names for Mailboxes
Recording User Names
Erasing User Names
Common Mailbox
Retrieving Messages from Mailboxes
Deleting Messages
................................................
.............................................
................................
..................................
.......................................
.........................................
............................................
.......................
..........................................
Changing the Number of Rings for Auto-answer
Advanced Features
Auto-Erase of Saved Messages
New Message Forwarding
Screening of Incoming Calls
External Answering Machine/Fax Bypass
Immediate Auto-Answer by # key
Section 6 Reminder Messages
Programming Reminder Messages
Section 7 Intercom
Keypad to Keypad Intercom
Telephone to Keypad Intercom
Baby Monitor Intercom
Door Station
Local Telephone to Door Station
Keypad to Door Station
Remote Door Station
................................................
Section 8 Time Programs
Change Date and Time
Change Holidays
Disable Announcements on a Keypad
Section 9 Testing Comfort
.........................................
................................
.....................................
...................................
........................
..............................
.....................
.........................
....................................
................................
.............................
.....................................
...............................
......................................
.........................................
............................
.......................................
............................................
......................
..........................
...........
34
34
34
35
36
36
36
37
37
38
39
39
39
39
40
40
42
42
45
45
46
46
47
47
47
47
48
49
49
49
50
Page 6

Comfort II User Manual
Battery Check
Security Check
Dial Test
Siren Test
Strobe Test
..............................................
..............................................
...................................................
..................................................
.................................................
Section 10 Comfort Menu Guide
Security System
Arm Security System
Remote Disarm
Bypass Zones
Silence a Trouble Alarm
Listen To Event Log
Listen to Alarm History
Do Security Check (Walk Test)
Do a Dial Test
Test the Backup Battery
Do a Siren Test
Do a Strobe Test
Program Telephone Numbers
Change Pager Code (4 digits)
Engineer Sign In Option
Record Alarm Message
Hear Alarm Message
Erase Alarm Message
Enter Duress Code
Activate a Panic Alarm
Activate a Fire Alarm
User Codes
Add User Code
Erase All User Codes and Mailboxes
Erase One User
............................................
........................................
.............................................
...............................................
......................................
..........................................
.......................................
................................
..............................................
......................................
.............................................
............................................
..................................
.................................
......................................
.......................................
.........................................
........................................
...........................................
.......................................
.........................................
..................................................
..............................................
............................
.............................................
...................
50
50
50
50
50
51
51
51
52
52
52
52
52
52
53
53
53
53
53
53
53
53
53
53
53
54
54
54
54
54
54
Page 7

Comfort II User Manual
Change User Code
Answering Machine
Record a Memo for a User
Record a Greeting Message
Listen to the Greeting Message
Erase the Greeting Message
Record User Name
Listen to User Name
Erase User Name
Hear Saved Messages
Erase Saved Messages in your mailbox
Assign a Telephone to your Mailbox for Message Forwarding
Screen Incoming Calls
Change Number of Rings to Answer
Change Recording Time Limits
Home Control
Control Appliances
Miscellaneous Programming
Change Date and Time
Enabled/Disable Announcements on each Keypad
Section 11 Getting Help
General Support
Frequently Asked Questions / Tips
User Code Forgotten
Keypad beeps when any key is pressed
Cannot Sign In on the Home Phone
Cannot Sign in using a Cellular Phone
I have telephone services which use the * key
What if I have Call Forwarding on my telephone
What if I have an external Answering Machine
If I remotely arm to Away Mode, is Exit necessary?
...........................................
.........................................
....................................
...................................
................................
...................................
...........................................
.........................................
............................................
........................................
.........................
.......................................
............................
.................................
...............................................
...........................................
................................
......................................
.............................
............................................
.........................
.........................................
.........................
............................
..........................
.......
................
...................
..................
...................
...............
54
54
54
54
54
55
55
55
55
55
55
55
55
55
56
56
56
56
56
56
57
57
57
57
57
57
57
58
58
58
58
Page 8

L
Comfort II User Manual
Telephone Line/ADS
Telephone Line Connections
ADSL Connection
Issues
............................................
...............................
...................................
Section 12 User Voice Menu Reference
User Voice Menu Flowchart
Arm Security System (1)
Messages (2)
New Messages (2,1)
Saved Messages (2,2)
Erase Saved Messages (2,3)
Record Messages (2,4)
Reminder Messages (2,5)
Answering Machine (2,6)
...............................................
.........................................
Security System Menu (3)
Change Sign-in code (3,0)
Alarm History (3,2)
Event Log (3,3)
Test (3,4)
Bypass Zone (3,5)
Siren Off (3,6)
..................................................
Home Control (4)
Voice Station (5)
Door Station (6)
Volume (7)
..................................................
.........................................
............................................
...........................................
..............................................
...........................................
...........................................
............................................
Section 13 Program Menu Reference
Answering Machine Settings (1)
Answering Machine Bypass (0)
Number of Rings (1,1)
Record Time (1,2)
Record Greeting Message (1,3)
Hear Greeting Message (1,4)
...........................................
.................................
...................................
.......................................
..................................
......................................
....................................
.....................................
..................................
...................................
..............
............................
................................
.......................................
................................
..................................
.........
58
58
59
60
60
61
62
62
62
62
63
63
65
68
68
68
69
71
72
72
73
74
74
75
77
78
78
78
79
79
79
Page 9

Comfort II User Manual
Erase Greeting Message (1,5)
Change Date and Time (2)
Change Date (2,1)
Change Time (2,2)
Holiday (2,3)
Security Settings (3)
Voice Report (3,1)
Pager Code (3,3)
Engineer Sign-in Option (3,4)
Alarm Message (3,5)
Siren Off (3,6)
...........................................
..........................................
...............................................
.......................................
...........................................
...........................................
.........................................
..............................................
Change Phone Numbers (4)
User Code (5)
Delete Mailboxes (5,0)
Add User (5,1)
Erase User (5,2)
Time Programs (6)
...............................................
.......................................
..............................................
............................................
.........................................
.................................
.................................
.................................
................................
80
80
80
80
81
82
82
82
82
83
83
83
85
85
85
86
86
Page 10

Comfort II User Manual
SECTION 1
Welcome to the world of Comfort, the Intelligent Home System. Comfort
is a fully integrated Security and Home Automation System with a
sophisticated digital (tapeless) answering machine with 8 personal
mailboxes. Unlike other alarm and automation products, Comfort is also
fun to use, besides protecting your home and family day and night.
Please read this manual to find out how to take full advantage of this
unique system. Information on Comfort is available at
http://www.cytech.biz.
tips, and user support on the User Forums at
http://www.comfortforums.com.
The print version of the manual may not always have the latest
changes. Please download the latest version if necessary from
www.cytech.biz
You can also find FAQs, hints, troubleshooting
GETTING STARTED
Introduction to Comfort
y Comfort is a state-of-the art, but easy-to-use Intruder alarm system
which not only warns of burglary and fire, but also lets you listen to
your home during alarms, monitors activity of elderly folks, informs you
at the office when your children return home, and can call any
combination of 8 telephones, pagers, Monitoring Stations, or SMS Text
messages (UCM/GSM required
y Comfort talks to you in a clear human (not synthetic) voice, operated
through the Keypads, any phone in the premises or any outside phone,
through a comprehensive Voice menu system.
y Comfort is an advanced tapeless Answering Machine with up to 8
personal mailboxes which even can call your pager or mobile phone
when a new message for your mailbox is recorded.
y Comfort is a practical Home Automation System which allows you to
operate your lighting, HVAC or home or office appliances via telephone,
Time program, or when triggered by Events.
y Comfort's Keypads with one-touch arming keys and short-cut keys
make it easy to operate the system, and double as intercoms for
communications within the premises.
y Comfort’s Door Station (DP03)
when you are in the premises, and calls you on your mobile phone when
you are out, and even takes a message from visitors.
y Comfort keypads can be used as a Baby Monitor
y Comfort’s Reminder Messages can ring the phone or call your mobile
phone to remind you of regular events or even act as an alarm clock.
y Comfort’s Time Programs can automatically switch off lights and
appliances or arm the security system or perform many other functions
at programmed times.
y Comfort can be controlled from the RC01 handheld remote control
or any universal learning remote control (eg Philips Pronto or Logitech
Harmony).
*) when different alarm situations arise.
* intercom rings your home phones
*
1
Page 11

Comfort II User Manual
y Comfort’s Scene Control Switches (SCS) * can be programmed to
activate scenes, e.g Movie, Sleep, Entertain, Study.
y Comfort can be controlled and monitored from your computer on the
Local Area Network or by Serial Port using the WizComfort software
(for Windows) through the Universal Communications Module (UCM)
Serial or Ethernet Interface
y Comfort works with Companion colour Touchscreens (wall-mount or
Wifi) with built-in web browser
y Comfort can be accessed from the Internet using the Comfort
Webserver Module (CWM01)
* Optional Item
These are only a few of Comfort's advanced functions. Please take the
time to read this manual to learn how you can make full use of Comfort
to provide security and convenience for your home and family or office.
Getting to Know Your Keypad
The Keypad is the control center for Comfort. In addition to arming and
disarming the security system, your Keypad allows you to record and
access your messages on the built-in answering machine, gives
short-cut access to commonly used menus and functions, and acts as an
intercom with other Keypads on the premises. This chapter introduces
you to the buttons, controls and indicators on Comfort’s Keypads.
There are 3 keypad models which can be used with Comfort;
y KP03 with Voice Menu and Infrared Receiver
y KP04 with LCD (Liquid Crystal Display), Voice Menu and Infrared
Receiver
In this manual where the text relates specifically to the KP04 LCD keypad
only, the symbol
will be shown.
*
*
*.
2
Page 12

Comfort II User Manual
Speaker
Volume Control
Arm to Away
Arm to Night
Arm to Day
Indicators
Steady
Blinking
Figure 1-1 KP04 LCD Keypad
Green
Sec Off
Trouble
Red
Armed
Alarm
Red
AC Off
Low Bat
3
Green
Memo
Message
Function Key
IR Rece iver
Microphone
Red
Mic ON
Page 13

Comfort II User Manual
Speaker
Volume Control
Arm to Away
Arm to Night
Arm to Day
Function
IR Receiver
Indicators
Steady
Blinking
Green
Sec Off
Trouble
Figure 1-2 KP03 Keypad
Red
Armed
Alarm
Red
AC Off
Low Bat
Green
Memo
Message
4
Microphone
Red
Mic ON
Page 14
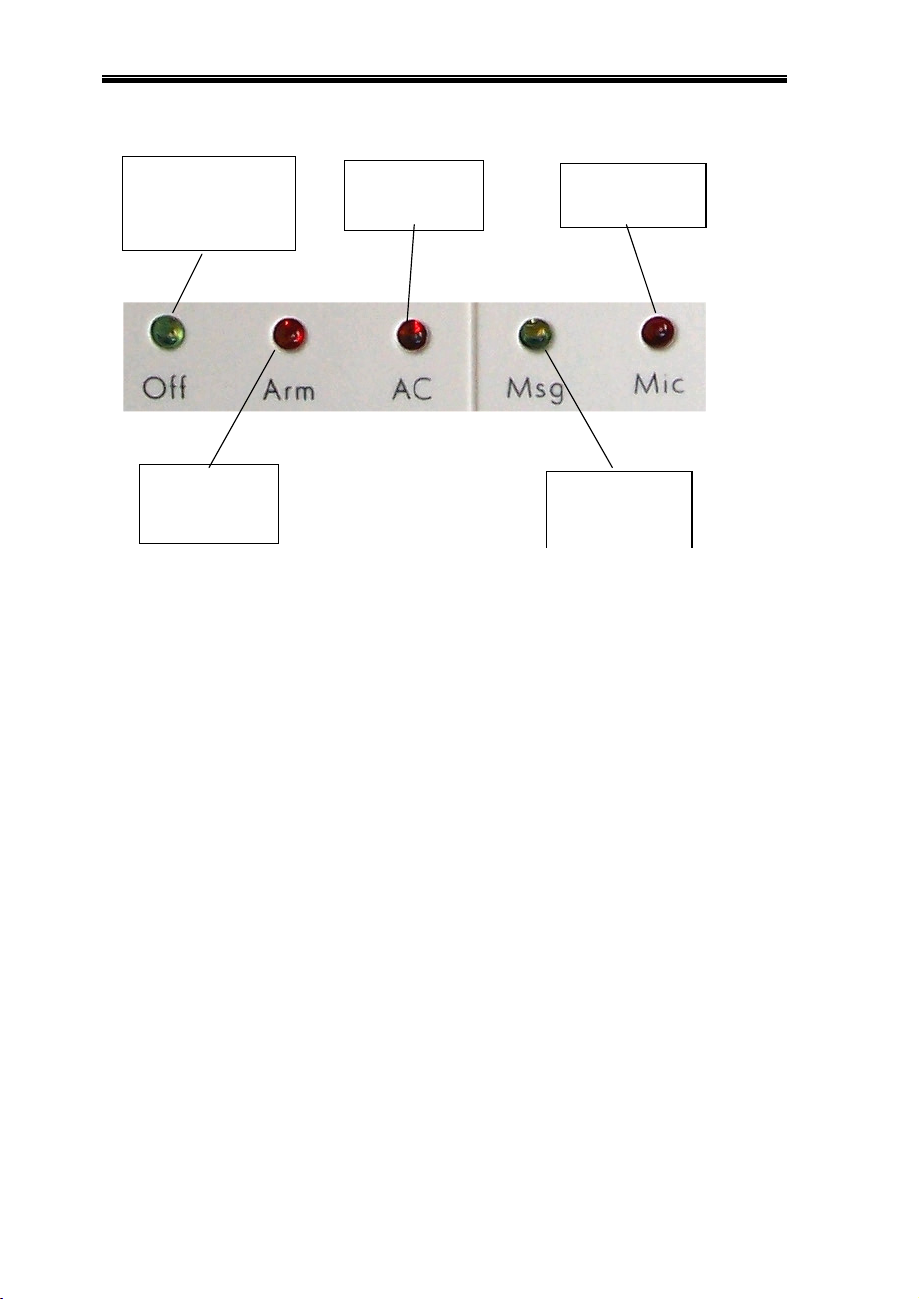
Indicators
Comfort II User Manual
Steady if not armed.
Blinking if Trouble
(Pho ne Cut, AC Fail, Low
Battery Zone Trouble)
Steady if Security
Armed
Blinking if in A larm
or Alert State
Figure 1-3 - LED Indicators
Stea dy if AC Failure.
Blinking if Low
Battery
Steady if Microphone
is t urn ed on for
reco rding or Interc om
St ea dy if n ew me mo
from us er.
Blinking if new
message from caller
Home/Trouble Indicator
The green OFF LED (Light Emitting Diode) indicator is steady when the
system is not armed, i.e. Security is off, and all conditions are normal,
i.e. there is no Trouble condition.
The OFF indicator will flash and the keypad will beep fast if there is a
Trouble condition, for example telephone line cut, Power Failure, Low
Battery, tamper, or Communication failure. To acknowledge the trouble
condition and to silence the keypad beeping, enter a valid user code on
the keypad (default 1234#). The keypad will announce the trouble. Take
note of the trouble condition and call your installer.
The Trouble condition is displayed on the KP04 LCD
Arm/Alarm Indicator
The red ARM LED (Light Emitting Diode) indicator is steady when the
system is armed, and all conditions are normal, i.e. there is no Alarm
condition.
The ARM indicator will flash and the sirens will sound if there is an
Alarm condition. To silence the alarm and disarm the security system to
Security Off, enter a valid user code on the keypad (default 1234#). The
keypad will say “Security Off” the ARM indicator will turn off and the
green HOME indicator will turn on.
5
Page 15
Comfort II User Manual
The ARM indicator will also flash if there is an Alert condition, i.e. the
Entry Door has been opened and the entry delay is in operation, waiting
for a valid code on the keypad.
The most recent alarm activated is displayed on the KP04 LCD
AC Indicator
The red AC LED (Light Emitting Diode) indicator is Off if the system is
connected to mains power.
The AC LED indicator is On Steady if mains power is off due to a power
failure.
The AC LED indicator is flashing if the standby battery is low. This may
happen if the mains power has been off for a few hours. When power
returns, the battery will be recharged, but if the Low Battery indication
persists after 8 hours, contact your installer.
Low Battery or Power Failure is displayed on the KP04 LCD
MSG Indicator
The red MSG LED (Light Emitting Diode) indicator is ON if there is a new
message recorded from an incoming caller or from the keypad F4 button.
Press the # key (no code required) to hear who the message is for. To
hear the message, enter the user code and # key on the keypad.
MIC Indicator
The red MIC LED (Light Emitting Diode) indicator is ON if the system is in
Intercom Mode, either with the Door Station or an internal or external
phone.
One-Touch Buttons
Function and InstructionsIcon
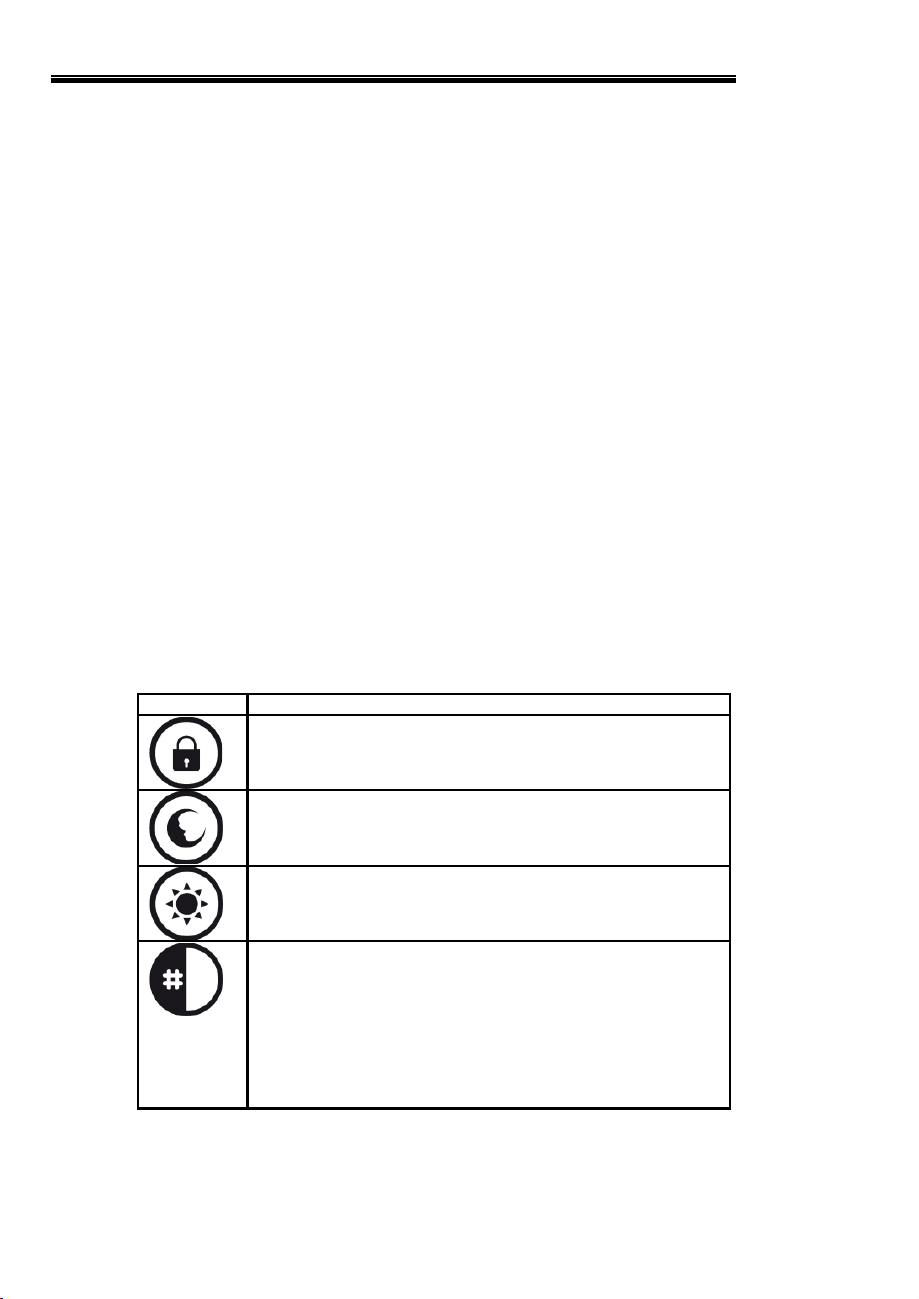
Arm to AWAY Mode - when all occupants are away from the
premises
Arm to NIGHT Mode when going to bed. All zones are protected
except for selected zones where movement is allowed
Arm to Day Mode during the day or at night to protect only doors
and windows, allowing movement in interior zones.
If Messages Indicator is steady or blinking, press # to find out
who has new messages. However, if # is pressed while Comfort
is doing a dialout, a long beep tone is heard. Try again in a
minute.
If # is pressed during arming while open zones are announced,
the system will be force-armed, automatically bypassing open
zones (provided Force Arm option is enabled). If # is pressed
when the telephone is ringing, Comfort answers the phone
immediately.
6
Page 16
Comfort II User Manual
Function and InstructionsIcon
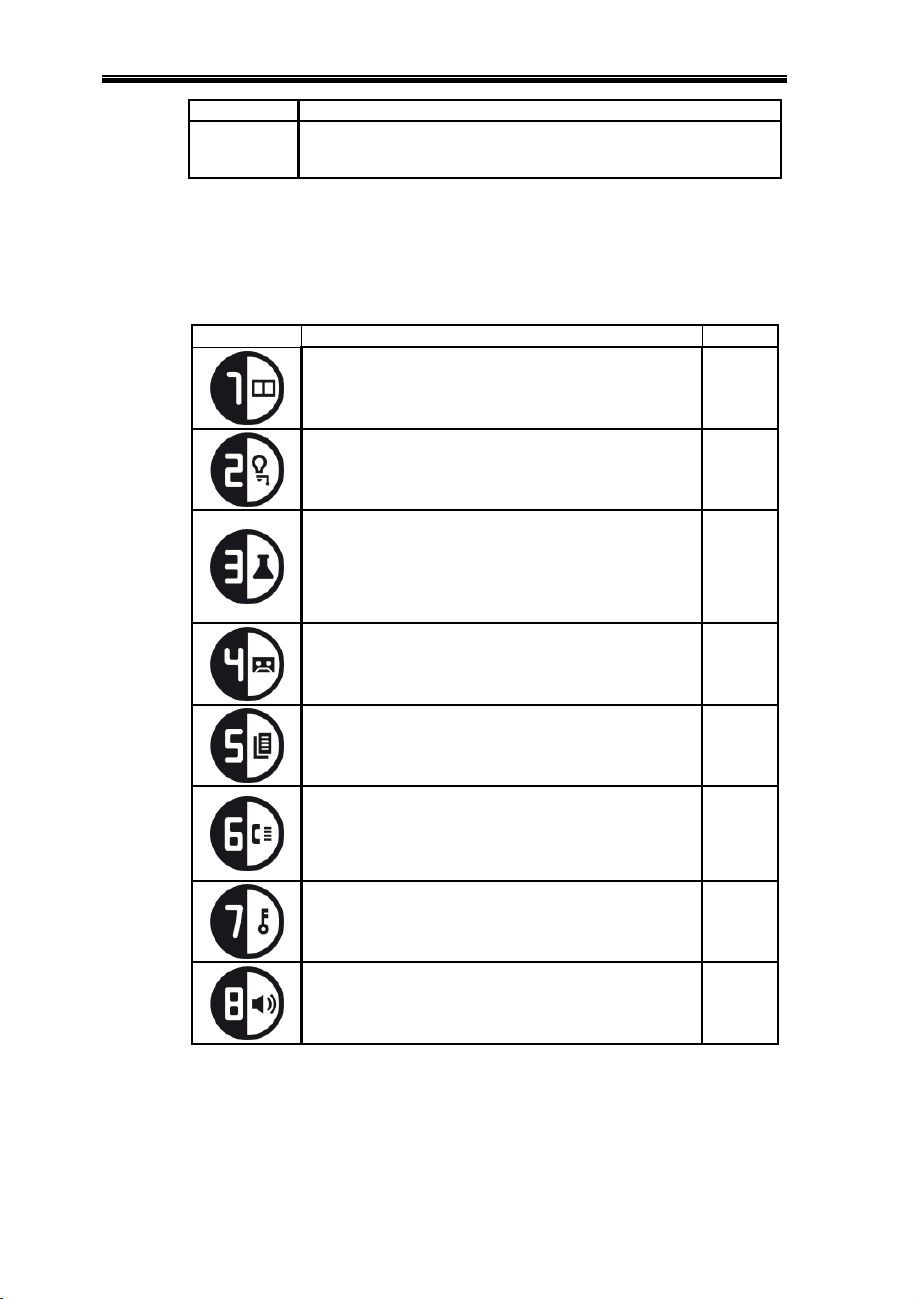
The F key selects a Function by pressing any of the other keys.
The Functions are defined in the next table. The F key also ends
the menu, Intercom or other keypad operation
Pressing the F key while in a menu or Intercom Mode will end
the keypad operation. Comfort will say “Thank You, Goodbye”.
Function Keys
Press the F key followed by 0 to 9, * or #. For some keys you may be
asked for your sign in code and # key to access the selected function.
Bypass Zones.
"Enter Zone number & # key. Press 1 to Bypass, 0 to
unbypass
Home Control Menu.
The list of ldevices to be controlled will be announced, if
any.
1 - Battery Test (turn off AC to test battery)
2 - Security Check (announce activated zones)
3 - Dial Test (audible dial to programmed phones)
4- Siren Test (test the siren for a few seconds)
5 - Strobe Test (turn on and off strobe)
Record Memo
Record a Memo message into any mailbox. New
Message LED will light up. Pressing # tells who the
memo is for. Hear message by pressing *+code+#
Event Log
1 - Next Event, 2 - Previous Event, 3 - Next Day, 4 Previous Day, 9 - Last Event.
Program/Change Phone Numbers
Select Phone 1 to 8. For each Phone, assign Phone
Type as follows:
0 = No Phone, 1 = Voice Phone (mobile or landline), 2
= Pager, then "Enter new number and # Key"
Change Sign In Codes
Sign in with your present code. Enter new code and #
key. Repeat to confirm
MenuFunction and InstructionsIcon
User 3,1
User 4
User 3,4Test Menu
User 2,4
User 3,3
Program
4
User 3,0
INTERCOM with other keypads. All keypads can hear.
Press any key on any other keypad to talk to originator
and cut off other keypads. Only 1 side can talk at a time
by pressing and releasing any key.
7
Page 17
Comfort II User Manual
Time Program
0 - OFF, 1 - ON, 2 - Change Time, 3 - Day of Week, 4 Response
Enable Engineer Sign-in Code.
Allow Engineer Code to gain access for programming.
This is automatically disabled when armed or at the end
of the day
Keypad Volume for this keypad. Enter 0 to 100 for
volume (default is 50)
User Codes
0 - Erase all users, 1 - Add User, 2 - Delete User
F + F is not assigned
Emergency Keys (2-key combinations)
Press the following 2-key combinations simultaneously to activate the
built-in Emergency functions. Practice pressing the two keys at the same
time. For best results, put your thumb on the F key and your index finger
on the other key (AWAY or NIGHT) and hold briefly until you hear the
alarm.
MenuFunction and InstructionsIcon
Program
6
Program
3,4,1
User 7
Program
5
FunctionKeys
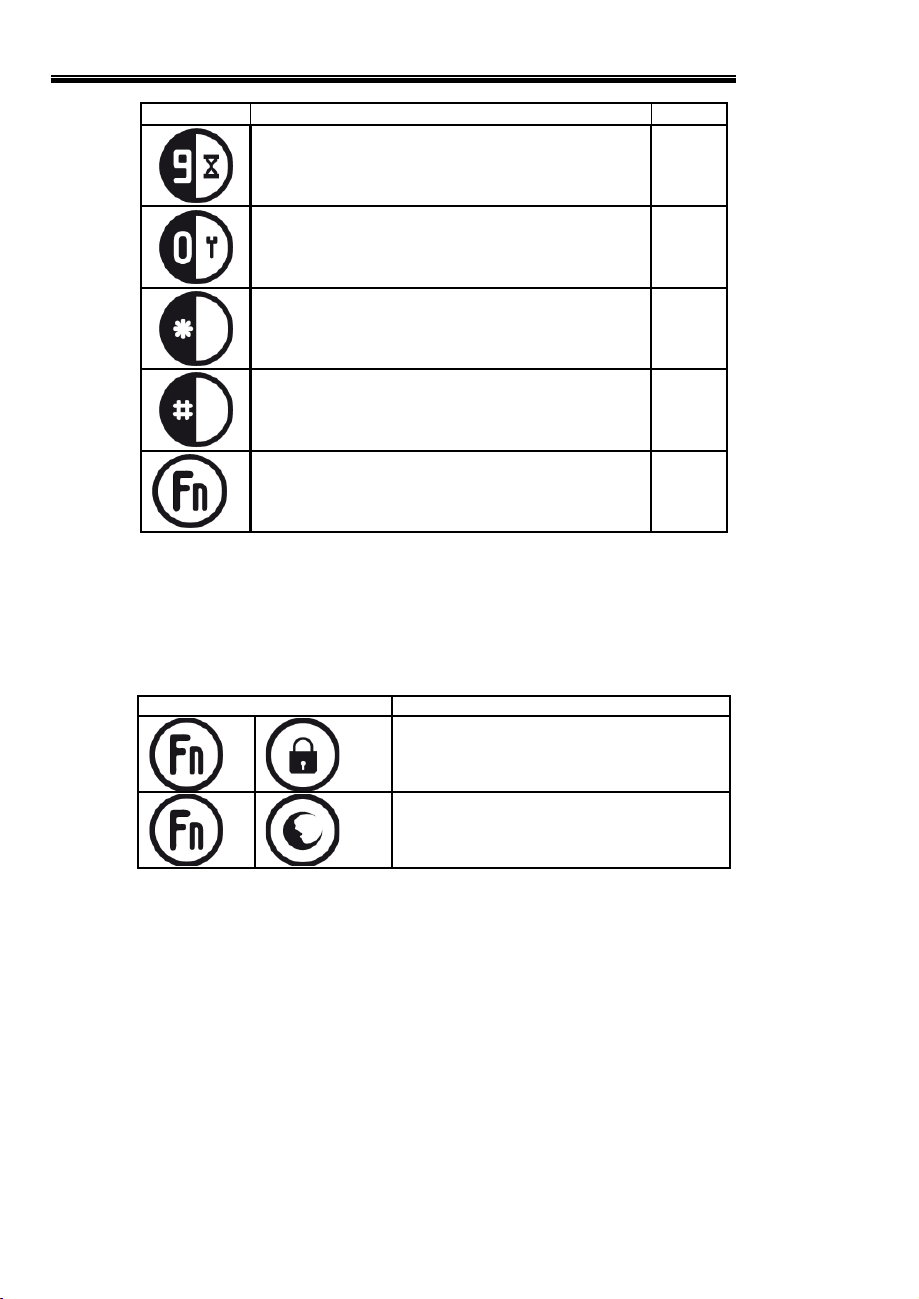
F + AWAY together causes a PANIC Alarm
Volume Control
Adjust the volume of the voice menu, announcements and siren tones to
the desired level.
Sounds
Long Beep: You will hear a long beep if a wrong sign-in code is entered,
or if an incomplete code is entered, i.e. without a # key, or if you try to
use a Keypad when another Keypad is in use.
F + NIGHT together causes a FIRE Alarm
which has a distinctive cadence on the siren
8
Page 18

Comfort II User Manual
Continuous Short Beeps: Trouble alarm or loss of communication with
the Comfort Control Panel. Sign in to acknowledge and silence the alarm.
The Keypad also acts as an internal siren. Some of the siren sounds are:
Intruder Alarm: a continuous tone oscillating in pitch.
Fire Alarm: A series of 3 pulses, with a short silence in between.
Entry Warning: When the entry door is opened when the system is
armed, a slow beeping tone is a reminder to disarm before the Intruder
alarm goes off.
The Siren sounds will not be heard on the Keypads when the
standby battery is weak, in order to conserve battery power. The
External siren will still sound as normal under these conditions
Trouble Conditions
Comfort constantly monitors the system for the following conditions;
y Telephone Line - Telephone line fault or disconnection.
y Power Failure - No AC power to the system.
y Low Battery - Standby Battery low, may be caused by prolonged power
failure.
y Zone Trouble - Zone wiring shorted or not connected (open-circuit).
y Communications Failure - No communications to Keypads, Door Stations
or other Comfort peripheral equipment.
When any of these trouble conditions occur, the keypads will beep
continuously, and the green Home/Trouble indicators on the keypads will
flash. To silence the beeping, enter your code and # key on any keypad.
The keypad will announce the cause of the trouble alarm, e.g.
“Phone Trouble”
“Battery Warning”
“Power Failure”
“Zone Trouble, (zone number)”
“Communications Failure, (module id)”
Take note of the trouble alarm message and call your installer. The
trouble alarm message will help the installer to diagnose the problem.
As long as the trouble condition persists, the green Home/Trouble
indicator will continue flashing. Every time you sign in to the User Menu,
the Trouble alarm message will be announced. When the trouble
condition is cleared, the Home/Trouble indicator will become steady.
The Trouble condition is displayed on the KP04 LCD.
9
Page 19

Comfort II User Manual
Comfort Voice Menus
By Keypad
Press * and your code and # key to access the User Voice Menu. If you
put * before your code, it does not disarm the security system.
When the system is armed (security is on) or there is an alarm,
entering your code without the * key in front turns off the
security or alarm.
The default Master Code is 1234. Change your code as soon as possible
to prevent unauthorized access into your security system.
By Local Telephone
Any telephone on the premises can be used to control Comfort.
1 Lift the handset, or turn on hands free mode for a speakerphone.
2 Press the * key within 4 seconds.
If you do not press the * key within 4 seconds or if some other
key is pressed first, you will not be able to sign in. If that
happens, replace the handset and try again.
3 Enter your sign-in code and the # key.
The default User Sign-in code is *1234#. Up to 8 personal
mailboxes can be set up, each with its own unique sign-in code.
If the wrong sign-in code is entered, Comfort will say "wrong code". Take
your time to enter the correct code. Once the correct sign-in code is
entered, you will be greeted by the User Voice Menu;
Welcome, Security Off
(You have N new messages)
(New messages are played)
Press 1 to Arm Security System
2 for Messages
3 for Security System Menu
4 for Home Control
5 for Voice Station
6 for Door Station (if installed)
7 for Volume
y Pressing 1 allows you to arm the security system to Away, Night, Day
or Vacation Mode.
y Pressing 2 allows you to access and manage the messages in your
personal mailbox.
y Pressing 3 lets you change Sign-in code, bypass zones, listen to the
Event Log and perform other security functions.
y Pressing 4 allows you to activate the electrical appliances and lights
which are controlled by Comfort.
y Pressing 5 puts the phone into Intercom mode with the keypads.
10
Page 20

Comfort II User Manual
y Pressing 6 allows you to talk with someone on the Door Station (if
installed)
Each menu may lead to other submenus. These are described in the User
Voice Menu Reference. There is always a voice menu to guide you so you
do not have to remember any code sequences. For full details of all the
User menus, refer to the User Voice Menu Flowchart and reference in this
manual.
By Remote Telephone
You can access Comfort from any telephone in the world.
1 Dial to your telephone number.
2 If no one answers the phone after the programmed number of rings,
Comfort answers, and plays the greeting message (if it has been
recorded). Callers can leave messages on the Answering machine.
3 While the greeting message is playing, press *, then your User and #
key. If a Greeting Message has not been recorded, Comfort answers
“Please sign in” and waits for a code.
4 If a valid code is entered, the User Menu will be played.
5 To end a call, it is recommended that you press # to go back to the
previous menu until Comfort says "Thank You, Good bye". You may also
hang up the phone, but the system will take slightly longer to detect that
the incoming call has ended.
While Comfort is saying "Thank You, goodbye, you can press *
and enter your code to gain access" saving you the trouble of
calling again.
6 You may arm, disarm, retrieve messages, record message, check alarm
history just as you would on your local phone.
Program Menu
The Program Menu allows user-defined settings for Comfort to be
changed. It is accessible only by User 1 code (the Master code). In order
to get to Program Menu,
y On the Keypad, press *, enter your Master Code (1234 by default)
followed by the # key. The User Menu will be heard. Press 9 for
Program Menu. The voice menu says..
Program Mode
Press 1 For Answering Machine Settings
2 for Date and Time
3 for Security Settings
4 to Change Phone Numbers
5 for User Code
6 for Time Program
y Pressing 1 allows you to change the Answering Machine settings; the
number of rings for answering, the recording time for each message,
and to record the Greeting Message.
y Pressing 2 lets you change the Date and Time, and Holidays.
11
Page 21

Comfort II User Manual
y Pressing 3 allows you to change security -related settings like Pager
Code.
y Pressing 4 allows you to enter the phone numbers for Comfort to dial to
in case of an alarm or to inform you of important events.
y Pressing 5 allows you to add and remove users.
y Pressing 6 allows you to change the Time Programs
Refer to the Program Menu Reference for full details of all the
submenus.
Tips for Signing In on the Telephone
y Press firmly and release each key the way you normally dial a phone
number. Do not keep your finger pressed on the button.
y When you are signing in, you will hear a beep tone for each key that you
press. If you do not hear a beep tone while signing in, you have
probably missed the first * key. Hang up and try again. Remember to
press * first.
y If you do not hear "Welcome, Security Off" or "Wrong Code" after you
enter a code and the # key, just hang up the phone and try again.
y If you hear "Wrong Code" after you enter a code and the # key, you do
not need to hang up. Just re-enter your code correctly with the # key.
Navigating the Voice Menu
The general sequence of the voice menus are:
y The Voice Menu gives the options or submenus that can be selected.
y If no number key is pressed within a time limit, the menu is replayed. If
no key is pressed after the allowed time, the menu will time out, and the
Keypad will say good-bye.
y The Voice menu may be interrupted at any time. You do not need to
wait until the menu has finished talking before making a selection if you
are already familiar with the menu.
y When the number key is pressed, either the selected menu item is
activated, or a new sub-menu is selected, or as in the case of the
Program Menu, the system requests the entry of a number and # key to
change an existing setting.
y When a new number is to be entered, the system reads out the current
value and ask for a new number and # key. After the number is entered
followed by the # key, the new value entered will be announced as
confirmation. If the current value is not to be changed, just press #.
The previous voice menu will be played. Pressing * clears the digits
entered. For example 1234*5678# will enter 5678.
To avoid mistakes when entering numbers during
programming using the telephone, press * before the number.
This stops the voice menu and clears any numbers entered.
y In any voice menu, pressing # by itself will bring you back to the
previous menu. Pressing F in any menu turns off the Keypad.
y If an invalid number is entered in response to a voice menu, the menu
will be repeated.
To repeat a menu, just press an invalid number.
12
Page 22

Comfort II User Manual
y As a beginner, you will be confused as sometimes, you are asked to
enter a number without the # key, while at other times, you have to
enter a number followed by the # key. The rule here is that if the
selection requires just a single number (0 to 9 and *), you just need to
press the number without #. An example of this is “Select Phone (1 to
8).” If you are required to enter a number which has 2 digits or more,
you need to enter # after the number. # is like the ENTER key on a
keyboard. An example is “Change Day, enter new number and # key”,
where the day is from 1 to 31 and requires # to enter.
13
Page 23

Comfort II User Manual
Important Notice
Test Regularly
To help ensure that your system continues to function as intended, it is
important that you test your system weekly. Refer to Checking Comfort
in this chapter and follow the instructions carefully. If your system does
not function properly, or if you have any questions about testing your
system, call your installation company.
Despite regular testing, it is still possible for the equipment to fail to
perform as expected, due to improper application, tampering, misuse
and other reasons.
Safety Instructions
Please abide to these basic safety precautions when using this product to
reduce the risk of shock, injury or other possible damage. The
manufacturer shall not be held responsible for damages or injury that are
incurred by not using the product according to the safety instructions.
y Read this User Manual and understand ALL instructions given.
y The system must be installed by an authorized Comfort installer.
y The system should not be installed in a location that will be exposed to
rain or moisture, or temperatures exceeding 40
y Any appliance connected to Comfort should not be able to cause any
hazard when turned on either remotely or automatically through Time
Programs.
y No components within the system are to be removed or exchanged,
except by an authorized Comfort installer or service center.
y Sign-in codes should be changed from the default values as soon as the
system is installed in order to prevent unauthorized access.
0
C or lower than 00C.
Fire Safety in the Home
Most fires occur in the home, and to minimize this danger, it is
recommended that a household fire safety audit be conducted and
family escape plan be developed.
Fire Safety Audit
1 Are all electrical appliances and outlets in a safe condition, e.g. frayed
cords, overloaded lighting circuits etc.? If you are uncertain of the
condition of your electrical appliances or electrical service, get a
professional evaluation done.
2 Are all flammable liquids stored safely in closed containers in a well
ventilated cool area? Cleaning with flammable liquids such as gasoline
should be avoided.
3 Are fire hazardous materials e.g. matches well out of reach of children?
4 Are furnaces and wood burning appliances properly installed, clean and
in good working condition?
14
Page 24

Comfort II User Manual
Family Escape Planning
There is usually very little time between the detection of a fire and the
stage at which it becomes deadly or uncontrollable. Therefore it is very
important that a family escape plan be developed, practiced and followed
1 Every family member should participate in developing the escape plan.
2 Study the possible escape routes from each location within the house.
Since many fires occur at night, special attention should be given to the
planning of escape routes from sleeping quarters.
3 It is essential that escape from a bedroom be possible without having to
open the interior door.
When making your escape planes, consider the following:
y Make sure that doors and windows that open to the outside are easily
opened, and are not painted shut.
y If opening or using an exit is too difficult for children, the elderly or
handicapped, plans for their rescue should be developed. This includes
making sure that those who are to perform the rescue can hear and
come to their aid.
y If the exit is above ground level, an approved fire ladder or rope should
be provided, as well as training in their use.
y Exits on ground level should be kept clear. Snow from exterior patio
doors should be removed.
y The family should have a predetermined assembly point where
everybody can be accounted for, e.g. at a neighbors house or across the
street.
y Once everyone is out of the house, call the Fire Department.
y A good plan emphasis quick escape. Do not investigate first or attempt
to fight the fire, and do not attempt to rescue belongings as this takes
up valuable time. Once outside, do not re-enter the house. Wait for the
fire department.
y Write the plan down and rehearse frequently, so that should an
emergency arise, everybody will know what to do. Revise the plan as
conditions change, e.g. new or fewer family members in the house, or if
there are changes to the layout of the house.
y Make sure your fire warning system is operational by conducting weekly
tests as noted in this manual. If you are unsure about system operation,
contact your installing company.
y It is recommended that you contact your local fire department and
request further information on home fire safety and escape planning. If
available, have your local fire prevention officer conduct an in-house fire
safety inspection
15
Page 25

Comfort II User Manual
EN50131 Compliance (Europe)
The product CP9000-ULT/EN03 with firmware version 5.106 and above
is suitable for use in systems designed to comply with EN50131 (Europe)
and PD6662:2004 (United Kingdom) at grade 2 or 3 and environmental
class II
About Firmware
The Firmware is the microcontroller program that determines the
operation and function of Comfort. The firmware from Comfort version
5.100 onwards can be changed in order to upgrade the functionality of
the firmware where there are new features introduced in Comfort, or to
correct errors or bugs in the firmware. Firmware can be upgraded using
the UCM05 and Comfigurator software. When bugs in the firmware have
been identified, Cytech will provide new firmware upgrades incorporating
changes to eliminate them. Cytech also provides firmware to enhances
the functionality of the system or to add more useful features. Firmware
upgrades may be available for download from
http://www.cytech.biz/upgrades.html
installer to upgrade the firmware if needed. It is not necessary to
upgrade the firmware in Comfort unless there is a firmware error
to be rectified.
from time to time. Contact your
16
Page 26
Comfort II User Manual
Arming the Security System
You can arm the security system to Away, Night, or Day modes using
the one-touch keys (the 3 keys on the top left). Follow the steps below.
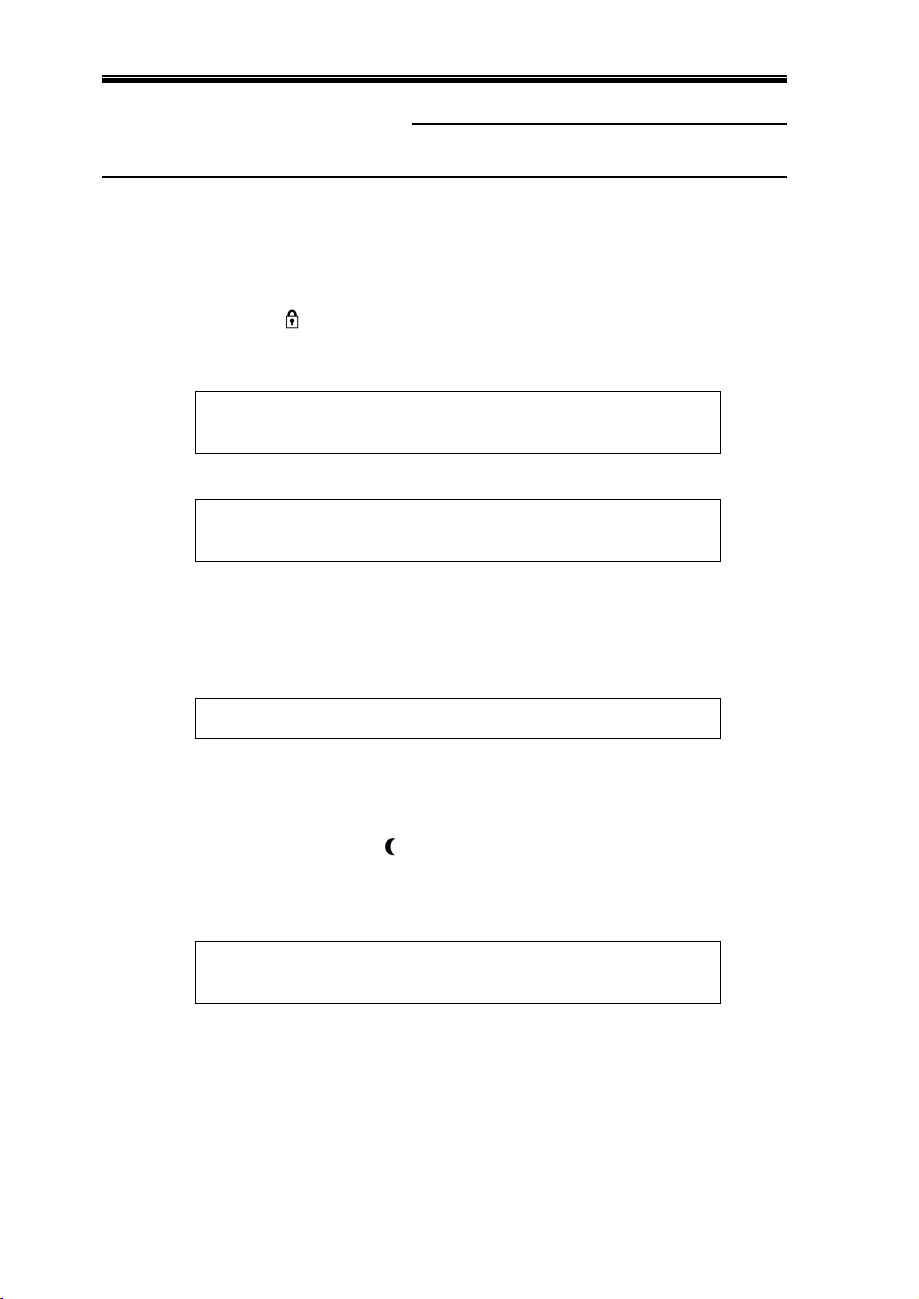
Away Mode
Arm to Away if all occupants are leaving the premises, by pressing the
Away Key If any security zone monitored by the security system is
unsecured, i.e. doors and windows are open, their names will be
announced repeatedly on all the keypads, e.g.
Kitchen Window,
Balcony Door,...
Once they are secured, the keypads will announce
Please Exit..
Please Exit..
Leave the premises by the Entry door. When the door is closed, you will
hear 2 beeps on the siren to confirm that the system is armed. If there is
a strobe light, this will flash for several seconds. The red Armed/Alarm
indicator on the keypad comes on steady (not flashing) and the keypad
will announce
SECTION 2 THE SECURITY SYSTEM
Night Mode
Away Mode
All your lights and appliances can be automatically switched off, if
programmed to do so by your installer.
Press the Night button (to arm to Night Mode before going to bed at
night. If any security zone monitored by the security system is
unsecured, i.e. doors and windows are open, their names will be
announced repeatedly on all the keypads, e.g.
Kitchen Window,
Balcony Door,...
After all the announced doors and windows are closed, the security
system will arm after a few seconds and the keypad will announce
17
Page 27
Day Mode
Comfort II User Manual
Night Mode
All zones are protected, with the possible exception of designated interior
zones, normally Motion Detectors.
Press the Day button on the keypad to arm to Day Mode. In Day
Mode, all interior zones will be inactive, while doors and windows are
protected. If any security zone monitored by the security system is
unsecured, i.e. doors and windows are open, their names will be
announced repeatedly on all the keypads, e.g.
Kitchen Window,
Balcony Door,...
After all the announced doors and windows are closed, the security
system will arm after a few seconds and announce
Day Mode
The red Armed/Alarm indicator on the Keypad will be lighted. In Day
Mode, all interior zones are disabled to allow free movement within the
premises without causing an alarm, while perimeter doors and windows
are protected.
Note: There may or may not be any difference between Day and Night
Mode, depending on how your Comfort installer assigns the Motion
detectors in the premises.
Vacation Mode
Vacation Mode is exactly like Away Mode, except that Comfort can switch
appliances on and off at different times each day to give the impression
that the house is still occupied (provided your installer has programmed
the system accordingly). Vacation Mode is not available on the
one-touch keys. Go to User Menu 1 to Arm Security System, 4 for
Vacation Mode.
Force-Arming
When some zones are open when you are trying to arm using the keypad
or telephone, you may force-arm the system by pressing the # key.
This automatically bypasses all open zones until they are closed. If the
open zones are closed later, they will be protected like other zones. This
may be useful if a window is open which is on another floor from the
keypad. You can force arm the system and then close the window after
arming.
Note: The Force-arm function may be disabled by the installer if it is not
allowed under local regulations.
18
Page 28
Comfort II User Manual
Arming from the Telephone
Comfort can be armed from an internal phone or a remote phone. From
the house phone, press * and enter your user code (default 1234) and
the # key. From a remote phone, call home and wait for Comfort to
answer, and while the greeting message is playing, press * and enter
your user code (default 1234) and the # key. The Voice menu will be
heard. Press 1 to Arm Security System; The Arm Security Menu is;
Press 1 for Away Mode
2 for Night Mode
3 for Day Mode
4 for Vacation Mode
Press # to End
Select which mode to arm to.
If zones are open while arming, press *# on the telephone keypad to
Force-arm (ie automatically bypass the open zones) the system,
provided this operation is enabled in your system.
Security Off / Stop Alarm
To disarm, i.e. to turn off security, enter your user code (default 1234#)
on the keypad.
DO NOT press * before your code, as this will go into user menu
instead of disarming.
The red Armed/Alarm LED indicator turns off and the green
Home/Trouble LED indicator turns on to show that security is off, and the
voice says “Security Off”.
If the Entry door is opened when the system is armed to any mode
(Away, Night, Day, Vacation) an entry delay will be started to allow time
for people coming home to disarm the system. During Entry Delay, the
keypad beeps and the red Alarm/Alarm indicator flashes. Disarm the
system to Security Off during the entry delay. If a valid code is not
entered in the allowed time, an Intruder Alarm will be triggered.
When an alarm occurs, causing the sirens to sound, you can turn silence
the alarm by entering your code (default 1234#). Entering the code (and
# key) during an alarm, or when the system is armed will turn off
security. Do not press the * key before the code, as this will go
into voice menu and not turn off the security or alarm. If you do
get into the voice menu, press 0 for Security Off to disarm.
Do not disarm the security system unless you are sure that there
is no intrusion into the premises.
19
Page 29
Comfort II User Manual
Bypassing Zones
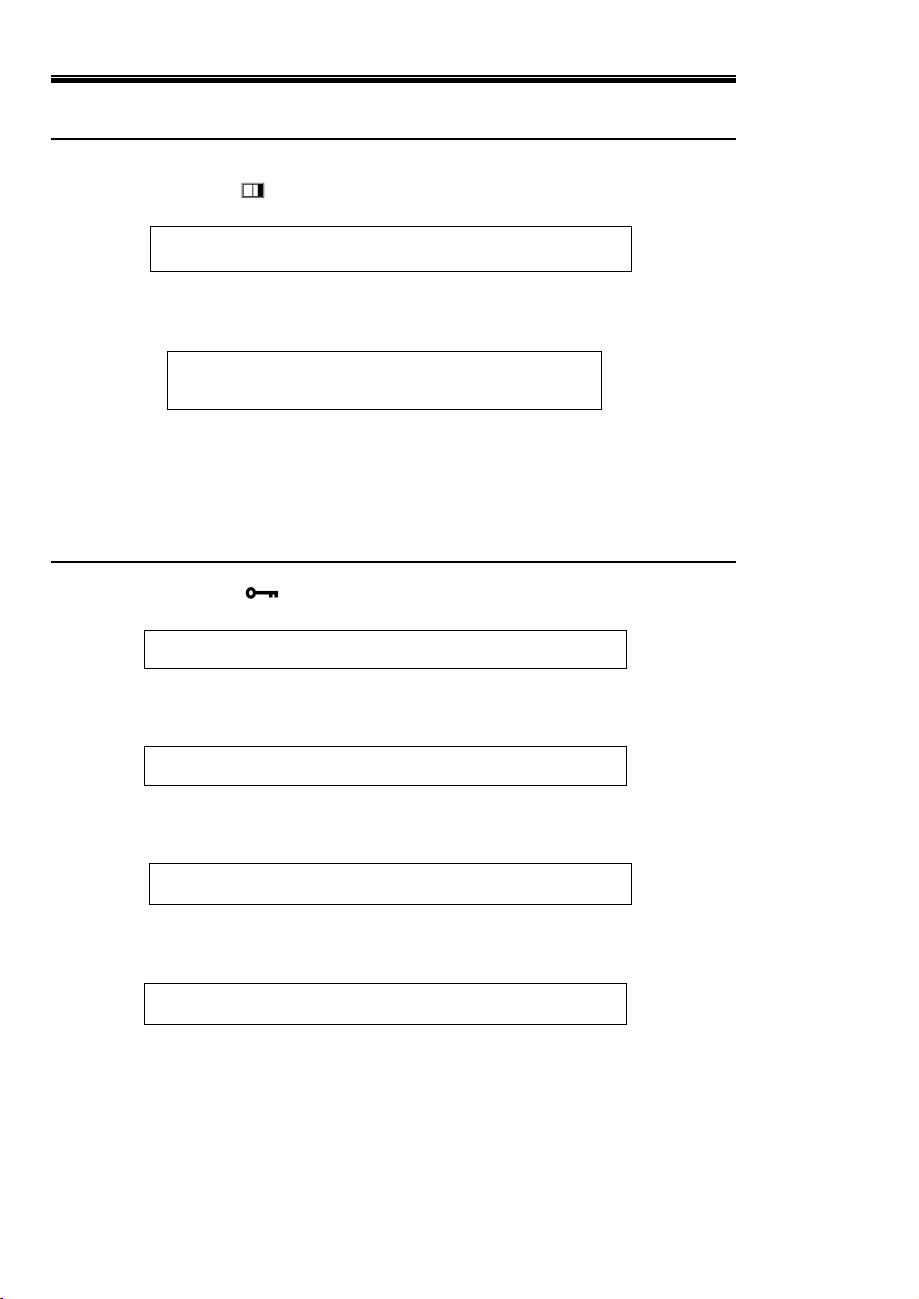
To temporarily bypass a zone (i.e. cause the system to ignore a zone),
press F +1 (open window icon). The Keypad voice menu says
Enter Zone Number and # key
The Zone assignment table is at the back of this booklet. Enter the zone
number to bypass and the # key. The zone is then announced, e.g.
Kitchen Window Bypass Off
Press 1 for On, 0 for Off
Press 1 to bypass and 0 to unbypass. A bypassed zone will not cause an
alarm.
All bypassed zones are automatically unbypassed when the
system is disarmed.
Changing Your Code
Press F+7 it . The Keypad menu says
Please Sign In
Enter your existing code and # key. The default user code is 1234. The
voice menu asks for the new code..
Enter new code and # key
Enter your new code of 4 to 6 digits and the # key. The Keypad will ask
for the code to be entered again as confirmation.
To confirm, Enter New Code and # key
If the number corresponds with the 1st number entered, the voice menu
will say
Sign-in Code OK
Always change your code immediately after Comfort is
commissioned, to prevent unauthorized access.
20
Page 30

Security Safeguards
Duress Code
If the duress code is entered twice, the system will seem to disarm
normally, but Comfort will silently dialout to the designated programmed
numbers. Enter your duress code if you are forced to turn off the security
system by an intruder.
Your duress code is your sign-in code +/- 2. For example, if your sign-in
code is 1356, the duress codes are 1354 or 1358. To safeguard against
entering your duress code by mistake, you need to enter the duress code
twice to activate the silent duress alarm. The first time you enter the
duress code, it will not be accepted; there will be a long beep meaning
wrong code. If you enter the duress code again, this confirms that you
intend to generate a Duress Alarm. This safeguard is an important
feature as many duress alarms are due to inadvertent user entry. If the
Duress alarm is programmed to dial to a voice phone, Comfort will say
the name of the person (user name) who initiated the duress call.
You may disarm a duress alarm by signing in with the correct code on
the local phone. A Duress Alarm cannot be disarmed remotely. Duress
sign-in works only on the local phone. Signing in with your duress code
remotely is treated as a wrong code.
Sign In Tamper
Comfort has an effective safeguard against hacking, or the practice of
trying to find out the sign in codes by repeatedly entering codes on the
telephone or Keypad. After 6 unsuccessful attempts, a Sign In Tamper
alarm will be generated, which cause a beeping alert and can be set to
dial to pagers and telephones. The Sign in Tamper alarm is reset by
entering a correct code twice. Double entry of a code to clear Sign in
Tamper is another security feature to defeat hackers who happen to
guess the correct code after a few attempts.
Comfort II User Manual
Engineer Access Restriction
The Engineer Code allows Installing Engineers to locally or remotely
program or interrogate Comfort. The Engineer Code is permitted only if
the user gives authorization by pressing Keypad F+0 The
authorization is automatically canceled whenever the system is armed or
at the end of each day to protect against unauthorized access.
21
Page 31
Comfort II User Manual
Programming Telephone Numbers
Press F+6 The Keypad menu is
Select Phone
Up to 8 telephones or pagers may be programmed for dial out in case of
an alarm or event. First, select which of the 8 telephone positions to use.
If your premises is monitored by a Central Station, phone positions 1 and
2 will be taken up, and 3 to 8 will be available for telephones or pagers.
If not, all 8 positions can be used. Press 3 for phone position 3.
No Phone...
Press 0 for No Phone
1 for Voice Phone
2 for Pager
4 for Monitoring Station
6 for SMS
* SMS dial-out requires the UCM/GSM Module
Pager dial-out may not be supported in future versions of
Comfort, as the use of pagers has declined worldwide.
To program a telephone (landline or mobile) press 1. For numeric pager,
press 2.
The voice menu says
*
Voice Phone
Enter new number and # key
Enter the new number and # key.
If you make a mistake while entering the phone number, press * or the
AWAY key on the keypad to clear and start again.
To enter the * or # keys within a telephone number (which may be
needed for calling card access or phone unlocking), press the DAY key on
the keypad followed by the desired key * or #.
For example, 1234 <DAY> # 5678 enters 1234#5678, whereas if
<DAY> was not used, the # would terminate the key entry. (Applicable
to firmware version 4.45 and above)
To enter a pause or delay within a phone number, press the NIGHT key
on the keypad followed the pause in seconds. For example, 1234
<NIGHT>35678 will insert a pause of 3 seconds during dialing between
the numbers 1234 and 5678.
22
Page 32

Comfort II User Manual
Monitoring Station Phone Type may not be assigned from this menu. If a
phone position is already assigned to Monitoring Station, it may not be
changed except by the Installer.
Check that Comfort can dial to the programmed numbers with the Dial
Test, described below in Checking Comfort.
Allowing Engineer Access
Engineer Code is used by the installer to program the system, or to
interrogate and do troubleshooting in the special Engineer Menu which a
voice menu used for system programming, as distinct from User
programming in the Program Menu. As protection from unauthorized
Engineer access, the Engineer Code will not be able to access the
Engineer Menu unless authorized by a user. To authorized the Engineer
Code, press F+0 on the keypad. The Engineer Code
authorization is automatically removed at midnight. To cancel Engineer
Code authorization immediately, go to Program Menu, press 3 for
Security, 4 for Engineer Sign in Option and 0 for Off.
23
Page 33

Event Log
Comfort II User Manual
Comfort has an Event Log for the most recent 250 events (125 for
Comfort Entry), which is maintained in nonvolatile memory even when
power, including the standby battery is completely removed. This event
log includes arming, disarming, alarms, zones triggered and all relevant
security events. Each event is date and time stamped. Press F+5 or User
Menu 3 for Security, 3 for Event Log. The Event Log will be announced in
the format
(Date), (Time), (event)
For example,
January 24 7:00 PM System Armed
8:53 PM Intruder Alarm
8:53 PM Kitchen Window
8:53 PM Phone Number 1
8:54 PM Monitoring Station OK
8:54 PM Phone Number 3
8:54 PM Phone Call Sign In.. John
9:05 PM Front Door
9:05 PM Entry Alert
9:05 PM John Sign In Code OK
9:05 PM Security Off
Press 1 for Next
2 for Previous
3 for Next Day
4 for Previous Day
0 for 1st
9 for last
When listening to the Voice menu you can navigate through the Event
Log by pressing 1 for next event, 2 for Previous event, 3 for Next Day, 4
for Previous Day, 0 for 1st event, 9 for last event. Pressing any number
during the event log announcement will immediately interrupt the
announcement and go to the specified event. In this way, you can go
quickly to the event of interest.
This is extremely useful to determine what happened during or before an
alarm. The Comfigurator software is able to read the event log and save
the log to a file on your computer.
The full list of events that are reported can be found in the User Voice
Menu Reference in this manual.
For KP04, the Event Log is announced on the speaker and
displayed on the LCD. Use the keys 1 for Next Event , 2 for
Previous Event, 3 for Next Day, 4 for Previous Day, 0 for 1st, 9
for Last to navigate through the log.
24
Page 34
Comfort II User Manual
Ensure that the system Date and Time is accurate so that the
event log can tell when the events occurred
Recording an Alarm Message
When Comfort dials out to a Voice Phone in the event of an alarm, a
recorded Alarm Message can be played so as to tell where the call is
coming from, for example
Intruder Alarm, Kitchen Window
"Alarm at 102 Philip St., Please contact Mr. Lee at 2351234”)
Press 1 to Repeat, # to end
The recorded message is played after the announcement of Alarm Type
and zone.
To record the Alarm Message, go to Program Menu 3, 5 for Alarm
Message
Press 1 to Record Alarm Message
2 to Hear Alarm Message
3 to Erase this (Alarm) message
The same alarm message will be played for all the alarm types during the
dialout.
Changing Date and Time
It is important to ensure that Comfort has the correct date and time.
Events in the event log and messages in the mailboxes are date and time
stamped. Time Programs also make use of Date and Time. To change the
Date and Time, enter Program Menu (User Menu, 9), and press 2 for
Date and Time
3:34 PM, 1998 February 1, Sunday (e.g.)
Press 1 to Change Date
2 to Change Time
3 for Holiday
Press 1 to change Date, 2 to change Time. 3 to program up to 24
holidays for the year.
Check the accuracy of the clock every few months.
25
Page 35

Comfort II User Manual
SECTION 3
Read this chapter to find out what you should do in the event of an
alarm, when you are within the premises and when you are out.
WHAT TO DO DURING AN ALARM
Turning off the Alarm
Enter your user code and # key to turn off, or disarm the alarm system.
This silences the internal and external sirens and the keypad siren tone.
Do not press the * key before the code, as this will go into voice
menu and not turn off the security or alarm. If you do get into
the voice menu, press 0 for Security Off to disarm.
Alarm Verification
Comfort helps to verify if alarms are genuine, by providing Alarm History,
two way Voice Station monitoring using any Keypad and Event Log.
Alarm History (User Menu 3,2)
The Alarm History gives the sequence of events which caused the alarm,
e.g.
Alarm History...
Thursday , 11:23 P.M., System Armed.
Thursday, 2:23 A.M. Downstairs Movement .
Thursday, 2:24 AM. Upstairs Movement
Alarm History is automatically played when Comfort calls to a Voice
Phone during an alarm. When the security system is disarmed, the Alarm
History remains in memory, until the next time the system is armed.
Event log (F5, or User Menu 3,3)
The voice event log can be used to check the events prior to or at the
time of an alarm, like who armed or disarmed the system. See the
previous section for details.
For KP04, the event log is not announced on the speaker, the
events are displayed on the LCD.
Voice Station (User Menu 5)
From User Menu, press 5 to activate the Keypad to listen to any sounds
on the premises. If more than 1 Keypad is installed, you will be asked to
select one. The Keypad remains in 2-way intercom mode for 90 seconds
at a time. This allows you to listen to sounds or talk to whoever is in the
area monitored by the Keypad. When the Keypad is on, the internal
speaker is turned off temporarily to allow any noises to be heard more
clearly. If there are several Keypads, press the keypad number to
26
Page 36

Comfort II User Manual
select the corresponding keypad for monitoring. End monitoring by
pressing * or #.
During Voice Station mode, real time Alarm Tracking is also
active, i.e.. violated zones will be announced as they occur.
Dial-out to Voice Phone
1 When Comfort dials to a Voice phone (telephone or cellular phone), it
will announce the Alarm event which caused the dial-out e.g. “Intruder
Alarm” , “Fire Alarm”, “Panic Alarm”, and the zone name (e.g. “back
door”, “kitchen window”). Comfort waits for a voice answer (e.g.
“hello”) before announcing so you must say something.
2 Comfort will play the recorded Alarm Message, if any (e.g. “This is 16
Intelligent Home Drive”), if any. You may record the Alarm message in
the User Program Menu , 3 - Security Options, 5 - Alarm Voice Message,
1 - Record Alarm Voice Message. The Alarm Message is used to identify
the location of the premises in which the system is installed.
3 Comfort will announce ..
“Press 1 to Repeat This Message
Press # to End”
If you did not hear the message (Alarm Type, Zone name, Alarm
Message), press 1 to repeat the message. Otherwise, to acknowledge
the message and end the call, press #. Pressing # will prevent Comfort
from calling the phone number again.
4 If you need to access Comfort to listen through the keypad (5 for Voice
Station), listen to Alarm History, or disarm the system (0 for Security
Off), you can press * and your user code and # key. This bring up the
User Menu for you to operate the system.
5 When you sign in, if the alarm is in alert or full alarm state, the Alarm
History, as described above, will be played. Check how the alarm was
activated.
6 From the User Menu, go to Voice Station to listen on the Keypad to any
sound on the premises. Any zones activated will be announced as they
occur.
7 You can check event log in User Menu 3,3.
8 You may turn off the siren in User Menu 3,6 if you are certain that it was
a false alarm. The security system remains armed and will reactivate if
any zone is violated.
9 When you sign in to access the user menu or press # to end the call, ,
the dialout is acknowledged, and Comfort does not call to the same
number again. If you press # to end the call without signing in, Comfort
will call to other phones in the dialing group. Never hang-up without
pressing # or entering your code, as Comfort will call on the
same number again.
A valid sign in during dial-out is recorded in the Event Log as
“”Phone Call Sign in OK”.
27
Page 37

Comfort II User Manual
SMS (Short Message Service)
Comfort can send SMS (Short Message Service) or text messages to a
GSM celllular phone (the UCM/GSM Module is required for this function)
The following information will be displayed:
XXXX - AlarmType - ZZ
y XXXX is the 4-digit ID Code, which identifies your system. This can be
changed in Program Menu, 3 for Security Options, 3 for Pager Report
Code.
y On Comfort Ultra systems, YY is the Alarm Description in text form
y For Comfort Entry and OPT systems, YY is the 2-digit Alarm Type code.
See the table below for the list of Alarm Description codes.
ZZDescriptionYYZZDescriptionYY
UserSecurity Off17ZoneIntruder1
UserCMS Test18UserDuress 2
UserSystem Armed1901 Line Cut3
UserAlarm Abort20UserArm Fail4
-Entry Warning21ZoneZone Trouble5
23IDLow Battery7
-ZoneFamily Care14
-ZonePerimeter15
-ZoneBypass Zone16
y ZZ is the 2-digit Zone number (1-64)or User number (1-16), or Device
ID depending on the Alarm Type. For example, Intruder alarm type will
report zone number, while Arm and Disarm will report user number.
If you are sent a text message by Comfort during an alarm, you may
phone in to access Comfort to assess the situation. When Comfort
answers the incoming call , the Voice Menu says:
-Siren Trouble22ZoneZone Alert6
IDRS485 Comms2400Low Bat Restore7
0RS485 Restore2401Power Fail8
IDDoorbell2500Power Fail Restore8
User26ZonePanic9
UserDial Test27ZoneEntry Alert10
-CMS Fail28ZoneTamper11
UserNew Message2900Tamper Restore11
-Engineer Dial30ZoneFire12
-Sign-in Tamper31ZoneGas13
Please Sign In
The Alarm Type is not announced unlike the case with a dialout. This is
to avoid giving alarm information to any caller. After sign-in, the Voice
28
Page 38

Comfort II User Manual
menu is the same as when dialing to a Voice Phone. The Alarm Type is
announced, and the Alarm History is played, followed by the Alarm Menu
Successful transmission to the SMS network is recorded in the
Event Log as “SMS OK”. However this does not mean the text
message has been delivered to the mobile phone, as that
depends on the GSM network
Dial-out to Central Monitoring Station
If your premises is monitored by a Central Monitoring Station, it will be
programmed to dial first to the Central Station and report the alarm.
Comfort can report to 2 Central Monitoring Stations.
After a successful call to the Central Monitoring Station, there
may be a programmed delay of 3 minutes before the system
dials to any other programmed phones, to allow the Central
Station to call in to verify the alarm according to the agreed
verification procedures (programmed by Installer)
Kissoff from the Monitoring Station is recorded in the event Log
as “Monitoring Station OK”.
29
Page 39
Comfort II User Manual
SECTION 4
Keypad Shortcut to Home Control
The Home Control Menu is programmed by your installer according to
your requirements. This is accessed by pressing F2
The first level of the Home Control Menu may be to select the group of
appliances. For example,
0 for Lights,
1 for Air-conditioners,
2 for Appliances
When one of the groups say “0 for Lights” is selected, the lights which
can be controlled are announced, e.g..
0 for All Lights
1 for Living Room Light
2 for Master Bedroom Light
3 for Dining Room light
...
9 for Garage light
HOME CONTROL MENU
When one of the items on the list is selected, the actions which are
possible for the device are announced, e.g.
Living Room Light is Off
Press 0 for Off
1 for On
Press # for Previous Menu
The real state of the device may be announced as in the above example.
This is only possible if a current sensor or some other sensing device is
used to monitor the device on/off state.
When an action has been selected, the menu will return to the top level
for selection of groups.
When there are fewer than 10 devices to be controlled, the first level to
select the group of appliances may not be announced, and the menu to
select the actual device would be heard instead, for example
30
Page 40

Comfort II User Manual
0 for All Lights
1 for Living Room Light
2 for Master Bedroom Light
3 for Living Room Airconditioner
4 for Study Lights
5 for TV
6 for Radio
7 for Garage Lights
8 for Garage Door
9 for Water Heater
Home Control Menu by Telephone
The Home Control Menu can also be accessed from the home telephone
or remote telephone.
From the home telephone, lift the handset, press * within 6 seconds,
enter a valid user code (default 1234) followed by the # key. The User
Menu will be announced, i.e.
Welcome, Security Off
(You have N new messages)
(New messages are played)
Press 1 to Arm Security System
2 for Messages
3 for Security System Menu
4 for Home Control
5 for Voice Station
6 for Door Station (if installed)
Press 4 for Home Control
To access Home Control Menu from a remote telephone, dial to your
telephone number and let Comfort answer the call after the programmed
number of rings. While the greeting message is playing, press *, then
your User and # key. If a valid code is entered, the User Menu will be
played. Press 4 for Home Control
.
31
Page 41
Comfort II User Manual
Comfort includes a built-in digital answering machine. Unlike the older
conventional answering machines, there is no recording tape required the messages are stored in nonvolatile semiconductor memory which is
maintained even if Comfort were to be switched off and the battery
disconnected for several year. Up to 8 mailboxes can be set up for
different members of the family, with access using each user’s individual
user code, ensuring privacy for mailboxes. Alternately, a common
mailbox can be set up with all users having access to the common
messages by using their own user code. The mailboxes have a combined
capacity of 10 minutes of recorded messages, with a maximum of 128
messages.
The answering machine has advanced features not normally found in a
stand-alone answering machine, like forwarding old new messages to
mobile phones, auto-erase of the oldest saved messages when mailbox is
full, recording of internal memo messages to any mailbox, and call
screening via keypad.
Greeting Message
To allow incoming callers to record messages, the Greeting message
must be recorded. If there is no recorded greeting message, when
Comfort answers the phone after the programmed number of rings, it
will ask for a user code to allow access into the Voice Menu.
Please Sign In
SECTION 5
THE ANSWERING MACHINE
When a Greeting message has been recorded, the caller will hear the
message, for example
“We can’t come to the phone, please leave us a message and
we will call you back... <beep>..
The caller can then record a message to any of the mailboxes or the
common mailbox.
A user who wants to access the Comfort Voice menu must press * while
the Greeting message is playing, followed by the user code (default
1234) and the # key.
Record Greeting Message
To record the Greeting Message, press F+* for Answering Machine
Menu. Comfort asks for a user code
Please Sign In
32
Page 42
Comfort II User Manual
The Master User (i.e. User 1) sign in code (default 1234) must be
entered, as only user 1 is allowed into the Answering Machine Menu.
Press 0 for Answering Machine Bypass
1 for Number of Rings
2 for Record Time
3 to Record Greeting Message
4 to Hear Greeting Message
5 to Erase Greeting Message
3 to Record Greeting Message. The voice menu says
Leave your Message after the Tone.. <beep>
Record the greeting message after the tone and press # to end the
recording. After recording, you may listen to the greeting message by
pressing 4.
For better recording quality, record the greeting message using the home
telephone. Lift the handset, press * (user code) #, 9 for Program Menu,
1 for Answering Machine 3 to record Greeting message. Record the
message after the beep, and press any key to end. Press 4 to listen to
the recorded message.
Adding and Removing Users
Comfort supports up to 16 users, each with their individual user code.
The Master Code belonging to user 1, (which is 1234 by default), is
allowed into Program Mode to change telephone numbers, date, time,
answering machine, add and remove users and change other important
settings (see the Program Menu Flowchart in this manual). The first 8
users can have their own mailbox for messages in the answering
machine. Users 9 to 16 do not have mailboxes. These user codes can be
given to guests, cleaners or other maintenance personnel.
To go to the menu to add, and delete users, press F+#. Comfort asks for
the user code and # key. When User 1 (master User) code has been
entered, the menu says:
0 - Erase Users
This erase all users and their codes except for user 1 whose code
defaults to 1234.
Press 0 to Erase Users
1 to Add User
2 to Delete User
33
Page 43
1 - Add User
Press 1 to Add a User. Comfort will announce the next available user
number and ask for a new code.
Enter a 4 to 6 digit code and #. Comfort asks for confirmation.
The new code is accepted when 2 consecutive entries are the same. This
code can be changed at any time by the user by pressing F 7
Comfort supports up to 16 users, but only the first 8 users have
mailboxes.
2 - Delete User
This removes one user code. Comfort says
Comfort II User Manual
New User... 2,
Enter new code and # key
To Confirm,
Enter new code and # key
Press 1 for (user 1)
2 for (user 2)
3 for (user 3)
..
Select the user number to delete. Do not press # after the user number.
The menu will announce “Mailbox Erased”.
Recording a Memo Message
You can leave messages for members of the family.
To record a message, press F+4 If only 1 user is set up, the
Keypad prompts you to leave a message.
Leave Your Message after the Tone.... (beep)
If more than 1 user is set up, the keypad will ask you to select the
mailbox by name (or number if the user name is not recorded).
34
Page 44

Comfort II User Manual
Press 1 for (user name 1)
2 for (user name 2)
3 for (user name 3)
...
Press the number key corresponding to the user number.
After the beep, leave a message (up to 60 seconds) by talking to the
keypad, and press any key to end. The red MIC indicator comes on while
Comfort is recording your message. The Message indicator (marked
MSG on the keypad) should light up steady when a new message is
available. Just press the # key to hear who has a new message.
Comfort will announce
New Message for .. Mailbox number 1 (or user name)
If you record a name for the mailbox, then the name will be announced
in the above sentence (e.g. “New Message for David”) instead of the
mailbox number.
To retrieve the message, just enter your code followed by the # key.
Comfort automatically plays any new messages in your mailbox.
Up to 8 mailboxes can be set up corresponding to users 1 to 8. If there is
more than 1 mailbox, you can leave memo messages in any mailbox.
If you assign a telephone to your mailbox, Comfort will forward the new
message to the programmed telephone.
User Names for Mailboxes
Incoming callers are able to record messages into any mailbox which has
a user name recorded. For example, User 1 is “Jim”, User 2 I is ”Jane”,
User 3 is “Timmy”, User 4 is “Joan”, an incoming caller would hear first
the greeting message followed by a choice of users,
(Greeting Message)
We can’t come to the phone, please leave us a message and
we will call you back...
Press 1 for Jim
2 for Jane
3 for Timmy
4 for Joan
If there are no User names, the caller will only hear the Greeting
message, and will not be asked to select the user names.
35
Page 45

Recording User Names
To record a user name using the home telephone, press * followed by
the user code for that mailbox. The User Menu will be heard. Press 2 for
Messages, 6 for Mailbox Options;
Press 2 to Record User name
3 to Hear User name
4 to Record Greeting Message
5 to Hear Greeting Message
6 for Call Monitoring
7 for Phone Settings
8 to Erase Name
2 to Record Mailbox Name. You will be prompted
Say Your Name After the Tone... (beep)
Say your name and press any key to end.
Press 3 to hear the name recorded.
Repeat this for all user mailboxes which have been setup.
Erasing User Names
Go to User Menu 2 for Messages, 6 for Mailbox Options (see menu in
Recording User Names above), and press 8 to Erase Name.
Comfort II User Manual
Common Mailbox
In many homes, a common mailbox is preferred. This means that
incoming callers will leave their message in a single mailbox belonging to
user 1, but all users can use their own user code to listen to the
messages. To do this, do not record a name for user 1. If User 1 has a
name recorded, erase it in User Menu 2, 6, 8 (Erase User Name). Other
users 2 to 8 may have names for their mailboxes. When Comfort
answers an incoming call, the Greeting message will be played, but the
caller will not be asked to select a name (even if users 2 to 8 have
recorded names). The recorded message will be saved in user 1’s
mailbox. All users can enter their own sign-in code to hear the messages
in the common mailbox as well as their own mailbox messages.
With the common mailbox setup. Users are still able to record memos in
individual mailboxes by pressing F4.
36
Page 46

Comfort II User Manual
Retrieving Messages from Mailboxes
The green MSG indicator blinks if there are new messages from incoming
callers, and it is steady if there are new memos from other users. Press
# by itself without any code on the keypad to find out who the new
messages are for. Comfort will say
New Message for John
Comfort announces the user name or number who has new messages.
Each user can retrieve the messages in their mailbox by entering their
own code. Comfort plays any new messages in the mailbox. When new
messages have been played, they become saved messages. Saved
messages can be played by going into User Menu 2 for Messages, and 2
to hear saved Messages.
Retrieving Messages Remotely
Deleting Messages
A Message can be deleted by pressing 3 while the message is being
played. All saved messages can be deleted in User Menu by pressing 2
for Messages, to hear the Messages menu;
Press 1 for New Messages (if any)
2 for Saved Messages
3 to Erase Saved Messages
4 to Record Messages
5 for Reminder Messages
6 for Answering Machine
Press 3 to Erase Saved Messages. Actually it is not necessary to delete
saved messages, at all. When a new message comes in and the memory
is full, Comfort automatically erases the oldest saved message. Thus, it
is not necessary to manually erase saved or old messages in order to
recover the message memory. Comfort is intelligent enough to take care
of this.
37
Page 47

Comfort II User Manual
Changing the Number of Rings for Auto-answer
Comfort answers the phone after a programmed number of rings. To
change this, Press F+* for Answering Machine Settings;
Press 0 for Answering Machine Bypass
1 for Number of Rings
2 for Record Time
3 to Record Greeting Message
4 to Hear Greeting Message
5 to Erase Greeting Message
Press 1 for Number of Rings;
Press 0 for Security off
1 for Away Mode
2 for Night Mode
3 for Day Mode
You can set the number of rings to answer in each of the security
modes. For example, you can have the answering machine answer all
calls in Night Mode, by setting the number of rings to 0. In the menu
above, press 2 for Night Mode. The menu announces the number of rings
to answer in Night Mode;
Night Mode, 8 Rings,
Enter new number and # key
Enter 0# to set the number of rings in Night Mode to 0.
To let Comfort answer a call immediately at any time, press #
on the keypad while the telephone is ringing. This allows the
answering machine to take the call without waiting for the
programmed number of rings.
38
Page 48
Comfort II User Manual
Advanced Features
Auto-Erase of Saved Messages
The answering machine can store more than 10 minutes of messages.
When a new message comes in and the memory is full, Comfort
automatically erases the oldest saved message (from any mailbox),
making it unnecessary to manually erase saved messages.
New Message Forwarding
Comfort has the unique ability to forward new messages for your mailbox
to your mobile phone. To turn this on, enter your code, then 2 for
Messages, 6 for Answering Machine,
Press 2 to Record User name
3 to Hear User name
4 to Record Greeting Message
5 to Hear Greeting Message
6 for Call Monitoring
7 for Phone Settings
8 to Erase Name
Press 7 for Phone Settings. The menu announces the assigned phone (0
if no phone assigned)
Phone Setting 0 (default)
Select Phone
Press 0 or 1 to 8 to select the phone. If 0 is selected, no phone is
assigned, and Comfort will not call any phone number when new
messages are received. Phone settings 1 to 8 are assigned to Voice
Phone or Pager in the Program Menu. When assigned to a pager, the
Alarm Type 29 will be displayed on the pager. You can call back to
retrieve the new message. When assigned to a Voice Phone, the new
message is played when the mailbox owner signs in.
Screening of Incoming Calls
If you let Comfort answer calls, you can screen incoming callers on the
Keypad when they are recording a message. You may take the call and
cancel the recording by picking up your telephone handset. The caller is
heard only on the first keypad, and not an all keypads.
Call screening is enabled by default. To turn it off or on, enter your code,
press 2 for Messages, 6 for Answering Machine (see Menu in New
Message Forwarding above) and press 6 for Call Monitoring
39
Page 49
g
Comfort II User Manual
Call Monitoring Option Off
Press 1 for ON
0 for OFF
Press 0 to turn Off call screening or 1 to turn it On. Default setting is
Call Screening on.
External Answering Machine/Fax Bypass
If there is an external fax machine or answering machine connected to
the same telephone line as Comfort, it will normally be programmed to
answer incoming calls first, i.e. before Comfort does so. This means that
you would not be able to call from an outside phone to access the
Comfort Voice menu. There is now an Answering Machine Bypass mode
which allows you to access Comfort remotely in such a circumstance. To
activate this, go to Program Menu (User Menu press 9) then 1 for
Answering Machine settings;
Press 0 for Answering Machine Bypass
1 for Number of Rings
2 for Record Time
3 to Record Greeting Message
4 to Hear Greeting Message
5 to Erase Greetin
Press 0 for Answering Machine Bypass.
Message
Answering Machine Bypass OFF
Press 0 for Off, 1 for On
Press 1 for On to enable, or 0 for Off to disable (disabled by default).
When you want to call from an outside phone to access Comfort, let the
phone ring exactly once, i.e. as soon as you hear the phone ringing,
end the call immediately. Dial again within a time window of 10 to 25
seconds. This time, Comfort will answer the call immediately. For this to
work, the external answering or fax machine must be programmed to
answer after 3 rings. Program the number of rings for Comfort to answer
(Program Menu 1) so that normally, the external machine will answer
first.
We recommend that you do not use an external answering machine.
Comfort’s built-in answering machine has all you want in an answering
machine, and more.
Immediate Auto-Answer by # key
Comfort answers the phone after a programmable number of rings in
each Security Mode (Security Off, Away, Night, Day). When the phone is
ringing, Comfort can be made to answer the phone immediately by
pressing # on the keypad. This is useful when you do not want to be
40
Page 50

Comfort II User Manual
disturbed at that time, or if you see an unwanted number in the Caller ID
device. The phone will be answered by the answering machine, and the
recorded message can be screened on the keypad.
The # key must be pressed while the phone is ringing (including
the pause between rings). If pressed when the phone has
stopped ringing, Comfort announces if there are new messages
for any mailbox.
41
Page 51

Comfort II User Manual
SECTION 6
Comfort is able to ring the home phone and give a chime on the keypads
or call a pager or telephone to remind you about appointments, to take
medicine, watch your favorite TV program or any other events. When
you pick up the phone, the reminder message that you recorded
previously will be heard. You may also press a key on the keypad when it
gives the characteristic Reminder chime tone to hear the message. Up to
8 Reminder Messages can be programmed at a time.
Programming Reminder Messages
Reminder messages can be programmed by any user.
To program a Reminder message, Sign in with your user code to get into
User Voice Menu. Press 2 for Messages, 5 for Reminder Messages,
Enter Reminder number and # key
Enter 1 to 8 # to select a Reminder message. If the Reminder message
has been programmed, the message and time settings are played, e.g.
Reminder Message 1 ON (or OFF)
9:30 PM,
Monday, Tuesday, Wednesday, Thursday
No Mailbox
"Time to watch the News" (recorded message)
Press 1 for ON
0 for OFF
2 to Change Time
3 for Day of Week
4 for Message
5 for User Number
REMINDER MESSAGES
The example above means that Reminder 1 is turned on, the activation
time is 9:30 PM on Monday, Tuesday, Wednesday and Thursday, the
reminder is not assigned to any mailbox, and the recorded reminder
message is “Time to watch the news”.
The menu options allow the Reminder program to be changed
1 for Reminder On or 0 for Reminder Off
Press 0 to turn off the reminder message or 1 to turn it on. You can turn
off a reminder message when you know you will not need it temporarily,
e.g. when you have guests.
42
Page 52

Comfort II User Manual
2 to Change Reminder Time
9:30 PM, Change Hours, 21
Enter new number and # key
Enter the new hours in 24 hour format followed by the # key, or just #
to leave the value unchanged. The voice menu says
Change minutes, 30
Enter new number and # key
Enter the new minutes followed by the # key, or just # to leave the
value unchanged.
The menu will say the new Reminder time, e.g.
10:30 PM
3 for Reminder Day of Week
Select day of week
1 for Monday
2 for Tuesday
3 for Wednesday
4 for Thursday
5 for Friday
6 for Saturday
7 for Sunday
8 for Holiday
This menu selects the says of week for which the Reminder message is
active. You may select any combination of days of week and holiday.
Press 1 to 8 to select the day of week. If you press 1, the Voice menu
says
Monday, OFF
Press 1 for ON, 0 for OFF
Press 1 to activate the Reminder message for the selected day, and 0 to
turn it off for that day. Do the same for all the days of week. The
holidays are defined in the Holidays menu.
4 for Reminder Message
Comfort plays the current reminder message, if any and says
43
Page 53
Press 1 to Record Reminder Message
2 to Hear Reminder Message
3 to Erase this (Reminder) Message
A reminder message must be recorded for the Reminder to be activated
at the programmed times.
Record Reminder Message
Leave your message after the tone ... beep
Record your reminder message now. Press any key to end the message.
The time limit for each reminder message is set in the Program Menu 1 Answering Machine Settings, 2 - Record Time, 3 - Reminder Messages.
Hear Reminder Message
Comfort plays back the current message or the one you have just
recorded.
Erase Reminder Message
Erases the recorded reminder message. If no message is recorded, the
Reminder message will not be activated at the programmed times.
5 for User Number
Each Reminder may be assigned to a mailbox to be delivered to a specific
person instead of a general reminder for anyone. Furthermore, if the
Mailbox is assigned to one of the programmed phones 1 to 8 (using
Menu 2,6,7) , the Reminder message is forwarded to the programmed
phone. This means that you can be reminded of any appointment
wherever you are, with a cellular phone.
Comfort II User Manual
No User
Press 0 for No User
1 for (Mailbox 1 name)
2 for (Mailbox 2 name)
Press 0 for No user or any of the keys (without #) to select one of the
programmed mailboxes to assign this Reminder. If No user is selected,
the reminder message will not be for any particular user, and will ring
the Keypad at the programmed time.
44
Page 54

Comfort II User Manual
Each Keypad and Door Station has a built-in speaker and microphone
which are used in Intercom Mode to communicate with any internal
telephone or remote telephone, or other keypads.
Keypad to Keypad Intercom
Keypads can act as intercoms, provided there is more than 1 installed.
From any keypad, you can broadcast to all keypads or select a specific
one.
Press F+8 .
You can start talking to all the other keypads on the premises. Notice
that the red MIC led on the Keypad is lighted to indicate that the
microphone is turned on, i.e. in Talk Mode. When anyone presses any
key on another Keypad, all other Keypads are switched off, and
communication will be between the two keypads only. Communication is
in one direction at a time, i.e. when one Keypad is talking the other is
listening and vice versa. This is called Simplex Mode. Press any key to go
into Talk Mode, causing the other keypad to go into Listen Mode. The
keypad in Talk Mode will have its red MIC indicator on. To end, any party
can press the F key. If there is no change in direction between talk and
listen for some time, the Intercom mode will time out after about 30
seconds. The Intercom mode is ended by any announcement, eg
“doorbell” or an alarm activation.
Instead of broadcasting to all keypads, a specific keypad can be selected,
after initiating intercom mode, by pressing the number corresponding to
the keypad. For example, from keypad 1, you can intercom to keypad 3
by pressing F8, followed by 3. This works if the keypad is selected before
any keypad responds.
The keypad to keypad intercom can be used to call children for dinner, or
to call any family member in their own room. It is not a full duplex
intercom where two sides can talk at the same time.
SECTION 7
INTERCOM
45
Page 55
Comfort II User Manual
Telephone to Keypad Intercom
The telephone to keypad intercom function can also be used from any
telephone in the house or from any outside telephone.
From the local or remote phone User Menu, press 5 for Voice Station. If
you have more than one Keypad, there will be a menu to select the
Keypad
Select Station 1 to (number of keypads)
You can listen to any sounds or talk to anyone in the vicinity of the
Keypad. Press the Keypad number 1 to 8 to select another Keypad to
monitor. Press # to end.
Note that the menu 5 for Voice Station when used on a keypad goes into
Baby Monitor Mode, see below.
Baby Monitor Intercom
Go to a keypad (which is not in the baby’s room) and sign in with your
user code and press 5 for Voice Station.
If there are more than 1 keypad on the premises, you will be asked to
select one of them to intercom.
Select Station 1 to (maximum)
Enter the Keypad number (1 to 8) to select the Keypad where the baby
is (It must not be the one you are using!).
This turns on the microphone on the other keypad so sounds on the
keypad can be heard on the keypad which is being used. The MIC red
LED on the other keypad will be turned on. The system will remain in
intercom mode until the F key is pressed on either keypad or an
announcement like “Doorbell” is required, or an alarm occurs which
terminates the intercom. This monitor mode is one way only, the
originating keypad is unable to talk to the other keypad.
Press # to end the Baby Monitor mode, and return to the previous menu.
Note that the menu 5 for Voice Station when used on a remote or local
telephone goes into two-way Intercom mode (see above)
46
Page 56
Comfort II User Manual
Door Station
This applies if the Door Station is installed. When the Door Station
button is pressed in Security Off or Night Mode, the home phones will
ring and Keypad will produce a door chime. You can talk to the visitor
using the local phone or the Keypad.
Local Telephone to Door Station
When you hear the Door chime and the phone ring, answer the phone.
Comfort says..
Press 0 for Door Station
4 to Open Gate (if gate is controlled)
7 to Open Door (if door is controlled)
# to End
Press 0 to talk to the visitor. When you have finished, just hang up the
phone, or if your system is set up to open a door or gate, you can press
4 or 7 to release the gate or door.
Comfort supports up to 3 Door Stations.
You can talk to the Door Station without first being called by any Door
Station by signing in with the usser code on a telephone or keypad and
selecting User Menu 6 for Door Station.
Select Station 1 to (number of Door stations)
# to End
Press 1 to 3 to select which Door Station you want to talk to if there are
more than one door station.
Keypad to Door Station
When you hear the Door chime, press any key on the Keypad. You will
be asked to press 0 for Door Station just like on the phone. You can talk
to the Door Station in two way mode.
Remote Door Station
If security is armed to Away or Vacation Mode and the Door station
button is pressed, Comfort can call to your mobile phone (if
programmed by the Installer), so that you can talk to the visitor
wherever you are and even open the door or gate if you know the visitor.
47
Page 57

Comfort II User Manual
SECTION 8
Comfort has Time Programs (32 for Ultra, 16 or OPTimum) to perform
automatic tasks, including automatic arming at night, automatic
disarming, turning off lights and appliances etc. Each Time Program can
be programmed for any combination of days of the week and holiday,
and at any time of the day. The action performed by each Time Program
(Response) is predetermined by your installing engineer and cannot be
changed, except by the engineer. You may change the programmed time
and days of week, or turn it on or off.
1 Start by entering your Master code (first user) to get to User Menu, then
press 9 for Program Menu. Press 6 for Time Program Menu.
Enter Time Program Number and # key
2 Enter Time program number 1 to 32 and # key. The voice menu says
(e.g.)
Time Program (1 to 32 ON (or OFF)
Monday, Tuesday, Wednesday, Thursday, Friday
11:00 PM, Response 69
Press 1 for ON (Enable the Time Program)
0 for OFF (Disable the Time Program)
2 to Change Time (Change activation time for this
program)
3 for Day of Week (Change days of week for this program)
4 for Response (actions to be performed, hear only,
3 By default, Time Program 1 and 3 are programmed to Auto-arm to Night
Mode and Time Program 2 and 4 to Auto-disarm, but these Time
Programs are not enabled. Two time programs each for auto-arm and
auto-disarm allows you to set a different time for weekends. You can
activate these Time Programs by selecting them, setting 1 for ON,
selecting the Days of week and the Time of day. For example, to set
Time Program 1 to auto-arm at 11 PM on Mondays to Fridays, go to the
Time Program Menu, enter 1#, press 1 for ON, then 2 to change Time,
enter 23# (11 PM), and 00# (minutes). Press 3 for days of week, select
1 - ON, 2- ON, 3 - ON, 4- ON, 5 -ON, 6 - OFF, 7 - OFF, 8 - OFF
(holiday).
4 Time Programs can be enabled or disabled. Select the Time Program
number and # key. Press 0 for OFF (Disable) and 1 for ON (Disable).
This allows you to temporarily disable a Time program (say to
automatically switch of lights or auto-arm the security systen when
entertaining guests.
Automatic arming and disarming of the alarm system may not
be allowed by your Monitoring Station, and may be disabled by
your installer
5 See Program Menu Reference Chapter 6 for a full description of the Time
Program Menu options
TIME PROGRAMS
48
Page 58

Comfort II User Manual
Change Date and Time
Program Menu 2, press 1 to change Date, 2 to change Time. Setting the
correct Date and Time is important for Time Programs, Reminder
Messages, and the Event Log.
Change Holidays
Program Menu 2,3 to change any of the 24 holidays. Holidays are used in
Time programs and Reminder messages only.
Disable Announcements on a Keypad
The keypad announces e.g. “Security Off” “Night Mode” and “Front Door”
and other zones which are programmed for announcements. You can
turn off the announcements on any keypad by going to Program Menu
3,1 - Voice Report and selecting 0 for off (1 for On). This works only on
the keypad which you are on. This has to be repeated for other keypads
where announcements are to be turned off. Announcements are on by
default for all keypads.
When announcements are turned off, Reminder and door station chimes
will not be heard on that keypad. When another keypad intercoms to all
keypads by pressing F8, the voice will not be heard on this keypad.
However, you can talk to a keypad with announcements off by directly
selecting the keypad. Press F8 followed by the keypad number.
49
Page 59

Comfort II User Manual
Comfort has a Test Menu which allows the basic system operation to be
tested on a regular basis.
Press F+3 to hear the Test Menu
This allows you to test your security system.
Battery Check
Press 1 to test your standby battery. This test will turn off the mains
power to Comfort for 2 minutes . If a low battery condition is detected, a
Low Battery Alarm is generated and the Mains is turned on again.
Security Check
Press 2 for Security Check. Walk through the premises, opening
protected doors and windows and triggering detectors. All zones
activated will be announced on the Keypads. 24 hour detectors like
Smoke detectors and Panic switches can be tested without causing an
alarm or dial out. To end, press any key. Warning: Any 24 hour
detectors left on will cause an alarm.
Press 1 for Battery Check
2 for Security Check
3 for Dial Test
4 for Siren
5 for Strobe
SECTION 9
TESTING COMFORT
Dial Test
Siren Test
Strobe Test
Press 3 for Dial Test. This initiates a dial out to all the programmed
phones. On pagers, the code reported is xxxx-27-xx for Dial Test. For
Voice Phones, the Alarm Type announced is “Dial Test”. For Central
Stations, the event reported is Test. During the dial test, all tones and
sounds are audible, so you can monitor the progress of the calls.
Press 4 for Siren test. This produces a short burst on the siren to test
that it still working.
Press 5 for Strobe Test then 1 for ON or 0 for Off. Remember to turn off
the strobe at the end of the test.
50
Page 60
Comfort II User Manual
SECTION 10 COMFORT MENU GUIDE
This chapter shows how to make find useful operations in Comfort’s User
and Program Voice Menus. The notation used for referring to a certain
sub-menu is
Menu, x,y,z
which means the specified menu (User or Program), Press x to select the
next menu, then y to select next menu and z to select the next menu.
For example,
User 2,6,7
means User menu 2 for Messages, 6 for User Options, 7 to select Phone.
Remember that you do not need to wait for the menu to finish talking
before selecting the next menu.
Full details of the User and Program Menus as well as flowcharts can be
found in the User Menu Reference and Program Menu Reference in this
manual.
In this chapter, the menu references are to show you quickly how to get
to the required places in the menus. Refer to the appropriate menus in
the Menu Reference for full instructions.
Security System
Arm Security System
Keypad for Away Mode
Keypad for Night Mode
Keypad for Day Mode
In the User Menu, press 1 to Arm Security System, then
Press 1 for Away Mode
2 for Night Mode
3 for Day Mode
4 for Vacation Mode
When you arm to Away or Vacation Mode from inside the premises, you
will be required to leave via the Entry Door. The system is armed when
the door is closed. However, when you arm to Away or Vacation Mode
remotely, the system arms after a short delay, without waiting for exit
51
Page 61

Comfort II User Manual
via the Entry Door. When arming to Night or Day Mode, no exit is
required.
Remote Disarm
From the telephone User main menu, press 0 for Security Off if the
system is armed or is in alarm. The option for “0 for Security Off” is not
heard if the system is not armed.
Do NOT do a Remote Disarm unless you are very sure that it is
safe to do so.
Remote Disarm may not be allowed by your Monitoring company
and may be disabled by the installer.
Bypass Zones
Keypad F+1 or, by User Menu 3,5
Silence a Trouble Alarm
When the keypad beeps continuously and the green Home/Trouble
indicator flashes, enter your user code and # on any keypad. The
keypad will announce the cause of the trouble alarm, e.g.
“Phone Trouble”, “Battery Warning”, “Power Failure”, “Zone Trouble,
(zone number)”, “Communications Failure, (module id)”.
Take note of the trouble alarm message and call your installer. The
trouble alarm message will help the installer to diagnose the problem.
As long as the trouble condition persists, the green Home/Trouble
indicator will continue flashing. Every time you sign in to the User Menu,
the Trouble alarm message will be announced. When the trouble
condition is cleared, the Home/Trouble indicator will become steady.
Listen To Event Log
Keypad F+5 or User Menu 3,3
When listening to the Voice menu you can navigate through the Event
Log by pressing 1 for next event, 2 for Previous event, 3 for Next Day, 4
for Previous Day, 0 for 1st event, 9 for last event.
Refer to User Menu Reference to see what events can be logged.
Listen to Alarm History
User Menu 3,2 plays Alarm History. After an alarm, the Alarm History is
played automatically upon signing in with your code. Alarm History keeps
the first 20 events after arming the security system, and is erased each
time security is armed.
Do Security Check (Walk Test)
Keypad F+3, 2 or User Menu 3,4,2. End by pressing any key.
52
Page 62

Comfort II User Manual
Do a Dial Test
Keypad F+3, 3 or User Menu 3,4,3.
Test the Backup Battery
Keypad F+3, 1 or User Menu 3,4,1.
Do a Siren Test
Keypad F+3, 4 or User Menu 3,4,4.
Do a Strobe Test
Keypad F+3, 5 or User Menu 3,4,5
Program Telephone Numbers
F+6 or Program Menu 4, select phone 1 to 8, for programming the Phone
type and number.
Change Pager Code (4 digits)
Program Menu 3,3.
This is the 4 digit number displayed on the pager to identify your
premises. You can enter the address or unit number here.
Engineer Sign In Option
Keypad F+0 to turn on. This allows the Engineer code to gain access for
system programming and troubleshooting. Engineer Sign-in option is
automatically disabled each time the system is armed, or at the end of
each day.
Record Alarm Message
The Alarm Message is a recorded message which is announced during
dial out to Phone Type 1 (Voice Phone).
Program Menu 3,5,1
Hear Alarm Message
Program Menu 3,5,2
Erase Alarm Message
Program Menu 3,5,3
Enter Duress Code
Enter your Sign in Code + or - 2 twice to turn off security but activate a
silent dial out, in case you are forced to turn off the security system.
53
Page 63

Comfort II User Manual
Activate a Panic Alarm
On the Keypad, press F and AWAY simultaneously.
Activate a Fire Alarm
On the Keypad, press F and NIGHT simultaneously.
User Codes
Add User Code
Keypad F+*, 1 or Program Menu 5,1. An authorized Master Code is
required. The next user number is announced. Enter the new sign in code
and # key. You will be asked to reenter the code to confirm. The first 8
users have their own mailbox for messages. Users can record their user
names (see the next section on Answering machine)
Erase All User Codes and Mailboxes
Keypad F+*,0 or Program Menu 5,0. An authorized Master Code is
required. The master code will default to 1234. If you have forgotten
your Master code (User 1 code), then call your installer to reset the User
Codes.
Erase One User
Keypad F+*, 2 or Program Menu 5,2. An authorized Master Code is
required. The user’s mailbox and messages will also be erased.
Change User Code
Press F+7 Also in User Menu 3,0
Answering Machine
Record a Memo for a User
Keypad F+4, or User 2,4 and select which user to leave the message for.
Press any key to end the message. The green MSG indicator lights up
steady when there is a new memo. Pressing # tells who the message is
for. The recipient enters his user code to hear the message.
Record a Greeting Message
Keypad F+*, 3 or Program Menu 1,3.
Listen to the Greeting Message
Keypad F+*, 4 or Program Menu 1,4.
54
Page 64

Comfort II User Manual
Erase the Greeting Message
Keypad F+*, 5 or Program Menu 1,5.
If there is no Greeting message and no recorded user names, Comfort
answers calls with “Please Sign In”.
Record User Name
User Menu 2,6,2.
When someone calls, Comfort prompts the caller to leave a message by
selecting the user name, i.e.
“Press 1 for (user1)
2 for(user 2)..
...”
Listen to User Name
User Menu 2,6,3.
Erase User Name
User Menu 2,6,8.
Without a user name, the name will not be announced in the list of
names for an incoming caller to leave messages, but messages can still
be left in your mailbox by selecting your user/mailbox number.
Hear Saved Messages
User Menu 2,2. While listening, press 1 for next message, 2 for Previous
message, 0 for 1st message, 9 for last message, 3 to erase the current
message.
Erase Saved Messages in your mailbox
User Menu 2,3.
Assign a Telephone to your Mailbox for Message Forwarding
User Menu 2,6,7.
Select one of the 8 programmed telephones 1 to 8 or 0 for No phone
assignment. All new messages will be forwarded to your programmed
phone.
Screen Incoming Calls
User Menu 2,6,6, and press 1 for screening On or 0 for screening Off.
Change Number of Rings to Answer
Keypad F+*,1 or Program Menu 1,1, and select Security Mode (0=Off,
1= Away, 2 + Night, 3 = Day). The number of rings in each mode can be
55
Page 65

Comfort II User Manual
different. The number of rings in Vacation Mode is the same as what is
programmed in Away Mode
Change Recording Time Limits
Keypad F+*, 2 or Program Menu 1,2. Enter the limit for recorded
messages in seconds. Recorded messages shorter than the programmed
limit will not use up the allocated time in the answering machine
memory. This time limit also applies to greeting message, alarm voice
messages and user names.
Home Control
Control Appliances
On the voice Menu, press 4 for Home Control and listen to the menu.
Select the appliance and the action (ON, OFF etc)
Miscellaneous Programming
Change Date and Time
Program Menu 2 for Change Date and Time. Select 1 to Change Date, 2
to change Time
Enabled/Disable Announcements on each Keypad
The keypad makes announcements, e.g. the security mode (Away, Night,
Day, Vacation), or zone names when the system is being armed. This
also includes chimes and siren tones. In some rooms where the keypad
is installed, these announcements may not be desired, e.g a baby’s
room where the keypad is used as a baby monitor. To enable or disable
keypad announcements on a specific keypad, go to Program Menu 3,1
for Voice Report and press 1 for On (enable) or 0 for Off (disable).
56
Page 66

Comfort II User Manual
General Support
Your installation company will be able to answer your basic questions and
show you how to operate Comfort. You may also access the Comfort
Web Site at http://www.cytech
system, and to download manuals and other information. You are invited
to join one of the Comfort Forums at http://www.comfortforums.com
ask questions, to share your experiences, good and bad, give your
opinions as well as your suggestions on how Comfort can be improved
further. Your questions will most likely be answered by us, one of our
distributors or installers or Comfort users worldwide.
Comfort is a continually evolving product, and it may be possible to add
new features to existing systems by a simple upgrading process.
Frequently Asked Questions / Tips
The Comfort forums on the web can be accessed for assistance.
FAQS - Technical http://www.comfortforums.com/forum16/
FAQS - User http://www.comfortforums.com/forum17/
Questions on Using Comfort http://www.comfortforums.com/forum1/
SECTION 11 GETTING HELP
.biz to find out more about thee Comfort
to
User Code Forgotten
The User Code has to be first deleted and then added again. The user
with the Master Code (User 1) must get into Program Menu (User Menu
9). Press 5 for User Code, and 2 to Erase User. Select the user number
to be erased from the list. This erases the user code and messages. To
erase all user codes and reset to the default code 1234, go to Program
Menu, press 5 for User Code and 0 to erase all Users. You can add a new
user using Program Menu (5,1). If the Master Code is forgotten, your
installer should be able to reset the code to default 1234. They will
probably charge for this, so please be careful not to lose your master
code!
Keypad beeps when any key is pressed
If one keypad is being used, either for intercom, voice menu access or
baby monitor, other keypads are shut out, giving a long beep tone if any
key is pressed. In urgent situations, press F on any keypad to end the
current operation on the other keypad and allow you to use the keypad.
Cannot Sign In on the Home Phone
See tips on Signing-in in the Quick Start Guide.
Cannot Sign in using a Cellular Phone
57
Page 67

Comfort II User Manual
If the system is dialing out, Comfort waits for a voice reply before giving
the Alarm Message. Once the Alarm Message is given, Comfort waits for
around 20 seconds to get a valid sign-in code. If no sign-in code is
received, you will hear "Thank You, Good bye". The signal strength at
your location may be low, especially indoors. Try to call and sign in at
other locations. If the problem persists, call your installer. Also, some
cellular phones have a setting for DTMF. Make sure that this is set to ON
I have telephone services which use the * key
Services provided by telephone companies like call Forwarding may
require the * key to be pressed as part of the sequence for turning the
service on and off. This will conflict with Comfort as the * key followed by
the user code and # key is used to access the voice menu. When you
need to use * to access other phone services, simply wait for more than
6 seconds before pressing *, as Comfort recognizes the * key only during
the first 6 seconds.
What if I have Call Forwarding on my telephone
If your telephone is forwarded to another number, your telephone will
not ring, and Comfort will not be able to answer calls. You will not be
able to remotely access Comfort, and other callers will not be able to
leave messages on Comfort’s answering machine.
What if I have an external Answering Machine
If you have an external answering machine connected to your phone
line, set Comfort for number of Rings to answer the call so that the other
answering machine answers first. This is done in Program menu 1,1.
Turn on Answering Machine Bypass in Program Menu 1,0 (Answering
Machine Bypass) and press 1 for On. If you want to access Comfort
remotely, let the phone ring once and hang up. Call again so that the
phone rings 10 to 25 seconds after you hang up. Comfort will answer the
call immediately to allow you to sign in and access the Voice Menu.
If I remotely arm to Away Mode, is Exit necessary?
No, Comfort knows that no one is in the premises, so it is not necessary
to open and close the door. The system will be armed after 6 seconds if
there are no open zones.
Telephone Line/ADSL Issues
Telephone Line Connections
Comfort can only be connected to one incoming telephone line. Comfort
must be connected to the incoming telephone line, before any other
telephones. Telephones must be connected to Comfort’s TEL OUT
connector. This is so that in the event of an alarm, Comfort can seize the
telephone line to dial to the programmed telephone numbers. If you
have a new telephone line or telephone extensions installed, make sure
that this rule is followed by the contractor who does the installation. If in
58
Page 68

Comfort II User Manual
doubt, refer to your Comfort installer. The connection diagram below
shows the correct and incorrect way to connect the telephone line and
telephones to Comfort.
Te lephone Line To phones
TEL I N TEL O UT
COMFORT
Te le p ho n e s
Te l e ph on es sh o ul d
NOT be con nect ed to
the incoming side of
Comfort
ADSL Connection
An ADSL modem on the same telephone line as Comfort should be
connected before Comfort on the TEL IN connection as shown in the
diagram below;
Te l e ph o ne Li n e
ADSL Mode m
A microfilter must be connected between the ADSL modem and Comfort.
Comfort is connected to the “Telephone” end of the microfilter. It will not
necessary to use microfilters for the other telephones in the house. The
telephones should be connected to Comfort TEL OUT, and NOT to the
ADSL modem. This will ensure that Comfort can still dial to the
programmed telephones in case of an alarm.
This is the correct way to connect telephones to Comfort
Microfilte r
To p ho n e s
TEL I N TEL O UT
COMFORT
Te le p ho ne s
59
Page 69
Comfort II User Manual
SECTION 12 USER VOICE MENU REFERENCE
User Voice Menu Flowchart
Default Sign-in Code *1234#
Welcome, Security Off
0 - Security Off (if armed)
1 - Ar m Security System
2 - Messages
3 - Security System Menu
4 - Home Control
5 - Voice Station
6 - Door Station (if installed)
7 - Volume
9 - Program Menu (User 1 only)
Arm Security System (1)
1 - Away Mode
2 - Night Mode
3 - Day Mode
4 - Vacation Mode
Saved Messag es (2,2)
Whil e a message is being played,
3 to Erase This Message
0 for 1st Message
1 for Next Message
2 to Previous Message
9 for Last Message
Answering M achine (2,6)
2 - Record User Name
3 - Hear User Name
4 - Record Greeting Message
5 - Hear Greeting Message
6 - Call Monitoring
7 - Phone Settings
8 - Erase Name
Phone Settings (2,6,7)
Select Phone 1 to 8
(enter phone 1 to 8 to assign
phone for the mailbox)
Me ssages (2)
1 - New Messages
2 - Saved Messages
3 - Erase Saved Messages
4 - Record Messages
5 - Reminder Messages
6 - Answering Machine
Reminder Me ssages (2,5)
Enter Remi nder Messa ge & # key
0 - OFF
1 - ON
2 - Change Time
3 - Day of Week
4 - Message
5 - Assign User to reminder
Home Control (4)
Press 1 for (Appliance A)
2 for .(Appliance B)
3 for (Appliance C)
Sec uri ty Me nu (3 )
0 - Change Sign-in Code
2 - Alarm History
3 - Event Log
4 - Test Menu
5 - Bypass Zone
6 - Siren Off
Test Menu (3,4)
1 - Battery Check
2 - Security Check
3 - Dial Test
4 - Siren Test
5 - Strobe Test
Volume (7)
Enter 0 to 100
Default is 50
60
Page 70
Comfort II User Manual
After you enter *, then your PIN code and # key, you will hear the User
menu:
Welcome, Security off (you have N new messages)
Press 1 to Arm Security System
2 for Messages
3 for Security System Menu
4 for Home Control
5 for Voice Station
6 for Door Station (if installed)
7 for Volume
Press # to End
If there are messages in your mailbox, Comfort will say
You have N new messages
and will play the messages now. If you have no new messages, Comfort
will skip this part and go on to the main voice menu.
Arm Security System (1)
Press 1 for Away Mode
2 for Night Mode
3 for Day Mode
4 for Vacation Mode
Press # to End
Enter the number to select the required mode.
Press 1 to arm to Away Mode when everyone will be away from the
premises.
Press 2 to arm to Night Mode when the family goes to bed. Certain
interior zones may be disabled to allow people to move within certain
areas.
Press 3 to arm to Day Mode to protect only the perimeters, i.e. doors and
windows, leaving all interior zones unprotected.
Press 4 to arm to Vacation Mode. If Vacation Programs have been
programmed by the installer, lights and appliances may be programmed
to switch on and off at random times to give the impression the
premises are occupied.
61
Page 71
Messages (2)
Press 1 for New Messages (if any)
2 for Saved Messages
3 to Erase Saved Messages
4 to Record Messages
5 for Reminder Messages
6 for Answering Machine
New Messages (2,1)
New Messages in your personal mailbox will be played. Comfort knows
that the messages are meant for you because of your unique sign-in
code. Once the new messages are played to you, they become "saved"
messages, which you can retrieve at any time, until you erase them.
While the message is playing, press 1 to go to the next message.
Saved Messages (2,2)
Your saved messages are played. They will remain in your mailbox until
you erase them. The mailboxes have a combined time limit of about 10
minutes for recorded messages. Press 1 to go to the next message, 2
for previous message, 3 to erase the message being played, 0 for 1st
message, and 9 for the last message.
If you press any key on the telephone while a message is being played,
Comfort will give this menu:
Comfort II User Manual
Press 3 to Erase this message
1 for next
2 for previous
0 for 1st
9 for last
When the answering machine memory is full, and a new message comes
in, the oldest saved message is erased automatically.
Erase Saved Messages (2,3)
All saved messages in your mailbox are erased. It is usually not
necessary to do this as the oldest saved message is automatically erased
when a new message comes in when Comfort’s memory is full.
62
Page 72

Record Messages (2,4)
You may record messages for other users using your home telephone. If
there is more than 1 user, Comfort will ask who the message is for;
Press 1 for (mailbox-name1)
2 for (mailbox-name2)
3 for ....
4 for ..
Press the number corresponding to the person to whom you want to
leave a message. You can then leave the message after the beep tone.
Reminder Messages (2,5)
The voice menu says:
Enter Reminder number and # key
Enter 1 to 8 # to select a Reminder message. If the Reminder message
has been programmed, the message and time settings are played, e.g.
Reminder Message (1-8), ON (or OFF)
9:30 PM,
Monday, Tuesday, Wednesday, Thursday
(Mailbox)
"Time to watch the News" (recorded message)
Press 1 for ON
0 for OFF
2 to Change Time
3 for Day of Week
4 for Message
5 for User Number
Comfort II User Manual
Reminder On (2,5,1) or Off (2,5,0)
Press 0 to turn off the reminder message without affecting the
programmed time, days of week , mailbox, or the recorded message.
Press 1 to turn it on. You can turn off a reminder message when you
know you will not need it temporarily, e.g. when you have guests.
Change Reminder Time (2,5,2)
9:30 PM, Change Hours, 21
Enter new number and # key
Enter the new hours in 24 hour format followed by the # key, or just #
to leave the value unchanged. The voice menu says
63
Page 73
Comfort II User Manual
Change minutes, 30
Enter new number and # key
Enter the new minutes followed by the # key, or just # to leave the
value unchanged.
The menu will say the new Reminder time, e.g.
10:30 PM
Reminder Day of Week (2,5,3)
Select day of week
1 for Monday
2 for Tuesday
3 for Wednesday
4 for Thursday
5 for Friday
6 for Saturday
7 for Sunday
8 for Holiday
This menu selects the days of week for which the Reminder message is
active. You may select any combination of days of week and holiday.
Press 1 to 8 to select the day of week. If you press 1, the Voice menu
says
Monday, OFF
Press 1 for ON, 0 for OFF
Press 1 to activate the Reminder message for the selected day, and 0 to
turn it off for that day. Do the same for all the days of week. The
holidays are defined in the Holidays menu.
Reminder Message (2,5,4)
Comfort plays the current reminder message, if any and says
Press 1 to Record Reminder Message
2 to Hear Reminder Message
3 to Erase this (Reminder) Message
A reminder message must be recorded for the Reminder to be activated
at the programmed times.
Record Reminder Message (2,5,4,1)
Leave your message after the tone ... beep
64
Page 74
Comfort II User Manual
Record your reminder message now. Press any key to end the message.
Hear Reminder Message (2,5,4,2)
Comfort plays back the current message or the one you have just
recorded.
Erase Reminder Message (2,5,4,3)
Erases the recorded reminder message. If no message is recorded, the
Reminder message will not be activated at the programmed times.
User Number (2,5,5)
Each Reminder may be assigned to a mailbox to be delivered to a specific
person instead of a general reminder for anyone. Furthermore, if the
Mailbox is assigned to one of the programmed phones 1 to 8 (using
Menu 2,6,7) , the Reminder message is forwarded to the programmed
phone. This means that you can be reminded of any appointment
wherever you are, with a cellular phone.
No User
Press 0 for No User
1 for (Mailbox 1 name)
2 for (Mailbox 2 name)
Press 0 for No user or any of the keys (without #) to select one of the
programmed mailboxes to assign this Reminder. If No user is selected,
the reminder message will not be for any particular user, and will ring
the Keypad at the programmed time.
Answering Machine (2,6)
Press 2 to record User name
3 to hear User name
4 to record Greeting Message
5 to Hear Greeting Message
6 for Call Monitoring
7 for Phone Settings
8 to Erase Name
Record User Name (2,6,2)
Use this menu to record your name for your mailbox. The name is used
by Comfort in the Call Answering Menu to let the caller select the person
for whom the message is meant.
The menu says
65
Page 75
Comfort II User Manual
Say Your Name After the Tone ... (beep)
Say the name by which callers will identify you to leave a message, and
press any key to end. If a mailbox name is recorded, this is heard by
incoming callers when they want to leave messages, e.g.
Press 1 for John
2 for Paul
3 for ...
If a mailbox has no name recorded, the caller will not be prompted to
leave a message, but messages can be recorded in the mailbox if the
caller knows the user/mailbox number. Only callers who know the
mailbox numbers will know which to select.
While recording, use the telephone handset instead of handsfree
mode or Keypad for best results. Also, for a better recording
quality, do not use a cordless phone.
Hear User Name (2,6,3)
Comfort plays back the current name.
Record Greeting Message (2,6,4)
You may record a greeting message for your callers using this menu.
Only one greeting message is kept, so if you record a greeting message,
it will be recorded over any existing greeting message.
The menu says
Leave Your Message After the Tone... (Beep)
Record the message and press any key to end.
You can also record the Greeting message in Program Menu (1,3).
However, the User Menu has no Erase Greeting Message selection. This
must be done in Program Menu (1,5).
While recording, use the handset on a corded phone instead of
handsfree mode for best results. For better recording quality,
do not use a cordless phone.
Hear Greeting Message (2,6,5)
Use this menu to hear the current greeting message, or the one you
have just recorded. You can also hear the Greeting Message in Program
Menu 1,4.
Call Monitoring (2,6,6)
66
Page 76

Comfort II User Manual
Call Monitoring Option Off
Press 1 for ON
0 for OFF
This menu selects Call Screening of recorded messages. If turned on, the
recorded messages are heard on the Keypad.
You can answer the call and stop recording by picking up your home
phone.
Phone Settings (2,6,7)
This assigns one of the 8 phones to the mailbox so that Comfort will call
the selected phone whenever a new message is received.
Phone Setting 0 (or current phone setting)
Select Phone
Press 0 or 1 to 8 to select the phone. If 0 is selected, no phone is
assigned, and Comfort will not call any phone number when new
messages are received. Select 1 to 8 for the phone assignment. Phone
settings 1 to 8 are assigned to Voice Phone, Pager or Alarm Voice
Message in the Program Menu (4). When assigned to a pager, the Alarm
Type 29 will be displayed on the pager. You can call back to retrieve the
new message. When assigned to a Voice Phone, the new message is
played when the mailbox owner signs in.
Erase Name (2,6,8)
This erases the name for this mailbox, so that callers will not be
prompted to leave messages in this mailbox. However, if those who
know can still select the mailbox number to leave a message even
though the name was not in the list. The mailboxes without names can
be used to arm and disarm (depending on each user’s authorization),
and to access the Voice menu as normal. Memo messages for this
mailbox can be recorded in the Record Messages Menu (2,4).
67
Page 77
Comfort II User Manual
Security System Menu (3)
Press 0 to Change Sign-in Code
2 for Alarm History
3 for Event Log
4 for Test Mode
5 to Bypass Zone
6 for Siren Off
Change Sign-in code (3,0)
Enter new code and # key
The system will not allow a sign-in code which is the same as another
existing sign-in code or a sign-in code +/- 2 which is a duress code
A 4-digit to 6-digit number may be entered. When the new number is
entered, the system will ask for confirmation
To confirm, Enter New Code and # key
If the number corresponds with the 1st number entered, the voice menu
will say
Sign-in Code OK
If the second code entered is not the same as the first number, the first
number will be discarded, and the new number will be saved for
comparison. The system will ask for a sign-in code until 2 consecutive
entries match.
Alarm History (3,2)
Comfort is able to tell the day of week and time of events leading to an
alarm condition. including arm and disarm events. For example,
Wednesday 11 PM, Night mode
Thursday 2:45 am, Kitchen Window
Thursday 2:46, Kitchen Movement
Thursday 2:47, Back Door
The first 20 events are saved in Alarm History. After the system is
disarmed to Security off, the Alarm History events are still available.
Comfort keeps the Alarm History events until the system is rearmed to
68
Page 78
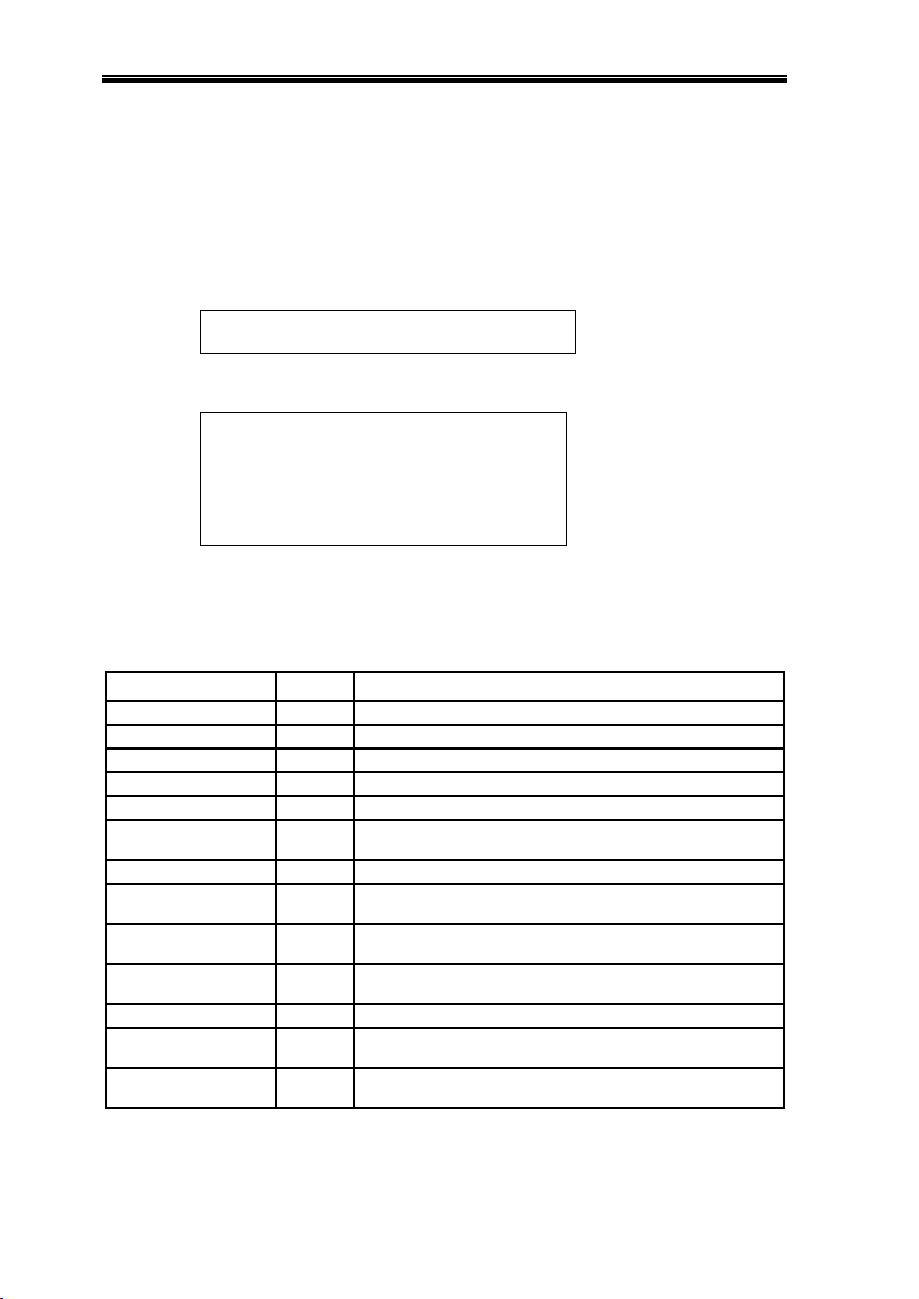
Comfort II User Manual
Away, Night, Day or Vacation mode. The Alarm History is played
automatically after signing in during an alarm.
Event Log (3,3)
Comfort keeps a record of the last 250 events (125 for FS17) related to
security functions e.g. arming, disarming, sign-ins, alarms. It keeps the
Date and Time of each event for easy traceability.
The Event Log will be announced over the phone in the format
(Date), (Time), (event)
January 24, 11:53 PM Intruder Alarm
If any key other than 1,2,3,4,9,0 is pressed, the voice menu will say
Press 1 for next
2 for previous
3 for Next Day
4 for Previous Day
0 for 1st
9 for last
Pressing 1,2,3,4,9, or 0 during the event log announcement will
immediately interrupt the announcement and go to the specified event.
In this way, you can go quickly to the event of interest
The events which are reported in the Event Log are:
Zone ‘Name’ Bypass
Failure
Failure
Failure
Bypass Off
33 Restore33 Communications
49 Restore49 Communications
65 Restore65 Communications
Restore33,49,65 Tamper Alarm
N/ADial Failure
DescriptionRestoralVoice Event
Alarm activation aborted within the ‘Abort Time’.N/AAlarm Erased
Dial-out acknowledged by recipient pressing # key.N/AAlarm Message OK
System failed to arm, returned to Security Off Mode.N/AArm Failure
System armed to Away Mode - Full SetN/AAway Mode
The battery was tested with AC ‘OFF’ and found to be lowRestoreBattery Warning
A zone was bypassedZone No.
Date or Time ChangedN/AChange Time
Slave Expansion Module 1-3 Data Failure. Prefix denotes
iD.Address 33=SEM 1, 34= SEM 2, 35= SEM 3
Door Station 1-3 Data Failure. Prefix denotes ID. 49=Door Station 1,
50=Door Station 2, 51=Door Station 3, 52=Door Station 4
Keypad 1-8 data failure. Prefix denotes ID 65=Keypad 1,
66=Keypad 2, 67=Keypad 3, 68=Keypad 4
The system is armed to Day ModeN/ADay Mode
SEM, Door Station or Keypad tamper, 33-35=SEM 1-3, 49-51=Door
Station 1-3 and 65-72=Keyad1-8
Dial-out to Monitoring Station failed (Busy, no answer, no
acknowledgment, no kissoff)
69
Page 79

Call Sign-In
(UK Only)
Sign-In
Comfort II User Manual
DescriptionRestoralVoice Event
System dial-test selected.N/ADial Test
Doorbell pressed while system is armed to Away ModeN/ADoorbell
N/ADuress Alarm
N/AEngineer Reset
RestoreSiren Tamper
RestoreSign-In Tamper
RestoreTamper Alarm
Duress Code entered by user adding or subtracting ‘2’ from their
code, it will be preceded by: (time ) user sign-in code OK.
System dialed engineer via a response linked to a function keyN/AEngineer Menu Phone
A valid user code was not entered within the entry timer duration. N/AEntry Alarm
The Engineer has reset the system following Alarm Activation, using
* on Engineer Menu
The Engineer has entered the system using the Eng code.N/AEngineer Menu
During Exit, the # key was pressed to force arm the system.N/AForce Arm
Fire Alarm Activation followed by Zone number.RestoreFire Alarm & Zone
System armed using the one-touch key or a key switchN/AKey Arm
Intruder Alarm Activation followed by Zone number.N/AIntruder Alarm & Zone
Valid user code 1-16 entered using local phone or Keypad.N/A(Name) Sign-In Code Ok
Valid user code 1-16 entered remotely using external phone.N/A(Name) Phone Call
Kissoff from Monitoring Station receivedN/AMonitoring Station OK
System Armed to Night Mode - Part Set.N/ANight Mode
Panic Alarm Activation followed by Zone number.RestorePanic Alarm & Zone
Successful dialout to pager with correct acknowledgmentN/APager Dial OK
Perimeter Alarm Activation followed by Zone number.N/APerimeter Alarm, Zone
Telephone line cutRestorePhone Trouble
System attempted to dial telephone number 1-8.N/APhone Number 1-8
Mains Power RemovedRestorePower Failure
The system is disarmed and unset.N/ASecurity Off
System Armed.N/ASystem Armed
Monitored Siren output (SRN-,SRN+) has a broken wire or ground
fault.
System reset using Reset Button, Engineer Menu or Comfigurator.N/ASystem Reset
More than six unsuccessful attempts to sign-in at the Keypad while
the system is armed.
Panel (JP5), Bell tamper, Keypad, Door Stations or Zone with
24-hour tamper zone type.
Zone with alert zone type activatedN/AZone Alert & Zone
Zone tampered with followed by Zone number .RestoreZone Trouble
70
Page 80

Comfort II User Manual
Test (3,4)
Press 1 for Battery Check
2 for Security Check
3 for Dial Test
4 for Siren
5 for Strobe
Battery Test (3,4,1)
Immediately activates a battery test by switching off the AC supply, and
letting the backup battery supply power to the system for 2 minutes
(default). If at any time during this test, a low battery condition is
detected, the AC power will be turned on and a battery test fail report
will be sent to the Monitoring Station (if a monitoring station is
programmed), or to any designated phone number in the Low Battery
Alarm Type.
This test also starts an automatic battery test at regular intervals. The
interval is programmed by your installer.
Security Check (3,4,2)
The system does a Security Check similar to the one which is activated
when the system is armed, except that any activated detector is
announced once, until # is pressed to end this test mode. Any activated
detector, even 24 hour zones will not activate an alarm during the
duration of this test. This allows a walk test to be done on the premises.
When the Security Check is started, all zones which are already ON will
be announced first. If a zone is in trouble condition, i.e. open or short
circuit with double EOL resistors, the Zone Number will be announced,
e.g. “Zone 4 Trouble”.
While in Security Check, if a zone does not announce when
activated, exit from Security Check by pressing #, and then
restart Security Check to hear if the zone is announced. If it is,
that means the zone is always open.
Dial Test (3,4,3)
When this menu is selected, the Voice Menu says..
Dial Test, Please hang up
After you hang up the phone, Comfort will immediately dial out to all the
programmed phones, pagers and monitoring stations. It will not seize the
telephone line immediately as this is an Idle state alarm. On pagers, the
Dial Test alarm type is displayed. On voice phones, "Dial Test" is
announced when the phone is answered. For Monitoring Station
receivers, the Test report code is sent.
71
Page 81
Comfort II User Manual
For Phone 1 and 2, any Voice Phone Sign-in or Central Monitoring Station
kissoff will stop the dial test to this group. For Phones 3 to 8, any Voice
Phone signin will stop the dial test to this group of phone numbers.
To stop the dial test while it is in progress, sign in and press 0
for Security off.
Siren Test (3,4,4)
Selecting this option activates a short Siren test. Ensure that you can
hear the external siren and internal speaker if installed.
Strobe Test (3,4,5)
Strobe
Press 1 for ON, 0 for OFF
Press 1 to activate the strobe light, and 0 to switch it off after the test.
Bypass Zone (3,5)
Enter Zone Number and # key
After the zone number is entered, the voice menu announces the zone
name (e.g.)
Kitchen Window Bypass Off
Press 1 for On, 0 for Off
Press 1 to bypass and 0 to unbypass.
When the system is disarmed (Security Off), all bypassed zones
are automatically unbypassed.
Siren Off (3,6)
If an alarm has occurred, you may turn off the siren without disarming
the security system. Any new violation of a protected zone will turn on
the siren again.
72
Page 82

Home Control (4)
In this menu, all the appliances controlled by the system will be
announced.
Depending on the system provided by the installer, the Home Control
Menu may be split up into a maximum of 3 groups of appliances. E.g.
Lights, Air-conditioning, heating etc. The Menu will be like this:
Press 0 for Lights
1 for Air conditioner
2 for Appliances
Pressing 0 (for Lights will then bring you to the next level where you can
select the device or appliance, e.g.
Press 1 for Living Room Lights
2 for Garden Lights
3 for Bedroom Lights
4 for Stair Lights
Select the appliance or function given by the menu (say 2), and the voice
menu allow you to select the action desired:
Comfort II User Manual
Bedroom Lights
Press 0 for Off, 1 for On,
Press # for previous menu
Just press the key to select the desired function.
If there are fewer than 10 appliances to control, the appliances may not
be organized into groups; instead they may all come under a single
Home control menu, e.g.
Press 1 for Living Room Lights
2 for Gate
3 for Hi-Fi
4 for airconditioner
5 for Garden Lights
6 for Bedroom Lights
7 for Heating
The Home Control menu is programmed by the installer according to
your specific requirements.
73
Page 83
Voice Station (5)
You can activate the Voice Station for 2-way voice function (i.e. listen
and talk) either from a local or remote phone or from a keypad.
Using the telephone you can talk or listen to sounds in the vicinity to
determine if there is any real intrusion, or in the case of medical
emergency. This is a two way full duplex intercom mode.
If there are more than 1 keypad on the premises, you will be asked to
select one of them to intercom.
Select Station 1 to (maximum)
At any time during the Voice Station Mode, you may press the Keypad
number (1 to 4) to select another Keypad (except the one you are
using!).
Press # to end the Voice Station mode, and return to the previous menu.
Using the keypad, the action of the Voice Station menu is different - it
is puts the keypad into a listening mode so that ot can be used as a
baby monitor. Select the other keypad number to listen to. This turns
on the microphone on the other keypad so sounds on the keypad can be
heard on the first keypad. The MIC red LED on the other keypad will be
turned on. The system will remain in intercom mode until the F key is
pressed on either keypad or an announcement like “Doorbell” is
reqquired, or an alarm occurs which terminates the intercom. This
monitor mode is one way only, the originating keypad is unable to talk to
the other keypad.
Comfort II User Manual
Door Station (6)
If the Door Station is installed, you can access the Door Station even
when no one has pressed the doorbell, by pressing 6 for Door Station
from the Main Menu. If there is only one Door Station installed, you will
hear the Door Station
Press 0 for Door Station
(4 to Open Gate)
(7 to Open Door)
Press # to end
Press 0 will allow you to talk to the visitor on the Door Station. You may
even open the door if you have an electric strike installed.
If your system has been configured to allow you to open the door or
gate, the menu “4 to open Gate” and/or “7 to open Door “ will be heard.
74
Page 84
Comfort II User Manual
If you have more than 1 Door Station installed (Comfort accepts up to 3)
the menu will prompt you:
Select Station 1 to 2 (or 3)
Press 1, 2 or 3 to select the Door Station by number. You will then be
connected to the selected Door Station. You can then press 1,2 or 3 to
select another Door station and press 4 and/or 7 to open the door(s).
If someone presses the Door Station button in Security Off or Night Mode
(when people are at home), all the phones connected to Comfort will
ring. You can pick up the phone to talk to the visitor. If there is only 1
Door Station, the menu will be
Press 0 for Door Station
(4 to Open Door)
(7 to Open Door)
Press # to end
If there is more than 1 Door Station you will be asked to select the Door
Station as above.
Use the telephone instead of the keypad to talk to the Door Station
whenever possible. This is because with the phone, you can talk to the
visitor in duplex mode. With the keypad, conversation is in simplex
mode, i.e. only one party can talk at one time. You have to press 1 in
order to switch the direction of the conversation. The MIC LED indicates
whether the keypad or Door Station is in talk mode.
If Comfort is armed to Away or Vacation Mode when the doorbell button
is pressed, the home phones will not ring. Comfort makes a call to the
programmed phone number, which may be a cellular phone. You can
then talk to the visitor from your phone. Your visitor (or burglar scouting
the premises) would not know that nobody is at home.
Volume (7)
The menu 7 for Volume allows setting the volume of the voice menu,
announcements and messages on each keypad, but does not affect the
volume of the Intercom between phone and keypads or Keypad to Door
station.
The default value is 50. Enter a new number between 0 to 100. The
volume of the voice menu changes immediately. The volume setting is
applied to the keypad being used. Each keypad has its own independent
volume that can be adjusted in this way.
50, Enter new number 0 to 100 and # key
75
Page 85

Comfort II User Manual
Try to avoid using the rotary volume control for controlling the volume.
Leave the rotary volume control at around 1/3 of the maximum level
and use the Volume setting on the keypad to achieve an acceptable
volume so that the intercom volume is not affected.
This menu is only heard on the keypad user menu, and not when you
access the user menu from a remote or local phone, as it is used for
setting the volume at the keypad being used.
The Function key F* is a shortcut to the keypad volume menu, but this
depends on how the system is configured by the installer
76
Page 86
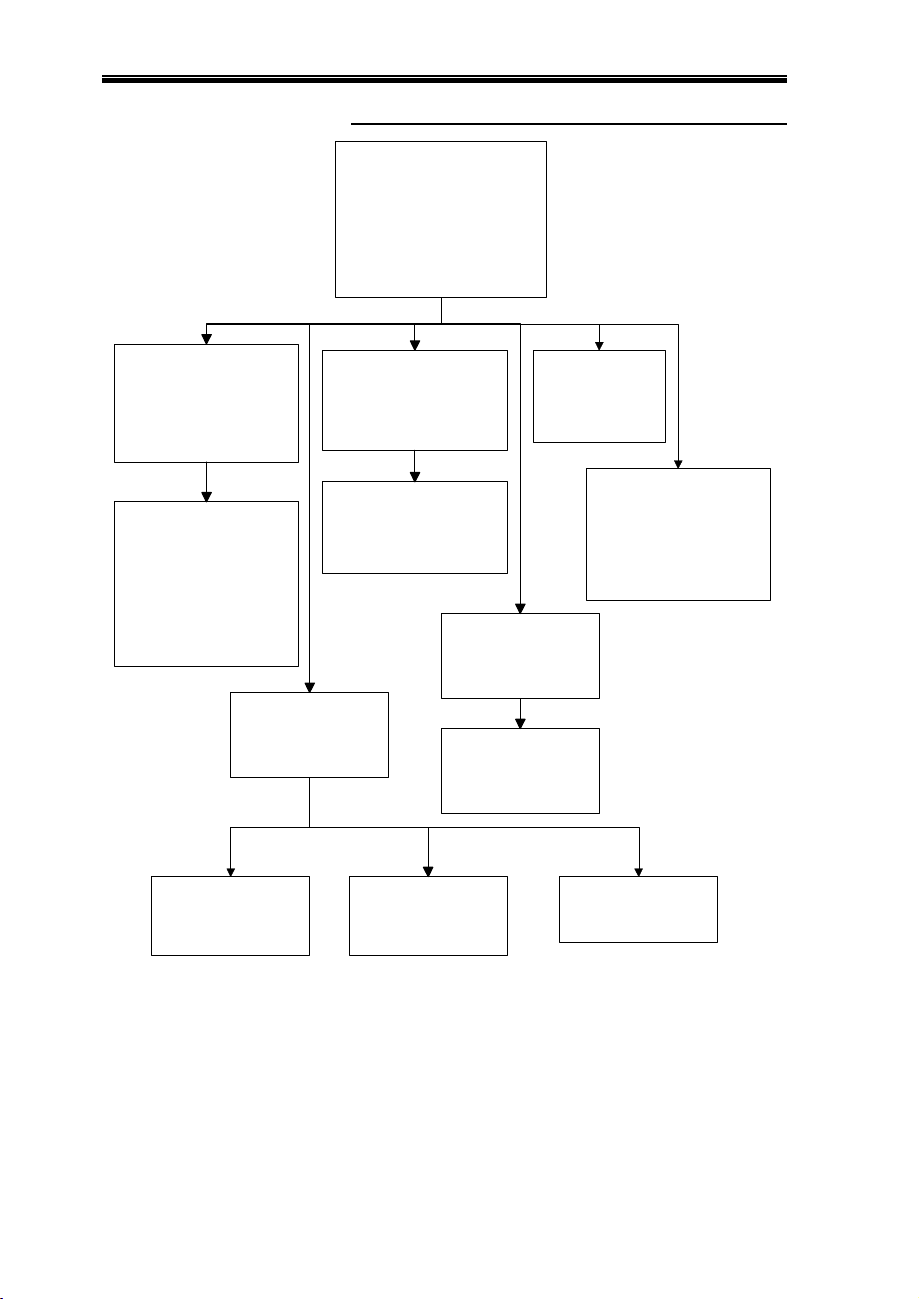
Comfort II User Manual
SECTION 13 PROGRAM MENU REFERENCE
Program Menu (user Menu 9)
1- Answering Machine
2 - Date and Time
3 - Security
4 - Change Phone Numbers
5 - User Code
6 - Time Program
Answering Machine (1)
0 - Answ Machine Bypass
1 - Number of Rings
2 - Record Time
3 - Record Greeting Message
4 - Hear Greeting Message
5 - Erase Greeting Message
Number of Rings (1,1)
0 - Home Mode
1 - Away Mode
2 - Night Mode
3 - Day Mode
Record Time (1,2)
"Enter new number & # key"
Date and Time (2)
1 - Change Date
2 - Change Time
3 - Change Holiday
Change Date (2,1)
Enter Year NN
Enter Month 1 to 12
Enter Day 1 to 30
Security Settings (3)
1- Voice Report
3 - Pager Code
4 - Engineer Sign-in Option
5 - Alarm Message
Alarm Message (3,5)
1 - Record Alarm Message
2 - Hear Alarm Message
3 - Erase Alarm Message
Change
Phone Numbers (4)
Select Phone
Press 0 for No phone
1 for Voice phone
2 for Pager
4 for Monitoring Station
Change Time (2,2)
Enter Hours (0-23)
Enter Minutes (0-59)
User Code (5)
0 - Delete Mailboxes
1 - Add User
2 - Erase User
Time Program (6)
Enter Time Program & # key
0 - Time Program OFF
1 - Time Program ON
2 - Change Time
3 - Day of Week
4 - Response
Change Holiday (2,3)
Enter Holiday and #key
77
Page 87

Comfort II User Manual
Only the Master code , i.e. user 1 can go into the Program Menu. From
the User Menu, press 9 .
Program Mode
Press 1 for Answering Machine
2 for Date and Time
3 for Security
4 to Change Phone Numbers
5 for User Code
6 for Time Program
Answering Machine Settings (1)
Press 0 for Answering Machine Bypass
1 for Number of Rings
2 for Record Time
3 to Record Greeting Message
4 to Hear Greeting Message
5 to Erase Greeting Message
Answering Machine Bypass (0)
Answering Machine Bypass (OFF or ON)
Press 0 for Off, 1 for On
Answering Machine Bypass is a feature that allows external answering
machines and Fax machines connected to the telephone line to be
bypassed so as to allow users to access Comfort from an outside
telephone. When the Answering Machine Bypass option is turned on, call
home and hear the telephone ring once, then put down the phone
immediately. Call again within 10 to 25 seconds, and Comfort will answer
immediately. If a Greeting message is recorded, it will be played,
otherwise, “please sign in” will be heard. Program the external answering
machine and/or fax to answer before Comfort. You can use this method
to access Comfort, bypassing the answer machine/fax.
Number of Rings (1,1)
Press 0 for Security off
1 for Away Mode
2 for Night Mode
3 for Day Mode
78
Page 88

In this menu, the number of rings after which the system will answer the
call is specified, for each security mode. For double-ring cadences, each
double-ring is normally counted as one ring, unless the interval between
each double-ring is too long (more than around 0.6 seconds), in which
case the double-ring is counted as 2 rings.
When 0 to 3 is pressed to select the security mode, the voice menu says
(e.g.)
4 rings, enter new number and # key
Enter the new ring count and #, or just # to leave the number
unchanged.
Record Time (1,2)
This menu allows you to set the recording time limit for all the message
types; Greeting Message, User name, Incoming Messages, and Reminder
messages. Setting a time limits prevents long messages from using up
Comforts recording message limit of 10 minutes. Comfort will say the
current setting e.g.
60 seconds, enter new number and # key
Enter the new time limit in seconds or just # to leave the value
unchanged. The time limit set is common to all messages.
If the recorded message is shorter than the allocated time limit, only the
time taken by the actual message will be used up, and not the full time
allocated for the message.
Comfort II User Manual
Record Greeting Message (1,3)
You may record a greeting message for your callers using this menu.
Only one greeting message is kept, so if you record a greeting message,
it will be recorded over any existing greeting message. This menu is also
available in the User Menu (2 - Messages, 6 -Answering Machine, 4 Record Greeting Message).
If no Greeting Message is recorded and no mailboxes are set up,
the Answering machine will not record messages. The system
will answer calls by saying "Please Sign In".
Hear Greeting Message (1,4)
Use this menu to hear the current greeting message, or the one you
have just recorded. This menu is also available in the User Menu (2,
Messages ..6, Answering Machine.. 5, Hear Greeting Message).
79
Page 89
Comfort II User Manual
Erase Greeting Message (1,5)
Use this menu to erase the recorded Greeting Message. This is done to
disable the Answering Machine. If there is no Greeting Message and no
recorded user names, Comfort will answer calls with “Please Sign In”
Change Date and Time (2)
3:34 PM, 1998 February 1, Sunday (e.g.)
Press 1 to Change Date
2 to Change Time
3 for Holiday
Change Date (2,1)
The Voice Menu will prompt you to enter the year, and then the month,
and the day. Comfort is Year 2000 Compliant, and will work correctly for
dates until Year 9999.
Change year, 1997
Enter new number and # key
Enter the year either as 2 digits e.g. 97, or in 4 digits if the century is
changed, e.g. 2001, and press the # key . The voice menu repeats your
entry, and says the month, e.g.
Change Month, April
Enter new number and # key
Enter the month, 1 to 12 and the # key. Comfort says the month
entered, January to December, and gives the day, i.e.
Change Day, 26
Enter new number and # key
Enter the day 1 to 31 and the # key. Comfort tells the full date entered,
e.g.
1996, October 10, Thursday
Change Time (2,2)
Comfort will prompt you to enter the time in the same way as described
above, e.g.
80
Page 90
Enter the new hours in 24 hour format 0 to 24 and the # key. Comfort
y
repeats the number entered, and asks for the minutes, e.g.
Enter the new minutes, 0 to 59 and the # key. Comfort says the time
entered,
and goes back to the Change Date and Time menu.
Holiday (2,3)
Up to 24 Holidays may be specified. For each holiday, the month and day
are programmed. These holidays are used in Time Programs and
Reminder Messages, where the Time program or Reminder Message can
be programmed to be activated for any combination of days of week and
public holidays.
When the Holiday number (1 to 24) is entered, the voice menu says e.g.
Comfort II User Manual
Change Hours, 13
Enter new number and # key
Change Minutes, 25
Enter new number and # ke
1:25 P.M.
Enter Holiday Number and # key
Change Month, January
Enter new number and # key
Enter the new month (1 to 12) and # key, or just # to leave the month
unchanged. The voice menu will say the new month e.g.
March
Change Day, 1, enter new number and # key
Enter the new day (1 to 31) and # key, or just # to leave the day
unchanged. The system will not allow the entry of an invalid day e.g.
April 31 or Feb. 29 for non-leap years.
81
Page 91
Security Settings (3)
1 for Voice Report
3 for Pager Code
4 for Engineer Sign-in Option
5 for Alarm Message
Voice Report (3,1)
Voice Report
Press 0 for OFF, 1 for ON
This allows the keypad to enable or disable announcements, for example,
“Security Off”, “Away Mode” , “Night Mode”, “Front Door” reminder and
door chimes. By default, announcements are enabled for all keypads. For
bedrooms and especially baby’s rooms these announcements are not
desirable. Announcements can be disabled at any particular keypad by
setting Voice Report OFF. This operation only affects the keypad
which is being programmed. Hence you need to repeat the operation
at all the keypads where announcements are to be disabled.
When Voice Reports are disabled at a keypad, this keypad will not be
able to hear another keypad talking in intercom mode. However, you can
talk to a keypad with announcements disabled by selecting the keypad,
i.e. pressing F8 followed by the keypad number.
Comfort II User Manual
Pager Code (3,3)
Pager Code 1234
Enter new number and # key
The pager code is the 4-digit identification code which is displayed on the
pager before the alarm type and zone/user number. Enter the new 4
digit pager code and #, or just # to leave the code unchanged. If you
have Comfort installed in your home and office, for example, this code
identifies which system generated the page.
Engineer Sign-in Option (3,4)
This menu determines whether the Engineer Code can be used to sign-in
to gain access to the Engineer Menu. If you set this option Off, the
Engineer code will not be able to gain access to the system. The
Engineer Sign-in Option is disabled automatically whenever the system is
armed and at midnight each day as a safety precaution. Your installer
may ask you to enable the Engineer Sign-in to allow remote access to
your system to check or diagnose the system. Keypad Function 0 may
also be programmed to enable Engineer Code.
82
Page 92
Engineer Sign-in Option Off (or N)
Press 1 for on, 0 for off
Alarm Message (3,5)
Press 1 to Record Alarm Message
2 to Hear Alarm Message
3 to Erase this (Alarm) message
The Alarm Message is the recorded message which is played during a
dialout to the Alarm Message Phone Type. When the call is answered, the
Alarm Type and the Alarm message is heard. Press 3 to erase the Alarm
Message.
(Alarm Type e.g. "Intruder Alarm", "Fire Alarm", "New Message")
(Recorded Alarm Message e.g.. "Alarm at 102 Philip St., Please
contact Mr. Lee at 2351234”)
Press 1 to Repeat this Message
Press # to end
Siren Off (3,6)
This turns off the siren without disarming the Security System. Any new
trigger from a sensor will reactivate the alarm
Comfort II User Manual
Change Phone Numbers (4)
Select Phone
Enter 1 to 8 to select the phone index.
The voice menu says the current setting of the selected phone index,
e.g.
Pager 92117893
Press 0 for No Phone
1 for Voice Phone
2 for Pager
4 for Monitoring Station
If 1 (voice phone) or 2 (pager) is selected, the voice menu says
Voice Phone (or pager)
Enter new number and # key
83
Page 93

Comfort II User Manual
Enter the new number and #, or just # to leave the number unchanged.
If you make a mistake while entering the phone number, press * or the
AWAY key on the keypad to clear and start again.
To enter the * or # keys in a telephone number (which may be needed
for calling card access or phone unlocking), press the DAY key on the
keypad followed by the desired key.
For example, 1234 <DAY> # 5678 enters 1234#5678, whereas if
<DAY> was not used, the # would terminate the key entry. (Applicable
to firmware version 4.45 and above)
To enter a pause or delay within a phone number, press the NIGHT key
on the keypad followed the pause in seconds. For example, 1234
<NIGHT>35678 will insert a pause of 3 seconds during dialing between
the numbers 1234 and 5678. (Applicable to firmware version 4.45 and
above)
This sub-menu does not allow the Monitoring station type or number to
be changed.
Monitoring Station Phone Type may not be assigned or changed from this
menu. If positions 1 and 2 are not assigned to Monitoring stations, other
phone types may be assigned. Phone settings 3 to 8 may be freely
assigned to Voice Phone or Pager. Phone settings 1 and 2 form one
group for dialing out, while 3 to 8 form another group. In the first group,
a kissoff from a Monitoring Station or a valid sign-in from a Voice Phone
stops further dial outs to that group. In the second dial out group (3 to
8), a valid sign-in from a Voice phone stops further dial outs to other
phones in the group. Acknowledged dial outs to pagers do not stop dial
outs to other phones, but end dial outs only to that particular number.
The sequence of dial outs is from phone 1 to 8. If a dial out is not
acknowledged or if the called number is busy or does not answer, the
system dials to the next number in the list, and returns to the failed
number in the next cycle.
84
Page 94

User Code (5)
0 to Delete mailboxes
1 to Add User
2 to Erase User
Delete Mailboxes (5,0)
Delete Mailboxes, Press 1 to confirm
This erases all the user codes, names, reminders, greeting message and
messages. After you press 1 to confirm, you will hear "Mailboxes Erased"
after a few seconds. The User code will be reset to 1234.
Add User (5,1)
Comfort supports up to 16 users, each with their own user code. The
first 8 codes have mailboxes for messages, Users 9 to 16 do not have
mailboxes to leave messages, but may be allowed to arm and disarm
and access other functions according to their programmed authorization
level.
When you add a new user, Comfort finds the next available user number
(1 to 16), e.g.
Comfort II User Manual
New User... 2, Enter New code and # key
Enter a 4 to 6 digit code and #. Comfort asks for confirmation.
Enter the number again. If the number does not match the 1st number
entered, Comfort says "wrong code" and repeats
To confirm , enter new code and # key
Comfort takes the last code entered as the new code, and checks that
the next code entered matches this. Comfort checks for a match between
2 successive codes before accepting the new code. Comfort then says
Sign-in code OK
Repeat this for the other users to be added, up to a total of 16.
Each user should change his/her sign-in code in his own menu. Each
user can record a mailbox name in User Menu (2,6,2). Recording a User
name will cause the name to be included in the list if names for an
incoming caller to leave messages ,e.g. "Press 1 for Bill, 2 for Hillary,..."
If a user has no mailbox name, the caller can still leave a message in the
85
Page 95
mailbox by pressing the key corresponding to the mailbox number. In
this case, only callers who know the users mailbox number will leave
messages in the mailbox.
Erase User (5,2)
Press 1 for (user-name1)
2 for (user-name2)
3 for ...
......
Enter the number for the user to be deleted. The sign in code and
mailbox messages will be erased. This can be done when the mailbox
owner has forgotten his sign-in code. This menu will allow Users 1 to 9 to
be deleted. To delete Users 10 to 16, press the * key. The menu will say
Enter User Number and # key
This allows all users 1 to 16 to be deleted.
Time Programs (6)
Time Programs are used to activate programs (or Responses) at a certain
time on selected days of the week.
Comfort II User Manual
Enter Time Program Number and # key
Enter Time program number 1 to 16.
When a valid Time program is selected, the voice menu says (e.g.)
Time Program (1 to 16) ON (or OFF)
Monday, Tuesday, Wednesday, Thursday, Friday, Holiday
11:45 PM, Response 3
Press 1 for ON
0 for OFF
2 to Change Time
3 for Day of Week
4 for Response
Time Program ON (6,1) and OFF (6,0)
Each Time Program can be turned on or off without affecting the
programmed Times, Days of week and Response for that Time Program.
This makes it convenient for temporarily turning off a Time Program, for
example, when there are guests, to disable the auto-arming program in
the evening.
86
Page 96
Comfort II User Manual
Change Time (6,2)
Change hours, 12, enter new number and # key
Enter new activation time (0 to 24) in 24 hour format and #, or just # to
leave the value unchanged. For example, for 2 PM, enter 14#.
14
Change Minutes, 0, enter new number and # key
Enter new activation minutes and # key, or just # to leave the value
unchanged. The time just entered is the activation time for the Time
program, when the Time Program Response will be activated.
Day of Week (6,3)
Select Day of week
Press 1 for Monday
2 for Tuesday
..
8 for Holiday
Press 1 to 8 to select a day of week. Number 8 selects a Holiday, which
takes precedence over other days of the week, i.e. if a day is a Holiday
and a Monday, the Holiday setting will be in effect.
If 1 for Monday is pressed, the voice menu says (e.g.)
Monday, ON
Press 1 for on, 0 for off
Press 1 to select the day of week to be on, and 0 to select the day to be
off. This determines whether the selected Time Program will be activated
on that day of week.
The same procedure is repeated for each day of week
Use of Holiday in Time Programs
If a Time Program Day of week is ON for Holidays, it will be active on any
of the defined Holidays. The application for this is when things should
happen at a different time from normal days, for example when a shop
opens later or closes earlier.
Response (6,4)
e.g.
Response 1
87
Page 97

Comfort II User Manual
The Response number assigned to the Time program is announced. You
will not be able to change the Response. This is to protect Comfort from
being altered wrongly, which may possibly cause unpredictable behavior.
Only the installer with Engineer privileges is able to change the Time
program Response.
A value of 0 means that no response will be executed.
88
Page 98

Limited Warranty
Cytech Technology Pte Ltd.. provides a warranty for a period of 24
months from the date of purchase. This warranty covers defects in
materials and workmanship under conditions of normal use by the
original buyer only. In the case of any breach of such warranty, Cytech
Technology Pte Ltd. shall either repair or replace the defective equipment
upon return of the equipment to its repair center at the purchasers own
expense.
This warranty does not apply to damages incurred in shipping, handling
or other causes beyond the control of Cytech Technology Pte. Ltd.,
including but not limited to: alterations to the product, abuse, improper
application, lightning, physical damage, mechanical shock, excessive
voltage or extremes in temperature.
While the product is an advanced security and automation system, it
does not offer guaranteed protection against burglary, fire or other
emergency. Any Intruder alarm system is subject to failure or
compromise.
Despite frequent testing and due to but not limited to all or any of the
following; disruption in electrical supply or communications, criminal or
accidental tampering, it is possible for the system to fail to perform as
expected. Cytech Technology Pte Ltd. does not warrant that the product
or system may not be compromised, or that it will in all cases prevent
loss of property by Burglary, fire or otherwise, nor that it will in all cases
give adequate warning or protection. A properly installed and maintained
security system may only reduce risk of fire, burglary robbery or
otherwise, but it is not a guarantee that these will not occur.
The warranty does not apply to firmware errors or bugs which do not
have a serious or critical effect on the performance of the system.
Cytech Technology Pte Ltd. is not liable under any circumstances for any
damages, loss of anticipated revenue, loss of time or any other losses
resulting from the purchase, installation, use or failure of this product.
Comfort II User Manual
89
Page 99

Comfort II User Manual
Document History
3.0.8 - 5 Jan 2009
Changed KP04 and KP03 illustrations. Added MN-UM Part Number.
Removed Comfort Settings form section.
3.0.7 - 30 June 2008
Added New Menu 7 for volume for firmware 5.145. Show new design
Keypad icons. Added Baby Monitor mode
3.0.5 - 15 August 2007
Added EN50131 Compliance Statement in Important Notice
3.0.4 - 14 April 2007
Removed pager, more detail for SMS. Added forum FAQS. Section 8 Time
Programs added instruction to enable or disable Time program. Tables
for Time Programs increased to 32 and reminders increased to 16. Added
instruction to download latest version
3.0.3 - 10 November 2006
Replaced KP01/KP02 with KP03
Included warning about Firmware in Section 1 and Warranty Statement
3.0.2 - 1 July 2006
Changed to new Cytech/Comfort logos and Forums website
3.0.0 - 13 Jan 2005
Released Comfort II user manual
90
Page 100

Comfort II User Manual
.
web site: http://www.cytech.biz
Email: [email protected]
User Group: http://www.comfortforums.com
Document Title:Comfort User Manual
Part Number: MN-UM
Version: 3.0.8
Date Last Modified 5 Jan 2009
Copyright Cytech Technology Pte Ltd.
91
 Loading...