

Page 1

CY8CKIT-059
PSoC® 5LP Prototyping Kit Guide
Doc. #: 001-96498 Rev. *G
Cypress Semiconductor
198 Champion Court
San Jose, CA 95134-1709
www.cypress.com
Page 2

Copyrights
Copyrights
© Cypress Semiconductor Corporation, 2015-2018. This document is the property of Cypress Semiconductor Corporation
and its subsidiaries, including Spansion LLC (“Cypress”). This document, including any software or firmware included or referenced in this document (“Software”), is owned by Cypress under the intellectual property laws and treaties of the United
States and other countries worldwide. Cypress reserves all rights under such laws and treaties and does not, except as specifically stated in this paragraph, grant any license under its patents, copyrights, trademarks, or other intellectual property
rights. If the Software is not accompanied by a license agreement and you do not otherwise have a written agreement with
Cypress governing the use of the Software, then Cypress hereby grants you a personal, non-exclusive, nontransferable
license (without the right to sublicense) (1) under its copyright rights in the Software (a) for Software provided in source co de
form, to modify and reproduce the Software solely for use with Cypress hardware products, only internally within your organization, and (b) to distribute the Software in binary code form externally to end users (either directly or indirectly through resellers and distributors), solely for use on Cypress hardware product units, and (2) under those claims of Cypress's patents that
are infringed by the Software (as provided by Cypress, unmodified) to make, use, distribute, and import the Software solely
for use with Cypress hardware products. Any other use, reproduction, modification, translation, or compilation of the Software
is prohibited.
TO THE EXTENT PERMITTED BY APPLICABLE LAW, CYPRESS MAKES NO WARRANTY OF ANY KIND, EXPRESS OR
IMPLIED, WITH REGARD TO THIS DOCUMENT OR ANY SOFTWARE OR ACCOMPANYING HARDWARE, INCLUDING,
BUT NOT LIMITED TO, THE IMPLIED WARRANTIES OF MERCHANTABILITY AND FITNESS FOR A PARTICULAR PURPOSE. No computing device can be absolutely secure. Therefor e, despite security measures implemented in Cypress hardware or software products, Cypress does not assume any liability arising out of any security breach, such as unautho rized
access to or use of a Cypress product. In addition, the products described in these materials may contain design defects or
errors known as errata which may cause the product to deviate from published specifications. To the extent permitted by
applicable law, Cypress reserves the right to make changes to this document without further notice. Cypress does not
assume any liability arising out of the application or use of any product o r ci rcuit de scri bed i n this document. An y info rma tion
provided in this document, including any sample design information or programming code, is provide d on ly for reference purposes. It is the responsibility of the user of this document to properly design, program, and test the functionality and safety of
any application made of this information and any resulting pr oduct. Cypress products are not designed, intended, or authorized for use as critical components in systems designed or intended for the operation of weapons, weapons systems, nuclear
installations, life-support devices or systems, other medical devices or systems (including resuscitation equipment and surgical implants), pollution control or hazardous substances management, or other uses where the failure of the device or system
could cause personal injury, death, or property damage (“Unintended Uses”). A critical component is any component of a
device or system whose failure to perform can be reasonably expected to cause the failure of the device or system, or to
affect its safety or effectiveness. Cypress is not liable, in whole or in part, and you shall and hereby do release Cypress from
any claim, damage, or other liability arising from or related to all Unintended Uses of Cypress products. You shall indemnify
and hold Cypress harmless from and against all claims, costs, damages, and othe r liabilities, including claims for personal
injury or death, arising from or related to any Unintended Uses of Cypress products.
Cypress, the Cypress logo, Spansion, the Spansion logo, and combinations thereof, WICED, PSoC, CapSense, EZ-USB,
F-RAM, and Traveo are trademarks or registered trademarks of Cypress in the United States and other countries. For a more
complete list of Cypress trademarks, visit cypress.com. Other names and brands may be claimed as property of their respective owners.
CY8CKIT-059 PSoC® 5LP Prototyping Kit Guide, Doc. #: 001-96498 Rev. *G 2
Page 3

Contents
Safety Information 5
1. Introduction 7
1.1 Kit Contents..................................... ... ... ....................................... ... ... ... .... ..................7
1.2 PSoC Creator ..............................................................................................................8
1.3 Getting Started...........................................................................................................11
1.4 Additional Learning Resources..................... ... ... ... ... .... ... ... ... .... ... ... ... ... .... ... ... ... .... ...11
1.5 Technical Support......................................................................................................12
1.6 Document Conventions .............................................................................................12
2. Software Installation 13
2.1 Before You Begin.......................................................................................................13
2.2 Install Software ..........................................................................................................13
2.3 Uninstall Software......................................................................................................15
1.2.1 PSoC Creator Code Examples ........................................................................9
1.2.2 Kit Code Examples............................ ... ... ... ... .......................................... .... ...10
1.2.3 PSoC Creator Help ........................................................................................10
1.2.4 Component Datasheets .................................................................................11
3. Kit Operation 16
3.1 Theory of Operation..................... .... ... ... ... .... ...................................... ... .... ... ... ... .... ...16
3.2 KitProg.......................................................................................................................17
3.3 Programming and Debugging the PSoC 5LP Target Device.....................................17
3.3.1 Programming using PSoC Creator.................................................................17
3.3.2 Debugging using PSoC Creator................................. .... ... ... ... ... .... ... ... ... .... ...19
3.3.3 Programming using PSoC Programmer.........................................................19
3.4 USB-UART Bridge................................................................. .... ... ... ... ... .... ... ... ... .... ...19
3.5 USB-I2C Bridge.........................................................................................................19
3.6 Updating KitProg Firmware........................................................................................19
4. Hardware 20
4.1 Board Details ................................... ... ... ... .... ... ...................................... .... ... ... ... .... ...20
4.2 Hardware Details.......................................................................................................21
4.2.1 Target Board...................................................................................................21
4.2.2 KitProg Board.................................................................................................22
4.2.3 Power Supply System....................................................................................23
4.2.4 Board Separation (Snapping).................. ... ... .... ... ... ... .... ... ... ... ... ....................24
4.2.5 Header Connections ......................................................................................24
4.2.6 User and Passive Inputs................................................................................28
CY8CKIT-059 PSoC® 5LP Prototyping Kit Guide, Doc. #: 001-96498 Rev. *G 3
Page 4

Contents
5. Code Examples 31
5.1 Using the Kit Code Examples....................................................................................31
5.2 CE195352_PSoC_5LP_Blinking_LED ......................................................................35
5.3 CE195277_ADC_and_UART ....................................................................................37
5.4 CE195394_HID_Mouse.............................................................................................38
Appendix 39
PSoC 5LP Prototyping Kit Schematics ...............................................................................39
Programming PSoC 5LP Prototyping Kit Using MiniProg3/KitProg ....................................41
Bill of Materials ....................................................................................................................42
Revision History 45
CY8CKIT-059 PSoC® 5LP Prototyping Kit Guide, Doc. #: 001-96498 Rev. *G 4
Page 5
Safety Information
The PSoC 5LP Prototyping Kit contains electrostatic
discharge (ESD) sensitive devices. Electrostatic charges
readily accumulate on the human body and any equipment,
and can discharge without detection. Permanent damage
may occur on devices subjecte d to high-energy disc harges.
Proper ESD precautions are recommended to avoid
performance degradation or loss of functionality. Store
unused PSoC 5LP Prototyping Kit boards in the protective
shipping package.
End-of-Life/Product Recycling
This kit has an end-of life five years from the date of
manufacture mentioned on the back of the box. Cont act your
nearest recycler for discarding the kit.
Regulatory Compliance
The CY8CKIT-059 PSoC® 5LP Prototyping Kit is intended for use as a development platform for
hardware or software in a laboratory environment. The board is an open system design, which does
not include a shielded enclosure. This may cause interference to other electrical or electronic
devices in close proximity. In a domestic environment, this product may cause radio inter ference. In
such cases, you may be required to take adequate preventive measures. In addition, this board
should not be used near any medical equipment or RF devices.
Attaching additional wiring to this product or modifying the product ope ration from the factory default
may affect its performance and cause interf erence with other apparatus in the immediate vicinity. If
such interference is detected, suitable mitigating measures should be taken.
The PSoC 5LP Prototyping Kit, as shipped from the factory, has been verified to meet with
requirements of CE as a Class A product.
CY8CKIT-059 PSoC® 5LP Prototyping Kit Guide, Doc. #: 001-96498 Rev. *G 5
Page 6

Safety Information
General Safety Instructions
ESD Protection
ESD can damage boards and associated components. Cypress recommends that you perform
procedures only at an ESD workstation. If such a workstation is not available, use appropriate ESD
protection by wearing an antistatic wrist stra p attached to the chassis ground (any unpainted metal
surface) on your board when handling parts.
Handling Boards
PSoC 5LP Prototyping Kit boards are sensitive to ESD. Hold the board only by its edges. After
removing the board from its box, place it on a gr ounded, static-fre e surface. Use a co nductive foam
pad if available. Do not slide board over any surface.
CY8CKIT-059 PSoC® 5LP Prototyping Kit Guide, Doc. #: 001-96498 Rev. *G 6
Page 7
1. Introduction
Thank you for your interest in the CY8CKIT - 059 PSoC 5LP Proto typing Kit. This kit is desig ned as an
easy-to-use and inexpensive prototyping platform. The PSoC 5LP Prototyping Kit supports the
PSoC 5LP device family, delivering a complete system solution for a wide range of embedded
applications at a very low cost. The PSoC 5LP is the industry’s most integrated SoC with an Arm
Cortex™-M3 CPU. It combines progra mmable and reconfigurable high-precision analog and digital
blocks with flexible automatic routing. The unique flexibility of the PSoC 5LP architecture will help
those who want to rapidly develop products using the PSoC 5LP device family.
The PSoC 5LP Prototyping Kit offers an open footprint breakout board to maximize the end-utility of
the PSoC 5LP device. This kit provides a low-cost alternative to device samples while providing a
platform to easily develop and integrate the PSoC 5LP device into your end-system. In addition, the
board includes the following features:
■ Micro-USB connector to enable USB application development
■ Onboard CMOD capacitors to enable CapSense
■ Bypass capacitors to ensure the high-quality ADC conversions
■ An LED to provide feedback
■ A push button to provide a simple user input
■ Load capacitors to connect 32-kHz external crystal oscillator
■ 3.3-V to 5.5-V operation
®
development
®
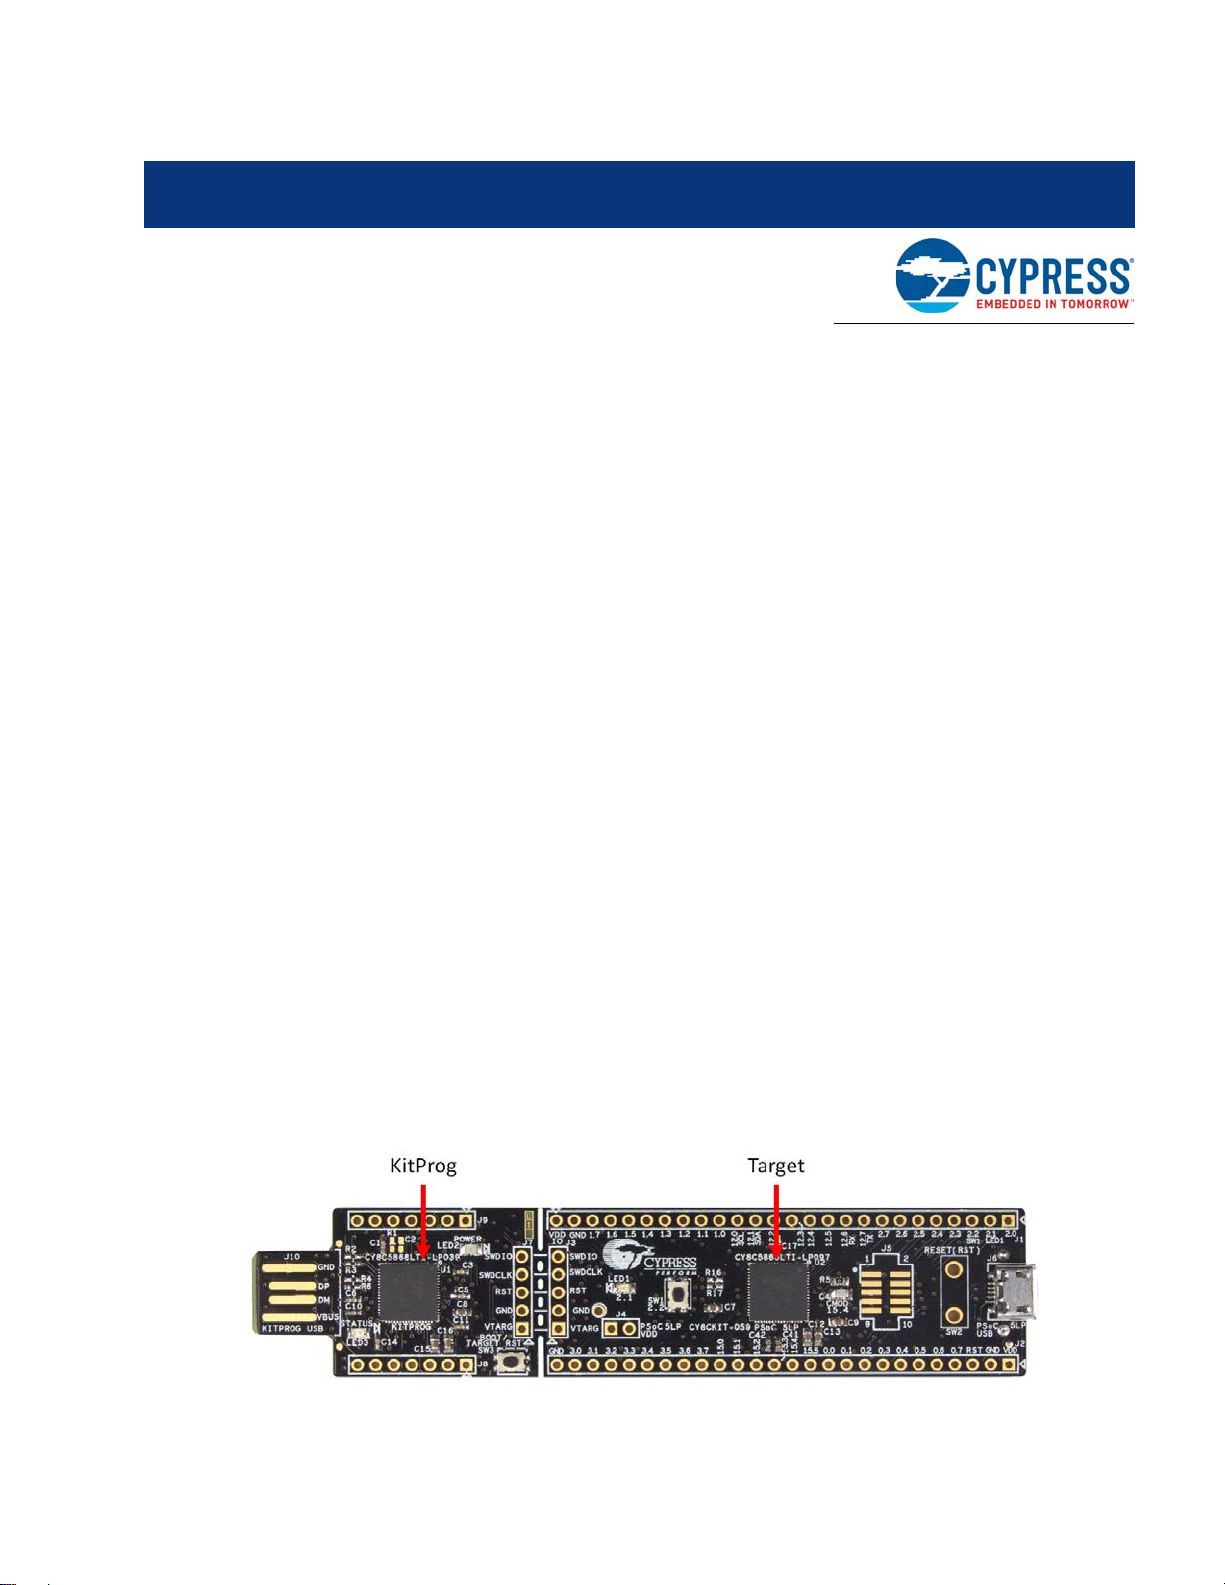
The PSoC 5LP prototyping kit also integrates the Cypress KitProg that enables onboard
programming, debugging, and bridging functionality, such as USB-UART and USB-I2C. The KitProg
is used to program and debug the target PSoC 5LP device (see Figure 1-1). The prototyping kit
allows you to separate the KitProg board from the PSoC 5LP target board.
1.1 Kit Contents
This kit contains only the PSoC 5LP Prototyping Kit board.
Figure 1-1. CY8CKIT-059 PSoC 5LP Prototyping Kit
CY8CKIT-059 PSoC® 5LP Prototyping Kit Guide, Doc. #: 001-96498 Rev. *G 7
Page 8
1.2 PSoC Creator
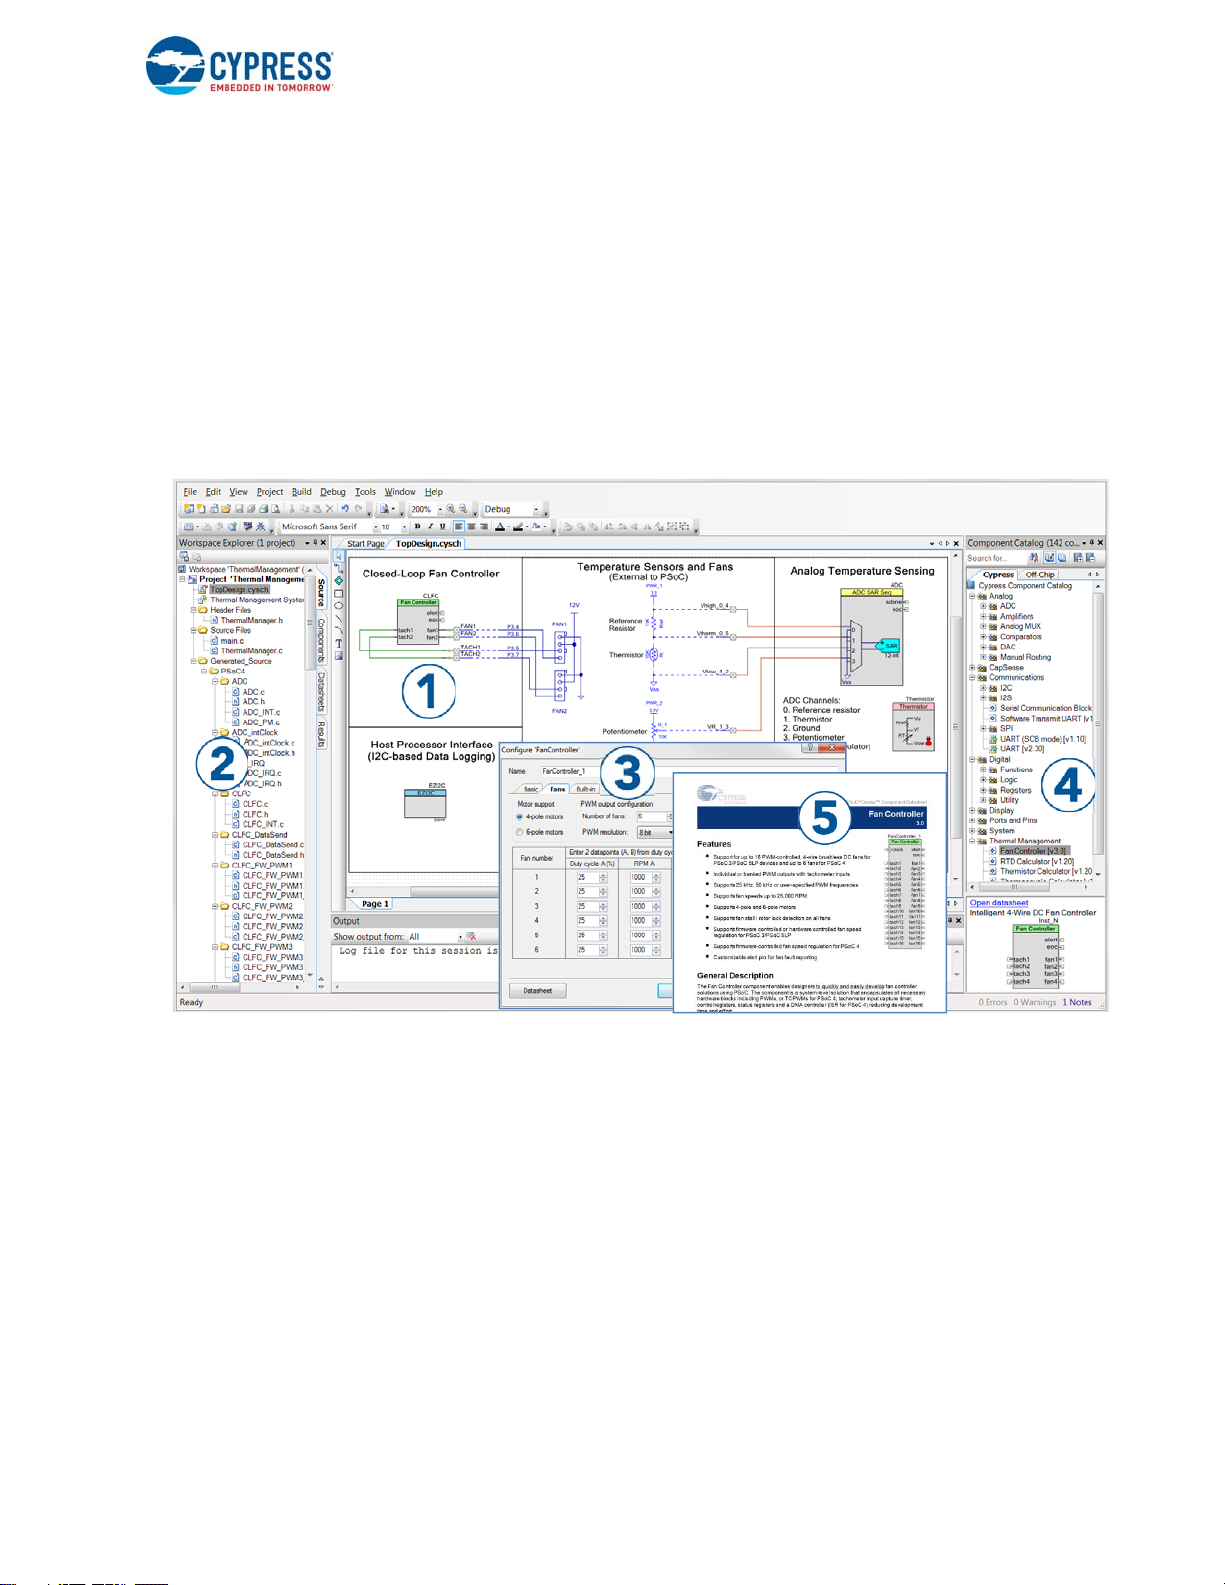
PSoC Creator™ is a state-of-the-art, e asy-t o- use in tegr ated d esi gn env iro nme nt (I DE). It intro duce s
revolutionary hardware and software co-design, powered by a library of pre-verified and precharacterized PSoC Components. With PSoC Creator, you can:
1. Drag and drop Components to build your hardware system design in the main design workspace
2. Codesign your application firmware with the PSoC hardware
3. Configure Components using configuration tools
4. Explore the library of 100+ Components
5. Review Component datasheets
Figure 1-2. PSoC Creator Features
Introduction
PSoC Creator also enables you to tap into an entire tool e cosystem wit h integrate d compiler ch ains
and production programming programmers for PSoC devices.
For more information, visit www.cypress.com/psoccreator.
CY8CKIT-059 PSoC® 5LP Prototyping Kit Guide, Doc. #: 001-96498 Rev. *G 8
Page 9
1.2.1 PSoC Creator Code Examples
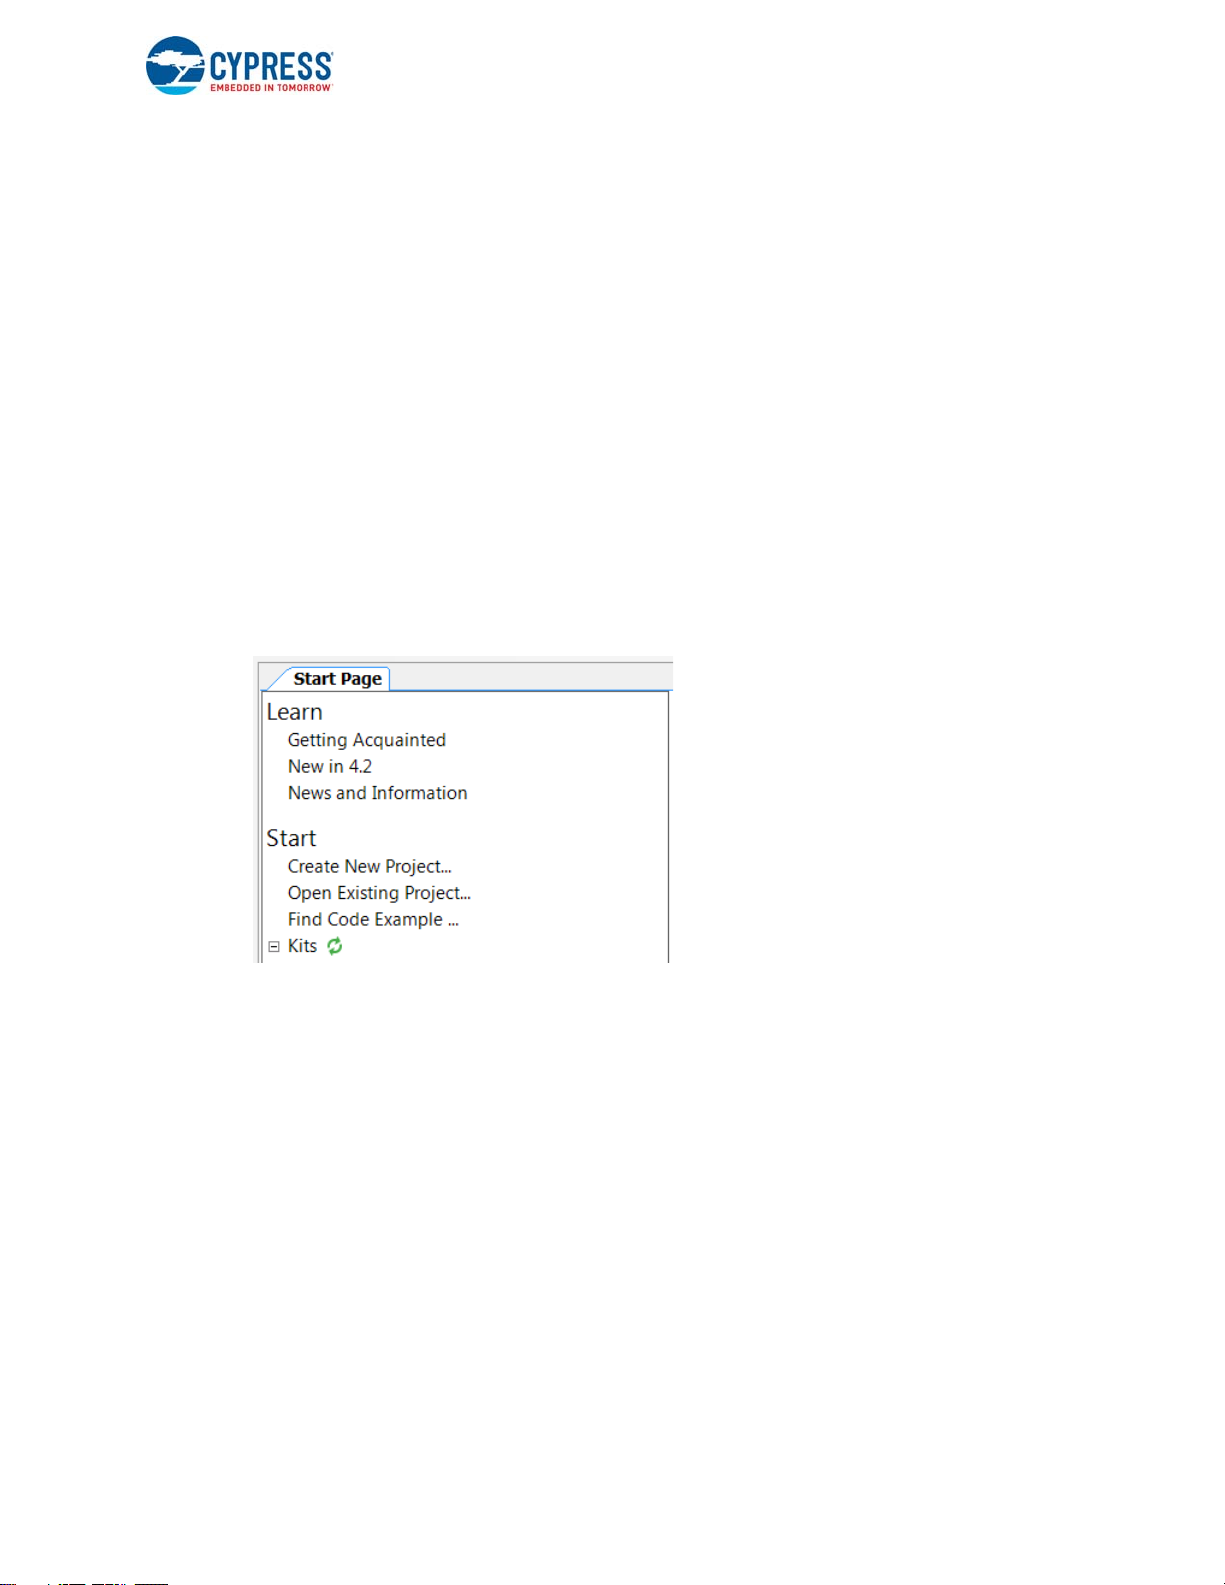
PSoC Creator includes a large number of code examples. These examples are available from the
PSoC Creator Start Page, as Figure 1-3 on page 9 shows.
Code examples can speed up your design process by starting you off with a complete design,
instead of a blank page. They also show how PSoC Creat or Components can be used for various
applications. Code examples and documentation are included, as shown in Figure 1-4 on page 10 .
In the Find Example Project dialog shown in Figure 1-4, you have several options:
■ Filter for examples based on architecture or device family, that is, PSoC 3, PSoC 4, or
PSoC 5LP; project name; or keyword.
■ Select from the menu of examples offered based on the Filter Options.
■ Review the example project’s description (on the Documentation tab).
■ Review the code from the Sample Code tab. You can copy the code from this window and paste
to your project, which can help speed up code development.
■ Create a new project (and a new workspace if needed) based on the selection. This can speed
up your design process by starting you of f with a comp lete, basic design. You can then adapt that
design to your application.
Figure 1-3. Code Examples in PSoC Creator
Introduction
CY8CKIT-059 PSoC® 5LP Prototyping Kit Guide, Doc. #: 001-96498 Rev. *G 9
Page 10

Figure 1-4. Code Example Projects with Sample Code
Introduction
1.2.2 Kit Code Examples
This kit includes a number of code exam ples, which can be used to quickly evaluate th e func tionality
of this kit. These examples are described in the Code Examples chapter on page 31.
1.2.3 PSoC Creator Help
Visit the PSoC Creator home page to download the latest version of PSoC Creator. Then, launch
PSoC Creator and navigate to the following items:
■ Quick Start Guide: Choose Help > Documentation > Quick Start Guide. This guide gives you
the basics for developing PSoC Creator projects.
■ Simple Component example projects: Choose File > Open > Example projects. These
example projects demonstrate how to configure and use PSoC Creator Components.
■ Starter designs: Choose File > New > Project > PSoC 5LP Starter Designs. These starter
designs demonstrate the unique features of PSoC 5LP.
■ System Reference Guide: Choose Help > System Reference > System Reference Guide.
This guide lists and describes the system functions provided by PSoC Creator.
■ Component datasheets: Right-click a Component and select Open Datasheet, as shown in
Figure 1-5. Visit the PSoC 5LP Component Datasheets page for a list of all PSoC 5LP Compo-
nent datasheets.
■ Document Manager: PSoC Creator provides a documen t manager to help you to ea sily find and
review document resources. To open the document manager, choose the menu item Help >
Document Manager.
CY8CKIT-059 PSoC® 5LP Prototyping Kit Guide, Doc. #: 001-96498 Rev. *G 10
Page 11
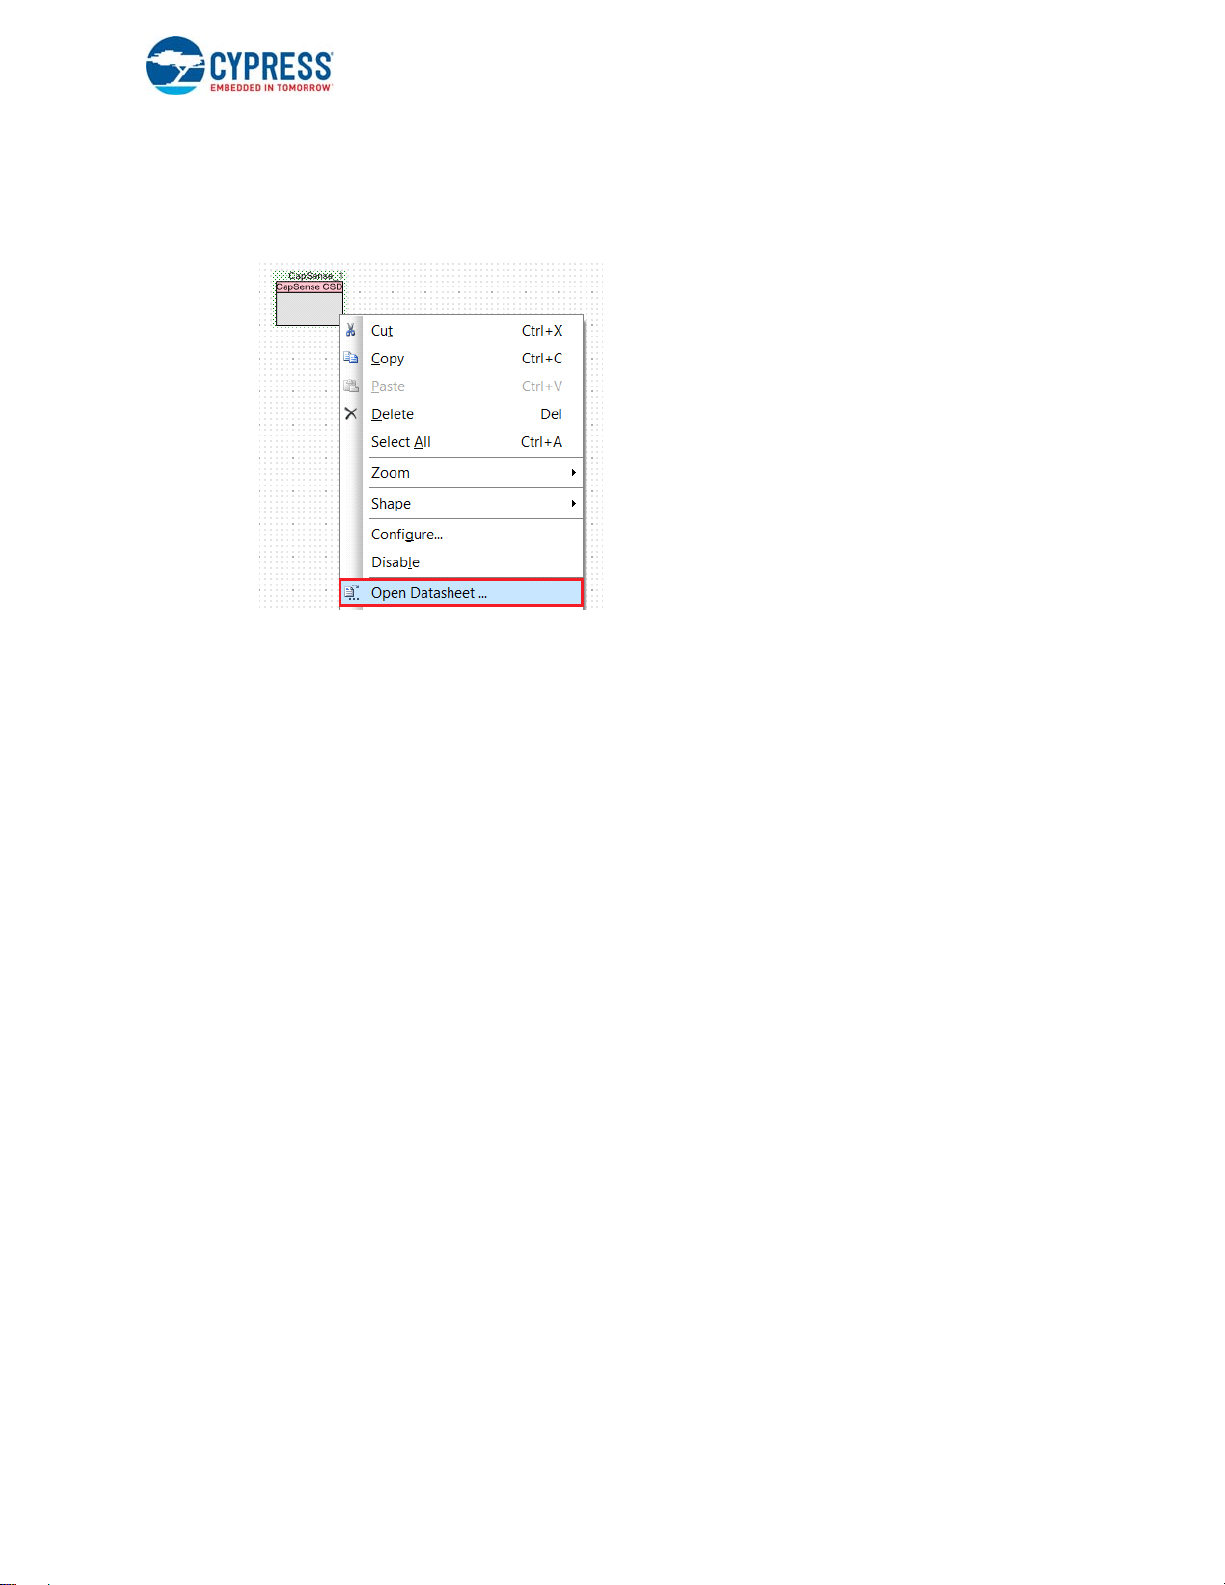
1.2.4 Component Datasheets
Right-click a Component and select Open Datasheet (see Figure 1-5).
Figure 1-5. Opening Component Datasheet
1.3 Getting Started
Introduction
This guide will help you get acquainted with the PSoC 5LP Prototyping Kit:
■ The Software Installation chapter on page 13 describes the installation of the kit software. This
includes installation of PSoC Creator IDE for development and debugging the app lications, and
PSoC Programmer for programming hex files.
■ The Kit Operation chapter on page 16 describes the major features of the PSoC 5LP Pioneer Kit
and functionalities such as programming, debugging, and the USB-UART and USB-I2C bridges.
■ The Hardware chapter on page 20 details the hardware content of the kit and the hardware
operation.
■ The Code Examples chapter on page 31 describes multiple PSoC 5LP code examples that will
help you understand how to create your own PSoC 5LP proj ects.
■ The Appendix on page 39 provides schematics, details about programming the kit using
MiniProg3, and the bill of materials (BOM).
1.4 Additional Learning Resources
Cypress provides a wealth of information at www.cypress.com to help you to select the right PSoC
device for your design, and to help you to quickly and effectively integrate the device into your
design. For a comprehensive list of resources, see KBA86521, How to Design with PSoC 3, PSoC 4,
and PSoC 5LP. The following is an abbreviated list for PSoC 5LP:
■ Overview: PSoC Portfolio, PSoC Roadmap
■ Product Selectors: PSoC 1, PSoC 3, PSoC 4, or PSoC 5LP. In addition, PSoC Creator includes a
device selection tool.
■ Datasheets: Describe and provide electrical specifications for the PSoC 5LP device family
■ CapSense Design Guide: Learn how to design capacitive touch-sensing applications with the
PSoC 5LP family of devices.
■ Application Notes and Code Examples: Cover a broad range of topics, from basic to advanced
level. Many of the application notes include code examples. V isit the PSoC 3/4/5 Code Exampl es
CY8CKIT-059 PSoC® 5LP Prototyping Kit Guide, Doc. #: 001-96498 Rev. *G 11
Page 12
Introduction
webpage for a list of all available PSoC Creator code examples. For accessing code examples
from within PSoC Creator - see PSoC Creator Code Examples.
■ Technical Reference Manuals (TRM): Provide detailed descriptions of the architecture and
registers in each PSoC 5LP device family.
■ Development Kits:
❐ CY8CKIT-050 PSoC 5LP Development Kit enables you to evaluate, develop, and prototype
high-precision analog, low-power , and low-vo ltage applications d esigned using the PSoC 5LP
device family.
❐ CY8CKIT-001 is a common development platform for all PSoC family devices.
❐ PSoC 5LP Expansion Boards are the expansion modules designed to implement a target
application.
■ The MiniProg3 device provides an interface for flash programming and debug.
■ Knowledge Base Articles (KBA): Provide design and application tips from experts on using the
device.
■ PSoC Creator Training: Visit the link www.cypress.com/go/creatorstart/creatortraining for a
comprehensive list of video trainings on PSoC Creator.
■ Learning From Peers: Visit www.cypress.com/forums to meet enthusiastic PSoC developers
discussing the next generation embedded systems on Cypress Developer Community Forums.
1.5 Technical Support
If you have any questions, our technical support team is happy to assist you. You can create a
support request on the Cypress Technical Support page.
If you are in the United States, you can talk to our technical support team by calling our toll-free
number: +1-800-541-4736. Select option 3 at the prompt.
You can also use the following support resources if you need quick assistance.
■ Self-help.
■ Local Sales Office Locations.
1.6 Document Conventions
Table 1-1. Document Conventions for Guides
Convention Usage
Courier New Displays file locations, user entered text, and source code:
C:\...cd\icc\
Italics Displays file names and reference documentation:
Read about the sourcefile.hex file in the PSoC Creator User Guide.
[Bracketed, Bold] Displays keyboard commands in procedures:
[Enter] or [Ctrl] [C]
File > Open Represents menu paths:
File > Open > New Project
Bold Displays commands, menu paths, and icon names in procedures:
Click the File icon and then click Open.
Times New Roman Displays an equation:
2 + 2 = 4
Text in gray boxes Describes Cautions or unique functionality of the product.
CY8CKIT-059 PSoC® 5LP Prototyping Kit Guide, Doc. #: 001-96498 Rev. *G 12
Page 13

2. Software Installation
This chapter describes the steps to install the software tools and packages on a PC for using the
PSoC 5LP Prototyping Kit. This includes the IDE on which the projects will be built and used for
programming.
2.1 Before You Begin
All Cypress software installations require administrator privileges, but these are not required to run
the software after it is installed. Close any other Cypress software that is curre ntly running before
installing the kit software.
Note: By default, the kit contents are installed in the C:\Program Files\Cypress folder, for a
32-bit machine and C:\Program Files (x86)\Cypress, for a 64-bit machine. This directory will
contain the kit code examples. To open these code examples, it is recommended to use the
procedure described in the Code Examples chapter on page 31. This procedure will create an
editable copy of the code example in a path that you chose so that the original installed code
examples will not be modified.
2.2 Install Software
Follow these steps to install the PSoC 5LP Prototyping Kit software:
1. Download the PSoC 5LP Prototyping Kit software from www.cypress.com/CY8CKIT-059. The kit
software is available in three formats for download.
a. CY8CKIT-059 Kit Setup: This installation package contains th e files related to the kit including
PSoC Creator, PSoC Programmer, and PDL. However, it does not include the Windows
Installer or Microsoft .NET framework packages. If these p a cka ges are n ot on your compute r,
the installer will direct you to download and install them from the Internet.
b. CY8CKIT-059 Kit Only: This executable file installs only the kit contents, which include kit
code examples, hardware files, and user documents. This package can be used if all the
software prerequisites (listed in step 5) are installed on your PC.
c. CY8CKIT-059 DVD ISO: This file is a complete package, stored in a DVD-ROM image format,
that you can use to create a DVD or extract using an ISO extraction program such as WinZip
or WinRAR. The file can also be mounted like a virtual CD/DVD using virtual drive programs
such as Virtual CloneDrive and MagicISO. This file includes all the required software, utilities,
drivers, hardware files, and user documents.
2. If you have downloaded the ISO file, mount it in a virtual drive. Extract the ISO contents if you do
not have a virtual drive to mount. Double-click cyautorun.exe in the root directory of the extr acted
content or mounted ISO if "Autorun from CD/DVD" is not enabled on the PC. The installation
window will appear automatically. Note: If you are using the "Kit Setup" or "Kit Only" file, then go
to step 4 for installation.
CY8CKIT-059 PSoC® 5LP Prototyping Kit Guide, Doc. #: 001-96498 Rev. *G 13
Page 14
Software Installation
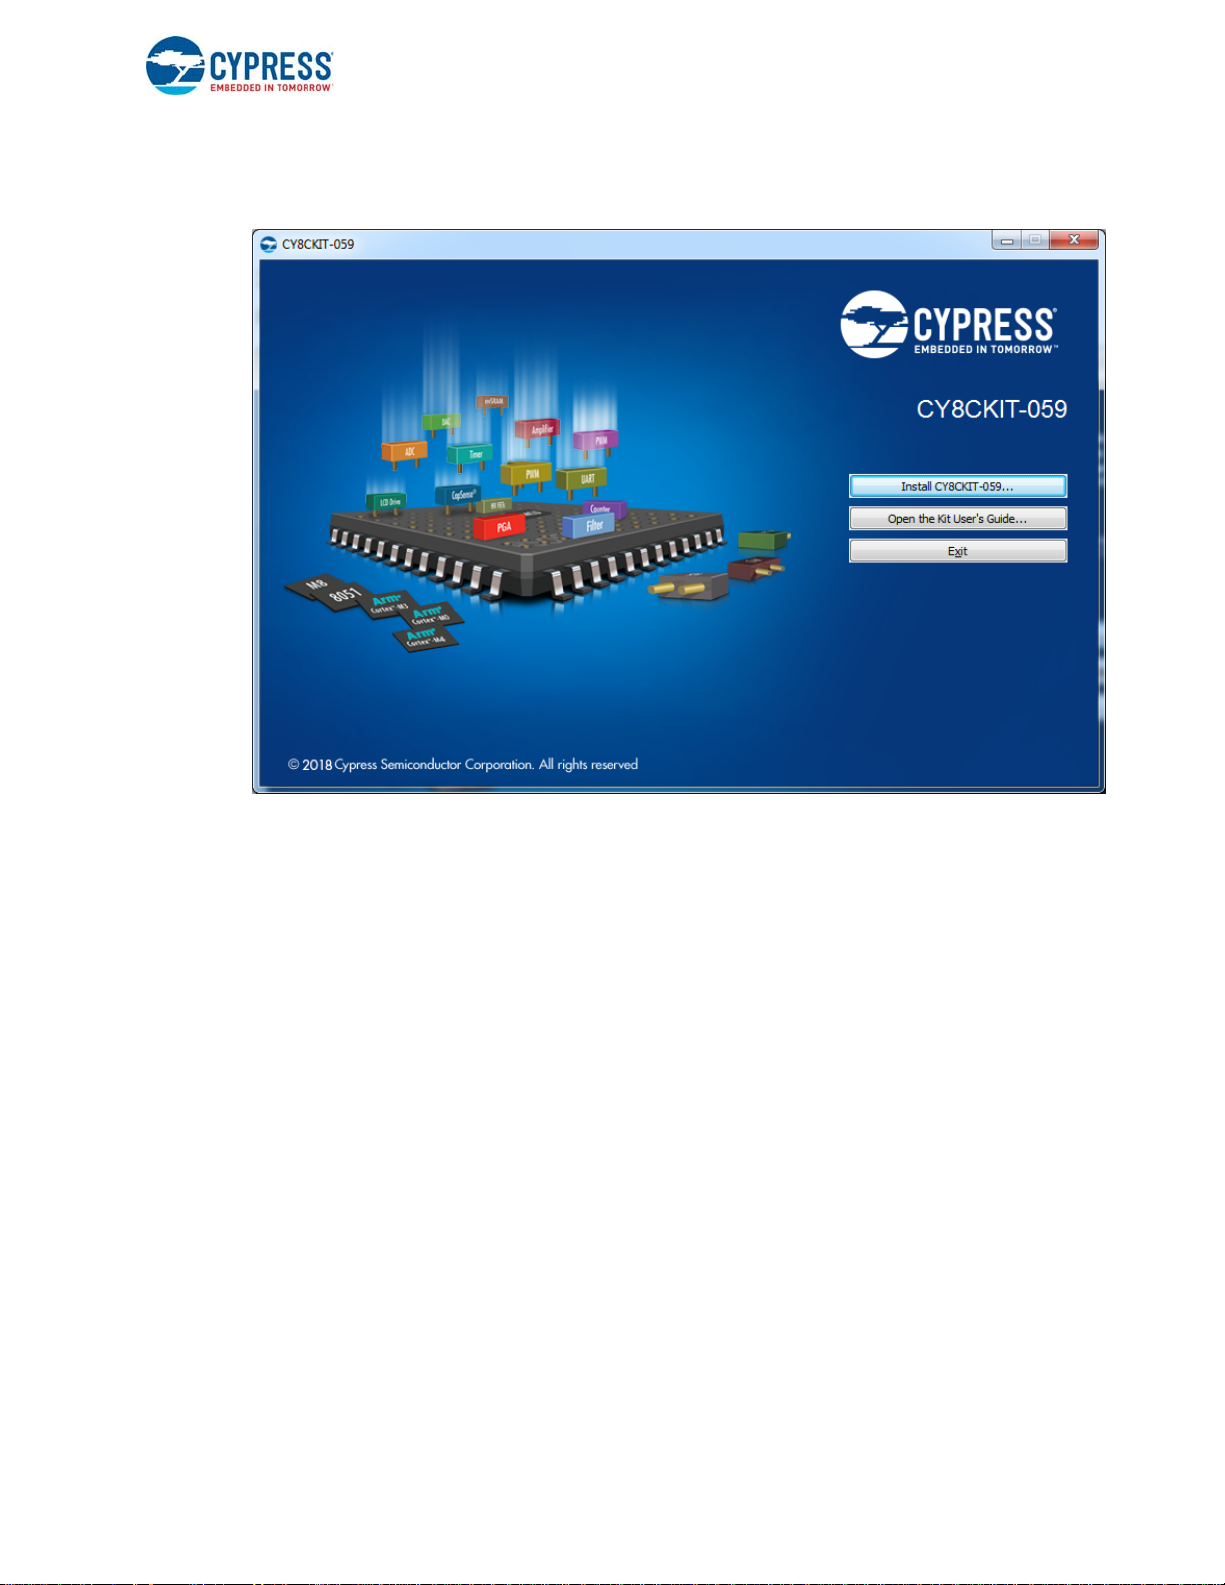
3. Click Install CY8CKIT-059 Kit to start the kit installation, as shown in Figure 2-1.
Figure 2-1. Kit Installer Screen
4. Select the directory in which you want to install the PSoC 5LP Prototyping Kit-related files.
Choose the directory and click Next.
5. When you click Next, the PSoC 5LP Prototyping Kit installer automatically installs the required
software, if it is not present on your computer. Following is the required software:
a. PSoC Creator 4.2: This software is available for download separately from the kit at
www.cypress.com/psoccreator. PSoC Creator 4.2 installer automatically installs the following
additional software:
– PSoC Programmer 3.27.1
– Peripheral Driver Library 3.0.1.
6. Choose the Typical/Custom/Complete installation type in the Product Installation Overview
window, as shown in Figure 2-2. Click Next after you select the installation type.
CY8CKIT-059 PSoC® 5LP Prototyping Kit Guide, Doc. #: 001-96498 Rev. *G 14
Page 15
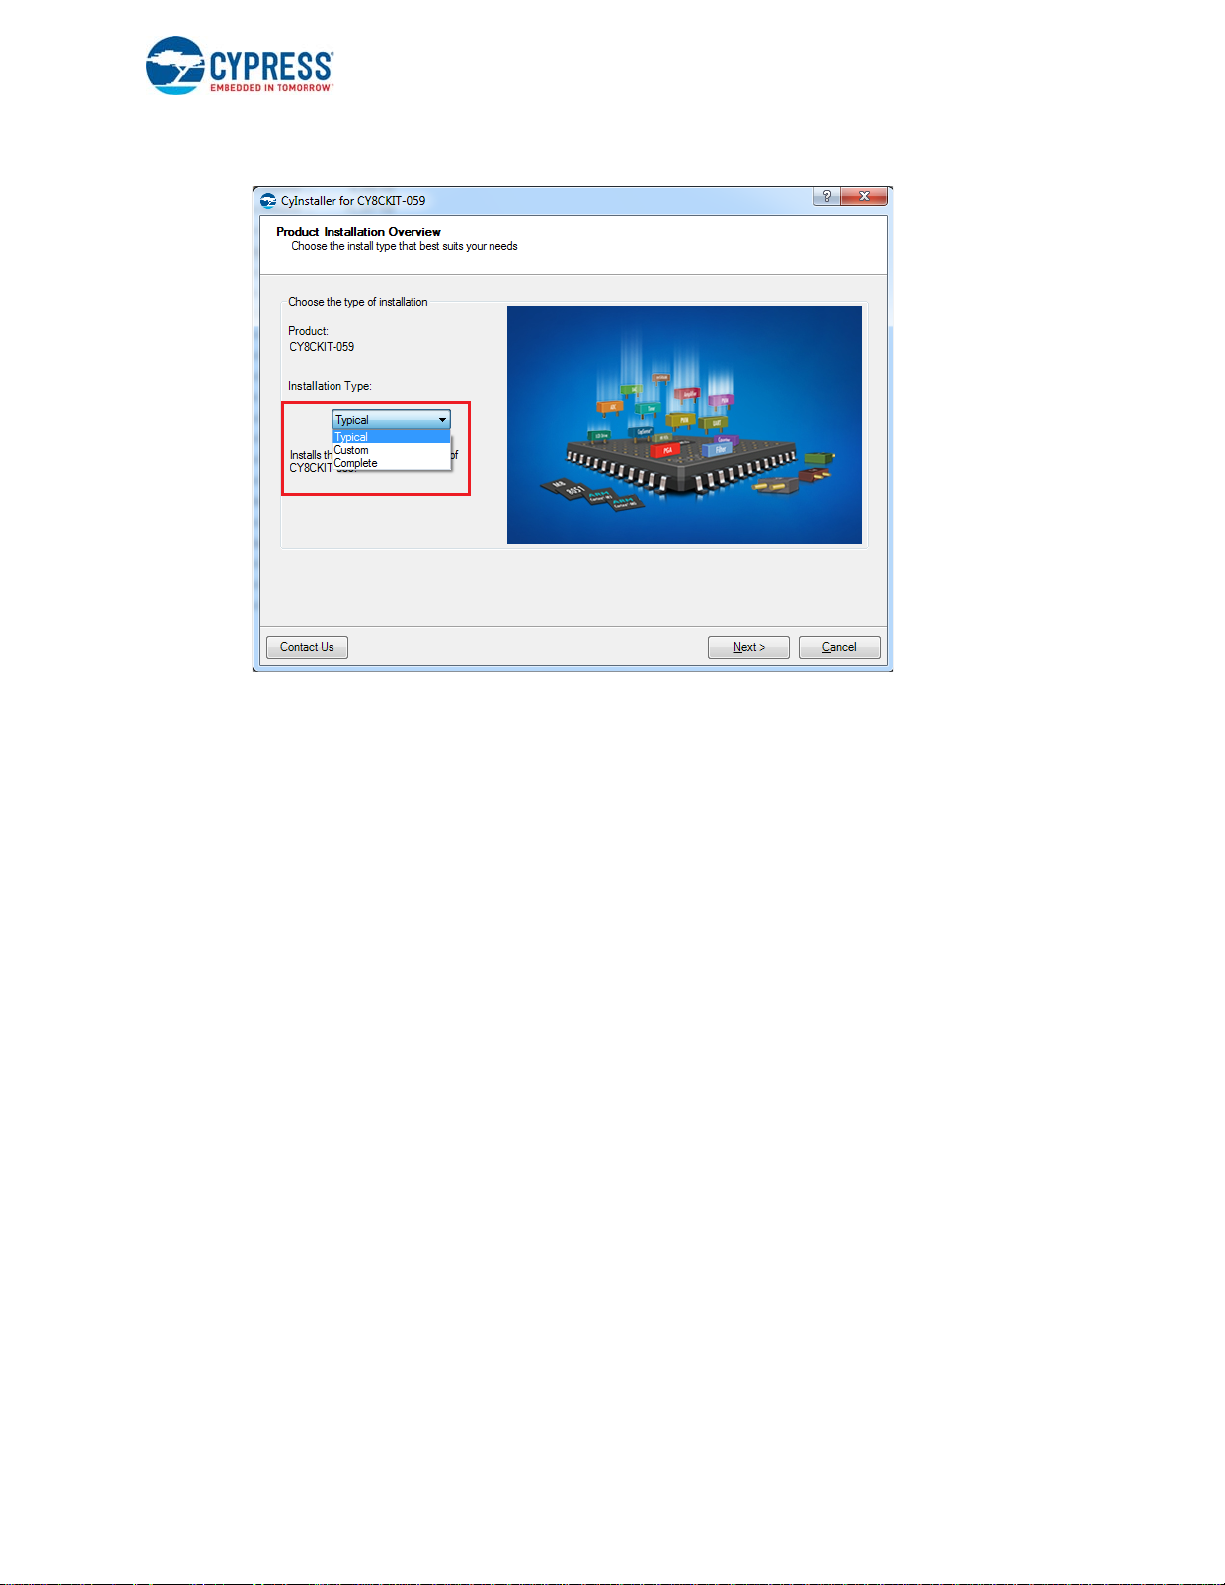
Figure 2-2. Product Installation Overview
Software Installation
7. Read the License agreement and select 'I accept the terms in the licen se agree ment' to co ntinue
with installation. Click Next.
8. When the installation begins, a list of packages appears on the installation page. A green check
mark appears next to each package after successful installation.
9. Enter your contact information or select the Continue Without Contact Information check box.
Click Finish to complete the PSoC 5LP Prototyping Kit installation.
10.After the installation is complete, the kit contents are available at the following location:
<Install_Directory>\CY8CKIT-059
Default location:
Windows OS (64-bit):
C:\Program Files (x86)\Cypress\CY8CKIT-059
Windows OS (32-bit):
C:\Program Files\Cypress\CY8CKIT-059
Note: For Windows 7/8/8.1/10 users, the installed files and the folder are read-only. To use the
installed code examples, follow the steps outlined in the Code Examples chapter on page 31. These
steps will create an editable copy of the example in a path that you choose, so the original installed
example is not modified.
2.3 Uninstall Software
The software can be uninstalled using one of the following methods:
1. Go to Start > All Programs > Cypress > Cypress Update Manager and select the Uninstall
button.
2. Go to Start > Control Panel > Programs and Features for Windows 7 or Add/Remove
Programs for Windows XP; select the Uninstall/Change button.
CY8CKIT-059 PSoC® 5LP Prototyping Kit Guide, Doc. #: 001-96498 Rev. *G 15
Page 16

3. Kit Operation
This chapter introduces you to the different features of the PSoC 5LP Prototyping Kit. This primarily
includes the programming/debugging functionality, KitProg USB-UART and USB-I2C bridges, and
the method to update the KitProg firmware.
3.1 Theory of Operation
Figure 3-1 shows the blo ck dia gr am fo r the PSoC 5LP Prot ot yp ing Kit.
Figure 3-1. Block Diagram of PSoC 5LP Prototyping Kit
The PSoC 5LP Prototyping Kit is simplistic in design and focuses on providing you with complete
access to develop applications using the PSoC 5LP device family. This kit supports the following
features:
■ KitProg: It is an onboard programmer/debugger, which enables programming and debugging the
target PSoC 5LP device. It can also act as a USB-UART and UART-I2C bridge.
When used as a standalone module, it can be used to program devices of the PSoC 3, PSoC 4,
or PSoC 5LP families through the SWD interface. For more details on the KitProg functionality,
refer to the KitProg User Guide in the kit installation directory:
<Install_Directory>\CY8CKIT059\<version>\Documentation\KitProg_User_Guide.pdf
■ Expansion Headers: The PSoC 5LP Prototyping Kit brings all I/Os of the device to the two
expansion headers, allowing you to have maximum access to the capabilities of the PSoC 5LP
device.
■ Micro-USB Connector: The onboard micro-USB connector provides access to the USB block of
the PSoC 5LP device. This connector enables you to develop USB applications.
■ User LED: The onboard LED can be used to display outputs from the PSoC 5LP device. This
includes modulating the brightness of the LED to notify different states of the device.
CY8CKIT-059 PSoC® 5LP Prototyping Kit Guide, Doc. #: 001-96498 Rev. *G 16
Page 17

■ Push Button (SW): This kit has a push button, which can be used to provide input to the
PSoC 5LP.
Note: The switch connects the PSoC 5LP pin to ground when pressed. Therefore, you need to
configure the PSoC 5LP pin as resistive pull-up to detect the switch press.
■ Reset Button: This button is used for the following purposes:
❐ Reset the PSoC 5LP device: When pressed, it connects the XRES line of the PSoC 5LP to
ground and resets the PSoC 5LP device.
❐ Bootload the KitProg: When pressed while c onnecting the kit’s PCB USB connector to the
USB port of the PC, this button puts the KitProg into the bootloader mode. For more det ails on
the KitProg functionality, refer to the KitProg User Guide.
Note: When the two boards are separated, you can mount the SW2 button on the target board to
reset the PSoC 5LP device using a switch.
3.2 KitProg
The KitProg is a multi-functional system, which includes a programmer, debugger, USB-I2C bridge,
and a USB-UART bridge. The Cypress PSoC 5LP device is used to implement KitProg functionality.
The KitProg is integrated in most PSoC development kits. For more details on the KitProg
functionality, refer to the KitProg User Guide in the kit installation directory:
<Install_Directory>\CY8CKIT-059\<version>\Documentation\
KitProg_User_Guide.pdf.
Kit Operation
3.3 Programming and Debugging the PSoC 5LP Target Device
The target PSoC 5LP device can be programmed and debugged using the KitProg. Before
programming the device, ensure that PSoC Creator and PSoC Programmer software are installed
on the PC. See Install Software on page 13 for more information.
3.3.1 Programming using PSoC Creator
1. Connect the kit to the computer through the PCB USB connector, J10, as shown in Figure 3-2.
The kit will enumerate as a composite device, if you are plugging in the PSoC 5LP Prototyping Kit
to your PC for the first time.
Figure 3-2. Connecting the PSoC 5LP Prototyping Kit to a Computer
CY8CKIT-059 PSoC® 5LP Prototyping Kit Guide, Doc. #: 001-96498 Rev. *G 17
Page 18

Kit Operation
2. Open the desired project in PSoC Creator by selecting File > Open > Project/Workspace. This
provides the option to browse to and open a previously saved project. If you want to open one of
the code examples provided with the kit, follow the instructions in the Code Examples chapter on
page 31.
3. Select the option Build > Build Project or press [Shift] [F6] to build the project as shown in
Figure 3-3.
Figure 3-3. Build a Code Example
4. If there are no errors during build, program th e firm wa re into the kit by cho os ing Debug >
Program or press [Ctrl] [F5], as shown in Figure 3-4. This programs the target PSoC 5LP device
on the PSoC 5LP Prototyping Kit, and the kit is ready to use.
Figure 3-4. Programming Device From PSoC Creator
CY8CKIT-059 PSoC® 5LP Prototyping Kit Guide, Doc. #: 001-96498 Rev. *G 18
Page 19

3.3.2 Debugging using PSoC Creator
To debug the project using PSoC Creator, follow step s 1 to 3 from Programming u sing PSoC Creator
on page 17 followed by:
1. Click the Debug icon or press [F5]. Alternatively, you can use the option Debug > Debug.
2. When the PSoC Creator opens in Debug mode, use the buttons on the toolbar to debug your
application.
For more details on using the debug features, refer to section 3.2 of the KitProg User Guide .
3.3.3 Programming using PSoC Programmer
PSoC Programmer (3.27.1 or later) can be used to program existing .hex files into the PSoC 5LP
Prototyping Kit. Refer to section 3.3 of the KitProg User Guide for a detailed explanation on how to
program using PSoC Programmer.
3.4 USB-UART Bridge
The KitProg on the PSoC 5LP Pioneer Kit can act as a USB-UART bridge. The UART lines between
the KitProg and the target are hardwired on the board, through the snappable area, with UART_RX
assigned to P12_6 and UART_TX assigned to P12_7 o n PSoC 5LP (target). For more details on the
KitProg USB-UART functionality, refer to the KitProg User Guide.
Kit Operation
3.5 USB-I2C Bridge
The KitProg can function as a USB-I2C bridge and communicate with the Bridge Control Panel
(BCP) software utility. The I2C lines on the PSoC 5LP (target) device are P12_1 (SDA) and P12_0
(SCL), which are hardwired on the board to the I2C lines of the KitProg. The USB-I2C supports I2C
speeds of 50 kHz, 100 kHz, 400 kHz, and 1 MHz. For more details on the KitProg USB-I2C
functionality, refer to the KitProg User Guide.
3.6 Updating KitProg Firmware
The KitProg firmware normally does not require any update. Yo u can use the PSoC Programmer
software to update the firmware. Refer to the KitProg Use Guide for a det a iled expla nation on ho w to
update the KitProg firmware.
CY8CKIT-059 PSoC® 5LP Prototyping Kit Guide, Doc. #: 001-96498 Rev. *G 19
Page 20

4. Hardware
4.1 Board Details
The PSoC 5LP Prototyping Kit consists of the following blocks:
■ PSoC 5LP device
■ PSoC 5LP header ports J1 and J2
■ Micro-USB connector, J6
■ PSoC 5LP program/debug JTAG header, J5
■ KitProg (PSoC 5LP) device
■ KitProg ports J8 and J9 (GPIO)
■ SWD connection J3 and J7
■ PCB USB connector
■ One amber LED (Power)
■ One green LED (Status)
■ One blue LED (User)
■ User push button and reset button
■ External reference capacitors (ADC Bypass)
■ CapSense capacitor (CMOD)
■ Programming connector, J3
■ Perforated ‘snappable’ board design
Figure 4-1. PSoC 5LP Prototyping Kit Pin Details
CY8CKIT-059 PSoC® 5LP Prototyping Kit Guide, Doc. #: 001-96498 Rev. *G 20
Page 21

4.2 Hardware Details
VDDD
P1_1PROG_SWDCLK
P1_0PROG_SWDIO
P_SWO
P1_3
P_TDI
P1_4
VSSA
PROG_RESET
XRES
VDDA
DM_P
DP_P
P0_0
P0_1
P12_0
P12_1
P12_6
VDDIO2
P12_7
P2_6
P2_7
P12_4
P1_2
P3_7
P3_6
P3_0
P3_4
P3_5
P1_7
P1_6
P3_1
VDDD
P12_5
P2_5
P1_5
P2_0
P2_4
P2_3
P2_2
P2_1
P15_5
P15_4
P15_3
P15_2
P0_5
P15_0
P15_1
P3_2
VSSD
P_VCCD
VSSD
P_VCCD
P3_3
VSSD
VDDIO1 VDDIO3
P0_6
P0_7
P0_4
P12_2
P12_3
VDDIO0
P0_3
P0_2
VCCA
VSSD
DP
DM
U2
CY8C5888LTI-LP097 QFN68
P2_6
1
P2_7
2
P12_4 I2C0_SCL, SIO
3
P12_5 I2C0_SDA, SIO
4
VSSB
5
IND
6
VBOOST
7
VBAT
8
VSSD
9
XRES
10
P1_0
11
P1_1
12
P1_2
13
P1_3
14
P1_4
15
P1_5
16
VDDIO1
17
P1_618P1_719P12_6_SIO20P12_7_SIO21P15_6 DP22P15_7 DM23VDDD24VSSD25VCCD26P15_027P15_128P3_029P3_130P3_231P3_332P3_433P3_5
34
VDDIO3
35
VDDIO0
52
P0_3
51
P0_2
50
P0_1
49
P0_0
48
SIO_P12_3
47
SIO_P12_2
46
VSSD
45
VDDA
44
VSSA
43
VCCA
42
P15_3
41
P15_2
40
SIO, I2C1_SDA P12_1
39
SIO, I2C1_SCL P12_0
38
P3_7
37
P3_6
36
P2_466P2_365P2_264P2_163P2_0
62
P15_561P15_4
60
VDDD
59
VSSD
58
VCCD
57
P0_756P0_655P0_554P0_4
53
VDDIO2
67
P2_5
68
EPAD
69
0603
R16 22E
0603
R17 22E
4.2.1 Target Board
The target board uses the PSoC 5LP family device. PSoC 5LP is the industry's most integrated
programmable SoC, integrating high-precision and programmable analog and digital peripherals,
and an Arm
(ADC), programmable amplifiers, flexible digital su bsystem, unmatched p arallel co-processing digit al
filter block (DFB), high-throughput peripherals such as DMA, CAN, and USB, and standard
communication and timing peripherals. The programmable analog and digital subsystems allow
flexibility and in-field tuning of the design. For more information, refer to the PSoC 5LP family
datasheet in the PSoC 5LP web page.
Figure 4-2. Schematic of PSoC 5LP (Target)
®
Cortex™-M3 CPU. The PSoC 5LP features a high-precision analog-to-dig it al converter
Hardware
CY8CKIT-059 PSoC® 5LP Prototyping Kit Guide, Doc. #: 001-96498 Rev. *G 21
Page 22

4.2.2 KitProg Board
P3
pin
5(MSB) 4
P3.2P3.3
Floating GND
GND read as binary "1
floating pin is read
Place Near PSoC 5LP
VDDD
VCCA
KP_DP
KP_DM KP_DM_P
KP_DP_P
KP_P0_0
KP_P0_1
KP_P12_0
KP_P12_1
KP_P12_6
KP_VDDIO0
VSSD
KP_P12_7
KP_P12_2
KP_P2_6
KP_P2_7
KP_P12_4
KP_P3_6
KP_VDDIO3
VSSD
KP_P12_3
KP_P3_0
KP_P3_4
KP_P3_5
KP_P1_7
KP_P1_6
KP_P3_1
KP_VCCD
KP_P12_5
KP_P0_4
KP_VCCD
KP_P0_5
VDDD
KP_VDDIO1
VDDA
KP_P1_6
KP_P1_7
VSSD
KP_P0_3
KP_P0_2
VSSD
KP_XRES
KP_XRES
KP_VDDIO2
VTARG VBUS
0603
R622E
U1
CY8C5868LTI-LP039 QFN68
P2_6
1
P2_7
2
P12_4 I2C0_SCL, SIO
3
P12_5 I2C0_SDA, SIO
4
VSSB
5
IND
6
VBOOST
7
VBAT
8
VSSD
9
XRES
10
P1_0
11
P1_1
12
P1_2
13
P1_3
14
P1_4
15
P1_5
16
VDDIO1
17
P1_618P1_719P12_6_SIO
20
P12_7_SIO21P15_6 DP22P15_7 DM23VDDD24VSSD25VCCD26P15_027P15_128P3_029P3_130P3_231P3_332P3_433P3_5
34
VDDIO3
35
VDDIO0
52
P0_3
51
P0_2
50
P0_1
49
P0_0
48
SIO_P12_3
47
SIO_P12_2
46
VSSD
45
VDDA
44
VSSA
43
VCCA
42
P15_3
41
P15_2
40
SIO, I2C1_SDA P12_1
39
SIO, I2C1_SCL P12_0
38
P3_7
37
P3_6
36
P2_466P2_365P2_264P2_163P2_0
62
P15_561P15_4
60
VDDD
59
VSSD
58
VCCD
57
P0_756P0_655P0_554P0_4
53
VDDIO2
67
P2_5
68
EPAD
69
R2
15K
0603
R422E
PSoC 5LP on the KitProg board is used to program and debug the target PSoC 5LP device. The
KitProg PSoC 5LP connects to the USB port of the PC through the PCB USB connector and to the
SWD interface of the target PSoC 5LP device.
Figure 4-3. Schematic of PSoC 5LP (KitProg)
Hardware
CY8CKIT-059 PSoC® 5LP Prototyping Kit Guide, Doc. #: 001-96498 Rev. *G 22
Page 23

4.2.3 Power Supply System
The power supply system on this board is dependent on the source of the power. For most
applications, you can use the 5-V supply from the USB connection to power the system. You can
also connect an external power supply to the board for low-voltage applications. The kit supports the
following connections:
■ 5 V from the KitProg USB
■ 5 V from the PSoC 5LP target USB (this will not power the KitProg section of the board)
■ 3.3 V to 5.5 V from a regulated supply connected to VDD (this will not power the KitProg section
of the board)
Note: To use an external power supply, while KitProg is connected to the PCB USB, remove diode,
D1, from the board. This ensures that VTARG supply from KitProg is not supplied to the target
device. KitProg measures the target voltage and adjusts the logic levels on the programming pins
accordingly.
This prototyping kit does not h a ve an o nbo ar d ESD protection circuitry. Therefore, the power source
for the PSoC 5LP Prototyping Kit must be of a high quality to ensure that the board is protected from
any over-current conditions and swapped-power connections.
4.2.3.1 Measure PSoC 5LP Current Consumption
Hardware
You can measure the current consumption of the PSoC 5LP device by using one of these methods:
Method 1:
1. Separate the KitProg board by 'snapping' the perforated edge between the two boards.
2. Power the remaining prototyping board via any of the VDD or VTARG terminals.
3. Place an ammeter in series with the VDD or VTARG connection to measure the current
consumption.
Method 2:
1. Remove the resistor R20 and install a 2-pin jumper in the supplied holes of J4.
2. Connect an ammeter across the 2-pin jumper to measure the current to the PSoC 5LP device.
This method can be used either with USB power or with power supplied to one of the VTARG pins
but not when supplying to one of the VDD pins.
CY8CKIT-059 PSoC® 5LP Prototyping Kit Guide, Doc. #: 001-96498 Rev. *G 23
Page 24

4.2.4 Board Separation (Snapping)
The PSoC 5LP Prototyping Kit consists of both a PSoC 5LP and a KitProg board. To separate the
two boards for testing or development, break the two boards apart at the built-in perforated edge.
The easiest method of separating the two boards is to place the kit on the edge of a table, where the
edge of the table is directly below the perforated edge and the smaller KitProg board is off the table
edge. Press gently on the KitProg board and snap the two boards apart. If any material is removed
from the edge of the boards, use sheers to clean up the edge of the kit.
Figure 4-4. PSoC 5LP Prototyping Kit Broken into Two Parts
4.2.5 Header Connections
Hardware
The PSoC 5LP Prototyping Kit supports a number of unpopulated headers on both the KitProg and
the target PSoC 5LP boards.
4.2.5.1 Functionality of the J1 and J2 Headers (Target Board)
The target board contains two dual-inline headers (J1 and J2). These headers are both 1×26-pin
headers and include all of the I/O available on the PSoC 5LP device. These headers support all of
the available ports, GND, VDD, and connections to passive elements and user-input devices.
The J1 and J2 headers support 100-mil spacing, so you can solder connectors to connect the target
board to any development breadboard.
Figure 4-5. J1 and J2 Headers
CY8CKIT-059 PSoC® 5LP Prototyping Kit Guide, Doc. #: 001-96498 Rev. *G 24
Page 25

Table 4-1. J1 Header Pin Details Table 4-2. J2 Header Pin Details
PSoC 5LP Prototyping Kit GPIO Header (J1)
Pin Signal Description
J1_01 P2.0 GPIO
J1_02 P2.1 GPIO/LED
J1_03 P2.2 GPIO/SW
J1_04 P2.3 GPIO
J1_05 P2.4 GPIO
J1_06 P2.5 GPIO
J1_07 P2.6 GPIO
J1_08 P2.7 GPIO
J1_09 P12.7 GPIO/UART_TX
J1_1 0 P12.6 GPIO/UART_RX
J1_11 P12.5 GPIO
J1_12 P12.4 GPIO
J1_13 P12.3 GPIO
J1_14 P12.2 GPIO
J1_15 P12.1 GPIO/I2C_SDA
J1_16 P12.0 GPIO/I2C_SCL
J1_17 P1.0 GPIO
J1_18 P1.1 GPIO
J1_19 P1.2 GPIO
J1_20 P1.3 GPIO
J1_21 P1.4 GPIO
J1_22 P1.5 GPIO
J1_23 P1.6 GPIO
J1_24 P1.7 GPIO
J1_25 GND Ground
J1_26 VDDIO Power
PSoC 5LP Prototyping Kit GPIO Header (J2)
Pin Signal Description
J2_01 VDD Power
J2_02 GND Ground
J2_03 RESET Reset
J2_04 P0.7 GPIO
J2_05 P0.6 GPIO
J2_06 P0.5 GPIO
J2_07 P0.4 GPIO/BYPASS CAP
J2_08 P0.3 GPIO/BYPASS CAP
J2_09 P0.2 GPIO/BYPASS CAP
J2_10 P0.1 GPIO
J2_11 P0.0 GPIO
J2_12 P15.5 GPIO
J2_13 P15.4 GPIO/CMOD
J2_14 P15.3 GPIO/XTAL_IN
J2_15 P15.2 GPIO/XTAL_OUT
J2_16 P15.1 GPIO
J2_17 P15.0 GPIO
J2_18 P3.7 GPIO
J2_19 P3.6 GPIO
J2_20 P3.5 GPIO
J2_21 P3.4 GPIO
J2_22 P3.3 GPIO
J2_23 P3.2 GPIO/BYPASS CAP
J2_24 P3.1 GPIO
J2_25 P3.0 GPIO
J2_26 GND Ground
Hardware
CY8CKIT-059 PSoC® 5LP Prototyping Kit Guide, Doc. #: 001-96498 Rev. *G 25
Page 26

4.2.5.2 Functionality of J7 and J3 Headers (PSoC 5LP to KitProg)
PSoC 5LP to KitProg Header (J7)
Pin Signal Description
J7_01 VTARG Power
J7_02 GND Ground
J7_03 P12.4 RESET
J7_04 P12.3 SWDCLK
J7_05 P12.2 SWDIO
PSoC 5LP (Target) Program and Debug Header (J3)
Pin Signal Description
J3_01 VTARG Power
J3_02 GND Ground
J3_03 XRES RESET
J3_04 P1.1 SWDCLK
J3_05 P1.0 SWDIO
The KitProg and target boards each contain a 1x5-pin header. These headers provide a physical
connection between the two devices. Specifically, the connection includes the SWD interface,
required to program/debug the target PSoC 5LP device, power, ground, and reset.
Figure 4-6. J7 and J3 Headers
Table 4-3. Pin Details of J7 Header Table 4-4. Pin Details of J3 Header
Hardware
When the boards are separated, the KitProg board can be used to program any other PSoC 3,
PSoC 4, or PSoC 5LP family of devices via J7.
CY8CKIT-059 PSoC® 5LP Prototyping Kit Guide, Doc. #: 001-96498 Rev. *G 26
Page 27

4.2.5.3 Functionality of J8 and J9 Headers (KitProg)
KitProg GPIO Header (J9)
Pin Signal Description
J9_01 VBUS Power
J9_02 GND Ground
J9_03 P12.5 GPIO
J9_04 P12.0 GPIO/I2C_SCL
J9_05 P12.1 GPIO/I2C_SDA
J9_06 P12.6 GPIO/UART_RX
J9_07 P12.7 GPIO/UART_TX
KitProg GPIO Header (J8)
Pin Signal Description
J8_01 GND Ground
J8_02 P3.0 GPIO
J8_03 P3.4 GPIO
J8_04 P3.5 GPIO
J8_05 P3.6 GPIO
J8_06 P0.0 GPIO
J8_07 P0.1 GPIO
The KitProg board contains two dual-inline headers (J8 and J9). These headers are both 1x7-pinheaders, used to pull out several pins of PSoC 5LP to support advanced features like a low-speed
oscilloscope and a low-speed digital logic analyzer. This header also contains the KitProg bridge
pins that can be used when the two boards are separated.
The J8 and J9 headers support 100-mil spacing, so you can solder connectors to connect the
KitProg board to any development breadboard.
Figure 4-7. J8 and J9 Headers
Hardware
Table 4-5. Pin Details of J9 Table 4-6. Pin Details of J8
CY8CKIT-059 PSoC® 5LP Prototyping Kit Guide, Doc. #: 001-96498 Rev. *G 27
Page 28

4.2.6 User and Passive Inputs
USER PUSH BUTTON
P2_2
SW1
Switch
1A
1B
2A
2B
4.2.6.1 Push Button
The target PSoC 5LP board contains a single push button connected to the P2.2 pin on the
PSoC 5LP device. This button can be used for general user inputs or to control different states in an
application.
Figure 4-8. Push Button on the Board
4.2.6.2 Reset/Boot Button
The KitProg board contains a push button connected to the XRES pin on the target PSoC 5LP
device and P12_4 of the KitProg device. This button serves two functions:
■ Reset the PSoC 5LP device: When this button is pressed, XRES line of the PSoC 5LP is
connected to ground, which, in turn, resets the target device.
■ Bootload the KitProg: When this button is pressed while plugging the KitProg into the USB port of
the PC, the KitProg enters the bootloader mode. In this mode, bootloadable applications can be
downloaded on the KitProg device.
Hardware
Figure 4-9. Reset/Boot Button
Reset Button
The target board also provides a footprint for a through-hole switch, which can be used to reset the
device when the two boards are separated.
Figure 4-10. Reset (RST) Button
CY8CKIT-059 PSoC® 5LP Prototyping Kit Guide, Doc. #: 001-96498 Rev. *G 28
Page 29

4.2.6.3 LEDs
The PSoC 5LP Prototyping Kit contains three LEDs:
■ Amber LED: Indicates that the board is powered from the PCB USB connector. This LED will not
light when the board is powered from the micro-USB connector or from VDD or VTARG directly.
■ Green LED: Indicates the KitProg status, conne cted to P3.1 of the KitProg PSoC 5LP device. For
more details on the KitProg status LED, refer to the KitProg User Guide.
■ Blue LED: This is the user LED, connected to P2.1 of the target PSoC 5LP device.
Figure 4-11. Power LED
Figure 4-12. Status LED
Hardware
Figure 4-13. User LED
CY8CKIT-059 PSoC® 5LP Prototyping Kit Guide, Doc. #: 001-96498 Rev. *G 29
Page 30

4.2.6.4 System Capacitors
The PSoC 5LP Prototyping Kit has seven capacitors, which are used when ADC operation at high
frequencies, CapSense, or external 32-kHz crystal oscillator is required in the application.
■ Four ADC bypass capacitors: Required for proper ADC samplin g at high frequencies:
❐ C9 and C12 – For two SAR ADCs
❐ C7 and C13 – For Delta Sigma ADC
■ A CapSense capacitor (CMOD): Required for proper CapSense functionality.
■ Two biasing capa citors: Required for interfacing an external 32-kHz crystal oscillator. These
capacitors are added in the Rev *A version of the PSoC 5LP Prototyping Kit.
Note: The crystal oscillator is not placed on the board, it can be soldered on pins P15_2 and P15_3.
Figure 4-14. System Capacitors Circuit Diagram
Hardware
CY8CKIT-059 PSoC® 5LP Prototyping Kit Guide, Doc. #: 001-96498 Rev. *G 30
Page 31

5. Code Examples
This chapter explains the code examples provided along with the PSoC 5LP Prototyping Kit. To
access these code examples, download and install the CY8CKIT-059 PSoC 5LP Prototyping Kit
setup file from the kit webpage: www.cypress.com/CY8CKIT-059. After installation, the code
examples will be available from Start > Kits > CY8CKIT-059 on the PSoC Creator Start Page.
5.1 Using the Kit Code Examples
Follow these steps to open and use the code examples.
1. Launch PSoC Creator from the Windows Start menu (Start > All Programs > Cypress > PSoC
Creator<version> > PSoC Creator <version>).
2. On the Start page, click CY8CKIT-059 under Start > Kits. A list of code examples appears, as
shown in Figure 5-1.
3. Click on the desired code example and save it at a desired location. For the remaining steps,
CE195277_ADC_and_UART.cywrk is used as reference.
Figure 5-1. Open Code Example from PSoC Creator
CY8CKIT-059 PSoC® 5LP Prototyping Kit Guide, Doc. #: 001-96498 Rev. *G 31
Page 32

Code Examples
4. Build the code example by choosing Build > Build <Project Name>, as shown in Figure 5-2. A
.hex file is generated after the build process.
Figure 5-2. Open Code Example from PSoC Creator
5. Connect the PSoC 5LP Prototyping Kit to the PC using the KitProg PCB USB port, J10 as
described in Figure 3-2 on page 17 to program the kit with this code example.
6. Choose Debug > Program in PSoC Creator as shown in Figure 5-3.
Figure 5-3. Program Device in PSoC Creator
CY8CKIT-059 PSoC® 5LP Prototyping Kit Guide, Doc. #: 001-96498 Rev. *G 32
Page 33

Code Examples
7. PSoC Creator opens the programming window if the device is not yet acquired. Select KitProg
and click the Port Acquire button, as shown in Figure 5-4.
Figure 5-4. Port Acquire
8. After the device is acquired, it is shown in a tree structure below the KitProg. Click the Connect
button and then OK to exit the window and start programming, as shown in Figure 5-5.
Figure 5-5. Connect Device From PSoC Creator and Program
CY8CKIT-059 PSoC® 5LP Prototyping Kit Guide, Doc. #: 001-96498 Rev. *G 33
Page 34

Code Examples
9. From the workspace explorer in PSoC Creator, open the CE195277_ADC_and_UART.pdf as
shown in Figure 5-6.
Figure 5-6. Project Datasheet - CE195277_ADC_and_UART.pdf
CY8CKIT-059 PSoC® 5LP Prototyping Kit Guide, Doc. #: 001-96498 Rev. *G 34
Page 35

5.2 CE195352_PSoC_5LP_Blinking_LED
This code example demonstrates the use of a fixed-function PWM. The PWM is set up to output a
50-percent duty cycle digital signal with a period of 1 second. This signal can be used to drive an
LED for visual testing of the PWM output. A switch is routed into the kill input of the PWM. When the
switch is pressed the PWM output is shut off.
Figure 5-7. TopDesign for CE195352_PSoC_5LP_Blinking_LED
Code Examples
For a detailed description, refer to th e CE195352_PSoC_5LP_Blinking_LED.pdf from PSoC Creator.
CY8CKIT-059 PSoC® 5LP Prototyping Kit Guide, Doc. #: 001-96498 Rev. *G 35
Page 36

Figure 5-8. Project Datasheet - CE195352_PSoC_5LP_Blinking_LED.pdf
Code Examples
CY8CKIT-059 PSoC® 5LP Prototyping Kit Guide, Doc. #: 001-96498 Rev. *G 36
Page 37

5.3 CE195277_ADC_and_UART
This code example implements a simple data collection system using the DelSig ADC and the UART
component. The ADC continuously samples an analog input. The resulting samples can be sent to a
PC over a UART connection a single sample at a time or continuously. Emulated data, which is just
an incrementing number , can also be sent over th e UART connection to test the communica tion. The
USB-UART Bridge in the KitProg is used to create an RS-232 connection to a terminal program on a
PC. The terminal program is used to send commands to get the ADC samp le data and read the
resulting responses.
Figure 5-9. TopDesign CE195277_ADC_and_UART
Code Examples
For detailed operation, refer to the CE195277_ADC_and_UART.pdf from PSoC Creator.
CY8CKIT-059 PSoC® 5LP Prototyping Kit Guide, Doc. #: 001-96498 Rev. *G 37
Page 38

5.4 CE195394_HID_Mouse
This code example demonstrates the use of the USBFS component to implement a HID mouse.
Using the standard HID mouse descriptor, the PSoC enumerates as a mouse on the PC. Once the
enumeration is complete the PSoC sends dat a ab out th e relative movement of the mouse to the PC.
A single button is also implemented in the project to emulate the left button, or button 1, on a
standard mouse. You can hold down the button on the kit and watch the cursor highlight text or
select items on a desktop while it draws the box.
Figure 5-10. CE195394_HID_Mouse
Code Examples
For detailed operation, refer to the CE195394_HID_Mouse.pdf from PSoC Creator.
CY8CKIT-059 PSoC® 5LP Prototyping Kit Guide, Doc. #: 001-96498 Rev. *G 38
Page 39

A. Appendix
EXTREF0
EXTREF1
PSoC 5LP Target Device
USER LED
USB Connector
PSoC 5LP Program/Debug Header
PSoC 5LP I/O Header
PSoC 5LP I/O Header
P3_2,P0_2, P0_3 and P0_4
these pins
have bypass CAP
connected
This signals will be coming from Kitprog from Breakable area
SAR1 EXTREF
provide silk
for UART pins
provide silk
for I2C pins
PCA: 121-60210-01
PCB: 600-60243-01
FAB DRW: 610-60235-01
ASSY DRW: 620-60243-01
SCH: 630-60242-01
SAR0 EXTREF
CMOD
USER PUSH BUTTON
SAR Bypass Capacitors
UART TX
UART RX
UART TX
UART RX
VDDD
P1_1PROG_SWDCLK
P1_0PROG_SWDIO
P_SWO
P1_3
P_TDI
P1_4
VSSA
XRES
PROG_RESET
XRES
VDDA
DM_P
DP_P
P0_0
P0_1
P12_0
P12_1
P12_6
VDDIO2
P12_7
P2_6
P2_7
P12_4
P1_2
P3_7
P3_6
P3_0
P3_4
P3_5
P1_7
P1_6
P3_1
VDDD
P2_1
P12_5
P2_5
P1_5
P_SWO
PROG_RESET
PROG_SWDCLK
P_TDI
PROG_SWDIO
P2_0
P2_4
P2_3
P2_2
P2_1
P15_5
P15_4
P15_3
P15_2
P0_5
P15_0
P15_1
P3_2
VDDD
VSSD
P_VCCD
VSSD
P_VCCD
P3_3
VSSD
P_VCCD
VDDIO1 VDDIO3
P0_6
P0_7
P0_4
P12_2
P12_3
P2_2
P3_4
P3_5
P3_2
P3_3
P3_1
P3_0
P3_6
P3_7
P15_3
P15_2
P15_1
P15_0
P0_6
P0_7
P0_1
P0_5
P0_4
P0_3
P0_2
P0_0
P15_4
P15_5
DM
P3_2
XRES
XRES
P2_4
P2_5
P2_0
P2_1
P2_2
P2_3
P2_6
P2_7
P12_3
P12_2
P12_5
P12_4
P12_6
P12_7
I2C_SDAP12_1
I2C_SCLP12_0
P1_2
P1_3
P1_4
P1_5
P1_6
P1_7
P1_1
P1_0
VDDIO0
VDDIO0
VDDIO1
VDDIO2
VDDIO3
P0_3
P0_2
P0_3
P0_2
P_VCCD
VCCA
P0_4
P15_4
VCCA
VSSD
DP
VDDA
DP
DM
P12_7
P12_6
P15_3
P15_2
VTARG
VTARG
VTARG
VTARG
VDD
VTARG
P5LP_VDD
VDD
VDDIO
VDDIO
VDDIO
VDD
VDD
P5LP_VDD
P5LP_VDD
I2C_SDA
I2C_SCL
UART RX
UART TX
PROG_SWDIO
PROG_SWDCLK
PROG_RESET
Title
Size Document Number Rev
CYPRESS SEMICONDUCTOR © 2015
630-60242-01
06
CY8CKIT-059 PSoC 5LP Prototyping Kit
B
Title
Size Document Number Rev
CYPRESS SEMICONDUCTOR © 2015
630-60242-01
06
CY8CKIT-059 PSoC 5LP Prototyping Kit
B
Title
Size Document Number Rev
CYPRESS SEMICONDUCTOR © 2015
630-60242-01
06
CY8CKIT-059 PSoC 5LP Prototyping Kit
B
0603
C37
1.0 uF
0402
C18
0.1 uF
SOD123
D2
0603
C36
1.0 uF
0603
C26
1.0 uF
J2
HDR 1x26
No Load
1
1
2
2
3
3
4
4
5
5
6
6
7
7
8
8
9
9
10
10
11
11
12
12
13
13
14
14
15
15
16
16
17
17
18
18
19
19
20
20
21
21
22
22
23
23
24
24
25
25
26
26
0603
R23 ZERO
21
Y1
32.768 KHz
No Load
J4
HEADER 1X 2No Load
112
2
R20 ZERO
0402
C29
0.1 uF
0402
C22
0.1 uF
0402
C42
22 pF
0603
C13
1.0 uF
J5
50MIL KEYED SMD
No Load
1
3
5
7
9
2
4
6
8
10
0402
C35
0.1 uF
R11
ZERO
0402
R12100K
J3
HDR 1x5
No Load
1
1
3
3
2
2
4
4
5
5
R19
4.7K
No Load
0402
C27
0.1 uF
0402
C17
0.1 uF
No Load
J1
HDR 1x26
No Load
1
1
2
2
3
3
4
4
5
5
6
6
7
7
8
8
9
9
10
10
11
11
12
12
13
13
14
14
15
15
16
16
17
17
18
18
19
19
20
20
21
21
22
22
23
23
24
24
25
25
26
26
TP3
BLACK
No Load
0603
R17 22E
F1
PTC Resettable Fuse
0402
C32
0.1 uF
0402
C33
0.1 uF
SW2
SW PUSHBUTTON
No Load
1 2
0402
C19 0.01 uF
TP1
BLACK
No Load
TP2
BLACK
No Load
R15 ZERO
0603
C31
1.0 uF
C4
2200 pF
J6
USB Micro-B
VBUS
1
DM
2
DP
3
ID
4
GND
5
S16S27S38S4
9
0603
C12
1.0 uF
0402
C23
0.1 uF
R18
820 ohm
TVS1
TVS DIODE
0603
R22 ZERO
0805
LED1
User LED BLUE
2 1
0603
R16 22E
0603
C21
1.0 uF
0402
C41
22 pF
SW1
Switch
1A1B2A
2B
0402
C20
0.1 uF
0603
C9
1.0 uF
0603
R5
ZERO
0402
C34
0.1 uF
U2
CY8C5888LTI-LP097 QFN68
P2_6
1
P2_7
2
P12_4 I2C0_SCL, SIO
3
P12_5 I2C0_SDA, SIO
4
VSSB
5
IND
6
VBOOST
7
VBAT
8
VSSD
9
XRES
10
P1_0
11
P1_1
12
P1_2
13
P1_3
14
P1_4
15
P1_5
16
VDDIO1
17
P1_618P1_719P12_6_SIO20P12_7_SIO21P15_6 DP22P15_7 DM23VDDD24VSSD25VCCD26P15_027P15_128P3_029P3_130P3_231P3_332P3_433P3_5
34
VDDIO3
35
VDDIO0
52
P0_3
51
P0_2
50
P0_1
49
P0_0
48
SIO_P12_3
47
SIO_P12_2
46
VSSD
45
VDDA
44
VSSA
43
VCCA
42
P15_3
41
P15_2
40
SIO, I2C1_SDA P12_1
39
SIO, I2C1_SCL P12_0
38
P3_7
37
P3_6
36
P2_466P2_365P2_264P2_163P2_0
62
P15_561P15_4
60
VDDD
59
VSSD
58
VCCD
57
P0_756P0_655P0_554P0_4
53
VDDIO2
67
P2_5
68
EPAD
69
0603
C7
1.0 uF
A.1 PSoC 5LP Prototyping Kit Schematics
CY8CKIT-059 PSoC® 5LP Prototyping Kit Guide, Doc. #: 001-96498 Rev. *G 39
Page 40

Kitprog on-board Programmer / Debugger
Target PSoC Program/Debug Header
I2C & UART Connection
Status LED
Power LED
USB Finger Connector
P3_3, P3_2, P0_7, P0_6, P0_5, P0_4
pins are reserved for HW REV ID
5(MSB)43210(LSB)
P0.4P0.5P0.6P0.7P3.2P3.3
FloatingFloatingFloatingFloating GND GND
GND read as binary "1"
floating pin is read as binary "0"
PCA: 121-60210-01
PCB: 600-60243-01
FAB DRW: 610-60235-01
ASSY DRW: 620-60243-01
SCH: 630-60242-01
SAR Bypass
Capacitor
Place Near PSoC 5LP
KitProg I/O Headers
VDDD
VCCA
KP_DP
KP_DM KP_DM_P
KP_DP_P
KP_P0_0
KP_P0_1
KP_P12_0
KP_P12_1
KP_P12_6
KP_VDDIO0
VSSD
KP_P12_7
KP_P12_2
KP_P2_6
KP_P2_7
KP_P12_4
KP_P3_6
KP_VDDIO3
VSSD
KP_P12_3
KP_P3_0
KP_P3_4
KP_P3_5
KP_P1_7
KP_P1_6
KP_P3_1
KP_VCCD
KP_P3_1
KP_P12_5
KP_P12_0
KP_P12_1
KP_P0_4
KP_P2_7
KP_P2_6
KP_VCCD
KP_P0_5
KP_P12_3
KP_P12_2
KP_P12_4
KP_P3_4
KP_P3_0
KP_P3_5
KP_P0_0
KP_P3_6
KP_P0_1
KP_DM
KP_DP
KP_P12_7
KP_P12_6
KP_P12_5
UART RX
UART TX
I2C_SDA
I2C_SCL
PROG_RESET
VDDD
KP_VDDIO2
KP_VDDIO0
KP_VDDIO1
KP_VDDIO1
KP_VDDIO3
KP_VCCD
VDDA
VDDD
VDDD
VDDA
VCCA
KP_P1_6
KP_P1_7
VSSD
KP_P0_3
KP_P0_2
KP_P0_4
KP_P0_3
KP_P0_2
VSSD
KP_XRES
KP_XRES
KP_VDDIO2
VTARG VBUS
KP_VDD
VBUS
VTARG
VBUS
VBUS
VTARG
VBUS
VBUS
VTARG
KP_VDD
KP_VDD
KP_VDD
I2C_SDA
I2C_SCL
UART RX
UART TX
PROG_SWDIO
PROG_SWDCLK
PROG_RESET
Title
Size Document Number Rev
CYPRESS SEMICONDUCTOR © 2015
630-60242-01
06
CY8CKIT-059 PSoC 5LP Prototyping Kit
B
Title
Size Document Number Rev
CYPRESS SEMICONDUCTOR © 2015
630-60242-01
06
CY8CKIT-059 PSoC 5LP Prototyping Kit
B
Title
Size Document Number Rev
CYPRESS SEMICONDUCTOR © 2015
630-60242-01
06
CY8CKIT-059 PSoC 5LP Prototyping Kit
B
U3
NTZD3152P
6
2
1
3 4
5
0402
C11
0.1 uF
F2
PTC Resettable Fuse
R10
560 ohm
0603
C16
1.0 uF
0603
C30
1.0 uF
0603
C38
1.0 uF
0603
C28
1.0 uF
0603
R622E
0603
C15
1.0 uF
0402
C39
0.1 uF
SW3
Switch
1A1B2A
2B
0805
LED2
POWER LED Amber
2 1
J7
HDR 1x5
No Load
1
1
3
3
2
2
4
4
5
5
R13
30K
R8
ZERO
0402
C5
0.1 uF
J8
HDR 1x7
No Load
1
2
3
4
5
6
7
R21
820 ohm
0805
LED3
Status LED Green
2 1
0603
C8
1.0 uF
U1
CY8C5868LTI-LP039 QFN68
P2_6
1
P2_7
2
P12_4 I2C0_SCL, SIO
3
P12_5 I2C0_SDA, SIO
4
VSSB
5
IND
6
VBOOST
7
VBAT
8
VSSD
9
XRES
10
P1_0
11
P1_1
12
P1_2
13
P1_3
14
P1_4
15
P1_5
16
VDDIO1
17
P1_618P1_719P12_6_SIO20P12_7_SIO21P15_6 DP22P15_7 DM23VDDD24VSSD25VCCD26P15_027P15_128P3_029P3_130P3_231P3_332P3_433P3_5
34
VDDIO3
35
VDDIO0
52
P0_3
51
P0_2
50
P0_1
49
P0_0
48
SIO_P12_3
47
SIO_P12_2
46
VSSD
45
VDDA
44
VSSA
43
VCCA
42
P15_3
41
P15_2
40
SIO, I2C1_SDA P12_1
39
SIO, I2C1_SCL P12_0
38
P3_7
37
P3_6
36
P2_466P2_365P2_264P2_163P2_0
62
P15_561P15_4
60
VDDD
59
VSSD
58
VCCD
57
P0_756P0_655P0_554P0_4
53
VDDIO2
67
P2_5
68
EPAD
69
R9
2.2K
0402
C3
0.1 uF
0603
C24
1.0 uF
0402
C1
0.1 uF
R1
4.7K
No Load
R2
15K
SOD123
D1
0603
R422E
0603
C25
1.0 uF
R14
30K
0402
C10
0.1 uF
0402
C14
0.1 uF
0402
C2
0.1 uF
No Load
J10
USB FINGER
VBUS
1
DM
2
DP
3
GND
4
R7
2.2K
J9
HDR 1x7
No Load
1
2
3
4
5
6
7
0402
C40
0.1 uF
0402
C6
0.1 uF
R3
15K
CY8CKIT-059 PSoC® 5LP Prototyping Kit Guide, Doc. #: 001-96498 Rev. *G 40
Page 41

A.2 Programming PSoC 5LP Prototyping Kit Using MiniProg3/KitProg
The target board has a provision to program the PSoC 5LP device using MiniProg3 or an external
KitProg via the 5-pin SWD header or the 10-pin JTAG header. To do this, connect wires or a 5-pin
100-mil spaced header to J3 or a 10-pin JTAG header to J5 on the target board. The PSoC 5LP
Prototyping Kit supports both power cycle and reset programming modes.
Figure A-1. Connecting CY8CKIT-059 to MiniProg3
Note: CY8CKIT-002 MiniProg3 is not part of the PSoC 5LP Prototyping Kit contents and can be
purchased from the Cypress Online Store.
CY8CKIT-059 PSoC® 5LP Prototyping Kit Guide, Doc. #: 001-96498 Rev. *G 41
Page 42

A.3 Bill of Materials
Item Qty Reference Value Description Mfr Name Mfr Part Number
PCB,
11N/A N/A
C1, C3, C5,
C6, C10, C11,
C14, C18,
C20, C22,
219
3 1 C4 2200 pF
417
5 1 C19 0.01 uF
6 2 C41, C42 22 pF
7 2 D1, D2 MBR0520L
8 2 F1, F2
9 1 J6 USB Micro-B
10 1 LED1
11 1 LED2
12 1 LED3
13 2 R2, R3 15K
14 4
C23, C27,
C29, C32,
C33, C34,
C35, C39,
C40
C7, C8, C9,
C12, C13,
C15, C16,
C21, C24,
C25, C26,
C28, C30,
C31, C36,
C37, C38
R4, R6, R16,
R17
0.1 uF
1.0 uF
PTC
Resettable
Fuse
User LED
BLUE
POWER LED
Amber
Status LED
Green
22E
108.89mm × 24.13mm,
High Tg, ENIG finish, 2 layer,
Color = BLACK,
Silk = WHITE
CAP .1UF 16V CERAMIC
Y5V 0402
CAP CER 2200PF 50V 5%
NP0 0805
CAP CERAMIC 1.0UF 25V
X5R 0603 10%
CAP 10000PF 16V
CERAMIC 0402 SMD
CAP CER 22PF 50V 2%
C0G 0402
DIODE, SCHOTTKY, 20V,
0.5A, 400mW, SOD-123
FUSE, PTC Resettable,
0.50A, 16V, 1210, SMD
CONN RCPT STD MICRO
USB TYPE B
LED, BLUE, CLEAR, 0805,
SMD
LED 595NM AMB DIFF
0805 SMD
LED GREEN CLEAR 0805
SMD
RES SMD 15K OHM 5%
1/10W 0402
RES, 22 OHM, 1%,
100PPM, 1/16W, 0402
Cypress
Semiconductor
AVX Corporation 0402YG104ZAT2A
Murata Electronics GRM2165C1H222JA01D
Taiyo Yuden TMK107BJ105KA-T
TDK Corporation C1005X7R1C103K050BA
TDK Corporation C1005C0G1H220G050BA
Fairchild
Semiconductor
Bel Fuse Inc 0ZCH0050FF2G
FCI 10103594-0001LF
Lite-On Inc LTST-C170TBKT
Avago Technologies
US Inc.
Chicago Miniature/
Visual
Communications
Company-VCC
Panasonic - ECG ERJ-2GEJ153X
Panasonic - ECG ERJ-2RKF22R0X
600-60178-01
MBR0520L
HSMA-C170
CMD17-21VGC/TR8
CY8CKIT-059 PSoC® 5LP Prototyping Kit Guide, Doc. #: 001-96498 Rev. *G 42
Page 43

Item Qty Reference Value Description Mfr Name Mfr Part Number
15 3 R5, R22, R23 ZERO
16 2 R7, R9 2.2K
17 1 R10 560 ohm
18 1 R12 100K
19 2 R13, R14 30K
20 4
21 2 R18, R21 820 ohm
22 2 SW1, SW3 Switch
23 1 TVS1 TVS DIODE
24 1 U1
25 1 U2
26 1 U3 NTZD3152P
No Load Components
1 2 C2, C17 0.1 uF
2 2 J1, J2 HDR 1x26
3 2 J3, J7 HDR 1x5
4 1 J4 HDR 1x2
51J5
6 2 J8, J9 HDR 1x7
7 2 R1, R19 4.7K
81SW2
R8, R11, R15,
R20
ZERO
CY8C5868LTI
-LP039
QFN68
CY8C5888LTI
-LP097
QFN68
50MIL
KEYED SMD
SW PUSHBUTTON
RES SMD 0.0 OHM
JUMPER 06O3 1/10W
RES 2.2K OHM 1/10W 5%
0603 SMD
RES, 560 OHM, 5%,
200PPM, 1/10W, 0603, SMD
RES 100K OHM 1/10W 5%
0402 SMD
RES SMD 30K OHM 5%
1/10W 0402
RES SMD 0.0 OHM
JUMPER 1/8W 0805
RES, 820 OHM, 5%, 1/10W,
0603
SW, TACTILE SWITCH,
SPST-NO, 0.05A, 32V
DIODE, TVS, 5V, 350W,
SOD-323
PSoC 5LP CYC58LP, 67
MHz
PSoC 5LP CYC58LP, 80
MHz
FET DUAL P-CH 20V
430mA SOT-563
CAP .1UF 16V CERAMIC
Y5V 0402
CONN HDR BRKWAY
26POS VERT
2.54mm,15AU, TH
CONN HEADER 5POS .100
VERT TIN
CONN HEADR BRKWAY
.100 02POS STR
CONN, HEADER, MALE,
1.27mm, 10POS, GOLD,
SMD
CONN HEADER FEMALE
7POS .1" GOLD
RES SMD 4.7K OHM 5% 1/
10W 0402
SWITCH TACTILE SPSTNO 0.05A 12V
Panasonic - ECG ERJ-3GEY0R00V
Panasonic - ECG ERJ-3GEYJ222V
Panasonic - ECG ERJ-3GEYJ561V
Panasonic - ECG ERJ-2GEJ104X
Panasonic - ECG ERJ-2GEJ303X
Panasonic - ECG ERJ-6GEY0R00V
Panasonic - ECG ERJ-3GEYJ821V
C&K Components KMR221GLFS
Semtech SD05.TCT
Cypress
Semiconductor
Cypress
Semiconductor
ON Semiconductor NTZD3152PT1G
AVX Corporation 0402YG104ZAT2A
TE Connectivity 2-104427-4
Molex 22-23-2051
TE Connectivity 9-146280-0-02
Samtec Inc FTSH-105-01-L-DV-K
Sullins Connector
Solutions
Panasonic - ECG ERJ-2GEJ472X
C&K Components PTS635SL50 LFS
CY8C5868LTI-LP039
CY8C5888LTI-LP097
PPPC071LFBN-RC
CY8CKIT-059 PSoC® 5LP Prototyping Kit Guide, Doc. #: 001-96498 Rev. *G 43
Page 44

Item Qty Reference Value Description Mfr Name Mfr Part Number
93
10 1 Y1 BLACK
Label
38 1 N/A
39 1 N/A
TP1, TP2,
TP3
BLACK
TP, TEST POINT, 0.040"D,
BLACK, TH
CRYSTAL 32.768KHZ
12.5PF THRU
LBL, PCA Label, Vendor
Code, Datecode, Serial
Number 121-60210-01 REV
01 (YYWWVVXXXXX)
LBL, PCBA Anti-St atic Warning, 10mm × 10mm
Keystone
Electronics
Citizen Finetech
Miyota
Cypress
Semiconductor
Cypress
Semiconductor
5000
CFS308-32.768KDZF-UB
CY8CKIT-059 PSoC® 5LP Prototyping Kit Guide, Doc. #: 001-96498 Rev. *G 44
Page 45

Revision History
CY8CKIT-059 PSoC® 5LP Prototyping Kit Guide Revision History
Document Title: CY8CKIT-059 PSoC® 5LP Prototyping Kit Guide
Document Number: 001-96498
Revision ECN Issue Date
** 4668422 02/23/2015 PMAD New kit guide
*A 4710488 04/02/2015 PMAD
Origin of
Change
Description of Change
Updated Introduction chapter on page 7:
Updated description.
Updated “PSoC Creator” on page8:
Updated “PSoC Creator Code Examples” on page 9:
Updated description.
Added “Kit Code Examples” on page 10.
Updated Software Installationchapter on page 13:
Updated “Before You Begin” on page 13:
Updated description.
Updated “Install Software” on page 13:
Updated description.
Updated Kit Operation chapter on page16:
Updated “Theory of Operation” on page16:
Updated description.
Updated Figure 3-1.
Updated “KitProg” on page17:
Updated description.
Removed “KitProg USB Connection”.
Updated “Programming and Debugging the PSoC 5LP Target Device” on page 17:
Updated “Programming using PSoC Creator” on page 17:
Updated description.
Updated “Programming using PSoC Programmer” on page 19:
Updated description.
Updated “USB-UART Bridge” on page 19:
Updated description.
Removed table “Specifications Supported by USB-UART Bridge”.
Updated “USB-I2C Bridge” on page 19:
Updated description.
Removed figure “KitProg USB-I2C Connected in Bridge Control Panel”.
Updated “Updating KitProg Firmware” on page 19:
Updated description.
Removed figure “KitProg Firmware Update Warning”.
Removed figure “Upgrade Firmware Message in PSoC Programmer”.
Removed figure “Firmware Updated in PSoC Programmer”.
CY8CKIT-059 PSoC® 5LP Prototyping Kit Guide, Doc. #: 001-96498 Rev. *G 45
Page 46

CY8CKIT-059 PSoC® 5LP Prototyping Kit Guide Revision History (continued)
Document Title: CY8CKIT-059 PSoC® 5LP Prototyping Kit Guide
Document Number: 001-96498
Revision ECN Issue Date
*A (cont.) 4710488 04/02/2015 PMAD
*B 4866765 07/30/2015 VRNK
*C 4891134 08/20/2015 SHIB
*D 5740232 05/17/2017 AESATMP8 Updated logo and Copyright.
Origin of
Change
Description of Change
Updated Hardware chapter on page 20:
Updated “Board Details” on page 20:
Updated Figure 4-1.
Updated “Hardware Details” on page 21:
Updated “Power Supply System” on page 23:
Updated description.
Updated “Header Connections” on page 24:
Updated “Functionality of the J1 and J2 Headers (Target Board)” on page 24:
Updated Table 4-2.
Updated “User and Passive Inputs” on page 28:
Updated “Push Button” on page 28:
Updated Figure 4-8.
Removed figure “Push Button Schematic”.
Updated Figure 4-14.
Updated “LEDs” on page29:
Updated description.
Updated “System Capacitors” on page 30:
Updated description.
Updated Figure 4-14.
Updated Code Examples chapter on page31:
Updated “CE195352_Blinking_LED” on page35:
Updated Figure 5-7.
Updated “CE195277_ADC_and_UART” on page 37:
Updated description.
Updated Figure 5-9.
Updated “CE195394_HID_Mouse” on page 38:
Updated description.
Updated Figure 5-10.
Updated Appendix chapter on page 39:
Updated “Programming PSoC 5LP Prototyping Kit Using MiniProg3/KitProg” on page 41:
Updated Figure A-1.
Updated “Bill of Materials” on page 42:
Added Item 10 under “No Load Components”.
Added “Label” and added corresponding items under the same.
Updated Hardware chapter on page 20:
Updated “Hardware Details” on page 21:
Updated “Header Connections” on page 24:
Updated “Functionality of the J1 and J2 Headers (Target Board)” on page 24:
Updated Table 4-2:
Added “/BYPAS S CAP” in the “Description” column corresponding to pins P0.4 and P3.2.
Remove “/BYPASS CAP” in the “Description” column corresponding to pin P3.3.
Updated Appendix chapter on page 39:
Updated “Bill of Materials” on page 42:
Updated Item 10 under “No Load Components”.
Index
CY8CKIT-059 PSoC® 5LP Prototyping Kit Guide, Doc. #: 001-96498 Rev. *G 46
Page 47

CY8CKIT-059 PSoC® 5LP Prototyping Kit Guide Revision History (continued)
Document Title: CY8CKIT-059 PSoC® 5LP Prototyping Kit Guide
Document Number: 001-96498
Revision ECN Issue Date
*E 6041084 01/22/2018 SAGA / GRSK
*F 6077263 02/21/2018 SAGA
Origin of
Change
Description of Change
Updated Introduction chapter on page 7:
Updated “PSoC Creator” on page8:
Updated “PSoC Creator Code Examples” on page 9:
Updated Figure 1-3.
Updated “Getting St arted” on page 11:
Updated description.
Updated “Additional Learning Resources” on page 11:
Updated hyperlinks.
Updated Software Installationchapter on page 13:
Updated “Install Software” on page 13:
Updated description.
Updated Figure 2-1, and Figure 2-2.
Updated Kit Operation chapter on page16:
Updated “Theory of Operation” on page16:
Updated description.
Updated “Programming and Debugging the PSoC 5LP Target Device” on page 17:
Updated “Debugging using PSoC Creator” on page 19:
Updated description.
Updated Hardware chapter on page 20:
Updated “Hardware Details” on page 21:
Updated “Header Connections” on page 24:
Updated “Functionality of J7 and J3 Headers (PSoC 5LP to KitProg)” on page 26:
Updated Table 4-3, and Table 4-4.
Updated “Functionality of J8 and J9 Headers (KitProg)” on page 27:
Updated Table 4-5, and Table 4-6.
Updated Code Examples chapter on page31:
Updated “Using the Kit Code Examples” on page 31:
Updated description.
Updated Figure 5-1, Figure 5-2, Figure5-3, Figure 5-4, and Figure 5-6.
Updated “CE195352_Blinking_LED” on page35:
Updated description.
Updated Figure 5-8.
Updated “CE195277_ADC_and_UART” on page 37:
Updated description.
Updated Figure 5-9.
Updated “CE195394_HID_Mouse” on page 38
Updated description.
Updated Figure 5-10.
Updated Appendix chapter on page 39:
Updated “PSoC 5LP Prototyping Kit Schematics” on page39:
Updated all figures.
Updated “Bill of Materials” on page 42:
Updated entire table.
Completing Sunset Review.
Updated Software Installationchapter on page 13:
Updated “Install Software” on page 13:
Updated description.
Updated Kit Operation chapter on page16:
Updated “Programming and Debugging the PSoC 5LP Target Device” on page 17:
Updated “Programming using PSoC Programmer” on page 19:
Updated description.
:
Index
CY8CKIT-059 PSoC® 5LP Prototyping Kit Guide, Doc. #: 001-96498 Rev. *G 47
Page 48

CY8CKIT-059 PSoC® 5LP Prototyping Kit Guide Revision History (continued)
Document Title: CY8CKIT-059 PSoC® 5LP Prototyping Kit Guide
Document Number: 001-96498
Revision ECN Issue Date
*G 6095702 03/12/2018 SAGA
Origin of
Change
Description of Change
Updated the code example title in Section 5.2.
Updated Figure 5.1 and Figure5-8.
Index
CY8CKIT-059 PSoC® 5LP Prototyping Kit Guide, Doc. #: 001-96498 Rev. *G 48
 Loading...