

Page 1
1
CSO-T2
Instant HQV HD Scaler
Box
Operation Manual
CSO-T2
Page 2

2
TABLE OF CONTENTS
1. Introduction
.........................................................................................
2. Features
...............................................................................................
3. Package Contents
...............................................................................
4. Operation Controls and Functions
....................................................
4.1 Front Panel ....................................................................................
4.2 Rear Panel .....................................................................................
5. Remote Control
...................................................................................
6. OSD Operation
.....................................................................................
6.1 Input...............................................................................................
6.2 Picture..........................................................................................
6.3 Screen..........................................................................................
6.4 HQV..............................................................................................
6.5 Setup............................................................................................
7. Connection and Installation
...............................................................
8. Specications
......................................................................................
1
1
1
2
2
2
3
4
4
4
5
6
6
7
7
Page 3

1
1. Introduction
The Instant HQV HD Scaler box allows the user to maximize the full benets
of the today’s High Denition DTV. Instant HQV uses the Industry leading
HQV Realta Video Processor to convert standard denition content (PAL/
NTSC) into crisp, detailed and artifact resolution of your DTV. This allows
you to enjoy the full benets of the high resolution by recreating the
cinema like viewing experience as the original DVD content was intended.
In addition, the HD inputs up to 1080i are vastly improved by the same
industry leading HQV video processing to deliver crisp, stunning and noise
free full HD video.
2. Features
3D video decoder for optimal NTSC/PAL/SECAM video quality.
HDMI1.3 Rx and Tx with Deep Color and xvYCC color gamut support.
True 10-bit HQV video processing.
Motion adaptive four eld de-interlacing for SD and HD input resolutions.
AnyNoise™-Automatically detects the different type of noise and applies
the appropriate per pixel based noise reduction algorithm.
AnyCadence™-Automatically detects all different cadences including
3:2:3:2:2 and animation.
MDDF (Multi Directional Diagonal Filtering) to eliminate jaggies for both SD
and HD input resolutions.
Lips sync audio delay.
HQV Detail Enhancement-Processes the SD input image quality to
approach HD output image quality.
3. Package Contents
Instant HQV scaler box.
5V/5A DC power supply adaptor.
Operation Manual.
HQV Benchmark.
Page 4

2
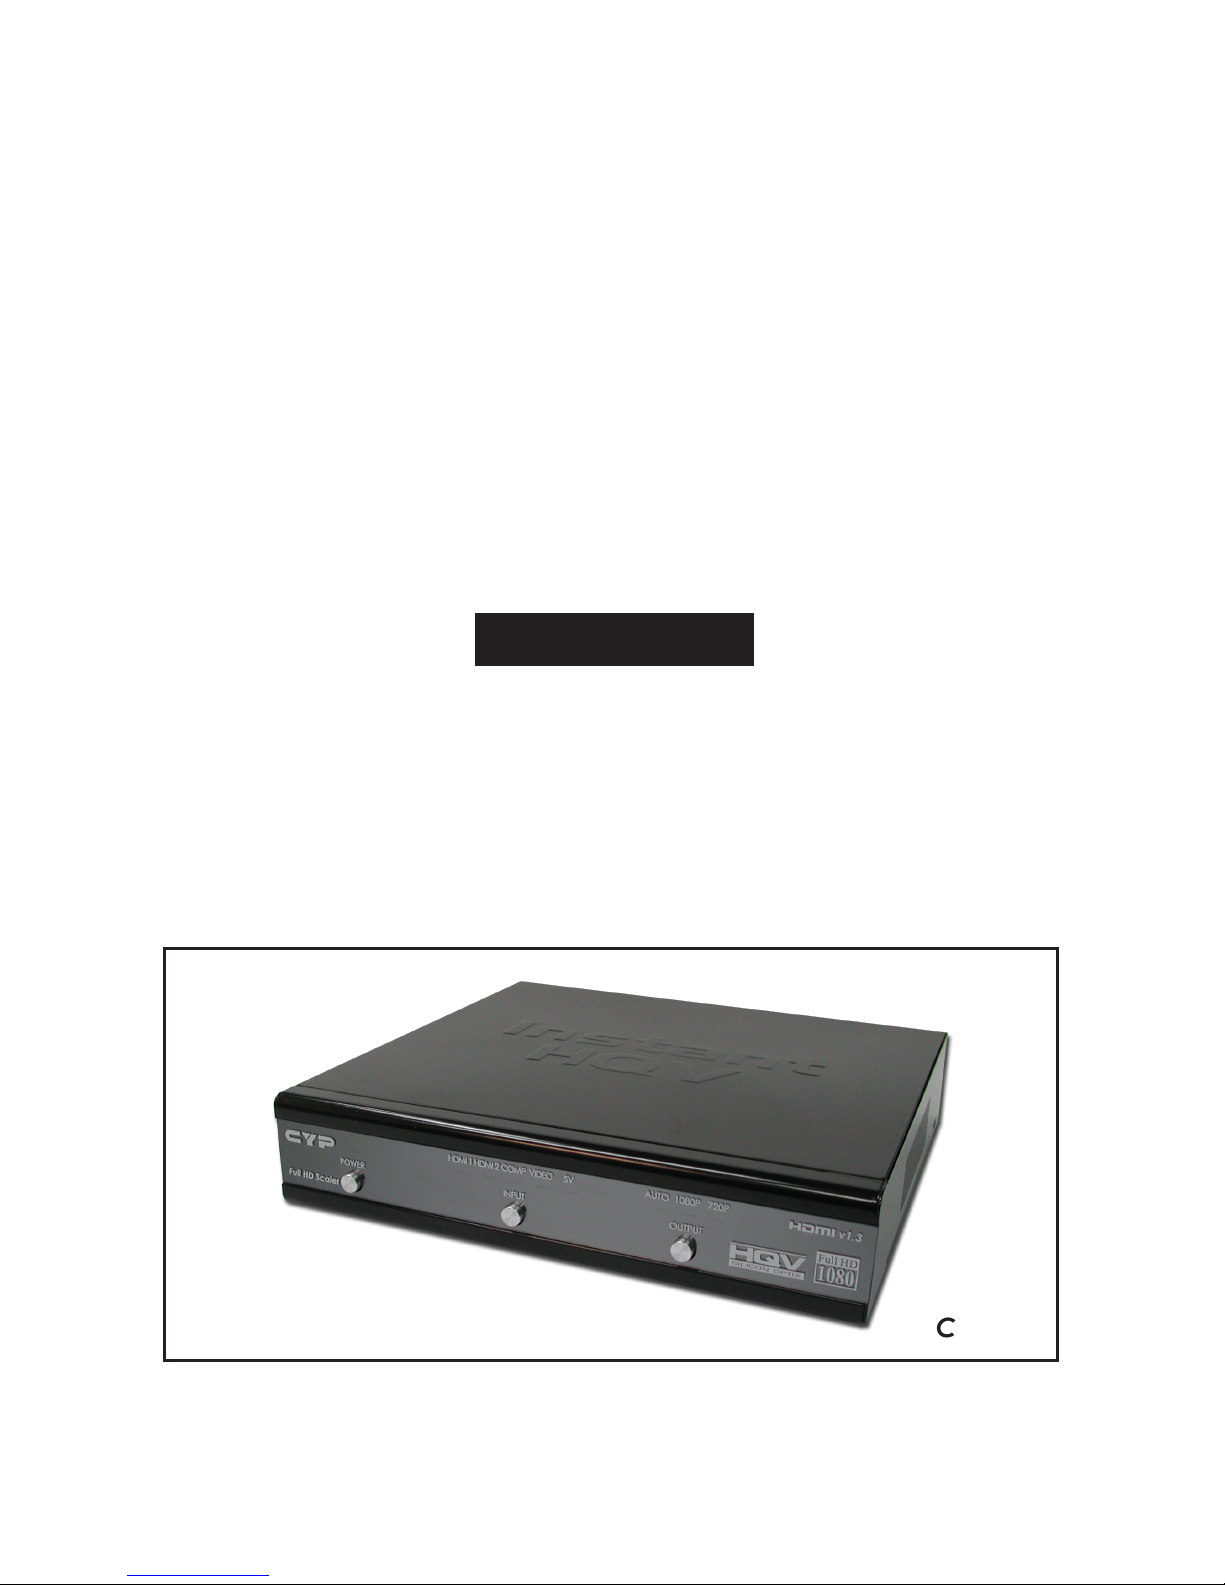
4. Operation Controls and Functions
4.1 Front Panel
4.2 Real Panel
1 Video with R/L input: Connect the Video with R/L input port to the source
equipment such as DVD player or set-top-box.
2 S-Video with R/L input: Connect the S-Video with R/L input port to the
source equipment such as DVD player or set-top-box.
3 HDMI 1/2 inputs: Connect each of the input ports to the HDMI output of
your source. (NOTE: Component output will be disable when there is a
HDMI input)
4 Component input: Connect the Component (Y, Pr/Cr, Pb/Cb, R, L) input
port to the source equipment such as DVD player or set-top-box.
5 Component output: Connect the Component (Y, Pr/Cr, Pb/Cb, R, L)
output port to the display.
6 HDMI output: Connect the HDMI output port to the display.
7 Power: Plug the 5V DC power supply into this unit and connect the
adaptor to AC wall outlet.
1 Power: Press to turn ON/OFF the system. The LED will illuminate in green
light when power is ON. When power OFF the LED will illuminate in red light.
2 IR sensor
3 Input selection: Press to select input source (HDMI 1/HDMI 2/Component/
Vdieo/S-Video). The LED will illuminate to indicate which input source is
being selected.
4 Output timing selection: Press to select output timing and the LED will
illuminate to indicate which output timing is being selected.
1 2 3 4
1 2 3 4 5 6 7
Page 5

3
5. Remote Control
CR-60
POWERMENU
CLEANER DETAIL
A.RATIO
OUTPUT
DEMO
SVCOMP VIDEO
Instant
HQV
ENTER
HDMI 2
HDMI 1
INPUT
1 Menu: Press the button to bring up
OSD main menu page.
2 Power: Press the button once to
power on the system, press again to
enter standby mode.
3 Cleaner: Press to switch the Noise
Reduction (NR) feature. There are four
levels can adjust Off/Low/Middle/High
and these features workable when input
resolution is 480i/480p/576i/576p/1080i.
4 Detail: Press to switch the Detail
Enhancement feature. There are ve
levels can adjust 0/25/50/75/100. The
factory default value is 0 (OFF).
5 Up/Down/Left/Right: Press the Up/Down button to move the highlight
bar to your desired parameter during the OSD operation. Press the Left/
Right button to increase/decrease the setting values.
6 Enter: Press the button to conrm the selection.
7 Demo: Press for window split demo mode. This demo mode will display
half left and half right side for video quality comparison. The half left side
is the original video source without HQV process and the half right side
video quality after HQV process. This demo mode workable when input
resolution is 480i/480p/576i/576p/1080i.
8 Aspect Ratio: Press to select the Aspect Ratio format, there are
Standard/ Full Screen/ Crop/ Anamorphic/ Flexview/ 1_1/ Cinemascope
and these features workable when input resolution is 480i/480p/576i/576p.
When input resolution is 720p/1080i/1080p, the standard/1:1/
Cinemascope can be adjusted,other features are futile. The factory
default is Standard.
9 Input selection: Press each quick input selection button to choose input
source.
10
Output: Press the button sequentially to select output resolution (Auto
mode/720p/1080p).
1 2
3
4
5
6
7
8
10
9
Page 6

4
6. OSD Operation
Press [MENU].
Press [▲/▼] to highlight an option.
Press [◄/►] to adjust or press [◄] return to previously page.
Press [Enter] to conrm the selection
6.1 Input
Option Description
Input Browse through HDMI1/2, Component, Composite and S-Video
6.2 Picture
Page 7

5
Option Description
Brightness 0~100 of Brightness levels, the factory default value is 50
Contrast 0~100 of Contrast levels, the factory default value is 50
Color 0~100 of Color levels, the factory default value is 50
Hue 0~360 of Hue levels, the factory default value is 180
Sharpness 0~100 of Sharpness levels, the factory default value is 50
Gamma Mode
Adjust Gamma Correction levels, there are 1.0, 1.8, 2.0,
2.2 and 2.4; the factory default value is 1.0
Black-Level 0 IRE (off), 7.5 IRE; the factory default value is 0 IRE (off)
Color Temp
9300K: Balanced color shade
Neutral: Neutral color shade
5500K: Dusky sky alike color shade; the factory default
value is Neutral
6.3 Screen
Option Description
Aspect Ratio
Standard: Original content aspect ratio
Full Screen: Full screen by linear stretching
Crop: Full Screen by cropping
Anamorphic: Use in conjunction of 16:9 to 2.35:1
conversion lens. Morphing a 4:3 or 16:9 lm contents
from a 16:9 format to a 2.35:1 format
Flexview: full screen by non-linear stretching
1:1: 1:1 ratio
Cinemascope: Use in conjunction of 16:9 to 2.66:1
conversion lens. Morphing a 4:3 or 16:9 lm contents
from a 16:9 format to a 2.66:1 format
Page 8

6
6.4 HQV
Option Description
HQV Processing HQV ON/OFF
6.5 Setup
Option Description
Output Mode
Auto/VGA/SVGA/XGA/SXGA/UXGA/WXGA/
WSXGA/WUXGA/480P/576P/720P/720P@50/1080i/
1080i@50/1080p/1080p@24/1080p@50
Reset Press to reset the system back to factory setting
Menu Position Center, Top Left, Top Right, Bottom Left, Bottom Right
Menu Transparency Select On/Off
Language Select preferred language
Audio Delay Adjust Audio Delay 0~400ms, each step 100ms
Page 9

7
7. Connection and Installation
8. Specications
Input ports Composite video + R/L x 1
S-Video + R/L x 1
Component + R/L x 1
HDMI x 2
Output port HDMI x 1
Component + R/L x 1
Power Supply 5V/5A DC (US/EU standards, CE/FCC/UL certied)
Dimensions (mm) 217(W) x 213(D) x 50(H)
Weight(g) 1430
Chassis Material Metal
Silk Skin Color Black
Operating Temperature Operating from 0°C ~ 40°C
Page 10

8
Page 11

9
20080704MPM-CSOT2
Page 12

Home page: http://www.cypress.com.tw
CYPRESS TECHNOLOGY CO., LTD.
 Loading...