

Page 1

Video to PC/HD
Scaler Box
Operation Manual
Page 2

(1). Introduction
Congratulations on your purchase of the Cypress Video Scaler CM-390.
Our professional Video Scaler products have been serving the industry
for many years.
In addition to Video Scalers, Cypress offers a full line of high quality
PC multimedia,Standard Converters, DV-to-Analog Converters,
Video Mixer, Time Base Correctors,and Video Processors.
Please visit www.cypress.com.tw to learn more details about
these products.
This manual includes operation information on the CM-390 model.
Please read this to become familiar with the CM-390 and keep the manual
for possible reference in the future.
Cypress's CM-390 is designed to convert Composite and S-Video to a variety
of computer and HDTV resolutions.
It handles video input from TV systems of
NTSC, PAL TV standards. Cypress CM-390 has many
great features to
enhance video performance and is ideal for use in professional large
screen presentation.
(3) This package includes:
1. Video Scaler Unit.
2. DC adaptor
3. VGA Cable-HD 15 to HD 15 x 1
4. HD-15 D-Sub to YPbPr 3-RCA Cable x 1
5. User Manual
6. Remote Control
7. Lithium battery
(2). Features:
* Motion adaptive 3D Y/C separation comb filter
( for composite video input )
* 3D( frame Based ) motion adaptive YNR/CNR noise reduction
( for Y/C video input )
* Advanced 3D motion adaptive deinterlace
* Automatic 2:2/3:2 film mode detection
* Supports 50Hz to 60Hz frame rate conversion
* Video quality improvement:
DCT1( Digital chroma transient improve ),
DLT1( Digital luminance transient improve ),
Black level extension.
*
Average picture level ( APL ), Automatic contrast limiter ( ACL )
function supported.
* OSD menu for picture quality adjustment.
* Built in 8-bit DAC for RGB or YPbPr output.
* Front Panel and IR remote control.
* Automatic NTSC/PAL video format detection
and switching.
11
Page 3

POWER INPUT
MENU
CM-390 Video to PC/HD Scaler Box
CV
SV
1 2 3 4 5 6
1. Power button and LED indicator:
Press the button once to power on the unit, Press again to power off.
when the unit is powered on,
one of the input LEDs will illuminate depending
on your last selection of input source before power off.
The factory default setting for the input is CV (composite video).
The green LED illuminates when composite video is selected.
The Yellow LED illuminates when S-Video is selected.
2. Input select button:
Press the button to select your desired input source between composite
video and S-Video.
3. IR Sensor: Infrad remote control sensor.
4. Menu/Enter: This button serves two purposes.
a. Press the button to enter OSD main control menu as shown in the "OSD Operation".
b. To act as a "enter" key to enter sub menu of your selected item.
5/6. +/- button: Press the button to move up or down the tick V to your
d
esired parameter. Or after a parameter is selected,
Press the button to alter
the value of your selected parameter.
Front Panel
(4). Operation Controls and Functions
2
Rear Panel
4
3
2
1
DC 5V 2A
SV
CV
VGA OUTPUT
INPUT
1. DC power jack: 5V 2A DC power input.
2. Composite Video: Use a Composite video cable to connect the
composite video output of the source equipment to this composite
video(CV) input of the scaler.
3. S-Video: Use a S-Video cable to connect the S-Video output of the
source video equipment to this " S-Video" input on the back of the video Scaler.
S-Video provides improved performance over composite video and is
recommended over composite.
4. PC/HD output: This HD-15 D-Sub connector is shared by PC/RGBHV output
and HDTV/YPbPr output.
When PC/RGBHV output resolution (VGA to SXGA) is selected,
use the HD-15 to HD-15 VGA cable to connect this output to the PC input
of your display monitor.
When HDTV/YPbPr output (480p, 576p, 720p, 1080i) is selected,
use the HD-15 to YPbPr 3 x RCA cable to connect this output to
the YPbPr input of you HDTV display.
Note: Use of wrong cable for your selected output will result in an abnormal
picture on the screen.
Page 4

Output Setup
When Output Set up is selected a submenu as below appears:
Output Setup
Timing XGA
Exit
Press the " MENU/ENTER" button to enter into output timing select mode.
Press +,- to toggle through a variety of output resolutions as below.
Once your desired resolution is selected. press the menu/enter
to enter the resolution.
VGA
SVGA
XGA
WXGA
SXGA
480p
576p
720p
Pseudo 1080i
640x480
800x600
1024x768
1280x768
1280x1024
720x480
720x576
1280x720
960x540p
60Hz
60Hz
60Hz
60Hz
60Hz
60Hz
50Hz
60Hz
60Hz
Vertical rate
Resolution
3
Note: 1. All output resolutions except 576p have 60Hz vertical rate,
The 576p resolution has 50Hz vertical rate.
2. - The output signal format for the 5 PC resolutions (VGA~SVGA) is RGBHV.
-
The output signal format for the 4 HD resolutions (480p~pseudo 1080i) is YPbPr.
Use +,- button to move "V" to your desired parameter, then pressing MENU/ENTER
to enter into sub-menu of your selected parameter.
Picture Adjust
When Picture Adjust is selected a sub menu as below comes up.
Default Range
Bright
Contrast
Color
Tint
Sharp
Default
Exit
16
16
16
16
05
OK
1-31
1-31
1-31
1-31
1-19
USE +,- to move the tick (V) to your desired adjust item, Press the Menu/Enter
to confirm
your selection.
At this point, the selected parameter will turn red, and you can use +,- to increase
or decrease the value of the parameter.
When adjustment is complete, Press "Menu" to leave the parameter. Move the tick "V"
to "Exit", then press menu/enter to exit.
(5). OSD Operation:
After power on the unit , pess the menu button to bring up the main menu
page as below:
Main Menu
Picture adj.
Output Setup
Exit
Page 5

(7). Remote Control
VIDEO
VGA SVGA
XGA
WXGA
SXGA
480p
720p
1080i
PICTURE
RESET EXIT
-
+
576p
SVIDEO
CR-21
13
4
2
1. Display: Press the button to display input source
and output resolution on the screen.
2. Power: Power ON/OFF button.
3. VGA~pseudo 1080i: Press to select your desired
output resolution.
4. Picture: Press the button to enter picture
adjust submenu. Use +,- button to move
cursor (V) up/down to your desired
parameter, press "Picture" again to
confirm.
5. +/-: Press to move up/down the cursor (V)
to your desired parameter,or press to
increase/decrease the setting value.
6. Reset: Press to reset all setting back to
factory default value.
7. Exit: To exit OSD.
8. Video: Press the button to select
composite video input.
9. SVideo: Press the button to select
SVideo input.
6
55
8
7
9
5
(6). HD-15 Pin Assignment
Part No. Pin No. Description (PC out)
1
2
3
4
5
6
7
8
9
10
11
12
13
14
15
DB15HD
RED
GREN
BLUE
GND
GND (DDC-RETURN)
GND-RED
GND-GREEN
GND-BLUE
N.C
GND-SYNC
GND
DDC-DATA
H-SYNC
V-SYNC
DDC-CLOCK
Part No. Pin No. Description (HD out)
1
2
3
4
5
6
7
8
9
10
11
12
13
14
15
DB15HD
Pr
Y
Pb
GND
GND (DDC-RETURN)
GND-Pr
GND-Y
GND-Pb
N.C
GND-SYNC
GND
DDC-DATA
H-SYNC
V-SYNC
DDC-CLOCK
1. PC RGB output (VGA~SXGA) 2. HD YPbPr output (480p~1080i)
5
109
15
14131211
4321
6 7 8
4
Page 6
(8). Specifications
Input signal levels
Video@1Vp-p, 75 ohm, Y@1 Vp-p, 75 ohm
Color@ 0.7 Vp-p, 75 ohm
Output Fomat
Analog YPbPr / HDTV, or RGB/PC
Output Connector HD 15 Female
Output Singnal
RGB @ 0.7 Vp-p, H&V Sync @ 3 Vp-p,
Y @ 1 Vp-p, Pb, Pr! 0.7 Vp-p 75 ohm
Weight 400 grams
Dimensions 125(W) x 123(D) x 30(H) mm
5
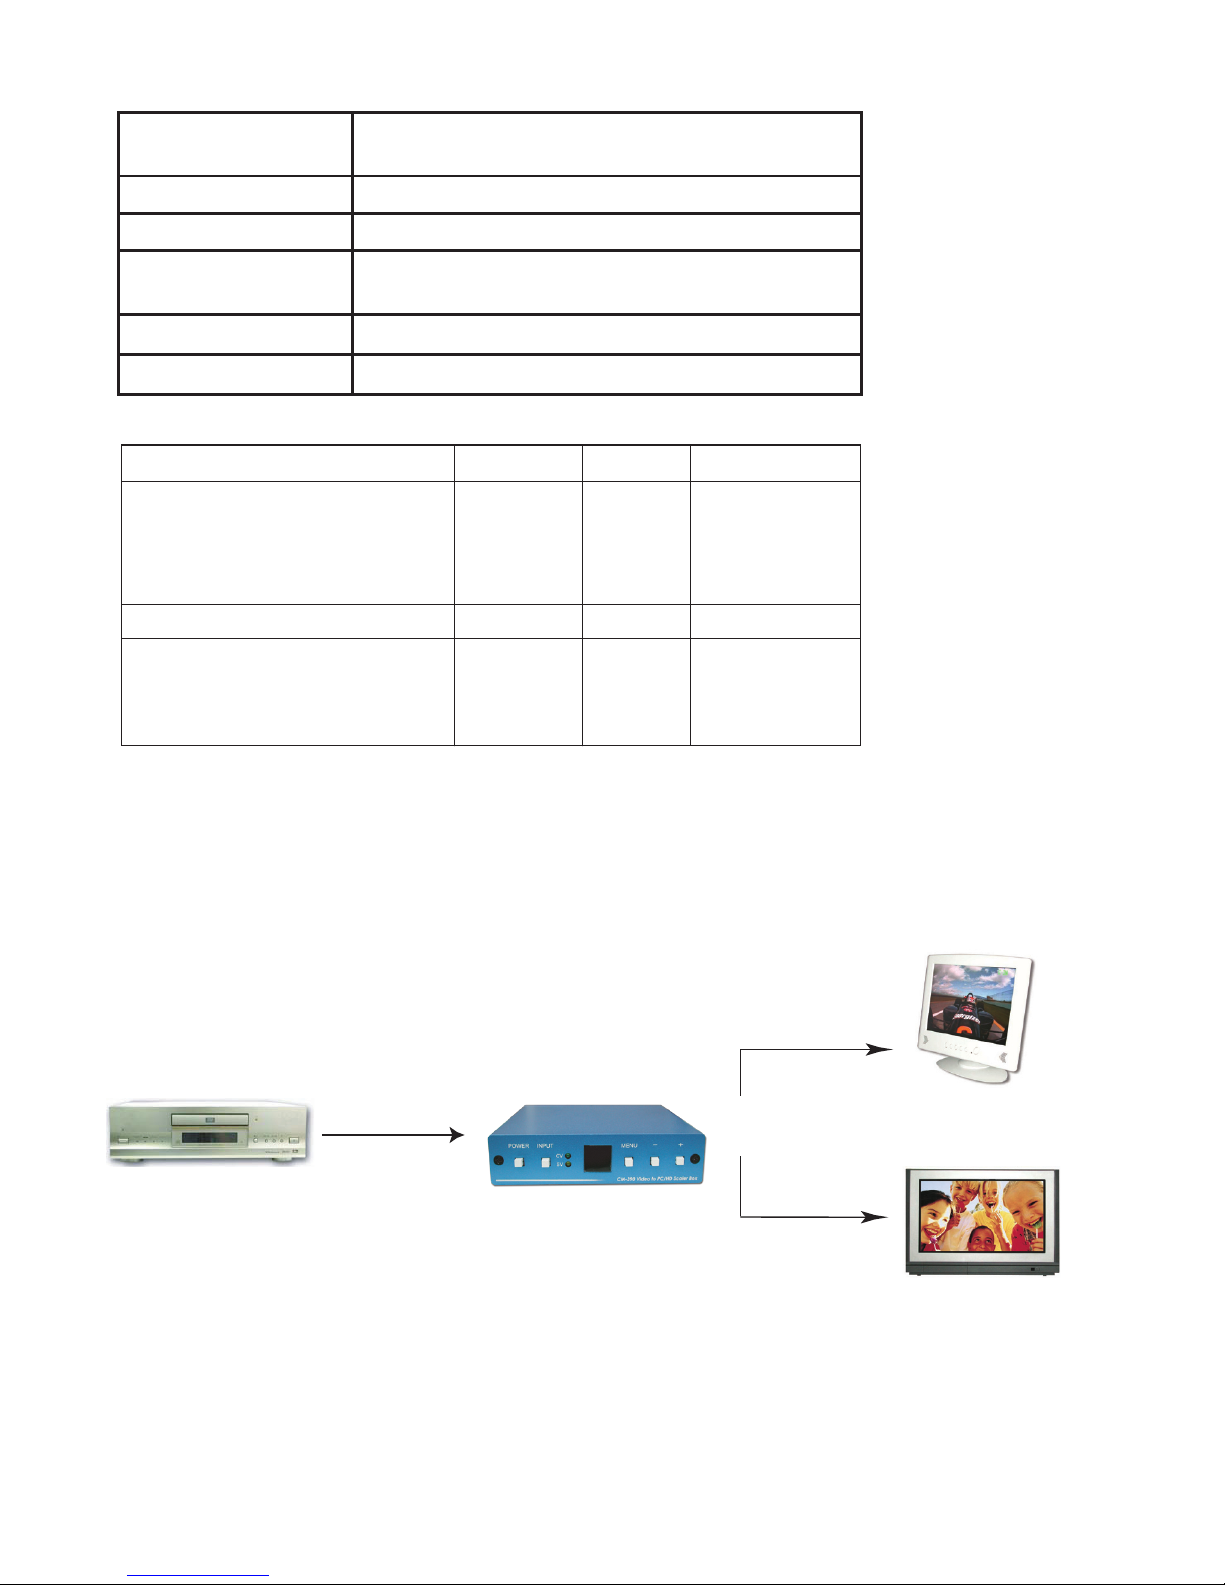
Video to PC or HDTV
VCR, DVD, STB, DVHS
PC display Monitor,
Projectors
LCD, Plasma TV
or
PC output
HDTV
output
Video,
SVideo
VGA Cable
VGA to 3 RCA
adaptor cable
PC Resolutions Vert Rate
Vert Rate
Format
Format
Scan Type
Scan Type
VGA
SVGA
XGA
WXGA
SXGA
640 X 480
800 X600
1024X768
1280X768
1280X1024
HDTV Resolutions
480p
576p
720p
Pseudo 1080i
720 x 480
720 x 576
1280 x 720
960x540p*
60 Hz
60 Hz
60 Hz
60 Hz
60 Hz
60 Hz
50 Hz
60 Hz
60 Hz
RGBHV
RGBHV
RGBHV
RGBHV
Progressive
progressive
Progressive
Progressive
Progressive
Progressive
Progressive
Interlaced
YPbPr
YPbPr
YPbPr
YPbPr
Output Signal Specifications
* The standard 1080i resolution is 1920 x1080i with sampling rate at 74 MHz.
CM-390's 1080i output is 960x540p which is half of the standard resolution,
therefore may be not be accepted by some of the HDTVs.
(9). Installation
 Loading...