

Page 1
TURCOM cyberView R
TS-621 HD Wireless Security Camera
Quick Set Up Guide
This document will take you through the initial set up of the camera and the user interface app.
1. Package contents:
- cyberVIEW R camera
- Mounting Hardware
- Power Supply
- Ethernet Cable
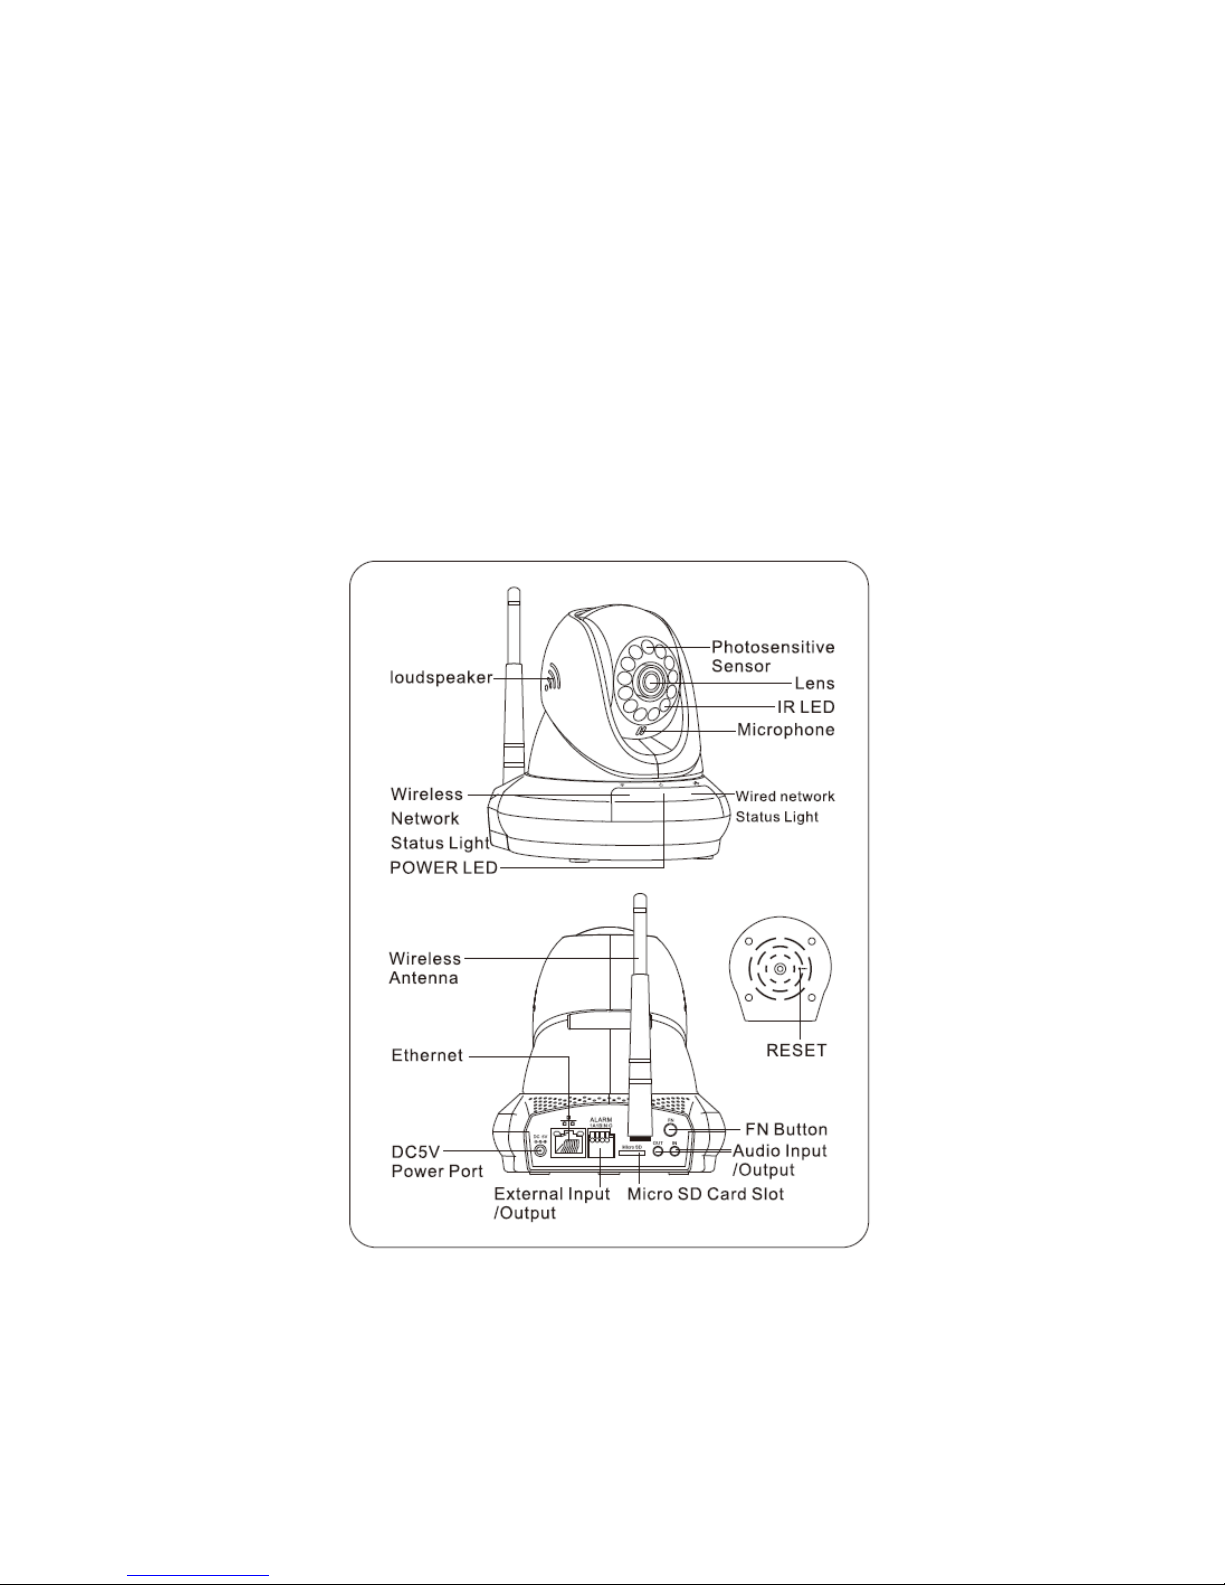
2. Product Schematic
Page 2
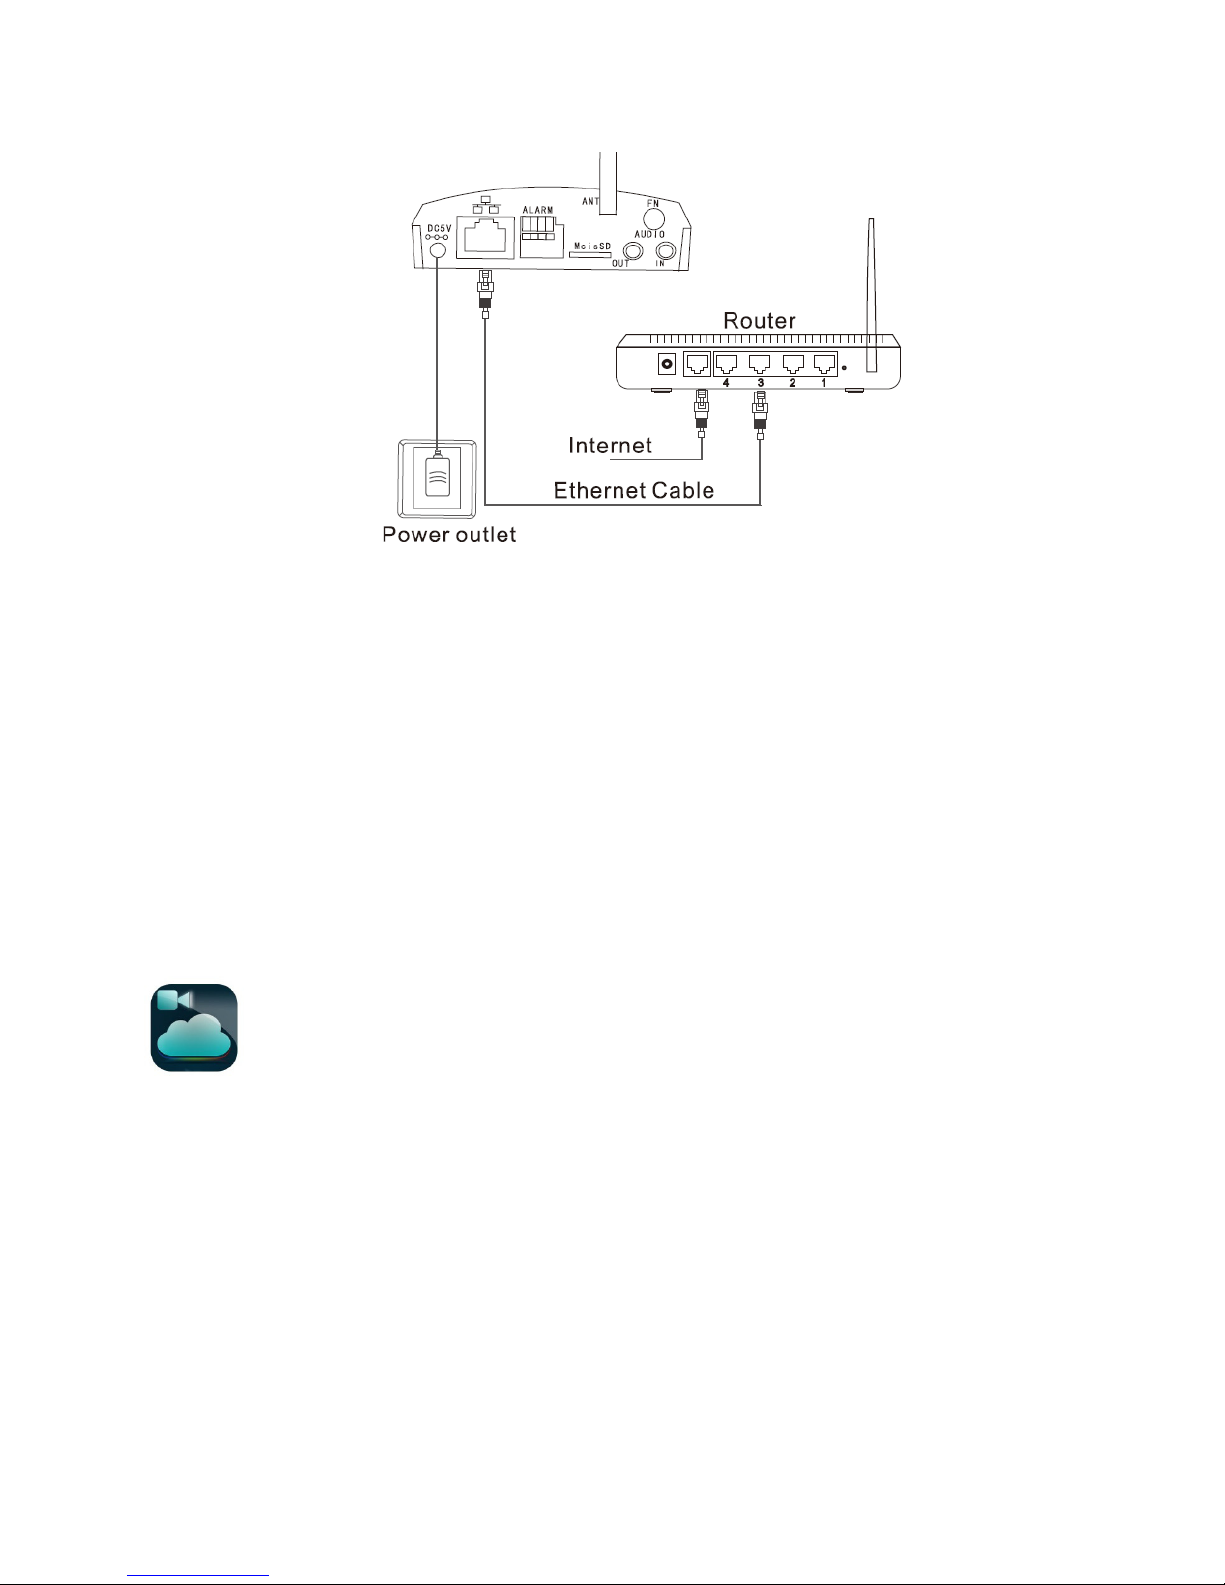
3. Connect Camera
- Install the antenna on the camera
- Connect power supply to the wall outlet and to camera DC 5V in port.
- Connect Ethernet cable to your router’s output port. Ensure the router has internet connection.
- After the power supply is connected, the camera will test the horizontal and vertical range of motion. Do not
touch the camera during this test.
- Wired Network Status light will flash green 3 times every 3 seconds when the wired connection with the
router is successful.
4. Download Camera Application
Dowload the camera user interface app “Mipc” from app stores. Mipc app is available at iOS and Android app
stores. See below image for the app logo.
Page 3
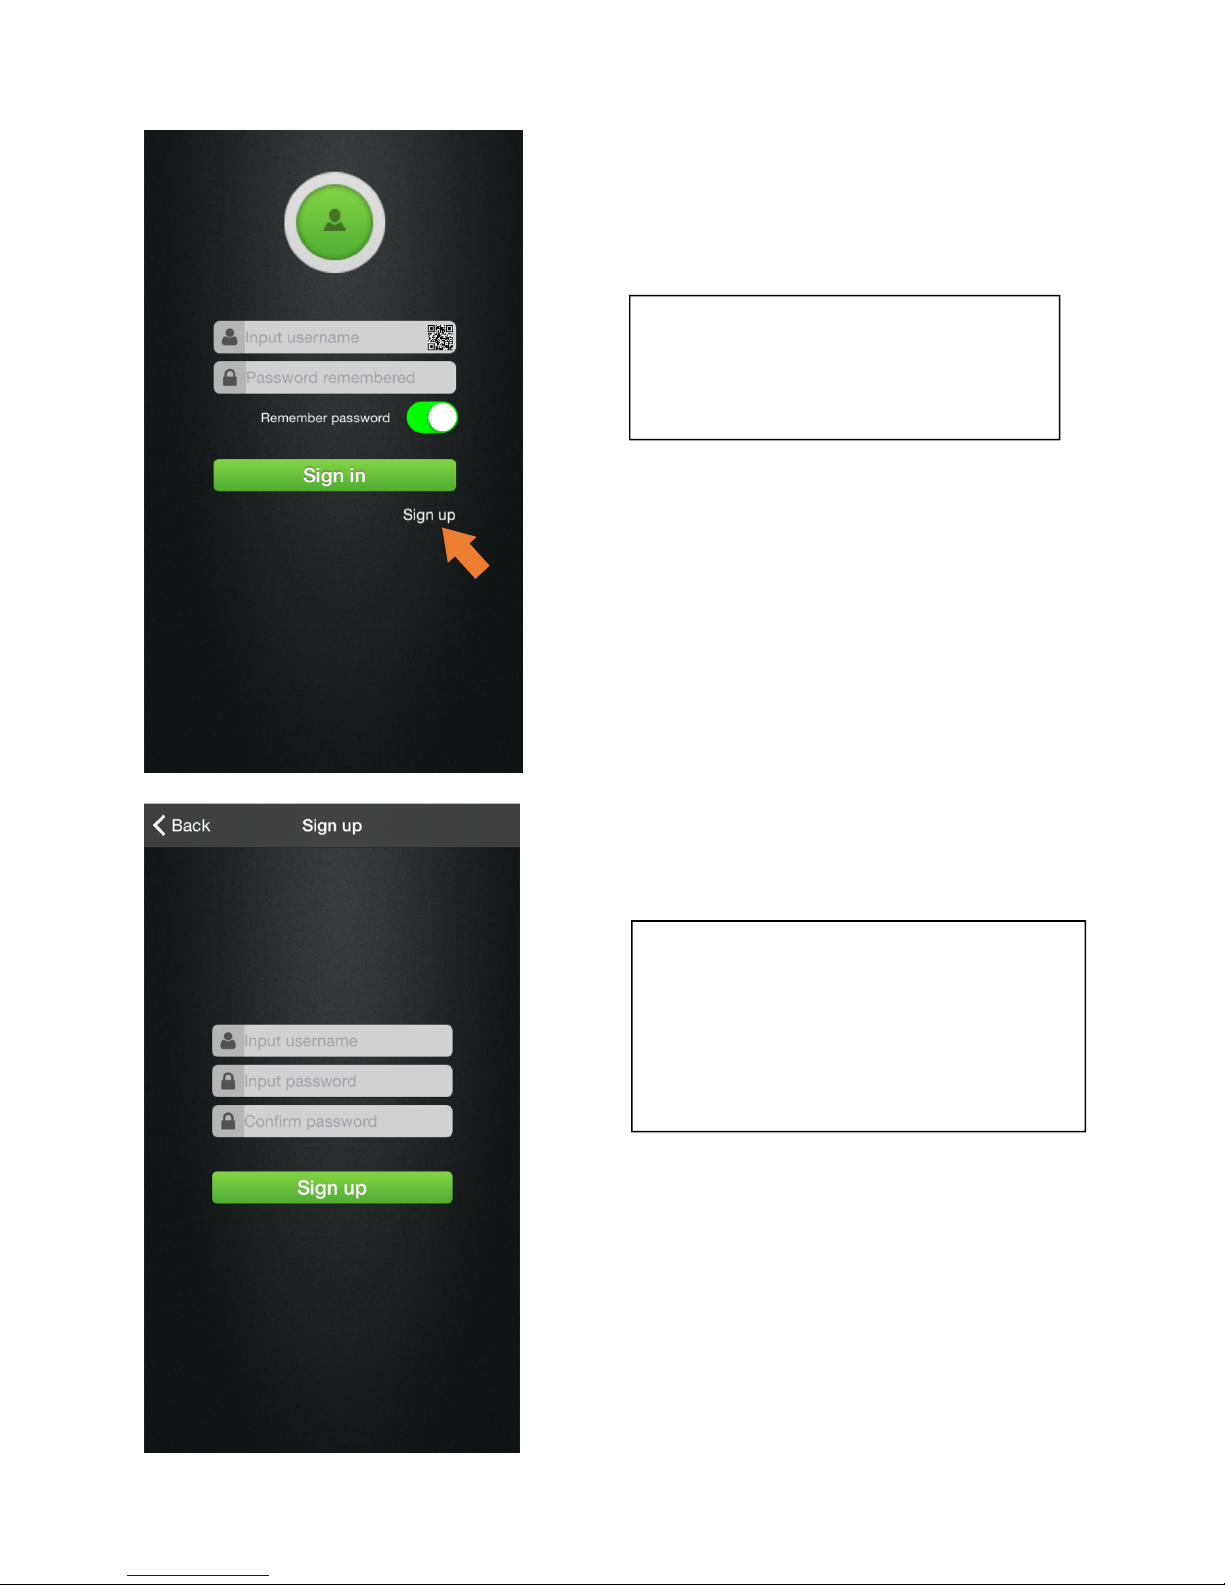
5. Create User Account
Open the Mipc
app on your smartphone or
After the Sign Up page opens, e
nter username
tablet. The first screen is the Account Set Up
screen. Click on Sign up to register your
account.
and password. The user name must be 6-20
characters, must start with a letter and must
contain both letters and numbers. Password
must be 6 to 20 characters long and can
contain letters or number, or both.
Page 4
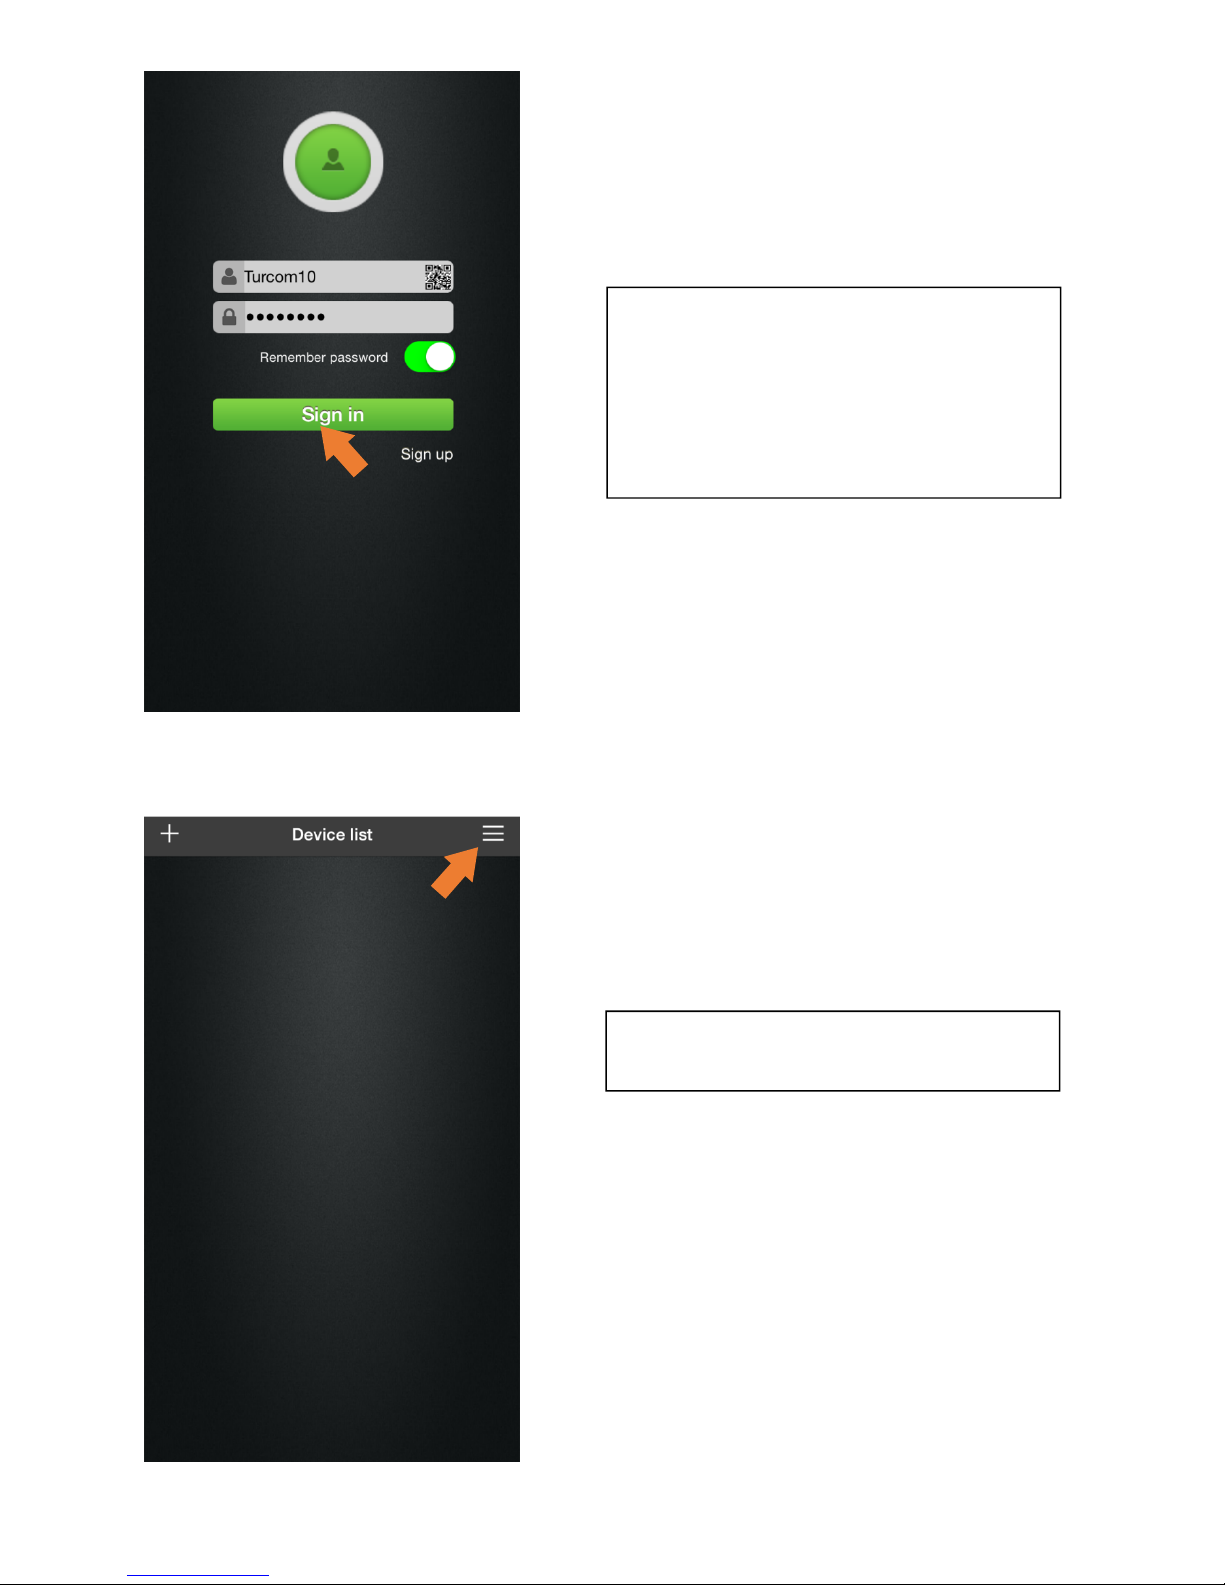
Once the username and password are
Click on the menu symbol on the top left to
6. Add Camera
successfully registered, you will be directed to
the Sign In page. You may turn on Remember
Password to record the entered password on
your device.
Click on Sign in button to add a camera.
open the menu.
Page 5
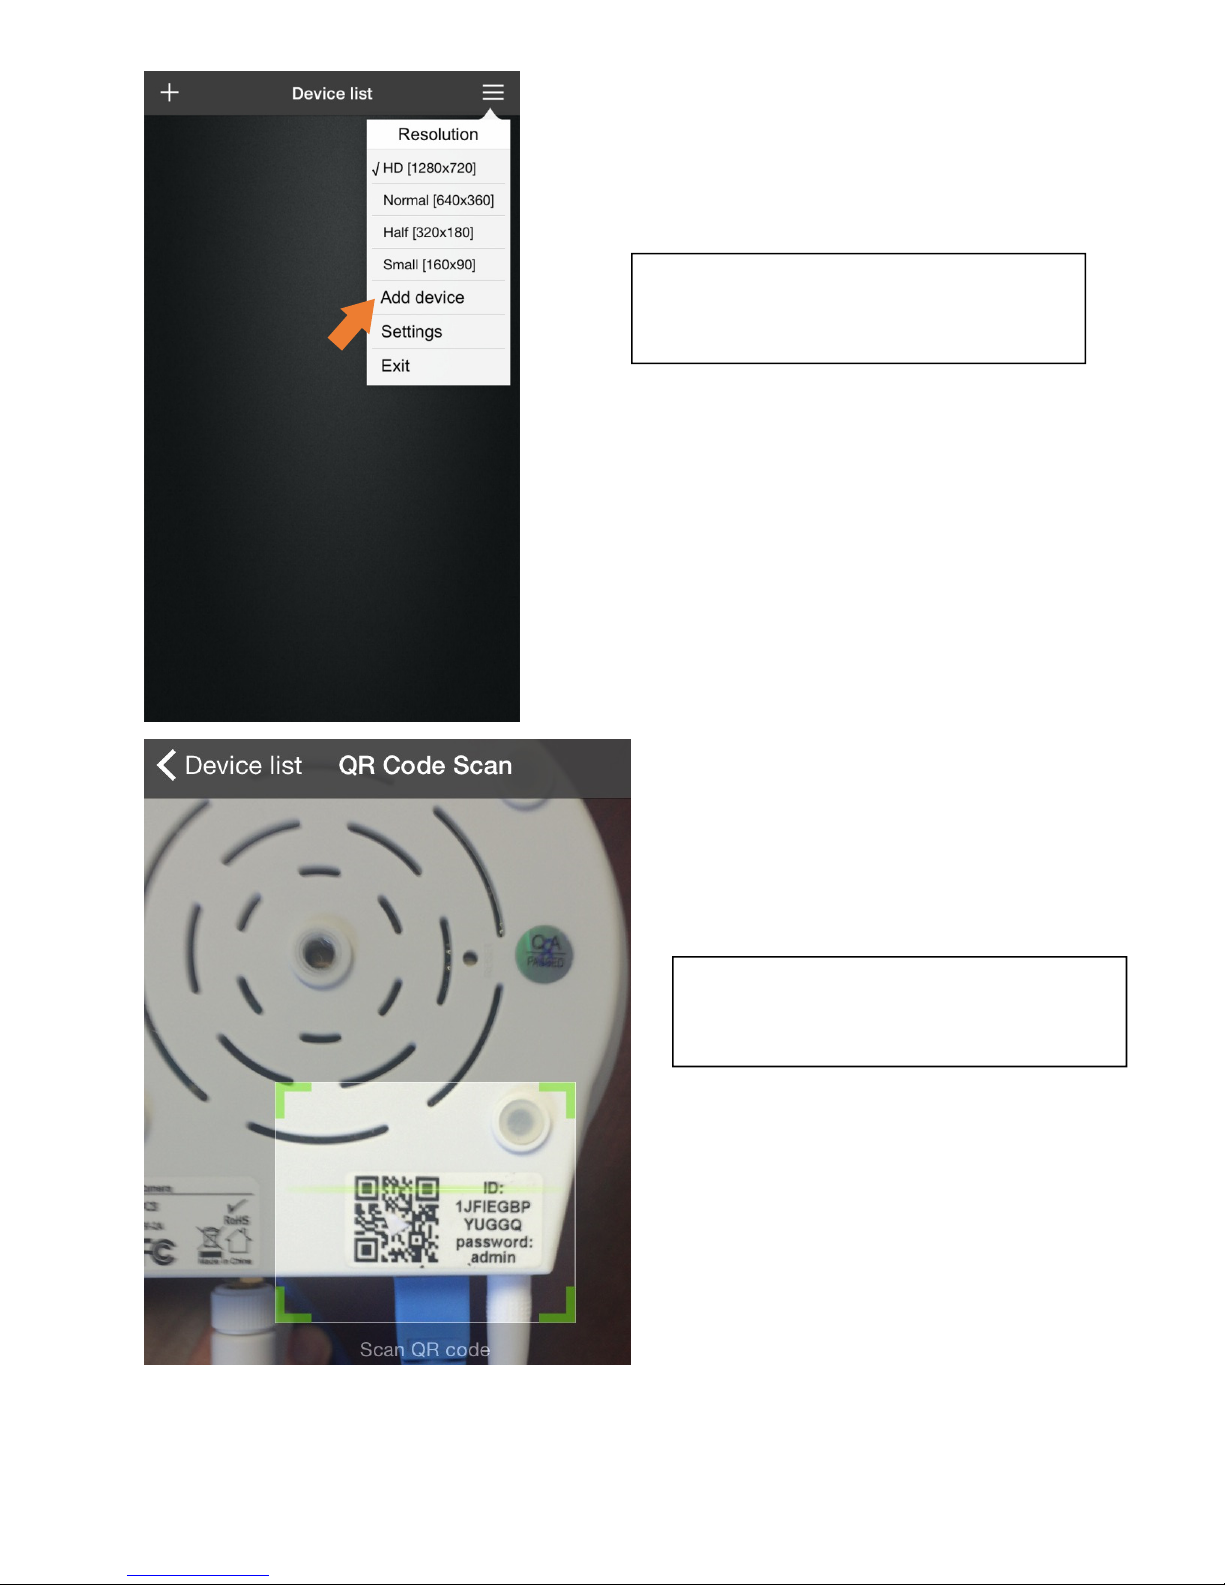
On the Device List, click on the Menu symbol
to open options. Select Add Device. QR code
Position your phone or tablet to read the QR
scanner will be activated.
code. The app will automatically identify the
camera ID number through the QR code scan.
Page 6
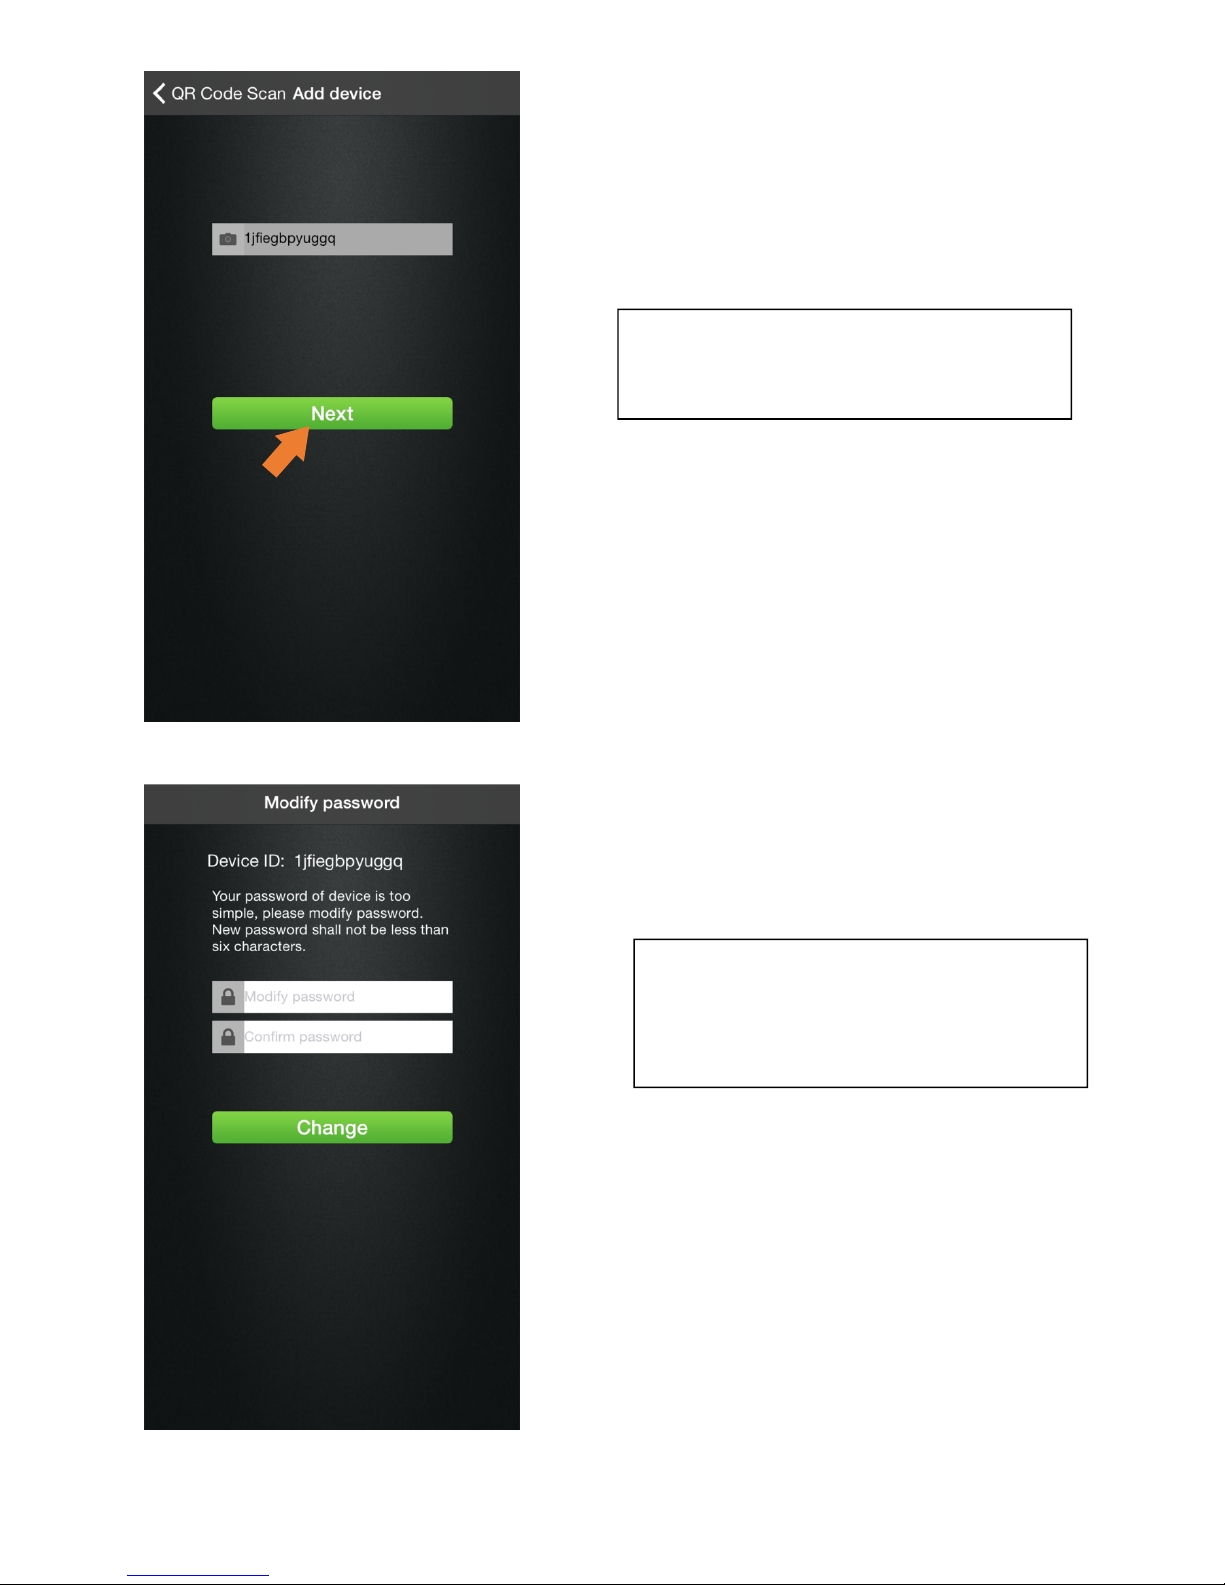
Click on Next to connect to the camera. After a
few seconds the app will successfully connect
Once the camera is identified, the App will
to the camera.
prompt for a new password. Enter a new
password that is alphanumerical and is 6-20
characters in length.
Page 7
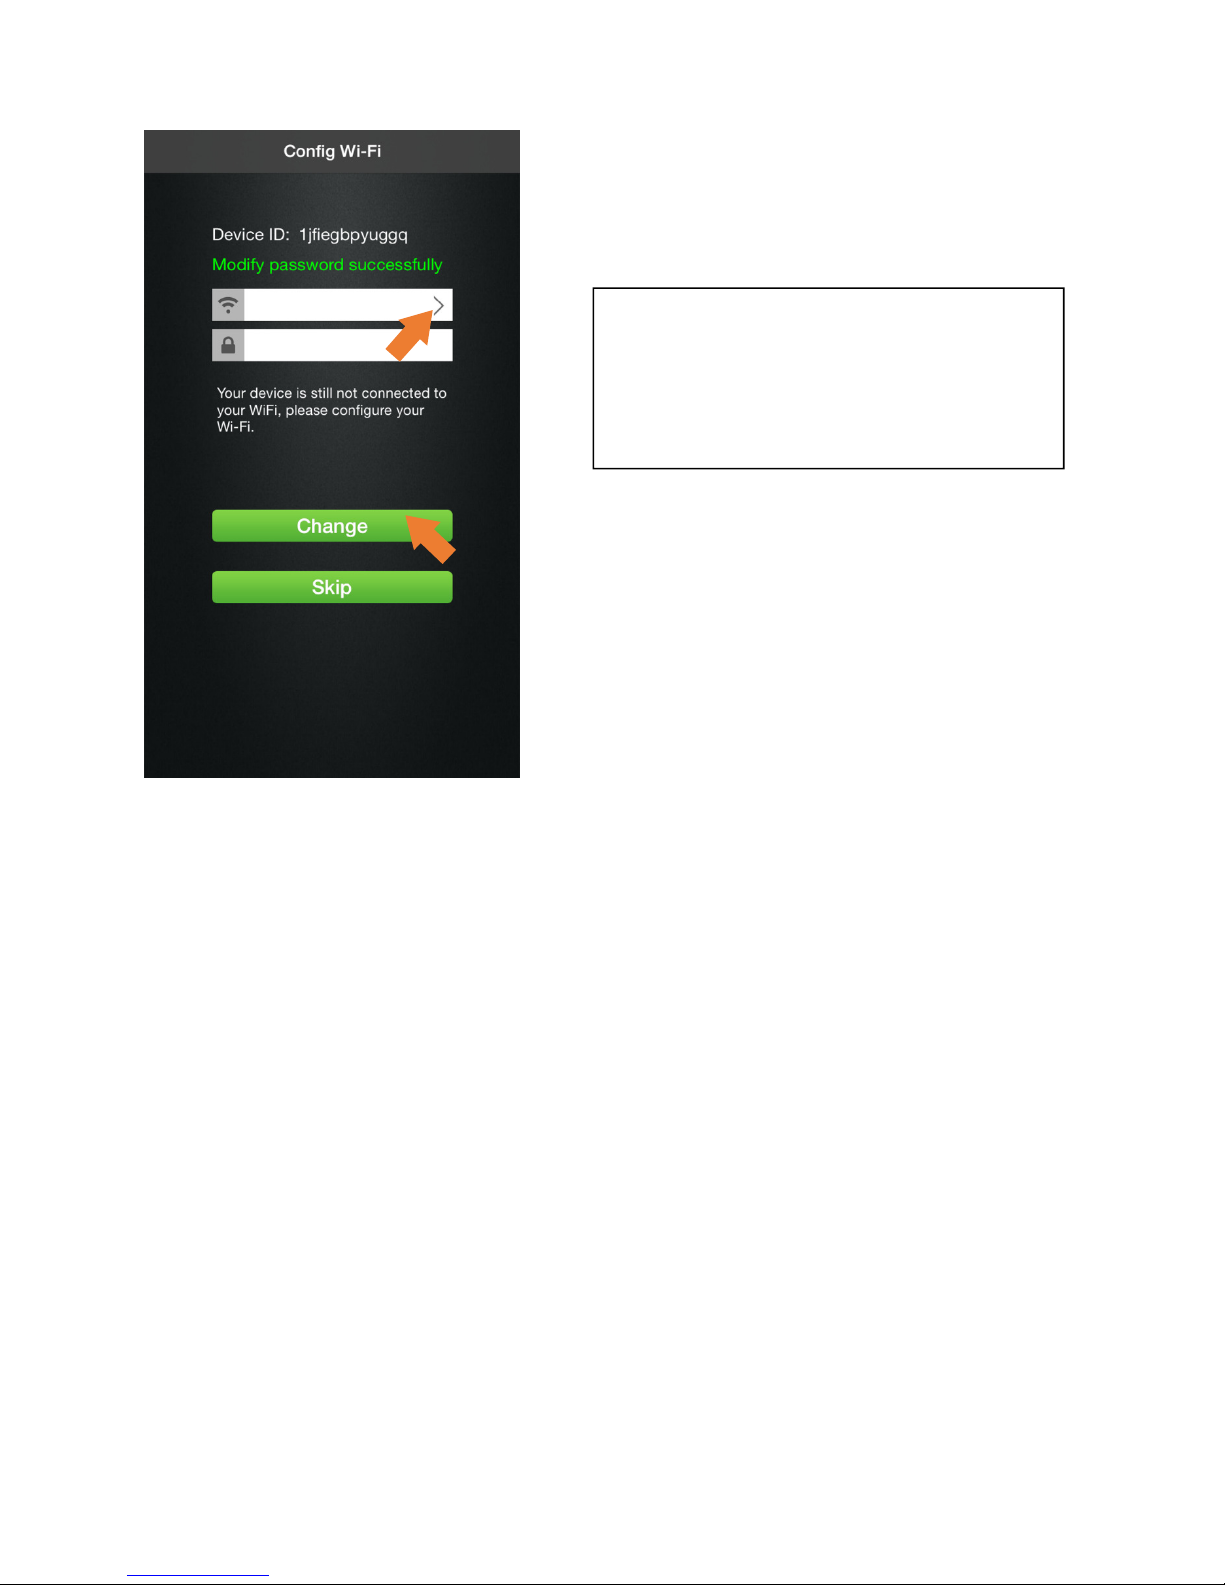
7. Configure Wireless (Wi-Fi) Network
To configure Wi
-
Fi network on the camera, click
on the arrow to see a list of available networks.
Select the desired network and enter the
password to access the network. Click on
Change.
Page 8
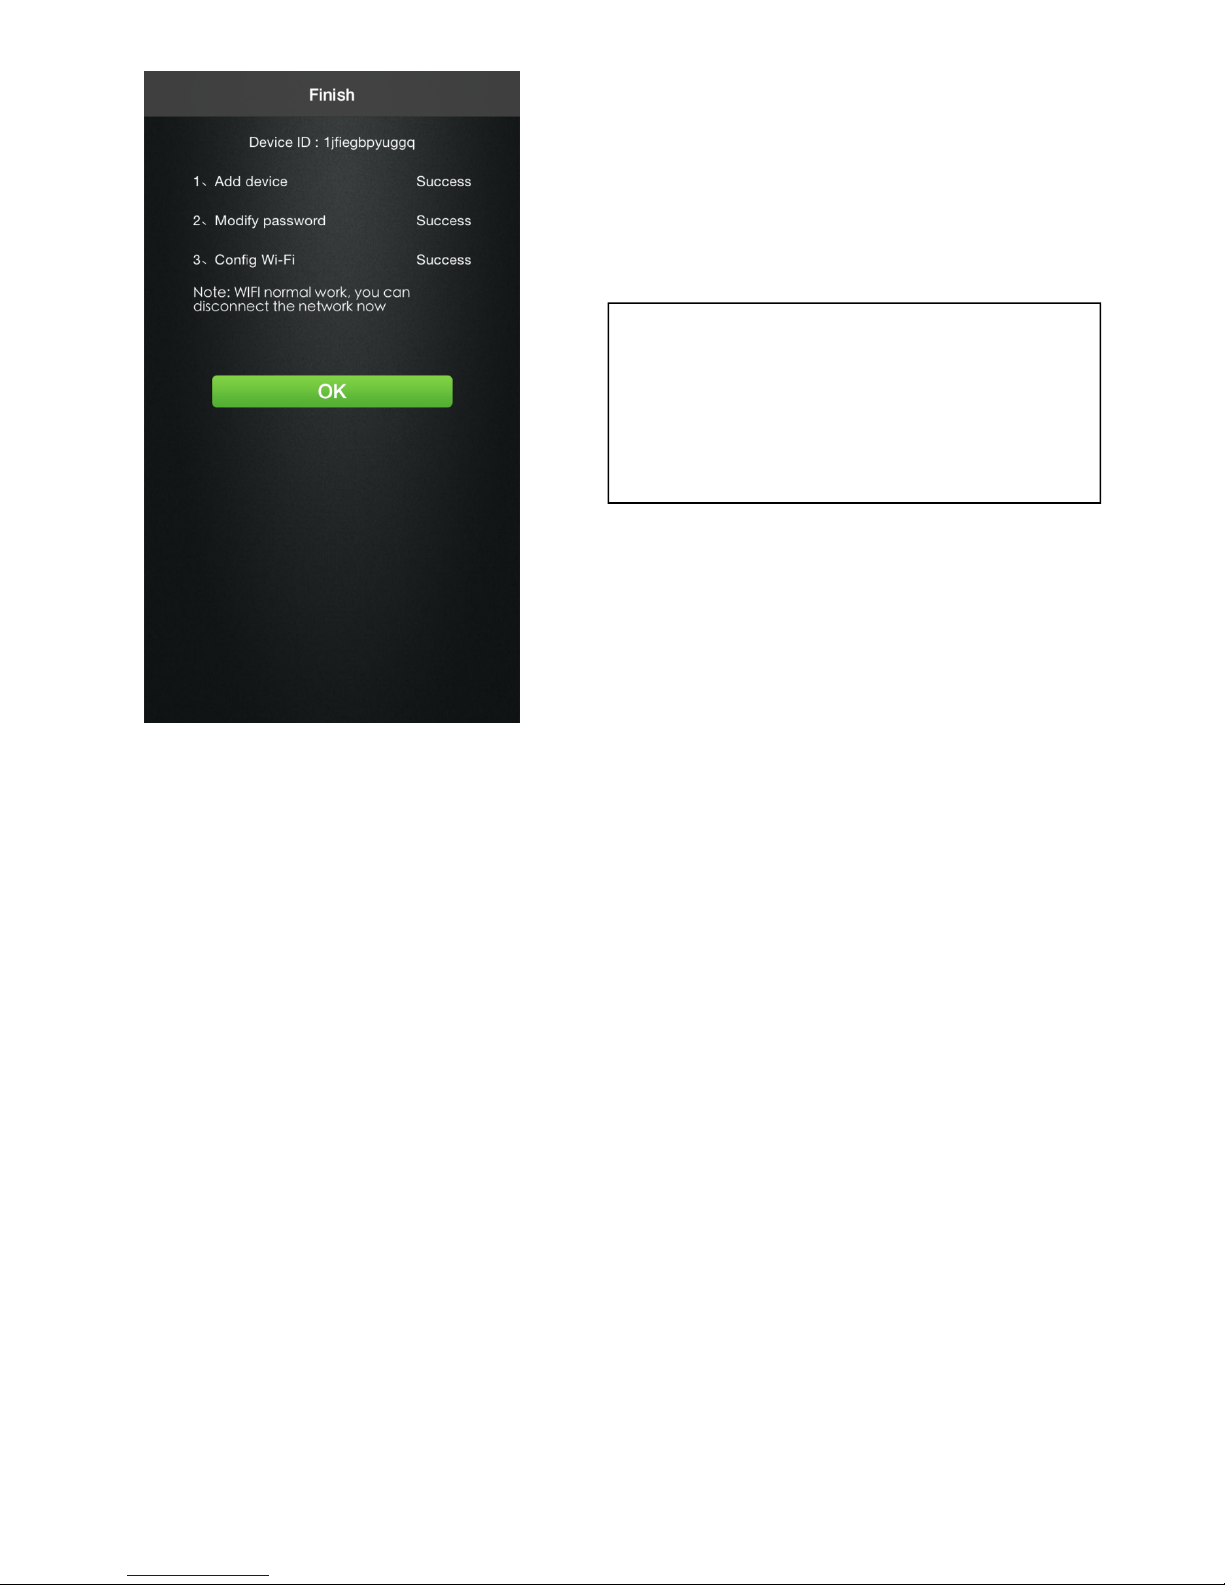
Once the WiFi network connection is established,
the app will confirm success. Click on OK to finalize
set up. The Ethernet cable can now be removed
from the camera and operated wirelessly. If the
camera image is not visible on wireless network,
close and restart the app.
 Loading...