

VoIP Intercom with
3CX Server Setup Guide
CyberData Corporation • 2555 Garden Road • Monterey, CA • 93940 • T:831-373-2601 • F: 831-373-4193
www.CyberData.net
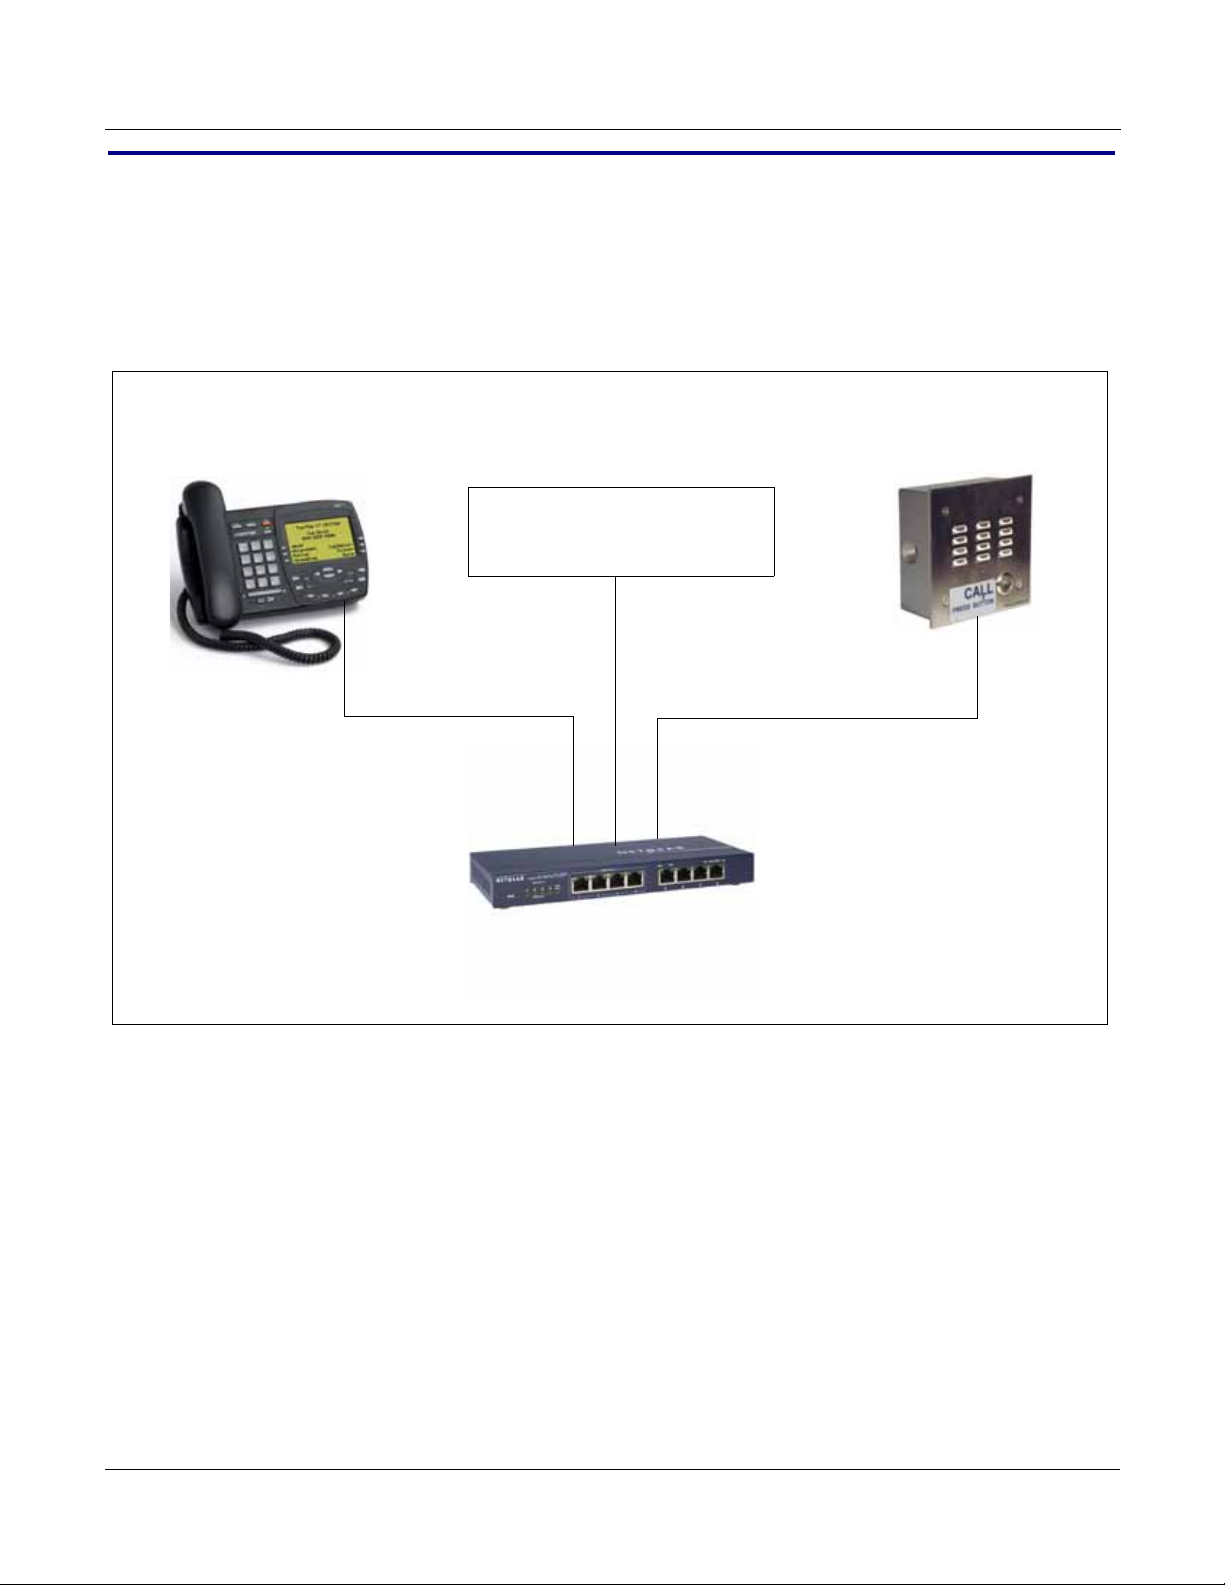
1.0 Setup Diagram
Aastra 480i CT IP Phone
xxx.xxx.x.xx
CyberData VoIP Intercom
xxx.xxx.x.xx
3CXSystem
xxx.xxx.x.xxx (default)
NetGear EtherFast FS108P 10/100 8-port Pro-Safe Switch with PoE
Windows Server
Figure 1-1 is a setup diagram for a single VoIP Intercom configuration. In this configuration, the
Intercom acts as a standalone SIP telephony device.
2
Figure 1-1. Setup Diagram
Server Setup Guide 930272B CyberData Corporation
2.0 Host PC Environment
Table 2-1. Host PC Environment Details
Description
Hardware Type Windows Server
Hardware Version Windows Server 2008
Software Type 3CX Phone System for Windows
Software Version 6.1.0
3.0 Test Setup Equipment
3
Table 3-1. Test Setup Equipment
Equipment Model Version
Aastra IP Phone 480i CT N/A
Notes:
CyberData VoIP Intercom 010935B 3.3.2
Notes:
Linksys EtherFast 10/100 8-port Workgroup Hub N/A N/A
Notes:
Notes:
Notes:
Notes:
Notes:
Notes:
Notes:
Server Setup Guide 930272B CyberData Corporation
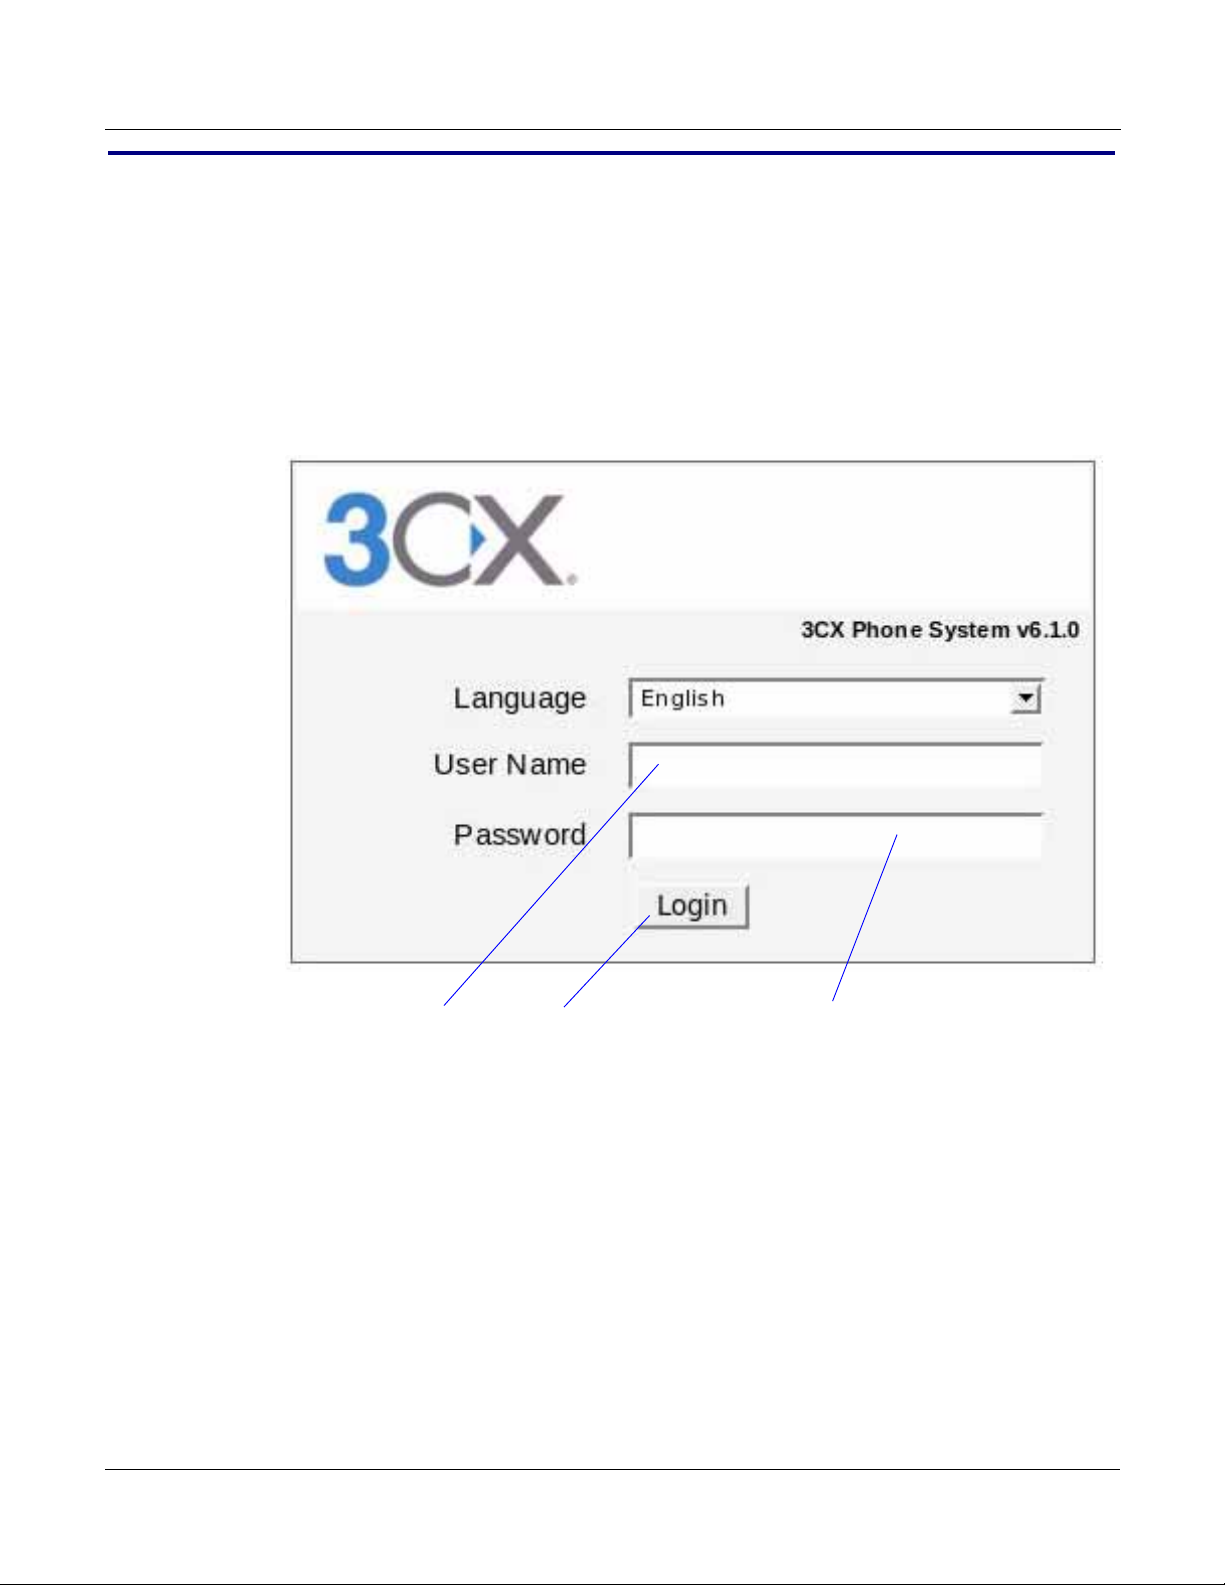
4.0 Setup Procedure
PasswordLoginUser Name
To set up the 3CX SIP Server for the CyberData VoIP Intercom,
1. Go to the web address of the Login page. The web address is determined by the customer.
2. On the Login page, type the user name and password into the User Name and Password fields.
Figure 4-2. The user name and password are determined by the customer.
See
4
Figure 4-2. Login
Server Setup Guide 930272B CyberData Corporation

3. Click on the Login button to go to the Main Page.
Click on here to add an extension.
4. On the Main Page under the “Complete the following steps to start using 3cx Phone System
for Windows:” section, look for the section that has the text, “Click here to add an extension.”
Figure 4-3. Main Page
5
5. Click on the word here to add an extension (Figure 4-3). This will take you to the Add
Extension page. See Figure 4-4.
Server Setup Guide 930272B CyberData Corporation
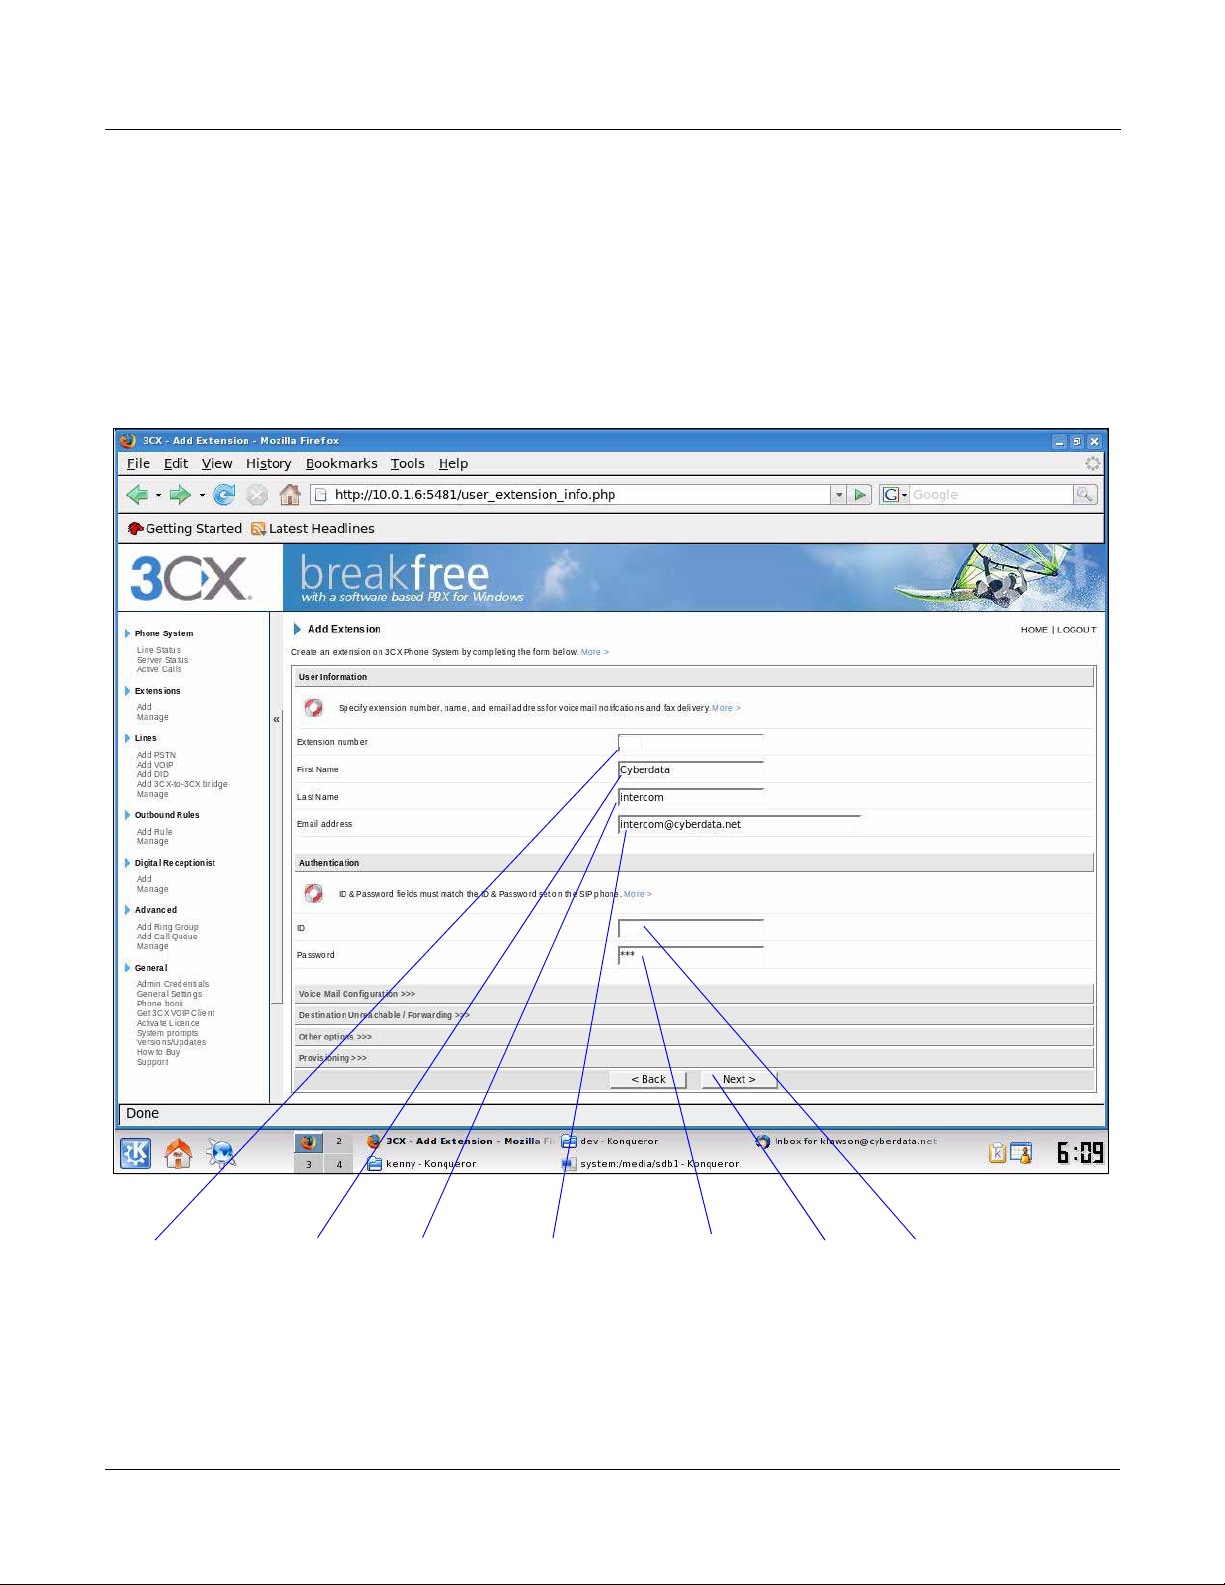
6. On the Add Extension page (Figure 4-4), type the following information:
PasswordFirst Name Email Address Login IDExtension Number Last Name Next
405
405
• Extension Number
• First Name
•Last Name
• Email Address
•Login ID
• Password
Figure 4-4. Add Extension Page
6
7. Click the Next button. You will see the Extension Created page. See Figure 4-5.
Server Setup Guide 930272B CyberData Corporation
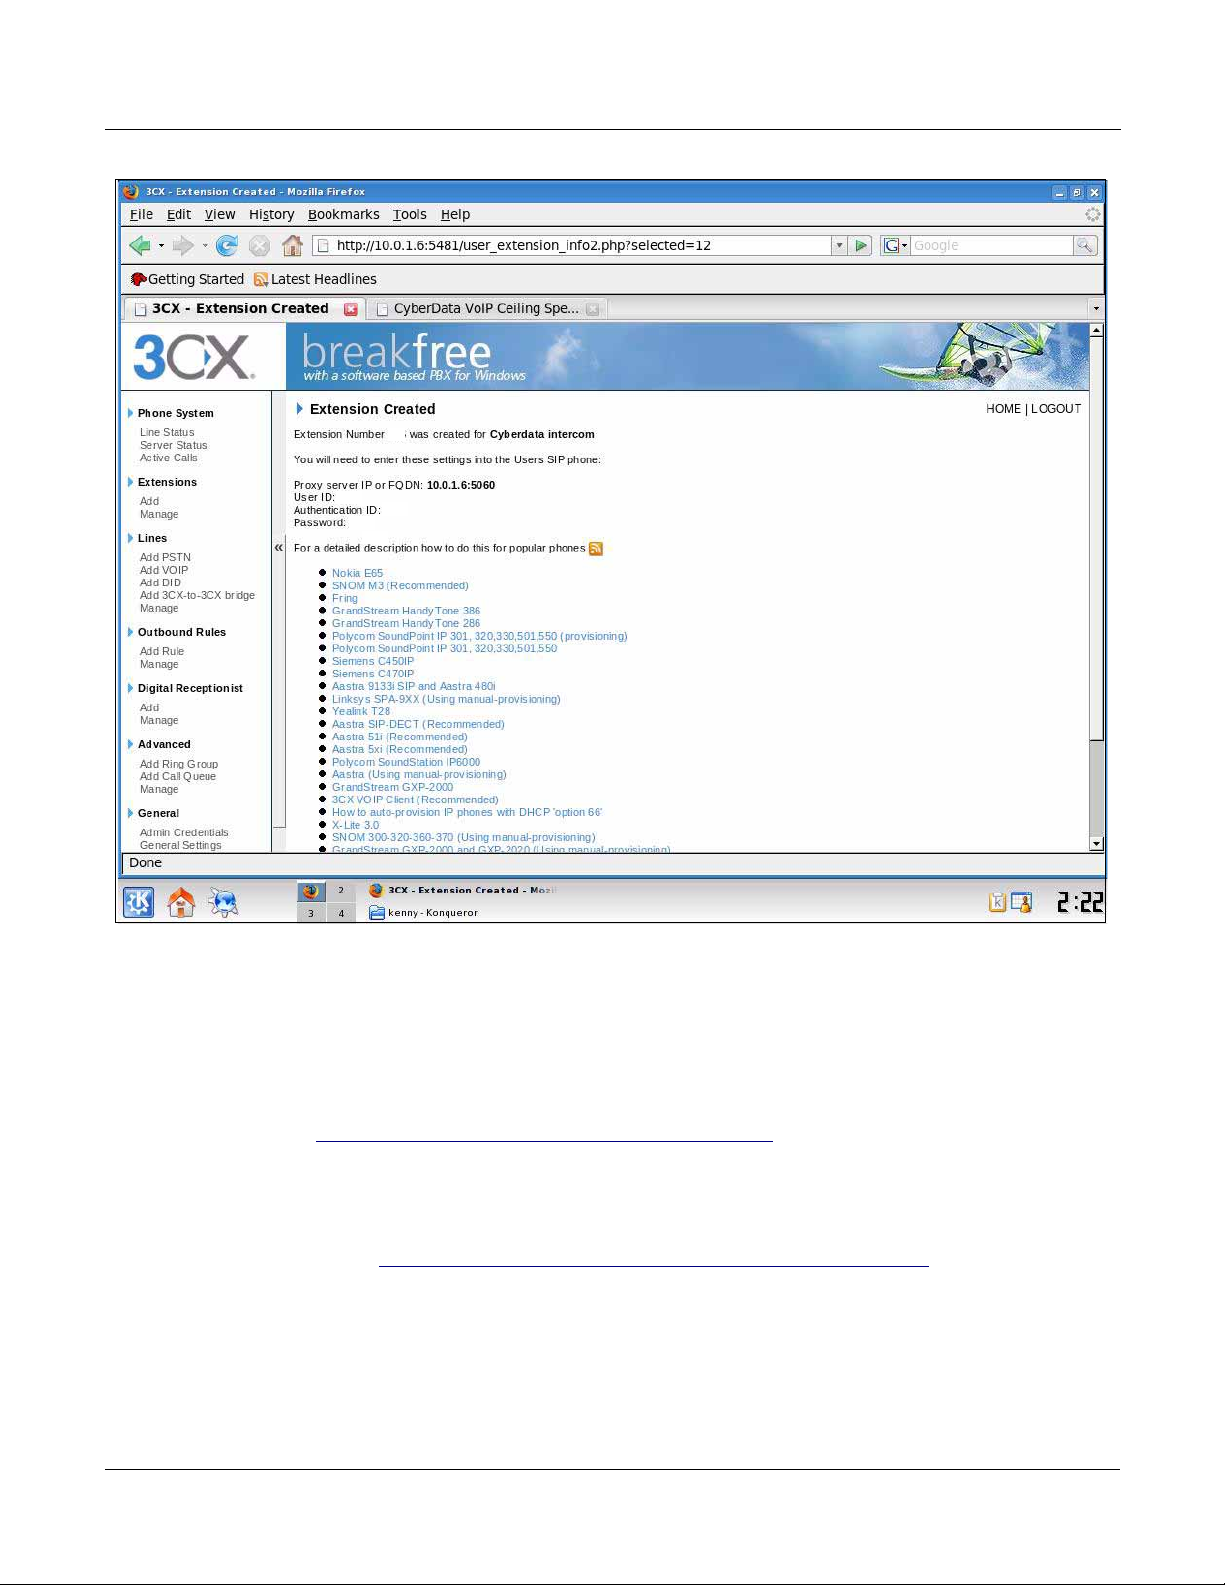
Figure 4-5. Extension Created Page
405
405
405
405
7
8. To register the Intercom, you will need to enter the information from the 3CX Extension
Created page into the Intercom by logging into the CyberData Configuration Home page.
Log into the CyberData Configuration Home page (Figure 4-6) by pointing your browser to the
Intercom’s IP address.
For the initial configuration of the Intercom, refer to the VoIP Intercom Operation Guide PDF
which can be found at the VoIP Intercom product page at:
http://www.cyberdata.net/support/voip/index.html
Note You may also download CyberData’s VoIP Discovery Utility program which allows you
to easily find and configure the default web address of the CyberData VoIP products.
CyberData’s VoIP Discovery Utility program is available at the following web address:
http://www.cyberdata.net/support/voip/discovery_utility.html
Server Setup Guide 930272B CyberData Corporation

9. When prompted, enter the following Web Access Username and Web Access Password to
SIP Config
000000
access the CyberData Configuration Home page (Figure 4-6):
Default Login:
Web Access Username: admin
Web Access Password: admin
Figure 4-6. CyberData Configuration Home Page
8
10. Click SIP Setup to open the SIP Setup page. See Figure 4-7.
Server Setup Guide 930272B CyberData Corporation

11. Use the information from the Extension Created page (Figure 4-5) to enter the following
Save Settings
405
405
405
409
information on the SIP Config page:
•SIP Server
• Remote SIP Port
•Local SIP Port
•SIP User ID
• Authenticate ID
• Authenticate Password
• Dial-Out Extension (put the phone extension into this field)
Note Figure 4-7 is an example of a CyberData VoIP Intercom that is configured to extension
405 and configured to call extension 409.
Figure 4-7. SIP Config Page
9
12. Click Save.
Server Setup Guide 930272B CyberData Corporation
13. After clicking on Save, a reboot timer countdown will begin.
Rebooting, please wait... 00:04
Figure 4-8. Intercom Reboot Timer
14. After the Intercom reboots, the green Status LED on the Intercom will blink at one second
intervals to indicate normal operation.
10
Note If Yes is selected for Speaker Beep After Initialization on the Intercom Setup page, you
will hear a tone after the initialization sequence is complete.
15. To test the Intercom, complete the following steps:
• Pick up any phone that is configured to the 3CX system and call the Intercom’s extension
number.
• When a connection is established (as indicated by a beep), speak into the phone and verify
that you can hear your voice through the Intercom.
• Hang up the phone and press the Call Button on the Intercom.
• When the phone rings, pick up the phone. Speak into the phone and verify that you can
hear your voice through the Intercom.
This step completes the procedure.
Server Setup Guide 930272B CyberData Corporation

5.0 Frequently Asked Questions
Settings
Advanced
Q: I upgraded my 3CX PBX server to 7.1 and now my Rev B CyberData VoIP Ceiling speaker and
My VoIP Paging Amplifier do not stay registered with the server.
A: There is a 3CX version 7.1 registration/timing bug. To correct this problem, complete the
following steps:
1. Log into the 3CX PBX system, select Settings, and then select Advanced. See Figure 5-1.
Figure 5-1. Select Settings and then Select Advanced
11
Server Setup Guide 930272B CyberData Corporation
12
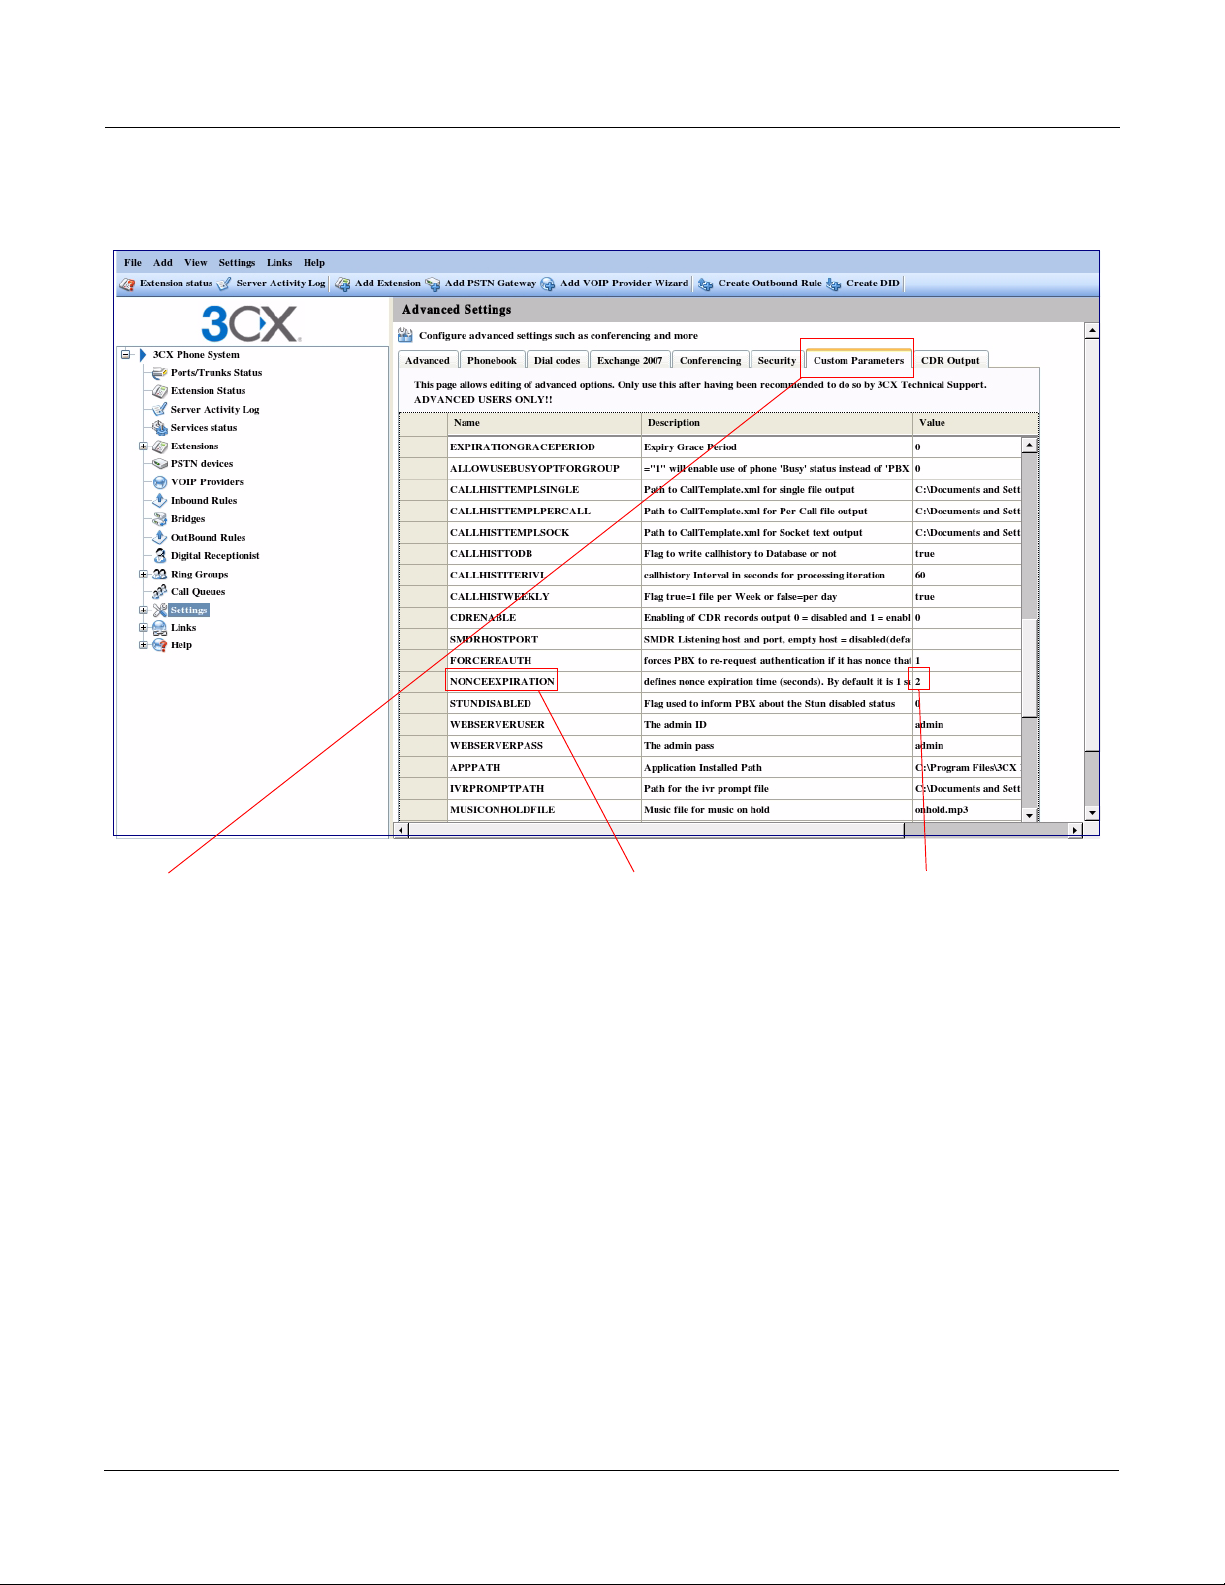
1. Select Custom Parameters 2. Select NONCEEXPIRATION 3. Change value from 1 to 2.
2. Select Custom Parameters, and then scroll down to select a parameter called
NONCEEXPIRATION. See
Figure 5-2.
Figure 5-2. Select Custom Parameters and then Select NONCEEXPIRATION
3. Change the NONCEEXPIRATION parameter value from 1 to 2 and save the changes.
See Figure 5-2.
CyberData Corporation 930272B Server Setup Guide
 Loading...