

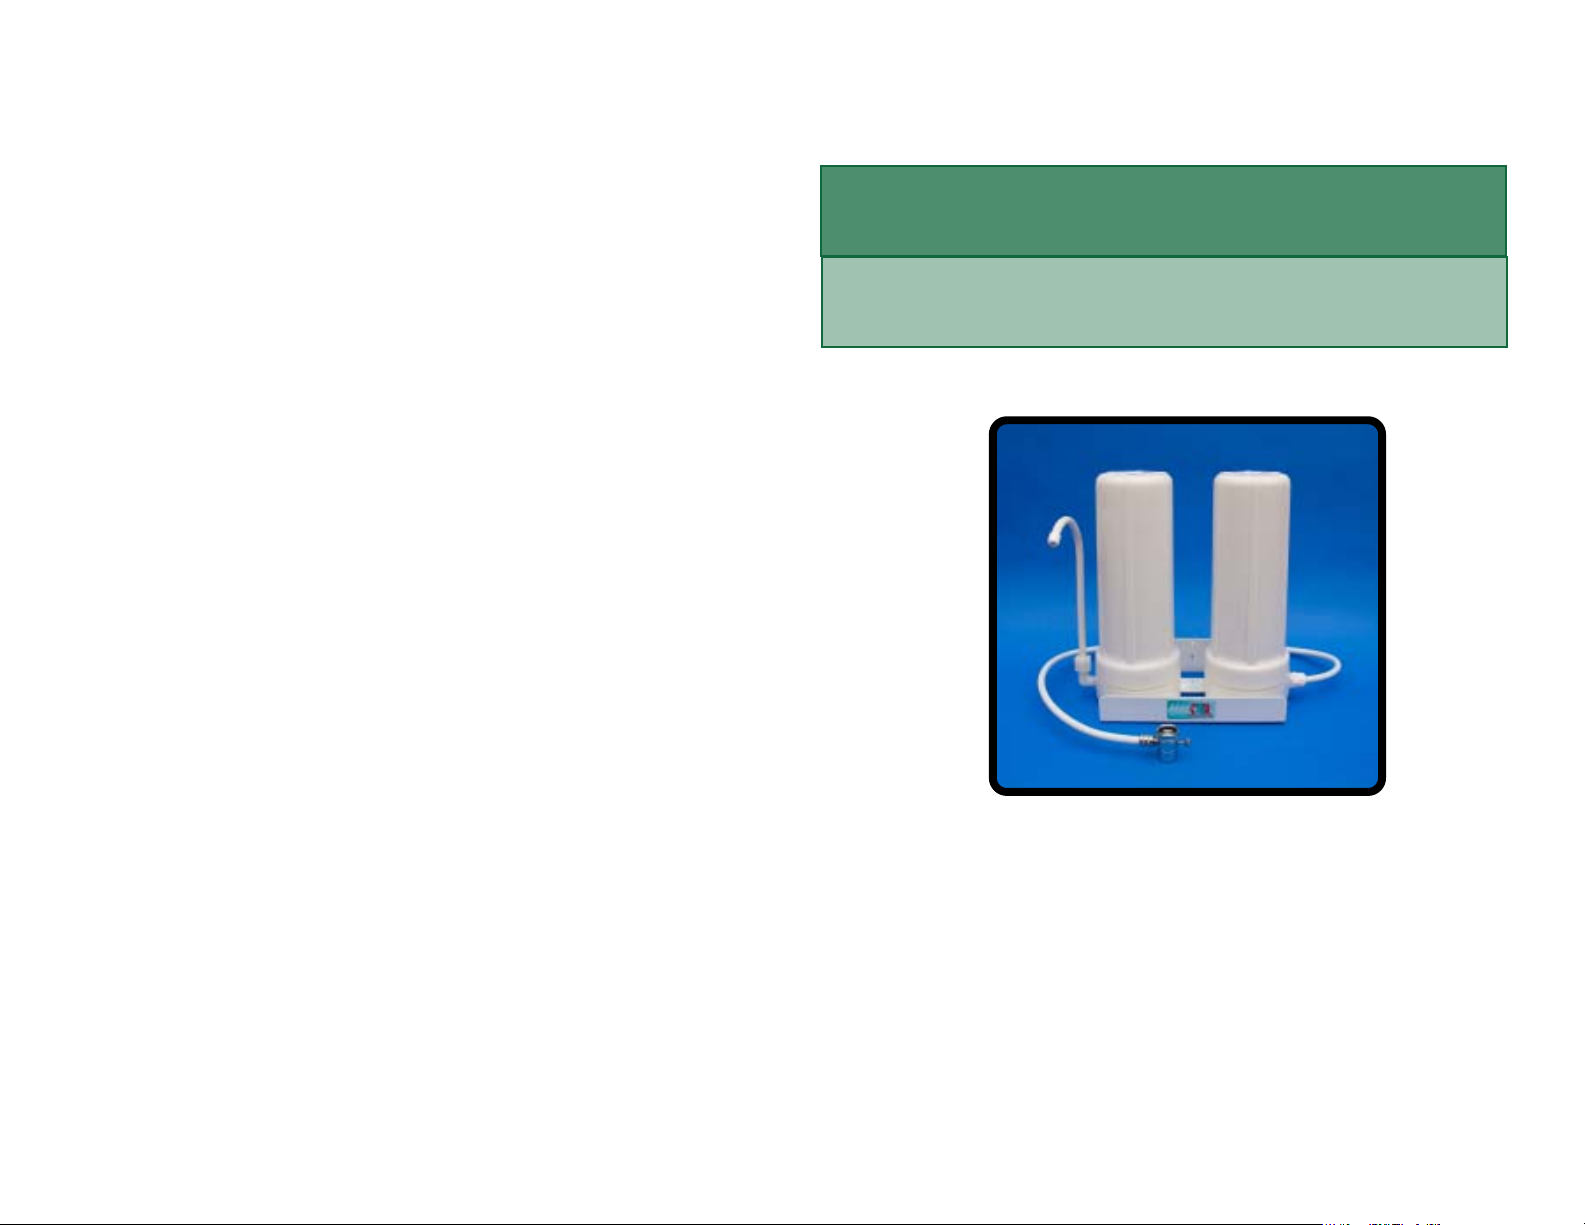
CWR’S
CERAMIC + FLUORIDE & HEAVY METAL
REMOVAL WATER FILTER
MODEL # CWR-DC10CT
Counter Top Model
Operating
Instructions
SAVE THESE INSTRUCTIONS
INSTALLATION INSTRUCTIONS
Thank you for purchasing the CWR’s Ceramic + Fluoride + Heavy Metal
Removal Water Filter . The Filter is designed to be a free - standing unit
positioned next to the sink and to be used with COLD water only.
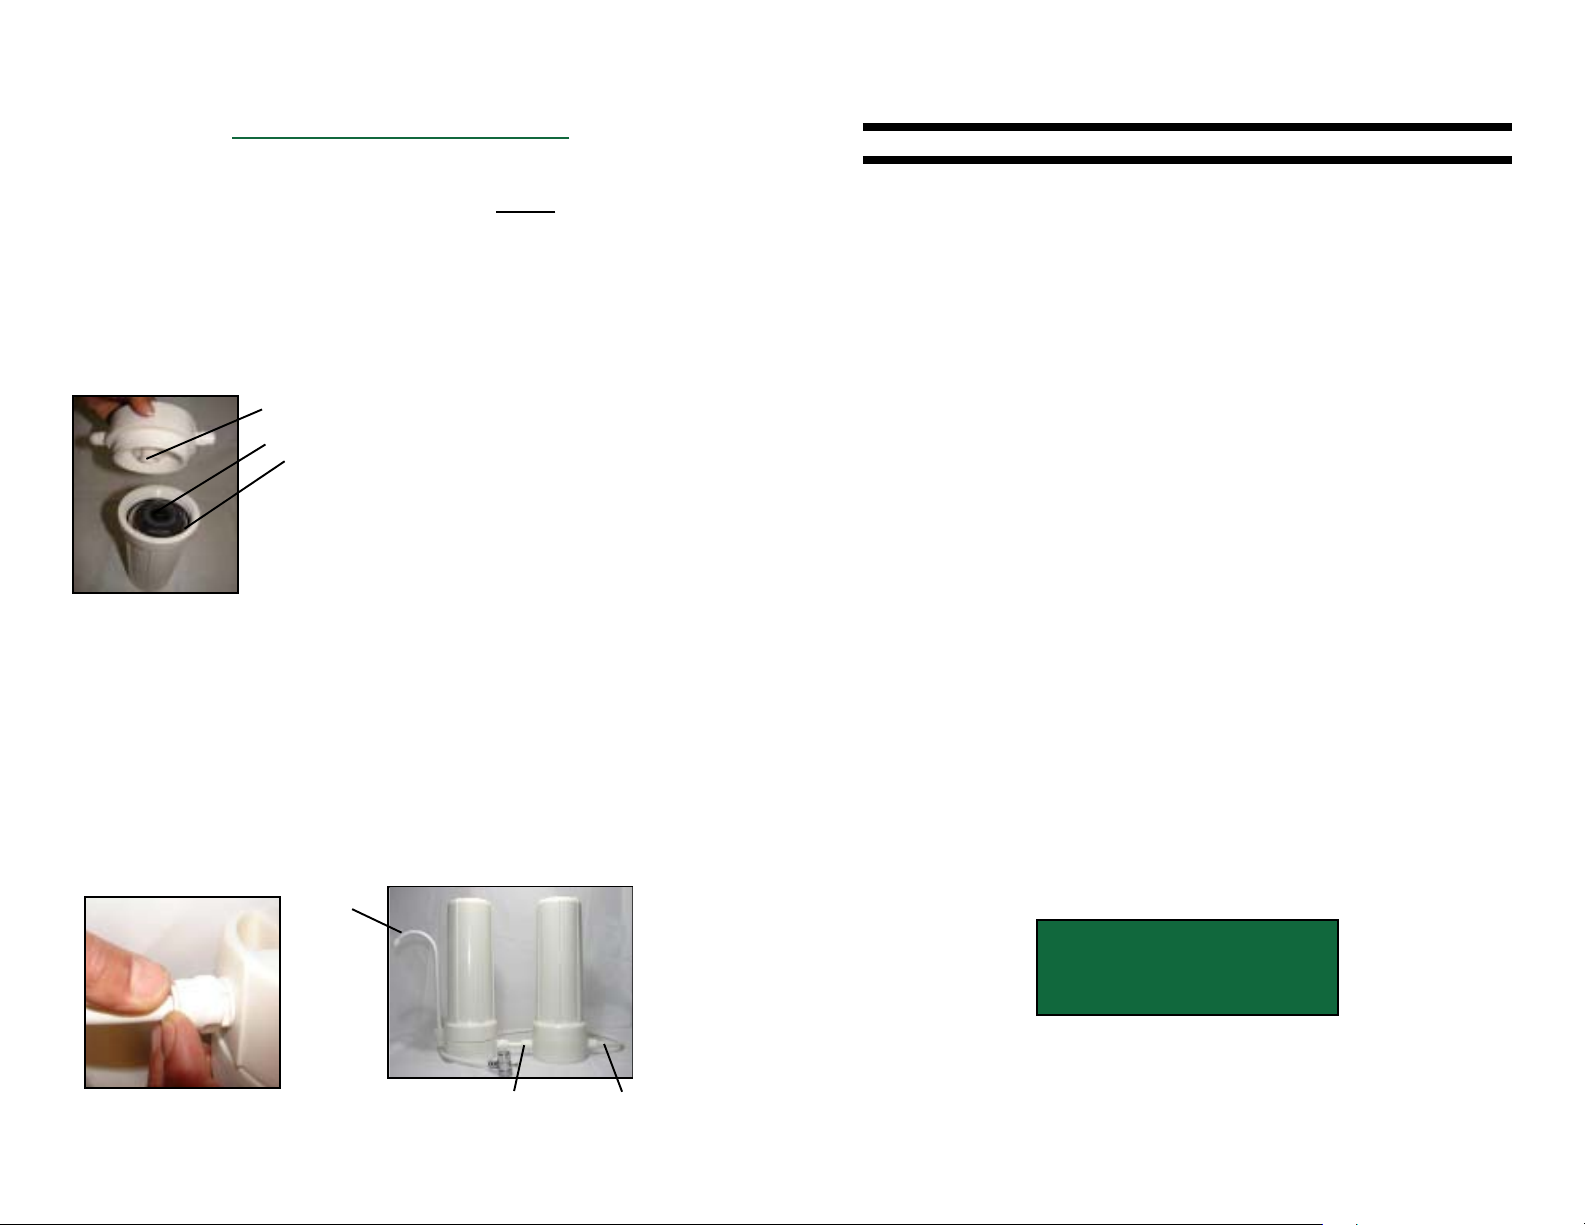
1. Open the box labeled “Ceramic Filter”. Open the unit carefully
by unscrewing the housing sump from the base. With clean
hands, rinse the white ceramic filter under cold water to remove
any loose ceramic dust. Make sure the Rubber O-Ring is seated
properly into the housing
Diag 1
(Diag 1).
Base Opening “hole”
Ceramic Filter “hole”
O-Ring
Replace and screw the sump up into the base,
make sure the opening or hole in the ceramic
Housing
Sump
filter faces towards the base, otherwise you
will not get proper water flow.
2. Open the 2nd box labeled “Fluoride Filter”. T ighten base to the
housing sump. The fluoride filter is already seated properly.
3. Locate the small plastic bag. Remove the “3 inch connector
tube” and push connector firmly into base opening of fluoride
filter housing as far as it will go. Then push the other end of the
connector tube into the opening on the base of the ceramic
housing. Push two housings together
4. Unscrew the end piece (aerator) of your faucet. This may require use of
pliers. There should be male threads visible (threading on the outside-see
seperate “Diverter Sheet”). Screw ring of diverter valve
Push in
connector
Spigot
(see Diag 2 & 3).
Ceramic
Filter
Fluoride
+
Heavy
Metal
Filter
Diag 3
Limited One Year Warranty
The Manufacturer warrants this product, to original purchase, for one year from
purchase date to be free of defects in material and workmanship.
Should a defect be discovered within one year of date of purchase, the Manufacturer agrees to repair or replace the defective part at no charge other than handling and return freight charges. The customer service department at CWR,
must be contacted prior to any action in the event it is possible to correct the
defect wihout returning the unit. All authorized product returns must be returned
with all shipping charges prepaid, accompanied by proof of purchase and letter
explaining unit problem to CWR.
This warranty does not appy to any unit that has been tampered with, nor to
damages incurred through negligence in use, faulty packing, or mishandling in
transit by any common carrier. Your remedy does not include cost of inconvenience or damage due to product failure. The Manufacturer liabilities for damages
to you for any costs whatsoever arising out of this statement of limited warranty
shall be limited to the amount paid for this product at the time of original purchase,
and The Manufacturer shall not be liable for any direct, indirect, consequential or
incidental damages arising out of the use of inability to use this product.
The Manufacturer does not authorize any person or representative to assmue or
grant any other warranty obligation with the sale of this product.
The Manufacturer limited warranty is valid only if you retain proof of purchase from
CWR, Environmental or an Authorized Ret ail Dealer for this product. If you purchase
this product from any other source, your purchase is “AS IS,” which means The
7
Manufacturer grants you no warranty, and that you, not the Manufacturer assumes
the entire risk of the quality and performance of this product, including the entire cost
of any necessary servicing or repairs of any defects. This warranty gives you specific
legal rights; you may also have other rights, which vary state to state.
T o facilitate warranty service request please: Keep dated sales receipt
6
FOR SERVICE or PARTS:
1-800-444-3563
5 6
For Service call:
1-800-444-3563
Diag 2
Connector Tube
1
Divertor Tubing
allwk\gary null\GN-DC4CT instructions 2012
For Replacment Filters call your dealer:
6

THE CERAMIC WATER FILTER
PERFOMANCE TABLE:
Reduces to safe levels: % Removal
Chlorine (class 1) 97.2 %
Taste & Odor 99.00%
Lead (at 150 ppb) >98.25%
Particulate reduction (class 1)
Rust/Dirt/Sediment
4
greater than 0.8 microns >99.98%
Parasites (cryptosporidium) >99.99%
Turbidity >99.69%
Flow rate: 0.5/gpm at 45 psi
Capacity: 600 gal chlorine and lead reduction
Results from independent tests:
Filtration efficiency:
0.8 microns 99.99%
onto end of faucet. If male threads are not present, screw in one of the
adapters that have been provided in the small plastic bag, then install the
diverter onto the adapter. Y our filter is now ready for filling.
4. T o avoid any problems caused by airlock in the filter housing, the
unit should be held upside-down over the sink, while filling for the
first time only . Turn the cold water tap partially then pull the diverter
valve to allow water to slowly fill the unit for the first time.
5. When the water starts to flow out of the spigot, turn unit right
side up. Note: you may see some loose black carbon or white
ceramic dust, it will flush out. Allow the water to run to waste for 10
minutes until water runs clear.
TROUBLE SHOOTING:
Problem: Leak between white housing and base.
The ceramic filter element has been tested in
accordance with and meets NSF protocol 42 & 53 for re-
duction of cysts, turbidity, particulates, chlorine and lead.
*not
*********************
5
Solution: First tighten down white sump into base. If this doesn’t
stop leakage, turn unit upside down, unscrew white housing from
base and reseat black “O” ring into groove.
Problem: Initially no water comes out of unit.
5
Solution: Check that the opening “hole” in the ceramic filter is
facing the hole in the base to allow for proper water flow.
Problem: Flow rate slows down.
Solution: Follow directions for cleaning unit.
Problem: Diverter valve doesn’t fit onto faucet.
Solution: Use one of the adaptors that was supplied with unit. If
neither one fits, call service at CWR for A UNIVERSAL ADAPTER.
Problem: Cleaning ceramic filter repetatively no longer restores flow rate.
Solution: Replace filters.
1a
2

GUIDELINES FOR FILTER REPLACEMENT:
HOW TO CLEAN YOUR CWR WATER FILTER:
The CWR, Water Filter that you have purchased is provided with a
ceramic/carbon filter and an fluoride filter. The filters should be
changed periodically since contaminants like chlorine and chemicals bind to the carbon and eventually the filter’s performance is
diminished. The time interval for filter replacement depends on usage and the types and concentrations of contaminants in your tap
water. Also, since the number of people in a family vary and there
are geographical differences in the types of contaminants, intervals
between filter changes will vary. We recommend that you...
1b
Replace Filter Every
6 months to 1 year
Under no circumstance should your filter be left in longer than 1 year.
Since the ceramic filter collects dirt on the surface, very dirty
source water will cause the flow rate to slow down. As soon as
you notice the flow rate decreased you must follow the instructions
to clean the ceramic filter. Failure to clean your ceramic filter in a
timely matter will cause dirt to accumulate and increase the
backpressure in the unit and it will be very difficult to open the unit.
2
Due to filtration of particulate (dirt) contaminants from the water
during use, the flow of water from the filter may reduce over a
period of time. To restore the water flow to its normal level simply remove, clean and replace the filter cartridge as follows:
____________________________________________________________
1) Open the white housing (sump) on the ceramic unit, by holding the unit upside down over the sink; unscrew the white housing (sump) clockwise. The sump will be full of water. Discard
the water.
2) Use a non-detergent, abrasive pad, “Scotch Brite” and lightly
brush off the ceramic filter under cold water until clean. NEVER
USE SOAP OR ANY CLEANING AGENTS. If the filter is st ained,
brushing will not remove the stains. Do not rub the filter too
hard as it will cause excessive wearing of the ceramic and crack.
3) Clean the inside of the base and sump with a 50% solution
of water and peroxide using a vegetable scrub brush. DO NOT
USE THIS BRUSH FOR ANY FOOD PROCESSING. Clean
threads of housing with Q-tip.
Conditions that require immediate filter replacement:
1. Cleaning ceramic filter no longer restores flow rate.
2. Following a “Boil Alert”.
3. Running HOT water through the unit.
4. If there is a breach in the ceramic or there is any noticeable
cracks in the ceramic.
The purpose of cleaning your ceramic is to remove excessive dirt
buildup, it wil not remove stains.
Following these simple maintenance guidelines will provide you
and your family with years of safe water for all your
drinking,cooking, rinsing, ice cubes and beverage requirements.
3
4) Reinstall ceramic filter into the base and screw in the white
housing (sump) into the base. MAKE SURE “O” RING IS
SEATED PROPERLY,
5) The Fluoride + Heavy Metal Filter cannot be cleaned.
Replacement Filters that you need:
3
RF-IMPB2
4
RF-IMPUC
 Loading...