

Page 1
PREMIUM PLAIN ZEBRA SHADE INSTALLATION MANUAL:
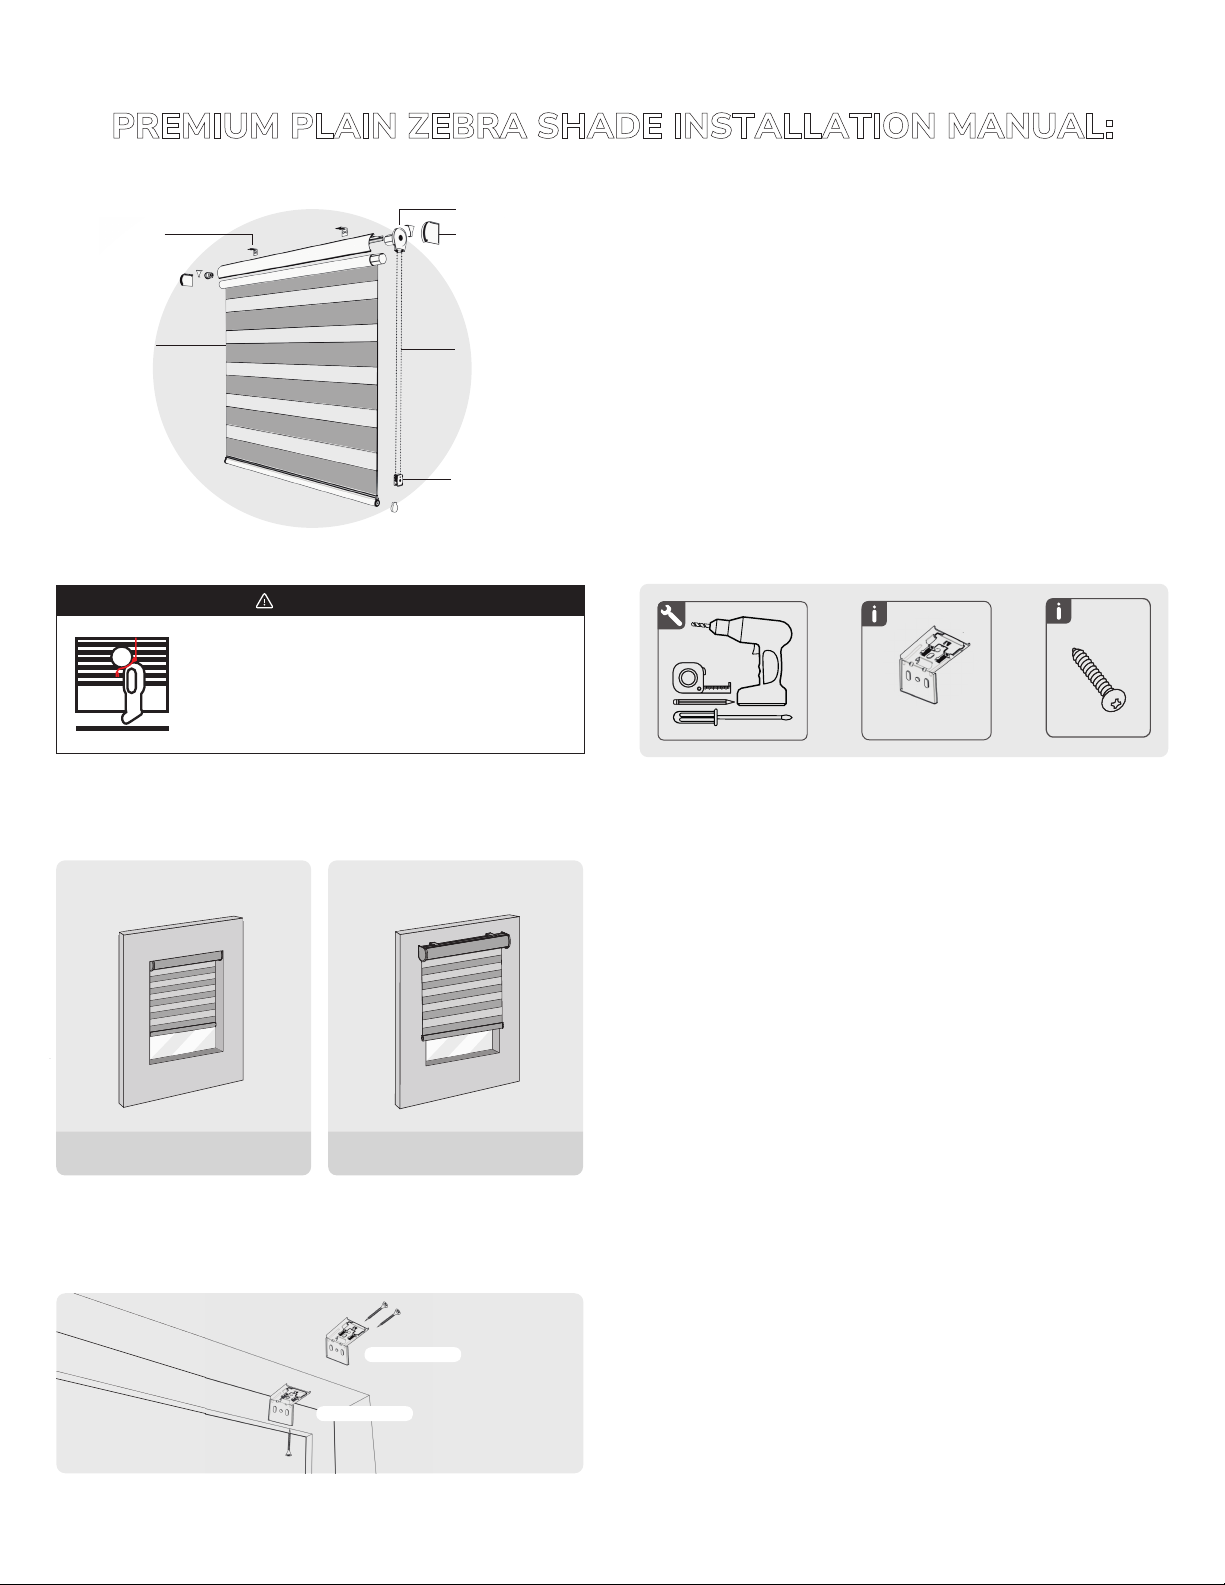
Clutch
Bracket
Fabric
WARNING
Window Blind Cord can STRANGLE your child.
To prevent strangulation, purchase cordless products
or products with inaccessible cords.
Cassette
Our Custom Premium Zebra Shades add unique beauty to your windows
and transform your spaces by providing a touch of versatile sophistication
to both contemporary and modern decor styles.
Cord
Please read and follow these instructions to ensure a proper installation that
will let you fully enjoy your Blinds.
Cord tensioner
NEEDED TOOLS AND COMPONENTS
Included hardware
INSIDE MOUNT OUTSIDE MOUNT
For inside mount,
install brackets using the top side.
Inside mount
For outside mount,
install brackets using the back side.
Outside mount
MOUNT TYPES
When choosing inside mount, the shade will be installed inside
the windowframe.
For outside mount, the shade will be installed outside the windowframe.
For this type of mount, consider ordering your shade slightly wider and
higher than the width and height of your windowframe. We recomend
increasing at least 5” to both width and height in relation to your
windowframe when ordering your shade for outside mount.
Please do consider that we deduct 1/4 of an inch when producing our
shades in order to ensure an easy fit when choosing inside mount
installation. Since this deduction is made on all of our shades regardless of
the type of installation you choose, please consider this when ordering you
shade for outside mount.
BRACKET INSTALLATION
1. Mark the location of the screws using brackets as a guide. Drill holes for
the screws and install the brackets (depending on the material of your walls,
you might need to use drywall anchors).
Important: Make sure brackets are perfectly aligned to each other before
attaching your shade to avoid wave effects to appear on the fabric.
Page 2
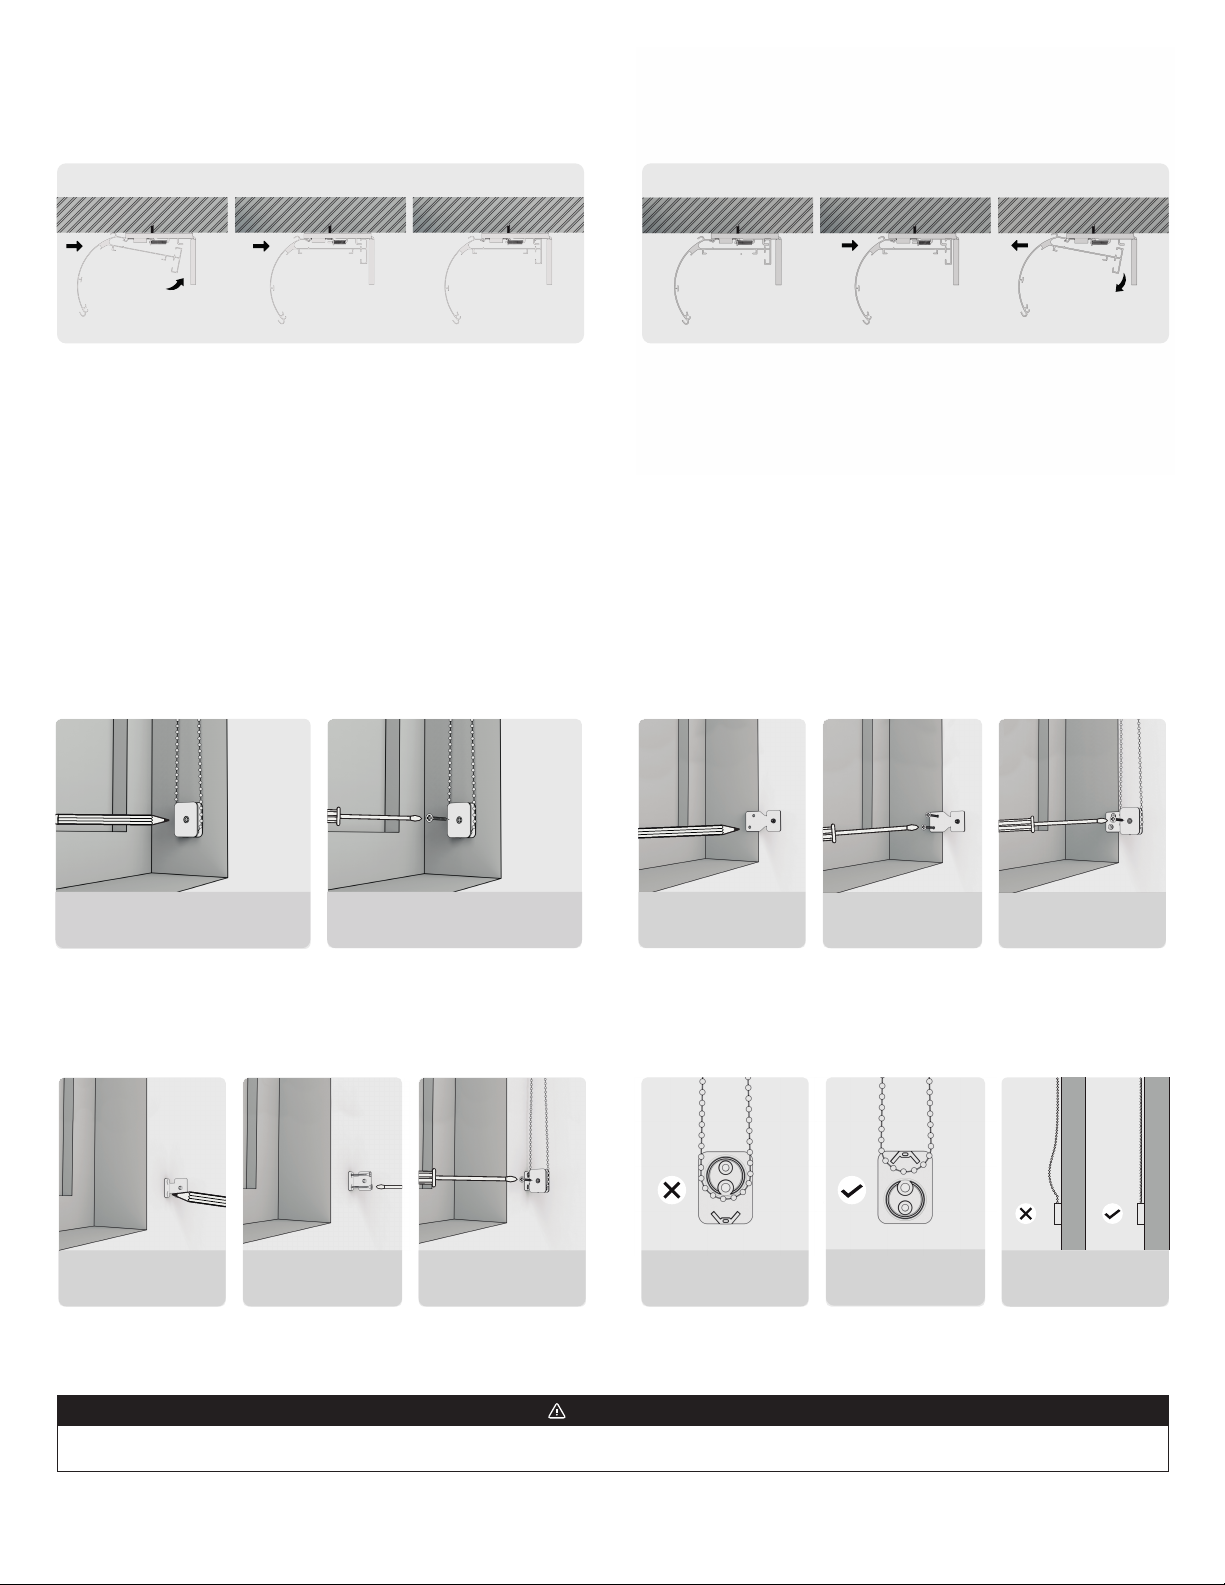
CASSETTE INSTALLATION
REMOVAL
2. Attach the cassette by pushing it with a slight inclination on to the
brackets until the front rib locks on the front bracket hook.
Push all the way into the bracket, rotate the cassette inwards and
release the push. The cassette should hold firmly in place.
SAFETY DEVICE
A. INSIDE MOUNT: Fully recessed shade and safety device
Position so there is no slack within the loop.
Mount the safety device.
Push the cassette against the brackets and rotate slightly inwards.
Slowly release the push, and remove the cassette from the brackets.
B. INSIDE MOUNT: Partially recessed shade and safety device
Position so there is no slack
within the loop.
Secure mounting bracket.
Mount safety device to the
mounting bracket.
C. OUTSIDE MOUNT: Shade and safety device outside window. INSTALLATION TIPS
Position so there is no
slackwithin the loop.
Secure mounting bracket.
Mount safety device to the
mounting bracket.
Shade will not
operate if safety device
is upside down.
Position the chain around the
circular side of the safety device
before installing.
Install the safety
device so there is no
slack in the chain loop.
WARNING
The safety device is used to avoid free hanging bead chain loops. Read the following instructions carefully in order to properly install the Safety Device.
 Loading...