

Page 1
Base
Support plate
Tripod
INSTRUCTIONS
CB Gimbal, CB Gimbal Basic, CB Gimbal Upgrade
Cleveland, Ohio 44143
website: www.custombrackets.com
Made in USA
email: info@custombrackets.com
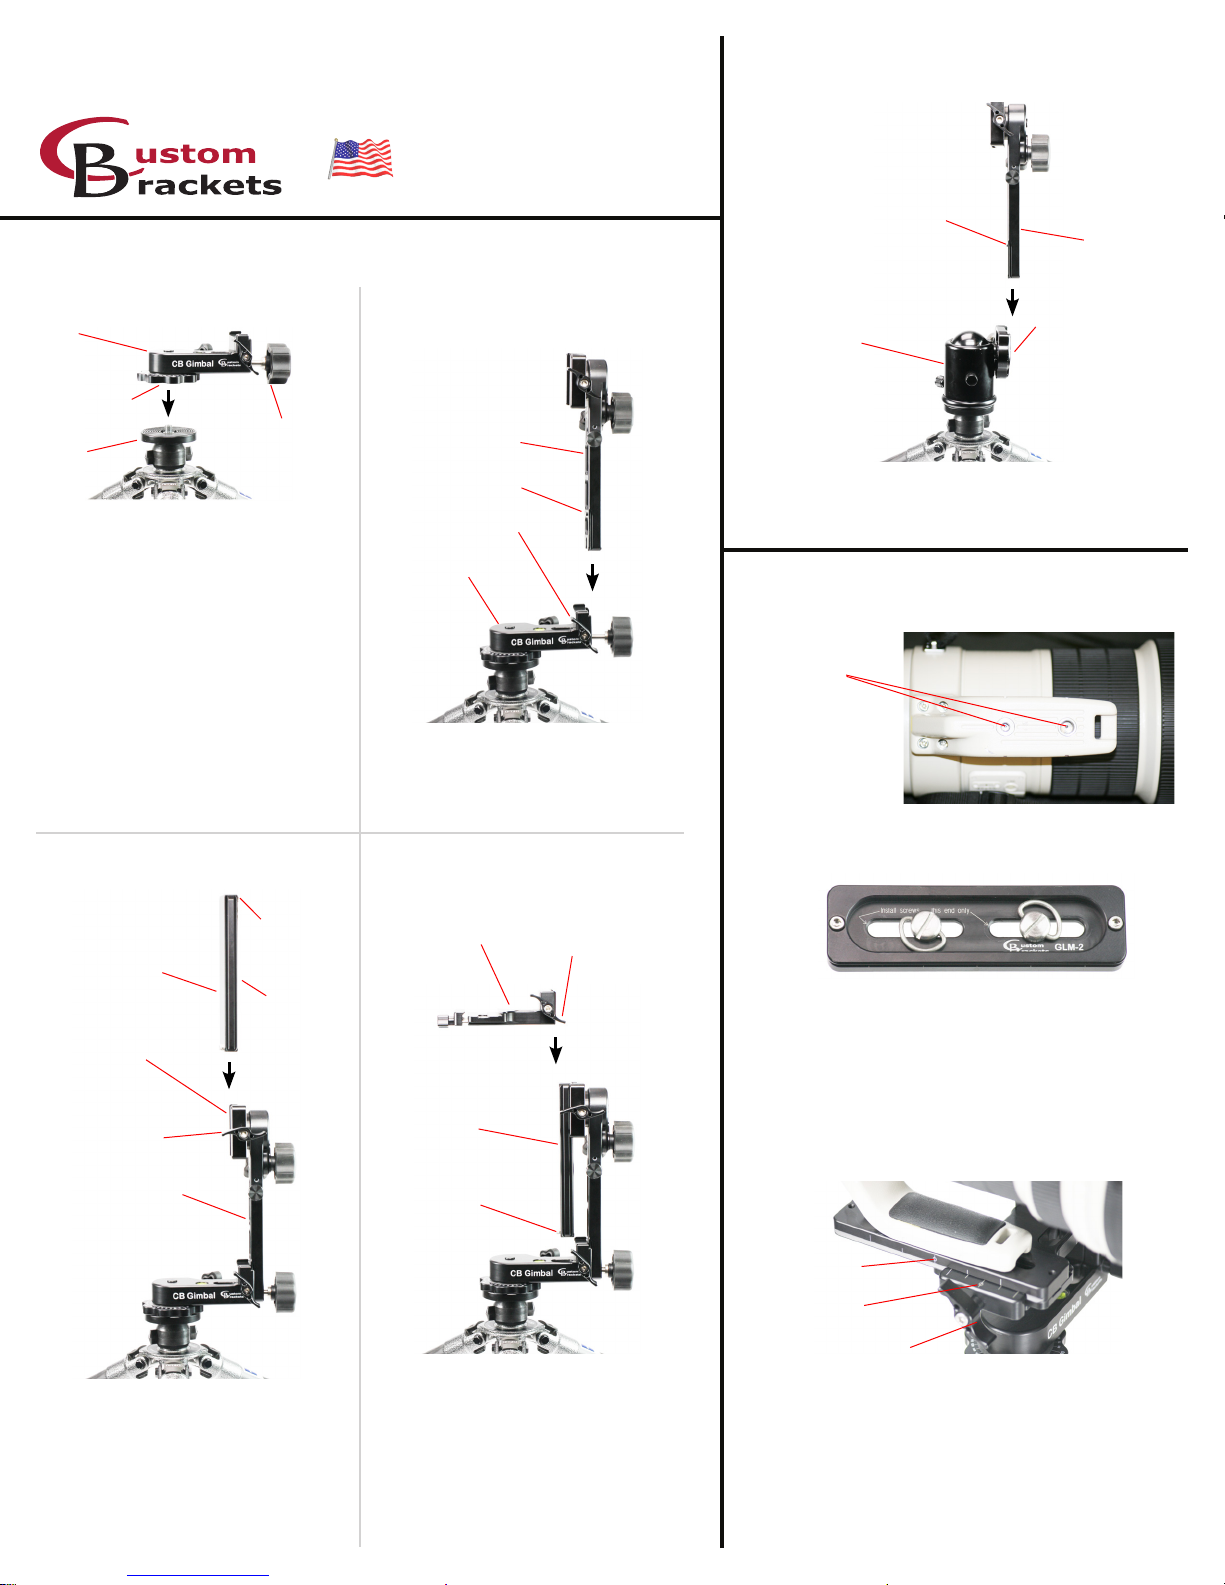
Assembling CB Gimbal
- - Step One - - - - Step Two - -
Pan lock
knob
Upright
phone 800.530.2289
32 Alpha Park
Assembling CB Gimbal Basic
Safety stop
Ball Head
Customer supplied
Upright
Arca Swiss type clamp
We recommend only using a tripod with a
3/8”-16 mounting stud.
Place base on the tripod’s 3/8”-16 mounting
stud and rotate support plate clockwise
until base is rmly attached to tripod. Hand
tighting will be enough to secure the base to
tripod. It is not recommended to use pan
lock to secure support plate to tripod.
Caution
If you choose to use a tripod with a 1/4”
* * * * *
mounting stud, test tripod to make sure it
will handle the weight of camera and lens
combination. You will need to purchase a
3/8” to 1/4” reducer bushing and install it in
bottom of CB Gimbal’s support plate.
* * * * *
- - Step Three - -
Safety stop
Arm
Pockets on
this side
Arca Swiss
type clamp
Arm lock knob
(must face front)
Safety stop
Upright lock knob
Base
Loosen upright lock knob and slide upright
into the base until safety stop rests on
base. Tighten upright lock knob to secure
upright.
- - Step Four - -
Lens platform
Arm
Lens platform
lock knob
Loosen Arca Swiss clamp of ball head and slide upright into
clamp until safety stop rests on clamp. Tighten clamp to
secure upright.
Attaching lens plate to lens and lens
to CB Gimbal or CB Gimbal Basic
Mounting holes
Lenses either have 1/4” or 3/8” threads. (1) 3/8” and (2) 1/4”
screws are included with each lens plate - it is important to use
the correct size.
Install screw(s) into lens plate at the labeled ends. If not, the
screw(s) may be damaged. Some lenes will require that both
screws be in one slot for balancing the lens.
The “D” screws have fold out clips for hand tightening. To
make it tighter, use a straight screwdriver or quarter.
Screw the GLM-1 or GLM-2 to the bottom of your lens foot
using the “D” screws that correspond to the lens mounting
holes.
Do not insert any object as leverage into the “D” clip.
Upright
Loosen arm lock knob and slide upright
into Arca Swiss type clamp until safety
stop rests on the clamp. Push in and
tighten arm lock knob to secure arm.
Note
Arm lock lever incorporates a unique
* * * * *
tighten system that allows the knob to
move freely once tightened.
* * * * *
Safety stop
Loosen lens platform knob and slide lens
platform into arm until it rests on the safety
stop. Tighten lens platform knob to secure
lens platform.
Final height location of lens platform is
explained in “CB Gimbal Features” on
reverse side.
* * * * *
Note
* * * * *
Lens plate setup
reference lines
Camera platform
reference lines
Lens platform lock knob
Rotate setup lever into arm pocket (see “CB Gimbal Features”
for location on reverse side).
Install lens plate by loosing lens lock knob all the way, then
place lens plate into lens platform. Tighten lens platform lock
knob completely, then loosen 1/2 turn. Slide lens plate forward
or backward to achive balance, then retighten lens platform
lock knob.
Achieving balance is similiar on CB Gimbal Basic.
Page 2
Note
* * * * *
* * * * *
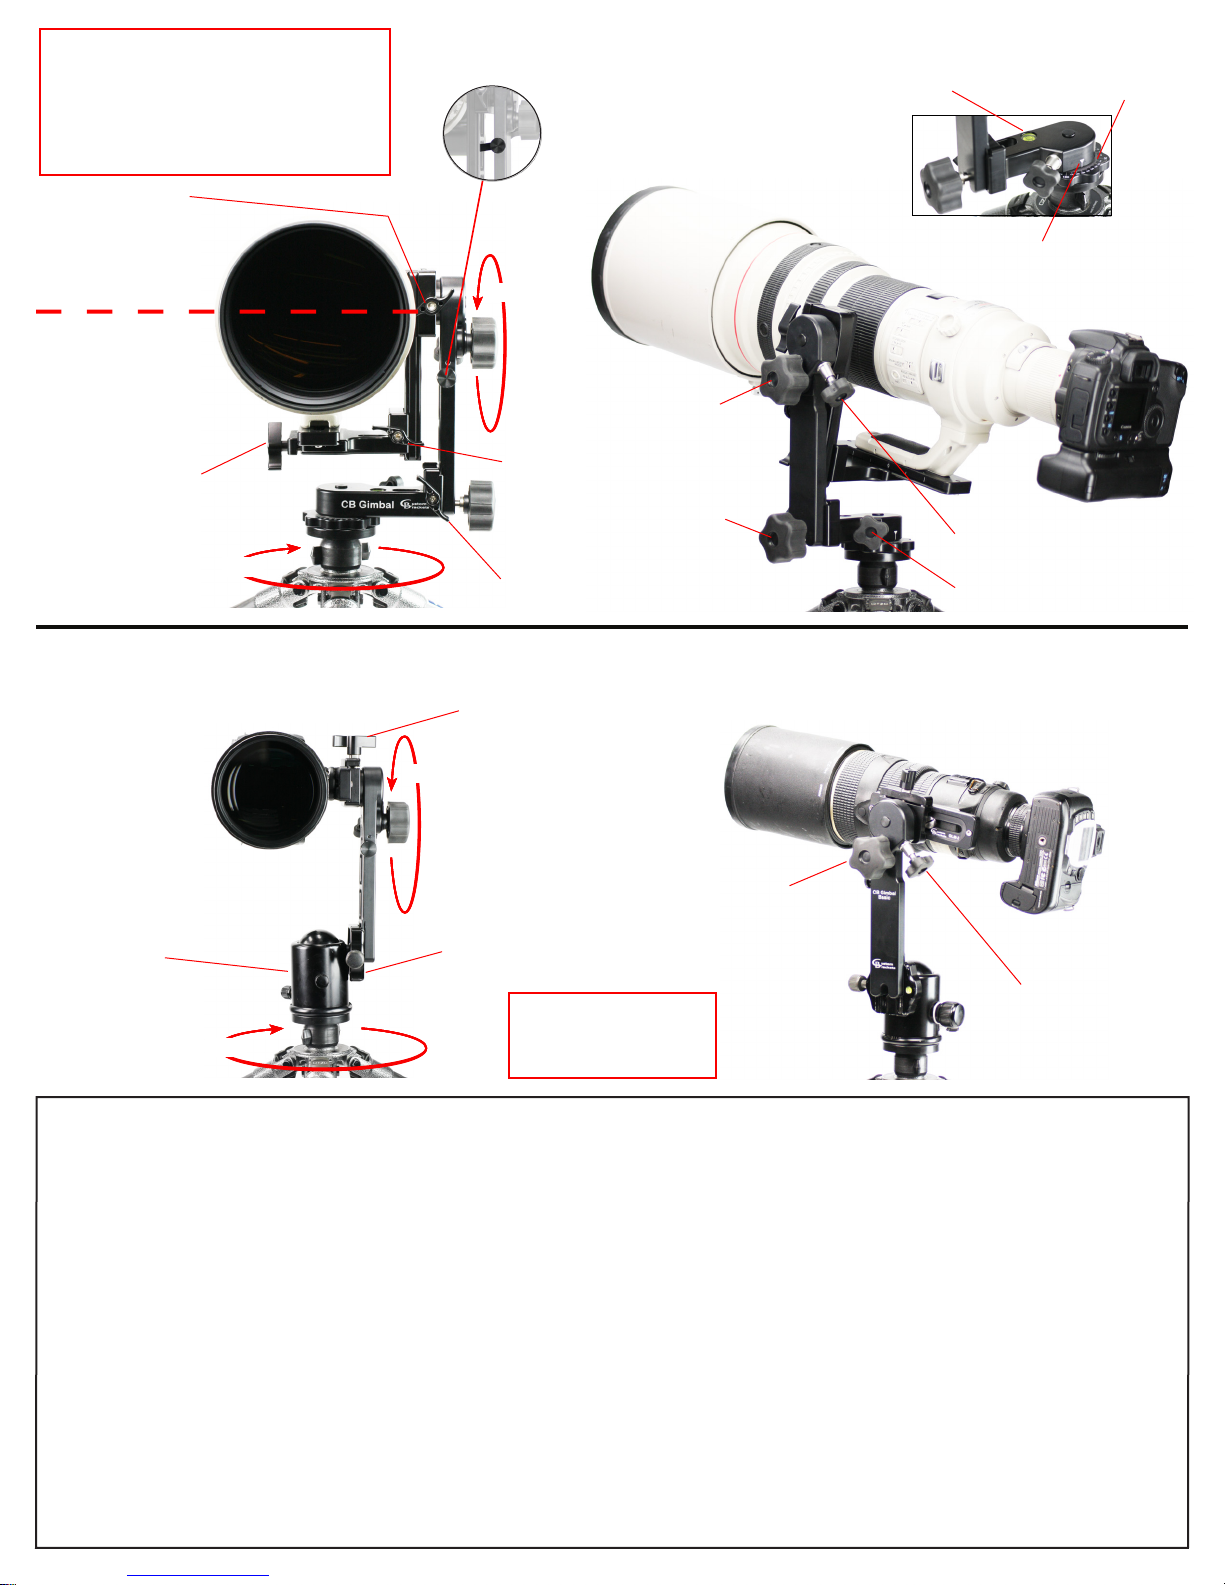
Adjusting the lens center height
For balancing the lens, position the lens
slighty above the center of the tilt axis
(best position is when lens stays in
position without drag or lock)
Arm lock lever
push in and turn
to lock and unlock
- - - CB Gimbal Features - - -
Setup lever
for balancing lens, changing cameras,
and secure travel while on tripod
Bubble level
2 degree markings
Degree indicator line
Center of Tilt Axis
in-line with arm lock lever
Lens lock lever
PA N
TILT
Tilt lock knob
Lens platform
lock lever
Pan lock knob
Upright lock lever
- - - CB Gimbal Basic Features - - -
Lens lock lever
push in and turn
to lock and unlock
TILT
Tilt drag knob
Pan drag knob
Tilt lock knob
Ball Head
Customer supplied
PA N
Arca Swiss type clamp
Note
* * * * *
Use Ball Head for all
panning functions
* * * * *
Tilt drag knob
CB Gimbal Facts
The CB Gimbal has many unique features found only in our Custom Brackets gimbal line. It is constructed from aircraft aluminum that is “hard anodized” for a lightweight and scratch resistent nish. All knobs
have an ergonomic design and are machined from aluminum to prevent breakage. All of the fasteners are made from stainless steel to resist corrosion. The pan and tilt knobs have a rubberized coating for
comfort, traction, and to resist cold weather. The CB Gimbal has a setup / travel lever that is used for balancing the lens and securing for travel from location to another when the lens is still attached.
USA 5 Year Warranty
For a period of ve (5) years from date of purchase, Custom Brackets will repair or replace free of charge, any defect in material or workmanship. Warranty does not cover repairs due to customer abuse,
negligence, impact or any modications made by the customer. All knobs are installed using “loctite” to prevent them from unscrewing. Hand tightening is sufcient to secure any component and the lens
plate. Excessive force unscrewing will cause the knobs to unscrew and void warranty. Warranty service is available by returning the CB Gimbal or component (shipping prepaid) to Custom Brackets. All
returns must include a return authorization (RA) number (contact Custom Brackets to obtain), letter explaining the problem, and a copy of the sales receipt.
International 5 Year Limited Warranty
For a period of ve (5) years from date of purchase, Custom Brackets will repair or replace free of charge, any defect in material or workmanship. Warranty does not cover repairs due to customer abuse,
negligence, impact or any modications made by the customer. All knobs are installed using “loctite” to prevent them from unscrewing. Hand tightening is sufcient to secure any component and the lens
plate. Excessive force unscrewing will cause the knobs to unscrew and void warranty. Limitation to the warranty - after year one shipping charges are not covered. Warranty service is available by returning
the CB Gimbal or component (shipping prepaid) to Custom Brackets. All returns must include a return authorization (RA) number (contact Custom Brackets to obtain), letter explaining the problem, and a
copy of the sales receipt.
Repair
Repair service is available by returning the CB Gimbal product (shipping prepaid) to Custom Brackets. All returns must include a return authorization (RA) number (contact Custom Brackets to obtain), letter
explaining the problem, and a copy of the sales receipt. A repair cost will be issued and must be approved prior to any repairs. Shipping charges are the responsibility of the customer.
Maintenance
The CB Gimbal product line is designed to be completely maintenance-free. The bearing rotation tension is factory set. Attempting to adjust the tension will void the warranty and may result in damage to
the camera or lens.
 Loading...