

Page 1
Page 2
Page 2
© 2013 Maka Technologies Group. All Rights Reserved.
benfit, without implying a violation of copyright law. The information in this manual is subject
to change without notice.
Page 3
Page 3
© 2013 Maka Technologies Group. All Rights Reserved.
Annex A
Page 4
Page 4
© 2013 Maka Technologies Group. All Rights Reserved.
Annex B
NOTE: In this user manual, you will find the use of “
TF Card” in the content below.
We wish to assure you that
TF Card is the same as MicroSD Card. You may
find “MicroSD Card” more commonly seen in your country and you’ll have our
assurance when you purchase a MicroSD card to fit into your Curve MX5.
Page 5
Page 5
© 2013 Maka Technologies Group. All Rights Reserved.
Page 6
Page 6
© 2013 Maka Technologies Group. All Rights Reserved.
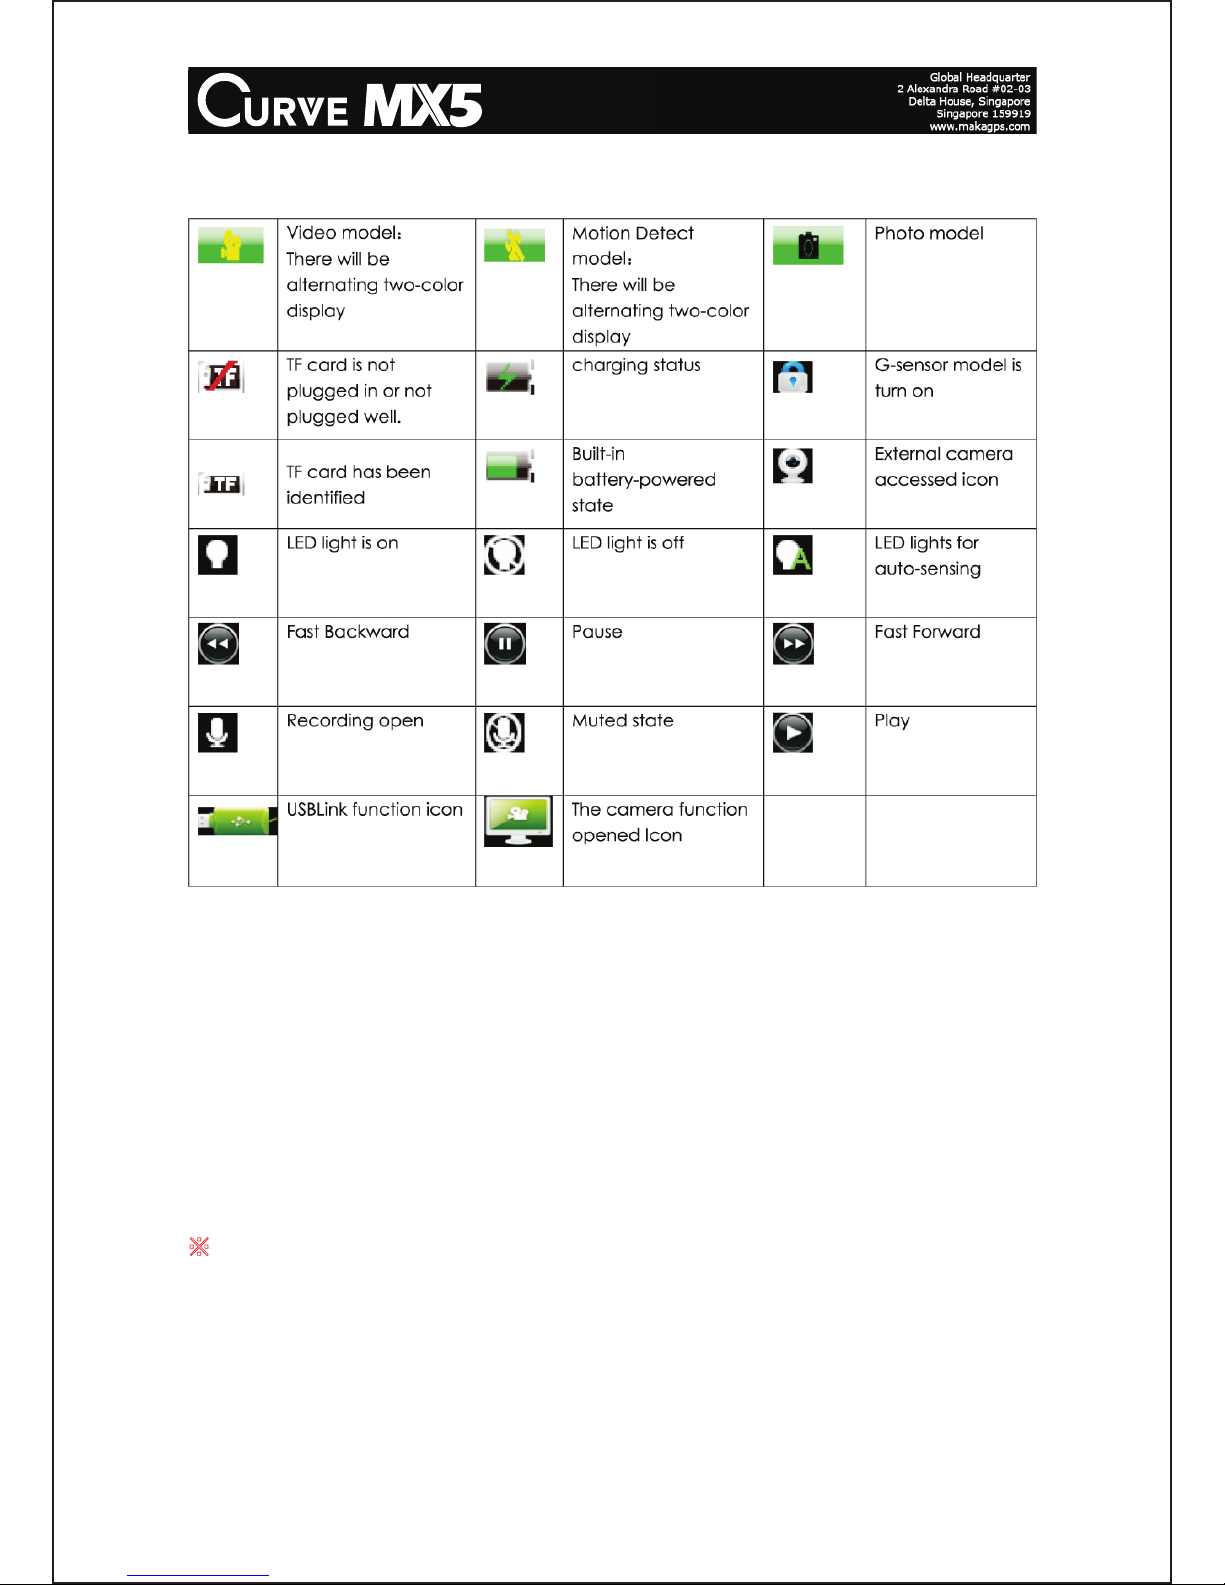
3. Icon Display Description
3.1 Load the Micro SD/TF card to start recording your video, take still images. Curve
recommends MicroSD with a minimum capacity of 4GB and this supports maximum
up to 32GB. Use of MicroSDHC is compatible and recommended.
3.2 You may charge the Curve MX5 from the power charger provided by our original
package. It is recommended to plug in the car charger at all times to prevent any
missed of recording opportunity during the accident or any fatal incident.
3.3 Turn on the Curve MX5 by pressing the ON/OFF button. Curve MX5 will switch
on and off automatically if you have connected your Curve MX5 to your car cigarette
lighter.
䈜
CAUTION: To protect your device against sudden surges in current, we
highly recommend you to connect the car charger only after the car engine
has been started.
3.4 Switch Mode: Curve MX5 has two operating mode: you may switch between
Video or Photography. However, Curve MX5 will automatically start with the video
recording mode and you may press the “Mode” button when you wish to switch to
Page 7

Page 7
© 2013 Maka Technologies Group. All Rights Reserved.
the photo mode. You may short press on the “Mode” button if you wish to switch
back to the video recording mode.
3.5 Video Mode:
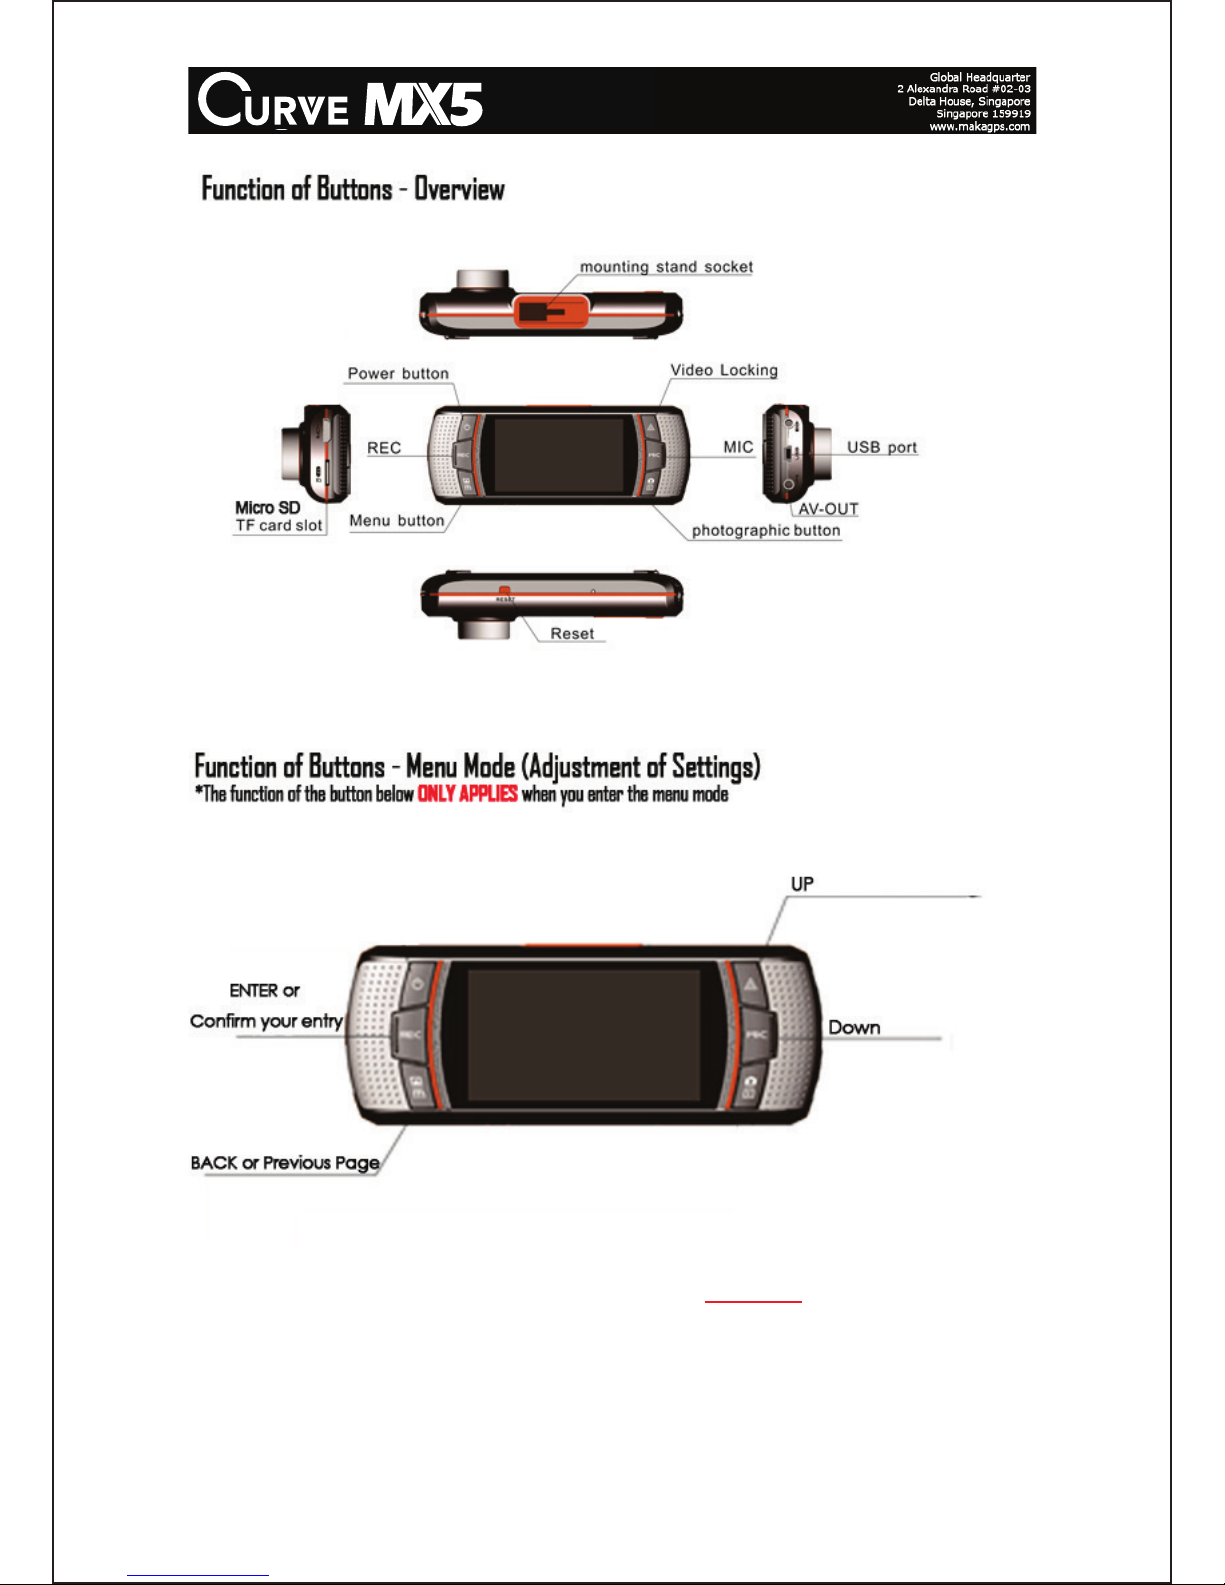
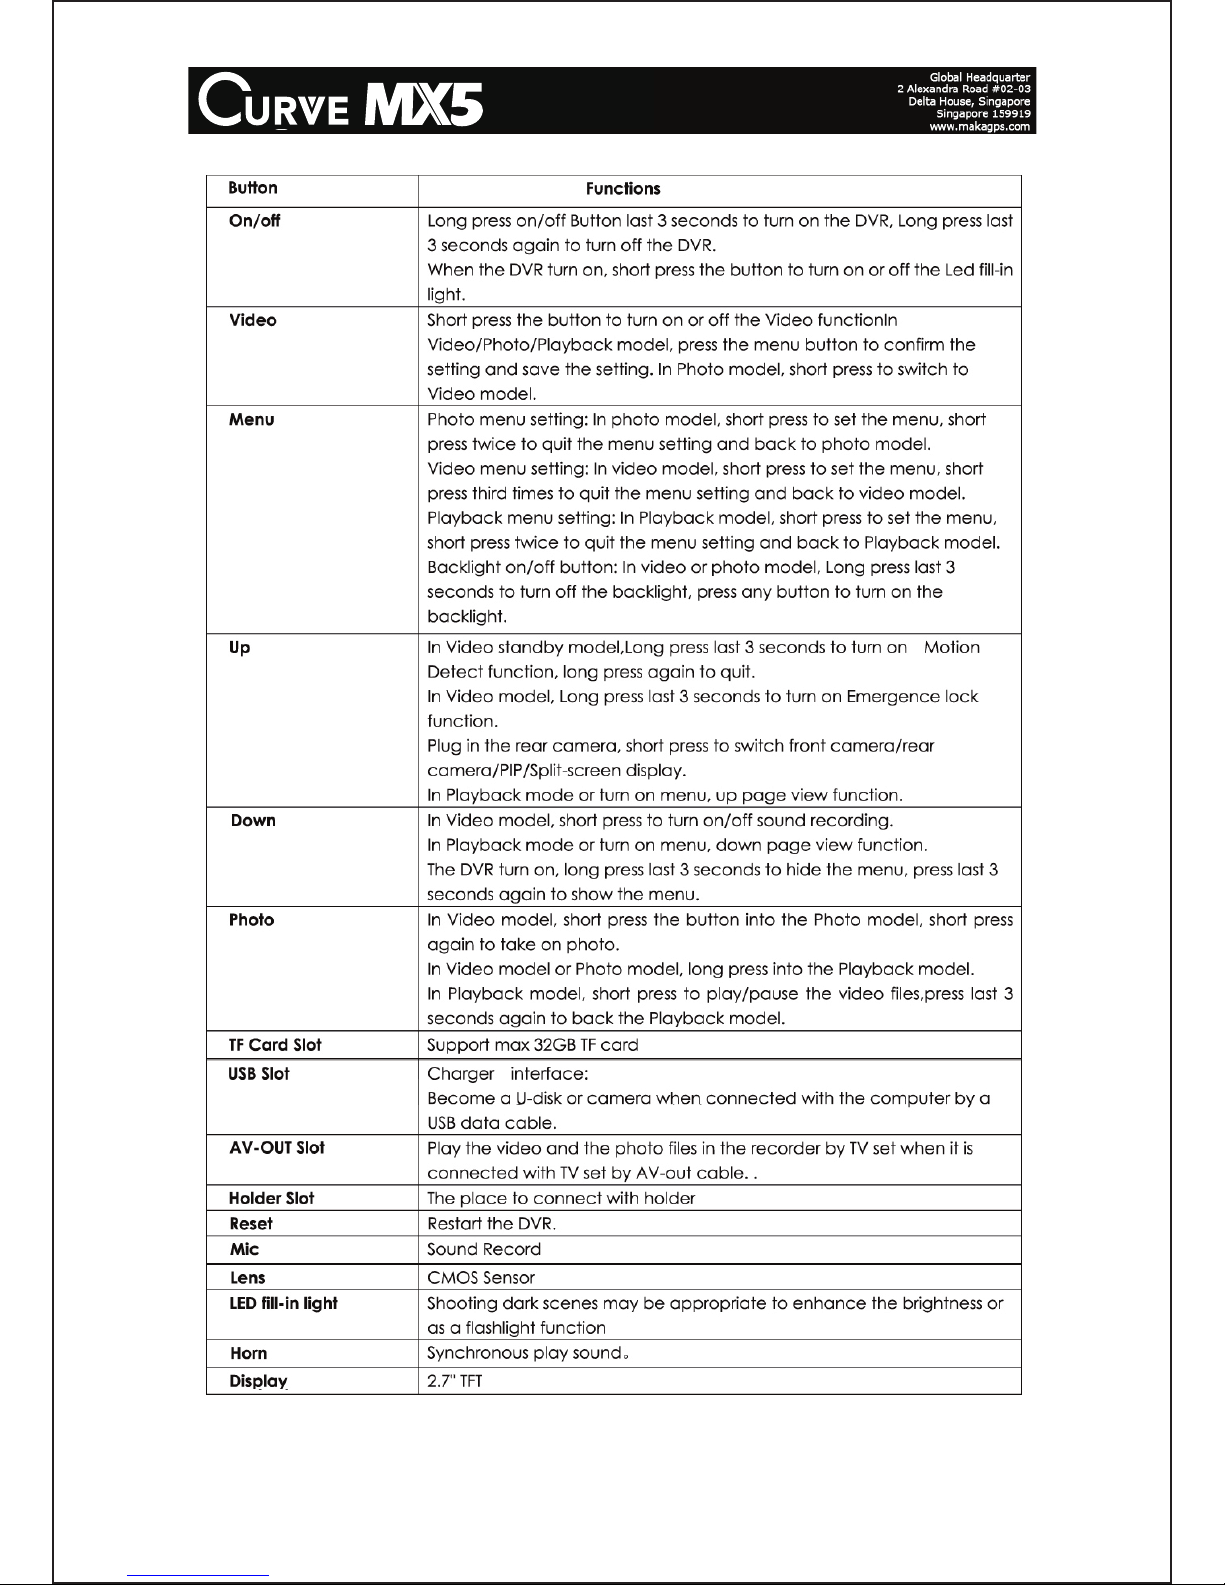
3.5.1 Turn on your Curve MX5 and press the “Menu” button, [Refer to Annex A,
Page.03] menu will show and you may press “Up” and “Down” button to select
between HD 720P or VGA640P, at last press the video button to confirm and save
the settings.
3.5.2 Press the “Menu” button twice [Refer to Annex A, Page 03], you will be able to
see a [Video Length] button will show, press the “Up” and “Down” button to select the
cycle time of the video clips, at last press the “Enter” button to confirm and save the
settings.
3.5.3 Press the “Menu” button three times [Refer to Annex A, Page 03], press “Up”
and “Down” to select the setting list, press the video button to confirm your entry and
press the “Up” and “down” button again to select the parameters of the settings , at
last press the video button to confirm and save the settings. Press the Menu button
to back to the menu list settings, press the Menu button again to quit the menu list
settings.
3.5.4. Setting lists and instructions
(1) White balance: a multi-scene selection feature, the default setting is Auto.
(2) Exposure: Free to adjust the different exposure levels. This can be adjusted
according to the light.
(3) Colour: According to your need to select a different style of shooting black-andwhite and retro.
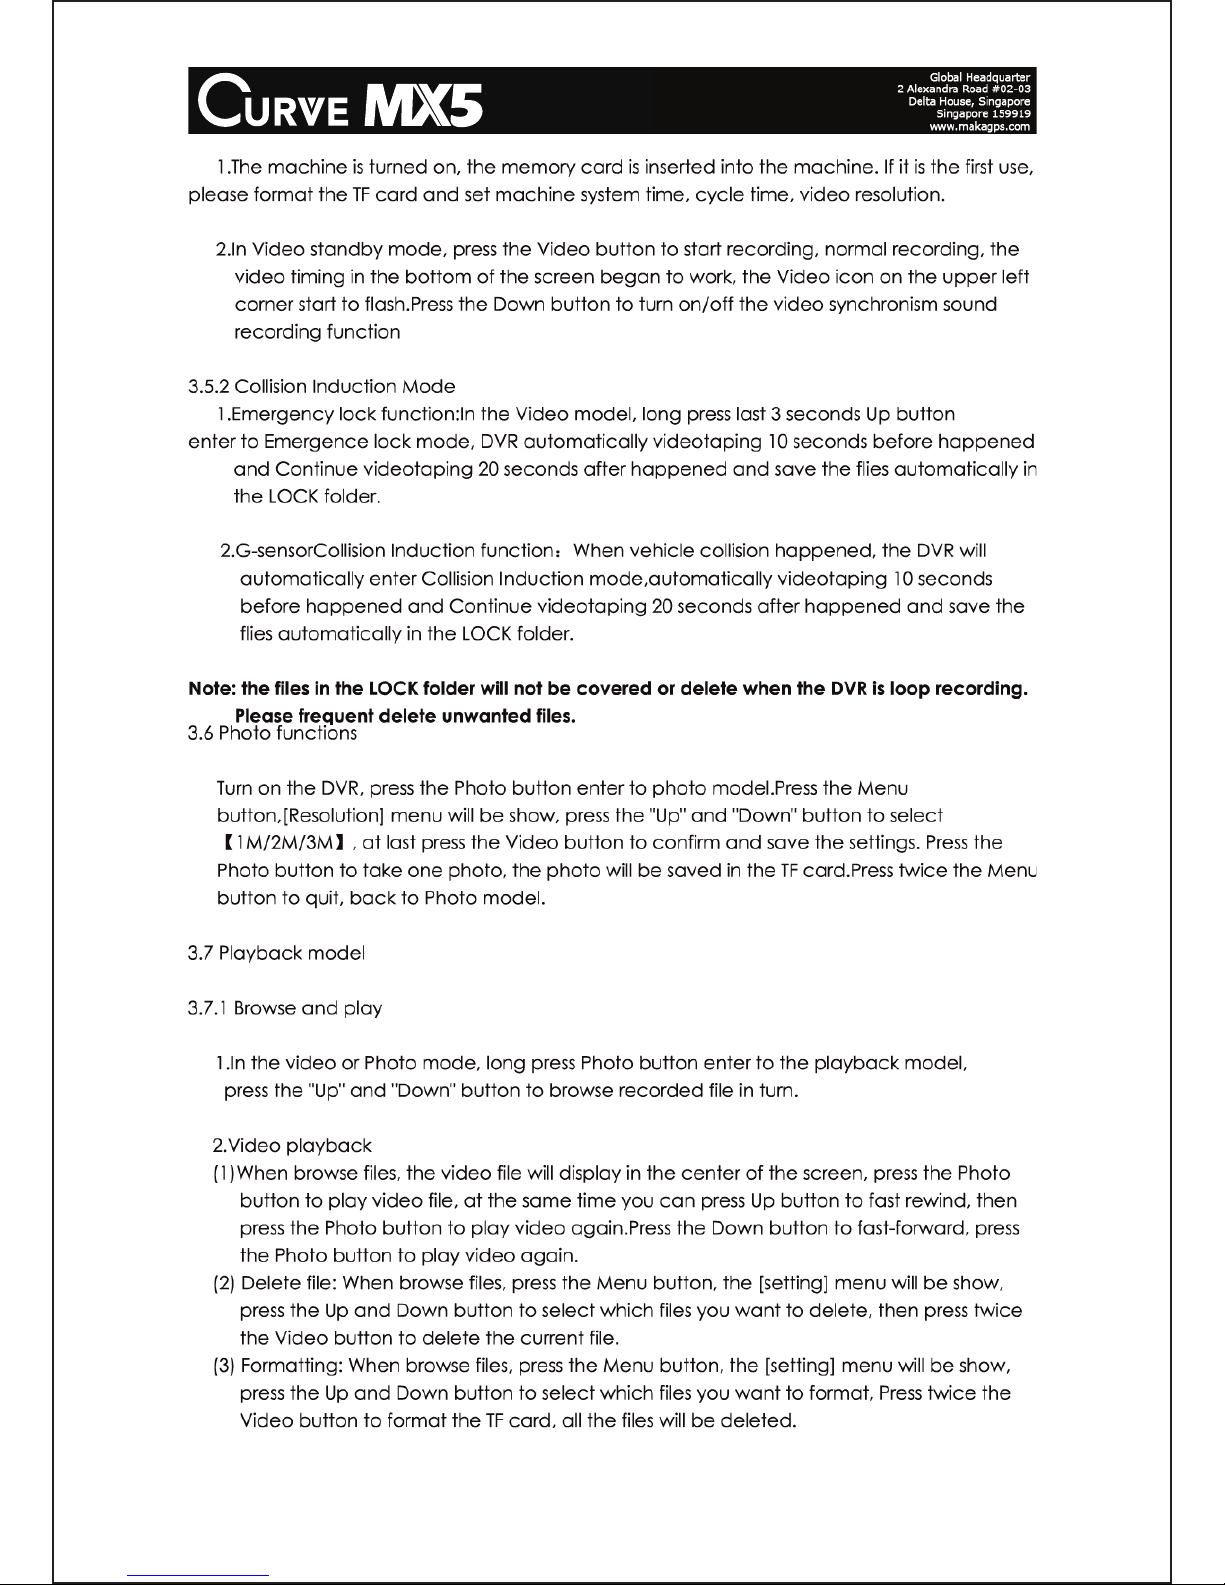
(4) Motion Detection: When this feature is enabled, Curve MX5 is in video standby
mode. When there is a moving object passed in front of your camera, the Curve MX5
will automatically run start recording. When the object has passed the movement or
stand still, the recording will be stopped automatically.
Note: Under the video recording mode, you may press “Up” button for 3
seconds to turn on the motion detection function. You may disable the motion
detection function by pressing another 3 seconds on the same button.
(5) Time watermark: turn on the function, when play the video files, the date and time
of the shooting will also be showed, otherwise you may wish to turn this function off
under the settings.
Page 8

Page 8
© 2013 Maka Technologies Group. All Rights Reserved.
Page 9
Page 9
© 2013 Maka Technologies Group. All Rights Reserved.
Page 10
Page 10
© 2013 Maka Technologies Group. All Rights Reserved.
Page 11
Page 11
© 2013 Maka Technologies Group. All Rights Reserved.
 Loading...