

Page 1
MODEL NO. SRCD681-ASST
PORTABLE CD RADIO BOOMBOX
INSTRUCTION MANUAL
PLEASE READ BEFORE OPERATING THIS EQUIPMENT
Page 2
Warnings and Precautions
TO PREVENT FIRE OR SHOCK HAZARDS, DO NOT EXPOSE THIS UNIT TO
RAIN OR MOISTURE.
This symbol, located on back or bottom of the unit, is
intended to alert the user to the presence of uninsulated
“dangerous voltage” within the product’s enclosure that
may be of sufficient magnitude to constitute a risk of
electric shock to persons.
This symbol, located on back or bottom of the unit, is
intended to alert the user to the presence of important
operating and maintenance (servicing) instructions in
the literature accompanying the appliance.
This product utilizes a Class 1 laser to read Compact
Discs. This laser Compact Disc Player is equipped with
safety switches to avoid exposure when the CD door
is open and the safety interlocks are defeated. Invisible
laser radiation is present when the CD Player’s lid
is open and the system’s interlock has failed or been
defeated. It is very important that you avoid direct
exposure to the laser beam at all times. Please do not
attempt to defeat or bypass the safety switches.
CAUTION: TO PREVENT ELECTRIC SHOCK,
MATCH WIDE BLADE OF PLUG TO WIDE SLOT,
FULLY INSERT.
To reduce the risk of electric shock, do not remove
cover (or back). There are no user-serviceable parts
inside. Please refer any servicing to qualified service
personnel.
Do not mix old and new batteries.
Do not mix alkaline, standard (carbon-zinc), or
rechargeable (ni-cad, ni-mh, etc) batteries.
NOTE: This equipment has been tested and found to
comply with the limits for a Class B digital device,
pursuant to Part 15 of the FCC Rules. These limits
are designed to provide reasonable protection against
harmful interference in a residential installation. This
equipment generates, uses, and can radiate radio
frequency energy and, if not installed and used in
accordance with the instructions, may cause harmful
interference to radio communications. However, there
is no guarantee that interference will not occur in a
particular installation. If this equipment does cause
harmful interference to radio or television reception,
which can be determined by turning the equipment
off and on, the user is encouraged to try to correct the
interference by one or more of the following measures:
• Reorient or relocate the receiving antenna.
• Increase the separation between the equipment and
receiver.
• Connect the equipment into an outlet on a circuit
different from that to which the receiver is
connected.
• Consult the dealer or an experienced radio/TV
technician for help.
WARNING: Changes or modifications to this unit
not expressly approved by the party responsible for
compliance could void the user’s authority to operate
the equipment.
2
Page 3
Important Safety Instructions
1. Read Instructions - All the safety and
operating instruction should be read before the
product is operated.
2.
Retain Instructions - The safety and
operating instruction should be retained for
future reference.
3.
Heed Warnings - All warning on the product
and in the operating instructions should be
adhered to.
4.
Follow instructions - All operating and use
instructions should be followed.
5.
Cleaning - Unplug this product from the
wall outlet before cleaning. Do not use liquid
cleaners or aerosol cleaners. Clean only with a
dry cloth.
6.
Attachments - Do not use attachments not
recommended by the product manufacturer as
they may cause hazards.
7.
Water and Moisture - Do not use this product
near water - for example, near a bath tub, wash
bowl, kitchen sink, or laundry tub; in a wet
basement, or near a swimming pool, and the
like. The apparatus shall not be exposed to
dripping or splashing and that no objects filled
with liquids, such as vases, shall be placed on
apparatus.
8.
Accessories - Do not place this product on
an unstable cart, stand tripod, bracket, or
table. The product may fall, causing serious
injury to a child or adult, and serious damage
to the product. Use only with a cart, stand,
tripod, bracket, or table recommended by the
manufacturer, or sold with the product. Any
mounting of the product should follow the
manufacturer’s instructions, and should use
a mounting accessory recommended by the
manufacturer.
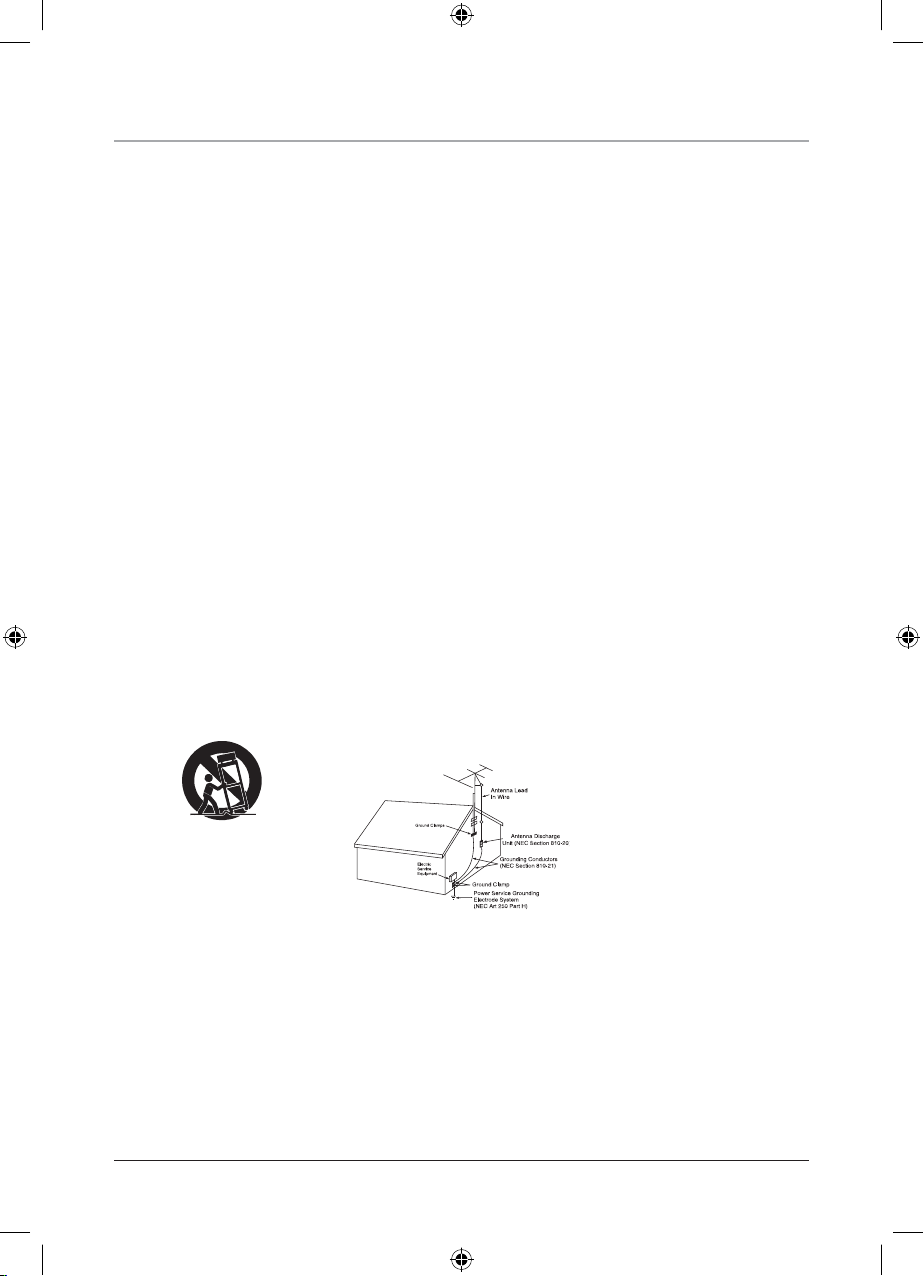
9. A product and cart combination should be
moved with care. Quick stops, excessive force,
and uneven surfaces may cause the appliance
and cart combination to overturn.
See figure:
10.
Ventilation - Slots and openings in the cabinet
are provided for ventilation and to ensure
reliable operation of the product and to protect
it from overheating, and these openings must
not be blocked or covered. The openings
should never be blocked by placing the
product on a bed, sofa, rug, or other similar
surface. This product should not be placed in a
built-in installation such as a bookcase or rack
unless proper ventilation is provided or the
manufacturer’s instruction have been adhered
to.
11.
Power Sources - This product should be
operated only from the type of power source
indicated on the marking label. If you are not
sure of the type of power supply to your home,
consult your product dealer or local power
company. For products intended to operate
from battery power, or other sources, refer to
the operating instruction.
12.
Grounding or Polarization - This product
may be equipped with a polarized alternatingcurrent line plug (a plug having one blade
wider than the other). This plug will fit into
the power outlet only one way. This is a safety
feature. If you are unable to insert the plug
fully into the outlet, try reversing the plug. If
the plug should still fail to fit, contact your
electrician to replace your obsolete outlet. Do
not defeat the safety purpose of the polarizes
plug.
Alternate Warnings
equipped with a three-wire grounding-type
plug, a plug having a third (grounding) pin.
This plug will only fit into a grounding-type
power outlet. This is a safety feature. If you
are unable to insert the plug into the outlet,
contact your electrician to replace your
obsolete outlet. Do not defeat the safety
purpose of the grounding-type plug.
13.
Power-Cord Protection - Power supply cords
should be routed so that they are not likely to
be walked on or pinched by items placed upon
or against them, paying particular attention to
cords at plugs, convenience receptacles, and
point where they exit from the product.
14.
Protective Attachment Plug - The product
is equipped with an attachment plug having
overload protection. This is a safety feature.
See Instruction Manual for replacement or
resetting of protective device. If replacement
of the plug is required, be sure the service
technician has used a replacement plug
specified by the manufacturer that has the
same overload protection as the original plug.
15.
Outdoor Antenna Grounding - If an
outside antenna is connected to the receiver,
be sure the antenna system is grounded
so as to provide some protection against
voltage surges and built-up static charges.
Article 810 of the National Electrical Code,
ANSI/NFPA 70, provides information with
regard to proper grounding of the mast and
supporting structure, grounding of the mast
and supporting structure, grounding of the
lead-in wire to an antenna-discharge unit, size
of grounding conductors, location of antennadischarge unit, connection to grounding
electrodes, and requirements for the grounding
electrode.
See figure:
16.
Lightning - For added protection for this
product during a lightning storm, or when it
is left unattended and unused for long periods
of time, unplug it from the wall outlet and
disconnect the antenna or cable system. This
will prevent damage to the product due to
lightning and power-line surges.
17.
Power Lines - An outside antenna system
should not be located in the vicinity of
overhead power lines or other electric light or
power circuits, or where it can fall into such
power lines or circuits. When installing an
outside antenna system, extreme care should
be taken to keep from touching such power
lines or circuits as contact with them might be
fatal.
18.
Overloading - Do not overload wall outlets,
extension cords, or integral convenience
- This product is
receptacles as this can result in a risk of fire or
electric shock.
19.
Object and Liquid Entry - Never push
objects of any kind into this product through
openings as they may touch dangerous voltage
points or short-out parts that could result in a
fire or electric shock. Never spill liquid of any
kind on the product.
20.
Servicing - Do not attempt to service this
product yourself as opening or removing
covers may expose you to dangerous voltage
or other hazards. Refer all servicing to
qualified service personnel.
21.
Damage Requiring Service - Unplug
this product from the wall outlet and refer
servicing to qualified service personnel under
the following conditions:
a) When the power-supply cord or plug is
damaged,
b) If liquid has been spilled, or objects have
fallen into the product,
c) If the product has been exposed to rain or
water,
d) If the product does not operate normally
by following the operating instructions.
Adjust only those controls that are covered
by the operating instructions as an improper
adjustment of other controls may result in
damage and will often require extensive work
by a qualified technician to restore the product
to its normal operation.
e) If the product has been dropped or
damaged in any way, and
f) When the product exhibits a distinct change
in performance - this indicates a need for
service.
22.
Replacement Parts - When replacement parts
are required, be sure the service technician
has used replacement parts specified by the
manufacturer or have the same characteristics
as the original part. Unauthorized substitutions
may result in fire, electric shock, or other
hazards.
23.
Safety Check - Upon completion of any
service or repairs to this product, ask the
service technician to perform safety checks
to determine that the product is in proper
operating condition.
24.
Wall or Ceiling Mounting - The product
should be mounted to a wall or ceiling only as
recommended by the manufacturer.
25.
Heat - The product should be situated away
from heat sources such as radiators, heat
registers, stoves, or other products (including
amplifiers) that produce heat. Battery shall not
be exposed to excessive heat such as sunshine,
fire, or the like.
26. Main plug is used as disconnect device and
it should remain readily operable during
intended use. In order to disconnect the
apparatus from the mains completely, the
mains plug should be disconnected from the
mains socket outlet completely.
27. Excessive sound pressure from earphones and
headphones can cause hearing loss.
3
Page 4

LOCATION OF CONTROLS
1
2
3
4
5
6
7
8
FRONT VIEW
TOP VIEW
16
9
10
11
12
13
14
15
13.
Repeat Indicator
1.
Carrying Handle
REAR VIEW
2
2. FM Antenna 14. Power Indicator
kcaJ enohpdaeH.51rooD DC.3
4. Function Selector 16. LED Display
5 Volume Control 17. Skip Backward Button
nottuBesuaP/yalP.81elacS laiD6
7 Band Selector 19. Skip Forward Button
8 Tuning Knob 20. Play/Pause Indicator
9 Program Button 21. FM Stereo Indicator
10 Stop
Button 22. AUX IN Jack
11. Repeat Button 23. AC Power Socket
12. Program Indicator 24. Battery Compartmen
t
17
18
19
20
21
22
4
Page 5

POWER SOURCE
The unit operates on 8 X ‘C' size (UM-2) batteries (Not included) or from AC120V ~ 60Hz
line power.
A. BAT TERY OPER
For best performance and longer operating time, we
recommend the use of alkaline batteries.
1. Remove the Battery Door.
2. Following the polarity (+ and -) diagram as shown
inside th e battery comp artm ent, insert 8 ‘C’ size (UM-2)
batteries.
3. Replace the Battery Door.
A
TION
BATTERY W
1. Be sure that the batteries are installed correc tly. Wrong polari ty m ay damag e the unit.
2. (a) Do not mix old and new batteries.
(b) Do n ot m ix alk aline, standard (c arbon-zin c) or rechargeable (nickel-cadmium ) batteries.
3. If the unit is not to be used for an extended p eriod of time, remove the batteries. Old or leaking
batteries can cause damage to the unit and may void the warranty.
4. Do not disp ose of batteries i n fi re, batteri es may explod e or l eak .
B. AC POWE R CONNECTION
1. Insert one end of power cord to the AC Socket on the back of the unit
2. Insert the power cord to the AC Socket (#23).
3. Connect the power cord to AC power source.
4. W hen the unit is operated from AC power source, the
internal battery source will automatically be disconnected.
CAUTION
TO PREVENT ELECTRIC SHOCK, MATCH WIDE BLADE
OF PLUG TO WIDE SLOT. FULLY INSERT
A
RNING
:
AC Outlet
.
Polarized AC Plug
RADIO RECEPTION
1. Set the Function Selector (# 4) to "RADIO".
2. Set the Band Selector (# 7) to "AM" or "FM" for the desired radio band.
3. Turn the Tuning Knob (# 8) to select the desired radiostation.
4. Adjust the Volume Control (# 5) to obtain the desired sound level from the Built-in Speakers.
5. To turn the Radio off, set the Function Selector (# 4)to the “OFF” position.
TIPS FOR BEST RADIO RECEPTION
1. To insure maximum FM tuner reception, the Telescopic Antenna (#2 ) should be fully
extended and rotated to obtain the best possible station reception.
2. The AM antenna is built into the unit. When tuning in AM reception, be sure to place the
unit in a vertical position. To insure best AM reception, try repositioning the unit until the
best station reception is obtained.
5
Page 6

CD PLAYER OPERATION
Note: This CD player will not only play commercial CDs, but also self-compiled CD-R/RW discs.
Do not attempt to play CD-ROM, CDI, VCD, DVD or computer CDs.
i
Notes on CD-R/RW D
•
Because of non-standardized format definition/production of CD-R/RW, playback quality
and performance are not guaranteed.
•
Manufacturer is not responsible for the playability of CD-R/RW due to recording conditions
such as PC performance, writing software, media ability, etc.
•
Do not attach a label or seal to either side of the CD-R/RW disc. It may cause a malfunction.
PLAYING A CD
1. Open the CD Door (# 3) by pressing down where the OPEN/CLOSE is indicated on the CD
Door (# 3).
2. Carefully place an audio CD with its label side upward in the CD compartment and close
the CD Door by pressing on the CD Door (# 3) where OPEN/CLOSE is indicated on the CD
Door (# 3).
3. Set the Function Selector (# 4) to the "CD" position. The POWER Indicator (# 14)
will light. The LED Display (# 16) will briefly display flashing “- -”and then the total
number of tracks on the CD will appear in the LED Display (# 16) after a few
seconds.
4. Press the CD Play/Pause
light steadilyand the CD will start playing from the first track.
5. Adjust the Volume Control (# 5) to obtain the desired sound level from the Built-in Speakers.
6. To pause playback, press the CD Play/Pause
will flash. To resume playing, press the CD Play/Pause
7. You can choose to play your favorite track directly by pressing either the Skip Forward
Button (# 19) or Skip Backward
correct track number selected.
8. To locate a particular section within a track, press and hold the CD Search Forward
Button (# 19) or CD Search Backward
button to continue playing your selection.
9. To repeat a particular track, press the CD Repeat Button (#11) until the CD Repeat Indicator (#
13) flashes.
10. TorepeattheentireCD
light steadily.
11. To stop playing, press the CD Stop
12. When you wish to turn off the CD Player, set the Function Selector (# 4) to the "OFF"
posit ion. The Power I ndica tor (# 14) will g o off.
CD PROGRAMMED P
This function allows the tracks to be played in a programmed sequence.
NOTE: Program can only be set in STOP mode.
1. In CD stop mode, pr es s th e Progr am Button (# 9) onc e. Program No. “01” will
appear and blink in the LED Display (#16).
2. Press the CD Skip Forward
3. Press the Program Button (#9) again to store selection. The LED Display (#16)
4. Press the CD Skip Forward
Button (# 17) to select the song to be programmed. For example
track 5 is selected.
will go to “02” and blink to prompt for input.
button (# 17) to select the next song to be programmed and press the CD
Prog ram Button (# 9) to store th e second s elect ion
scs
Button (#18). The Play/Pause Indicator (# 20) will
Button (#18). The
Button (# 17). The LED Display (# 18) will indicate the
Button (# 17) until the section is found. Release the
,
,
press the CD Repeat Button (#11) until the CD Repeat Indicator (#13)
Button (#10).
LA
Y
Button (# 19) or CD Skip Backward
Button (# 19) or CD Skip Backward
.
Play/Pause Ind icator (#20)
Button (# 18) again.
19
0
1
5
02
1
6
Page 7

5. You can repeat steps #2 - #4 to program up to 20 tracks. The programmed tracks will be
shown in the LED Display (#16) one by one in the programmed sequence after the 20
selection has been stored.
6. To check the programmed tracks, press the Program Button (#9) repeatedly until the last
Program No. appears and flashes in the Display and then press the Program Button (# 9)
once again. The programmed tracks will be displayed one by one in the programmed
sequence.
7. Press the CD Play/Pause Button (#18) to start playing in the programmed sequence. The
Program Indicator (#14) will light steadily. To stop programmed play, press the CD Stop
Button (#10).
•
After all the programmed tracks have been played the player stops but the program remains
in the memory.
•
Press the Play/Pause Button (#18) to begin programmed playback again.
8. Normally all the programmed tracks will be played through once and then stop. However, you
can use the Repeat function to repeatedly play a certain track (Repeat 1) or all tracks in the
program (Repeat All). You can also tap the CD Skip Forward
to other tracks ahead or use CD Skip Backward
track(s) during program play.
9. To review/edit the programmed tracks during play, press the CD Stop
the CD Program Button (#9), “01” will show in the LED DISPLAY (#16) and Program Indicator
(#12) will both flash. If you do not want to change any track in the program, press CD Stop
Button (#10).
10. To edit a programmed track, use the CD Skip Forward
Backward
confirm. To skip forward, press CD Program Button (#9) until you reach the program
number of the track you want to change.
11. To cancel program play, press the CD Stop Button (#10) twice while program playback is
running or open the CD Door (#3) in stop mode. The Program Indicator (#12) will go off
Button (#17) to select a new track and press CD Program Button (#9) to
Button (#17) to go back to previous
Button (#19) to go directly
Button (#10) and then
Button (#19) or CD Skip
.
AUX IN OPERATION
You can play other music sources (MP3 or other digital audio players) through the speakers of
this player by connecting the AUX IN Jack (#22) to your external player’s audio out jack or
headphone jack.
1. Plug one end of an aud io c able (not included ) in to th e AUX IN Ja ck (#22) and the oth er end of
the cable to the headphone jack of your digital audio player.
2. Set the Function Selector (#4) to “AUX IN”.
3. Start playing the device you plugged into the AUX IN J
4. Slowly adjust both the volume controls of your unit and the external device.
5. Turn off your iPod, MP3 player etc. when finish listening.
6. Set the Function Selector (#4) to the “OFF” position to turn unit off and unplug the AUX IN
Jack
.
ack (#22).
th
USING HEADPHONES (NOT INCLUDED)
Inserting the plug of your headphones into the Stereo Headphone Jack (#15) will enable you to
listen to the CD or Radio music in private. W hen using headphones, the Built-in Speakers will be
disconnected.
READ THIS IMPORTANT INFORMATION BEFORE USING YOUR HE
1. Avoid extended play at very high volume as it may impair your hearing.
2. If you experience ringing in your ears, reduce the volume or shut off your unit.
3. Do not use while driving a motorized vehicle. This is dangerous and also illegal in some
states.
4. Keep the volume at a reasonable level even if your headset is an open-air type designed to
allow you to hear outside sounds. Please note excessive high volume may still block outside
sounds.
A
DPHONES
7
Page 8

CARE AND MAINTENANCE
1. Clean your unit with a damp (never wet) cloth. Solvent or detergent should never be used.
2. Avoid leaving your unit in direct sunlight or in hot, humid or dusty places.
3. Keep your unit away from heating appliances and sources of electrical noise such as
fluorescent lamps or motors.
4. If drop-outs or interruptions occur in the music during CD play, or if
the CD fails to play at all, its bottom surface may require cleaning.
Before playing, wipe the disc from the center
soft cleaning cloth.
outwards with a good
TROUBLESHOOTING GUIDE
Symptom Possible Ca
Noise or sound
distorted on AM or
FM broadcast
AM or FM no sound Unit not in Tuner mode, AM or FM
CD player will not
play
CD skips while
playing
Intermittent sound
from CD Player
Station not tuned properly for AM
or FM.
FM: Telescopic antenna is not
fully extended.
AM: Internal antenna is not
positioned correctly
band.
Volume at minimum
Unit not in CD function mode.
CD is installed incorrectly.
If the CD is self-compiled, the
media used may not be compatible
with the player.
Disc is dirty or scratched. Wipe CD with clean cloth or use
Dirty or defective disc.
Dirty pick up lens.
Player is subject to excessive
shock or vibration
us
SPECIFICATIONS
Power Requirement : AC120V 60Hz 14W
Battery (Not included) : DC1.5V ’C’(UM2) x 8
Frequency Range : FM 88-108MHz
AM:530-1710KHz
Speaker : 8 ohms, 3 inch x 2
Se
oluti
Fine tune the AM or FM
broadcast station.
FM: Fully extend the FM
Telescopic antenna.
AM: Reposition the unit until the
best reception is obtained.
Slide function selector to select
AM or FM.
Increase Volume
Select CD function mode.
Insert CD with label side up.
Use better quality blank media
and retest.
another disc.
Clean or replace the defective
disc.
Use a CD-lens cleaning disc to
clean the lens.
Relocate the player away from
shock or vibration
on
8
Page 9

LIMITED PRODUCT WARRANTY
This quality product is warranted to be free from manufacturer’s defects in material and workman-ship,
provided that the unit is used under the normal operating conditions intended by the manufacturer.
Should you have any problem with this product, please and it is highly recommended to visit our website
www.curtisint.com
at
operating manuals and trouble shooting tips on our website which gives you the answer on most of the
questions you could have in operating the unit.
C.I. Service Dept. warrants this product to be free from defects in materials and workmanship for 90 days on
parts and 90 days on labor. If you originally purchased your product more than 90 days ago, a repair fee
may apply.
Nothing within this warranty shall imply that C.I. will be responsible or liable for any damage to any items
placed in this product, whether due to any defect of the product, or its use, whether proper or improper.
Save as herein provided, C.I. Service Dept. (Canada) or C.I. Service Dept. (USA), there are no other
warranties, conditions, representations or guarantees, express or implied, made or intended by C.I. or its
authorized distributors and all other warranties, conditions, representations or guarantees, including any
warranties, conditions, representations or guarantees under any Sale of Goods Act or like legislation or
statue is hereby expressly excluded. Save as herein provided, C.I. Service Dept. (Canada) or C.I. Service
Dept. (USA), shall not be responsible for any damages to persons or property, including the unit itself,
howsoever caused or any consequential damages arising from the malfunction of the unit and by the
purchase of the unit, the purchaser does hereby agree to indemnify and save harmless C.I. from any claim
for damages to persons or property caused by the unit.
1. The original purchaser must present a copy of the original bill of sale and the service warranty card.
2. Any alterations, abuse, misuse, battery corrosion or accidental damage voids the warranty.
3. The warranty does not cover cabinets and accessories.
4. No warranty or insurance contained or set out shall apply when damage or repair is caused by power
failure; damage in transit or when moving the unit; improper power supply; use for commercial or
industrial purposes; service calls resulting in customer education, etc.
5. The defective product should be mailed to:
before you take any other steps as we have additional copies of instruction manuals,
TERMS OF WARRANTY
EXCLUSIONS
TO OBTAIN REPAIRS UNDER THE TERMS OF THIS WARRANTY
A.S.UadanaC
dtL lanoitanretnI sitruC.tpeD ecivreS .I.C
yawkraP weivekaL 001evirD llewttA 513
LI ,
slliH nonreVoiratnO ,otnoroT
160061C5 W9M
For service assistance and product information, please call: 1-800-968-9853.
If mailing the product, the freight must be prepaid and a money order for $7.00 should be included
to cover the cost of insurance and the return of the product.
6. C.I. reserves the right to repair or replace the parts which have become defective.
Model No. Date Purchased Serial No.
is a registered trademark of OSRAM SYLVANIS Inc. used under licence.
 Loading...