

Page 1
Update Version Dec 2005
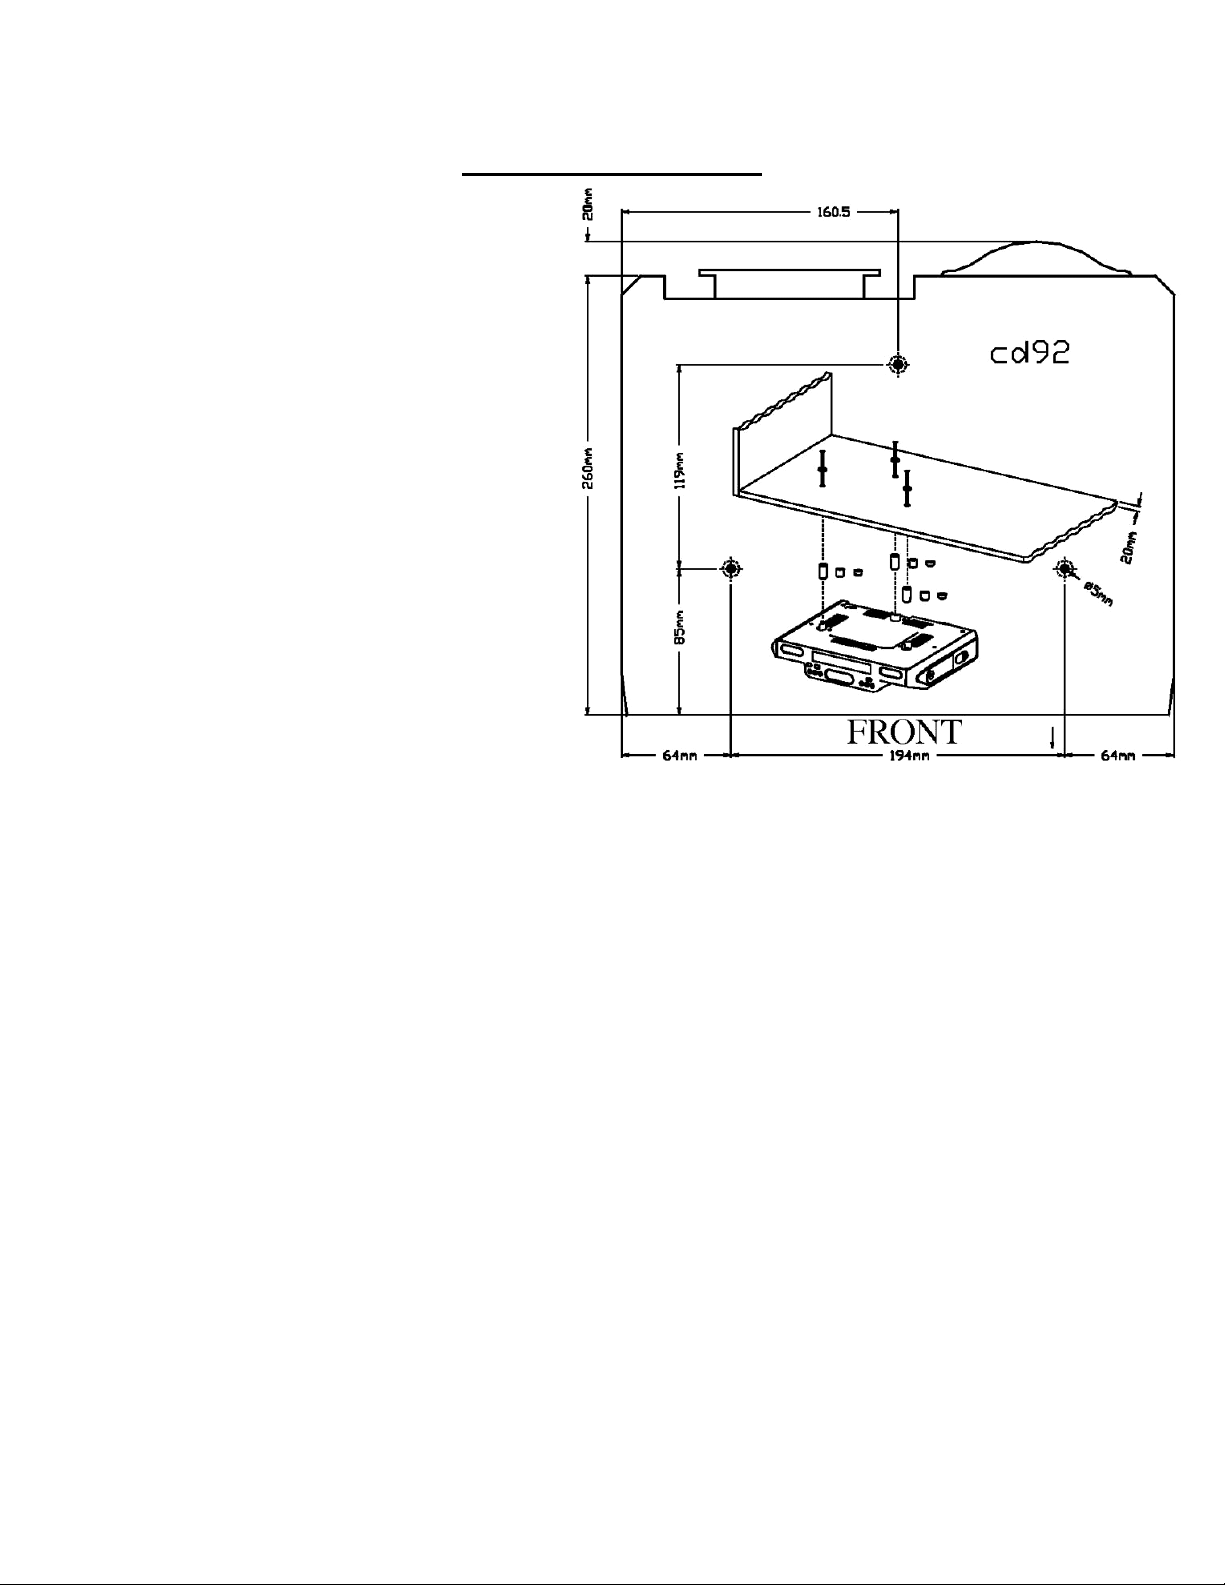
1 – Mounting template
For Model SCR2608
Parts Packed with your unit
1. Spacers (3pcs of 1/4” , 3pcs of
1/2”, 3pcs of 1”)
2. Washers (3pcs)
3. Phillips head screws (3pcs of
4. Mounting Template
Before Mounting
Empty contents of the selected cabinet under which the unit will be mounted and
thoroughly clean the underside of the cabinet to remove any grease residue which might
be present. We recommend the unit be mounted at the front edge of the cabinet.
Important: For secure mounting, the screws must go into the radio to a depth of at least
3/8”. If the overall length from the bottom of the cabinet shelf to the bottom of the over
hand is more the 1 3/4”. Then a wood shim will be necessary. A shim can be made from a
sheet of plywood, using the template to locate the central lines for drilling the
mounting holes; the shim can be located between the cabinet shelf bottom and spacers.
Make sure the wood is at least as thick as the excess over 1
longer screws are required.
Longer screws (Type#10-32) are available at most local hardware stores
Cut out the template on the line indicated. The template size and the screw hold positions
are identical to the top of the Clock radio.
2 3/4”, 3pcs of 1 5/8”)
3/16”
3/4”. If a shim is necessary,
Page 2
Mounting Procedure
Step 1.
If your cabinet does not have a overhang :
a) Position template in desired location on underside of cabinet, flush with front
edge.
b) Then tape template in place and go to step 2.
If your cabinet has an overhang:
a) Measure the thickness of the overhang.
b) Fold front of the template downward along the printed guideline that is closet to
the thickness of your cabinet.
c) Tape fold-down portion to backside of overhand, tape template to cabinet
underside.
Note: If your cabinet has glue blocks or other obstructions, cut out corresponding areas
on the template to clear them. Do not cut or cut through the screw holes indicated on the
template.
CAUTION: It is recommended that safety glasses be worn while drilling screw holes to
prevent the possibility of eye injury.
Page 3

Step 2
Drill 3/16” inch diameter holes through the underside of the cabinet bottom shelf using
the three points marked on the template.
Helpful Hints:
On wooden cabinets you may want to mark and start the drill holes with a nail or an awl.
Be sure to hold the drill very firmly against the cabinet to reduce “walking” of the drill
bit from the markings.
Use masking tape above the hole locations on inside of wooden cabinet shelf to help
reduce splintering.
If installing the unit under a wood cabinet, you may wish to countersink the drilled holes
from the INSIDE of the cabinet. If you opt not to countersink the holes, use the supplied
washers.
Step 3
Remove template and clean drill shavings from inside and underside of cabinet.
Step 4
If your cabinet does not have an overhang. Go to Step 5.
If your cabinet has an overhang. Select the spacer or combination of spacers that is equal
to or longer than the cabinet overhang.
Installation with supplied washers (no Countersink)
Page 4

Step 5.
Insert screws from inside the cabinet. The washers must be used on metal cabinets, and
on wood cabinets if you did not countersink the drilled holes. Position washers, flat side
down, and place screws into the holes.
If your cabinet does not have an overhang, go to Step 7.
Step 6.
Hold screw heads down while you push the selected spacers onto the screws under the
cabinet. Be sure to push up spacers until they are fully nested (if more then one is in used)
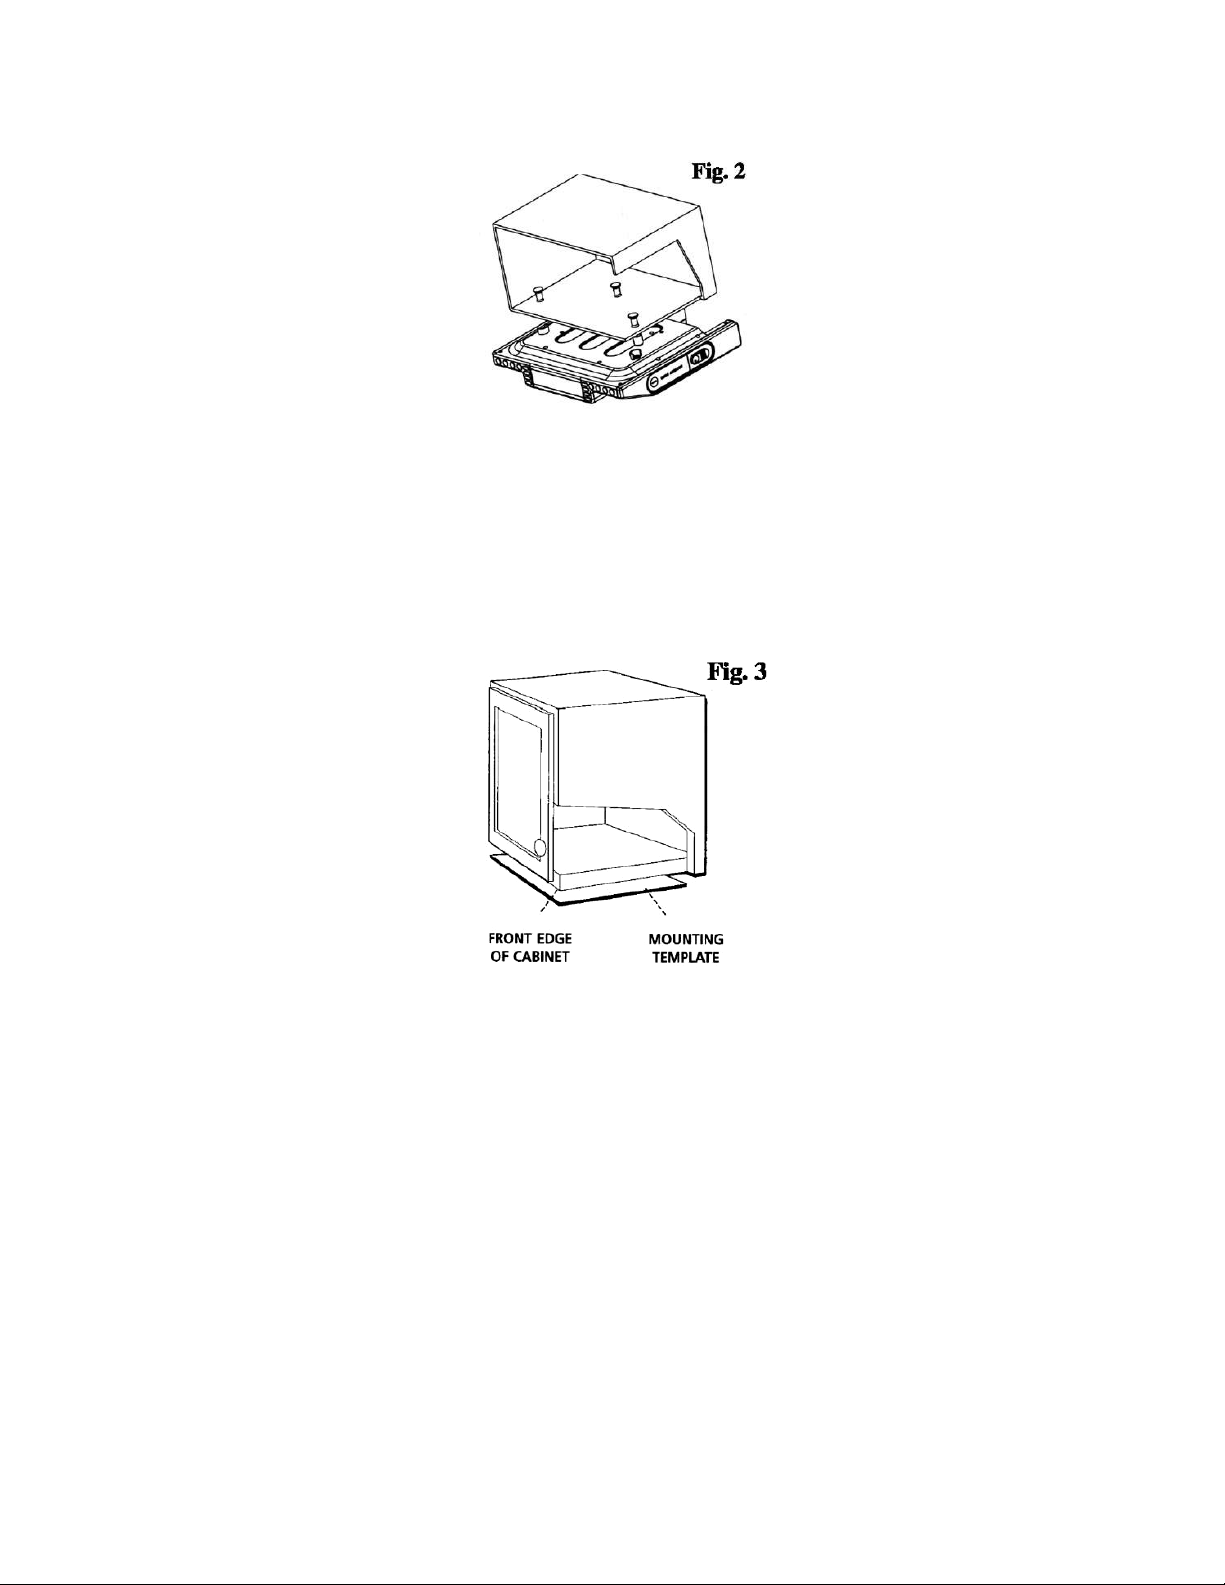
Step 7
Align radio under the screws. Hold the screw holes in the top of the clock radio against
the mounting screws and partially tighten the screws.
Do not fully tighten until all 3 screws have been started. (The top front edge of the clock
radio should clear the overhang.)
 Loading...