

Page 1
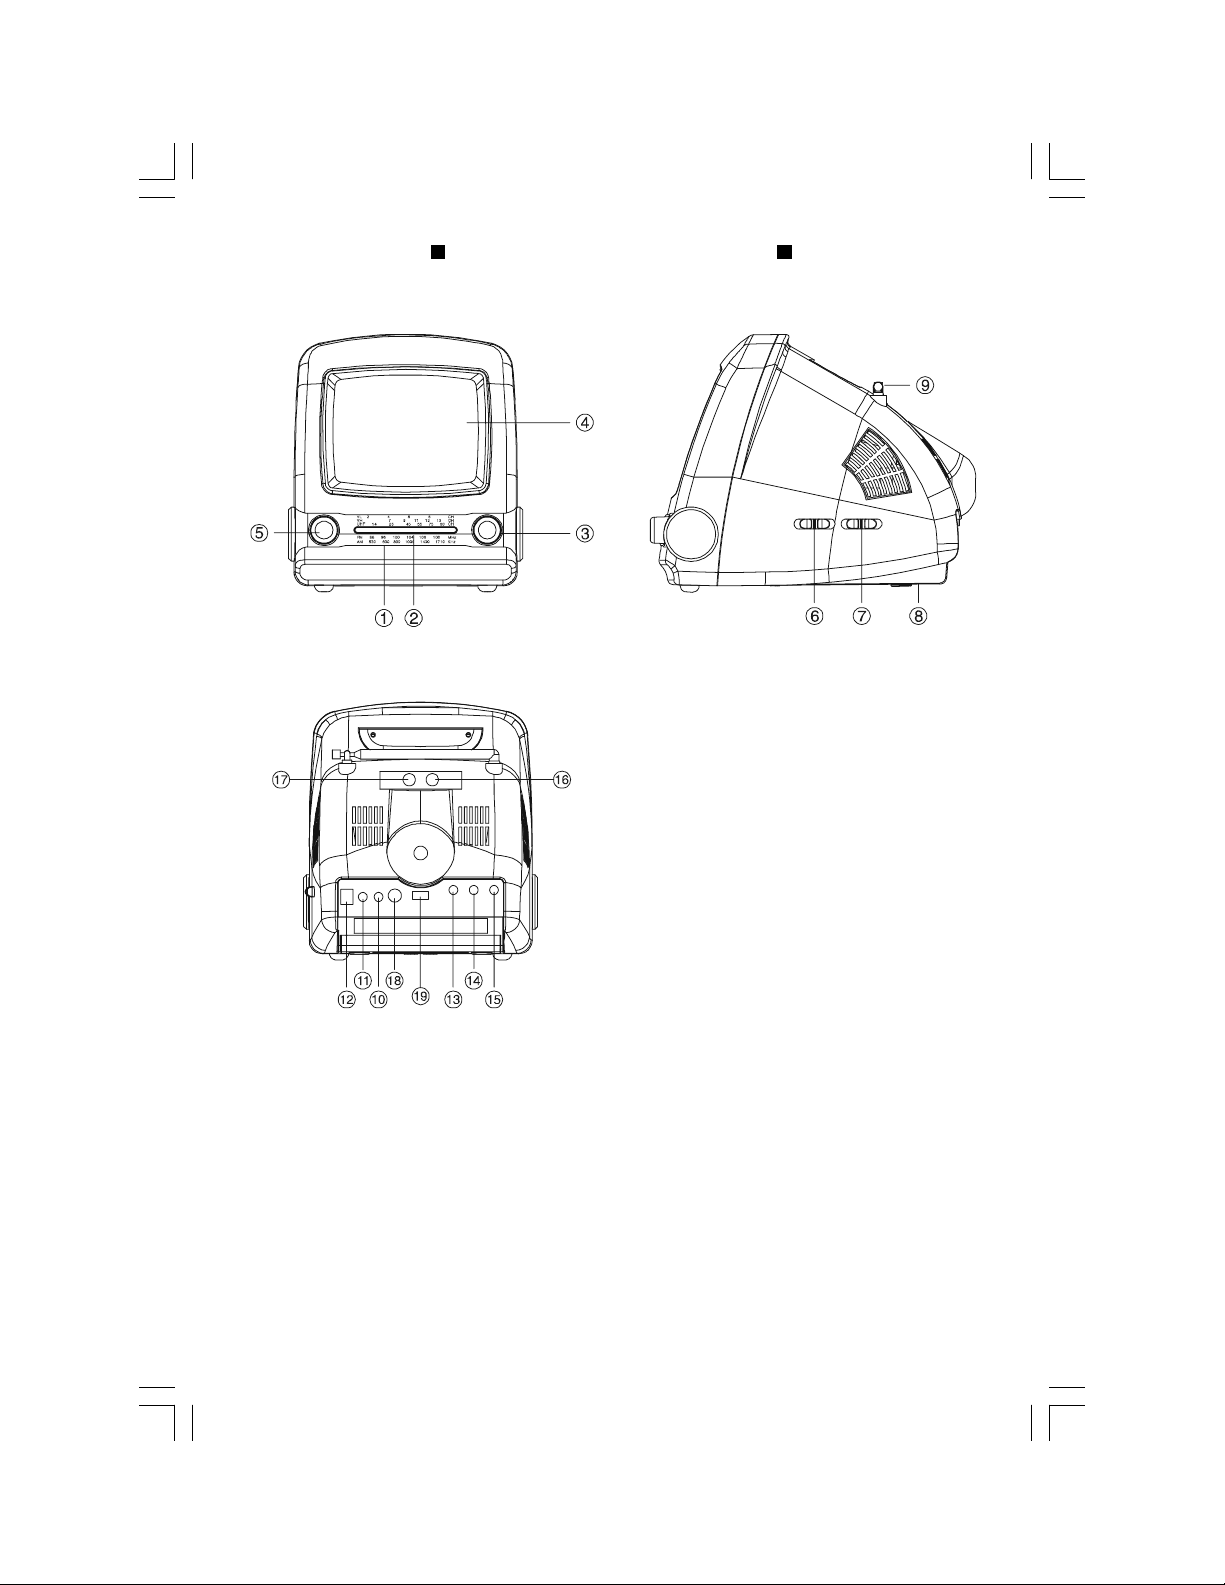
LOCATION OF CONTROLS
1. TV/Radio channels indicator
2. Dial Pointer
3. Tuning Control
4. Picture Tube
5. Volume Control/Power Switch
6. Function Selector TV/Radio
7. Band Selector
TV : VL/VH/UHF Radio : AM/FM
8. Battery Cover
9. Telescopic ROD antenna
10. Earphone Jack
11. External Antenna Jack
12. DC Power Input Jack
13. Contrast Control
14. Brightness Control
15. Vertical Hold Control
16. Video In
17. Audio In
18. AV/TV Switch
19. Ext/Batt/Charge
E-<1>
Page 2
OPERATING INSTRUCTIONS
TV OPERATION
1. Turn on Power Switch (5).
2. Slide the Function selector (6) to the “TV” position.
3. Slide the band selector switch (7) to a desired band
(VL/VHF/UHF).
4. Turn the tuning control (3) to a desired station on the tuning
indicator (1).
5. Adjust rod antenna (9) length, direction and angle to attain best
picture and sound.
6. Adjust the volume control (5) to a desired volume level.
7. Brightness control (14) & contrast control (13).
If the picture is too bright or too dark, adjust the brightness and
contrast control knobs.
8. If picture rolls up and down, adjust the vertical hold control (15).
RADIO OPERATION
1. Slide the function switch (6) to the “RADIO” position.
2. Slide the band selector (7) to a desired band AM/FM.
3. Turn the tuning control (3) to a desired station on the tuning indicator (1).
4. Adjust rod antenna (9) for best sound in the FM mode, turn the unit for best sound in
the AM mode.
5. Adjust the volume control (5) to a desired level.
CAUTION: SLIDE THE POWER SWITCH (5) TO THE “OFF” POSITION FOR CLOSE
UNIT POWER SOURCE. REMOVE THE BATTERIES/CAR/AC ADAPTER SOURCE
IF THE UNIT NOT BEING USED FOR A LONG TIME.
E-<2>
Page 3

POWER SOURCES
AC ADAPTER OPERATION
To use the adaptor, plug the small round end of the adaptor into the DC
jack (12). Then plug the pronged plug into AC wall outlet.
WARNING:
Before plugging into AC wall outlet, make sure the outside adapter voltage selector is
set for the voltage used in your location.
Use other adapter with wrong specification may damage your set.
12V CAR/BOAT ADAPTER OPERATION (not supplied)
Plug the torpedo-shaped end of the adapter into the socket, making sure to push it all
the way in. Now plug the small end of the adapter into the DC jack (12).
The set will now operate on the current of your Car/Boat power source.
IMPORTANT: DC adapter operates only with a negative ground battery system. If you
are not certain your vehicle operates on a 12-volt DC, negative-ground system, consult
your vehicle’s user manual.
BATTERY OPERATION
Open the battery cover (8), then install TEN 1.5V “C” size batteries (not supplied) into
the compartment and close the case. Be sure negative and positive terminals are
positioned as indicated in the battery compartment.
When either of the above mentioned adapter is plugged into the unit, the power from the
batteries is automatically disconnected.
CAUTION:
Do not mix batteries of different composition or old with new batteries.
Do not mix alkaline or standard (carbon zinc) with rechargeable (nickel cadmium)
batteries.
TO CHARGE NI-CD BATTERIES
Set the function selector (19) to the “Charge” position. Insert the AC adaptor plug into
the DC input jack. Charging time takes about 12 hours.
NOTE: when batteries have been fully charged, the function selector (19) must be
changed to other position or unplug the AC adaptor.
1. Do not charge alkaline batteries as charging will cause these batteries to leak acid or
explode.
2. Charge only NI-CD batteries.
3. Use only the AC adaptor included in your set.
E-<3>
Page 4

CAUTION:
DO NOT ATTEMPT TO CHARGE STANDARD ALKALINE OR REGULAR BATTERIES.
CHARGE ONLY RECHARGEABLE BATTERIES. CHARGING ANY OTHER BATTERIES MAY CAUSE THE BATTERIES TO LEAK ACID OR EXPLODE.
PRIVATE LISTENING (earphone)
An earphone jack (10) is provided for your private listening enjoyment. When the earphone plug is inserted into the jack, the internal speaker is automatically disconnected.
NOTE: The jack is designed to permit the use of 3.5 plug earphone only.
CAUTION: LISTENING AT HIGH VOLUME LEVELS FOR A LONG MOMENT COULD
DAMAGE USERS’ EARS.
ANTENNA CONNECTOR
INTERNAL ROD ANTENNA (75 OHM)
In a normal reception area, the built-in rod antenna (9) will deliver a sharp clear picture.
When operating, extend it’s length and adjust its direction & angle for the clearest
picture.
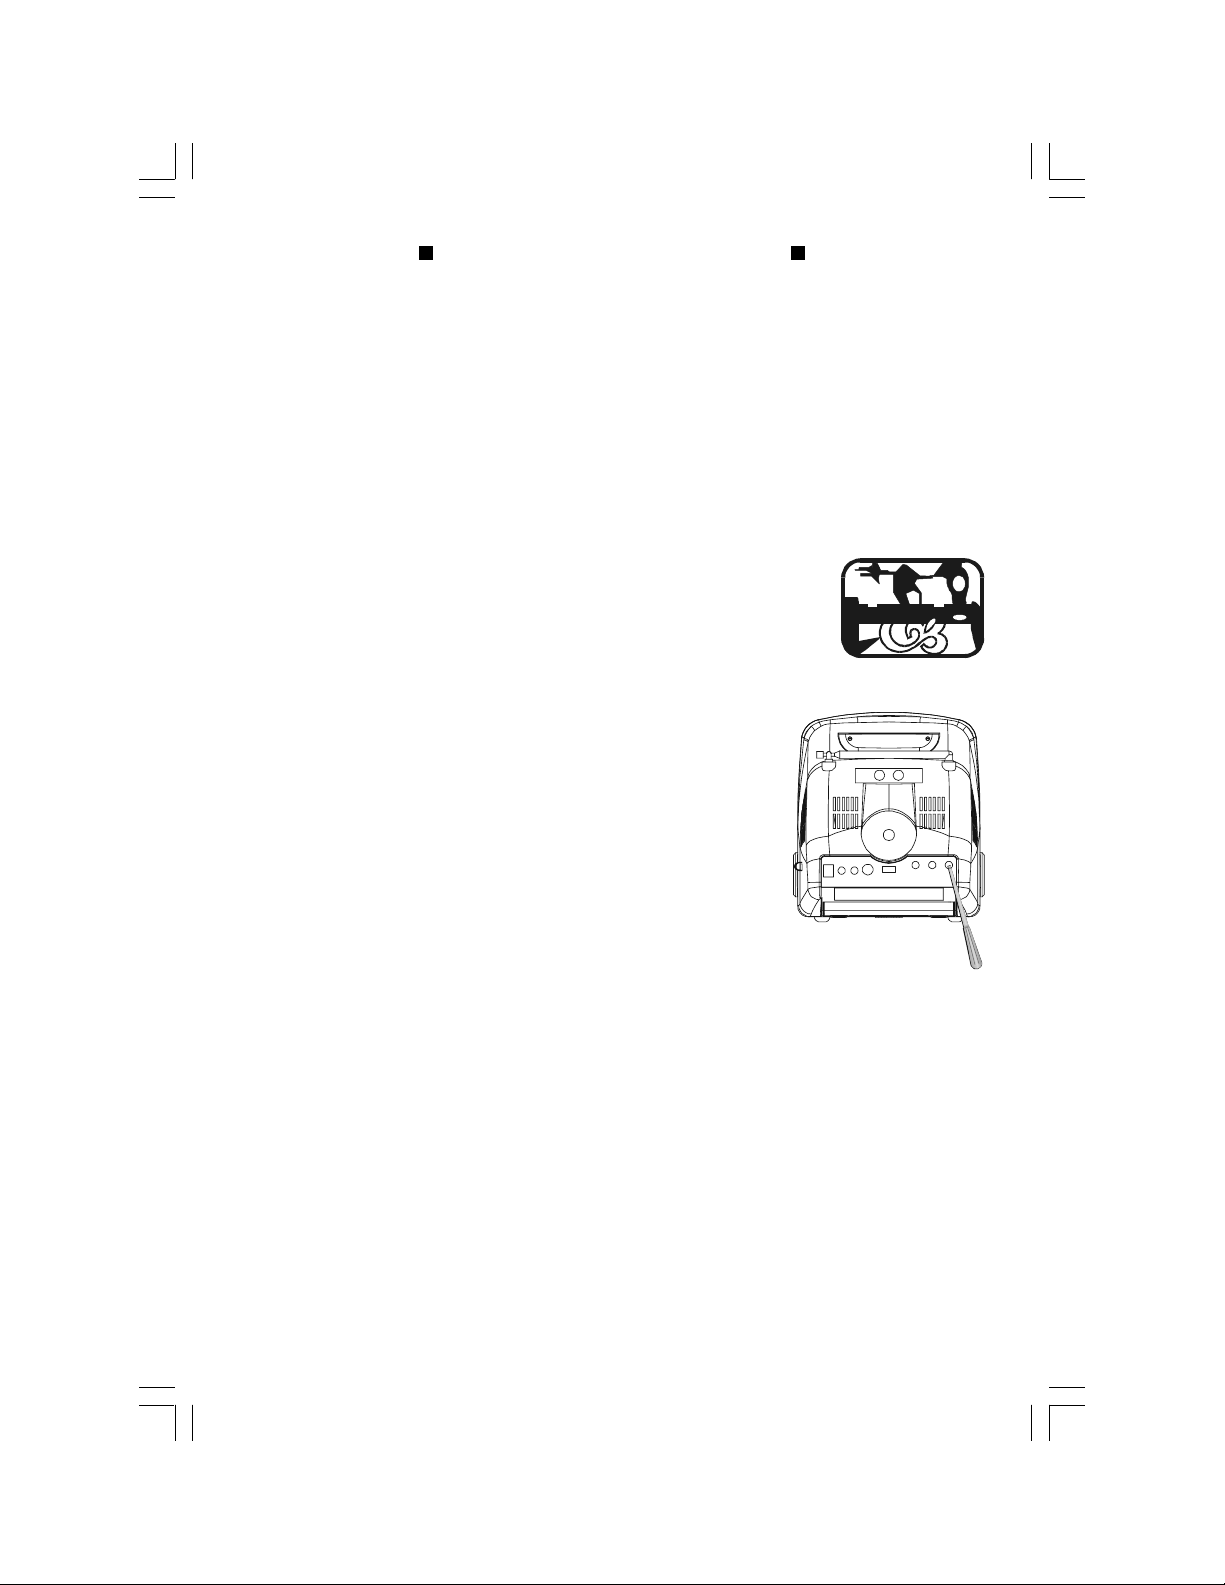
EXTERNAL ANTENNA
If desired you may hook-up an outdoor antenna to your portable tv set.
This will give you greater range and clearer reception for channels that are difficult to
receive with the telescopic antenna.
To hook-up the outdoor antenna, connect the VHF or UHF antenna to antenna adapter
and connect antenna adapter to External antenna jack (11) (See illustration)
Note:
When the antenna adapter is plugged into the external antenna jack, the telescopic
antenna is automatically disconnected.
300 OHM FEEDER CONNECTION
E-<4>
Page 5

SPECIFICATIONS
TV System: NTSC M
Channel Range: VHF-Lo: CH: 2-6
VHF-Hi: CH: 7-13
UHF: CH 14-83
Radio : AM: 530-1710 KHz FM: 88-108 MHz
Antenna Input Impedance: 75 ohm
CRT: 5” diag. 70 def.
Resolution : More than 280 lines
Sound Output: 0.5 watt
Power Source: 1. 12V 850mA AC adapter
2. 10 X 1.5V “C” size alkaline or nickel cadmium rechargeable batteries
3. Car battery (use car battery cord)
Power Consumption: 12W @ DC 12V Input (Average)
Dimension : 172(W) x 239.5(D) x 190(H) mm.
Net Weight: 1.6 Kg. (Approx)
Gross Weight: 2.65 Kg. (Approx)
Average Battery Life at 25
O
C: 1. Alkaline “C” size X 10-about 5 to 7 hrs
2. Rechargeable Ni-MH/Ni-Cd batteries “C” size X 10about 1.5 to 1.9 hrs
Accessories included: AC/DC adapter
antenna adapter
Car DC cord
E-<5>
Page 6

INSTRUCTION MANUAL
PORTABLE 5” BLACK & WHITE TELEVISION
WITH AM/FM RADIO
MODEL NO.: SRT072
Read these instructions completely before operating this receiver.
E-<6>
Page 7

NTSC M
RADIO
EXT.ANT
AV/TV
EARPHONE
CHARGE
SIZE: A5
FINISHING: Print black on the white paper.
516R
I/M (ENGLISH)
FJ24060 (SYLVANIA)
1
WEN HUI JUAN
27/4-2004
E-<7>
 Loading...