

Page 1
Page 2

Table of Contents
Main Features…… ……… ………………… ……… ……… ……… ………… ……… ……… ……… …1
Important Safety Instructions………… ………… ……… … ……… ………… ………… …………1
Technical Specification… ………… … ………… ………… … ………… ………… … ………… ……3
The Technical Specifications for Final Product……… …………… …………… …………… ………3
Technical Specifications for TV 4
……… … ………… … …………… … ………… … ………… … ……
VGA Display Mode………… ………………… …………… ………………… ………………… ………4
Power Management… ………… ……… ………… ……… ………… ……… ………… ……… ………4
Packing List…………… ……………………… ……………………… ………………… ………………4
Installation and Connection… ……… ……… ……… ………………… ……… ……… ……………5
Antenna Connection………………… ……… ……… ……… ……… ……… …………………………6
Power Connection…………… ……… …………………… ……… …………………… ……… ………6
Computer Connection…… … ………… … ………… ………… … ………… ………… … ………… …6
HDMI Digital Interface Connection … … … ……………… … … … … ……………… … … … ………7
Video 1/Video 2 Signal Connection… … … … … ……………… … … … … ………………… … … …7
S-VIDEO nput onnection 7
I C …… ………… ……… ………… ……… ………… ……… ………… ……
YPbPr/YCbCr Input Interface Connection……… ……… ……… …………………… ……… ………7
AV Output Connection………… ………… ………… ………… ………… ………… ……… … ………7
Panel Control Keys… …………… ………… … ………… … ………… … ………… … ………… ……8
Remote Control………… ……… ………… ……… ………… ………… ……… ………… ………… …8
General Operating Instructions… … … … … … … … … … … … … … … … … … … … … … … … …9
Power On…… … … …………… … … ………… … … …………… … … …………… … …………… …9
Installation Guide-Setting………………… … … … … … … … ……………………… … … … … … …9
Standby……… …………………… …………… …………… ……… …………… …………… ………10
Signal Source Selection…… …………………… …………………… …………………… …………10
OSD Menu Operation… ……… …………………………… ……… ……… …………………………10
Picture………… … ………… ………… … ………… ………… … ………… ………… … ………… …11
Sound……… ……………………… ……………………… ……………………… ………………… …12
Setting……… … ………… ………… ………… ………… ………… ………… … ……… … …………13
TV……… ………… ………… ……… ………… ………… ……… ………… ………… ……… ………16
Troubleshooting…… ……………………… ……………………… ………………… ………………18
Page 3
Main Features
1. LCD panel with no glint and low radiation can ease eyes' fatigue and protect eyes.
2. High-quality LCD panel is adopted with high brightness, high contrast, wide viewing angle, and
super fast response time. Super fast response time can greatly eliminate the shadow of moving
images.
3. De-interlacing image disposal is adopted. Today's most advanced technique for movement
compensation, can completely improve the saw tooth and vague edges of the athletic picture.
4. With 3-D digital comb filter, dynamic interlaced scanning technology, and 3-D noise reduction
function;
5. With ATSC/NTSC digital-analog integrated tuner, supporting auto scan .
6. Power is designed to save energy.
7. All functions can be realized with remote control, which is really a convenient operation.
8. With hi-definition YPbPr and double HDMI, Supporting signal input of 1080P@60Hz max..
9. Input ports include VGA, YPbPr, HDMI, S-VIDEO, CVBS, USB and TV.
10. Output ports include AV and SPDIF digital audio .
11. Having inter high quality speakers, which will give you purely audiovisual enjoyment.
12. Dynamic contrast technology can obviously improve the definition and contrast of the picture.
13. With perfect timing function, you can set time to turn off. It will be turned off in state of no
signals, too.
14. TV/Monitor with two in one and multiple input ports can easily switch among the modes.
15. Auto Adjustment can help you to setup the image into the best performance in a few seconds
instead of complicated adjustment in PC mode.
Important Safety Instructions
Thank you for purchase our high-performance multifunctional TV. As a precious article, it will give
you an excellent audio-visual enjoyment. We have taken personal safety into account while
designing this product and strictly tested it before delivery. However, improper use could cause an
electric shock and fire hazard. In order to ensure and extend its service life and fully perform its
functions, please read the instructions below carefully before operating the product and remember
to follow them.
● In the following cases, please disconnect the power plug from the socket and refer servicing to
qualified maintenance personnel:
A. The power cord or power plug is damaged or worn;
B. The product is dropped or its casing is damaged;
C. There is an obvious exception. The product fails to work even
if operated as per the User's Manual;
D. There is an external object or liquid falling into the product;
E. There is an unusual sound or smell.
● There is a high voltage inside the product. For your safety, please
do not open the casing to do repairs without permission. You can
refer servicing to qualified maintenance personnel.
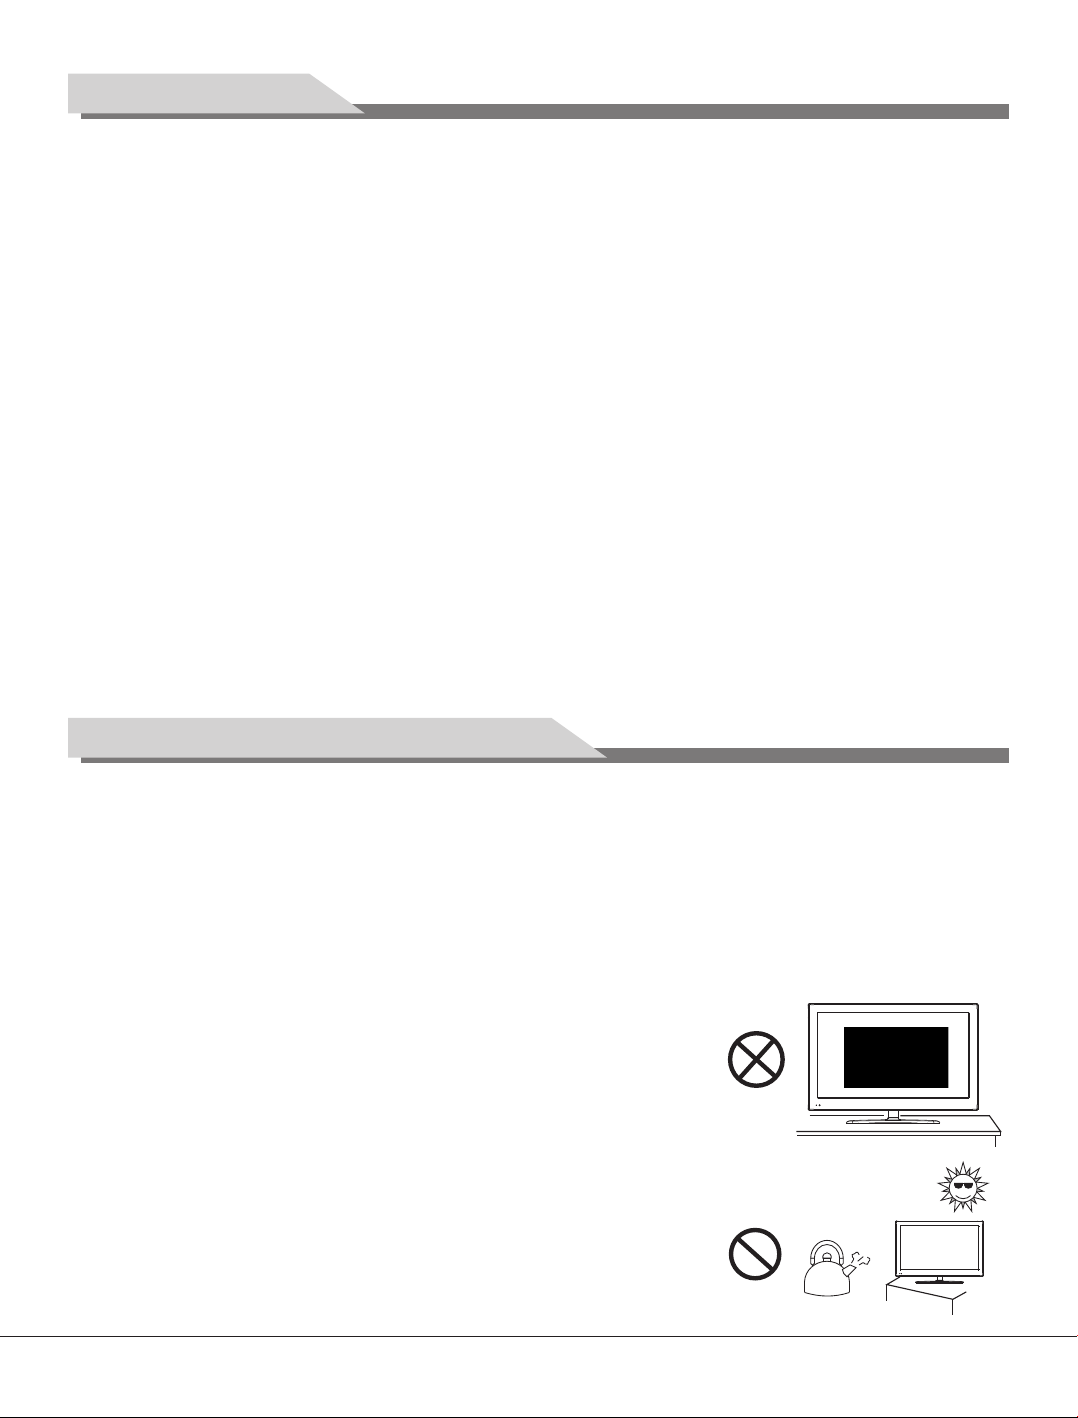
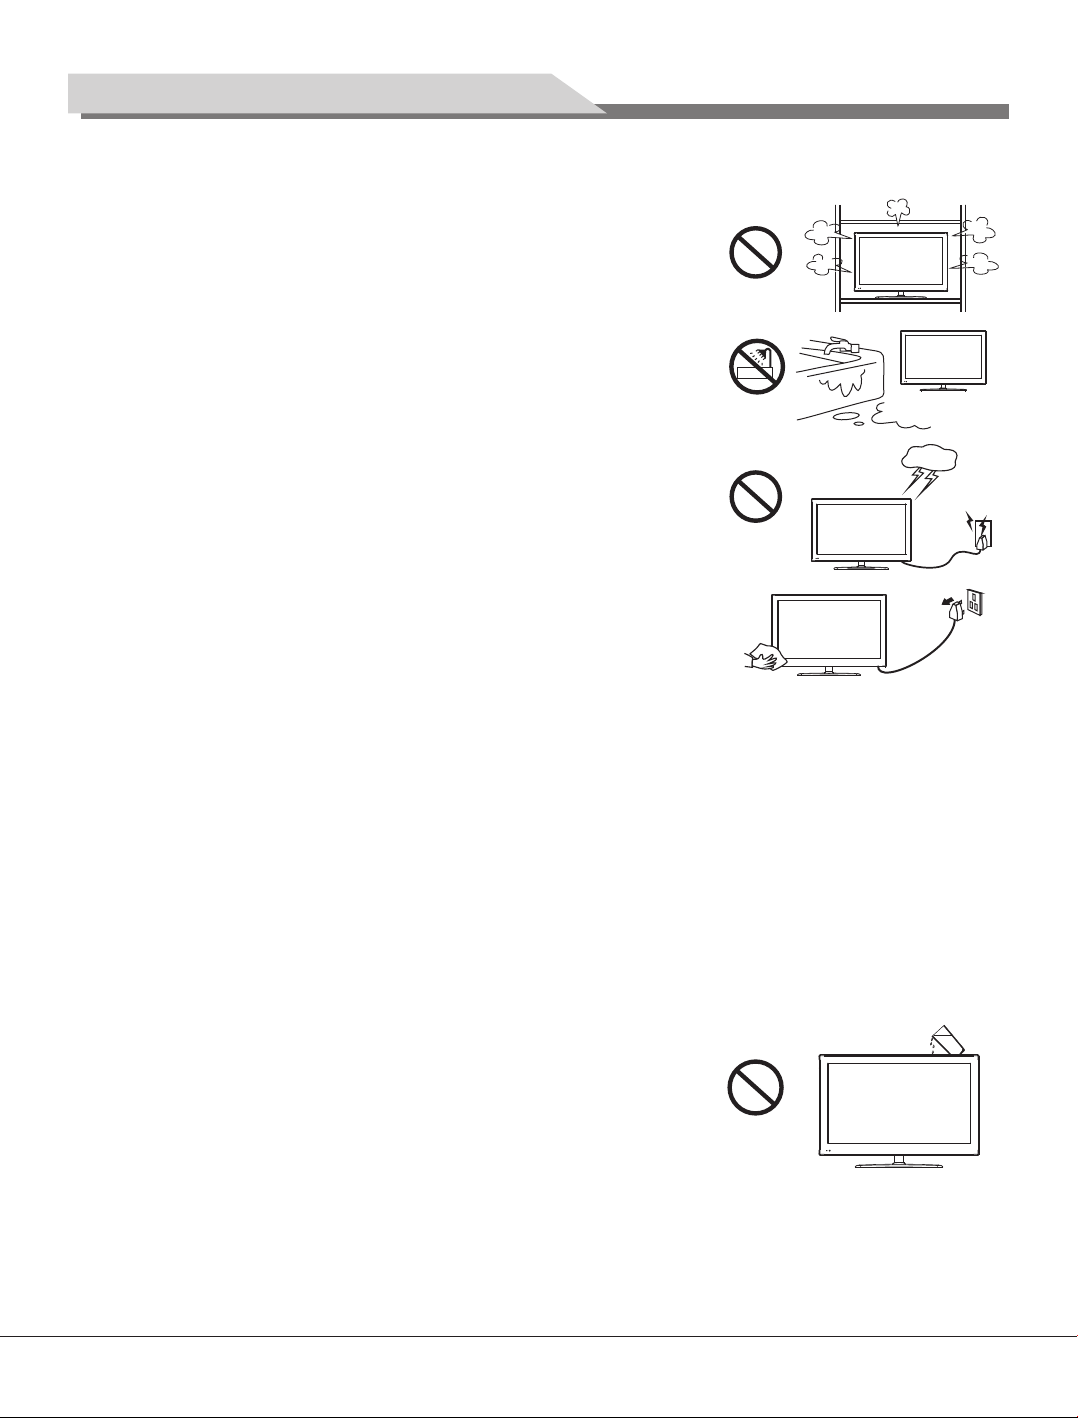
● Please put this product in a well-ventilated place. Keep it away
from overheating, overcooling, humidity, or direct sunlight.
1
Page 4
Important Safety Instructions
● The pores on the casing are designed for ventilation and heat dissipation so that the components
inside can work long without overheating. Do not block them when placing the product.
● Do not put the product into any embedded device unless there is
an appropriate ventilation installation.
● Do not put the product on any unsteady surface, or it could fall
down with damage.
● Do not use the product nearby any water source, such as bathtub,
pool or washing machine, or in
similar environment.
● Do not touch the power cord or antenna cable in thunder days. In
order to protect the product against thunder, please unplug its
power cord and antenna.
● Please disconnect the power supply before plugging or
unplugging any cable.
● Please unplug the power cord before cleaning the product. Do not
use any liquid detergent or spray detergent, like alcohol, solvent,
or ammoniac liquid to clean the screen. Please use a wet soft
cloth to clean the product lightly.
● If you are not going to use the product in the near future, please
unplug its power cord so that the product will not keep staying in
standby state.
● Please read and understand all the operating instructions and nameplate contents before
operating the product. Keep the User's Manual for future use.
● Do not use any accessory without the manufacturer's recommendation, or it could cause danger.
● Well keep the power cord and prevent it being stepped on by anyone or pressed down by any
object.
● Do not overload the power socket or extend the power cord, or it could cause fire or electric
shock.
● The LCD screen is a delicate component. Please do not use any hard object to hit, press or
scratch its surface, or it could be damaged and replaced at a high cost.
● All the technical specifications indicated both in this User's Manual and on the outer package are
subject to change without further notice. In case of any discrepancy between the user's Manual
and actual operation, the latter shall prevail.
When the power plug or appliance coupler is used as a disconnection device, it should be easy
●
to operate.
Keep the product away from any water drop or splash. Do not put
●
any container full of water (or other liquid) on the product, or it
could cause fire or electric shock.
Insert the power plug fully into the power socket. Unreliable
●
connection could cause sparkle and fire hazard.
Do not put any candle, ash tray, incense, inflammable gas, or explosive object nearby the
●
product.
Do not make any sharp object, metal or liquid touch the signal joint or heat dissipation pores, or
●
it could cause a short circuit and electric shock and cause damage to the product. Be more
careful if there is any child nearby.
a humid basement or any other
2
Page 5
Important Safety Instructions
● ● Please wait a moment before operating the product if it is moved from a low-temperature
environment to a high-temperature one. Do not install or use it opposite to the air-conditioner, or
there could be moisture condensation inside it causing a failure.
Be careful to move the product and protect it against any collision, particularly protect its screen.
If you use a handcart, please avoid the product overturning as a result of emergency brake,
overexertion or unsmooth ground, or the product could be damaged.
Technical Specification
The Technical Specifications for Final Product
Panel size
Max. Resolution
Best Resolution
Pixel Pitch
Active Area
Color
Power Supply
Power Consumption of Speaker
Dimension (L×H×W)
Weight
Operating Environment:
Temperature: 5℃~40℃ Humidity: 10%~85% Atmosphere Pressure: 86kPa~104kPa
Storage Environment:
Temperature: -20℃~55℃ Humidity: 5%~95% Atmosphere Pressure: 86kPa~104kPa
32" (HD)
1366×768
1360×768@60Hz
0.51075mm×0.51075mm
697.6845mm×392.256mm
16.7M
100V-240VAC 60/50Hz
8W+8W
Unpacking: 787×494×101mm or
787×494×93mm
Excluding base
Packing: 900×610×205mm or
900×610×195mm
Unpacking: 787×555×101mm or
787×555×93mm
Including base
Packing: 1015×610×200mm or
1030×600×190mm
Net Weight: 10.0Kg Gross Weight: 11.5Kg
Excluding base
Net Weight: 11.5Kg Gross Weight: 13.0Kg
Including base
32" (FHD)
1920×1080
1920×1080@60Hz
0.36375mm×0.36375mm
698.4mm×392.85mm
3
Page 6
Technical Specification
Technical Specifications for TV
1. Supported Systems: ATV: PAL M/N, NTSC M
DTV: ATSC-T
2. TV(RF): 75Ω Imbalance
3. AV Video-Input: 75Ω, 1VP-P, RCA
4. AV Audio-Input: 20KΩ, 500mV RMS
5. YPbPr/HDMI Video Input: 480i, 480p, 576i, 576p, 720p, 1080i, 1080p
VGA Display Mode
32"(FHD) 32"(HD)
NO.
1
2
3
4
5
Recommended mode:1360X768 @60Hz
Mode Resolution
VGA
SVGA
XGA
WXGA
720×400
640×480
800×600
1024×768
1360×768
Refresh
70Hz
60Hz
60Hz
60Hz
60Hz
NO.
1
2
3
4
5
6
7
8
Recommended mode:1920X108 0@60Hz
Mode Resolution
VGA
SVGA
XGA
WXGA
WUXGA
720×400
640×480
800×600
1024×768
1280×720
1360×768
1600×900
1920×1080
Refresh
70Hz
60Hz
60Hz
60Hz
60Hz
60Hz
60Hz
60Hz
Power Management
This product is complied with EPA Energy Star Standard and compatible with VESA DPMS
Standard. Details are listed as follows:
Mode
Work
Standby
Note: All the specifications in the user manual or on the packing carton may be changed without
additional notice.
Power Indicator
Off
On
Power Consumption
≤110W
≤1W
Packing List
LCD TV
●
User's Manual
●
Remote Control
●
Power Cord (or the TV attached with power cable)
●
●
Remote co ntrol 2X1. 5V AAA batteri es
4
Page 7

Installation and ConnectionInstallation and Connection
Instruction Wall Mount
The wall mo unt kit(no t in cluded) with your pu rchase all ows you to mount your RCA TV on the wall.
For detai led inform tion on inst alling the wall mount,refer to the instru ctions pro vided by the w all
Mount man ufacture r.It is strongly
assista nce for wall m ount
injury to
yourself or others re sulting fr om the wall-mounting.
install ation.RC A is not respon sible for an y damage to the product or
recommended to cont act a techni cian for pro fessiona l
- This RCA TV is compatible with a 200x20 0mm mounti ng hole patt ern,
- 4pcs of typ e M6 screws ar e required f or install ing the wall m ount brack et toyour RCA TV.Do not
use screw s that are lon ger than 10m m.Screws that are too long may cause damage to the
inside of t he TV set.
- Do not fast en the scerw s too tight for this may damage the TV or cause the TV to fall,resulting
in person al injury.RCA is not liab le for these kinds of incidents
- Do not moun t your RCA TV at more than a 15 degree tilt.
- Alwsys use two people to m unt the TV to a wall.
- Do not inst all your Wall Mount Kit when your TV is turned on.It may result in persona l injury
due to elec tric shock .
5
Page 8

Installation and ConnectionInstallation and Connection
CVBS, DVD Pl ayer o r other
machine wit h YPbPr /YCbC r.
AV machin e
To power socket
(AC 100V-240V, 60 /50Hz)
AV Devic e with HDMI In terfa ce
G
Y
R
B
W
R
W
R
Y
(like DVD, V CR, Ga me Cons ole.. .)
AV Devic e
W
R
G Gre en (Y)
W
R
B Blu e (Pb/C b)
W Whi te(AUDI O-L )
R Red ( AUDIO -R , Pr/ Cr)
Y Yellow (V IDE O)
Antenna Connection
For a brilliant and clear image, you'd better use the outdoor antenna or CATV cable.
Notes: Please turn off the TV power switch before connecting the outdoor antenna to the TV signal
interface. Keep the outdoor antenna away from any high-voltage wire, or there could be an electric
shock. Please disconnect the outdoor antenna in thunder days, in order to avoid a thunder strike.
Power Connection
Plug one end of the power cord into the input port of the machine's power supply and then insert the
other end into the socket of the electrical source (
AC 100V-240V, 60/50Hz).
Notes:
1. When connecting the power cord, be sure to turn off the machine and other equipment's power.
2. If a long time at leisure, please disconnect it from power supply
3. This TV must be connected to a three pin socket outlet for safety.
Computer Connection
Connect one end of the VGA cable to the output interface on the computer (desk-top or lap-top
computer) and connect the other end to the VGA input interface on the TV back.
6
Page 9

Installation and ConnectionInstallation and Connection
HDMI Digital Interface Connection
Use the HDMI digital signal cable (optional) to connect the external HDMI high-definition signal
source to the HDMI digital input interface on the
TV. Press SOURCE to select the signal source
HDMI .
" -1" or "HDMI-2"
Video 1/Video 2 Signal Connection
Use the composite cable to connect the video
and audio output interfaces on the AV device
respectively to the video and audio input
interfaces on the TV.
" "
Dig ital a udi o ou tpu t
R
W
Y
Ear phone j ack
R Red ( AUDIO -R)
W Whit e(AUD IO-L)
Y Yellow (VIDEO)
S-VIDEO nput onnectionI C
Through S-VIDEO/AUDIO cables to connect
external AUDIO/VIDEO equipment to the
machine's AUDIO/VIDEO input port, and press "SOURCE" key to select "SV" si l source.
gna
USB i nterf ace
(like DVD, V CR, Ga me Cons ole.. .)
AV Devic e
YPbPr/YCbCr Input Interface Connection
If the signal source comes from a DVD player, set-top box or device with YPbPr/YCbCr output
interface, you are recommended to connect the YPbPr/YCbCr output interface to the YPbPr/YCbCr
input interface on the TV for a better image quality. Meanwhile, please connect the audio output
interface to the audio input interface on the TV. See the figure below. To select the YPbPr/YCbCr
signal, please set the input signal source to be component mode.
AV Output Connection
Use the audio/video cable to connect the TV audio/video output interface to another monitor to
watch the TV programs synchronously.
SPDIF-OUT:
analog signal via optical fiber and thus achieve a better sound effect. Please use the optical fiber
connection cable to connect it to the device with a SPDIF digital input interface, like your audio
power amplifier.
Earphone jack: when you insert the earphone into the earphone jack, there will be no sound
from the TV speaker.(Please adjust the volume to a suitable , to avoid sounds excessive
to affect the hearing.)
The SPDIF audio output interface can transmit digital audio signal instead of traditional
sound level
SERVICE: USB interface (It's used only for software upgrade).
7
Page 10

Panel Control Keys
1
2
3
Power Indicator
Remote Receiving Sensor
4
5
1). SOURCE: press it to enter the signal source selection menu to select a signal source.
2). CH+/CH-: select the next or previous channel; in OSD menu operation, press them to select the
next or previous adjustment item.
3). VOL+/VOL-: increase or decrease the volume; in OSD menu operation, press them to adjust the
analog value of the current item.
4). MENU: press it to enter the main menu.
5). POWER.
Remote Control
Keys on Remote Control
WIDE
Name
POWER ( )
WIDE (16:9)
MUTE ( )
Numerical
F1
Program List ( )
MENU
SOURCE
Cursor ( , , , )
VOL+/VOLCH+/CHEXIT
Time ( )
Return ( )
DASH
MTS (optional)
CC
FAV
EPG
AUTO
INFO
SMART S
SMART P
OK
Function Description
Shift between work state and standby state.
Shift among different aspect ratios for image.
Turn off the sound.
Numerical keys.
Freeze image: On / Off.
Display the program list.
Display the main menu.
Display the signal source selection menu.
Up/Down: select functions. Left /Right: adjust the analog value.
Increase or decrease the volume.
Select the previous or next channel.
Return to the previous menu.
Set Auto Off time.
Quickly return to the channel you selected last time.
Digital TV programs (select different programs from the same channel).
Select different ATV sounds: Stereo/SAP/MONO or select DTV sounds
from TS.
Caption: Off/CC1/CC2/CC3/CC4/Text1/Text2/Text3/Text4.
Display your favorite channel list.
Digital TV programs (electronic program guide).
Auto adjust the screen image (on the PC).
Display the channel information.
Shift among sound modes.
Shift among picture modes.
Confirm the operation.
TO INSTALL THE BATTERIES
8
Page 11

Remote Control
BATTERYRE PLACEMEN T
when the ba tteries be come weak th e operatin g distance of the remote control is greatly
reduced and you will need to replac e the batter ies.
Note: The remote control may differ from the above figure in appearance. The actual remote control
shall prevail.
Operating Notes for Remote Control
1. Aim the remote control at the remote receiving sensor. Any article placed between the remote
control and remote receiving sensor could affect the normal operation.
2. Do not shake the remote control violently or operate or put it under direct sunlight, as heat could
deform the remote control.
3. If the remote receiving sensor is located under direct sunlight or strong light, the remote control
could fail to work. Please change the light angle or TV angle or get closer to the remote receiving
sensor to operate the remote control.
4. Low battery power could affect the remote control distance, please replace the battery. If the
remote control is about to be idle for long or the battery is used up, please remove the battery to
avoid any leakage corroding or damaging the remote control.
5. Do not use any battery of other specifications. Do not mix the old and new batteries. Always
replace both batteries together.
6. Do not throw the battery into fire, charge it, or break it down. Do not charge, disassemble, heat or
burn the used battery or cause a short circuit to it. Please comply with the relevant environmental
protection regulations to dispose of the waste battery.
General Operating Instructions
Power On
Insert the power plug into the power socket, press the [ ] button on panel, and then press
[POWER] on the remote control to turn on the TV.
Installation Guide-Setting
When you turn on the TV for the first time, the first
page is the setting menu below.
1. Menu Language: Menu language selection. Press
[t] and [u] on the remote control or [VOL-] and
[VOL+] on the panel to select an menu language
from English/Spanish/French, and then press [OK]
to confirm your selection and enter the next item
"Time Zone".
Menu Lang uage
Time Zone
DST
Antenna
Auto Scan
2. Time Zone: Press [t] and [u] on the remote
control or [VOL-] and [VOL+] on the panel to select
Select Move
your time zone from Eastern/Central/Mountain/
Pacific/Alaska/Hawaii/Atlantic, and then press [OK] to confirm your selection and enter the next
item "DST".
Setup Wizard
English
Pacific
Off
Air
MENU
Return
9
Page 12

General Operating Instructions
3. DST: Daylight Saving Time, press [u] on the remote control to select from On/Off to enable or
disable the daylight saving.
4. Antenna: Press [u] to select the TV receiving mode from Air/Cable repeatedly.
5. Auto Scan: Auto channel scan selection. Press [u] on the remote control to enter the auto
channel scan page and start scanning. You can also press "EXIT" to skip this operation and exit
this page. Refer to the section TV for detailed operation steps.
Standby
Press [POWER] on the remote control or power button on the panel to enter the standby state.
★Special Attention
1. If there is no signal input after turning on the TV, the system will auto enter the standby state a
few minutes later.
2. If you are not going to operate the TV soon, please press the power button to turn off the power.
Signal Source Selection
Press [SOURCE] on the remote control or on the panel to enter the menu
"Input Source". Press [▲] and [▼] on the remote control or [CH+] and [CH-]
on the panel to select a signal source, and then press [OK] on the remote
control to enter the signal input source you've selected.
OSD Menu Operation
Press [MENU] on the remote control or panel to display the main menu:
1. Press [t] and [u] on the remote control or [VOL-] and [VOL+] on the
INPUT SOUR CE
TV
AV1
AV2
SV
YPBPR
HDMI1
HDMI2
VGA
panel to select a functional menu.
2. Press [▼] or [OK] on the remote control or [CH-] on the panel to enter the functional menu.
3. Press [▲] and [▼] on the remote control or [CH+] and [CH-] on the panel to select an adjustment
item from the functional menu.
4. Press [t] and [u] on the remote control to change the analog value. When there is an icon "u"
on the screen, you can press [u] on the remote control or [VOL+] on the panel to enter the next
sub-menu or press [MENU] to exit the current menu.
5. No matter which menu you have entered, you can press [MENU] to exit the current menu, press
[EXIT] to exit the entire menu, press [SOURCE] to display the menu "Input Source", and then
press [SOURCE] to exit the menu "Input Source".
6. In menu operation, each disabled option is auto hidden with a purple icon. When you change the
OSD menu setting value, the new setting value will auto take effect upon the disappearance of
the menu even if you do not press the relevant key to exit the OSD menu.
7. The operating instructions provided in this User's Manual for the menu "Picture", "Sound",
"Setting" and "TV" are all based on TV Input Source. The operating steps in any other Input
Source are nearly same as TV Input Source. Please understand them by yourself.
Note: [t], [ u], [▲] and [ ▼] in this Manual stand for the direction cursor keys on the remote control
unless specifically defined. The operating instructions in the text below are all based on keys on the
remote control. Please understand the keys on the panel by yourself.
Below is a list of menu. Please find the detailed operating instructions in the later sections.
10
Page 13

General Operating Instructions
In TV Mode
Sound Mode
Bass
Treble
Balance
Surround
AVC
SPDIF
Audio Language
Setting
Parental Controls
Time
Closed Caption
Menu Settings
VGA Settings
Restore Default
TV
Pict ure
Picture Mode
Contrast
Brightness
Saturation
Soun d
Tint
Sharpness
Advanced Video
Picture
1. Press [MENU] to display the main menu.
2. Press [▼] or [OK] to enter the menu "Picture" and
press [▲] and [▼] to move the cursor to select an
adjustment item.
3. Press [t] and [u] on the remote control to change
the analog value. When there is an icon "u"on the
screen, you can press [u] on the remote control or
[VOL+] on the panel to enter the next sub-menu or
Pictu re Mod e
Contr ast
Brigh tness
Satur ation
Tint
Sharp ness
Advan ced Vid eo
press [MENU] to exit the current menu.
Select Mo ve
★Special Attention
All the analog values adjusted by the user will be auto saved as personal mode.
Stand ard
Antenna
Auto Scan
Favorite
Show/ Hide
Channel NO.
Channel Label
DTV Signal:
50
50
50
50
50
MENU
Return
★Remote Control Shortcut Keys
Press [SMART P] on the remote control to directly shift among Standard, Dynamic, Soft and User.
Function:
Picture Mode
Contrast
Brightness
Saturation
Tint
Sharpness
Advanced Video
Select from four image modes repeatedly: Standard/Dynamic/Soft/User.
Standard: Moderate color and brightness.
Dynamic: Brilliant, bright, and dynamic image.
Soft: Soft and bright image.
User: Set the value as you like.
Adjust the image contrast and change the image level feeling with an analog value of 0-100.
Adjust the screen brightness with an analog value of 0-100.
Adjust the image brilliance with an analog value of 0-100.
Adjust the image hue to be warmer or cooler with an analog value of 0-100 only in NTSC
system.
Adjust the image definition and sharpen or soften the image with an analog value of 0-100.
Color Temp.: Adjust the white chroma of the image, selecting from Cool/Normal/Warm
repeatedly.
Scale: Select picture scale: Auto/4:3/Full/zoom/cinema mode.
Noise reduction: Set the noise reduction level: Off/Weak/Middle/Strong/Auto.
11
Page 14

General Operating Instructions
Sound
1. Press [MENU] to display the main menu.
2. Press [t] and [u] to move the cursor to select the
menu "Sound", press [▼] or [OK] to enter the menu
"TV" and press [▲] and [▼] to move the cursor to
select an adjustment item.
3. Press [t] and [u] on the remote control to change
the analog value. When there is an icon "u" on the
screen, you can press [u] on the remote control or
[VOL+] on the panel to enter the next sub-menu or
press [MENU] to exit the current menu.
Function:
Sound Mode
BASS
Treble
Balance
Surround
AVC
SPDIF
Audio Language
Select from four sound modes repeatedly: Standard/News/Music/Sports/User.
Adjust bass value of 0-100.
Adjust Treble value of 0-100.
Adjust the sound output proportion of the left and right sound channels within 0-100.
When you set the analog value as 0, there is no sound from the right speaker. When you
set the analog value as 100, there is no sound from the left speaker. When you set the
analog value as 50, both speakers have the same volume.
Enable or disable surround sound.
Automatic Volume control: Enable or disable it. Auto adjust the volume of the required
channel. Reduce the audio output in case of strong modulation signal and increase the
audio output in case of weak modulation signal.
Select SPDIF mode, selecting from RAW/PCM repeatedly.
Digital TV language selection: English/French/Spain.
Note: This item is adjustable only in DTV mode. It is not adjustable in ATV mode with a
purple icon. The default value is English.
Sound Mod e
Bass
Treble
Balance
Surround
AVC
SPDIF
Audio Lan guage
Select M ove
Stand ard
Off
Off
RAW
Engli sh
MENU
80
50
50
Return
Volume Adjustment
Press [VOL+] and [VOL-] on the remote control to adjust the volume. Press [VOL+] on the remote
control to increase the volume and press [VOL-] to decrease the volume.
Mute
If you want to turn off the sound for a while, please press [MUTE] on the remote control to enable
the mute function and you will see a mute icon on the screen. Press [MUTE] again to disable the
mute function.
Special Attention
★
Please set the balance value as 50 in general cases.
★Remote Control Shortcut Keys
Press [SMART S] on the remote control to directly shift among Standard/News/Music/Sports/User.
12
Page 15

General Operating Instructions
Setting
1. Press [MENU] to display the main menu.
2. Press [t] and [u] to move the cursor to select the
menu "Setting", press [▼] or [OK] to enter the
menu "Setting" and press [▲] and [▼] to move the
cursor to select an adjustment item.
3. Press [t] and [u] on the remote control to change
the analog value. When there is an icon "u"on the
screen, you can press [u] on the remote control or
[VOL+] on the panel to enter the next sub-menu or
press [MENU] to exit the current menu.
Parental controls
Set the level of the TV program or movie. Press [▼]
to select the menu "Parental control" and press [u]
or [OK] to enter it as shown below. Each time when
you try to enter this menu, you have to input the
correct password, or you will fail to enter it. Generally,
the initial password provided by the manufacturer is
0000. You can also follow the instructions below to set
the password as you like.
Parental Controls
Time
Closed Ca ption
Menu Sett ings
VGA Settings
Restore D efault
Select M ove
Change Pa ssword
System Lo ck
Unrated L ock
Input Loc k
US
Canada
Select M ove
MENU
Return
On
Off
MENU
Return
Change password
System Lock
Unrated Lock
Input Lock
US
Set the parental controls access password. The message "Enter New password" asks
you to input a new password. The message "Confirm New password" asks you to
confirm the new password you've just input. If the two inputs are exactly the same, your
new password is set successfully.
Press "Left/Right" key on the remote control to select the states of System Lock: On/Off.
Before you select "on" option, the below item is auto hidden in a purple icon.
Press "Left/Right" key on the remote control to select the states of Unrated Lock: On/Off
press [u] or [OK] to enter it , press [▲] and [▼] to move the cursor to select an
adjustment source , Press [t] and [u] on the remote control to Lock or Unlock.
TV: Set the TV program ratings. Press
[u] or [OK] to enter it, as shown below.
Press [▲], [▼], [t] and [u] on the
remote control to move the cursor and
press [OK] to confirm the TV program
rating setting and mark it with a tick.
Any program marked with a tick will
not be played. If you want to cancel or
reset the TV program rating, please
follow the above steps for an operation
again. Press [MENU] to return to the
TV-Y
TV-Y7
TV-G
TV-PG
TV-14
TV-MA
ALL FY V S L D
Select Move
TV RATING
Press ENTER to Block or Unblock: Block
MENU
Return
previous menu and press [EXIT] to exit the entire menu.
TV-Y: applicable to all children.
TV-Y7: applicable to children no younger than 7.
13
Page 16

General Operating Instructions
US
Canada
TV-G: applicable to all people.
TV-PG: requiring parents' instructions and advices.
TV-14: accompanied by parents.
TV-MA: only applicable to adults.
ALL: select all TV programs.
FV: fantasy violence.
V: violence.
S: sex scene.
L: indecent language.
D: suggestive dialogue.
MPAA: Stands for Motion Picture Association of America, including 7 ratings. Press [▲],
[▼] to select rate.
G: General rating, applicable to
people of all ages, acceptable to
parents, free of naked scene and
sex scene, few drug taking and
violence scenes.
PG: Parental guidance rating: some
contents are not suitable for
children; some scenes may
discomfort them; they should
be accompanied by parents.
G
PG
PG-13
R
NC-17
X
N/A
Select Move
MENU
Return
PG-13: Particular guidance rating: not applicable to children below 13; they should
be accompanied by parents, as some contents are not suitable for them.
R: Restricted rating: anyone below 17 should be accompanied by parents or guardian.
NC-17: only applicable to adults, anyone below 17 is not allowed to watch the movies
at this rating.
X: the movies at this rating are not suitable to be released to the public in large
cinemas; they are restricted.
N/A: movies without rating.
Canadian English: Including seven ratings: C/G8+/G/PG/14+/18+/EXEMPT. The
operating steps are similar to MPAA
Guidelines.
C: applicable to children above 8.
G8+: acceptable to children above 8.
G: general rating, applicable to all
people.
PG: requiring parents' instructions
and advices.
14+: only applicable to children
above 14.
18+: adult rating, only applicable to
C
C8+
G
PG
14+
18+
EXEMPT
Select Move
MENU
Return
adults; any one under age is not allowed to watch the movies at this rating.
EXEMPT: exempt rating, including news, sports news, files, music, and various
entertainment programs.
14
Page 17

General Operating Instructions
Canada
Canadian French: Six ratings: G/8ans+/13ans+/16ans+/18ans+/EXEMPT. The
operating steps are similar to MPAA Guidelines.
G: general rating, applicable to all
people.
8ans+: applicable to children
above 8.
13ans+: applicable to children
above 13.
16ans+: applicable to children
above 16.
18ans+: only applicable to people
no younger than 18.
EXEMPT: exempt programming.
Time
To set the time, please press [▼] to select the menu
"Time" and then press [u] or [OK] to enter it, as
shown below.
G
8ans+
13ans+
16ans+
18ans+
EXEMPT
Select Move
Sleep Timer
Time Zone
DST
Clock
Off
Pacif ic
Off
1980/ 01/06 12:00 A M
MENU
Return
MENU
Return
Sleep Timer
Select Move
Set a time for the system to auto enter the standby state: Off/5min./15min./30min./45min./
60min./90min./120min./150min./180min./240min.
Time Zone
DST
Clock
Time zone selection: Eastern/Central/Mountain/Pacific/ Alaska/Hawaii/Samoa/ Atlantic.
Daylight Saving Time; Selection: On/Off.
DTV program clock information.
Closed Caption
To set the caption, please press [▼] to select the menu "Closed Caption" and then press [u] or [OK]
to enter it, as shown below.
CC On Mute
CC mode
Advance selection
Option
Press [t] or [u] to select on/off .
Caption mode, selection: Off/CC1/CC2/CC3/CC4/Text1/Text2/Text3/Text4.
Selection: service 1/ service 2/ service 3/ service 4/ service 5/ service 6, It is enable
only in DTV source.
Caption Option, please understand them by yourself.
Menu Settings
To set the menu, please press [▼] to select the menu "Menu Settings" and then press [u] or [OK] to
enter it, as shown below.
Transparency
Menu language
OSD Time
To adjust the OSD menu transparency, press [t] and [u] to adjust the analog value.
To select the OSD menu language, selection English/French/Spanish.
Set the OSD menu display time: 5/15/30/45//60; Unit: second.
15
Page 18

General Operating Instructions
VGA Settings (under VGA signal)
In VGA mode, it is necessary to select the VGA as
the signal source. If other signal source is selected,
the system menu turns into purple and becomes
unavailable.
Note: Under VGA source mode, if there is no signal
in one second, the prompt menu pops up; the device
enters power saving state after one minute and the
green indicator flashes. When VGA signals are
connected, the device will wake up and display
normally.
Note: (1). The PC screen varies according to Windows version and video card.
(2). If nonstandard video format is selected, the PC screen display will be abnormal.
1. Press [▲] or [▼] to move the cursor and select VGA menu, press [u] or [OK] to enter the VGA
menu, and press [▲] or [▼] key to move the cursor and select desired item in the VGA menu.
2. Press [MENU] to return to previous menu, and press [EXIT] to hide the menu.
Function:
H-Position
V-Position
Clock
Phase
Auto
Move the screen to left/right (range: 0-100).
Move the screen up/down (range: 0-100).
Adjust when image flashes and has vertical stripe (range: 0-100).
Reduce the water wave in line to increase image sharpness (range: 0-100).
The PC screen of the machine can adjust automatically according to the PC video signal.
H-Pos ition
V-Posit ion
Clock
Phase
Auto
Select M ove
MENU
50
50
50
50
Return
Restore Default
To restore the system default, please press [▼] to select the menu "Restore Default" and press [u]
or [OK] to conduct the restore operation.
TV
1. Press [MENU] to display the main menu.
2. Press [t] or [u] to move the cursor to select the
menu "TV", press [▼] or [OK] to enter the menu
"TV" and press [▲] and [▼] to move the cursor to
select an adjustment item.
3. When there is an icon "u"on the screen, you can
press [u] on the remote control or [VOL+] on the
panel to enter the next sub-menu or press [MENU]
to exit the current menu.
Antenna
Press [▲] or [▼] to select the menu "Antenna" and then press [t] or [u] to select Air and Cable
repeatedly.
16
Antenna
Auto Scan
Favorite
Show/Hide
Channel N o.
Channel L abel
DTV Signa l :
Select Move
Air
Weak
MENU
Return
Page 19

General Operating Instructions
Auto Scan
Press [▼] to move the cursor to select "Auto Scan", press [u] or [OK] to enter the menu "Auto
Channel Scan", press [t] or [u] to select "Yes", and press [OK] to start auto scanning . When
scanning is finished, it will stop at the channel where auto scan begins.
Friendly Tips: Please select Auto Scan for a new product. The system will auto scan channels in
your area. Please wait a few minutes for auto scan, do not disconnect the power or turn off the TV.
Favorite
Press [▲] or [▼] to move the cursor to select "Favorite" and then press [u] or [OK] to enter the
menu "Favorite List". Press [▲] and [▼] to select a channel as your favorite channel, then press
[OK], the channel which you selected will be added to the "Favorite channel list". It is enable only
when memorise channels.
Show/Hide
Press [▲] or [▼] to move the cursor to select "Show/Hide" and then press [u] or [OK] to enter the
menu "Show/Hide". Press [▲] and [▼] to select a channel, then press [OK], the channel which you
selected will hide.
Channel No.
Press [▲] or [▼] to move the cursor to select "Channel No ." and then press [t] or [u] to select
Channel. It is enable only when memorise channels.
Channel Label
Press [▲] or [▼] to move the cursor to select "Channel Label" and then press [u] or [OK] to enter
the menu "Channel Label", press [▲] or [▼], [t] or [u] to edit channel label. It is enable only when
memorise channels.
DTV Signal:
DTV signal information, it is enable only when memorise channels.
17
Page 20

Troubleshooting
Failure Reason
The TV image has snowflakelike spots, and noise
The screen has no display,
no audio, and the indicator
isn't on
The TV image has spot, line
or stripe interference
Image ghosting occurs
The image doesn't have color
The TV has no audio
DTV screen has mosaic
The PC has no display,
prompts no signal input, and
the red indicator flashes
The remote control distance
is short, or out of control
PC display is blurry
PC image shifts, can't fill
the screen, or exceeds the
screen
Can't operate the device
1. Antenna connector is loose, or
cable is damaged
2. Antenna type isn't suitable
3. Antenna orientation or position isn't
proper
4. Weak signal
1. Power plug is loose, and the power
isn't connected
2. Power isn't switched on
The signal is interfered with by
automobile, neon light, electric hair
drier, etc.
1. The TV signal is reflected by high
mountain or building
2. Antenna orientation isn't proper
Color saturation is too low
1. The volume is too low
2. The audio is mute
The signal is weak
The signal cable is loose or falls off
1. The signal receiver of the remote
control is blocked by certain object
2. The battery voltage of the remote
control is low
1. The adjustment isn't proper
2. The display mode isn't proper
1. The adjustment isn't proper
2. The display mode isn't proper
External influences (e.g. lighting,
static, etc.) will interfere with the
normal operation
Solution
1. Check whether antenna connector is loose,
whether cable is intact
2. Check antenna type (VHF/UHF)
3. Adjust antenna orientation and position
4. Use signal amplifier
1. Check whether the power cord is connected
properly
2. Check whether the power switch on the panel is
turned on
Do not use the electric hair drier near the device,
and adjust the antenna direction to reduce
interference
1. Use high-directional antenna
2. Adjust the antenna orientation
Enter "Picture" to increase the color saturation
1. Adjust the volume properly
2. Press the "MUTE" key on the remote control to
cancel the mute state
Check whether the antenna plug is loose and
whether the cable is intact
Check whether the signal cable is loose or falls
off, and re-connect properly.
1. Move the object that blocks the signal receiver
2. Replace the battery
1. Use automatic adjustment function
2. Use recommended mode
1. Use automatic adjustment function
2. Enter "Geometry" to adjust the horizontal or
vertical position
3. Use recommended mode
Press the power switch to turn off the device, and
restart the device after one to two minutes
CAUTION: Don't let your machine display the same picture for a long time, please set up a
screen protection procedure. If a high contrast picture remains for along time, this picture
will bring a 'leave shadow' in screen. Usually the 'leave shadow' will disappear gradually
when you turn off the machine power. However, this trouble can't be repaired , Which isn't
in range of warranty.
18
 Loading...