

Page 1
Page 2
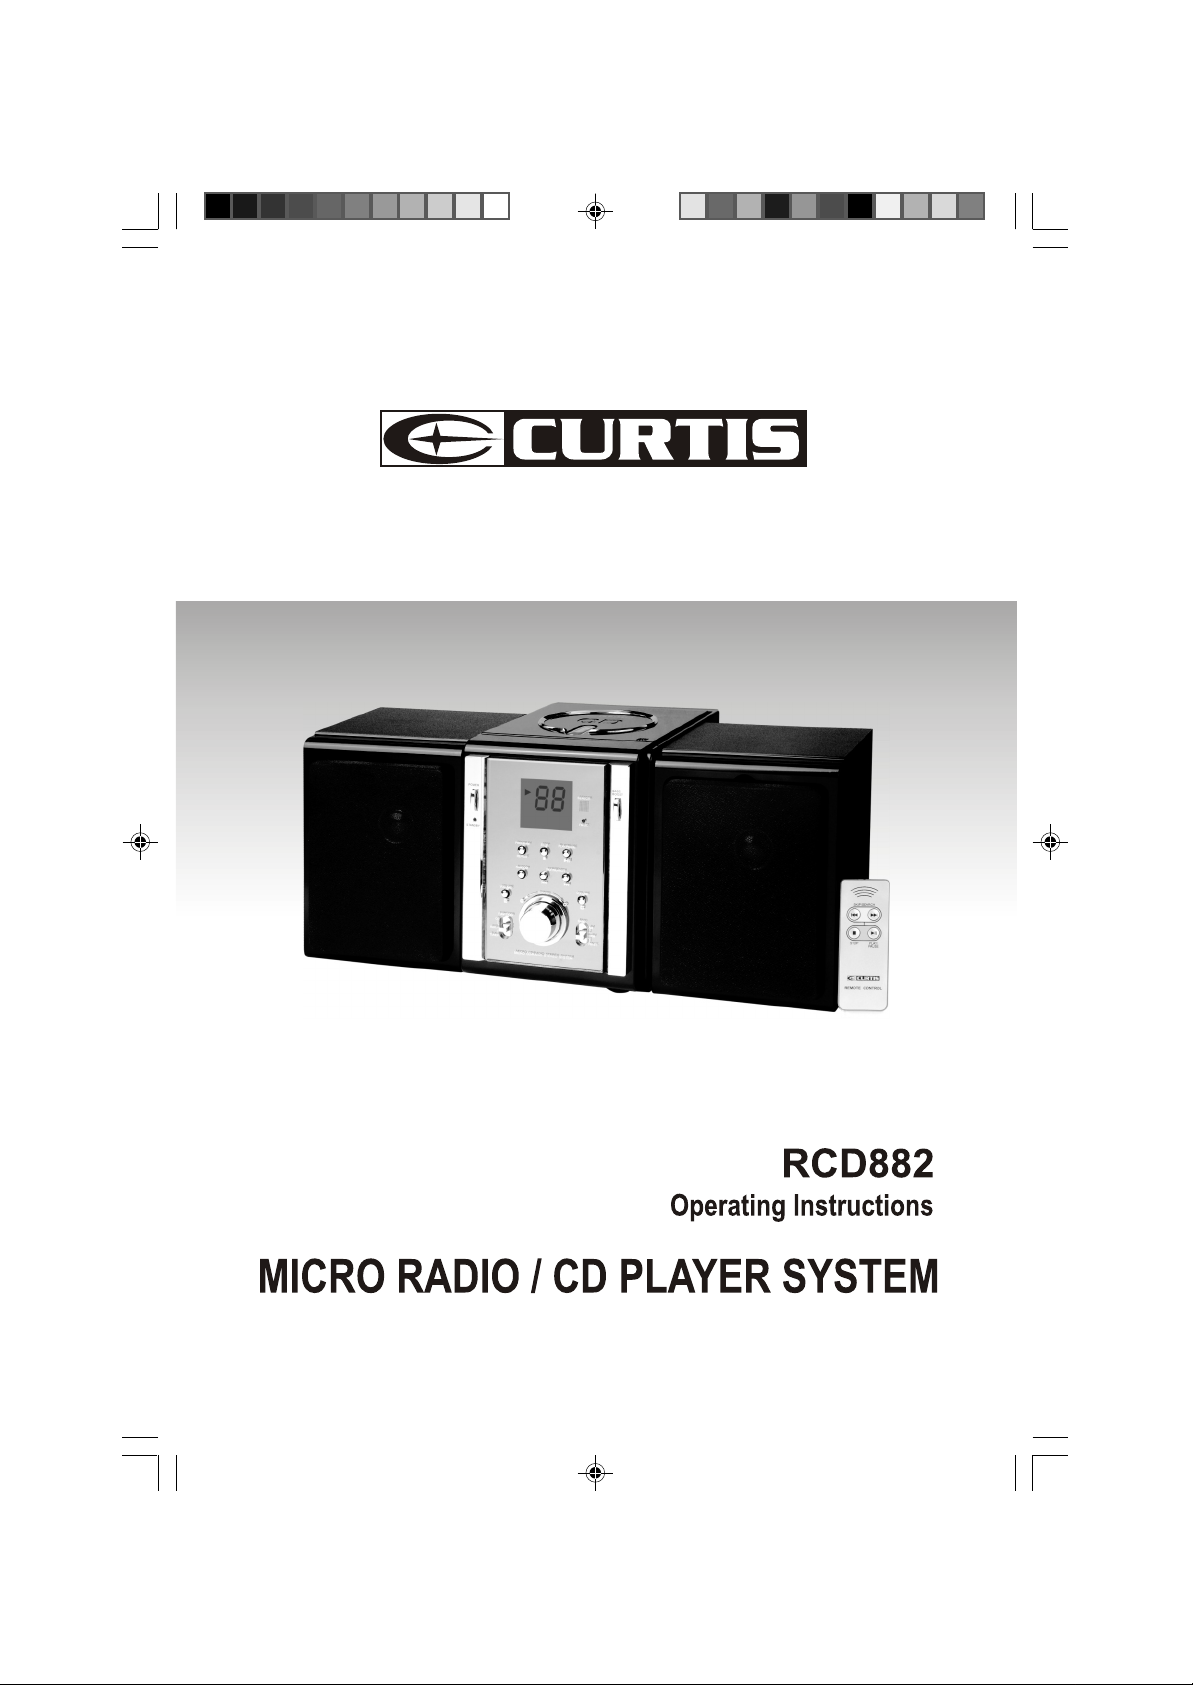
CD Radio Micro System
The lightning flash with an arrowhead
symbol within an equilateral triangle,
is intended to alert the user to the
presence of uninsulated dangerous
voltage within the product s enclosure
that may be of sufficient magnitude to
constitute a risk of electric shock to
persons.
WARNING: TO REDUCE THE
RISK OF ELECTRIC SHOCK,
DO NOT REMOVE COVER
(OR BACK). NO USERSERVICEABLE PARTS
INSIDE, REFER ALL SERVICING
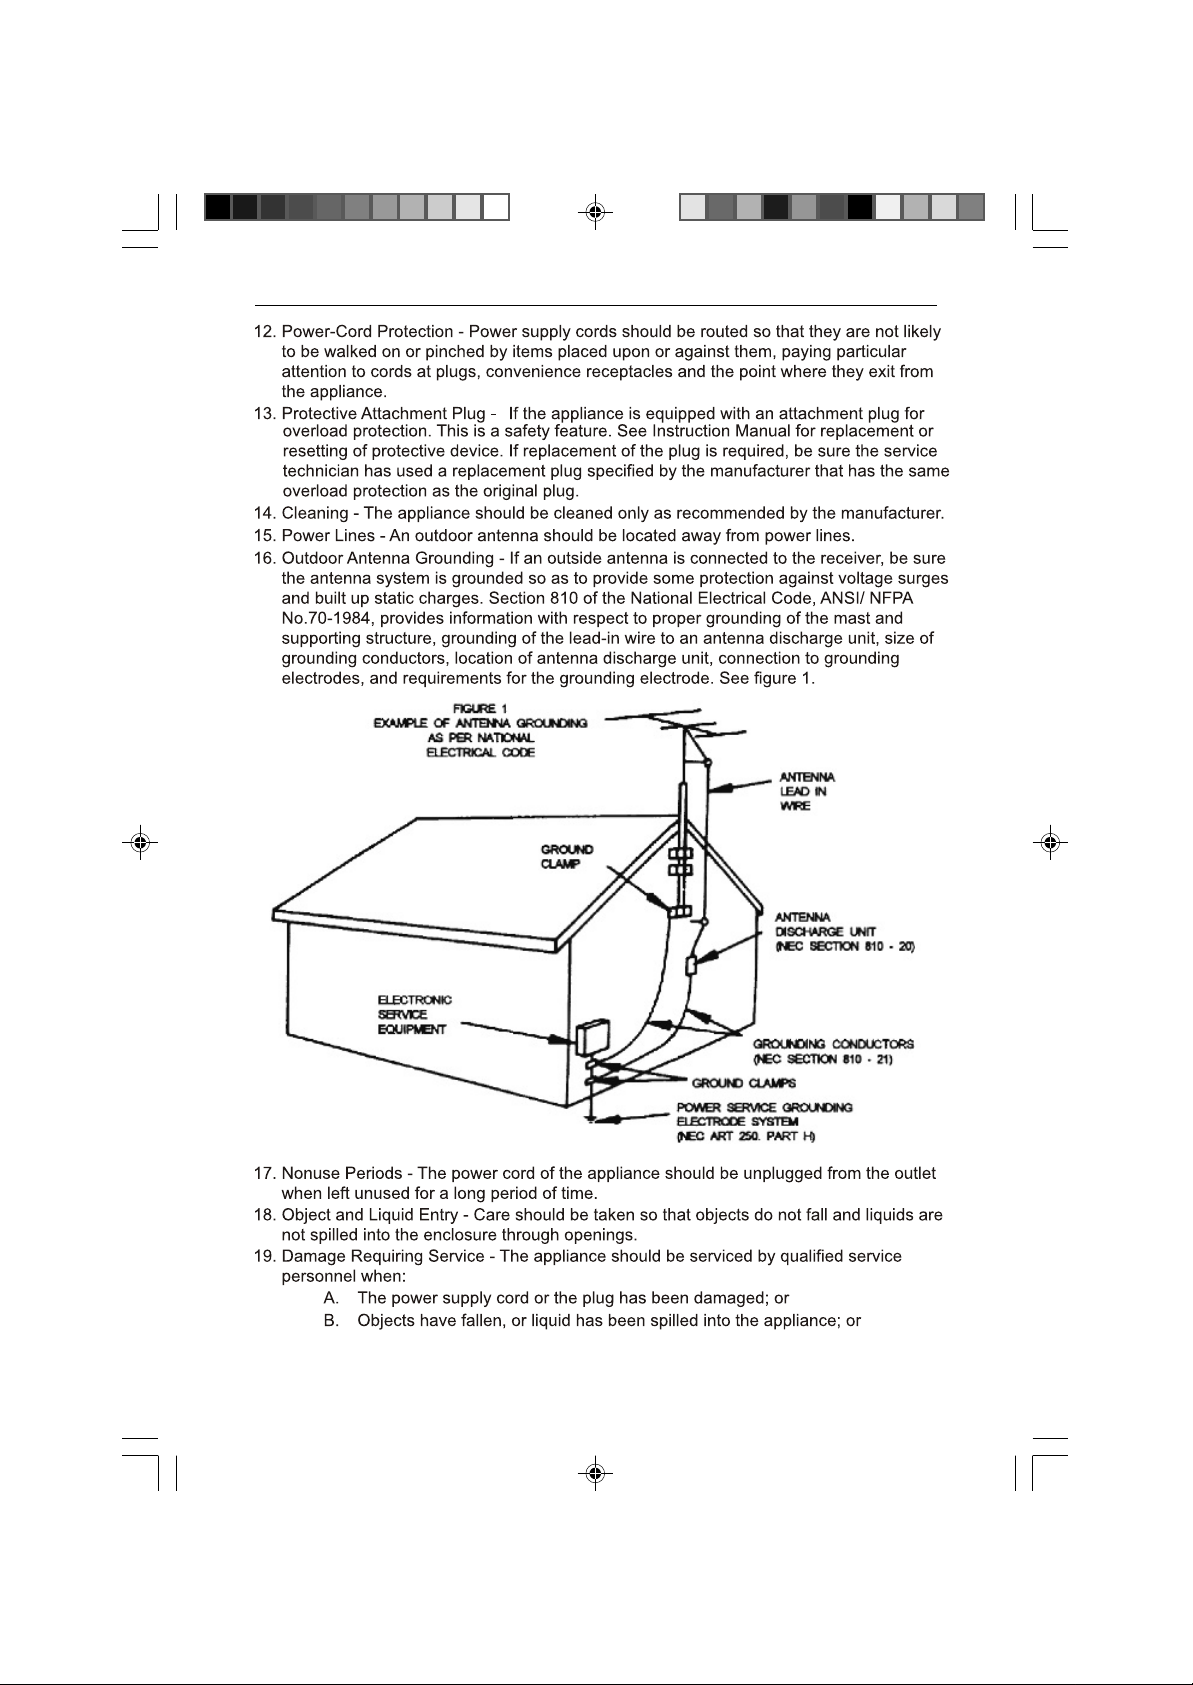
TO A QUALIFIED SERVICE
PROFESSIONAL.
The exclamation point within
an equilateral triangle is intened to alert the user of the
presence of important operating, maintenance and
servicing instructions in the
literature accompanying the
appliance.
2
Page 3
CURTIS RCD882
3
3
Page 4
CD Radio Micro System
3
4
Page 5
RCD882CURTIS
3
5
Page 6
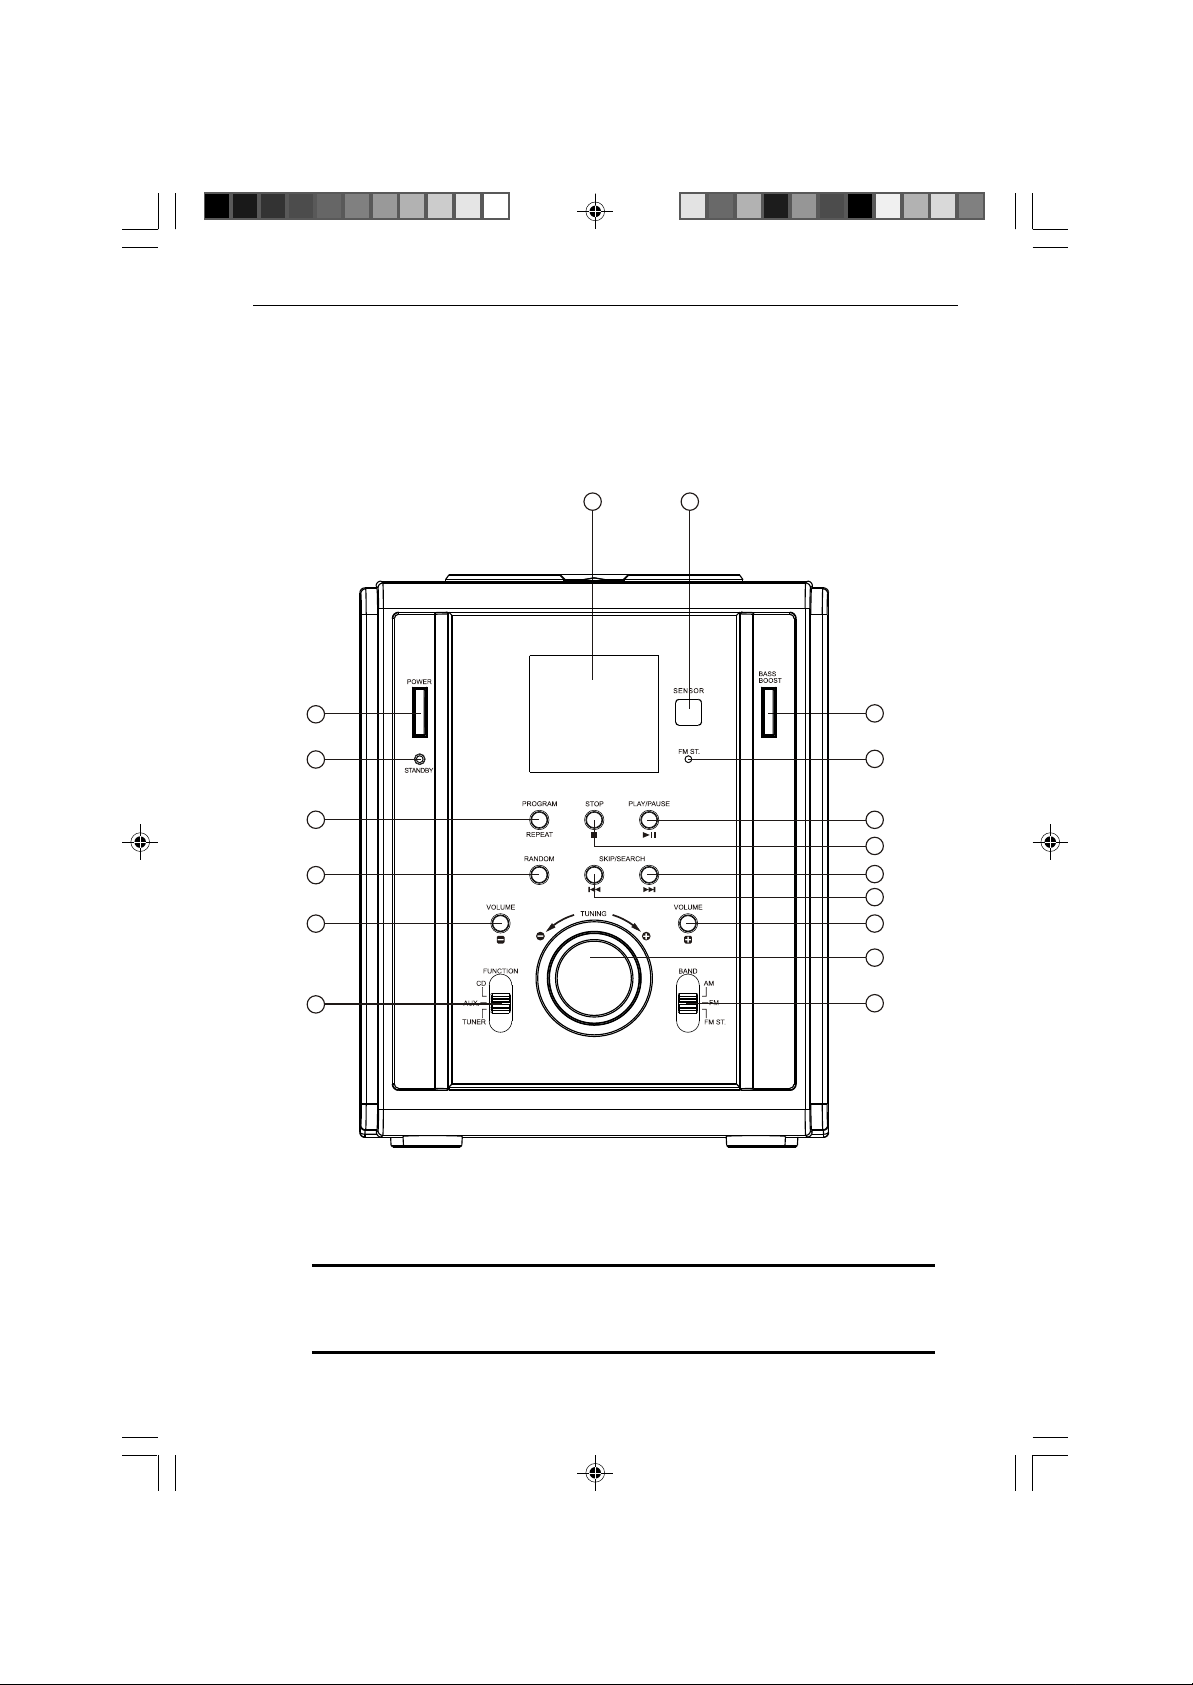
Location of Controls
Front View
CD Radio Micro System
1
12
13
14
15
16
17
2
3
4
5
6
7
8
9
10
11
NOTE: For the POWER ON/OFF,
is with the button pressed
in, the second with the button out.
BASS BOOST
6
buttons, the first option
7
Page 7

CURTIS RCD882
Top View
18
Rear View
19
20
21
22
23
7
Page 8

CD Radio Micro System
Location of Controls
1. LCD Display
2. Remote Control Sensor
3. Bass Boost Button
4. FM Stereo Indicator
5. CD PLAY/PAUSE Button
6. CD STOP Button
7. CD Forward Skip/Search Button ( )
8. CD Reverse Skip/Search Button ( )
9. Volume Up Control
10. Tuning Control
11. Band Switch ( AM/FM/FM ST. )
12. Power Button
13. Standby Indicator
14. Program/Repeat Button
15. Random Button
16. Volume Down Control
17. Function Switch
(CD/AUX./TUNER)
18. CD Compartment
19. Speaker Connector (Right)
20. Speaker Connector (Left)
21. Line In Jack
22. FM Antenna
23. AC Cord
Remote Controls
Pull out the transparent in insulation tape from the battery compartment
on the rear. The remote control unit is ready to be used.
CD Reverse Skip/Search Button
1. ( )
CD Forward Skip/Search Button
2. ( )
1
3
2
4
3. CD STOP Button
4. CD PLAY/PAUSE Button
Battery Installation (Remote Control Unit)
1. Remove the battery cover.
2. Insert batteries making sure the polarity (+/-) matches the marks inside
the unit.
3. Replace the cover.
--- Do not attempt to recharge, short-circuit, disassemble, heat or throw the
batteries into any fire.
--- Do not mix old and new batteries.
--- Dispose properly in accordance with local law.
Note: Weak batteries can leak and severely damage the remote control unit.
8
Page 9

CURTIS RCD882
Getting Started
NOTE: If you have not done so already, please familiarise yourself with
the safety instructions and electrical information on pages 4 to 5,
before continuing with this section.
Remove your CD Radio Micro System carefully from the box. Y ou may
wish to store the packaging for future use.
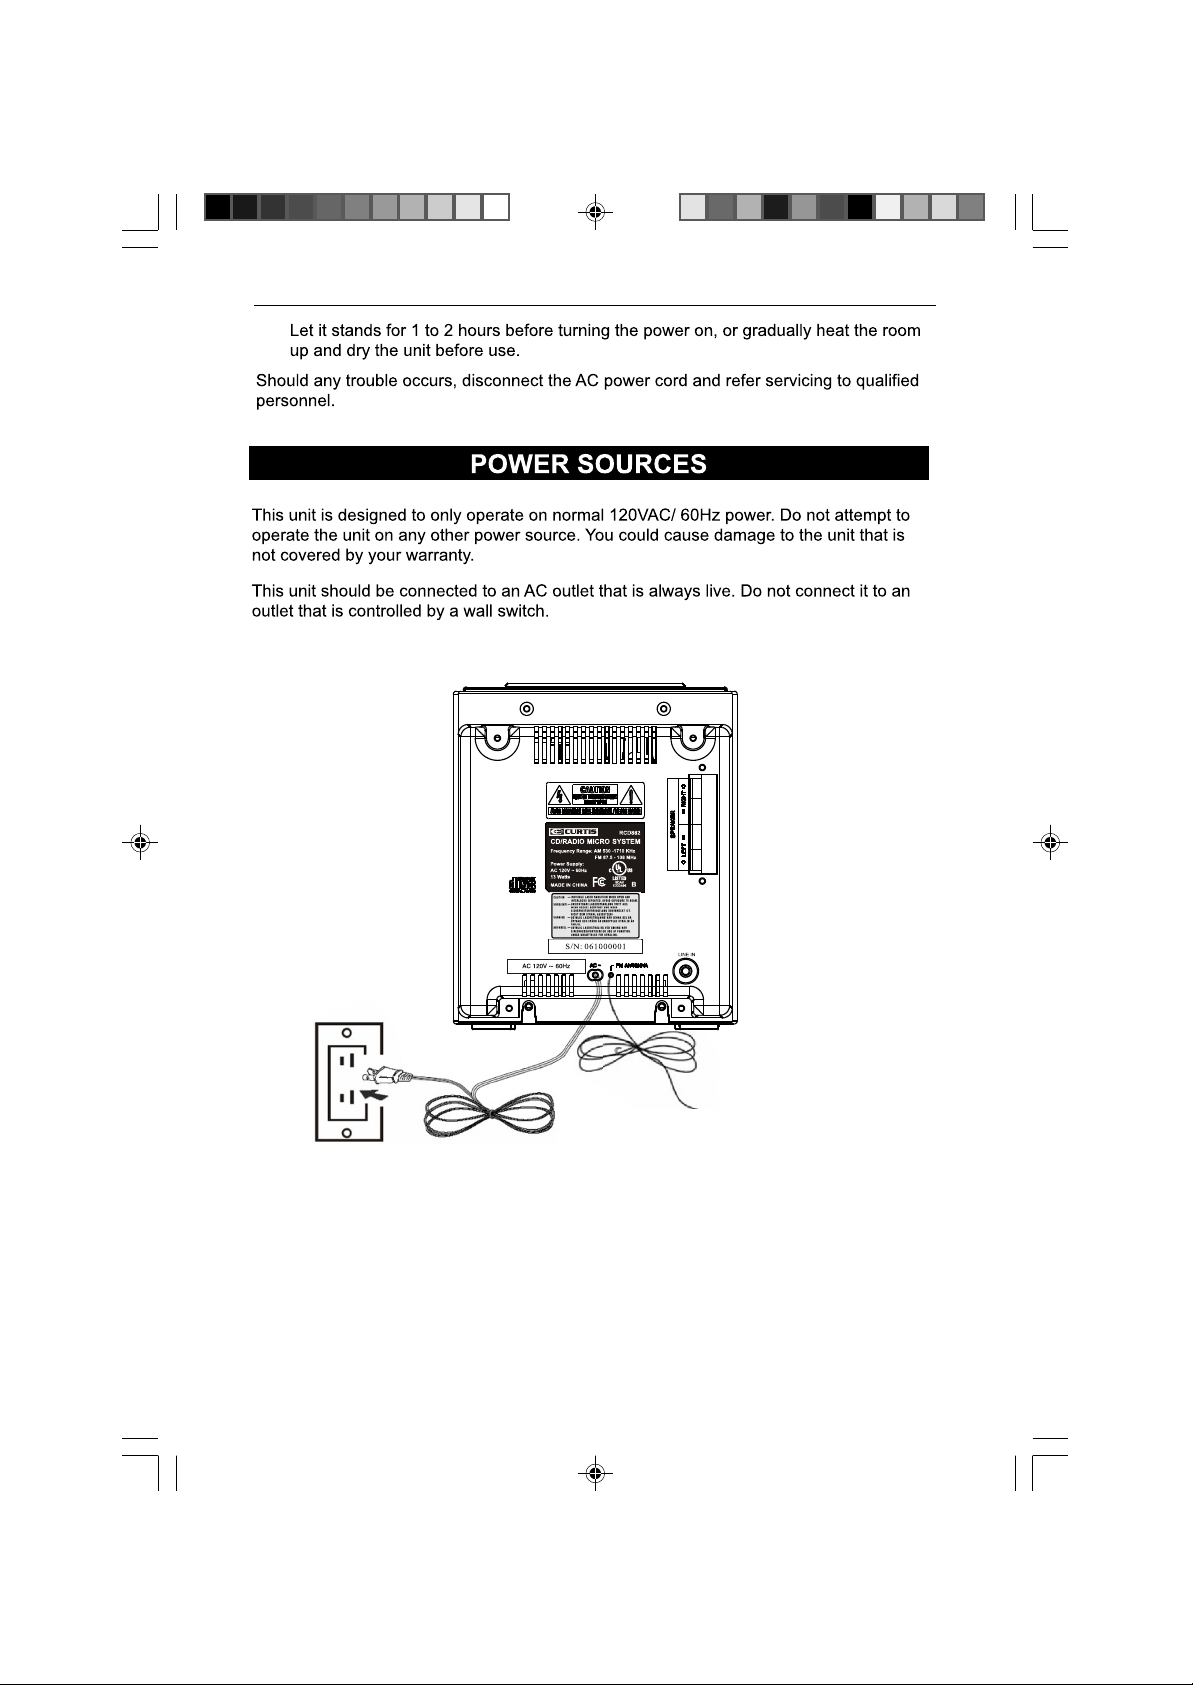
Connecting the Speakers
The speakers have integral cables. The ends of the cables are stripped
and soldered, ready for connection to the CD Radio Micro System.
The connectors on the rear of the
left (L) and right (R) and
the coloring of the
Connect the LEFT speaker to the lower connectors, and connect
the RIGHT speaker to the upper connectors.
connectors as shown opposite.
close the connector so that it clicks
colored red and black. This
cables.
CD Radio Micro System are
corresponds to
Click open the
Insert the wires into the hole and
in place.
marked
NOTE: Only insert the stripped part of the wires. If you insert too far the
connector may grip the insulation and not make contact with the wire.
Repeat this process using the upper connectors for the left speaker
wires.
Switching on
Your CD Radio Micro System requires a mains supply of 120 volts AC
at 60 Hz. Please ensure that your mains supply is compatible.
CAUTION! Applying power with the volume set near maximum
can cause damage to the speakers.
Your CD Radio Micro System is supplied with an integral mains power
cable and fitted plug.
9
9
Page 10

CD Radio Micro System
Unwind the mains cable and insert the mains plug into the mains
socket and switch on.
Press the POWER button.
When not in use, unplug your CD Radio Micro System from the mains
power supply.
Adjusting the Volume
Adjust the volume by pressing the VOLUME + or VOLUME - buttons.
Dynamic Bass Boost
The Dynamic Base Boost System enhances the low frequency
components of the sound output.
Adjust the volume to normal listening level then press in the Bass Boost
button.
NOTE: When the Bass Boost is on, some music may exceed the bass
capacity of the speakers or causing distortion. If this
reduce the volume or switch the Bass Boost off to avoid
your speakers.
occurs either
damaging
AUX input (Line-in jack)
For connection of other sound sources.
(e.g. TV or VCR audio output).
Move the FUNCTION selector to the AUX. position.
10
Page 11

CURTIS RCD882
Using the Radio
Press the POWER button, the STANDBY indicator will go off and the
display will light up.
Move the FUNCTION selector to the TUNER position.
Move the BAND selector to the desired band, AM, FM, or FM ST.
Tune to your desired station with the TUNING control. lf you have set
the BAND selector to FM ST. and you tune to FM Stereo the FM ST.
LED Indicator will light.
Note: If you are listening to the a weak FM stereo station you can
usually improve the reception by moving the BAND selector from
the FM ST. position to the FM position, however the sound will now
be mono.
Set the VOLUME +/- control to the desired level.
Aerial
Your CD Radio Micro System has an integral FM aerial.
For best FM reception, extend the aerial to a position where the best
reception is received. A void close proximity to the speakers and other
electrical appliances.
There is a built in ferrite aerial for the AM signal. If the AM signal is
weak, the unit may need to be moved to a different area of the room to
obtain better reception.
11
11
Page 12

Using the CD Player
WARNING! THIS PRODUCT USES A CLASS 1 LASER. AVOID ANY
DIRECT EXPOSURE TO THE LASER BEAM. USE OF CONTROLS,
ADJUSTMENTS OR PROCEDURES NOT LISTED IN THIS GUIDE
MAY RESULT IN HAZARDOUS EXPOSURE.
Handling Compact Discs
To remove a CD from its storage case, press
down on the centre of the case and lift the disc
out.
Hold the disc by the edges. Avoid touching the
recorded side of the disc.
Compatible Compact Discs
Only compact discs identified with the mark shown
opposite can be used with your CD player.
Loading CDs
CD Radio Micro System
Press the POWER button, the STANDBY indicator will go off and the
display will light up.
Move the FUNCTION selector to the CD position.
The display will briefly flash - - then show 00.
Open the CD door by pressing on the lid where indicated.
Place the CD in the compartment with the label side facing upwards.
Close the lid. When fully closed the CD player starts to spin the disc.
The display will briefly flash - - while reading the CD and will then
display the total number of tracks on the CD.
CAUTION! Do not put anything other than a CD into the
compartment. Other objects may damage the CD mechanism.
Do not force the lid to open further than the mechanism allows.
Keep the lid closed when not in use to prevent dirt and dust from
entering the mechanism.
Never insert more than one CD at a time.
If a CD is deeply scratched or too dirty, it may not play.
12
Page 13

CD Radio Micro System
Removing CDs
To remove the CD press the STOP button then open the door as
described previously.
Remove the CD once it has stopped spinning.
Error Compensation
Your CD player has built in error compensation circuits that enable
constant play despite any minor defects in the CD surface. If, however,
the defects are too great, the play may jump or skip tracks during play.
If you encounter this problem, clean the disc or play a different disc. If
the CD player operates normally, the skipping problem may be due to a
defective disc.
Playing CDs
Once you have loaded a CD, press the PLAY/PAUSE button. The
display shows the track currently playing.
To stop play, press the STOP button.
Pause
To stop a track temporarily, press the PLAY/PAUSE button. The CD will
pause at the current play position.
To resume play, press the PLAY/PAUSE button again.
Skip Forward or Backward Through Tracks
To select the next track, press the SKIP/SEARCH forward button,
If you are on the last track of the CD, the player will return to
track 1.
To go back to the beginning of the current track press the SKIP/
SEARCH back button once.
To go back to the previous track press SKIP/SEARCH back button
twice.
13
13
Page 14

CURTIS RCD882
To play a particular track, load the CD in the CD player and press either
of the SKIP/SEARCH buttons until the track number required is shown
in the display.
Press the PLAY/PAUSE button to play the required track.
Programmed Track Selection
You can set your CD Player to play a preset selection of tracks.
To Program Specific Tracks
Make sure the CD is at STOP mode, then press the PROGRAM button
on the CD Radio Micro System.
Press either SKIP/SEARCH buttons to display the track number
required.
Press the PROGRAM button to store your first selected track.
Repeat these steps until all the tracks required are stored. A maximum
of 20 tracks can be stored. It is possible to select a track more than
once.
NOTE: If, during track selection, you press the PLAY/PAUSE button
before pressing the PROGRAM button, the last track will not be stored
in
the memory and the CD will start playing from the first programmed
track.
You cannot continue to select tracks if you interrupt the programming
by pressing either the PLAY/PAUSE or STOP buttons.
Press the PLAY/PAUSE button. The first programmed track is
displayed and your selection starts playing.
You can press either of the SKIP/SEARCH buttons to skip through the
programmed selection.
After all the programmed tracks have been played, the CD player stops
automatically. Your programmed tracks stay in memory until you open
and close the CD door.
14
Page 15

CD Radio Micro System
Repeat Disc Play
You can set your CD player to repeat a single track, the whole CD or
your programmed selection of tracks.
To Repeat a Single Track
Press either of the SKIP/SEARCH buttons to select the track you wish
to repeat.
Press the REPEAT buttononce. The 'REPEAT 1' appears on indicator
the display.
Press the PLAY/PAUSE button to play the track.
The selected track will play continuously until you press the STOP
button. To cancel the repeat function press the REPEAT button twice.
To Repeat the Entire CD
Press the REPEAT button twice.
on the display.
Press the PLAY/PAUSE button.
The entire disc will play continuously until you press the STOP button.
To cancel the repeat function press the REPEAT button once more.
The 'REPEAT ALL' appears indicator
To Repeat a Programmed Selection
Select your programmed tracks as described on the previous page.
Press the REPEAT button twice.
Press the PLAY/PAUSE button.
The programmed tracks will play continuously until you press the STOP
button. To cancel the repeat function press the REPEAT button once
more.
15
15
Page 16

CURTIS RCD882
Random Play
In this mode the CD player will play tracks in a random order until the
STOP button is pressed.
Press the RANDOM button. 'RANDOM' appears on the display.
Press the PLAY/PAUSE button. Tracks are played in random order until
either the STOP button is pressed or the RANDOM button is pressed. If
the RANDOM button is pressed the CD will continue to play from the
current track until the end of the CD or programmed selection.
Press Forward Skip button to go to next Random track.
Press the RANDOM button once more to return to the Normal
Playback mode.
16
Page 17

CD Radio Micro System
Care and Maintenance
Cleaning CDs
Use a soft cloth to remove fingerprints
and dust from the disc surface. Wipe in
a straight line from the centre to the
outside of the disc.
• Never use chemicals such as record sprays, anti-static sprays,
benzine or thinners to clean your CDs.
• To reduce the risk of scratches, always put CDs back in their
cases after use.
Do not expose CDs to direct sunlight, high humidity or high
temperatures for long periods.
• Do not stick paper or write on either side of the CD.
Only discs displaying this symbol can be played on this unit.
Cleaning the Lens
A dirty lens will cause sound skipping and, if the lens is very dirty, the
CD may not work. Open the CD door and clean the lens as follows:
• Unplug the power supply.
•
Dust or Dry Particles
camera lens brush/blower, blow on
the lens a couple of times, then
wipe it lightly with the brush to
remove dust. Then blow on the lens
once more.
•
Finger Prints
cleaned by using a brush/blower,
use a dry cotton swab and starting
in the middle work to the outside
edge.
- If the lens cannot be
- Using a
17
17
Page 18

EVIDENCE MC 2509
Technical specifications
Power supply
AC: AC120V ~ 60 Hz
Radio frequency coverage
FM: 87.5 - 108 MHz
AM: 530 - 1710 kHz
CD player
Pick Up: 3-beam, semiconductor laser
Encoding: 16 Bit Linear
General
Speakers: 8 ohms
18
 Loading...