

Page 1
RCD739UK (Eng.)(A5) 17-8-2007 /L
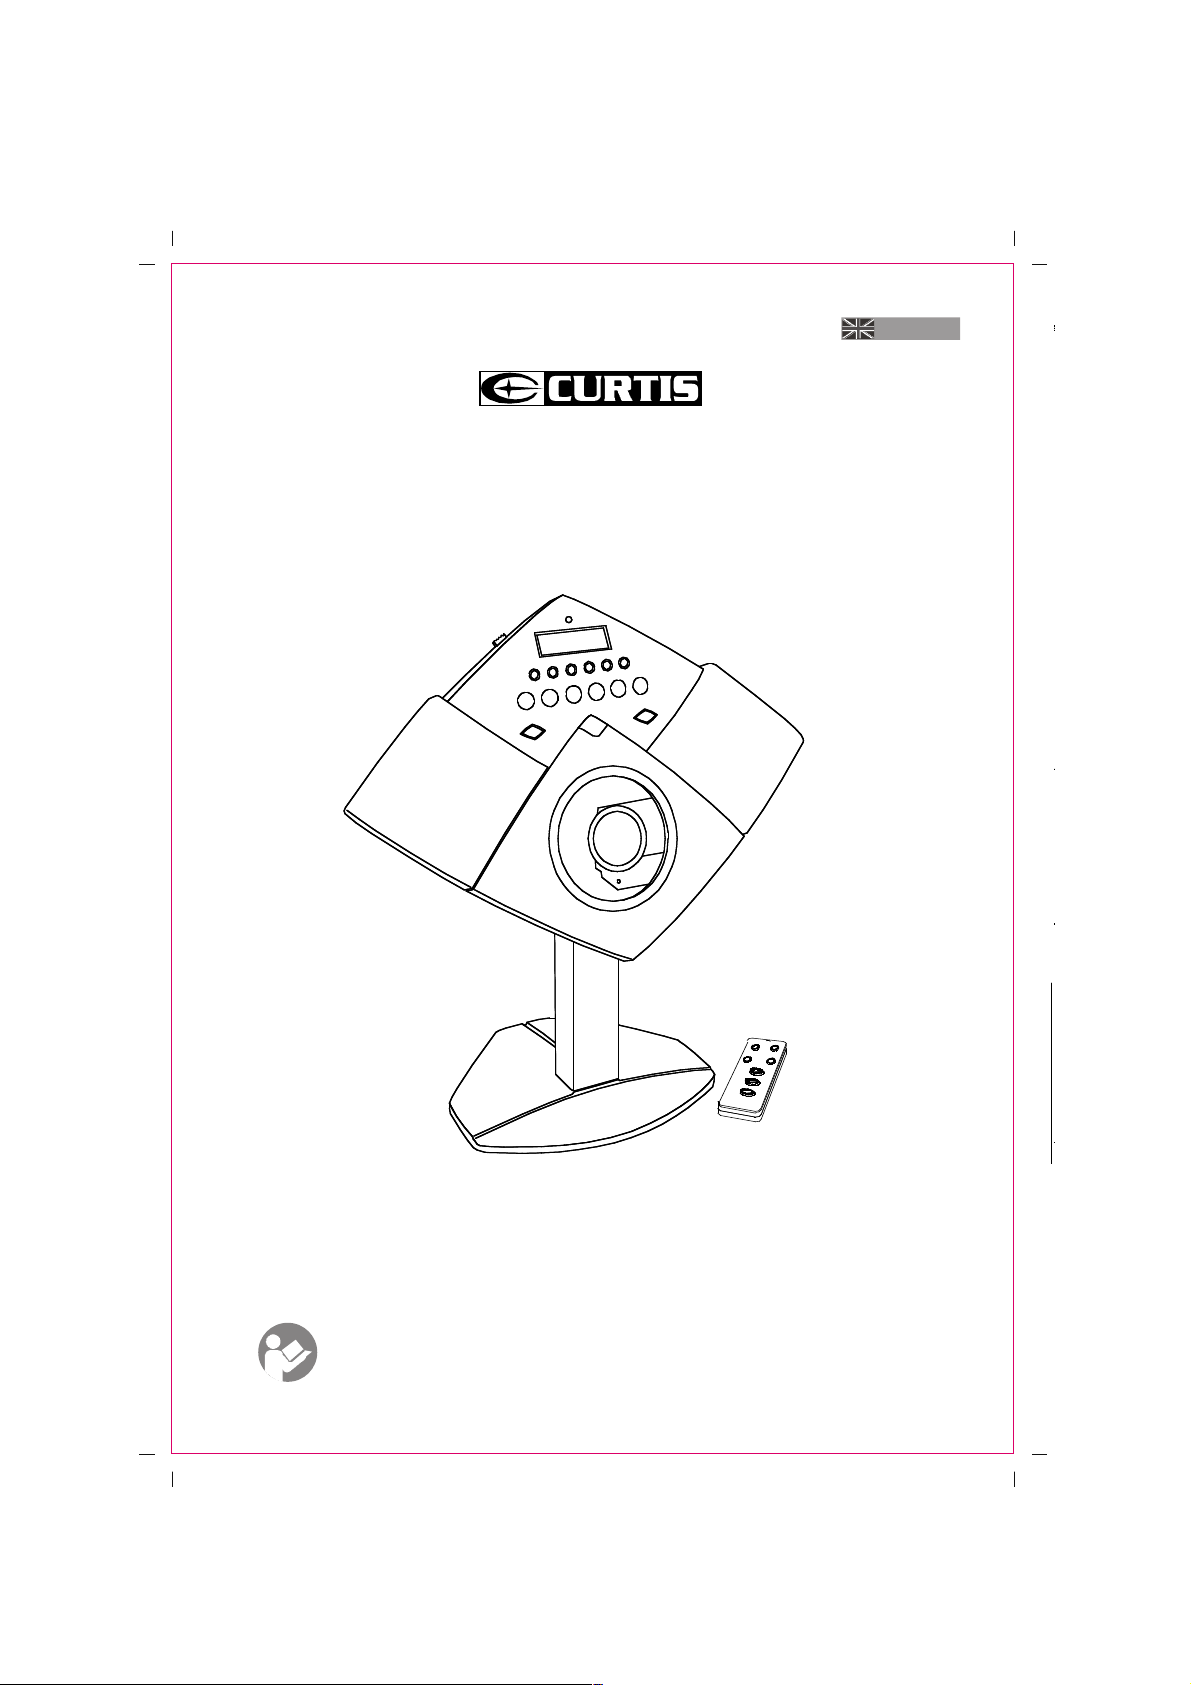
Digital CD/Radio Stereo System with Remote
MODEL : RCD739UK
INSTRUCTION MANUAL
Operating Instructions
BEFORE OPERATING THIS PRODUCT, READ, UNDERSTAND,
AND FOLLOW THESE INSTRUCTIONS.
Be sure to save this booklet for future reference.
ENGLISH
Page 2
RCD739 (Eng.)(A5)
- 1 -
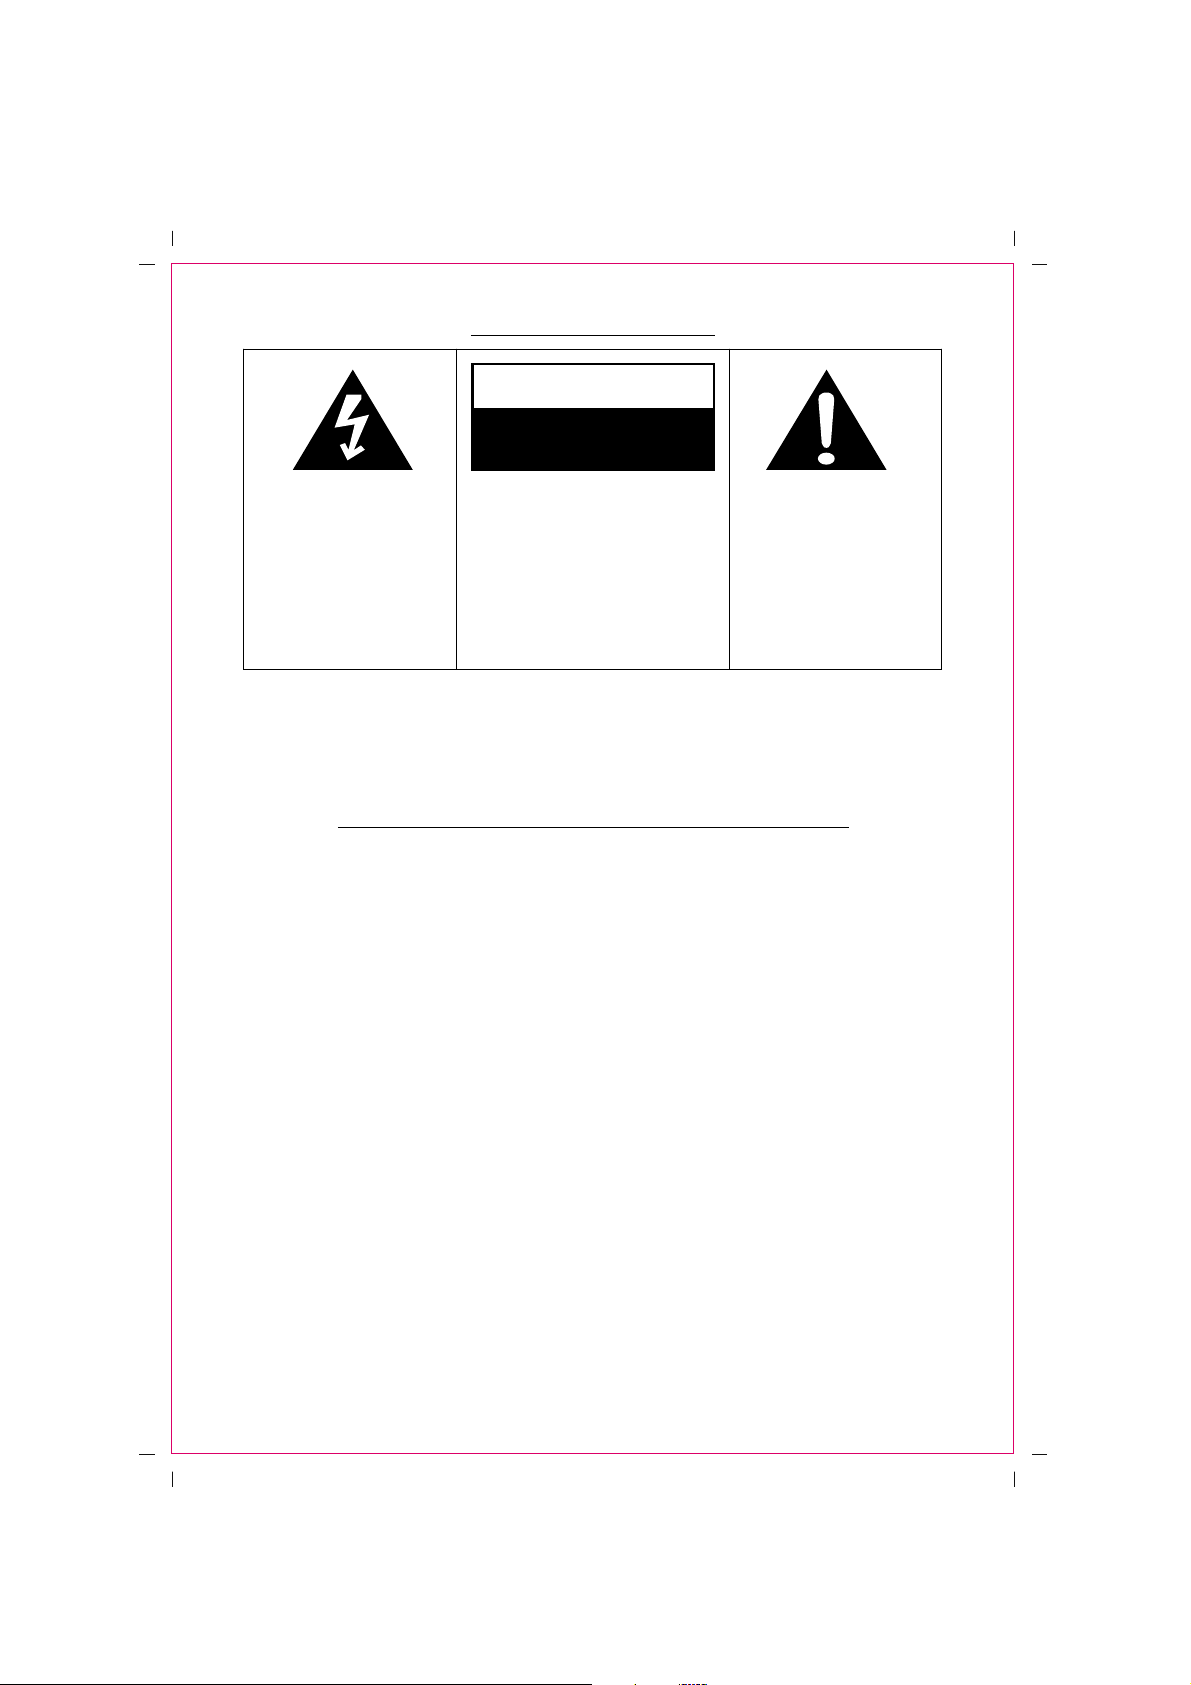
SAFETY INSTRUCTIONS
The exclamation poi nt within
an equi l a tera l tr iangl e is
intended to alert the user of the
presence of important operating
and maintenance (s er vicing)
instruc tions in the liter ature
accompanying the appliance.
Th e L i ght n in g fl a sh wit h
arrow he ad symb ol, with an
equilateral triangle is intended
to alert the user of the presence
of u n ins ulat ed d a nge r ous
vol tage within the produ ct's
en c los ure th at ma y be of
s uf fic i en t m ag n i t u de to
constitut e a risk of electric
shock to persons.
CAUTION: TO REDUCE THE RISK
OF ELECTR IC SHOCK, DO NOT
REMOVE COVER (OR BACK ). NO
US E R S E RVI CEA B L E PA RT S
IN SI DE. RE FER SE RVIC IN G TO
QUALIFIED SERVICE PERSONNEL.
CAUTION
RISK OF ELECTRIC SHOCK
DO NOT OPEN
CAUTION : TO PREVENT ELECTRIC SHOCK, MATCH WIDE BLADE OF PLUG TO WIDE SLOT,
FULLY INSERT.
WARNING : TO REDUCE THE RISK OF FIRE OR ELECTRIC SHOCK, DO NOT EXPOSE THE
APPLIANCE TO RAIN OR MOISTURE.
1. Read ins tructions-All the safety and ope rating instructions should be read before the app lianc e is
operated.
2. Retain instructions-The safety and operating instruction s should be reta ined for future reference.
3. Head Warnings-All warnings and cautions on the appliance and in the operating instructions shou ld
be adhered to.
4. Fol low instructions-All operating and use instructions sh ould be followed.
5. Water and Moisture-The appliance should not be us ed ne ar water, e.g. near a bathtub, washbowl,
kitchen sin k, laundry tub, in a wet basement, or near a swimming pool or the like.
6. Wall or Ceiling Mounting-The appliance should not be mounted to a wall or ceiling.
7. Ventilation-The appliance shou ld be situated so that its location or position does not interfere with its
proper ventilation. For example, the ap pliance should not be situated on a be d, sofa, rug or similar
surface that may bloc k the ventilation openings, or placed in a built-in installation, such as a bookcase
or cabinet, that may impede the flow of air through the ventilation openings.
8. he at-The appliance should be situa ted away from nea t sources such as radiators, heat registers, stoves,
or other ap pliances (including amplifiers) that produce heat..
9. Pow er So urces-The product should be operated only with the type of power supply indicated on the
marking labe l. If you are not sure of the type of power supply to your home, consu lt you r product
dealer or local power company. For products intended to operate from battery power, or other sources,
refer to the oper ation instructions.
10.Grounding Polarization -This produc t may be equipped with a polarized alternating current line plug
(a plug having one blade wider than the other). This plug will fit into the pow er outlet only one way
this is a safety feature. If you are unable to insert the plug fully into the outlet, try reversing the plug.
If the plug should still fail to fit, contact your electrician to replace you r obsolete outlet. Do not defeat
the safety purpos e of the polarized plug.
11.Power-Cord Protection-Pow er supply cords should be routed so that they are not likely to be walked
on or pinched by items placed upon or against them, paying particular attention to cords at plugs,
convenience receptacles, and the point where they exit from the appliance.
SAFETY INSTRUCTIONS
THESE IMPORTANT SAF ETY INSTRUCTIONS ARE INCLUDED ,
AS APPLICABLE TO THE APPLIANCE, CONVEYI NG TO THE
USER THE INFO RMATION ITEMIZED BELOW
Page 3

RCD739 (Eng.)(A5)
- 2 -
12. Cleaning-The appliance shou ld be cleaned on ly as recommended by the manufacturer.
13. Nonuse periods-The power cord of the appliance should be unplugge d from the outlet when left
when left unused for a long period of time.
14. Object and Liquid Entry-Care should be taken so that objects do not fall and liquids are not spilled
into the product case throug h product openings.
15. Damage Req uiring Service-Unplug this product from the wall outlet and take it to qualified service
personnel under the following cond itions .
a) When the power-supply cor d or plug is damaged.
b) If liquid has been spilled into, or objects have fallen into the produc t.
c) If the product has been expos ed to rain or water.
d) If the p roduct does not operate when used according to the operating instructions.
Adjust only those controls that are covered by the operating instruc tions as an improper
adjustment of other co ntrols may interfere with the product's normal operation.
e) If the product has been dropped or damaged in any way.
f) When the product exhibits a distinct change in performance-this indicates a need for service.
16. Servicing-The user should not attempt to service the product beyond that de scribed in the operating
instruction. All servicing should be referred to qua lified service personnel.
17. Power Lines-An outside antenna system should not be located in the vicinity of overhead power
lines, or o ther electric light or power circuits, or where it can fall into such power lines or circuits.
When installing an outside antenn a sys tem, extreme care should be taken to keep from touching
power lines or circuits as contact with them might be fatal.
18. If an outside antenna is connected to the receiver, be sure the antenna system is grounded so as to
provide some protection against voltage surges and built up static.
19. Cleaning-Unplug this produc t from the wall outlet before cleaning. Do not use liquid cleaners or
aerosol cleaners. Use a damp cloth for cleaning.
20. Lightning-For added protection for this product during a lightning storm, o r when it is left
unattended and un used for long periods of time, unplug it from the wall outlet and disconnect the
antenna or cable system. This will prevent damage to the produc t due to lightning and power-line
surges.
21. Safety Che ck-Up on completion of any service or repairs to this product, ask the service technician
to perform safety checks to determine that the product is in prop er operation condition .
22. Overloading-Do not over load wall outlets, extension cords , or integral convenience receptacles as
this can result in a risk of fir or electric shock.
CAUTION
Invisible laser radiation will be emitted when the product is open and interlocks are defeated.
Do not defeat the safety interlocks.
GRAPHIC SYMBOLS WITH SUPPLEMENTARY MARKINGS ARE LOCATED ON THE
BOTTOM OF THE UNIT.
USE OF CONTROLS, ADJUSTMENTS, OR PERFORMANCE PROCED URE HEREIN MAY
RESULT IN HAZARDOUS RADIATION EXPOSURE.
Page 4

RCD739 (Eng.)(A5)
- 3 -
MOUNTING LOCATION
1
3
5
1
3
2
4
6
2
4
Page 5

RCD739 (Eng.)(A5)
- 4 -
LOCATION OF CONTROLS
23 24
1. CD Door
2. CD Door Open Button
3. Speaker
4. Repeat Button
5. Volume Control Knob
6. Program Button
7. Random Button
8. SKIP (FAST-FORWARD) butto n
9. Function Switch (CD, AM, FM )
10. Alarm ON/OFF Button
11. Minute Set Button
12. LCD Display (CD, Clock and Frequency)
13. Stereo LED Indicator
14. Hour Set Button
15. Alarm Set Button
16. Selector Switch (ON/OFF/AUTO)
17. Time Set Button
18. SKIP (REWIND) button
19. Tuning Control Knob
20. CD Play/Pause Button
21. CD Stop Button
22. Remote Sensor
23. Headph one Jack
24. DC Input Jack
19
1
3
2
4
5
6
7
8
9
10
11
12
13
14
15
16
17
18
20
21
22
Page 6

6
7
1
2
3
4
5
RCD739 (Eng.)(A5)
- 5 -
REMOTE CONTROL
1. PLAY Button
2. SKIP (FAST-FORWARD) butto n
3. Program Button
4. Repeat Button
5. Random Button
6. STOP Button
7. SKIP (REWIND) button
AC OPERATION
To operate the unit using AC power , connect a 9V AC adapt or (include d) to an AC outlet
having 230V AC.
CAUTION: W
hen not using AC power, disconnect the AC adapter from the wall outlet by pulling the
plug (not the cord). Do not touch the AC ad apter with wet hands and plug fully inserted without
exposing any part of the blade.
HEADPHONE JACK
This unit will ac cept stereo headphones with a Ø 3.5mm plug. Before con necting the head phones set the
volume to minimum level as not to damage your ears or the head phones . Con nect the headphones to the
headphones jack. The speakers will be automatically disconnected.
Warning: Prolonged exposur e to high sound levels may permanently damage your hearing. You may not
hear some warning soun d while wearing these headphones.
VOLUME CONTROL
Adjust the VOLUME co ntrol to the desired level.
RADIO SECTION
LISTENING TO THE RADIO
1. Slide SELECTOR Switch to "ON" position.
2. Slide FUNCTION Switch to select AM or FM position
3. Rotate the Tuning Control Knob to your desired Radio station.
4. To turn off Radio, Slide SELECTOR switch to "OFF" pos ition to turn off the unit.
For better reception,
This unit has a built-in antenna for AM/FM, Locate the unit where you can obtain the best reception.
CLOCK SECTION
CLOCK SETTING
Press and hold Time./SET button to set the clock
Press Hour or Min button respectively
Note: In radio mode, the frequency will appea r at the location where time appe ars. Press and hold the
Time/Se t button to display the current time; Press and hold the AL./Set button to display the current
alarm time.
Page 7

RCD739 (Eng.)(A5)
- 6 -
ALARM TIME SETTING
1. Slide SELECTOR switch to "OFF" or "AUTO" position.
2. Press and hold Al. SET button to set the Alarm time
3. Press Hour or Min button respectively.
4. Turn on the alarm func tion by pressing AL.ON/OFF but ton till the alarm Icon appears
Note. While alarm time is on, it will alarm for 3 minutes. To turn off the alarm, press the AL.ON/OFF
button once.
Wake up by Buzzer
1. After set the desired alarm time. And press the AL.ON /OFF button till the alarm icon appears
2. Slide the SELECTOR switch to "OFF" position.
Wake up by CD or Radio
1. Slide SELECTOR switch to "AUTO" position .
2. Set your desired alarm time.
3. Turn on the alarm func tion by pressing AL.ON/OFF but ton till the alarm Icon appears
4. Slide the SELECTOR switch to "AUTO" position.
5. Slide the Function Switch to CD, AM or FM position.
When the alarm time is on, CD & RADIO(AM/FM) will be automatically played.
CD SECTION
PLAYING A CD
1. Press the Open butto n of CD Door wher e remarked "Open" to open the CD Door.
2. Insert a CD with the labe l facing upw ard.
3. Close the CD compartment by pressing the upper corner of CD Door.
4. Slide the FUNCTION switch to CD position
5. Slide the SELECTOR switch to "ON" position to turn on the unit.
The CD will rotate for a while and then stop.
6. Press PLAY/PAUSE button to start CD playbac k from the first track.
7. Press onc e more PLAY/PAUSE button to momentarily pause, Icon " " will flash. Press again
PLAY/PAUSE button to resume to playback
8. To stop the playb ack, Press STOP button.
TRACK SEARCH
Press the S KIP/S EARCH butto n during play to skip to the desired track.
Press the " F.FWD" button to skip to the next track on the disc.
Press the " REW" button to skip to the beginning of the current track
Press the " REW" button twice or more to skip to previous track.
FORWARD/REVESE SEARCH
Press and hold the For ward or Back ward SKIP/S EARCH butto n during play to scan the disc at high speed .
When the desired section of the disc if foun d, release the Button and normal play will resum e.
"F.FWD" -------------------Forward
"REW" -------------------Backward
Press and hold the "F.FWD" button while playing to scan the current track forward at high speed.
Press and hold the "REW" button while playing to scan the current track backward at high spee d.
Page 8

RCD739 (Eng.)(A5)
- 7 -
PROGRAMMED PLAYBACK
Up to 20 tracks can be progr ammed in to play in any desired sequence.
1. Press the Open button of CD Door where rema rked "Open" to o pen the CD Door.
2. Insert a CD with the label side facing upwar d.
3. Close the CD compartment by pressing the upper corner of CD Door.
4. Slide the FUNCTION Switch to CD position
5. Slide the SELECTOR Switch to ON position to turn on the uni t.
The CD will rotate for a while and then stop.
6. Press PROG button until "PROG 01" flashes in display.
7. Press SKIP Forward or SKIP Backward but ton to select a desired track to be memorized.
8. Press PROG button to program the track.
9. Repeat steps 7 and 8 to program tracks.
10. Press PLAY/PAUSE button to start playing.
To cancel program play, Press STOP button two times.
REPEAT PLAY
To Repeat Sing le Track
Press REPEAT button on the remote control while the track you want to repeat is playing. The "REPEAT"
flashing will appear in display.
------Press REPEAT two times on the remote control.
------Press REPEAT button on the remote control twice during play.
------To repeat another track, Press REW or FWD SKIP button.
------To cancel repea t play, Press REPEAT button two times.
To Repeat all the tracks
Press REPEAT button twice during play. The "REPEAT" indicator will appear in display.
------All tracks will be played through in sequence and then the sequence will be repeated continu ously.
------To cancel repea t play, press REPEAT button one time.
Random play
Press stop button to enter into stop mode, press Random button once then press play/pause button to
carry out random play, "RANDOM" will appe ar in display.
All tracks on the disc will be played in random order, then will stop.
During rando m playing, To cancel rando m play, press stop button twice.
HANDLING DISCS
This produc t is designed to play CDs b earing the DISC Identification logo.
CD not carrying this logo may not conform to the CD standard and may not play pro perly.
Dirty, scratched, or warped discs may cause skipping or noise.
------Handle the CD only by the edges.
------To keep the CD clean , do not touch the surface of the disc.
------Return CDs to their o riginal cases after use to avoid serious scratches that could cause the laser
pickup to skip.
------Do not exp ose CDs to direc t sunlight, high humidity or high temperatures for extended periods of
time, as prolonge d exposure to high temperatures can warp CDs
------Do not apply pap er or write anything on either side of a CD. Sharp writing instruments or the
inks in some felt-tip pens, may damage the surface of a CD
TO Clean CDs:
------Fingerprints should be wipe d from the surface of the CD with a soft cloth. Unlike conventional
records, CDs have no grooves to collect dust and microscopic deb ris, so ge ntly wiping the CDs
with a cloth removes most of the p articles.
------Wipe in a straight motion from the inside to the outside of the CD.
------Never use che micals (i.e. record cleaning sprays, anti-static sprays, benzene or thinner) to clean
CDs, as damage to the plastic of the CD may result.
Page 9

To clean the CD player :
Dust on the pickup lens can lead to erratic operation and interruption of the soun d during play.
NOTE: Do not touch the surface of the pickup lens. Do not allow any liquids on the inside of the produ ct.
------To clean the pickup lens, open the CD Door and blow the dust off of the pick up lens using a camera
lens blower(available at most camera sto res)
-----To clean the CD player ca binet , use a soft , damp cloth to wipe off the exterior surface.
-----Never use benzene or other strong chemical cleaners ,as these could damage the produ ct's finish.
RCD739 (Eng.)(A5)
- 8 -
TROUBLESHOOTING GUIDE
You experience a problem with this unit check the ch art below before calling of service.
CARE AND MAINTENANCE
CARING FOR COMPACT DISCS
--- To keep the CD clean, hand le it by its edge. Do not touch the surface.
--- Do not stick paper or tape onto the CD
--- Do not expose the CD to direct sunlight or heat source s such as holt air ducts.
Do not leave the CD in a car parked under direct sunligh t.
Cleaning the Unit
--- To prevent fire or shock hazard , disconnect your unit from the AC power source whe n cleaning.
--- The finish on your unit may be cleaned with a dust cloth and cared for as other furniture.
Use caution when cleaning and wiping the plastic parts.
---Mild soap and a damp clo th may be used on the front panel.
IMPORTANCE
To keep up the clock's ope rating, Remember to turn off the unit by sliding the SELECTOR switch A to
AL.OFF position as the clock memory will be lost if you disconnect your unit from the AC power source.
• Reinsert headphone cord into
headphone jack
• Increase the volume
• Try anothe r compact disc
• press FUNCTION SELECTOR
switch to the desired function
SOLUTION
CD Player will
Not turn on
• Wrong ad apter being used
• AC adapter not connected
properly
Disc will n otPlay
• Disc ins erted incorrectly
• Defective compact disc
• CD compartment not closed
• Moisture conde nsationon disc
• Reinsert disc with label side
facing up
• Try anothe r compact disc
• Close CD compartment
• Wipe disc with soft cloth
Erratic CDplayback
No sound
Noise or So und
distorted on radio
• Dirty or defective disc • Clean or replace disc
• Headphone plug not inserted
property
• Volume con trol set to minimum
• Defective compact disc
• FUNCTION is not set to the
• desired position
• Station not tuned properly for FM • Retune F M broa dcast station
SYMPTOM CAUSE
 Loading...