

Page 1

MP3 PLAYER / LECTEUR DE MP3
MPS533
USER'S MANUAL / MODE B'EMPLOI
ENGLISH
FRENCH
Page 2
- 4 -
ENGLISH
Precautions 6
Notice 6
Earphone Information 7
Operating Conditions 7
Accessories 8
Main Unit Interface 9
LCD Illustration 10
Battery (Optional) Information 11
Function Summary 12
General Functions 13
Menu Selection 13
Mode Selection 13
Lock Button 15
Playing Music 16
General Operation 16
Sound Effect Mode 17
Lyric Display 19
Play Mode 19
A-B Repeat 21
CONTENTS
Page 3
Page 4
- 6 -
ENGLISH
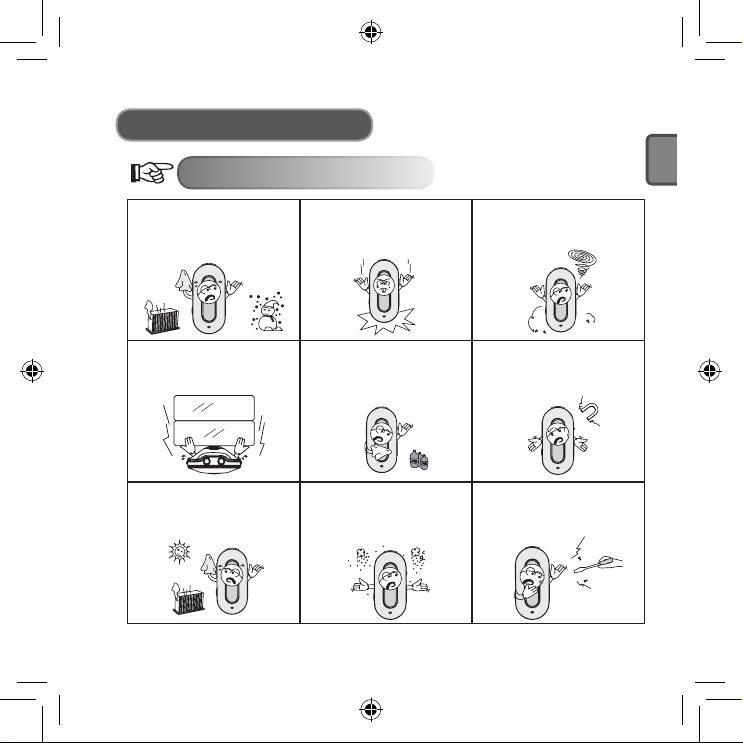
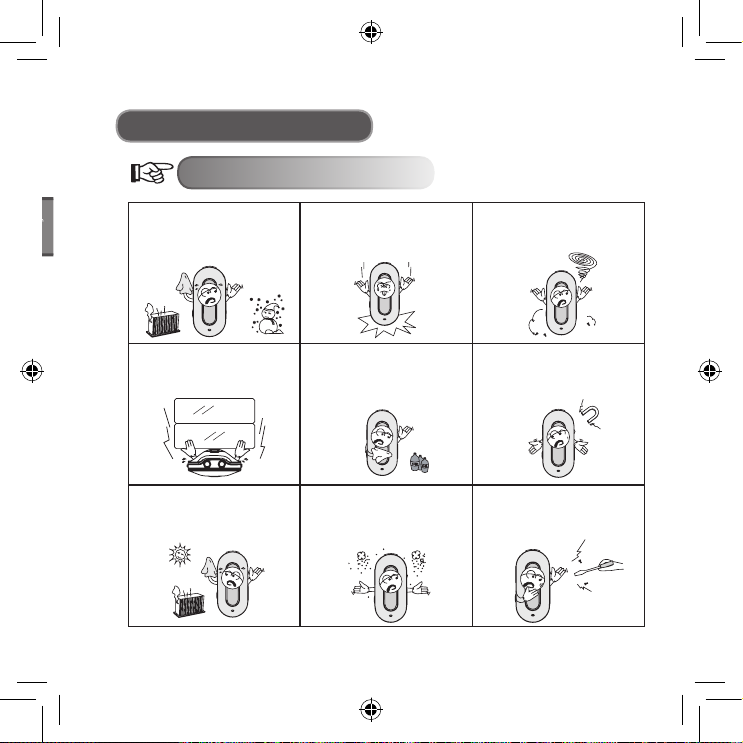
Precautions
Notice
Do not leave the player in a
place subject to moisture or
with temperatures higher than
40ºC or lower than -5ºC.
Avoid heavily impacting the
player.
Prevent other objects entering
into the player.
Do not place heavy articles on
top of the player.
Keep away from strong light
or calorific instruments.
Do not expose the player to
dusty environments.
Keep away from benzene,
thinner, acid and other
chemicals.
Keep away from magnetic
objects.
Do not break, fix or attempt
to dissemble the player by
yourself.
Page 5

ENGLISH
- 7 -
Precautions
Earphone Information
● Protect your hearing
1. Always select a suitable listening volume.
2. Do not turn the volume up too high.
3. Place the earphones correctly, L stands for left and R stands for right.
It will affect the timbre and dimensional sound if you wear the earphones the
wrong way around.
4. To avoid interference, please keep away from electromagnetic fields.
● Transportation safety
1. Do not listen to music when driving.
2. Do not listen to music when walking, running or during other potentially
hazardous activities.
Operating Conditions
● External temperature: 5-30ºC
● Moisture: 10-70%
Page 6
- 8 -
ENGLISH
Manual
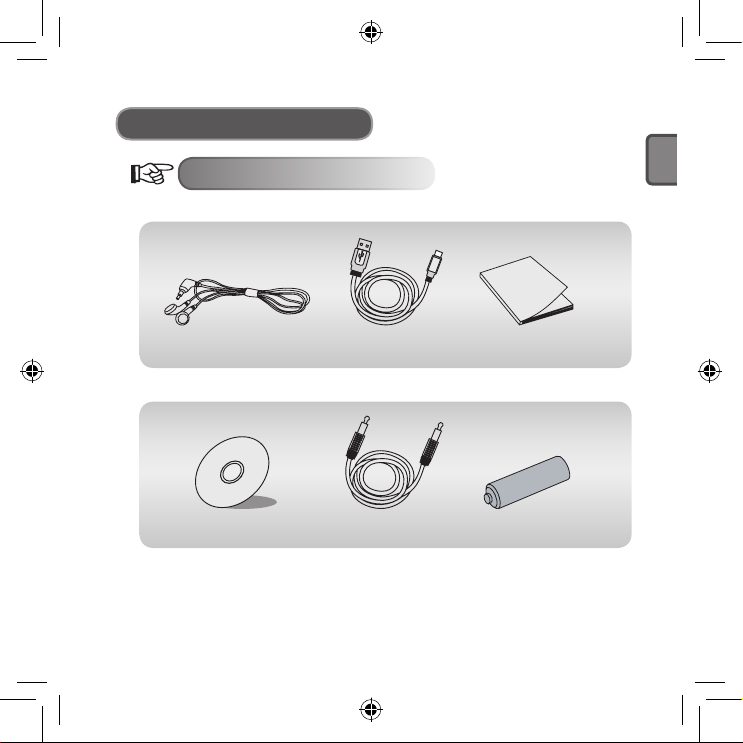
Accessories
Accessories
Earphones USB Cable Manual
Drive disc Line in Cable Alkaline Battery (Optional)
Page 7
ENGLISH
- 9 -
14
1
10
2 8
1311 12
3 4 5 6 7
9
8
9
10
11
12
13
14
1
3
4
5
6
7
2
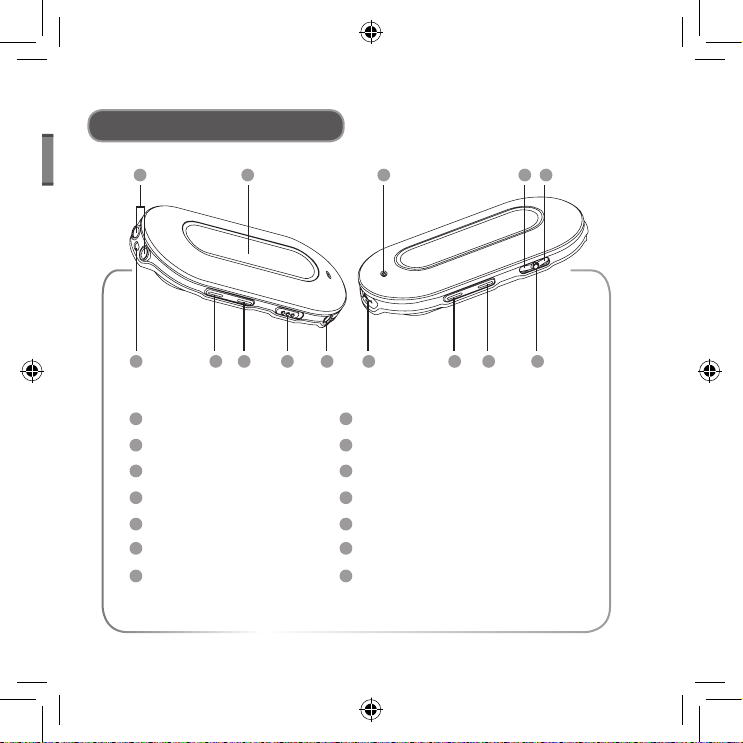
Main Unit Interface
Earphone jacks
LCD screen
Earphone line hole
Volume decrease
Volume increase
Hold button
Line in jack
Built in microphone
Skip track/forward
Previous track/backward
USB port
Power on/play/confirm/power off
A-B button
Menu button
Page 8
- 10 -
ENGLISH
Heal the world.mp3
1 2 3 4 5 6 7
8
10
9
1
2
3
4
5
6
7
8
9
10
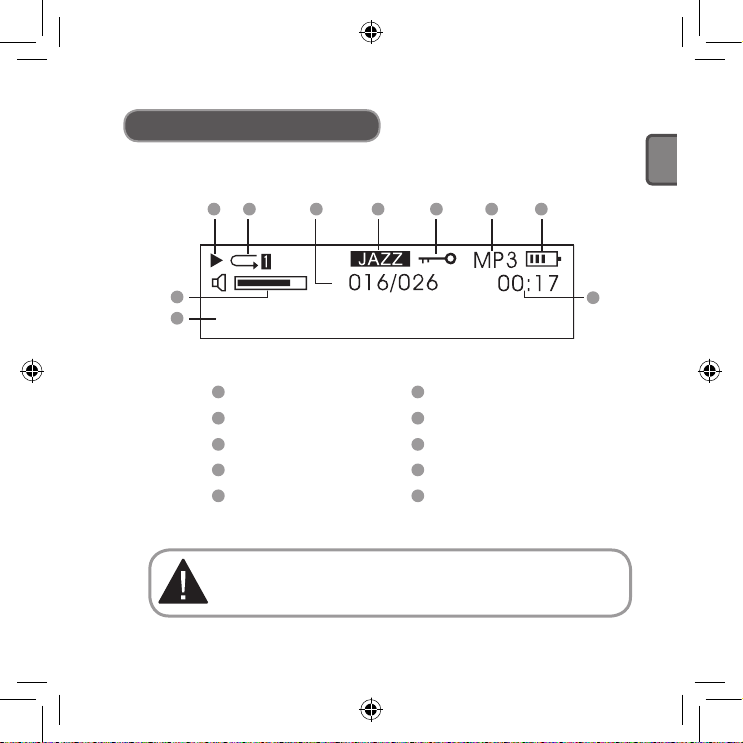
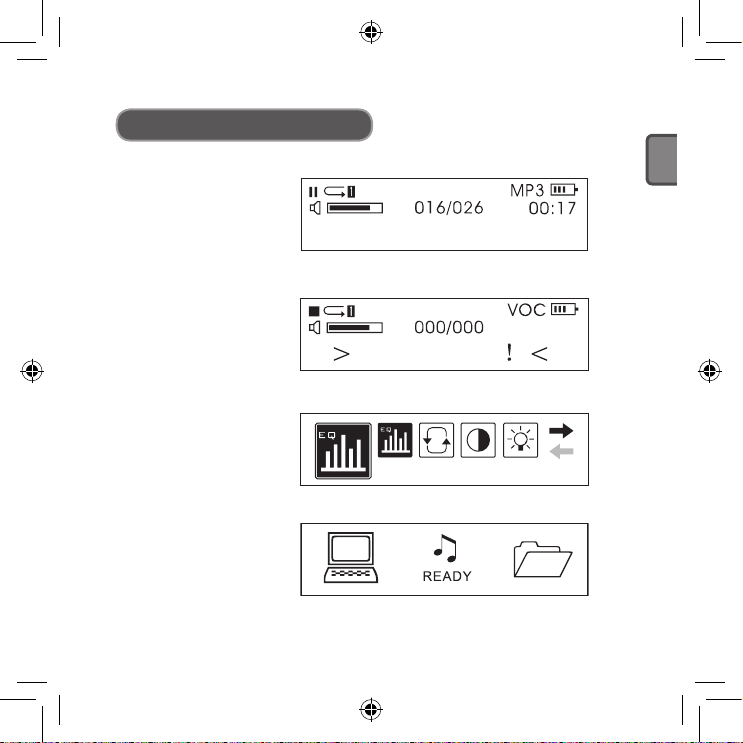
LCD Illustration
Play
Play mode
Current music
Sound effect mode
Hold
File format
Battery status
Volume
Play time
Music title
Please pay attention to the display of the LCD screen, it helps to
operate the player correctly.
Page 9
ENGLISH
- 11 -
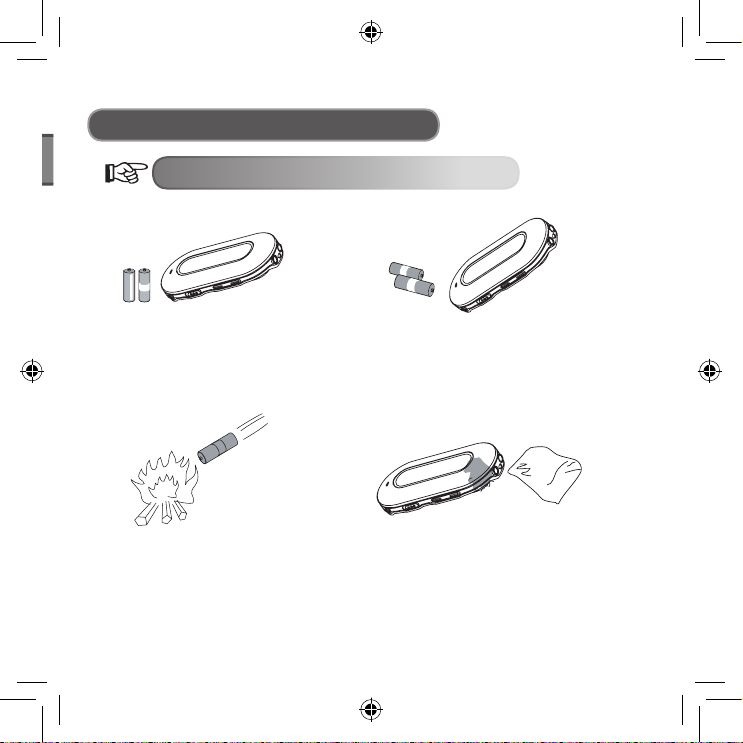
Battery (Optional) Information
Battery (Optional) Information
Do not use defective batteries,
these can provide an unstable
electric current.
Do not attempt to recharge or heat
up batteries. Batteries should be
disposed of in an environmentally
friendly manner.
Remove the battery (optional)
when you are not using the device
for a prolonged period of time.
Should fluid escape from the
battery (optional), wipe it away
immediately to protect the player.
Page 10

- 12 -
ENGLISH
Function Summary
● Supports multi-audio formats
For example: MP1, MP2, MP3, WMA and so on.
● No USB driver required
Operated directly through “removable disc” of “my computer”.
It does not require installation of any driver in WIN2000 or above.
● Record/ Repeat function
The MP3 Player can record voice by microphone and be saved as a voice file
in WAV format. Sections can be repeated for language learning.
● 5 sound effect equalizers
Normal, Rock, Jazz, Classical, Pop.
● Multi-play modes
Normal, Repeat all, Repeat one, Random, Random all, Preview.
● Power OFF timer
Preserves battery (optional) life.
● Simple menu
Easy to use menu.
Page 11
ENGLISH
- 13 -
Play music
General Functions
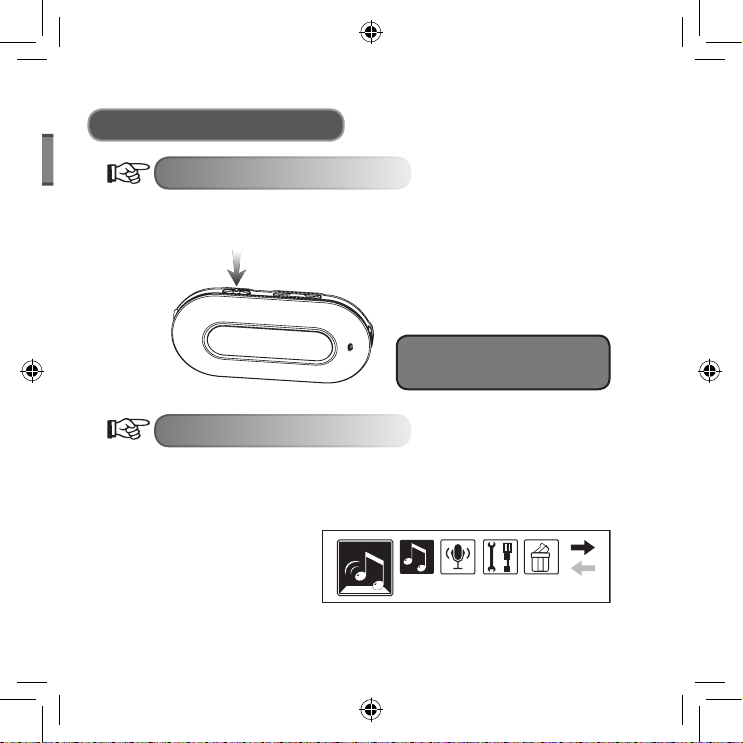
Menu Selection
The menu can be divided into main menu and submenu. Press the Menu button
to open the main menu. The menu can be selected by pulling Next/Last Music
button.
Press Menu button to enter the main menu.
Notice: The reference “press Menu
button” later in this manual operates
the same as showed in the diagram.
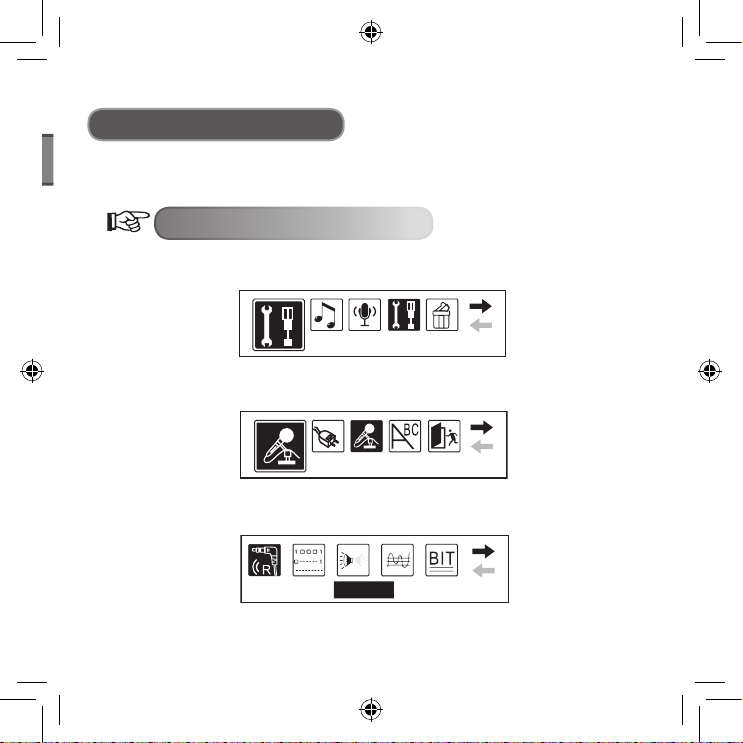
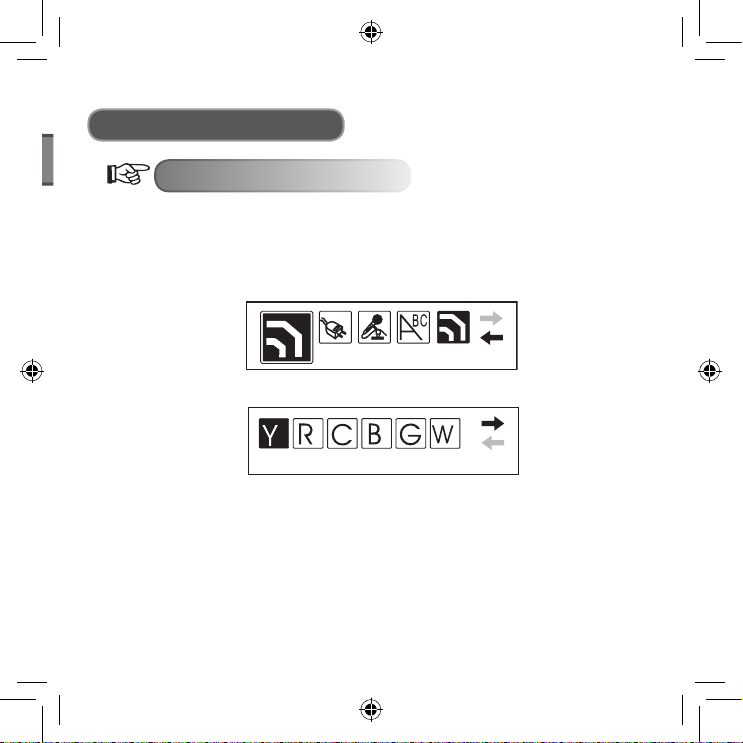
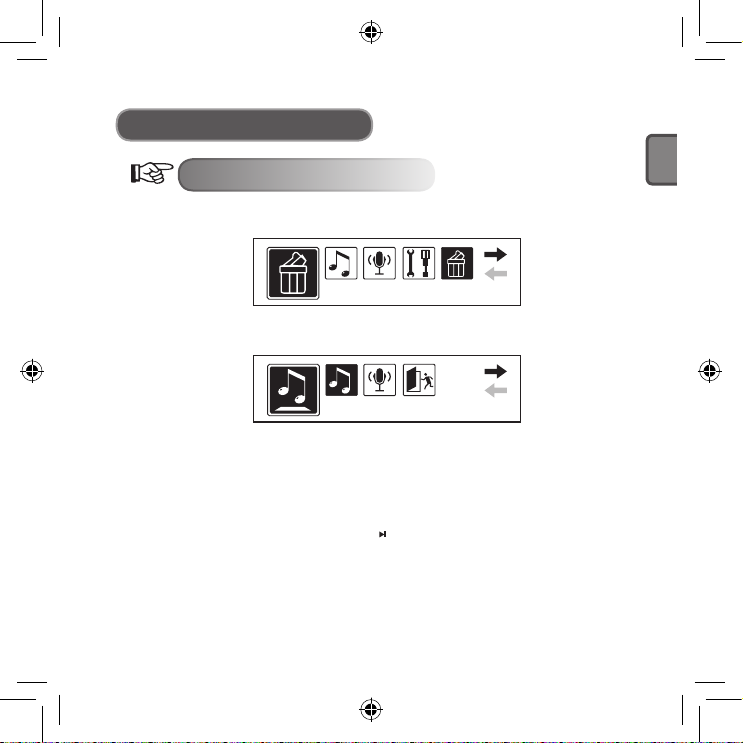
Different modes can be selected from the main menu. LCD screen displays as
follows.
● Main Menu (press the Menu
button)
Mode Selection
Page 12
- 14 -
ENGLISH
Heal the world.mp3
NO VOC FILES
EQ Set
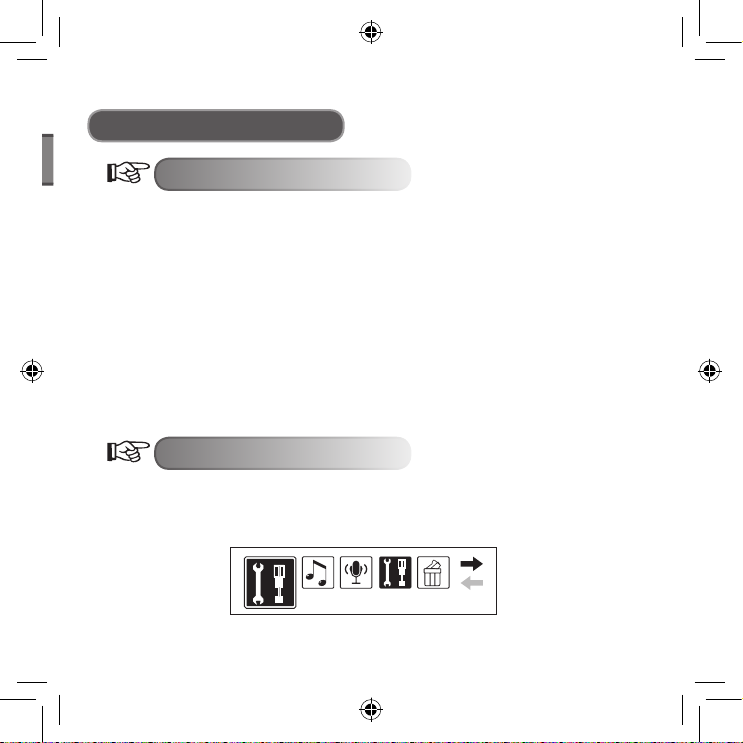
General Functions
● Play mode
● Record mode
● Interface setting
● USB mode
(connecting with PC)
Page 13
ENGLISH
- 15 -
Heal the worl
Locked
Heal the world.mp3
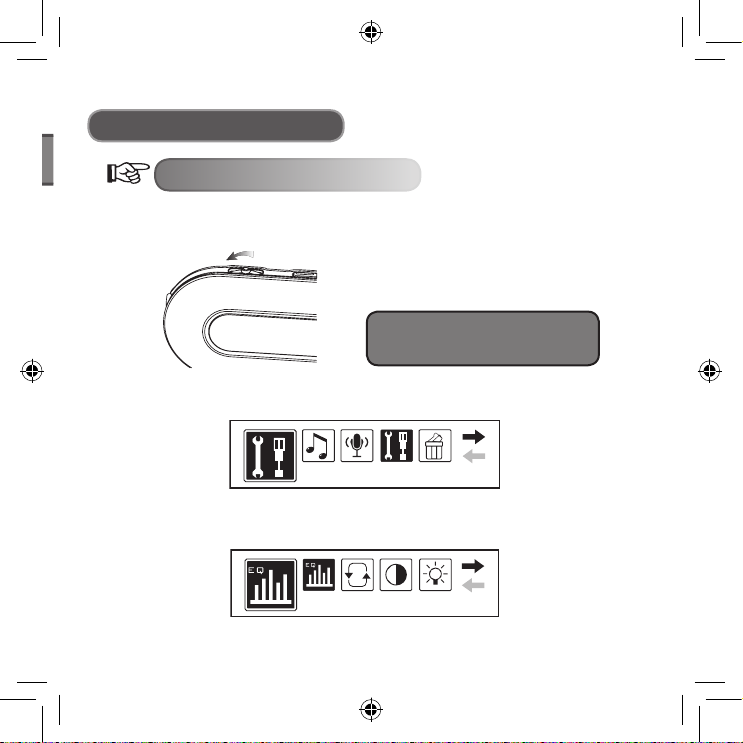
General Functions
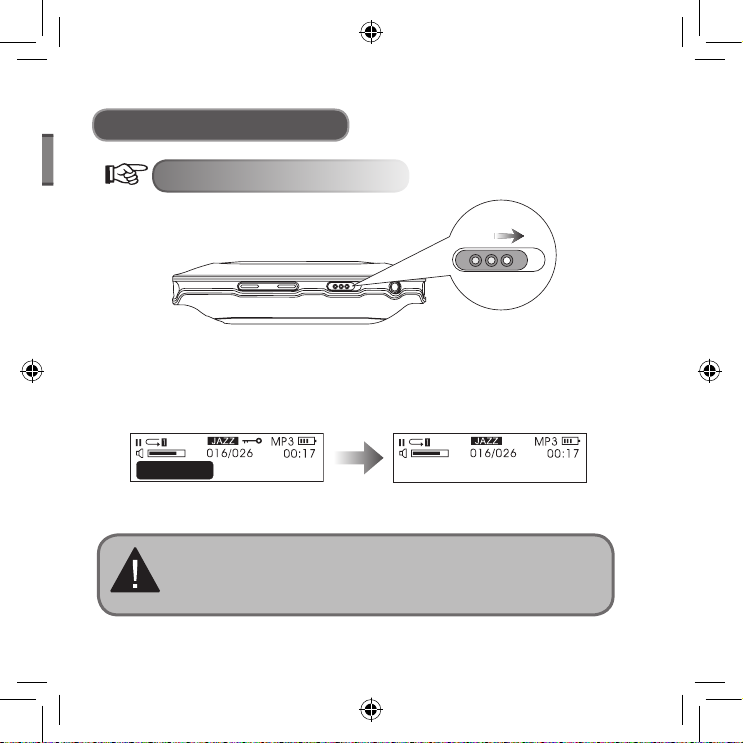
Lock Button
In any status, push the HOLD button in the direction indicated by the arrow to
lock the buttons.
When the buttons are locked, the LCD screen displays as follows:
1. When buttons are locked, the buttons on the player will lose their functionality
(When the player is OFF, it cannot be turned ON if the buttons are locked).
2. When buttons are locked, data cannot be transferred via the USB connection.
Data can only be put in when the buttons are unlocked.
When buttons are locked When buttons are unlocked
Page 14
- 16 -
ENGLISH
Playing Music
General Operation
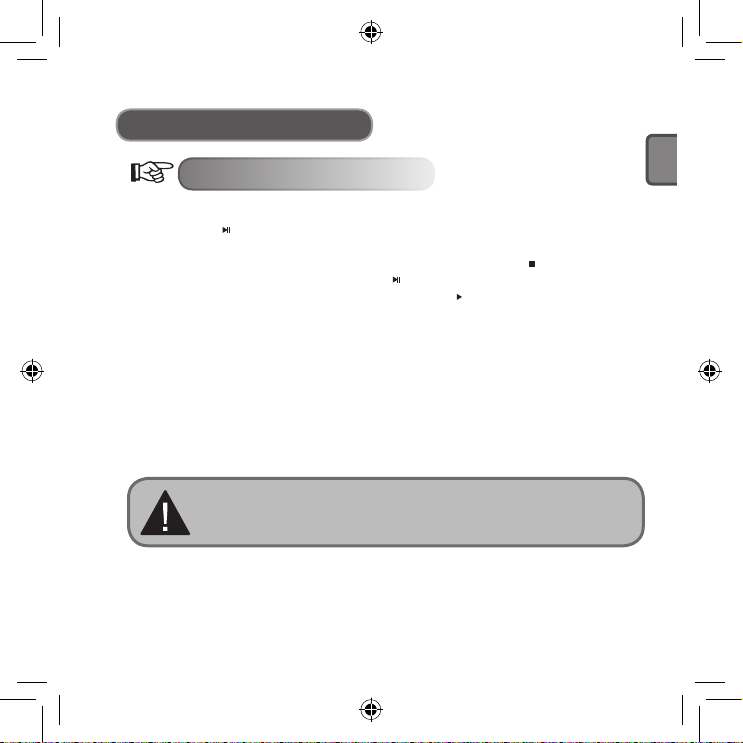
● Power ON / Play
Press the “ “ button and the player will turn ON after 3 seconds. In the Music
mode, the player reads the default music automatically, but does not start
playing. The left upper corner of LCD screen will display the “ “ symbol.
The player is in stop status. Press the “ “ button again to start playing, the left
upper corner of the LCD screen will display the “ “ symbol and its music
type, for example, MP3.
● Music Selection
Previous music button: select previous music. Holding, backward.
Next music button: select next music. Holding, forward.
● Volume Control
Volume + : Volume increase
Volume - : Volume decrease
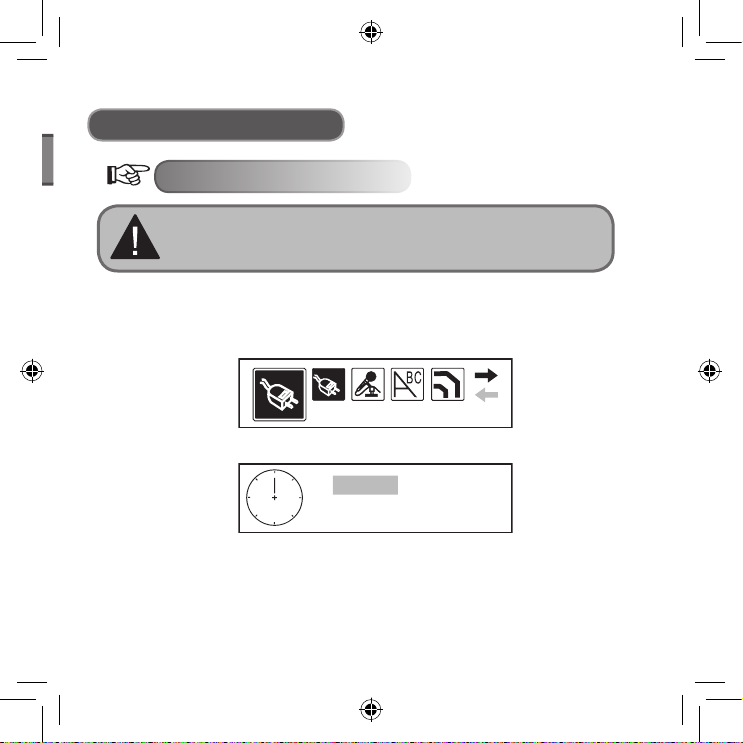
In the stop status, the player will shut OFF automatically after the time
set in “Setting/Power set “ has elapsed.
Page 15
ENGLISH
- 17 -
Setting
EQ Set
Playing Music
Sound Effect Mode
1. Press the Menu button to enter the main menu, pull the Next Music button to
select “Setting”.
Pull the Next Music button to select
Notice: The reference “pull Next Music
button” later in this manual operates the
same as shown in this diagram.
2. Press the Menu button to confirm. Pull the Next Music button to select “EQ
Set”.
The LCD screen displays as follows (the selected one displays black)
Page 16
- 18 -
ENGLISH
JAZZ
Heal the world.mp3
Playing Music
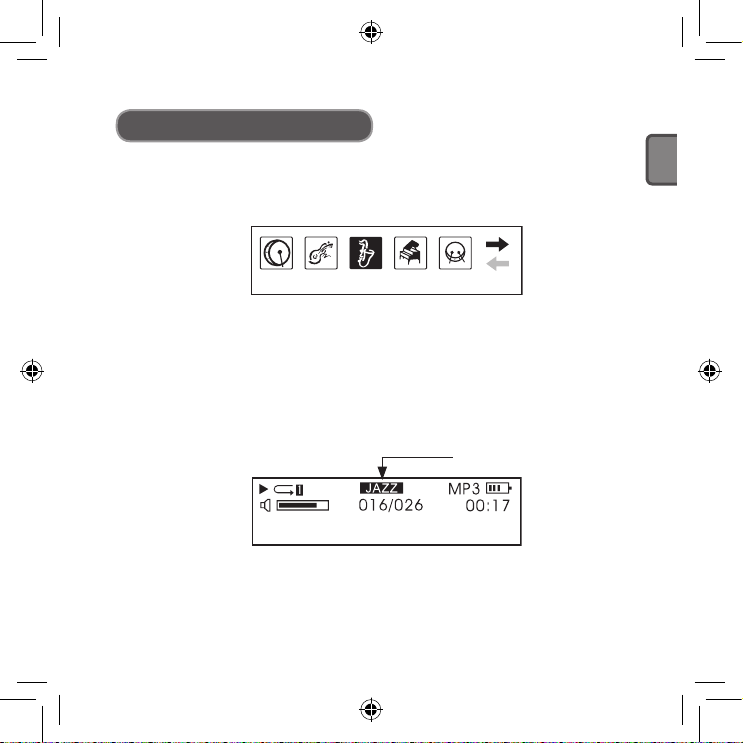
3. Press the Menu button to confirm. The sound effects will switch by pulling the
Next Music button. Press the Menu button to confirm the sound effect you
need. The LCD screen displays as follows:
● There are 5 sound effects to select from.
They are Normal, Rock, Jazz,Classical, Pop.
4. After sound effect selection, the menu will return to the previous menu
automatically. Pull the Next Music button; select “Exit” to return to the playing
interface (the player will also return to playing interface automatically if there
are no operations for 10 seconds). At that time, the LCD screen will display the
selected sound effect mode as follows:
display sound effect mode
● The LCD screen displays sound effects:
NORMAL, ROCK, JAZZ, CLASSICAL, POP
Page 17
ENGLISH
- 19 -
Setting
Playing Music
Lyric Display
The player supports “LRC” file. This enables music files and lyrics to be played
and displayed synchronously.
● How can “Lyrics be displayed”?
Put the lyric file in the same directory with the music file. The lyric file must
have the same name as the music file.
For example: if the file of the music title is “Yesterday once more.mp3”, the file
of Lyric should be “Yesterday once more.Irc”.
● How to know the existence of Lyric files.
The player examines for Lyric files automatically. If there is a Lyric file, the
music file and Lyric file are display synchronously.
Play Mode
1. Press the Menu button to enter the main menu. Pull the Next Music button to
select “Setting”. The LCD screen displays as follows (the selected one displays
black).
Page 18

- 20 -
ENGLISH
Play mode
[Normal]
Playing Music
2. Press the Menu button to confirm. Pull the Next Music button to select “Play
mode”. The LCD screen displays as follows:
3. Press the Menu button to confirm. The play mode will switch by pulling the Next
Music button. Press the Menu button to confirm the play mode you need.
The LCD screen displays as follows:
● There are 6 play modes for you to select from.
They are:
Normal
Repeat one
Random all
Repeat all
Random
Preview
Page 19
ENGLISH
- 21 -
Heal the world.mp3
Heal the world.mp3
Playing Music
4. After selecting play mode, the menu will return to the previous menu
automatically. Pull the Next Music button and select “Exit” to return to the
playing interface (the player will also return to the playing interface
automatically if no operations are made for 10 seconds). At this time, the LCD
screen will display the selected play mode as follows:
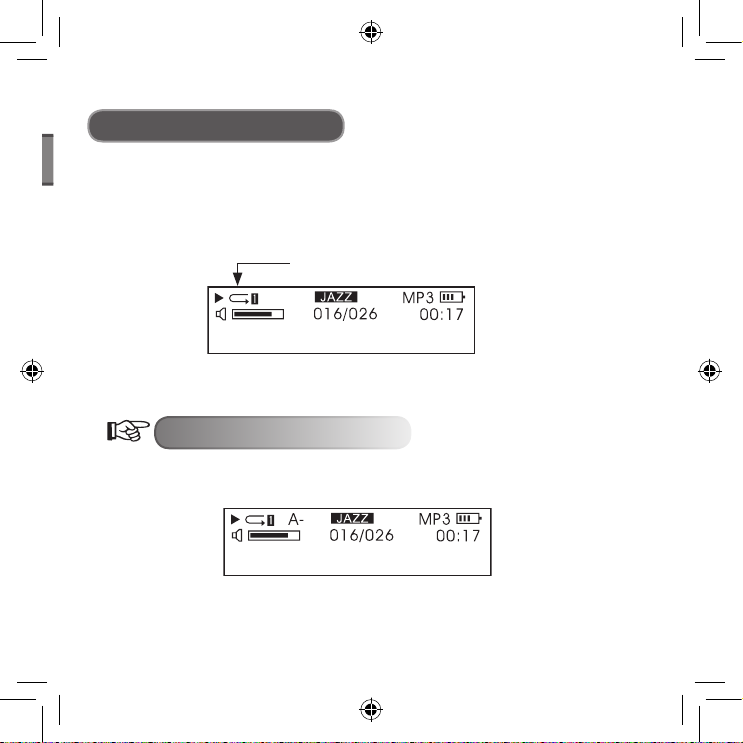
● In stop status, pressing the A-B button can also switch the play mode directly.
Display play mode
A-B Repeat
1. When playing music, press the A-B button to select the start point.
The LCD screen displays as follows:
Page 20
- 22 -
ENGLISH
Heal the world.mp3
Playing Music
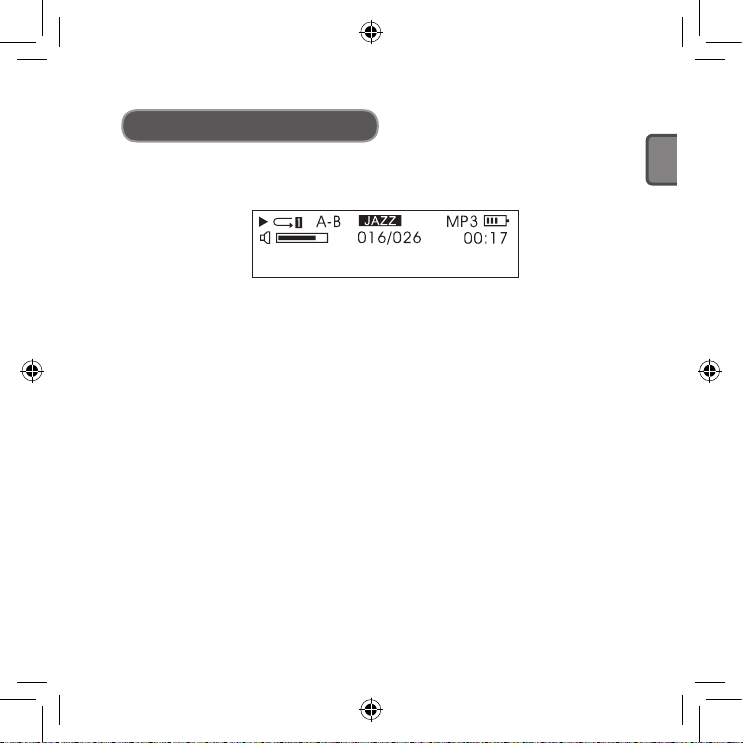
2. Press the A-B button again to select the end point. The LCD screen displays
as follows:
3. Press the Play button and the player will play the set repeat period.
Press the A-B button to cancel the repeat function.
4. Repeat the steps above to reset Repeat.
● The repeat of a Recorded file operates the same as in the above
procedure.
Page 21
ENGLISH
- 23 -
Setting
Record set
[Source] MIC Line in
Recording
The player has a record function, it can transfer recorded voice files to
.WMA file.
Recording Settings
1. Press the Menu button to enter the main menu. Pull the Next Music button to
select “Setting”. The LCD screen displays as follows:
2. Press the Menu button to confirm. Pull the Next Music button to select “Record
Set”. The LCD screen displays as follows:
3. Press “Record Set” to set up source, sample, encoder, channel and so on. The
LCD screen displays as follows:
Page 22
- 24 -
ENGLISH
[Source] MIC Line in
Voice
NO VOC FILES
Recording
4. Pull the Next Music button to switch among options. Press the Menu button to
confirm an option. Take “source” as an example, when pressing the Menu
button, “Microphone” will switch to “Line in”. The LCD screen displays as
follows:
Recording Operation
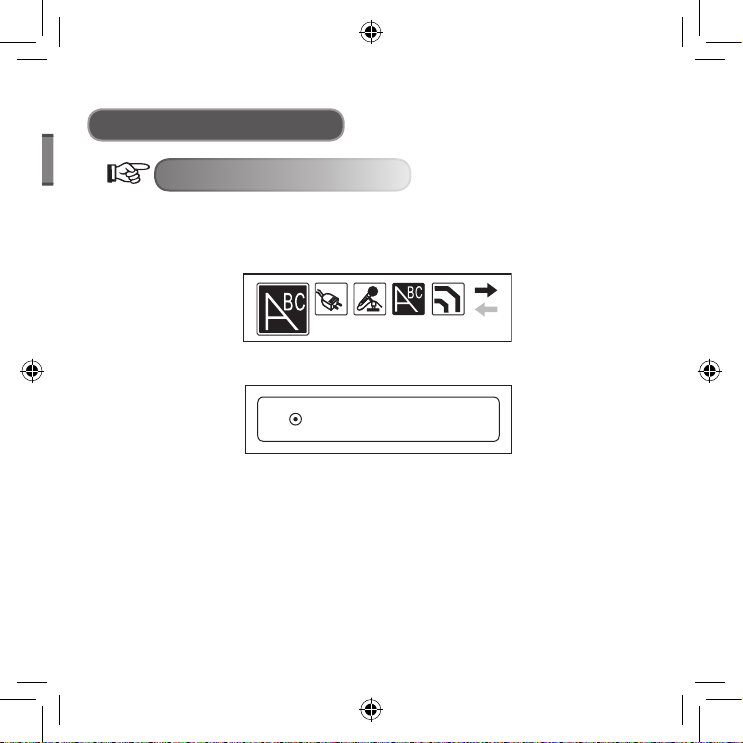
A. Voice Record: Recording External Voice
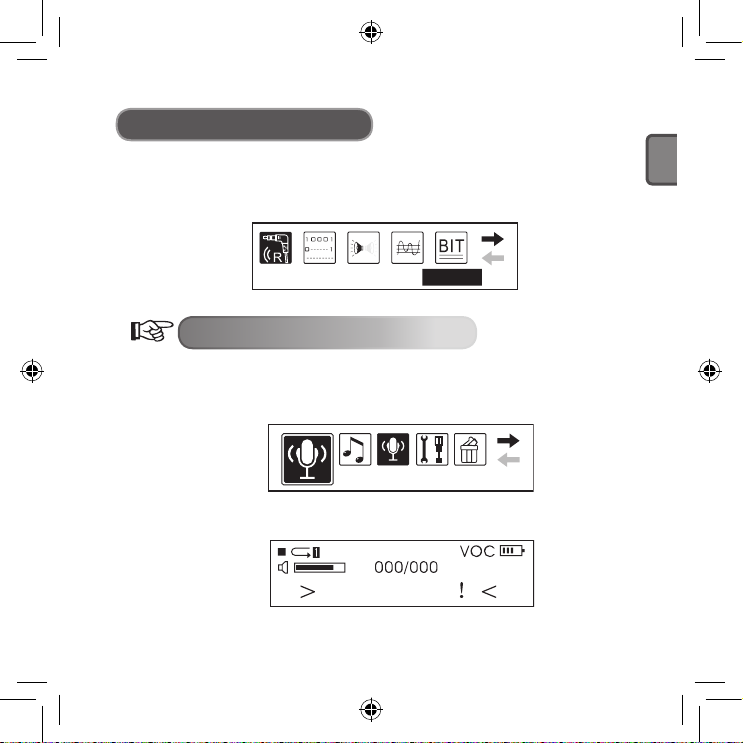
1. Press the Menu button to enter the main menu. Pull the Next Music button to
select “Voice”. The LCD screen displays as follows:
2. Press the Menu button to confirm. The LCD screen displays as follows:
Page 23
ENGLISH
- 25 -
Recording
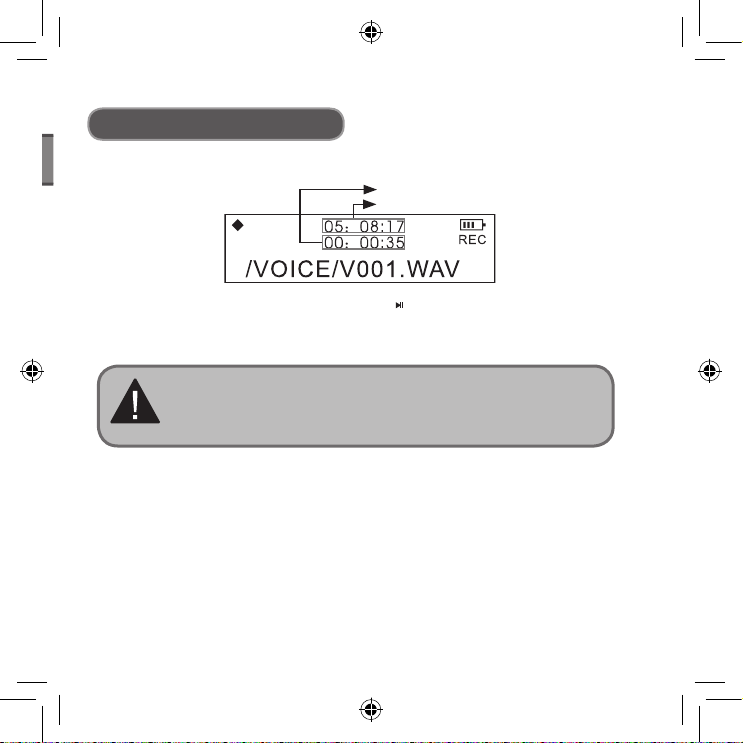
3. Press the A-B button to start recording. The LCD screen displays as follows:
● During recording, press the Play button “ ” to pause. The left upper corner
of the LCD screen displays a pause symbol. Press the Play button again to
continue recording.
Recording time
Remaining time
● During recording, press the A-B button to stop. It will transfer to playing the
recorded file automatically. The A-B Repeat feature operates the same as
when playing music.
4. Exit “recording” and “recorded file playing”: press the Menu button to enter the
main menu and pull the Next Music button to select “Play Music”
1. The player saves the recorded file as .WAV format automatically.
2. The recorded files will be saved in the VOICE folder. The files will be named
numerically increasing by one each time a new file is saved. Do not remove
.WMA file in the folder to a subdirectory, this may cause damage to the player.
Page 24
- 26 -
ENGLISH
Recording
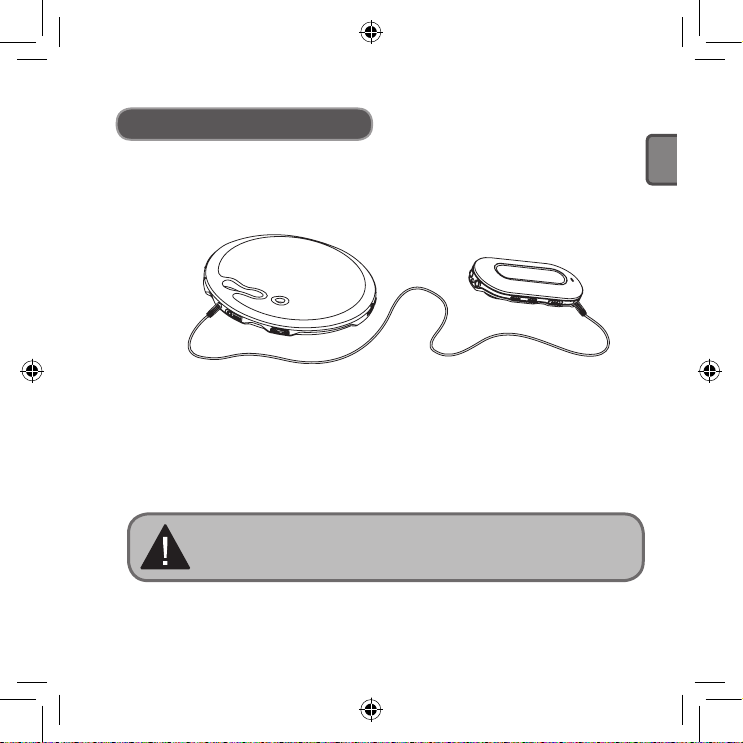
B. Line in Recording: Recording from other audio equipment
1. Connect the LINE OUT Jack of the external equipment (MD player, CD player
and so on) to the LINE IN jack of the player, as illustrated:
2. In “Record set”, select “LINE-IN” of “Source”. Exit the Record mode.
3. When the external equipment {recorder, CD player and so on} outputs audio
signal (eg: music), press the A-B button simultaneously to start recording.
4. The remainder of the procedure operates the same as Microphone record.
Ensure that audio input is of a suitable volume. It is suggested to listen to a
short recorded sample to ensure it is sufficiently loud and there is no distortion.
1. Ensure that the battery (optional) is fully recharged.
2. If there is no space to record new files, delete other files to create
sufficient space.
Page 25
ENGLISH
- 27 -
Backlight color
Yellow
Other Operations
Backlight Setting
● Backlight Colour Setting
1. Press the Menu button to enter the main menu, pull the Next Music button to
select “Setting”.
2. Press the Menu button to confirm. Pull the Next Music button to select
“Backlight colour”. The LCD screen displays as follows:
3. Press the Menu button to confirm. The LCD screen displays as follows:
● Y represents Yellow, R represents Red, C represents Cyan, B represents
Blue, G represents Green, W represents White, P represents Purple, A
represents Auto.
4. Press the Next Music button to select the colour you want. Press the Menu
button to confirm.
Page 26

- 28 -
ENGLISH
Backlight
Other Operations
● Backlight Time Setting
1. Press the Menu button to enter the main menu, pull the Next Music button to
select “Setting”.
2. Press the Menu button to confirm and pull the Next Music button to select
“Backlight”. The LCD screen displays as follows:
3. Press the Menu button to confirm.
The LCD screen displays as follows:
4. Pull the Next Music Button to select the backlight time required.
Press the Menu button to exit.
Page 27
ENGLISH
- 29 -
Power Set
Disable
2 MIN
30 MIN
10 MIN
Other Operations
Power Setting
The “Power Set” means that in stop status, the player will shut down
automatically to preserve the battery (optional), if there is no operation
for some time.
1. Press the Menu button to enter the main menu, pull the Next Music button to
select “Setting”.
2. Press the Menu button to confirm and pull the Next Music button to select
“Power Set”. The LCD screen displays as follows:
3. Press the Menu button to confirm. The LCD screen displays as follows:
4. Pull the Next Music Button to select the required time. Press the Menu button
to exit.
Page 28
- 30 -
ENGLISH
Contrast
Other Operations
LCD Contrast Setting
1. Press the Menu button to enter the main menu. Pull the Next Music button to
select “Setting”.
2. Press the Menu button to confirm and pull the Next Music button to select
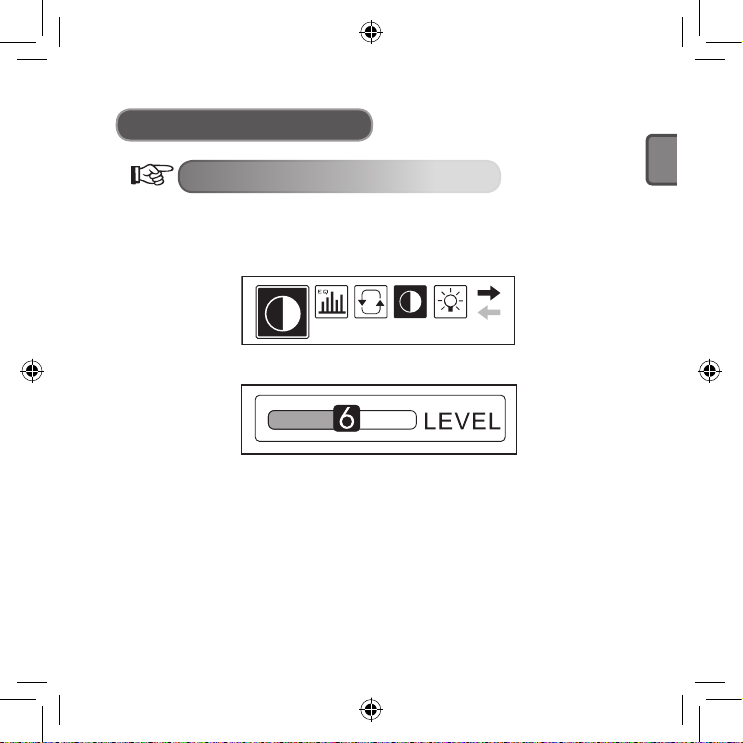
“Contrast”. The LCD screen displays as follows:
3. Press the Menu button to confirm. The LCD screen displays as follows:
4. Pull the Next Music Button to select the Contrast level required.
Press the Menu button to exit.
Page 29
ENGLISH
- 31 -
Language
English
Other Operations
Language Setting
1. Press the Menu button to enter the main menu, pull the Next Music button to
select “Setting”.
2. Press the Menu button to confirm and pull the Next Music button to select
“Language”. The LCD screen displays as follows:
3. Press the Menu button to confirm. The LCD screen displays as follows:
4. Pull the Next Music Button to select the language required. Press the Menu
button to exit.
● The player supports ENGLISH & KOR, ENGLISH & JAP, ENGLISH & EUR,
ENGLIS H & GB5 and so on. The menu will be the relative language you
choose.
● If the music title is in English, while the language you select is not English.
The player will display the music title as disorderly codes.
Page 30
- 32 -
ENGLISH
Del
Delete music files
Other Operations
Deleting files
1. Press the Menu button to enter the main menu. Pull the Next Music button to
select “Del”.
2. Press the Menu button to confirm and pull the Next Music button to select
“Delete music files”. The LCD screen displays as follows:
● In this menu, you can select the file types you want to delete.
MP3 music files, or WAV recorded files.
● In the “Del” interface of the player, the default operation is “NO” to prevent
accidental deletion.
3. Pull the Next Music button to select the file you need to delete, press the A-B
button to switch to “YES” and press “ “ to delete the file.
4. Exit “Del” status: press the Menu button and return to the previous interface,
press Next Music button and select “Exit”.
Page 31

ENGLISH
- 33 -
Exit
About Exit
During the non-playing status, press the Menu button in any menu (except the
main menu) to return to the previous interface. Pull the Next Music button and
select “Exit” to exit. For example, to exit “Setting”, the LCD screen displays as
follows:
Other Operations
Page 32
- 34 -
ENGLISH
Other Operations
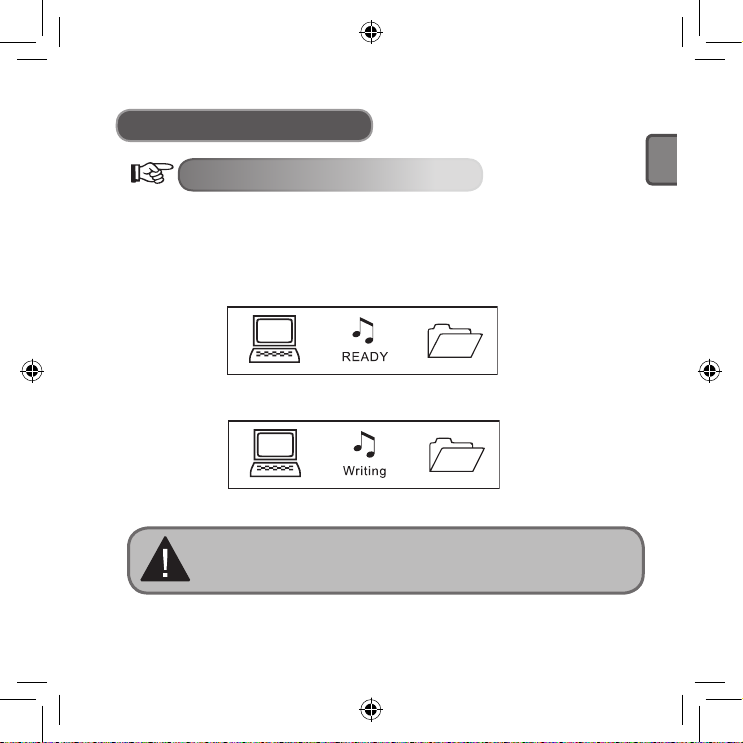
USB Disk Application
The player can be used as a USB disk under Windows98 operating system
(after the driver has been installed), for Windons2000 operation system and
above (no need to install driver).
When connecting with a PC, there are three Modes.
1. Waiting
2. Downloading
3. Uploading
Ensure to remove the USB disk safely when disconnecting the player
from the PC. Do not remove the player whilst transferring information
in case of any damage to the unit or files.
Page 33

ENGLISH
- 35 -
About
VER: 2.611
INT: 512MB
Other Operations
About Version
1. Press the Menu button to enter the main menu and pull the Next Music button
to select “ About “. The LCD screen displays as follows:
2. Press the Menu button to confirm. You may see the version information of the
player moving from the top down. The LCD screen displays as follows:
Page 34

- 36 -
ENGLISH
Other Operations
How to copy songs and files to your player
The CD driver supplied with the MP3 player will NOT be required if your PC is
using the Windows XP or 2000 operating system (the CD is only needed if using
Windows 98). For quick set up please follow the instructions below.
1. Connect the MP3 player to the USB cord and insert into the USB slot of your
PC.
2. The PC should recognize the MP3 player and will pop up a
New Hardware
Found window on the screen.
3. By viewing your disk drives under “My Computer” on the PC desktop, you
should now have a new drive named Removable Disk followed by the drive
letter.
4. Using the Windows Explorer application, music files from your PC can now be
copied to this “Removable Disk” drive and the files will be saved onto the MP3
player.
5. To do this, find the Windows Explorer application (usually under ‘accessories’
found under all programs in your start menu. You can then simply drag and
drop your music files from your PC folder into the “Removable Disk” drive.
Refer to the Windows Help application on your PC for instructions on copying
files.
Please note this MP3 player does not contain software to enable downloads or
copying of music of any kind. You must have music files on your PC in order to
copy them onto this MP3 player. Please also note that the MP3 player will only
recognize .MP3 or .WMA files. It will not read files such as .WAV. Files that are
encrypted with DRM (digital rights management) such as files purchased off the
internet, only work with DRM capable models (Depend on model).
Page 35

ENGLISH
- 37 -
Troubleshooting
No power supply
Ensure the battery (optional) is properly
loaded. Ensure that the power is ON.
No sound form the earphones
Ensure that the volume has not been
adjusted to the lowest position and the
earphones are well connected.
Ensure that the earphones are clean.
Damaged MP3 files may produce a
different degree of noise or may even be
unplayable. Please keep the file intact.
The LCD screen displays disorderly
codes
Ensure to select the correct language.
Files cannot be downloaded
Check if the USB cable has been
damaged.
Check if the player has been well
connected with the PC USB port.
Ensure that driver has been installed
properly. Check that there is sufficient
memory space.
The memory capacity displaying in the
operation system is different from the
standard capacity
The software of the player uses part
of the memory. Therefore, the memory
capacity displaying may be less than the
standard capacity.
Page 36

- 38 -
ENGLISH
Technical Specification
Display Screen Matrix (132*32) LCD
USB Interface High Speed USB (Read 1000K Byte, Write 800K Byte)
Memory Capacity
Record
Sample Rate 8KHz
Record Format WMA(32K bps)
Maximum Record Time 5 Hours
MP3. WAV
Maximum Earphone Output 8K bps-320K bps
Bit Rate 5K bps-384K bps
Frequency Response 20Hz-20KHz
Signal/Noise Ratio 85dB
Decoding Format MP1, MP2, MP3, WMA
Operating Temperature -5ºC ~ 40ºC
Language Support
ENGLISH & KOR, ENGLISH & JAP, ENGLISH & EUR,
ENGLISH & GB5
Operation System WIN98/SE/ME/2000/XP(WIN2000 and above no driver needed)
Page 37

ENGLISH
- 39 -
Packing materials are raw materials and can be used again.
Keep packing materials separate. For more information about recycling
contact your local administration.
Old devices do not belong in the domestic refuse!
Dispose of old devices responsibly, and contribute to environmental
protection.
Your local administration will inform you about collecting points and
opening times.
Old batteries do not belong in the domestic refuse!
Dispose of old batteries accordingly and contribute to environmental
protection.
Your local administration will inform you about collecting points and
opening times.
With reference to environmental protection
Page 38

DEUTSCH
- 3 -
Sicherheitshinweise 5
Hinweis 5
Hinweise zum Ohrhörer 6
Klimabedingungen 6
Zubehör 7
Tasten und Anschlüsse 8
Displayanzeige 9
Hinweise zur Batterie (Optional) 10
Merkmale 11
Allgemeine Funktionsweise 12
Auswahl der Menüs 12
Modusauswahl 12
Tastatursperre 14
Musikwiedergabe 15
Allgemeines 15
Klangeffekte einstellen 16
Textanzeige 18
Wiedergabemodi 18
A-B Wiederholung 20
INHALT
Page 39

Page 40

DEUTSCH
- 5 -
Sicherheitshinweise
Hinweis
Setzen Sie das Gerät
keiner Feuchtigkeit und
Temperaturen höher als 40°C
oder unter –5°C dauerhaft
aus.
Vermeiden Sie heftige
Stöße.
Lassen Sie keine Gegenstände ins Innere gelangen.
Stellen Sie keine schweren
Gegenstände auf den MP3Player.
Den MP3-Player keinem
Sonnenlicht oder anderer
Wärmestrahlung aussetzen .
Setzen Sie den MP3-Player
keiner staubigen Umgebung
aus.
Den MP3-Player von
Lösungsmitteln, Benzolen,
Säuren und anderen Chemikalien fern halten.
Den Mp3-Player von
magnetischen Objekten fern
halten.
Den Player nicht versuchen
selbst zu öffnen oder zu
reparieren.
Page 41

DEUTSCH
- 6 -
Sicherheitshinweise
Hinweise zum Ohrhörer
● Schützen Sie Ihr Gehör
1. Stellen Sie immer eine angenehme Lautstärke ein.
2. Stellen Sie die Lautstärke nicht zu hoch ein.
3. Setzen Sie die Ohrhörer richtig ein, L steht dabei für links und R für rechts.
Durch falsch herum eingesetzte Hörer verändern sich Klangfarbe und
Raumklang.
4. Halten Sie den MP3-Player von elektromagnetischen Felden fern, um
Interferenzen zu vermeiden.
● Verkehrssicherheit
1. Benutzen Sie keine Ohrhörer, wenn Sie fahren.
2. Benutzen Sie keine Ohrhörer, wenn Sie joggen, walken oder bei anderen
potenziell gefährlichen Aktivitäten.
Klimabedingungen
● Umgebungstemperatur: 5-30°C
● Relative Feuchtigkeit: 10-70%
Page 42

DEUTSCH
- 7 -
Manual
Zubehör
Zubehör
Ohrhörer USB-Kabel Bedienungsanleitung
Treiber-CD
Line in Kabel Alkaline Batterie (Optional)
Page 43

DEUTSCH
- 8 -
14
1
10
2 8
1311 12
3 4 5 6 7
9
8
9
10
11
12
13
14
1
3
4
5
6
7
2
Tasten und Anschlüsse
Ohrhöreranschlüsse
LCD
Halsbandöse
Lautstärke –
Lautstärke +
Tastensperre
Line in Anschluss
Eingebautes Mikrofon
Nächster Titel/ Vorlauf
Voriger Titel / Rücklauf
USB Port
EIN / play / bestätigen / AUS
A-B Taste
Menü
Page 44

DEUTSCH
- 9 -
Heal the world.mp3
1 2 3 4 5 6 7
8
10
9
1
2
3
4
5
6
7
8
9
10
Displayanzeige
Play
Play-Modus
Titelnummer
Klangmodus
Sperre
Dateiformat
Batteriestatus
Lautstärke
Laufzeit
Titel
Beachten Sie bitte die Anzeigen im Display, sie helfen Ihnen bei
der richtigen Bedienung des MP3-Players.
Page 45

DEUTSCH
- 10 -
Hinweise zur Batterie (Optional)
Hinweise zur Batterie (Optional)
Benutzen Sie keine defekten
Batterien, die schwankende
Spannung abgeben können.
Versuchen Sie nicht die
Batterien
(Optional) wiederaufzuladen.
Batterien nicht ins Feuer werfen
oder erhitzen. Verbrauchte
Batterien sollten umweltgerecht
Entfernen Sie die Batterien
(Optional), wenn Sie den MP3Player über einen längeren
Zeitraum nicht benutzen.
Um den MP3-Player vor
Beschädigung zu schützen,
wischen Sie sofort die Flüssigkeit
ab, wenn Batterieflüssigkeit
auslaufen sollte.
Page 46

DEUTSCH
- 11 -
Merkmale
● Unterstützung mehrerer Audioformate
Zum Beispiel: MP1, MP2, MP3, WMA usw.
● Keine USB-Treiber notwendig
Bei den Betriebssystemen WIN2000 oder neuer wird kein zusätzlicher Treiber
benötigt, der MP3-Player wird als “Wechseldatenträger” im “Arbeitsplatz”
angezeigt.
● Aufnahme-/Wiederholfunktion
Über das eingebaute Mikrofon können selbst Tonaufnahmen aufgezeichnet
und im WAV-Format abgespeichert werden. Sequenzen können zum
Sprachstudium wiederholt werden.
● Equalizer mit 5 Klangeinstellungen
Normal, Rock, Jazz, Klassik und Pop.
● Verschiedene Wiedergabemodi
Normal, Alles wiederholen, Eins wiederholen, Zufällig, Alles zufällig, Intro.
● Automatische Selbstabschaltung
Verlängert die Lebenszeit der Batterien (Optional).
● Einfache Menüführung
Selbsterklärende Menüs.
Page 47

DEUTSCH
- 12 -
Play music
Allgemeine Funktionsweise
Auswahl der Menüs
Das Menü ist in ein Hauptmenü und Untermenüs aufgeteilt. Durch Drücken der
Menütaste wird das Hauptmenü geöffnet. Die Untermenüs werden mit der Taste
für nächtes-/voriges Stück ausgewählt.
Menütaste drücken, um das Hauptmenü zu öffnen.
Hinweis: Der Hinweis “Menütaste
drücken” in diesem Kapitel bezieht
sich auf die Taste in der Abbildung.
Verschiedene Modi können im Hauptmenü gewählt werden. Folgende Displays
werden je nach Modus angezeigt.
● Hauptmenü
(Menütaste drücken)
Modusauswahl
Page 48

DEUTSCH
- 13 -
Heal the world.mp3
NO VOC FILES
EQ Set
Allgemeine Funktionsweise
● Play-Modus
● Aufnahme
● Einstellungen
● USB
(bei Verbindung mit
einem PC)
Page 49

DEUTSCH
- 14 -
Heal the worl
Locked
Heal the world.mp3
Allgemeine Funktionsweise
Tastatursperre
Unabhängig vom aktuellen Status können die Tasten gesperrt werden, indem
die Sperrtaste in Pfeilrichtung geschoben wird.
Bei gesperrter Tastatur erscheint folgendes Symbol im Display:
1. Bei aktivierter Tastensperre sind alle Tasten des MP3-Players außer Funiktion
(d.h. der MP3-Player kann auch nicht eingeschaltet werden).
2. Bei aktivierter Tastensperre können keine Daten zwischen PC und MP3-Player
kopiert werden. Daten können nur bei ausgeschalteter Tastensperre auf den
MP3-Playerkopiertwerden.
Tastensperre ein Tastensperre aus
Page 50

DEUTSCH
- 15 -
Musikwiedergabe
Allgemeine Funktionsweise
● Einschalten / Play
Die Taste “ “ drücken und nach 3 Sekunden schaltet sich der MP3-Player ein.
Im Musikmodus liest der MP3-Player alle relevanten Musikdateien ein, beginnt
jedoch nicht mit der Wiedergabe. In der oberen linken Ecke des Display
erscheint das Symbol “ “ für Stopp. Die Taste “ “ erneut drücken, um die
Wiedergabe zu starten. Das Symbol wechselt auf “ “ und das Dateiformat z.B.
MP3 wird angezeigt.
● Auswahl der Musikstücke
Taste voriges Stück betätigen: Sprung zum vorigen Musikstück.
Taste halten: Rücklauf
Taste “nächster Titel” betätigen: Sprung zum nächsten Musikstück.
Taste halten : Vorlauf
● Lautstärke einstellen
Laustärke + : Lautstärke erhöhen
Lautstärke - : Lautstärke vermindern
Im Status Stopp schaltet sich der MP3-Player nach Ablauf der in
“Einstellungen/Power set” eingestellten Zeit automatisch ab.
Page 51

DEUTSCH
- 16 -
Setting
EQ Set
Musikwiedergabe
Klangeffekt einstellen
1. Durch Drücken der Taste Menü das Hauptmenü öffnen. Dann mit der Taste
“nächster Titel” “Einstellungen” auswählen.
Taste “nächster Titel”zur Auswahl betätigen
Hinweis: Hinweise “Taste nächstes Stück”
in dieser Anleitung beziehen sich auf die
Taste in dieser Abbildung.
2. Mit der Taste Menü die Auswahl bestätigen, dann mit der Taste “nächster Titel”
“EQ Set” auswählen.
Folgendes wird angezeigt, die aktuelle Auswahl ist schwarz markiert.
Page 52

DEUTSCH
- 17 -
JAZZ
Heal the world.mp3
Musikwiedergabe
3. Mit der Taste Menü bestätigen. Mit der Taste “nächster Titel”die gewünschte
EQ-Einstellung wählen (z.B. Jazz) und wieder mit der Taste Menü bestätigen.
Auf dem Display wird folgendes angezeigt:
● 5 EQ-Einstellungen stehen zur Auswahl:
Normal, Rock, Jazz, Klassik und Pop.
4. Nach der Bestätigung wird automatisch das vorhergehende Menü geöffnet. Mit
der Taste “nächster Titel” “Exit” wählen, um zurück in den Wiedergabemodus
zu gehen (nach 10 Sekunden ohne Eingabe schaltet der MP3-Player
automatisch zurück) Auf dem Display wird die aktuelle EQ-Einstellung wie folgt
angezeigt:
aktuelle EQ-Einstellung
● Angezeigt wird: NORMAL, ROCK, JAZZ, KLASSIK oder POP
Page 53

DEUTSCH
- 18 -
Setting
Musikwiedergabe
Textanzeige
“LRC” Dateien werden von diesem MP3-Player unterstützt, d.h. der Text der
Musik kann synchron zur Musik auf dem Display angezeigt werden.
● Wie kann der Text zur Musik angezeigt werden?
Die LRC-Datei in den gleichen Ordner wie die Musikdatei kopieren. Die LRC Datei muss den gleichen Namen wie die Musikdatei besitzen.
Zum Beispiel: Heißt die Musikdatei “Yesterday once more.mp3”,
muss die LRC-Datei “Yesterday once more.Irc” heißen.
● Woher weiß ich, dass eine LRC-Datei vorhanden ist?
Der MP3-Player erkennt eine entsprechende LRC-Datei automatisch.
Falls eine LRC-Datei erkannt wurde, wird der Text synchron zur Musik auf dem
Display angezeigt.
Wiedergabemodi
1. Taste Menü drücken, um das Hauptmenü zu öffnen. Mit der Taste “nächster
Titel” “Einstellungen” auswählen. Auf dem Display wird folgendes angezeigt
(die aktuelle Auswahl ist schwarz markiert):
Page 54

DEUTSCH
- 19 -
Play mode
[Normal]
Musikwiedergabe
2. Mit der Taste Menü die Auswahl bestätigen. Mit der Taste “nächster Titel”
“Wiedergabemodi” auswählen, folgendes wird angezeigt:
3. Mit der Taste Menü die Auswahl bestätigen. Mit der Taste “nächster Titel” den
gewünschten Wiedergabemodus auswählen und mit der Taste Menü
bestätigen, folgendes wird angezeigt:
● 6 verschiedene Wiedergabemodi stehen zur Auswahl:
Normal
Eins Wiederholen
Alles Wiederholen
Alles Wiederholen
Zufällig
Intro
Page 55

DEUTSCH
- 20 -
Heal the world.mp3
Heal the world.mp3
Musikwiedergabe
4. Nach der Auswahl des Wiedergabemodus schaltet der MP3-Player
automatisch in das vorhergehende Menü. Mit der Taste “nächster Titel “Exit”
wählen, um zurück in den Wiedergabemodus zu gehen (nach 10 Sekunden
ohne Eingabe schaltet der MP3-Player automatisch zurück). Der aktuelle
Wiedergabemodus wird wie folgt angezeigt:
● Im Status Stopp kann der Wiedergabemodus mit der Taste A-B direkt
eingestellt werden.
Aktueller Wiedergabemodus
A-B Wiederholung
1. Während der Wiedergabe die Taste A-B drücken, um den Startpunkt A
auszuwählen. Folgendes wird angezeigt:
Page 56

DEUTSCH
- 21 -
Heal the world.mp3
Musikwiedergabe
2. Die Taste A-B erneut drücken, um den Endpunkt B auszuwählen.
Folgendes wird angezeigt:
3. Durch Drücken der Taste Play wird die vorher markierte Sequenz abgespielt.
Durch Drücken der Taste A-B wird die A-B Funktion verlassen.
4. Oben stehende Schritte wiederholen, um eine neue Sequenz zu
markieren.
● Die gleiche Vorgehensweise anwenden, um sich Sequenzen von
Aufnahmen wiederholen zu lassen.
Page 57

DEUTSCH
- 22 -
Setting
Record set
[Source] MIC Line in
Aufnahme
Dieser MP3-Player besitzt eine Aufnahmefunktion und kann
Tonaufzeichnungen in WMA-Dateien umformen.
Aufnahmeeinstellungen
1. Taste Menü drücken, um das Hauptmenü zu öffnen. Mit der Taste nächster
Titel “Einstellungen” auswählen, folgendes wird angezeigt:
2. Mit der Taste Menü bestätigen, dann mit der Taste “nächster Titel”
“Aufnahmeeinstellungen” auswählen. Folgendes wird angezeigt:
3. Folgende Einstellungen können gesetzt werden: Quelle, Sample, Encoder,
Kanal usw. Folgendes wird angezeigt:
Page 58

DEUTSCH
- 23 -
[Source] MIC Line in
Voice
NO VOC FILES
Aufnahme
4. Mit der Taste “nächster Titel”die gewünschte Option auswählen und mit der
Taste Menü die Auswahl bestätigen. Wurde z.B. “Quelle” ausgewählt wird
durch Drücken der Taste Menü zwischen “Mikrofon” und “Line in” gewechelt.
Folgendes wird angezeigt:
Tonaufzeichnung durchführen
A. Tonaufzeichnung
1. Mit der Taste Menü das Hauptmenü öffnen. Mit der Taste “nächster Titel” “Ton”
auswählen. Folgendes wird angezeigt:
2. Mit der Taste Menü bestätigen. Folgendes wird angezeigt:
Page 59

DEUTSCH
- 24 -
Aufnahme
3. Die Aufnahme durch Drücken der Taste A-B starten. Folgendes wird angezeigt:
● Die Aufnahme kann durch Drücken auf ” “ unterbrochen werden, oben
links im Display wird dann ein Pausensymbol eingeblendet. Die Taste Play
erneut drücken, um die Aufnahme fortzusetzen.
Aufnahmezeit
Verbleibende Zeit
4. Zum Verlassen der Aufnahme- und Wiedergabefunktion die Taste Menü
drücken und im Hauptmenü mit der Taste “nächster Titel” “Musikwiedergabe”
wählen.
1. Tonaufnahmen werden automatisch im WAV-Format abgespeichert.
2. Aufgenommene Dateien werden durchnummeriert im Ordner VOICE
gespeichert. Verschieben Sie keine .WMA-Dateien in Unterverzeichnisse, dabei könnte der MP3-Player Schaden nehmen.
Page 60

DEUTSCH
- 25 -
Aufnahme
B. Line in Aufnahme: Aufnahme von einem anderen Audiogerät
1. Den LINE OUT Ausgang des externen Gerätes (MD-Player, CD-Player usw.)
mit dem LINE IN Eingang am MP3-Player per Line in Kabel verbinden (siehe
Abb.):
2. Im Menü “Aufnahmeeinstellungen” bei “Quelle” LINE IN auswählen und das
Menü verlassen.
3. Sobald das externe Gerät Audiosignale abgibt (d.h. Musik abspielt) die Taste
A-B drücken, um die Aufnahme zu starten.
4. Die weitere Bedienung ist die gleiche wie bei der Aufnahme per Mikrofon.
Achten Sie darauf, dass die Lautstärke am externen Gerät passend
eingestellt ist, es wird empfohlen sich eine kurze Probeaufnahme anzuhören,
um sicherzustellen, dass die Aufnahme laut genug ist und keine Störgeräusche
auftreten.
1. Vergewissern Sie sich, dass die Batterie (Optional) voll geladen ist.
2. Reicht der Speicherplatz nicht für neue Aufnahmen aus, löschen
Sie andere Dateien, um ausreichend Platz zu schaffen.
Page 61

DEUTSCH
- 26 -
Backlight color
Yellow
Weitere Einstellungen
Displaybeleuchtung
● Einstellung der Displaybeleuchtung
1. Die Taste Menü drücken, um das Hauptmenü zu öffnen und mit der Taste
“nächster Titel” “Einstellungen” auswählen.
2. Mit der Taste Menü bestätigen und mit der Taste “nächster Titel”
“Displaybeleuchtung” auswählen (siehe Abb.):
3. Mit der Taste Menü bestätigen. Folgendes wird angezeigt:
● Y steht für gelb, R für rot, C für Cyan, B für blau, G für grün, W für weiß, P
für purpur und A für Auto.
4. Mit der Taste “nächster Titel” die gewünschte Farbe auswählen und mit der
Taste Menü bestätigen.
Page 62

DEUTSCH
- 27 -
Backlight
Weitere Einstellungen
● Displaybeleuchtung
1. Die Taste Menü drücken, um das Hauptmenü zu öffnen und mit der Taste “näch
ster Titel” “Einstellungen” auswählen.
2. Mit der Taste Menü bestätigen und mit der Taste “nächster Titel”
“Displaybeleuch tung” auswählen (siehe Abb.):
3. Mit der Taste Menü bestätigen.
Folgendes wird angezeigt:
4. Mit der Taste “nächster Titel” die gewünschte Dauer der
Hintergrundbeleuchtung einstellen und das Menü mit der Taste Menü
verlassen.
Page 63

DEUTSCH
- 28 -
Power Set
Disable
2 MIN
30 MIN
10 MIN
Weitere Einstellungen
Selbstabschaltung
Um Batterie (Optional) zu sparen, schaltet sich der MP3-Player nach
Ablauf einer bestimmten Zeit selbst ab, wenn er sich im Modus Stopp
befindet und keine Taste betätigt wird.
1. Die Taste Menü drücken, um das Hauptmenü zu öffnen und mit der Taste “näch
ster Titel” “Einstellungen” auswählen.
2. Mit der Taste Menü bestätigen und mit der Taste “nächster Titel” “Selbstabschal
tung” auswählen (siehe Abb.):
3. Mit der Taste Menü bestätigen. Folgendes wird angezeigt:
4. Mit der Taste “nächster Titel” die gewünschte Zeit einstellen und mit der Taste
Menü das Menü verlassen.
Page 64

DEUTSCH
- 29 -
Contrast
Weitere Einstellungen
Kontrast
1. Die Taste Menü drücken, um das Hauptmenü zu öffnen und mit der Taste
“nächster Titel” “Einstellungen” auswählen.
2. Mit der Taste Menü bestätigen und mit der Taste “nächster Titel” “Kontrast”
auswählen (siehe Abb.):
3. Mit der Taste Menü bestätigen. Folgendes wird angezeigt:
4. Mit der Taste “nächster Titel” den gewünschten Kontrast einstellen und mit der
Taste Menü das Menü verlassen.
Page 65

DEUTSCH
- 30 -
Language
English
Weitere Einstellungen
Sprache
1. Die Taste Menü drücken, um das Hauptmenü zu öffnen und mit der Taste
“nächster Titel” “Einstellungen” auswählen.
2. Mit der Taste Menü bestätigen und mit der Taste “nächster Titel” “Sprache”
auswählen (siehe Abb.):
3. Mit der Taste Menü bestätigen. Folgendes wird angezeigt:
4. Mit der Taste “nächster Titel” die gewünschte Sprache einstellen und mit der
Taste Menü das Menü verlassen.
● Folgende Einstellungen stehen zur Verfügung: ENGLISH & KOR,
ENGLISH & JAP, ENGLISH & EUR, ENGLISH & GB5 usw. Je nach Wahl
wird das Menü entsprechend angezeigt.
● Ist der Titel des Musikstücks in Englisch, aber die gewählte Sprache nicht,
wird im Display der Musiktitel nicht korrekt angezeigt.
Page 66

DEUTSCH
- 31 -
Del
Delete music files
Weitere Einstellungen
Dateien löschen
1. Die Taste Menü drücken, um das Hauptmenü zu öffnen und mit der Taste
“nächster Titel” “Löschen” auswählen.
2. Mit der Taste Menü bestätigen und mit der Taste “nächster Titel” “Musikdateien
löschen” auswählen (siehe Abb.):
● In diesem Menü wird zunächst der Dateityp (MP3 oder WAV) der zu
löschenden Dateien ausgewählt.
Page 67

DEUTSCH
- 32 -
Exit
● Im Menü “Löschen” ist “NO” für “nicht löschen” voreingestellt, um ein
unbeabsichtigtes Löschen zu vermeiden.
3. Mit der Taste “nächster Titel”die zu löschende Datei auswählen, die Taste A-B
drücken, um von “NO” auf “YES” für “löschen” zu schalten und die Taste
drücken, um die Datei endgültig zu löschen.
4. Zum Verlassen der Löschfunktion zuerst die Taste Menü drücken, um zurück
zum vorhergehenden Menü zu gehen und dann mit der Taste “nächster Titel”
“EXIT” auswählen.
Exit
Befindet sich der MP3-Player nicht im Status Play kann jedes Menü außer
dem Hauptmenü durch Drücken der Taste Menü verlassen werden. Dann
mit der Taste “nächster Titel” “Exit” auswählen, um das Menü zu verlassen.
Die Abbildung zeigt als Beispiel die Anzeige zum Verlassen des Menüs
“Einstellungen”:
Weitere Einstellungen
Page 68

DEUTSCH
- 33 -
Weitere Einstellungen
USB Disk
Der MP3-Player kann auch als normaler USB-Disk benutzt werden. Bei
Windows2000 oder neueren Betriebssystemen ist kein zusätzlicher Treiber
notwendig, während bei Windows 98 der Treiber vorher installiert werden muss.
Bei der Verbindung mit einem PC werden 3 Modi angezeigt.
1. Bereit
2. Herunterladen
3. Hochladen
Benutzen Sie immer “Hardware sicher entfernen”, wenn die
Verbindung zwischen PC und MP3-Player getrennt werden soll.
Trennen Sie die Verbindung nie während des Dateitransfers, um das
Gerät oder Dateien nicht zu beschädigen.
Page 69

DEUTSCH
- 34 -
About
VER: 2.512.400
INT: 128Mb
Weitere Einstellungen
Versionsanzeige
1. Die Taste Menü drücken, um das Hauptmenü zu öffnen und mit der Taste
“nächster Titel” “Info” auswählen (s. Abb.).
2. Mit der Taste Menü bestätigen und im Display wird die aktuelle Version des
MP3-Players angezeigt (s.Abb.):
Page 70

DEUTSCH
- 35 -
Weitere Einstellungen
Dateien und Musik auf den MP3-Player
kopieren
Der auf der beiliegenden CD befindliche Treiber wird für Windows2000 und XP
NICHT benötigt (nur bei Windows98 muss der Treiber installiert werden). Um
Daten zu kopieren bitte unten stehende Schritte befolgen:
1. Mit dem USB-Kabel den MP3-Player mit der USB-Schnittstelle am PC
verbinden.
2. Der PC sollte den MP3-Player automatisch erkennen, die Meldung “Neue
Hardware gefunden” wird eingeblendet.
3. Wird der “Arbeitsplatz” geöffnet, erscheint ein neues Laufwerk namens
“Wechseldatenträger” mit Laufwerksbuchstaben.
4. Mit dem Programm Windows Explorer können jetzt Daten und Musik vom PC
auf den Wechseldatenträger bzw. MP3-Player kopiert werden.
5. Das Programm Windows Explorer kann üblicherweise unter Start, alle
Programme, Zubehör gefunden werden. Durch einfaches Ziehen und
Fallenlassen (drag and drop) werden die Musikdateien auf den
Wechseldatenträger kopiert (weitere Informationen zum Kopieren von Dateien
finden Sie in der Windows Hilfe).
Bitte beachten Sie, dass der MP3-Player über keine Software verfügt, die selbst
Musik herunterladen oder kopieren kann. Um Daten auf den MP3-Player zu
kopieren, müssen die Musikdateien vorher auf Ihrem PC gespeichert sein. Ferner
kann der MP3-Player nur .MP3 oder .WMA Dateien abspielen. .WAV Dateien, die
mit DRM (digital rights management) kodiert sind und über das Internet vertrieben
werden, können nur von Modellen, die mit dieser Funktion ausgestattet sind,
abgespielt werden (je nach Modellausführung).
Page 71

DEUTSCH
- 36 -
Fehlerbehebung
Kein Strom
Prüfen, ob die Batterien (Optional) voll
geladen sind.
Prüfen, ob der MP3-Player eingeschaltet
ist.
Kein Ton auf den Ohrhörern
Prüfen, ob die Lautstärke auf Null ist, und
die Ohrhörer richtig eingesteckt sind.
Prüfen, ob die Ohrhörer sauber sind.
Beschädigte MP3-Dateien können in der
Lautstärke schwanken oder sogar gar nicht
mehr abspielbar sein. Achten Sie bitte auf
intakte Dateien.
Auf der Anzeige erscheinen nur
Sonderzeichen.
Prüfen, ob die richtige Sprache eingestellt
ist.
Daten können nicht
heruntergeladen werden.
Prüfen, ob das USB-Kabel beschädigt ist.
Prüfen, ob der MP3-Player richtig mit dem
USB-Port verbunden ist.
Prüfen, ob der Treiber richtig installiert ist.
Prüfen, ob genügend freier Speicherplatz
vorhanden ist.
Der angezeigte freie Speicher
stimmt nicht mit der angegebenen
Sollkapazität überein.
Die Software des MP3-Players beansprucht
einen Teil des Speichers, daher kann die
angezeigte Speicherkapazität geringer als
die Sollkapazität sein.
Page 72

DEUTSCH
- 37 -
Technische Daten
Display Matrix (132*32) LCD
USB High Speed USB (1000K Byte lesen, 800K Byte) schreiben
Speicherkapazität
Aufnahme
Sample Rate 8KHz
Aufnahmeformat WMA(32K bps)
Max. Aufnahmezeit
5 Stunden
MP3. WAV
Max. Ohrhörer Ausgang
8K bps-320K bps
Bitrate 5K bps-384K bps
Frequenzgang 20Hz-20KHz
Dynamik 85dB
Musikformate MP1, MP2, MP3, WMA
Umgebungstemperatur -5ºC ~ 40ºC
Sprachausgabe
ENGLISH & KOR, ENGLISH & JAP, ENGLISH & EUR,
ENGLISH & GB5
Betriebssysteme WIN98/SE/ME/2000/XP(ab WIN2000 keine zusätzlichen Treiber)
Page 73

DEUTSCH
- 38 -
Verpackungsmaterialien sind Rohstoffe und können wieder
verwendet werden.
Trennen Sie die Verpackungen sortenrein und führen Sie diese im
Interesse der Umwelt einer ordnungsgemäßen Entsorgung zu. Nähere
Informationen erhalten Sie auch bei Ihrer zuständigen Verwaltung.
Altgeräte gehören nicht in den Hausmüll!
Entsorgen Sie auch Altgeräte fachgerecht! Sie tragen damit zum
Umweltschutz bei. Über Sammelstellen und Öffnungszeiten informiert
Sie Ihre örtliche Verwaltung.
Batterien gehören nicht in Hausmüll!
Entsorgen Sie Batterien umweltgerecht und führen Sie diese im
Interesse der Umwelt einer ordnungsgemäßen Entsorgung zu.
Über Sammelstellen und Öffnungszeiten informiert Sie Ihre örtliche
Verwaltung.
Hinweise zum Umweltschutz
Page 74

FRANÇAIS
- 2 -
Nous vous félicitons de l’acquisition de votre nouveau produit Commodore
et sommes convaincus que vous serez satisfait de cet appareil.
Afin de garantir une fiabilité et un fonctionnement parfaits de votre produit, nous
vous prions de lire attentivement ce mode d’emploi avant la mise en service et de
respectez les consignes de sécurité!
● Toutes les activités sur et avec cet appareil ne doivent être exécutées que de
la manière décrite dans ce mode d’emploi.
● Si vous souhaitez donner cet appareil a une tierce personne, veuillez y joindre
cette notice d’utilisation.
Emballage:
Cet appareil est livré dans un emballage afin de le protéger des dommages dus
au transport. Les matériaux d’emballage sont des matières premières et sont
donc recyclables. Veuillez recycler ces matériaux.
Page 75

FRANÇAIS
- 3 -
Précautions 5
Notice 5
Utilisation des écouteurs 6
Conditions d’utilisation 6
Accessoires 7
Interface principal 8
Illustration Ecran LCD 9
Utilisation des piles (Optionnel) 10
Récapitulatif des Fonctions Principales 11
Fonctions Usuelles 12
Sélection du Menu 12
Sélection du Mode 12
Verrouillage 14
Mode Lecture 15
Opérations Usuelles 15
Mode Effet de Son 16
Affichage des paroles 18
Mode Lecture 18
Répétition A-B 20
SOMMAIRE
Page 76

FRANÇAIS
- 4 -
SOMMAIRE
Mode Enregistrement 22
Paramètres d’enregistrement 22
Procéder à un enregistrement 23
Autres Opérations 26
Réglage du Backlight 26
Arrêt Programmé 28
Réglage Contraste Ecran LCD 29
Réglage de la Langue 30
Supprimer des Fichiers 31
A propos d’Exit 32
Application Disque USB 33
Caractéristiques du modèle 34
Comment copier des chansons et des fichiers vers votre lecteur 35
Défauts de fonctionnement 36
Caractéristiques Techniques 37
Concernant la protection environnementale 38
Réclamations et Garanties 39
Page 77
FRANÇAIS
- 5 -
Précautions
Notice
Protégez votre lecteur de
l’humidité et tenez-le à l’écart
des températures supérieures
à 40ºC ou inférieures à -5ºC.
Evitez les chocs brutaux.
Evitez que des corps
étrangers ne pénètrent dans
le lecteur.
Ne placez pas d’objets lourds
sur le lecteur.
Tenez-le à l’écart des sources
de chaleur et d’une trop
grande luminosité.
Préservez votre lecteur de la
poussière.
Tenez-le à l’écart des diluants,
benzènes, acides et autres
produits chimiques.
Tenez-le à distance des objets
magnétiques.
N’essayez pas d’ouvrir, de
réparer ou de démonter le
lecteur vous-même.
Page 78

FRANÇAIS
- 6 -
Précautions
Protégez votre audition
● Protégez votre audition
1. Adaptez toujours le volume de façon appropriée à votre écoute.
2. Ne réglez pas le volume trop fort.
3. Placez les écouteurs comme indiqués, le sigle L correspondant à l’oreille
gauche, R à l’oreille droite. Le timbre et la dimension sonore en seront
affectés si vous ne tenez pas compte de ces conseils.
4. Afin d’éviter les interférences, essayez de vous tenir à l’écart des champs
électromagnétiques.
● Pour la sécurité de vos déplacements
1. N’écoutez pas de musique pendant que vous conduisez.
2. N’écoutez pas de musique en marchant, courant ou lorsque vous vous livrez
à d’autres activités potentiellement à risques.
Conditions d’utilisation
● Température extérieure: 5-30ºC
● Humidité: 10-70%
Page 79

FRANÇAIS
- 7 -
Manual
Accessoires
Accessoires
Ecouteurs Câble USB Manuel
Disque Câble Line-In Pile alcaline (optionnel)
Page 80

FRANÇAIS
- 8 -
14
1
10
2 8
1311 12
3 4 5 6 7
9
8
9
10
11
12
13
14
1
3
4
5
6
7
2
Interface Principal
Prise jack pour écouteurs
Ecran LCD
Prise cordon écouteurs
Diminution du volume
Augmentation du volume
Bouton Hold (Bloquer)
Prise du câble Line-In
Microphone incorporé
Morceau suivant/avance
Morceau précédent/arrière
Port USB
Marche/lecture/confirmation/arrêt
Bouton A-B
Menu
Page 81

FRANÇAIS
- 9 -
Heal the world.mp3
1 2 3 4 5 6 7
8
10
9
1
2
3
4
5
6
7
8
9
10
Illustration Ecran LCD
Lecture
Mode de lecture
Morceau en cours
Mode d’effet de son
Hold (Bloquer)
Format du fichier
Témoin de batterie
Volume
Durée en cours
Titre du morceau
Prêtez bien attention aux informations affichées sur l’écran LCD,
celles-ci vous aideront à utiliser le lecteur de façon optimum.
Page 82

FRANÇAIS
- 10 -
Utilisation des piles (Optionnel)
Utilisation des piles (Optionnel)
N’utilisez pas de piles
défectueuses, celles-ci peuvent
être à l’origine d’un courant
électrique instable.
N’essayez pas de recharger ou de
réchauffer les piles.. Lorsque vous
jetez les piles, assurez-vous de
le faire en veillant au respect de
l’environnement.
Otez les piles (optionnel) en cas
de non utilisation prolongée de
l’appareil.
Si vous constatez qu’un fluide
quelconque s’échappe d’une
des piles (optionnel), essuyez
immédiatement l’endroit concerné
pour protéger le lecteur.
Page 83

FRANÇAIS
- 11 -
Récapitulatif des Fonctions Principales
● Multiples formats audio supportés
Par exemple: MP1, MP2, MP3, WMA, etc.
● Driver USB non nécessaire
L’opération s’effectue directement par le “removable disc” (disque amovible) de
“my computer” (mon ordinateur). Cela ne nécessite aucunement l’installation de
pilotes tel que WIN2000 ou supérieurs.
● Fonction Enregistrement/ Répétition
Le lecteur MP3 peut faire des enregistrements vocaux à l’aide du microphone,
sous forme de fichiers WAV. Les différentes sections peuvent être répétées, par
exemple pour un usage à but linguistique.
● 5 égaliseurs (Equalizer) d’effet sonore
Normal, Rock, Jazz, Classique, Pop.
● Mode multi-play (lecture multiple)
Normal, Répéter tout, Répéter un morceau, Aléatoire, Aléatoire complet,
Aperçu.
● Arrêt programmé
Préserve la durée de vie des piles (optionnel).
● Menu simple
Menu facile d’utilisation.
Page 84

FRANÇAIS
- 12 -
Play music
Fonctions Usuelles
Sélection du Menu
Le menu peut être divisé en menu principal et sous-menu. Appuyez sur la touche
Menu pour accéder au menu principal. Vous pouvez opérez votre sélection en
utilisant les boutons Morceau suivant/Morceau précédent.
Appuyez sur la touche menu pour accéder au menu principal.
Note: Dans la suite du manuel, procédez
de cette même façon à chaque fois que
la mention “appuyez sur la touche menu“
apparaît.
Vous pouvez sélectionner différents modes à partir du menu principal. Voici ce
qui s’affiche sur votre écran LCD.
● Menu principal
(appuyez sur la touche menu)
Sélection du Mode
Page 85

FRANÇAIS
- 13 -
Heal the world.mp3
NO VOC FILES
EQ Set
Fonctions Usuelles
● Mode lecture
● Mode enregistrement
● Paramètres de
réglage de l’interface
● Mode USB
(connexion à un PC)
Page 86

FRANÇAIS
- 14 -
Heal the worl
Locked
Heal the world.mp3
Fonctions Usuelles
Verrouillage
Quel que soit l’état dans lequel se trouve le lecteur, pousser le bouton HOLD
dans la direction indiquée par la flèche permet de verrouiller les touches de
l’appareil.
Lorsque les touches sont verrouillées, l’écran LCD affiche les informations
suivantes:
1. Lorsque les touches sont verrouillées, les fonctions du lecteur sont désactivées.
(Lorsque le lecteur est éteint, il ne peut être allumé si les touches ont
préalablement été verrouillées)
2. Lorsque les touches sont verrouillées, aucun transfert de données ne peut
s’opérer par le biais de la connexion USB.
Les données ne peuvent être transmises au lecteur que lorsque les touches
sont débloquées.
Lorsque les touches sont verrouillées
Une fois les touches débloquées
Page 87

FRANÇAIS
- 15 -
Mode Lecture
Opérations usuelles
● Mise en marche / Lecture
Appuyez sur la touche “ ”, le lecteur se met en marche au bout de 3 secondes.
En mode Musique, le lecteur lit automatiquement le morceau par défaut, mais
ne lance pas la musique. En haut à gauche de l’écran LCD, le symbole “ “
apparaît. Le lecteur est alors en mode stop. Appuyez à nouveau sur la touche
“ “ pour lancer la musique. Le symbole “ “ apparaît en haut à gauche de
l’écran LCD, de même que le type du fichier musical, par exemple MP3.
● Sélection de la musique
Bouton morceau précédent: permet d’écouter le morceau précédent. Pour faire
arrière rapide, laissez le bouton appuyé.
Bouton morceau suivant: permet d’écouter le morceau suivant. Pour faire
avance rapide, laissez le bouton appuyé.
● Contrôle du volume
Volume + : Augmentation du volume
Volume - : Diminution du volume
En mode stop, le lecteur s’éteint automatiquement dès que la durée
limite fixée dans “Setting/ Power set “ (Réglages / Paramètres
d’alimentation) s’est écoulée.
Page 88

FRANÇAIS
- 16 -
Setting
EQ Set
Mode Lecture
Mode Effet de Son
1. Appuyez sur la touche Menu pour accéder au menu principal. Poussez le
bouton Morceau Suivant vers la gauche pour sélectionner “Setting” (Réglages).
Poussez le bouton Morceau Suivant vers la gauche
pour opérer une sélection
Note: Dans la suite du manuel, procédez
de la façon indiquée sur ce diagramme à
chaque fois que la mention “actionnez le
bouton Morceau Suivant“ apparaît.
2. Appuyez sur la touche Menu pour confirmer. Actionnez le bouton Morceau
Suivant pour sélectionner “EQ Set” (Paramètres Equalizer / Egaliseur).
Voici ce qui s’affiche sur l’écran LCD (l’option sélectionnée apparaît en noir)
.
Page 89

FRANÇAIS
- 17 -
JAZZ
Heal the world.mp3
Mode Lecture
3. Appuyez sur la touche Menu pour confirmer. Vous pouvez alors accéder aux
différents effets de son en actionnant le bouton Morceau Suivant. Appuyez sur
la touche Menu pour confirmer votre choix d’effet de son. Voici ce qui s’affiche
sur l’écran LCD :
● 5 effets de son différents peuvent être sélectionnés: Normal, Rock, Jazz,
Classique, Pop.
4. Une fois l’effet de son sélectionné, le lecteur retourne automatiquement au
menu précédent. Actionnez le bouton Morceau Suivant; sélectionnez “Exit”
(Sortie) pour retourner à l’interface lecture de la musique (le lecteur retournera
également automatiquement à cet interface s’il n’enregistre aucune opération
durant 10 secondes). A ce moment, l’effet de son sélectionné sera affiché sur
l’écran LCD de la façon suivante:
Affichage du mode d’effet de son
● Les effets de son s’affichent ainsi sur l’écran LCD:
NORMAL, ROCK, JAZZ, CLASSIQUE, POP
Page 90

FRANÇAIS
- 18 -
Setting
Mode Lecture
Affichage des paroles
Le lecteur supporte les fichiers “LRC”. Ainsi, les fichiers de musique et de texte
peuvent être lus et affichés de manière synchronisée.
● Comment « afficher les paroles »?
Placez le fichier de texte dans le même répertoire que le fichier de musique.
Le fichier de texte doit porter le même nom que le fichier de musique.
Par exemple: si le titre du fichier de musique est “Yesterday once more.mp3”,
le fichier de texte doit s’appeler “Yesterday once more.Irc”.
● Comment détecter l’existence des fichiers de paroles ?
Le lecteur recherche automatiquement les fichiers de paroles. S’il existe un tel
fichier, ce dernier et le fichier de musique seront lus simultanément.
Mode Lecture
1. Appuyez sur la touche Menu pour accéder au menu principal. Actionnez le
bouton Morceau Suivant pour sélectionner “Setting”. Voici ce qui apparaît sur
l’écran LCD (l’option sélectionnée apparaît en noir).
Page 91

FRANÇAIS
- 19 -
Play mode
[Normal]
Mode Lecture
2. Appuyez sur la touche Menu pour confirmer. Actionnez le bouton Morceau
Suivant pour sélectionner “Play mode” (Mode de Lecture). Voici ce qui apparaît
sur l’écran LCD:
3. Appuyez sur la touche Menu pour confirmer. Vous pouvez accéder aux
différents modes en actionnant le bouton Morceau Suivant. Appuyez sur la
touche Menu pour confirmer le mode de lecture de votre choix. Voici ce qui
s’affiche sur l’écran LCD:
● 6 modes de lecture peuvent être sélectionnés. A savoir:
Normal
Répéter un morceau
Aléatoire complet
Répéter tout
Aléatoire
Aperçu
Page 92

FRANÇAIS
- 20 -
Heal the world.mp3
Heal the world.mp3
Mode Lecture
4. Une fois sélectionné le mode de lecture, le lecteur retourne automatiquement
au menu précédent. Actionnez le bouton Morceau Suivant et sélectionnez
“Exit” (Sortie) pour retourner à l’interface de lecture (le lecteur retournera
également automatiquement à cet interface s’il n’enregistre aucune opération
durant 10 secondes). A ce moment, le mode de lecture choisi apparaît de la
façon suivante sur l’écran LCD:
● En mode stop, appuyer sur la touche A-B permet également de changer
directement le mode de lecture.
Affichage du mode de lecture
Répétition A-B
1. Pendant la lecture du morceau, appuyez sur la touche A-B pour sélectionner le
point de départ.
Voici ce qui s’affiche sur l’écran LCD:
Page 93

FRANÇAIS
- 21 -
Heal the world.mp3
Mode Lecture
2. Appuyez à nouveau sur la touche A-B pour indiquer au lecteur où se situe la fin
de la section à répéter. Voici ce qui s’affiche sur l’écran LCD:
3. Appuyez sur la touche Lecture, le lecteur répète alors la section que vous
venez de sélectionner. Appuyez sur la touche A-B pour quitter le mode
répétition.
4. Réitérer les opérations des étapes précédentes pour sélectionner une nouvelle
section à répéter.
● Pour répéter un fichier enregistré, procéder de la même façon que pour
l’opération décrite ci-dessus.
Page 94

FRANÇAIS
- 22 -
Setting
Record set
[Source] MIC Line in
Mode Enregistrement
Le lecteur est doté d’une fonction enregistrement. Il peut ainsi convertir un
fichier vocal en fichier de format .WMA.
Paramètres d’enregistrement
1. Appuyez sur la touche Menu pour accéder au menu principal. Actionnez
le bouton Morceau Suivant pour sélectionner “Setting” (Réglages). Voici ce
qu’affiche l’écran LCD :
2. Appuyez sur la touche Menu pour confirmer. Actionnez le bouton Morceau
Suivant pour sélectionner “Record Set” (Paramètres d’enregistrement).
L’écran LCD affiche alors:
3. Appuyez sur “Record Set” pour effectuer les réglages de source, échantillon,
encodage, canal, etc. Voici ce qui s’affiche sur l’écran LCD:
Page 95

FRANÇAIS
- 23 -
[Source] MIC Line in
Voice
NO VOC FILES
Mode Enregistrement
4. Actionnez le bouton Morceau Suivant pour avoir accès aux différentes options.
Appuyez sur la touche Menu pour confirmer votre choix. Par exemple, pour
“source”, lorsque vous appuyez sur Menu, le lecteur passe de “Microphone” à
“Line in”. Voici ce qui apparaît alors sur l’écran LCD:
Procéder à un enregistrement
A. Enregistrement vocal: Enregistrer une voix extérieure
1. Appuyez sur la touche Menu pour accéder au menu principal. Actionnez le
bouton Morceau Suivant pour sélectionner “Voice” (Voix). Voici ce qui s’affiche
sur l’écran LCD:
2. Appuyez sur la touche Menu pour confirmer. L’écran LCD affiche alors:
Page 96

FRANÇAIS
- 24 -
Mode Enregistrement
3. Appuyez sur la touche A-B pour débuter l’enregistrement. Voici ce qui s’affiche
sur l’écran LCD:
● Pendant l’enregistrement, appuyez sur la touche lecture “ “ pour faire
une pause. Le symbole de pause apparaît en haut à gauche de l’écran
LCD. Appuyez à nouveau sur la touche lecture pour reprendre
l’enregistrement.
● En cours d’enregistrement, appuyez sur la touche A-B pour arrêter. Le
fichier enregistré est alors automatiquement lancé par le lecteur. Vous avez
dès lors accès aux mêmes fonctions que pour la lecture d’un fichier
musical.
Durée d’enregistrement
Durée d’enregistrement
4. Pour quitter “recording” (enregistrement) et “recorded file playing” (lecture du
fichier enregistré) : appuyez sur la touche Menu pour accéder au menu
principal, puis actionnez le bouton Morceau Suivant pour sélectionner “ Play
Music “ (Lecture Musique).
1. Les fichiers enregistrés sont automatiquement sauvegardés au format .WAV
par le lecteur.
2. Les fichiers enregistrés sont sauvegardés dans le dossier VOICE (Voix). Ils sont
numérotés par ordre croissant, le numéro étant incrémenté d’une unité à chaque
fois qu’un nouveau fichier est sauvegardé. Ne déplacez pas un fichier .WAV du
dossier vers un sous-répertoire, cela pourrait endommager le lecteur.
Page 97

FRANÇAIS
- 25 -
Mode Enregistrement
B. Enregistrement par Line in: Enregistrer à l’aide d’un autre
appareil audio
1. Reliez la sortie LINE OUT du deuxième appareil (Lecteur MD, lecteur CD, etc)
à l’entrée LINE IN du lecteur MP3. Le diagramme ci-dessous illustre cette
procédure:
2. Dans “Record set” (Paramètres d’enregistrement), sélectionnez “LINE-IN” dans
“Source”. Sortez du mode enregistrement.
3. Lorsque l’appareil externe {lecteur cassette, lecteur CD, etc} transmet un signal
audio (par ex: musique) vers le lecteur, appuyez simultanément sur la touche
A-B pour débuter l’enregistrement.
4. Les étapes suivantes sont les mêmes que pour l’enregistrement par
microphone. Assurez-vous que le volume du signal audio d’entrée est
convenablement réglé. Nous vous suggérons d’écouter d’abord un court
morceau pour vous assurer que le signal est suffisamment audible et non
déformé.
1. Assurez-vous que les
piles (optionnel) sont bien rechargées au maximum.
2. S’il n’y a plus d’espace disponible pour enregistrer de nouveaux
fichiers, détruisez certains des fichiers existants pour créer un
espace suffisant.
Page 98

FRANÇAIS
- 26 -
Backlight color
Yellow
Autres Opérations
Réglage du backlight
● Couleur du backlight
1. Appuyez sur la touche Menu pour accéder au menu principal. Actionnez le
bouton Morceau Suivant pour sélectionner “Setting” (Réglages).
2. Appuyez sur la touche Menu pour confirmer. Actionnez le bouton Morceau
Suivant pour sélectionner “Backlight color” (Couleur du backlight). Voici ce qui
s’affiche sur l’écran LCD:
3. Appuyez sur la touche Menu pour confirmer. Voici ce qui apparaît sur l’écran
LCD:
● Y représente Yellow (Jaune), R représente Red (Rouge), C représente
Cyan (Cyan), B représente Blue (Bleu), G représente Green (Vert), W
représente White (Blanc), P représente Purple (Pourpre), A représente Auto
4. Actionnez le bouton Morceau Suivant pour sélectionner la couleur de votre
choix. Appuyez sur la touche Menu pour confirmer.
Page 99

FRANÇAIS
- 27 -
Backlight
Autres Opérations
● Durée d’éclairage du backlight
1. Appuyez sur la touche Menu pour accéder au menu principal. Actionnez le
bouton Morceau Suivant pour sélectionner “Setting” (Réglages).
2. Appuyez sur la touche Menu pour confirmer. Actionnez le bouton Morceau
Suivant pour sélectionner “Backlight”. Voici ce qui s’affiche sur l’écran LCD:
3. Appuyez sur la touche Menu pour confirmer.
L’écran LCD se présente alors ainsi:
4. Actionnez le bouton Morceau Suivant pour régler la durée résiduelle de
l’éclairage suivant votre souhait. Appuyez sur la touche Menu pour sortir.
Page 100

FRANÇAIS
- 28 -
Power Set
Disable
2 MIN
30 MIN
10 MIN
Autres Opérations
Arrêt programmé
La fonction “Power Set” permet au lecteur, lorsqu’il est en mode stop,
de s’éteindre automatiquement pour préserver les piles (optionnel) si
aucune opération n’a été effectuée pendant un certain temps.
1. Appuyez sur la touche Menu pour accéder au menu principal. Actionnez le
bouton Morceau Suivant pour sélectionner “Setting” (Réglages).
2. Appuyez sur la touche Menu pour confirmer et actionnez le bouton Morceau
Suivant pour sélectionner “Power Set”. Voici ce qui apparaît sur l’écran LCD:
3. Appuyez sur la touche Menu pour confirmer. L’écran LCD affiche alors:
4. Actionnez le bouton Morceau Suivant pour sélectionner la durée de votre
choix. Appuyez sur la touche Menu pour sortir.
 Loading...