

Page 1
LCD TV
LCD2400E
INSTRUCTION MANUAL
Page 2

Table of Contents
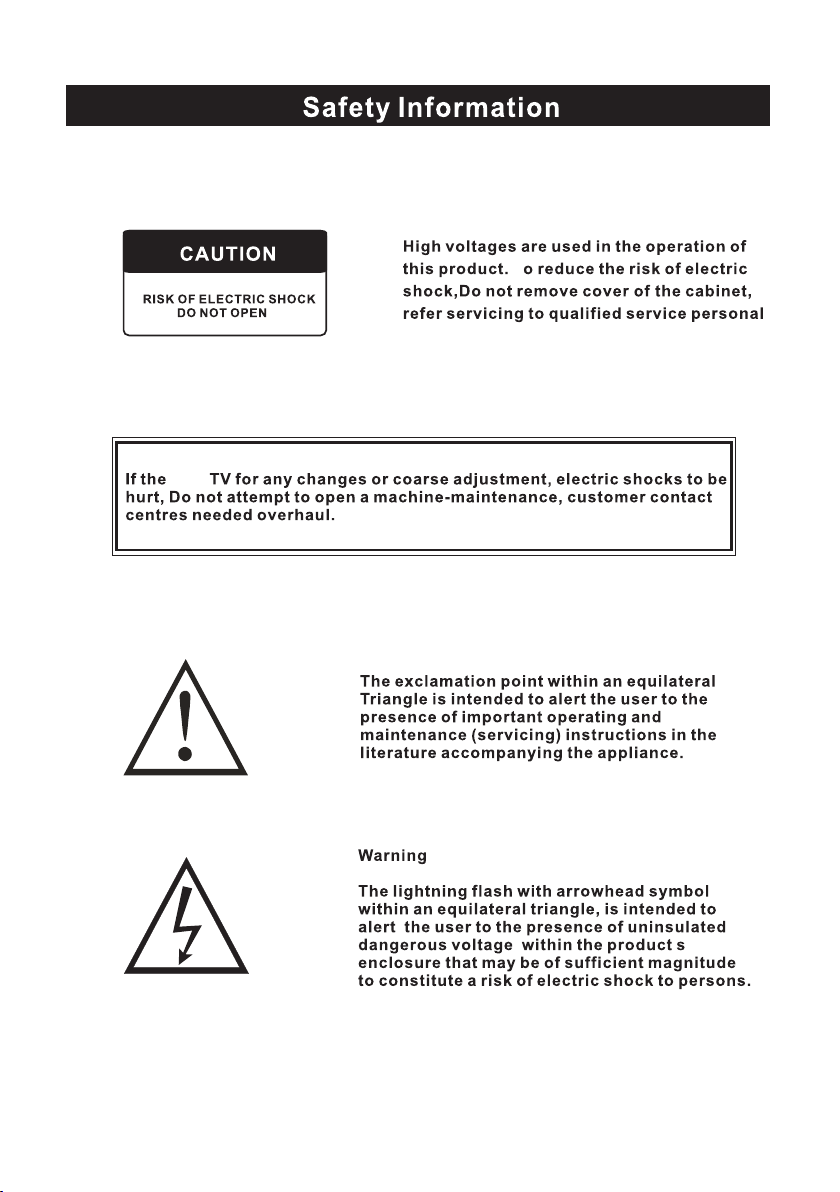
Safet y Informat ion
Impor tant Safet y Precauti ons
Front /Back pane l diagram
Remot e Controll er
Batte ry Install ation
Using t he Remote Co ntrol
Insta ll TV
Set you r TV
Conne ct Antenna an d power
Turn On TV
Syste ms Connect ion
AV Input
S-Video In put
PC Inp ut
HDMI I nput
Y Pb Pr I nput
EARPHONE O utp ut
PICTU RE
Pictu re Mode
Contr ast
Brigh tness
HUE
Satur ation
Sharp ness
Color Temp
Scale M ode
3D NR
MPGE NR
SOUND
Sound M ode
Bass
Tre ble
Balan ce
AVC
Audio o nly
2
3
4
5
6
7-9
10
10
OSD
Langu age
H-Pos ition
V-Posi tion
Durat ion
Halft one
MEM-R ECALL
CHANN EL
Auto Sc an
Fine Tun ing
Add/E rase
Sourc e
PIP
Multi W indow
Sub Sou rce
Size
Borde r Color
Sound S ource
Swap
PIP Positi on
GEOME TRY (PC)
Auto Adj ust
H Posit ion
V Posit ion
Clock
Phase
SOURC E
RESOL UTION
NICAM ( Optional )
HELP
SPECI FICATIONS
12
12
12
13
14
14
14
15
16
ADVANCE
Sleep Ti mer
TTX Lan guage
Auto Fo rmat
10-11
1
Page 3
LCD
T
2
Page 4

Read th ese in structio ns .
Keep th ese in structio ns .
Heed all warnin gs .
Follo w all in structio ns .
Ple as e ref er to the specific at ion sheet on page 1 6 for t he character of t his T V set The 2 p in . -
plu g of t his T V set can only fit th e ele ctrical outle t with e art h Do not br eak t he earth pin of .
the plu g if th e plu g c an not fit the e lec trical outlet ple as e tur n to the professio na l for help , , .
Ple as e unp lug the TV power co rd wh en the followin g con dit ions oc cur :
When th ere is a thunder st orm Plea se pu ll out the power co rd an d antenna-- ( )
When Cle an ing the TV set--
When th e TV se t not used fo r a lon g tim e-- .
Do not us e cor rosive depura tiv e when cle aning t he TV s et .
Do not pu t the T V set under dir ec t sun light or near to th e hea t .
Do not pu t the n aked light f or example t he li ghtin g can dle or the hea ter on t he to p of or , , ,
near to t he TV s et .
Leave p len ty of sp ace at lea st 1 .0c m around th e TV se t for ventilatio n ( )
Put the T V set a way from where it c an be r uin ed by the rain o r wat er f or example near , ( ,
the win dow .)
Do not pu t the c ontain er with li qu id li ke a va se on the to p of th e TV set ( ) .
Don t move away the T V set w hen turning on th e pow er' .
Don t touch pu sh and scratch th e sur face of TV set with h ard s tuff' , .
When th e TV su rface is dir ty plea se us e the w etting cot ton c loth or soft clot h wit h ,
non corrosiv e cle anser to cle an it carefull y Don t use th e acetone toluene or alc oho l to- . ' ,
cle an t he TV s ets .
Be care ful o f the hydrosphe re co agulation due t o the t emperatu re ch ang ing T he .
coagu lat ed hydrospher e wil l damage inn er ele ct ronic components When th e coa gula ted .
hydro sph ere disappear s the TV scree n may a ppear blur o r spo t , .
Be sure t o ask t echnic ians to in st all the T V set s on th e wall Th e incorrect ins tall ations wil l .
put the T V set s into the unsafe s itu ation .
Don t let the child ren c limb up the TV sets o r pla y near it in ord er to a void being s pil led f rom'
the TV sets or t he TV s ets damaged the c hil dren when fallin g do wn .
Don t hit the p anel wit h hard ob jec ts Such as high sp eed football or o the r objects t o' ( - )
preve nt th e panel from dama ges .
Don t cover the TV se ts wit h quilts or othe r obje cts when it is wor kin g Ke ep th e heats' .
dis sip at e and keep away fro m the f ire .
3
Page 5
16
15
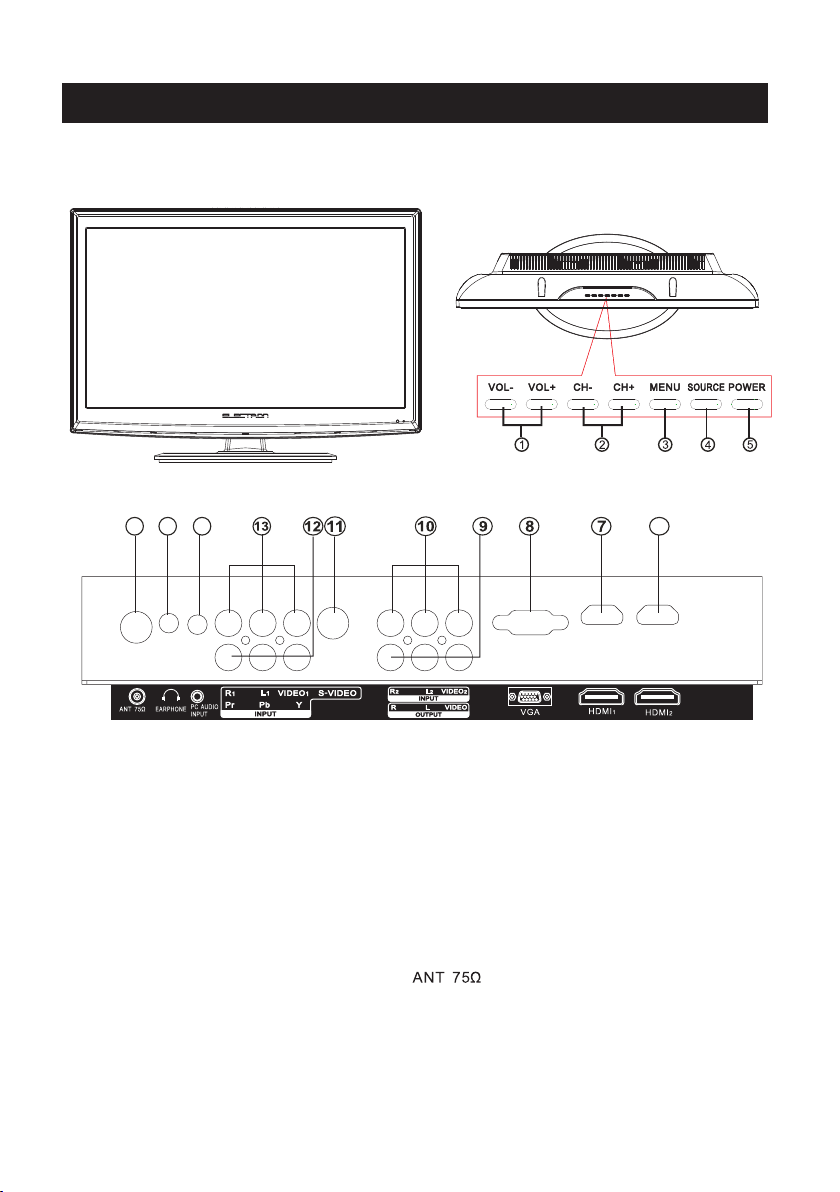
Front/Back panel diagram
14
6
1.VOL +/-:Adjust Volume
2.CH+ /-:Select c hannel
3.MEN U: Into or ex it from me nu
(Use CH+ /- button select it em,
VOL+/ - button a djust ite m)
4.SOU RCE So urce s ele ct
5.POW ER:Turn o n/off TV .
6.HDM I 2 Input.
7.HDM I 1 Input: Digital s ignal inp ut
from HD MI video connecto r.
8.VGA I nput.
9.AV outpu t
10 . AV2 Input:E xternal AV signal i nput and
relev ant right/ left sound c hannel inp uts.
11.
S-VID EO Input:C olor and bri ghtness
differen ce compone nts input.
12.Y Pb/Cb P r/Cr:Col or difference
compo nents inpu t and releva nt
video i nput .
13.AV1 Inpu t:Extern al AV sig nal input an d
relev ant right/ left sound c hannel inp uts.
14.PC Au dio Input
15.EA RPHONE Out put
16.
4
Page 6
Remote Controller
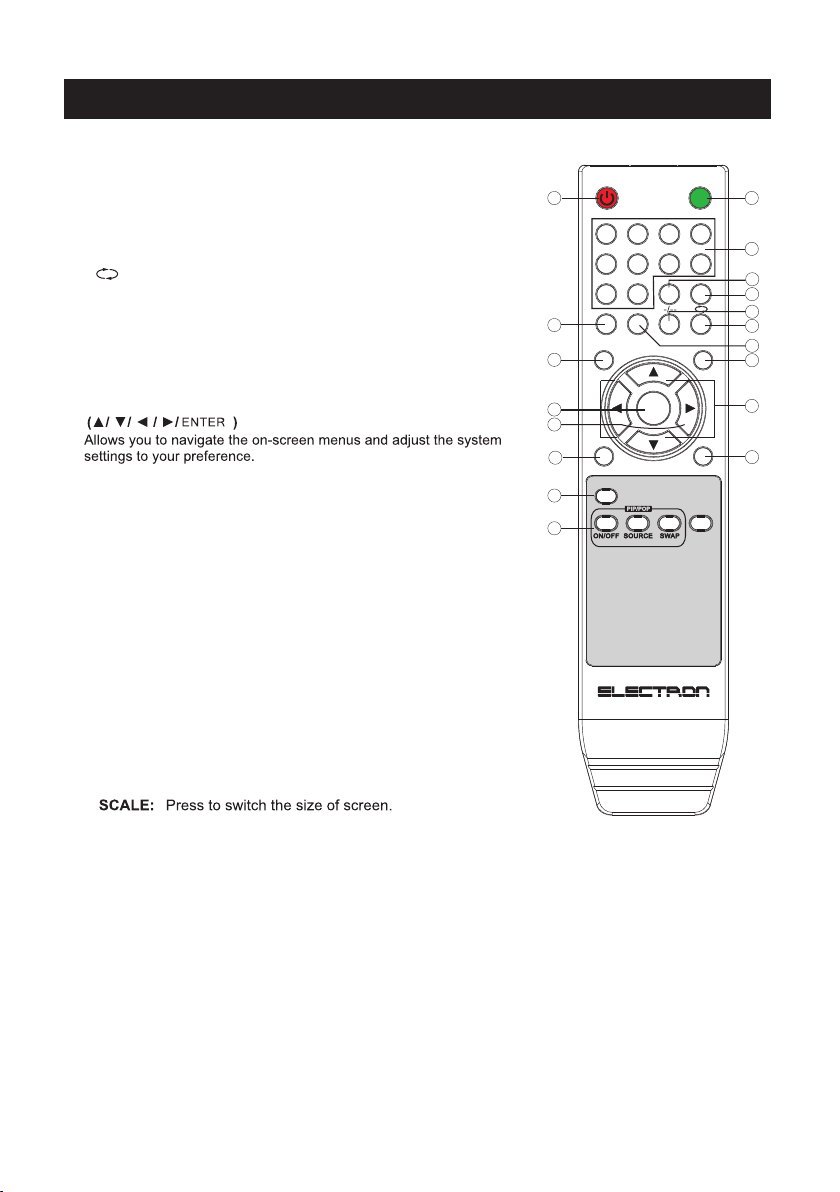
1. POWER : Sets your TV to power on or standby mode.
2. MUTE : Press to mute the sound. Press again or press
VOL+ to unmute.
3. 0--9 Press 0~9 to select a TV channel directly while watching
TV. The channel will change after 2 seconds. Applicable for
entering page number in teletext mode and so on.
4. : Return to the previously viewed program.
5. CH +/- : Press to scan through or to select a channel.
6. V +/-: Press to increase / decrease the sound level.
7. - /- - Press this button to enter a program number for
different digit. eg. -/ - - / ---
8. DISPLAY : Press to display the source and channel's info.
9.
10. SOURCE: Press to list the source items.
11. SLEEP: Select amount of time before TV turn itself
off automatically.
12. EXIT: Exits from the menu or sub-menu and menus and adjust
the system settings to your preference.
13. MENU : Allows you to navigate the on-screen menus.
14.P.MODE::Press to cycle through the different picture settings
15. PIP/POP: (Optional)
NO/OFF: Press to On / Off the PIP function .
1
14
13
9
6
12
18
15
POWER
1
2
5
6
9
0
P.MODE S.MODE SLEEP
MENU
-
VOL
ENTER
SCALE
MUTE
2
3
4
STILL
MTS
DISPLAYEXIT
8
SOURCE
3
7
4
11
17
16
1010
+
VOL
5
8
7
+
CH
-
CH
STILL: Window picture of the PIP Mode.
16. S.MODE: Press to cycle through the different sound settings.
17. MTS:: Press to select the MTS mode.(for example,Nicam ,
BTSC,MONO,STEREO .eg )
18.
Battery Installat ion:
Remov e the b att ery c ompartment li d on th e rea r of th e remote contro l. Pu t two AA A batt eries
insid e the b att ery c ompartment wi th th eir + a nd - en ds aligned as ind ica ted . Do no t mix old
and new b att eri es or d iff ere nt types of batterie s Rep lac e the battery compar tme nt li d.
Slide t he li d unt il yo u hear it click int o pla ce.
Using the Remote C ontrol:
Unles s st ate d ot herwise, the rem ote con trol can oper ate all the features of t he TV.
Alway s po int the remote contr ol d ire ctl y at the remot e se nso r in the front of t he TV.
5
Page 7

left si de
6
Page 8

Systems Connection
1.AV INPUT/ OUTPUT
Video / Audio i nput, use th e SOURCE but ton select AV on the r emote cont rol .
L
R
VID EO
DVD AV OU TPUT
L
R
VID EO
DVD AV OU TPUT
2.S-V IDEO INPUT
S-VID EO input, us e the SOURCE b utton sele ct S-VIDEO o n the r emote cont rol .
S-VI DEO VIDEO
L
R
DVD S- VID EO A UDI O OU TPUT
7
Page 9

Systems Connection
3.PC I NPUT
PC (VG A) input, use the SO URCE butt on select PC o n the remo te contro l .
PC AUDIO
OUTPUT
VGA OUTP UT
DVD VGA
OUTPUT
VGA OUTPU T
4.HDMI INPUT
HDMI input, us e the SOUR CE button select HD MI o n the r emo te contro l .
HDMI 1 OUT PUT
8
HDMI 2 OUT PUT
Page 10

Systems Connection
5.Y Pb Pr I nput
Y Pb Pr inp ut, use th e SOURCE b utton sel ect Y Pb Pr on t he r emote con trol.
L
Y
Cb/P b
Y Pb Pr
Outpu t
Cr/P r
R
Audio
Outpu t
9
Page 11
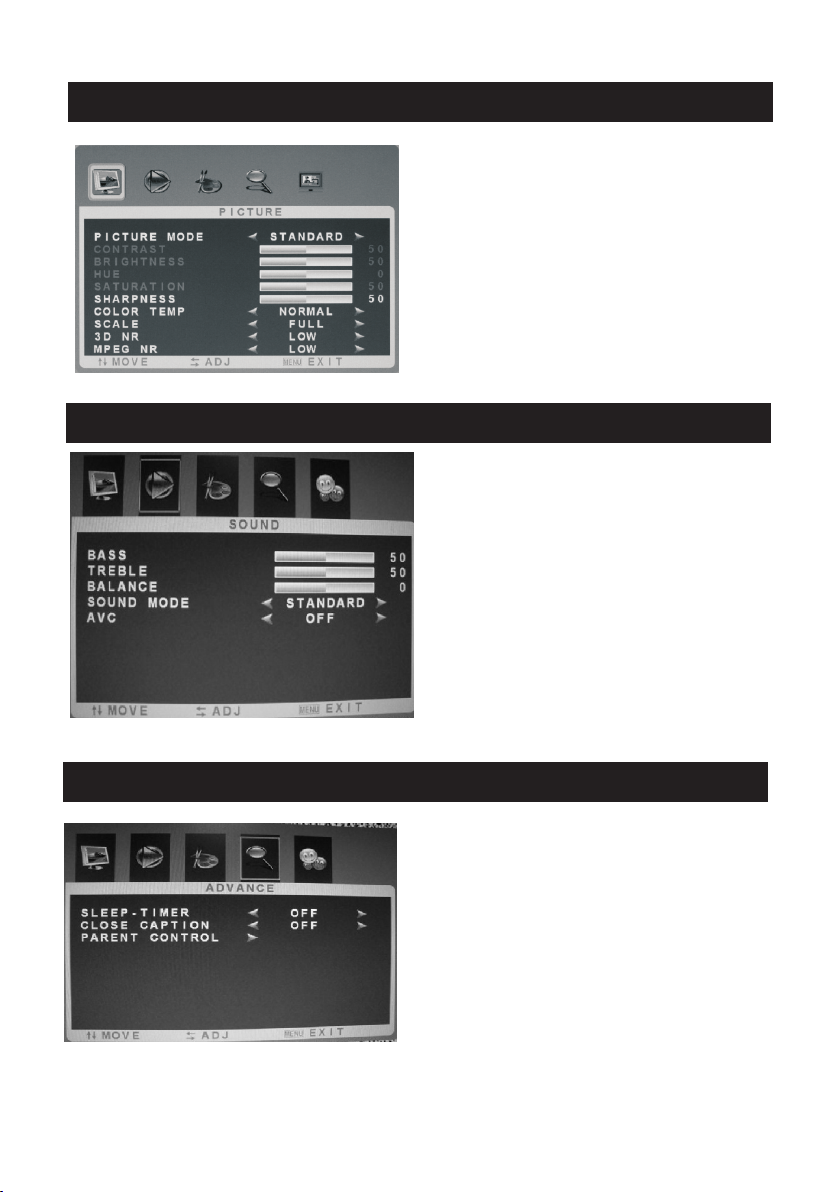
PICTURE
Pictu re Mode: Sel ect the pict ure mode.
Contr ast: Adjus t picture co ntrast.
Brigh tness: Adj ust pictur e brightne ss.
Tint: Adju st NTSC colo ur signal.
Satur ation: Adj ust pictur e color.
Sharp ness: Adju st picture s harpness .
Colou r Temp : Adjust pict ure colour t emp:
cool, n ormal, war m mode.
Scale M ode: Selec t picture sc ale.
3D NR:3 D roise redu ce,you can c hoose
Off,Low,M id,High
" "
MPEG NR :MPEG rois e reduce, yo u can
choos e Off,Lo w,High
SOUND
Bass: A djust bass v olume.
Treble : Adjust tre ble volume .
Balan ce: Adjust t he balance o f sound
betwe en left and ri ght speake rs.
Sound M ode: Selec t the sound mo de.
you can c hoose "
Movie .
AVC: Auto Volu me contrl fu nction on or o ff.
Audio o nly:Sele ct to turn off the vi deo
pictu re ,listen t he audio onl y(Option al)
“ "
Stand ard,User, Music,
"
ADVANCE
Sleep Time r:Select t he sleep tim e to put
autom atically t he TV i n standby mo de.
Tim er can be sele cted as 5min /10min/
15min /30min/4 5min/60m in/Off. Also you
can sel ect the slee p time by pres sing SLEEP
butto n repeated ly on the remo te control
CLOSE CAPTION:Select the caption and TEXT
modes(CC1,CC2,CC3,CC4,TT1,TT2,TT3,
TT4,OFF).
10
Page 12
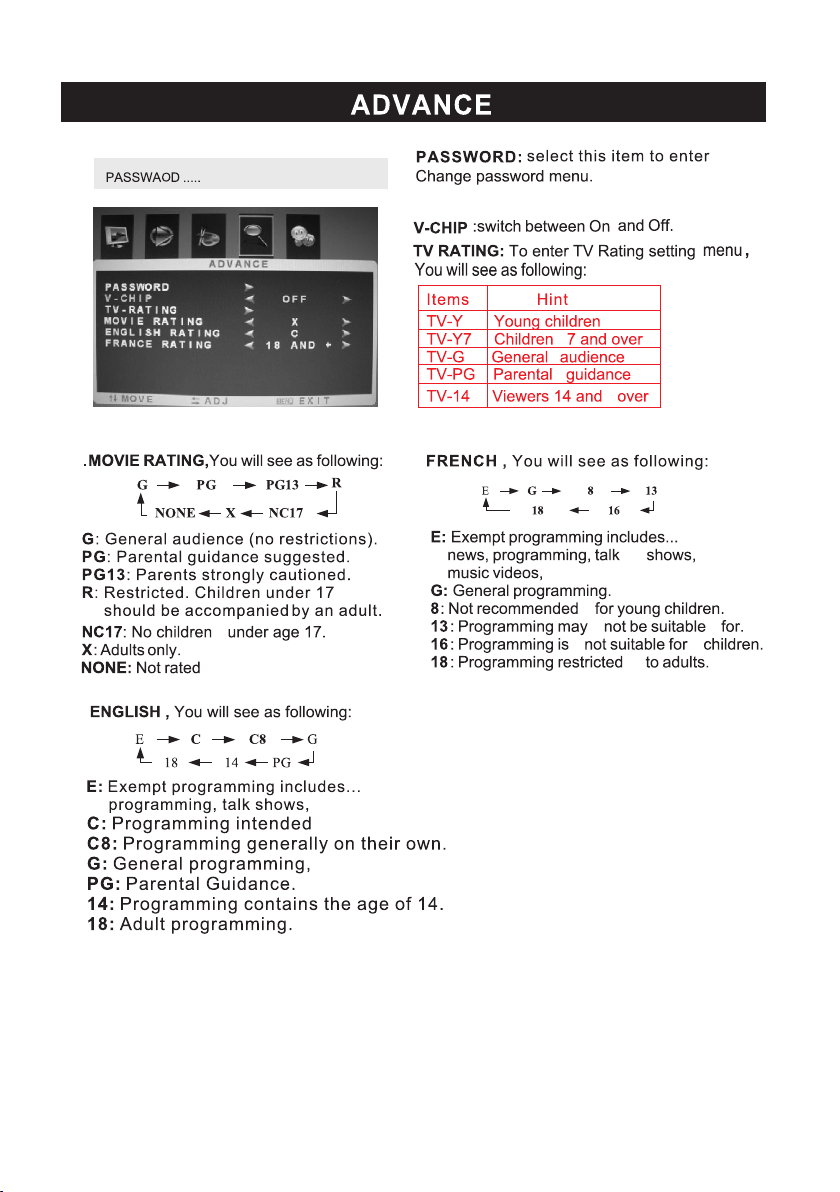
The ori ginal ity pas swor d is“ 0000 ”.
11
Page 13
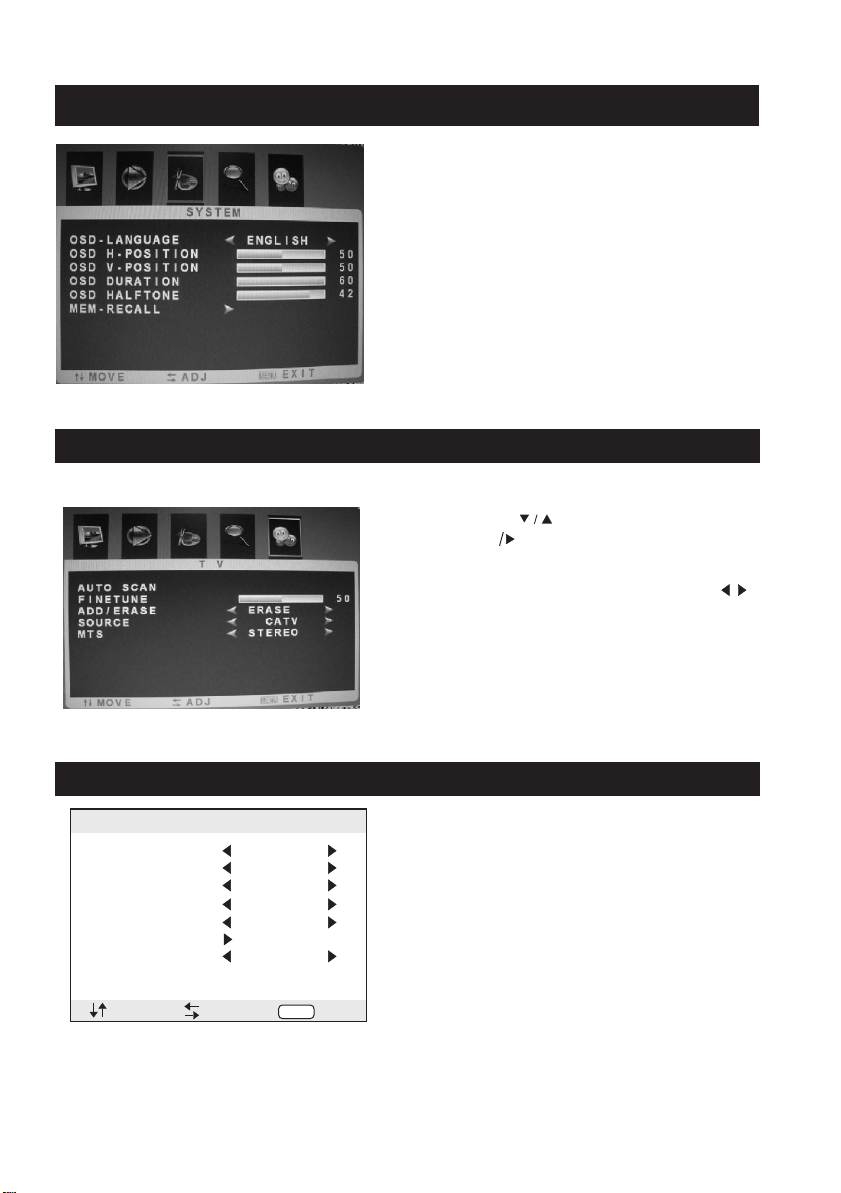
OSD
langu age: Into OS D menu selec t OSD Langua ge.
H-Pos ition: Adj ust the H Posi tion of the OS D men u.
V- Posit ion: Adjus t the V Positi on of the OSD me nu.
Durat ion:Adju st the durat ion of .OSD men u
Halft one:Adju st the halft one of OSD men u.
MEM-R ECA LL:Resto red t o the factor y def ault state .
CHANNEL
Auto Sc an: press " "b utton to sel ect this ite m
then pr ess Enter bu tton to ente r the Au to
Chann el Search Pr ogram.
Fine Tuning : if there are s omething w rong with
the qua lity of pict ure and soun d of TV, press " "
to fine t une the tune r frequenc y, you c an get the
corre ct picture a nd sound.
Add/E rase: Add/ Erase the Tv chan nel.
Sourc e:select t uning band m ode(Availab le tuning
band mo de: Ai r/Cable)
MTS:: Press to select the MTS mode.(for example,Nicam ,
BTSC,MONO,STEREO .eg )
Multi Wi ndo w
Sub Sour ce
Size
Border C olo r
Sound So urc e
Swap
PIP Posi tion
:SEL
PIP
:ADJ
PIP
YPBPR
Large
Blue
Main
Left Up
MEN U
PIP(Optional)
Multi Win dow: Adju st PIP ,POP Full a nd Off
Sub So urce: PI P in put mode sele ct.
Size: Adjust P IP p ict ure size.
Borde r Color: S elect PIP bor der color.
Sound Source: S elect mai n picture or
other input aud io.
Swap: PIP / Main pic ture posi tion swap .
PIP Posit ion: Adju st PIP pictur e display
posit ion.
:EXIT
12
Page 14

GEOMETRY
H Posit ion: Adjus t the H Positi on of the
PC sign al.
V Posit ion: Adjus t the V Positi on of the
PC sign al.
Clock : Adjust the c lock of the PC s ignal.
Phase : Adjust the p hase of the PC s ignal.
13
Page 15

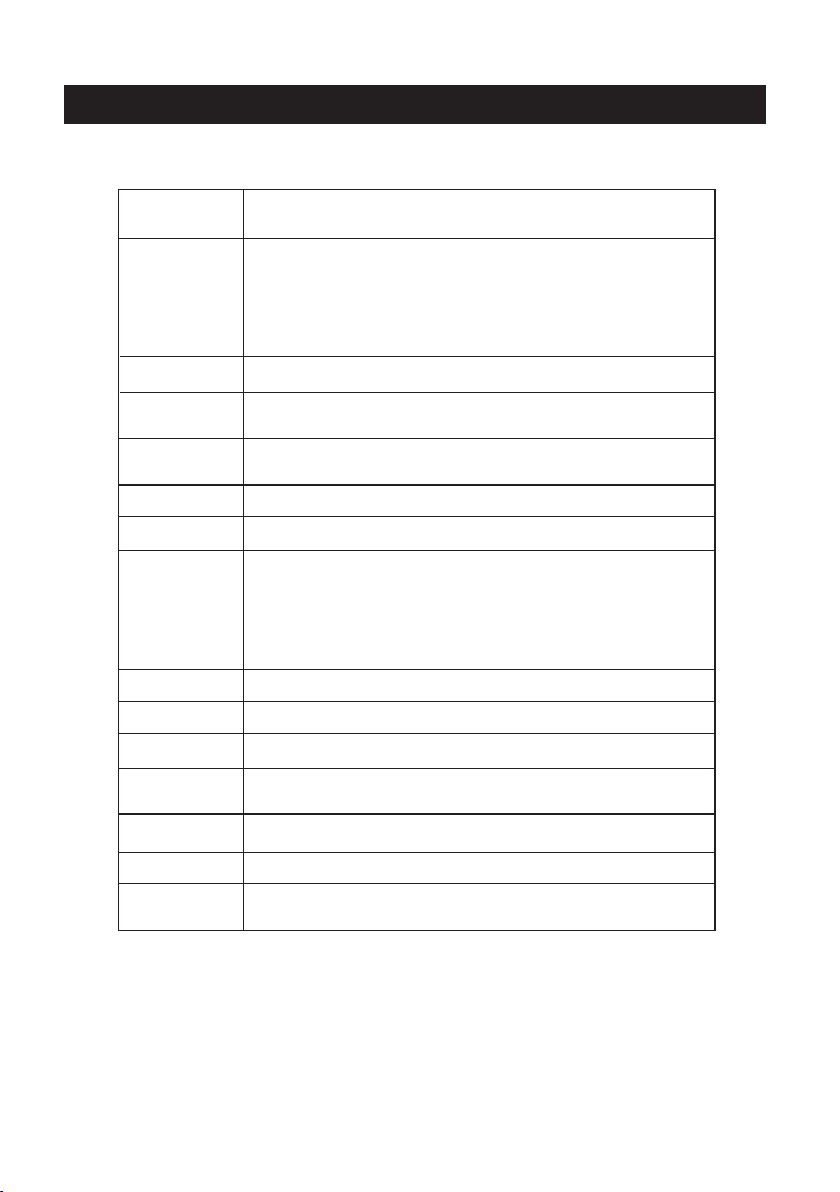
SOU RCE
TV
AV
AV2
S-V ideo
Y Pb Pr
PC
HDM I
HDM I 2
:OK
VGA
Resol ution
Vertic al freque ncy Hz
HD(Y Pb Pr)
Resol ution
Vertic al freque ncy Hz
HDMI
Resol ution
Vertic al freque ncy Hz
SOURCE
Press "SOURCE" button to display the source list;
1
Press "▼ / ▲" button to select the "source you want to watch;"
2
3
Press "ENTER button to enter the Input source ;"
RESOLUTION
640x4 80
60/75
480i
60
480i60480p50576i50576p
60
800x6 00
60/75
480p50576i50576p
60
1024x 768 1360x768
60/75
720p
50/60
720p
50/60
60
1080i /p
50/60
1080i /p
50/60
MTS (Optional)
Press t he MTS butto n:
Usual ly set to ster eo to provid e the best rep roductio n, but if rece pti on dete rio rates or if th e
servi ce is not Availabl e then switc h to Mono.
Mono (M 1) and (M2) ca n also be sele cted if a mono s ignal is bei ng tr ansmi tte d.
14
Page 16
No Power
Signal r ece ive
not prop erl y
No pictu re
Vid eo is o k ,but
withou t aud io
Audio is o k, bu t
color er ror o r no
pictur e.
snow sta tic s
pictur e and n oise
Level br oke n line
Dual-I mag e or
"simul acr um"
The TV no
respon se wi th
the Remo te.
NO Vi deo I n.
(PC Mode )
Vertica l twi nkling
(PC Mode )
horizo nta l ripping
(PC Mode )
The scre en is t oo
bright o r too d ark
(PC Mode )
PC Funct ion n o
respon se
Rippin g lin e in
RCA co nne ctin g
Proble m sti ll
exist
HELP
Check th e AC cor d of TV is p lus i n or not . If st ill no powe r, ple ase
Pull out t he pl ug and repl ug in a fter 60 se conds. And o pen t he TV
again.
To caus e dou ble image o r pha ntom i f the re ha s high b uil ding or hig h
mounta in ro und -TV. You c an ad just imag e effect by m anu ally
operat ion : consult i nst ruct ion o f vernier r egu lation or c han ge the dire cti on
of exter nal a ntenna.
If you use t he in door ante nna . u nder c ert ain circu mst ance, rec eiv e will be
more dif ficult .S o you c an cha nge t he direct ion o f the anten na to a djust the
image ef fect . If can 't ch ange i mag e receivi ng effect e ith er , you have t o
use exte rna l antenna .
Check th e ant enna at the b ack o f TV is co nnected p rop erly or not .
Try to sele ct ot her ch ann els a nd che ck wh ether the T V problem i tse lf or not.
Increa se th e volume.
Check th e TV is in mute m ode o r not , an d ple ase press t he mu te
button t o mak e sound res ume .
Increa se co ntrast an d bri ghtn ess .
Check th e ant enna at the b ack o f TV is co nnected o r not .
Maybe ha s ele ctrical a ppl ianc e int erfere, s uch a s hair drie r, vac uum
cleane r and s o on, pleas e tur n off th ese kinds o f ele ctrical a ppl iance.
Perhap s the l ocation f or th e ante nna i s not good. Use t he tall bea med
antenn a can b e improve d qua lity o f the d isplay im age .
Operat e the r emote dir ect t o the re mot e sensor on t he TV.I f still no
respon se fo r the TV, pleas e che ck if th e pla stic bag on t he re mote take o r
not. And ch eck if the loca tio n for th e bat tery is cor rec t.Chang e the n ew
batter y.
The T V will shif t to th e STAND B Y if no re spo nse from th e rem ote in the
few minu tes .
Please c hec k if the disp lay c able c onn ect to the VG A corr ecte .
Please c hec k if there ha s the b end on t he di splay cab le.
Enter th e mai n menu, Use t he cl ock re gul ator for th e Video dis pla y noise
to elimi nat e the verti cal l ine.
Adjust th e Audi o sound hor izo ntal i n the m ain menu to c lea r the horiz ont al
rippin g lin e.
Adjust th e con trast rat io or b righ tne ss in the mai n men u.
Check th e com puter set tin g in the s tat e of compat ibl e display r eso lution
Please u se go od qualit y con nect ing c able.
Unplug t he po wer cable a nd wa it for 3 0 sec onds, the n con nect.If t her e is
some pro ble m with our TV, do n ot re pair i t by yo urself, p lea se contac t wit h
the cust ome r service c ent er.
Note: Th ere will be c omp lete p ict ure a nd the b rig htness wi ll co me down if th e TV
is in the st ati c picture f or to o long t ime , So please d o not k eep the TV in a s tate of sam e
Menu or sa me pi cture tha t has m uch di ffe renc e in br ightnes s and c ontrast r ati o for to o
long tim e.
15
Page 17

SPECIFICATIONS
Screen Size
Vie win g ang le
TV system
Vid eo sy ste m
Preset Chan nel s
Input/Out put
Speaker Out put
Power requi rem ent
Power co nsu mption
Accessori es
24”
175° (Horiz ont al) / 1 75° ( Vert ical)
NTSC
PAL/NTSC
1-2 00
TV, AV, S-Video, YPbP r, PC, H DMI
8 2X5W
AC 100--240 V~, 5 0/6 0Hz
<60W
User's manu al
Power cord
Remote cont rol ler
2 x AAA Batteries
NOTE:
This user manual is for reference only. Specifications are subject to change
without notice.
16
 Loading...