

Page 1

Contents
Contents
03 Safety Precautions
05 Locations of Controls
07 Power Supply
08 General Operation
IP1134UK
Port able CD Radio
Docking Station for iPod
09 iPod Operation
10 CD Player Operation
11 Maintenance & Safety
12 Troubleshooting
13 Specifications & Recycling
14 Warranty
User’s Guide
Please re ad before operating this equipment
ENG-2PEENG-4
Page 2
Warnings and Precaution s
Safety Precautions
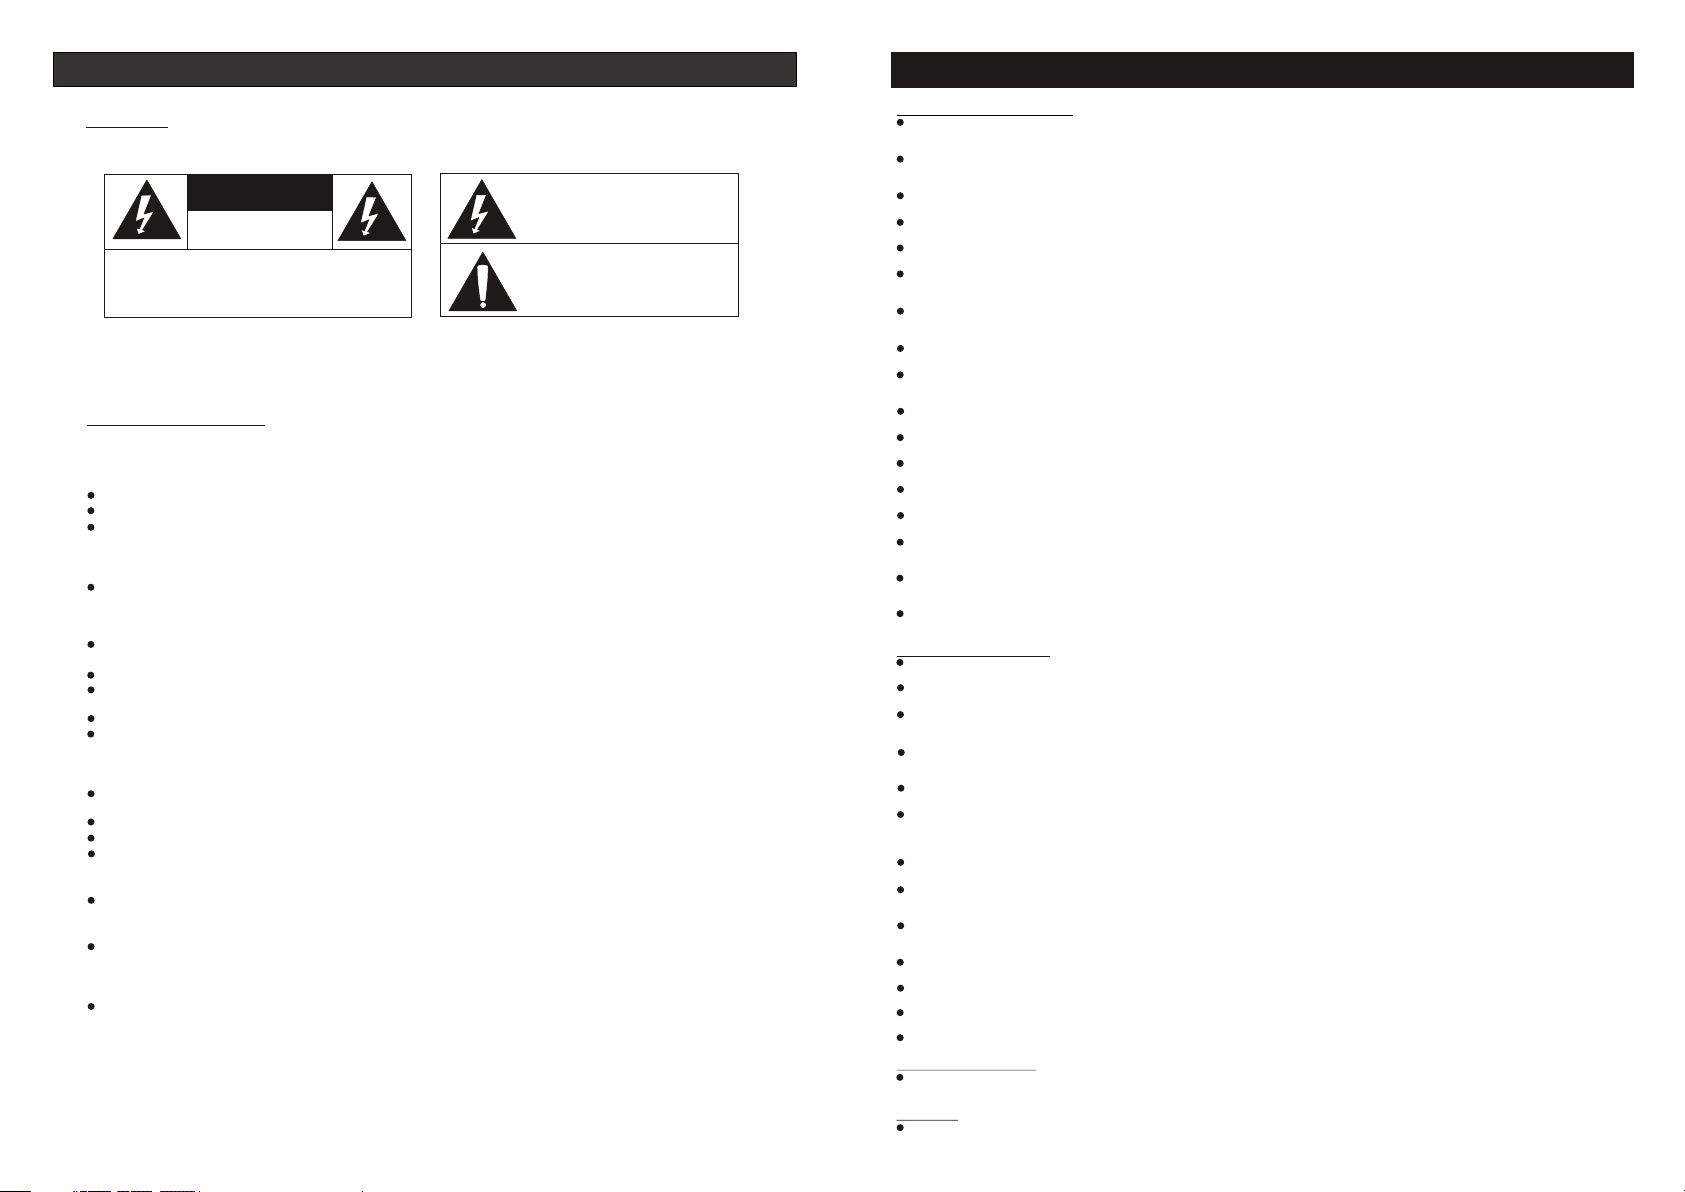
WARNING S
To r educe the risk of f ire or el ectri c sh ock, do n ot ex pose this
pro duct to r ain or mo istur e.
CAUTION
RIS K OF ELEC TRIC SH OCK
DO NO T OPEN
CAUTION: TO MINIMISE THE RISK OF ELECTRIC SHOCK,
NEVER REMOVE THE COVER. THIS PRODUCT CONTAINS
NO USER-SERVICEABLE PARTS. ONLY QUALIFIED REPAIR
TECHNICIANS SHOULD WORK ON THIS EQUIPMENTS.
HAZARD WAR NING : TO RED UCE THE RISK OF FIRE OR ELE CTRI C SH OCK , DO NOT EXP OSE THIS
PRODUC T TO RAI N OR MOI STU RE.
EXP LANATI ON OF GRAP HIC SYM OBOLS .
The lightning symbol inside an equilateral
triangle warns the user of the presence inside
the product of uninsulated hazardous electric
voltages powerful enough to represent an
electrocution risk.
The exclamati on mark symbol ins ide an
equila teral tria ngle warns the user that
i mp or ta nt op er at in g a nd se rv ic in g
(troubleshooting) instructions are contained in
the documentation accompanying the product.
PRECAU TIO NS FOR USE
To ens ure safe us e of th is produc t, pl ease foll ow th e advice be low:
Positi oni ng
Do not use t he pr oduct in ex tre mely hot, c old , dusty or da mp condit ion .
Place th e pro duct on a smo oth , flat surf ace .
Do n ot obstru ct th e flo w of ai r thr ough the produ ct. P lace it on a w ell -ventil ated positio n; do n ot
cover wi th fa bric or sta nd on a r ug or carpe t.
Power su ppl y
Before us ing this produc t, check that its rated volt age matche s your mains pow er supp ly
voltag e.
Safety i nst ruction s
Never pull on the power cord when plug ging in or u n-p lugging the pr odu ct: a lways use the plug
pullin g the c ord could d ama ge it and cre ate a r isk of elec tric shoc k.
Unplug t he pr oduct fro m the m ains sock et if y ou do not int end to use it f or an e xtended p eri od.
The On/ Off bu tton doe s not iso late the pr odu ct from the po wer su pply. To dis connect the
produc t fro m the mains p owe r supply, yo u must unpl ug the power ada ptor.
This pro duc t should on ly be u sed in a hori zon tal posit ion.
Mains pl ug is u sed as the disco nnectin g dev ice. It sha ll re main read ily o perable a nd sh ould not
be obstr uct ed during i nte nded used .
Conden sat ion
Wat er dropl ets o r conde nsa tion ma y from insid e it is mov ed in to a v ery w arm, hu mid
atmosp her e.
Conden sat ion can cau se th e product t o mal functio n.
Leave th e set i n a warm room f or 1 to 2 h ours to all ow th e condens ation to ev apo rate.
In the eve nt of a p roblem, u npl ug the powe r cor d and conta ct a qualif ied r epair tec hni cian.
Ven tilatio n pre caution s
Never ob str uct the pro duc t’s ve nti lation ho les.
War nin g concern ing l iquids
Do n ot al low liquids to spla sh or spil l ont o the p rod uct, and never stan d a liquid -filled cont ain er
(vase, j ar, et c.)on the t op of i t.
War nin g concern ing e xcessiv e sou nd levels
Owing to this product ’s ex tremely low noise outp ut an d ext ended dynami c ran ge, t he us er ma y
be tempted to t urn u p the v olume lou der t han n ecessar y. The sound o utp ut ma y be excess ive ly
high, to the point of dam aging the produc t’s hea dph ones or lou dsp eaker. Alw ays kee p the
volume w ith in reason abl e limits.
IMPORTANT INF ORMATION
This product is designed for use in mod erate clim ate. Do not use or install this unit where it would be exposed to direct
sunlight or in extremely hot tempe ratures , or near a radia tor, stove or appl iance that produces heat.
Do not take this un it into the bat hroom, or near a swimming poo l. Do not use it where it would be exposed t o water,
moisture, dripping or splash ing.
No objects filled with liquids, su ch as vases, pla ced on the product.
No naked flam e sources, su ch as lighted candies on the product.
If water gets in side the unit , Unplug the power cord from the suppl y socket and con sult your dealer.
Do not ha ndle t he power co rd wit h wet ha nds. To avoid ele ctric shock, NEVER to uch any internal part s.
Repairs/servicing shou ld be left to quali fied service personnel.
When connecting or disconne cting from the mains supply, hold the plug but not the cord. Pulling the cord may
damage it and is dangerous.
Do not drop the uni t, spill liqu id into it or allow ob jects to fall in it.
When p lugged in , a very small current will flo w. To save e lectricity and for s afe, it is recommended that t he product is
completely disconnecte d with the AC mains socket after the unit not used for a long tim e.
Consult your nearest dealer whe n damage, dis connection or contact fail ure is found wit h the cord.
Do not bend the cor d sharply, pull or twist it.
Do not modify the power cord in any manner.
Do not insert any metallic object in the un it.
Unplug the power cord when th ere is the possi bility of lighting.
Mains plug is used a s the disco nnecting device. I t shall remain readily operab le and should not be obstructed
during intended used.
To be compl etely disconnected the apparatus fro m supply mains, the mains plug of the app aratus shall be
disconnected from the mains socket outlet completely.
In case of ma lfuncti on due to electrostatic di scharge , just reset th e product re connect of po wer source may be
required to resume normal operation.
POSITIONING THE UNIT
A minimum di stance of 6 INCH ES must be kept to provide sufficient ventilation.
Do not place the product in closed boo kcases or racks wit hout proper ventilatio n.
Allow adequat e ventilation for the unit v entilat ion. It sh ould not be impede d by cover ing the ventilati on openings with
items such as ne wspaper s, table cloths, curtains etc .
Do not sta nd it on a thick pile carpet, install it in a thick pile carp et, or install it in a place with inade quate air flo w. Plac e
the unit on a flat eve n surface.
Do not use the unit in ex cessive ly hot, cold, dusty, damp or humid place.
Condensation may form inside the C D player i f the unit i s left any where warm and damp , or if you m ove the unit from
somewhere cold to a warm room. In this case, let the unit stan d for 1-2 hours or gradually increase the room
temperature that the unit will be dry be fore use.
Do not place it where it could be subj ect to vibration.
Do not place it wher e it could be magnetise d by a magnet or speaker. Si nce there are magnets , do not place tapes as
recorded data could be erased.
When th is unit is use d near a TV, the TV picture could be distorted . If this happens, move th e unit away form the TV. If
the situation could not be solved, av oid using the un it when the TV is turned on.
Keep the CD door cl osed so the lens is no t contaminated by dust. Do not touc h the lens.
Batteries shall not be expo sed to excessive heat such as sunshine, fire or the like .
Warni ng: excessi ve sound pressu re from earphones and headphones can cause heari ng loss.
Attention should be drawn to the envi ronment al aspects of battery disposal.
SAFETY MECHANISM
This u nit incor porates a safety in terlock m echanis m that switches the l aser beam on and off, when the disc holder is
open, the las er baser beam st ops automatically.
CAUTION
Danger of explosion if battery is inc orrectl y replaced. Replace only with th e same or equivalent typ e.
ENG-3
Page 3
Functions and Locations
Functions and Locations
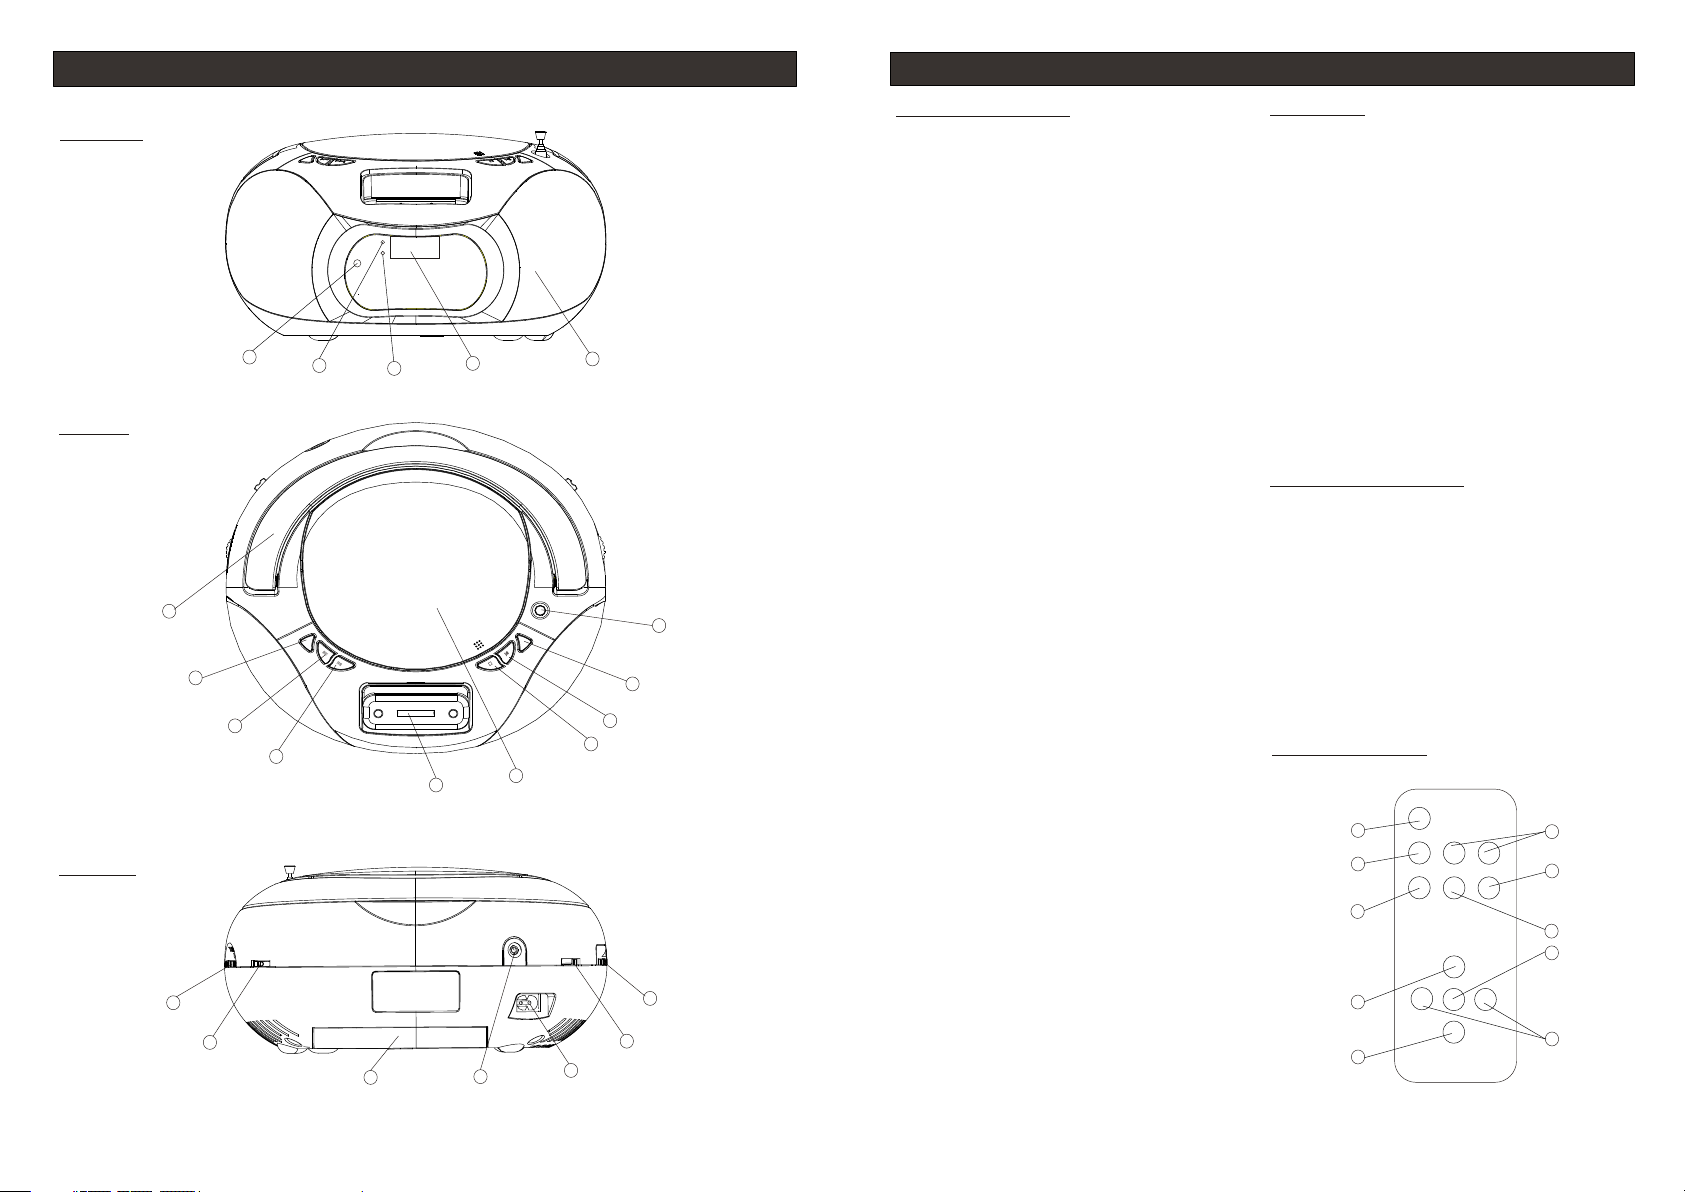
Front pa nel
Top p anel
FRONT AND TOP PANE L
1. SPEAK ER
2.
DISPLAY
- display of CD fu ncti ons.
3.
IPOD IND ICATO R
- display of iPo d indi cati ons.
4.
FM STERE O IND ICATO R
- display of FM st ereo i ndic atio ns.
5. REMOTE S ENS OR
6. TELESC OPI C AN TEN NA
5
15
14
13
4
12
3
2
11
10
1
6
7
8
9
- imp rovemen t of FM re cept ion.
7. PROGRA M (FO R CD ONLY)
CD: prog ramm ing a nd con trol of pr ogra mmed t rack
number.
8. PLAY/PAUSE
CD: start or pau ses CD p layb ack.
9. STO P
CD: stops CD pla ybac k or del ete a pr ogra m.
10. CD DOOR
- CD co mpartme nt doo r open /clo se mar k
(OP EN/CLOS E).
11. iP od DO CKING JAC K
- con nect your i Pod.
12. NEXT
CD: next track s.
13. BACK
CD: return to th e prev ious t rack .
14. MODE (FO R CD ON LY)
Repeat 1/Rep eat All /Ran dom pl ayba ck.
15. HANDLE
REAR PANE L
16. VOLU ME CO NTROL
- sou nd level co ntro l.
17. FUNCTI ON SE LECTOR
- sou rce selec tion i Pod, C D, RAD IO and p ower o ff.
18. AC POW ER SU PPLY
- pow er supply c ord co nnec tion .
19. STEREO H EAD PHONE JAC K
- con nect for th e 3.5m m ster eo hea dpho ne.
20. BATTE RY COM PARTM ENT
- ope ning of the b atte ry com part ment .
21. BAND SEL ECTOR (AM •FM •FM ST.)
- fre quency ba nd sel ecti on: AM, F M or FM ST.
22. TUNI NG KN OB
- AM/ FM/F M ST. stat ions s elec tor.
REMOTE C ONT ROL PAN EL
1. iPod SC ROL L UP/D N (operat e for iP od onl y)
2. REPEAT
3. RANDO M
4. PLAY/PAUSE
5. SKIP +/-
6. MUTE
7. STOP
8. PROGR AM (o pera te for C D only )
9. SELEC T (op erat e for iP od onl y)
10. MENU ( oper ate for iPo d only )
Remote c ont rol panel
Rear pan el
10
MENU
9
PROG. (C D) RAND OM REPE AT
8
VOLUMEVOLUME
22
21
20
~~AC IN~~AC IN
19
18
ENG-5
16
17
ENG-6
7
6
SELEC T
SKIP-
iPod
SCROLL U P
STOP
PLAY/
PAUSE
MUTE
iPod
SCROLL DN
SKIP+
1
2
3
4
5
Page 4

Power Supply
General operation
If you woul d like, the electri cal power supply can be use d to sa ve the batteries. Make s ure tha t t he u nit is
unplug ged f rom the wal l out let befor e ins erting th e batteri es.
USING TH E DC PO WER SUPPLY
Batter ies ( not inclu ded )
Open th e ba ttery co mpa rtment a nd insert 8 R 14 batte rie s with re spe ct to the "+" and " -" p olarity ind ication s
in the com par tment.
Import ant :
When rep lac ing the bat teries, mak e sure you dispose of the old bat teries in acc ordance w ith app licable
regula tio ns. T hey s hould be dispo sed o f in a locat ion s pec ificall y des ign ated for that purpo se so they c an be
recycl ed sa fely and wi tho ut posing a ny ri sk for the en vironme nt. D o not burn or b ury t hem.
Incorr ect u se of the bat ter ies may res ult i n electro lyte leak age h aving a cor ros ive effec t in th e compart ment.
Do not mix d iff erent typ es of b atterie s: do n ot use alka line batt eri es with sal ine b atterie s, fo r example .
only use b att eries of th e typ e recomme nde d by the manu facture r.
Do not mix o ld an d new batte rie s when inse rti ng new ones .
If the uni t is no t to be used fo r an ex tended pe rio d of time, re move the ba tte ries from t he un it.
Batter ies s hall not be e xpo sed to exce ssi ve heat suc h as sunshi ne, f ire or the li ke.
War nin g: excess ive s ound pres sur e from earp hones and head phones ca n cau se hearin g los s.
USING TH E AC POW ER SU PPLY
1.
Make sure tha t the vol tag e indicat ed on the manu facture r's rating label corresp ond s to the voltage
suppli ed by y our elect ric al instal lat ion. If thi s is not the ca se, c onsult yo ur de aler or ser vic e center.
2.
Connec t the electri cal pow er cab le the uni t then p lug it int o the wall o utl et. The wall o utlet mus t be
locate d nea r the produ ct an d be easily a cce ssible.
3.
To tur n power to th e app aratus of f, un plug the po wer s upply cab le from the w all o utlet.
4.
To pro tect the un it du ring viol ent t hunders tor ms, unplu g the power s upp ly cable fr om th e wall outl et.
Instal l/R eplace th e Rem ote Contr ol Batteries
The remo te co ntrol bat ter ies are alr ead y install ed at the
factor y. Remove ba tte ry insula tor t ape befor e use. When t he
remote c ont rol stops o per ating or it s ran ge seems re duced,
replac e the b atterie s wit h new ones.
1. The bat ter y door is loc ate d on the back o f the unit.
2. Pull th e bat tery door o ut.
3. Inser t one “ CR2032” 3 -vo lt lithiu m bat teries. M ake sure
the pola rit y (the + and - si de of t he batter y) is c orrect.
4. Fully i nse rt the batt ery d oor back to t he original po sition.
Batter y con tain chem ica l substan ces , so they
NOTE:
should b e dis posed of pr ope rly.
Bat tery do or
GENERA L OPERATIO N
1.
Select t he so urce by set tin g the FUNCT ION S ELECTOR to iPod , CD, O FF or RADIO .
2.
Set the de sir ed volume l eve l using the V OLU ME KNOB.
3.
To tur n off the uni t, se t the FUNCT ION S ELECTOR to OFF.
RADIO RE CEP TION
1.
Set the FU NCT ION SELEC TOR to RADI O.
2.
Positi on th e BAND SELE CTOR on the d esi red band: AM, FM or F M ST.
3.
Turn t he TU NING CONT ROL t o search fo r the d esired st ation.
NOTE: T he FM stereo indic ato r com es on if th e BAND SE LECTOR is set o n FM s tereo an d you have tuned
the radi o to an F M stereo st ati on.
4.
Adjust V OLU ME CONTRO L for t he desire d volume level .
5.
When yo u have fi nished l istenin g to the r adio, po sition t he FUNCT ION SELE CTOR to OFF to turn the
unit off .
Helpfu l hin ts:
To imp rove radi o rec eption
To liste n to the FM rad io, ext end the tel escopic ant enn a an d or ien t it for optimu m recep tion. R educe
the leng th of t he antenn a if th e signal is t oo st rong (if yo u are very ne ar th e transmi tte r, for examp le) .
As the uni t i s e quipped with a built- in ant enna, the tel escopic antenna does not have to be used to
listen t o AM sta tio ns. Move th e ent ire unit to o rient the buil t-in ante nna .
STEREO H EAD PHONE JAC K
Plug ste reo h eadphon es (n ot includ ed) , equippe d wit h a 3.5mm min i-plug, into t he PHONES j ack f or privat e
listen ing , without d ist urbing th ose a round you .
Reduce the VOLUME to a low le vel bef ore put ting on the head phones. You can the n adjus t the V OLUME
progre ssi vely to a com for table lev el.
ENG-7
ENG-8
Page 5

iPod operation
CD Player Operation
Playin g and c harging y our i Pod
NOTE:B efo re pluggi ng yo ur iPod in th e doc k, snap the s uitable i nse rt into the d ock t o provide a s nug f it for
the play er to b e docked.
1. Snap th e com patible i Pod i nto the doc k con nector.
2. Posit ion the FUN CTION SEL ECTO R on iP od.
3. Then, i Pod w ill playb ack a utomati cal ly.
→ By using t he bu ttons (ME NU, S ELECT, PLAY/ PAUSE, SKI P+/- , iPod S CRO LL UP/ DOW N,
FOLDER U P/D OWN and VOL UME ) and its rem ote control, t he follow ing d isc playb ack f eatures
4. Tur n Volu me Co ntrol to ad jus t the sound l eve l.
5. Press o ff bu tton on you r iPo d to turn off i Pod.
NOTE: If y our d ock an iPod w ith a d rained ba tte ry, it ma y take up to 6 mi nut es of charg ing b efore the i Pod
will res pon d.
are avai lab le: Play/ Pau se, selec tin g next/pr evious tr ack a nd changi ng vo lume.
1st Gen N ano
1st Gen Na no
iPod nan o 2GB /4GB
iPod M ini
iPod Min i
iPod min i 4GB /8GB
Thin iP od
Thin iPo d
3rd nano 4 GB/ 8GB
5th 30GB
iPod cla ssi c 80GB
iPod tou ch 8G B
CD PLAYBA CK
The CD pl ayer supp ort s aud io discs, CD-R and CD-RW. D o not atte mpt t o rea d CD- ROM, CDi, VCDs , DVD s or
data CDs .
Note: E ven i f thi s por tab le ra dio -CD p layer is a ble to read CD -R an d CD- RW di scs, in addit ion t o conven tional
compac t disc s, it is not possibl e to offer a 100% gua rantee that all CD- R/RW dis cs can be rea d; playba ck
depend s on the qualit y an d condi tion of the bla nk d iscs th at y ou u se, amo ng o ther things . A playb ack fai lure
does not n ece ssarily i ndicate t hat t he unit is ma lfuncti oni ng.
1. Positi on th e FUNCTIO N SELECTO R on CD (the di splay uni t bri efly disp lays - - -).
2. To ope n the CD play er do or, raise it b y the corne r mar ked OP EN/ CLOSE.
3. Insert a CD, CD-R or CD -RW d isc, printed surface faci ng upwar ds an d gently pres s the CD p layer door
to close i t.
4. Start pl ayb ack by pres sing PLAY/ PAUSE .
5. Press PL AY/PAU SE to inter rup t or resume p layback .
6. To sto p CD playba ck, p ress S TOP.
NOTE: CD p lay back stop s automat ica lly when:
the CD com par tment is op ened;
the radi o fun ction is se lected;
the CD is fi nis hed.
SELECT ING A DIFFER ENT TRACK
During p lay back, pre ss NEXT or BA CK on t he unit or re mote cont rol u nit to s ele ct a track.
If you hav e sel ected a tra ck number i n Sto p or Pause mo de, press P LAY/PAU SE to resum e pla ybac k.
Briefl y pre ss NEXT to pass to th e nex t tra ck or pres s NEXT severa l tim es un til t he de sir ed tr ack n umber
appear s in th e display.
Briefl y pre ss BACK to re turn to the s tar t of the c urr ent track .
Press BA CK se veral tim es to find a pr evi ous track .
SEARCH ING F OR A PAS SAGE ON A TR ACK
1. Press an d hol d BACK or NEX T to read the t rac k in fast for ward mode a t red uced v olu me.
2. When yo u hav e found the de sired passag e, relea se the BACK or NE XT bu tto n(norma l pla yba ck
resume s aut omatica lly).
REPEAT
Repeat : pla yback of th e current t rac k continu ously.
Repeat a ll: p layback o f the entir e CD co ntinuou sly.
Random : pla yback in th e random co nti nuously.
PROGRA MMI NG OF TRACK N UMBERS
Up to 20 tra cks c an be progr ammed in an y ord er. If desir ed, a g iven trac k can be prog ram med more th an once.
1. In STOP mo de, press B ACK or NEXT t o sel ect a track .
2. When t he d esired trac k nu mbe r ap pears, pres s the PROG butt on once to reco rd the trac k (t he disp lay
unit dis pla ys "prog" , briefly f oll owed by the t rack numb er se lected) .
3. Repeat s tep s 1 and 2 to sele ct and prog ram t he desire d tracks.
4. To sta rt playba ck of y our pr ogr ammed tra cks, pres s PLAY/PAUS E.
PROGRA M CHE CK
In STO P m ode, press th e P ROG. b utto n. ( the dis pla y u nit dis pla ys th e t rac k n umbers i n t he o rder
progra mme d).
DELETI NG A PROGRAM
Perfor m the f ollowin g operati ons t o delete th e memory:
Open the C D doo r;
Select t he RA DIO sourc e;
Press ST OP onc e.
ENG-9
ENG-10
Page 6

Maintenance & Safety
Troubleshooting
CD PLAYER AN D CD HA NDLING
OPERATI NG PRECAU TIO NS AND G ENERAL MA INTENAN CE
Place the unit on a hard and plane surface to ensure that it d oes not
tip over.
Do n ot expos e the unit, ba tteries or th e CDs to hu mid ity, rain, sand or
an exces siv e source of h eat f rom a heate r or di rect sunl ight.
No not ope n the ap paratus . A gap of at least 15 cm mus t be kep t
betwee n the ve ntilati on openin gs and the s urround ing su rfa ces in
order to ensure suf ficient ventil ati on and avo id all accumulati on of
heat.
The un it's me cha nism fe atures self-lu bri cating bearing s and t hus do
not requ ire g rease or lu bri cation.
Use a s oft and dry clot h to cle an t he u nit. Never use c lea ning agents
contai nin g alcoh ol, am mon ia, be nzene or a brasive s, which m ay
damage t he ca binet.
CLEANI NG CD s
Use a soft a nd cl ean cloth t o wip e away fing erp rints or du st from the s urf ace of the di sc.
Wipe in a stra igh t m oti on fro m the center to the edg e. Very s mall d ust part icl es and slight smud ges
have abs olu tely no eff ect o n the sound q ual ity.
Never use chemical prod uct s suc h as sprays fo r conv entiona l (vin yl) re cords, ant i-s tatic aero sol s,
benzen e or th inners to c lea n your CDs.
To red uce the ris k of sc ratches , alw ays store C Ds in their case w hen not use d.
Do not expose CDs t o di rec t sunlight, hig h hu midity or ex ces sively high tem peratur es f or l ong periods
of time.
Never wr ite o r affix lab els t o the CD's su rfa ces.
CLEANI NG TH E LENS
If the lens is dirty, th e so und may ski p an d the CD may not be r ead correct ly. O pen the CD d oor and clean
the lens a s fol lows:
Unplug t he po wer cord.
Dust or dr y par ticles:
Blow on the lens several times us ing a cam era l ens brush, t hen w ipe it ge ntl y wit h th e bru sh to rem ove
the dust . The n blow agai n on th e lens.
Finger pri nts:
If you are una ble to clea n the lens with the camera len s bru sh, use a dry cotton swab t o cle an the
surfac e, fr om the cent er to t he outsid e.
If a probl em oc curs, che ck th e points be low b efore tak ing the app ara tus in for re pai r.
If you are u nab le to remed y a pro blem by fol low ing these h ints, con tac t your deal er or a fter-sa les servi ce
center.
WARNING : Und er no circu mst ances sho uld y ou attemp t to repair t he se t yoursel f; as t his will in val idate the
guaran tee . Do not open t he se t as there ar e a ris k of electr ic shock.
No sound /El ectric po wer
Vol ume no t adju sted .
→ Adj ust th e volu me.
The e lectric al pow er cor d is not p lugg ed in co rrec tly.
→Check the powe r cord c onne ctio ns.
The b atterie s are de ad/n ot ins erte d corr ectl y.
→Check the inst alla tion a nd cha rge of t he bat teri es.
The disp lay u nit does no t fun ction cor rectly/ The b uttons do n ot fu nction
Electrosta tic di scha rge.
→Turn t he uni t off an d disc onne ct it. Plug i t back i n a few se cond s late r.
Interm itt ent crack lin g sound dur ing FM recepti on
Wea k sign al.
→ Ext end and pos itio n the FM a eria l.
iPod doe s not d ock prope rly
Using no or wron g iPod i nser t.
→ Mak e sure the do ck ins ert is t he pro per fi t for yo ur iPo d.
iPod didn’t in stal l prop erly.
→ Remove your iP od fro m the do ck and c heck f or obs truc tion o n the co nnec tors i n the dock an d on you r iPod .
iPod doe s not r esponse t o the u nit/iPo d is playin g but n o sound com es ou t
iPod is not inst alle d prop erly.
→ Remove your iP od fro m the do ck and c heck f or obs truc tion o n the co nnec tors i n the dock an d on you r iPod . Then r esea t
it in the dock.
iPod is locked u p/pl ays bu t no sou nd com es out .
→ Check your vol ume se ttin g. Mak e sure y our iP od is wo rkin g prop erly b efor e docking i nto th e unit . Plea se ref er to yo ur
iPod manual fo r deta ils. S ee abo ve for u pgra de inf orma tion . You may n eed to r eset y our iP od. To do s o:
1. Tog gie th e Hold s witc h to hol d posi tion , then o ff.
2. Pr ess and hol d the Me nu and c ente r Sele ct but tons a t the sa me tim e unti l Appl e logo a ppea rs. You m ay nee d to rep eat
thi s step.
Unit/i Pod p erforma nce i s erratic
The u nit is reac ting t o exte rnal i nter fere nce.
→ Mov e unit away f rom po tent ial so urce s of ext erna l inte rfer ence s uch as c omputer s, mod ems, w irel ess de vice s (rou ters )
or fl uoresce nt lig ht.
iPod did n’t c har ge up
iPod is not inst alle d prop erly.
→ Remove your iP od fro m the do ck and c heck f or obs truc tion o n the co nnec tors i n the dock an d on you r iPod . Then r esea t
it in the dock.
iPod is locked u p/fr ozen o r iPod b atte ry has p robl em.
→ Please make su re you r iPod i s work ing pr oper ly bef ore do ckin g into t he unit. Please r efer t o your i Pod ma nual f or det ails .
Remote C ont rol didn’ t wor k
Battery weak .
→ Replace curr ent ba tter y with n ew bat tery.
Remote Contr ol is no t poin ted to ward t he uni t remo te sen sor.
→ Point the Remo te Con trol t owar d the un it rem ote se nsor ( to rig ht of di spla y), move wi thin 1 0 feet o f the un it.
No infor mat ion displ aye d about the d isc
No CD in the playe r.
→Ins ert a CD, CD- R or CD- RW in the p layer.
The C D is scratc hed or v ery di rty.
→Replace/cl ean CD . See Ma inte nanc e.
The l aser lens i s cove red wi th con dens atio n.
→Wai t unti l cond ensa tion disappea rs fro m the le ns.
The C D-R is blan k or the d isc is n ot fin aliz ed.
→Use a finalize d CD-R .
The CD is no t rea d
The C D is scratc hed or v ery di rty.
→Replace/cl ean CD . See Ma inte nanc e.
The l aser lens i s cove red wi th con dens atio n.
→Wai t unti l cond ensa tion disappea rs fro m the le ns.
The CD ski p tra cks
The C D is scratc hed or d irty.
→Replace/cl ean CD . See Ma inte nanc e.
ENG-11 ENG-12
Page 7

Specifications
Power su ppl y
Power co nsu mption
Dimens ion s of unit
Wei ght
Freque ncy r ange
Output p owe r (RMS)
Speake r
Headph one s
(The tec hni cal chara cte ristics a re li able to cha nge witho ut no tice)
: AC 23 0V ~ 50Hz
: DC 12V 8 x UM- 2/R 14 batter ies ( not inclu ded )
: 14 Wa tts
: 253(L) x 2 36( W) x 123(H) m m
: 1.713k g
: AM 54 0 to 1600KH z
: FM 88 to 108 MHz
: 1.2 x 2W RMS
: 8 Ohms
: ø 3.5mm
Recycling
This s ymb ol bear s the s ele cti ve s ort ing symbol for wa ste electr ica l and e lec tronic
equipment (WE EE) . Th is mea ns tha t this product must be handled pursu ant to
European Dir ect ive 200 2/9 6/E C in or der to be recycle d or di sma ntl ed to m ini mize
its impact on the en vir onm ent .
For further info rma tio n, pl ease contact your loca l or re gio nal a uthorities.
Electronic produ cts not included in t he s ele ctive sorting pro ces s are
potentially da nge rou s fo r the environment an d hu man h eal th due to the
ENG-13
 Loading...