

Page 1
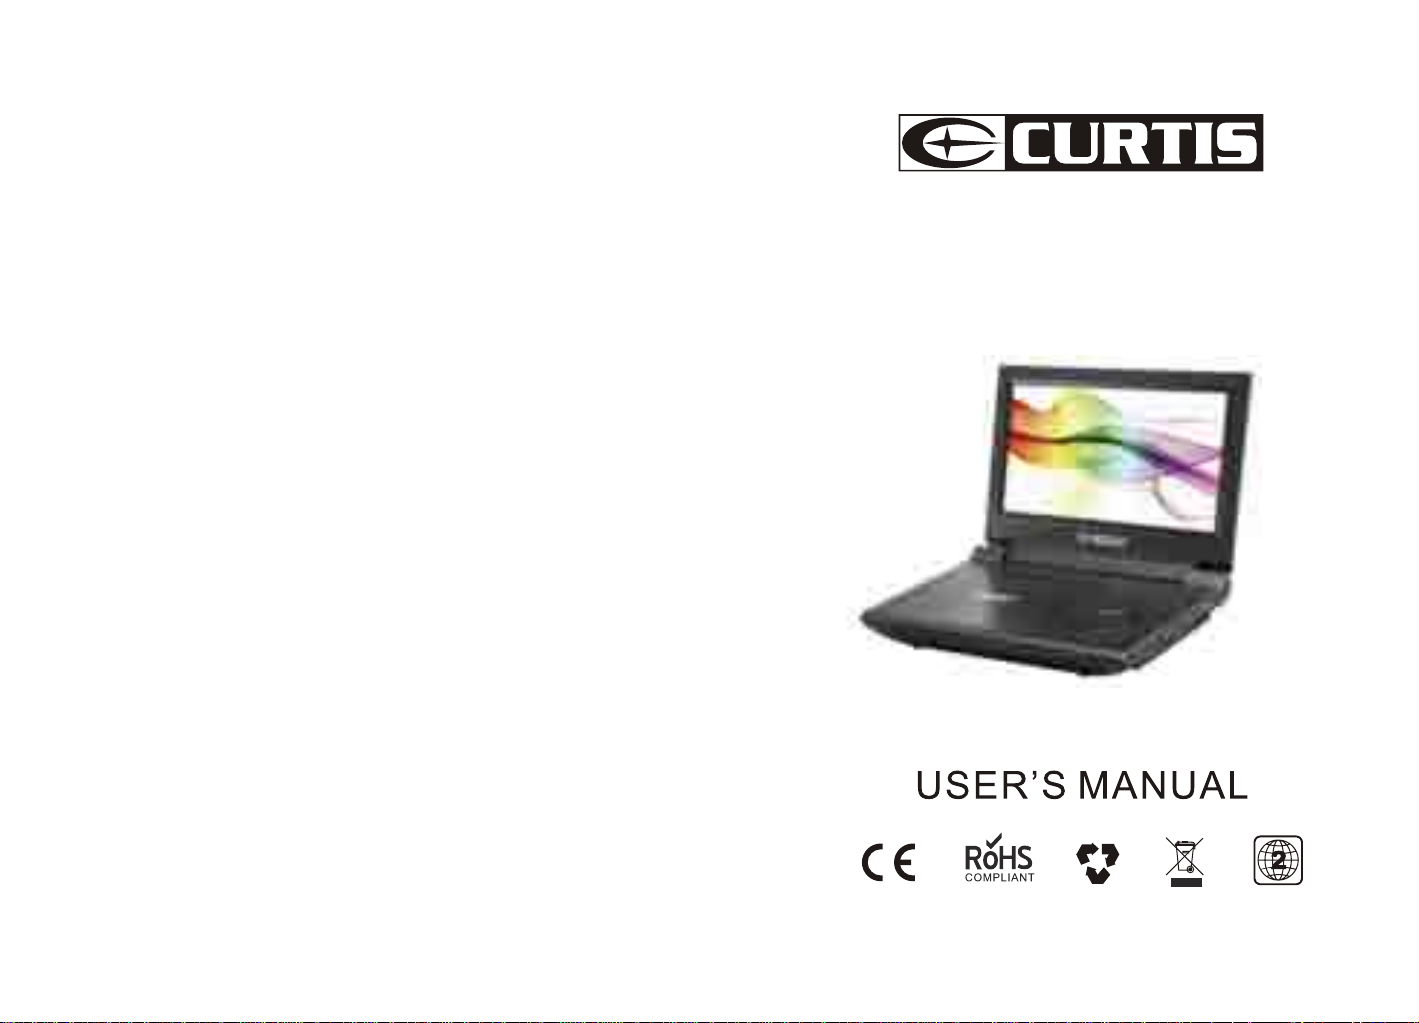
DVD9009UK
Page 2
Table Of Contents
Safety Precaution 1
Package 2
Safety Precaution
Main Features 2
Main Unit Controls 3
System Connection 4
Basic operation 6
System Setup 9
Specification 12
Troubleshooting 13
The lightning flash with arrowhead symbol, within an equilateral
triangle, is intended to alert the user to the presence of uninsulated
“dangerous voltage” within product’s enclosure that may be of
sufficient magnitude to constitute a risk of electric shock.
The exclamation point within an equilateral triangle is intended to
alert the user to the presence of important operation and servicing
instructions in the literature accompanying the appliance.
Warning: To reduce the risk of fire or electric shock, do not expose this
apparatus to rain or moisture.
1) Please read the instruction manual carefully and follow all the
requirements of safe operation to operate the device.
2) Do not use this unit near water. Do not place over the unit any container
with liquid inside.
3) Do not install near any heat sources such as radiators, heat registers,
stoves, or other apparatus (including amplifiers) that produce heat.
4) Unplug this unit during lightning storms or when unused for long time.
5) About Cleaning: Unplug the system, use only wet cloth to clean. Do not
use liquid detergent or aerosol.
6) Only use accessories specified by the manufacturer.
7) Refer all servicing to qualified service personnel, servicing is required
when the unit has been damaged in any way, such as power supply cord
or plug is damaged, liquid has been spilled or objects have fallen into the
unit, exposed to moisture, does not operate normally. Don't try to repair
the machine by yourself because of the danger of high voltage and
electric shock.
8) Do not use irregular shaped discs such as heart or star-shaped discs as
they may cause the unit to malfunction.
1
Page 3
Package
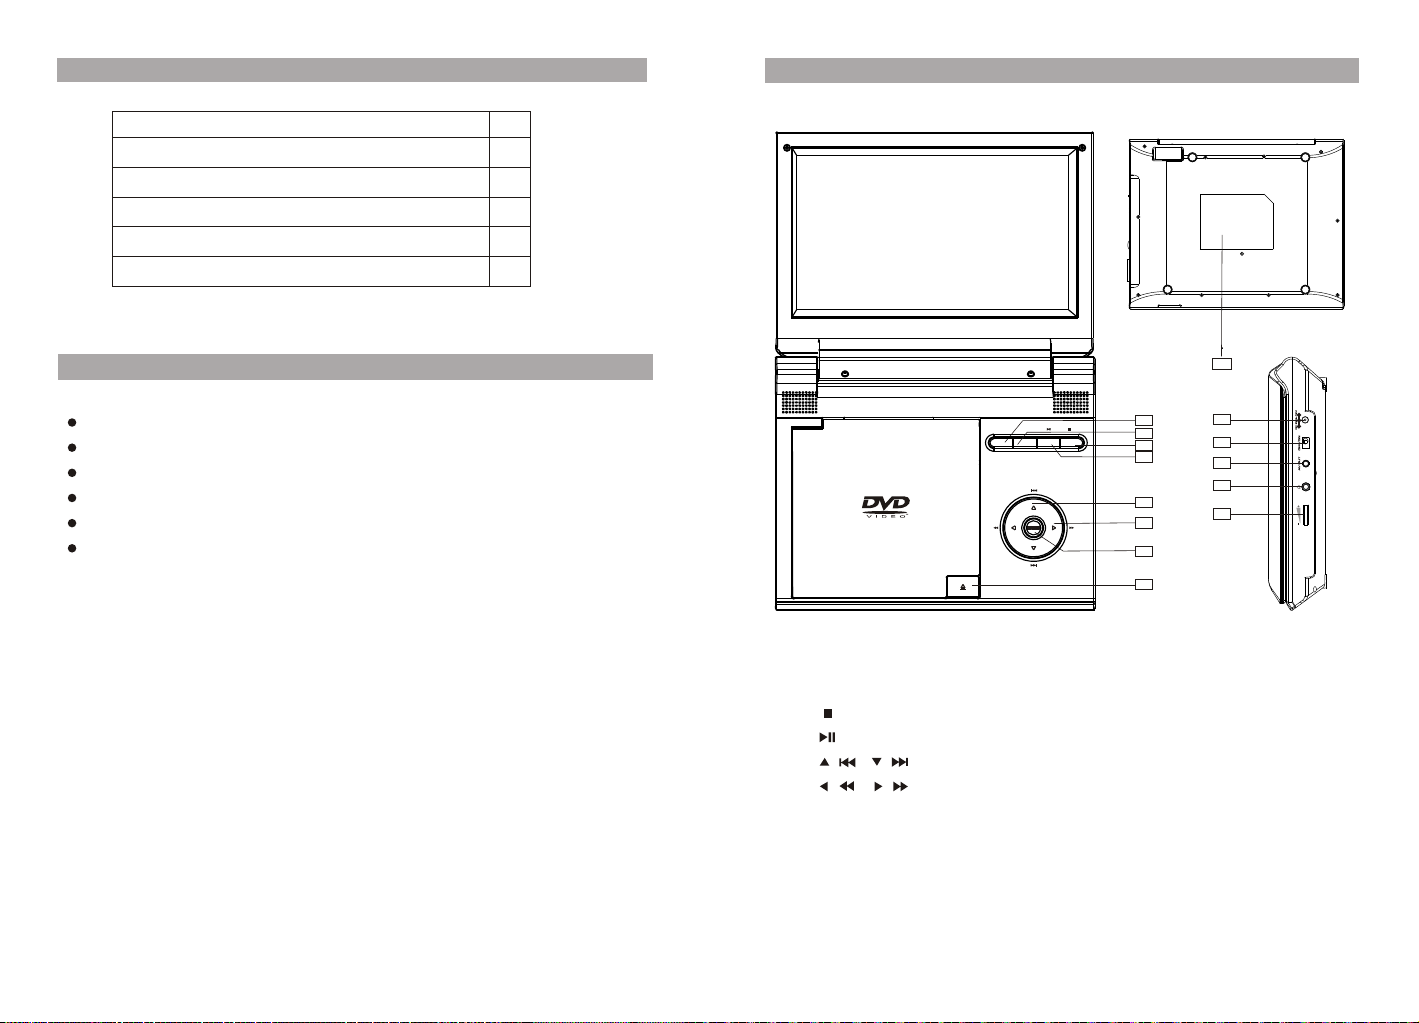
Main Unit Controls
DVD player
AC/DC Power Adapter
User Manual
Car Adapter
AV Cable
Earphone
1
1
1
1
1
1
Main Features
High brightness color 9 LCD screen
Compatible with disc of DVD, CD, JPEG, etc.
Built-in stereo speaker
Built-in rechargeable Lithium polymer battery
Support PAL/NTSC system
Support Multi-language OSD,speed forward/backward,repeat function
1. FUNCTION Button
2. SETUP Button
3. STOP Button
4. PLAY/PAUSE Button
5. ( ), ( ) BUTTON
6. ( ), ( ) BUTTON
7. OK BUTTON
FUNCTION SETUP
14
1
2
3
4
5
6
7
8
9
10
11
12
13
8. OPEN
9. DC IN 9-12V
10. POWER ON/OFF SWITCH
11. AV OUT
12. HEADPHONE
13. VOLUME
14. Rating Label Position
32
Page 4

System Connection
Powering and installation
Plug one end of the AC/DC power adaptor into the DC IN 9 -12V jack on the right of
the machine, then plug the other end into the AC power receptacle.
Please refer to the following illustration.
If using car cigarette lighter adaptor to connect to the power: Plug one end of the
cigarette lighter adaptor into the DC IN 9-12V jack on the unit, plug the other end
into the car cigarette lighter socket. See illustration below.
Connecting with external speaker
TV
Centre speaker
Left front speaker
AV CABLE
(Not Supplied)
AUDIO INVIDEO IN
AMPLIFIRE
Right front speaker
DC IN 9-12V
Note
Car cigarette lighter adaptor is available to use only when the car cigarette
lighter with DC 12V negative grounding.
The mains plug is used as the disconnect device, the disconnect device
should remain readily operable.
SUBWOOFER
Left rear speaker
Right rear speaker
Note There is no 5.1 channel in the unit,however,after connecting to
APM it is available to output audio in 5.1 channel.
54
Page 5

Basic Operation
Playing disc of DVD, CD
1.Connect the unit to the power;
2.Open the unit and adjust the monitor to the best position for viewing.
3.Turn on the unit by sliding the ON/OFF switch to ON.
4.Open the disc door and insert a disc into the door with the label side facing up.
5.Close the disc door. The unit will load the disc and start playing.
6.During playback,press[ ] to pause;press it again to resume playback.
7.When playing disc of DVD,CD,Press[ ] ,the unit will search forward. Press it
repeatedly, the unit will play at 2,4,8,16,32 times of speed.press[ ],the unit will
search backward. Press it repeatedly,the unit will play at 2,4,8,16,32 times of speed
8.Press[ ] once to stop playback; then press[ ] to resume playback from the
point where you stopped; press[ ] twice to stop playback completely.
9.When the playing is finished, please turn off the power by sliding ON/OFF switch
to OFF.
CD
DVD
Virtual Remote Operation
1.Press "FUNCTION " button when disc is playing, you will see a virtual
remote control as below, and the playback will be paused.
2.The virtual key is shown on
the left of the menu, and the
current playback status is
displayed on the right.
3.Use the / / / button to
SRH
TT
OSD
choose the icon, when the icon
is selected, you can see the
description at the bottom.
SEARCH
4.Press OK button, the selected virtual key will be activated, "OK=Selected
function" icon will be shown at top left for 10 seconds, in these 10 seconds
you just need to press OK button to change the style of the function. If the
icon disappear, the OK key will not work. (For Search, Return, Mute, the
icon won't be shown).
5.You can also press "FUNCTION" button to close virtual remote menu
without any operation. The player will resume playing after the menu exit.
Note:
1.When the disc is in the submenu, press the function key can go back the
title menu.
2.Stop or no disc state, the "FUNCTION" is invalid.
M
ADO
ZOOM
Subtitle Off
Repeat Off Mute Off
SUB
Angle Mark Null
SLOW
ANGLE
Virtual Remote Operation
1.SRH (Search): Press the"SRH" key ,you can see the number bar below, Use
left/right key to move the cursor, press ok to confirm , when playing DVD, you can
change the chapter and the title, press the "T/C " icon change the item you want
to change. When playing CD, you can select the track. Note: To select the title,
you need to enter two numbers.
0 1 2 3 4 5 6 7 8 9
2.M(Menu):to enter or exit menu root
3.ZOOM:When playing DVD discs ,you can zoom in, press the "ZOOM" button
and ok button to change the image size according the following sequence:
x2 x3 x4, when playing JPEG file, you can zoom in and zoom out, press the
"ZOOM" button and ok button to change the image size according the
following sequence: 100% 125% 150% 200% 75% 50%.
4.TT(Title): to display title information
5.ADO( Audio): to select audio language
6.SUB(Subtitle): to select subtitle language when playing DVD disc
7.OSD: Display the disc information during playing DVD/CD. Such as elapsed
time and remaining time.
8. ( Repeat): When playing disc of DVD/CD, you can change the repeat style by
press repeat button. For different type of disc, it change according different
sequence.
DVD:
CD:
Chapter
Track
Title
All
9.Slow: You can press slow key to change the playing speed slowly during
playing DVD. Then press OK repeatedly to change the playback speed
according the following sequence: 1/2 1/4 1/8 1/16.
10. (Return): to return to the main menu
11. (MUTE): to turn mute
12.Angle: When playing a DVD disc with multi-angles, press "Angle" button
and OK button to change the display angle.
Note: The function is available only for disc with multi-angle.
OK
All
T/C
Repeat off
6
7
Page 6

Playing JPEG file
1.Place a JPEG disc into the tray,the unit will start reading and playing.
2.Press [ ] and OK button to select a JPEG file from the menu.
3.Press [ ] to rotate the picture clockwise.
4.Press [ ] to reverse the picture horizontally and press [ ] to reverse the
picture vertically.
Function operation:
Press "FUNCTION" key you will see the toolbar as below:
Press the / to move the cursor to select functions.
Press "OK" to select the function.
: Return, to return to the main menu.
: To repeat one, repeat all.
: To zoom in/out the image during playback.
Press "FUNCTION" to exit the toolbar.
System Setup
Setup Menu -- Main Page
General Setup
Video Setup
Preference Setup
General Setup Page
General Setup
TV Display Wide
Angle Mark ON
OSD Lang ENG
Screen Saver ON
:Move
:Return
General Setup
Normal/PS
Normal/LB
Wide
:Entry
Press Setup button,the main menu will be
displayed on the screen
In the General Setup Page, Press button
to highlight this item.
Press ENTER button to access.
Press button to select the setting.
Press ENTER button to confirm your selection.
Press button to exit.
TV display:
Enter this option, user can set screen
display format (Nomal/PS, Nomal/LB,Wide)
The default is "Wide"
Note
The function depends on the display ratio
with which the DVD disc is recorded.
Please choose Wide(16:9)"when using
a16:9 wide screen TV set
TV Display Wide
Angle Mark ON
OSD Lang ENG
Screen Saver ON
:Move
TV Display Wide
Angle Mark ON
OSD Lang ENG
Screen Saver ON
:Move
:Return
General Setup
:Return :Entry
On
Off
:Entry
English
8
Angle Mark:
Enter this option to set the angle during
playback.
Optional setting: ON, OFF
The default is: ON
OSD Language:
In the option user can set OSD menu
language English.
9
Page 7

General Setup
Preference Setup
TV Display Wide
Angle Mark ON
OSD Lang ENG
Screen Saver ON
:Move
Video Setup Page
Video Setup
TV Type PAL
Panel Quality
:Move
Video Setup
TV Type PAL
Panel Quality
:Move
Preference Page
:Return
:Return
:Return
On
Off
PAL
NTSC
:Entry
:Entry
:Entry
Screen Saver
Enter this option to set whether to activate
the screen saver function.
The default is ON.
TV Type:
Enter this option to select TV type
(PAL,NTSC)
The default is PAL.
Set the Video Quality of PANEL
Audio ENG
Subtitle Off
Disc Menu ENG
Parental
Default
:Move
:Return
Preference Setup
Audio ENG
Subtitle Off
Disc Menu ENG
Parental
Default
:Move
:Return
Preference Setup
Audio ENG
Subtitle Off
Disc Menu ENG
Parental
Default
:Move
:Return
Preference Setup
Audio ENG
Subtitle Off
Disc Menu ENG
Parental
Default
English
Off
:Entry
English
:Entry
1 KID SAFE
2 G
3 PG
4 PG 13
5 PGR
6 R
7 NC 17
8 ADULT
:Entry
Reset
Subtitle
Select your preferred language to show
the subtitles on the screen.
The default is OFF
Disc Menu
This function allows you to choose the
menu language stored on the disc.
Note:
the disc menu languages depend on the
information available on the disc.
Parental:
Enter this option to set the parental control
level to some unsuitable disc scenes being
watched by the children.
Optional parental control levels: KID SAFE,
G, PG, PG 13, PGR, R, Nc17, ADUL T.
The default of this option is ADULT.
The default password:8888.
Default:
Select this item and press ENTER button
to reset all settings to the original factory
settings.
Preference Setup
Audio ENG
Subtitle Off
Disc Menu ENG
Parental
Default
:Move
:Return
English
:Entry
Audio:
Enter this option, user can select your
preferred audio language for DVDs.
Note
The audio language depend on the
material on each disc.
:Move
:Return
:Entry
1110
Page 8

Specification
Compatible disc: DVD+R/RW, DVD-R/RW, CD-DA,
CD-R/RW, JPEG
Signal system: PAL/NTSC
Panel size: 9 inch
Picture resolution: 640x234 (RGB) or 640x220(RGB)
Frequency response: 20 Hz to 20 kHz
Video output: 1 Vp-p/75 Ohm, unbalanced
Audio output: 1.4Vrms/10kOhm
Audio S/N: Better than 80 dB
Dynamic range: Better than 85 dB
Laser: Semiconductor Laser, Wave Length: 650 nm/795 nm
Power source: DC 9-12V
Power consumption: 10 W
Operating temperature:
Weight : 0.99 kg
Dimensions (W x D x H): 234 x 185 x 42 mm
Battery Type: Li Polymer
Note:
1.The quality and speed for reading JPEG photos depend on the resolution and
compression ratio of the photos. Some JPEG photo may not be played due to the
disc quality and the formats.
2.Some DVD+R/RW,DVD-R/RW,CD-R/RW disc may not be played due to the
quality on burning conditions.
Rechargeable battery use
The unit utilizes long-life Li polymer battery for portable power supply. The battery
has no Memory Effect and thus can be recharged safely regardless of whether the
battery is fully or partially discharged. It is enough to recharge no longer than 4H
each time. Fully recharged battery can last about 2.5 hours with earphones on.
Precautions related to Battery Recharge
The battery can be only recharged when turning power to OFF state,and keep
continuous power supply,the red light will be on,and the light will turn yellow when it
is fully charged.
Using and Maintaining Rechargeable Battery
1. The normal working temperature is: 0 ~40 ;
2. Always unplug AC/DC power supply for the unit when not in use;
3. Heat will create during playing, it's normal, while avoid long time playing and
unattended;
4. Avoid having the unit collide with any objects, and place away from all possible
heat sources or damp areas.
Caution: Danger of explosion if battery is incorrectly replaced. Replace only with
the same or equivalent type.
0 ~40
Main PCB
Battery
Battery
Before to discard EOL unit, please remove the waste battery by below steps:
a. Pull out the screws on the bottom cover by the screwdriver to unpack the unit.
b. Pull out the screws on the Main PCB board by the screwdriver to unpack the
PCB board and then the battery can be seen.
c. Remove the battery socket from the board.
Troubleshooting
PROBLEM SOLUTION
No sound or
distorted sound
Can't advance
through a movie
The icon
appears on
screen
Picture is
distorted
No forward or
reverse scan
Make sure the machine is connected properly.
Make sure all cables are securely inserted into
the appropriate jacks.
You can't advance through the opening credits
and warning information that appears at the
beginning of movies because the disc is
programmed to prohibit that action.
The feature or action cannot be completed at
this time because:
1. The disc's software restricts it.
2. The disc's software doesn't support the
feature (e.g., angles)
3. The feature is not available at the moment.
4. You've requested a title or chapter number
that is out of range.
The disc might be damaged. Try another disc;
It is normal for some distortion to appear during
forward or reverse scan.
Some discs have sections that prohibit rapid
scanning or chapter skip;
If you try to skip through the warning information
and credits at the beginning of a movie, you
won't be able to. This part of the movie is often
programmed to prohibit skipping through it.
1312
Page 9

14
 Loading...