

Page 1
Safety Precautions
Safety Precautions
CAUTION
RISK OF ELECTRIC SHOCK
DO NOT OPEN
The lightning flash with an arrowhead symbol within an equilater a l
t riangle is intended to alert the user of the presence of uninsulated
"dangerous voltage" within the product's enclosure that may be of
sufficient magnitude to constitute a risk of electric shock to persons.
The exclamation point within an equilateral triangle is intended to
a l e rt the user of the presence of important operating and
maintenance (servicing) instructions in the literature accompany i n g
the appliance.
THIS DEVICE COMPLIES WITH PA RT 15 OF THE FCC
RU L E S.O P E R ATION IS SUBJECT TO THE FOLLOWING T WO
CLASS 1
LASER PRODUCT
WA R N I N G : DO NOT EXPOSE THIS APPLIANCE TO RAIN OR
M O I S T U R E ,DUE TO THE HIGH RISK OF FIRE OR ELECTRIC SHOCK,D O
N OT OPEN THE CABINET D A N G E ROUS HIGH VO LTAGES ARE PRESENT
INSIDE THE ENCLOSURE. O N LY QUALIFIED SERVICE PERSONNEL
SHOULD ATTEMPT T H I S .
C AU T I O N : DURING PLAY BAC K ,THE DISC SPINS AT HIGH SPEED,SO DO
N OT LIFT OR MOVE THE PLAY E R ,DOING SO MAY DA M AGE THE DISC.
C AU T I O N :This Digital Video Disc Player employs a Laser System. M a ke sure
the device is shut down prior to opening player lid.Visible laser radiation
when open and interlocks defeated.Use of controls or adjustments or
p e r fo rmance of procedures other than those specified herein may result in
hazardous radiation e x p o s u r e.
C O N D I T I O N S :(1)THIS DEVICE MAY NOT CAUSE HARMFUL
INTERFERENCE, AND (2) THIS DEVICE MUST ACCEPT ANY
INTERFERENCE RECEIVED. INCLUDING INTERFERENCE
T H AT MAY CAUSE UNDESIRED OPERAT I O N .
1
DO NOTS TA R EI N TOB E A M .
To ensure proper use of this product, please read this ow n e r ’s manual carefully
and retain for future ref e r e n c e. Should the unit require maintenance, contact an
a u t h o ri zed service location, or contact us.Only qualified service personnel should
r e m ove the cove r.
FCC NO T I C E: This equipment has been tested and found to comply with
the limits for a Class B digital dev i c e. Pursuant with the FCC Rules, Pa rt 1 5 .
These limits are designed to provide reasonable protection against harm f u l
i n t e r ference in a residential installation.
This equipment genera t e s,uses and can radiate radio frequency energy
and,if not installed and used in accordance with the i n s t ru c t i o n s, m ay
cause harmful interference to radio commu n i c a t i o n , H oweve r,this is no
g u a rantee that interference will not occurin a particular installation.If this
equipment does cause harmful interference to radio or television reception,
which can be determ i n e dby turning the equipment off and on,the user is
e n c o u raged to try to correct the interference by one of the fo l l ow i n g
m e a s u r e s :
- Reorient or relocate the receiving antenna.
- Increase the separation between the equipment and
receiver.
- Connect the equipment into an outlet on a circuit dif-
ferent from that to which the receiver is connected.
- Consult the dealer or an experienced radio/TV techni-
cian for help.
FCC Caution:To assure continued compliance, ( example-use only
shielded interface cables when connecting to computer or peripheral
devices).Any changes or modifications not expressly approved by the
party responsible for compliance could void the user’s authority to
operate this equipment.
BAT T E RY WA R N I N G: The DVD player contains a NiMH battery pack .T h e r e
is a risk of fire and bu rns if the battery pack is handled improper l y.Do not
d i s a s s e m bl e, crush, puncture, short e x t e rnal contacts, or dispose of in fire or
wa t e r.Do not attempt to open or service the battery pack .Replace only with
the battery pack designated for this product.Discard used batteri e s
according to the manu fa c t u r e r ’s instru c t i o n s.
2
Page 2

Safety Information
Safety Information
CAUTION:Use of controls or adjustments or performance
of procedures other than those specified herein may
result in hazardous radiation exposure.
Please carefully study this manual and always keep it
available. There are, however, some installation and operation
precautions which you should be aware of.
1.Read Instructions - All the safety and operating instructions
should be read before the product is operated.
2.Retain Instructions - The safety and operating instructions
should be retained for future reference.
3.Heed Warnings - All warnings on the product and in the
operating instructions should be adhered to.
4.Follow Instructions - All operating and use instructions
should be followed.
5.Cleaning - Unplug this product from the wall outlet before
cleaning.Do not use liquid cleaners or aerosol cleaners. Use a
damp cloth for cleaning.
6.Attachments - Do not use attachments not recommended by
the product manufacturer as they may cause hazards.
7.Water and Moisture - Do not use this product near water - for
example, near a bath tub, wash bowl, kitchen sink, or laundry
tub; in a wet basement; or near a swimming pool; and the like.
8.Accessories - Do not place this product on an unstable cart,
stand, tripod, bracket, or table. The product may fall, causing
serious injury to a child or adult, and serious damage to the
product.Use only with a cart, stand, tripod, bracket, or table
recommended by the manufacturer, or sold with the product.
Any mounting of the product should follow the manufacturer’s
instructions, and should use a mounting accessory
recommended by the manufacturer.
9.A product and cart combination should be moved with care.
Quick stops, excessive force, and uneven surfaces may cause
the product and cart combination to overturn.
3
10.Ventilation - Slots and openings in the cabinet are provided for
ventilation and to ensure reliable operation of the product and to
protect it from overheating, and these openings must not be
blocked or covered.The openings should never be blocked by
placing the product on a bed, sofa, rug, or other similar surface.
This product should not be placed in a built-in installation such as
a bookcase or rack unless proper ventilation is provided or the
manufacturer’s instructions have been adhered to.
11.Power Sources - This product should be operated only from the
type of power source indicated on the marking label. If you are not
sure of the type of power supply to your home, consult your
product dealer or local power company.For products intended to
operate from battery power, or other sources, refer to the
operating instructions.
12.Grounding or Polarization - This product may be equipped with
a polarized alternating-current line plug (a plug having one blade
wider than the other).This plug will fit into the power outlet only
one way.This is a safety feature. If you are unable to insert the
plug fully into the outlet, try reversing the plug. If the plug should
still fail to fit, contact your electrician to replace your obsolete
outlet.Do not defeat the safety purpose of the polarized plug.
Alternate Warnings - This product is equipped with a three-wire
grounding-type plug, a plug having a third (grounding) pin.This
plug will only fit into a grounding-type power outlet.This is a safety
feature, If you are unable to insert the plug into the outlet, contact
your electrician to replace your obsolete outlet. Do not defeat the
safety purpose of the grounding-type plug.
13.Power-Cord Protection - Power-supply cords should be routed
so that they are not likely to be walked on or pinched by items
placed upon or against them, paying particular attention to cords
at plugs, convenience receptacles, and the point where they exit
from the product.
14.Protective Attachment Plug - The product is equipped with an
4
Page 3

Safety Information
Safety Information
attachment plug having overload protection.This is a safety
feature.See Instruction Manual for replacement or resetting of
protective device.If replacement of the plug is required, be sure
the service technician has used a replacement plug specified by
the manufacturer that has the same overload protection as the
original plug.
15.Outdoor Antenna Grounding - If an outside antenna or cable
system is connected to the product, be sure the antenna or cable
system is grounded so as to provide some protection against
voltage surges and built-up static charges. Article 810 of the
National Electrical Code, ANSI/NFPA 70, provides information with
regard to proper grounding of the mast and supporting structure,
grounding of the lead-in wire to an antenna discharge unit, size or
grounding conductors, location of antenna-discharge unit,
connection to grounding electrodes, and requirements for the
grounding electrode.
16.Lightning - For added protection for this product during a
lightning storm, or when it is left unattended and unused for long
periods of time, unplug it from the wall outlet and disconnect the
antenna or cable system.This will prevent damage to the product
due to lightning and power-line surges.
17.Power Lines - An outside antenna system should not be
located in the vicinity of overhead power lines or other electric
light or power circuits, or where it can fall into such power lines or
circuits.When installing an outside antenna system, extreme care
should be taken to keep from touching such power lines or circuits
as contact with them might be fatal.
18.Overloading - Do not overload wall outlets, extension cords, or
integral convenience receptacles as this can result in a risk of fire
or electric shock.
19.Object and Liquid Entry - Never push objects of any kind into
this product through openings as they may touch dangerous
voltage points or short-out parts that could result in a fire or electric shock.Never spill liquid of any kind on the product.
5
2 0. S e rvicing - Do not attempt to service this product yourself as
opening or removing covers may expose you to dangerous vo l t a g e
or other hazards.R e fer all servicing to qualified service personnel.
2 1.Damage Requiring Service - Unplug this product from the wa l l
outlet and refer servicing to qualified service personnel under the
fo l l owing conditions:
a .When the power-supply cord or plug is damaged.
b.If liquid has been spilled, or objects have fallen into the product.
c .If the product has been exposed to rain or wa t e r.
d .If the product does not operate normally by fo l l owing the
o p e rating instru c t i o n s.Adjust only those controls that are cove r e d
by the operating instructions as an improper adjustment of other
controls may result in damage and will often require ex t e n s i ve wo rk
by a qualified technician to restore the product to its norm a l
o p e ra t i o n .
e.If the product has been dropped or damaged in any way, and
f.When the product exhibits a distinct change in perfo rmance - this
indicates a need for serv i c e.
2 2.Replacement Pa rts - When replacement parts are required, be
sure the service technician has used replacement parts specified
by the manu facturer or have the same chara c t e ristics as the
o riginal part .U n a u t h o ri zed substitutions may result in fire, electr i c
s h o ck, or other hazards.
2 3. S a fety Check - Upon completion of any service or repairs to this
product, ask the service technician to perfo rm safety checks to
d e t e rmine that the product is in proper operating condition.
2 4. Wall or Ceiling Mounting - The product should be mounted to a
wall or ceiling only as recommended by the manu fa c t u r e r.
2 5.Heat - The product should be situated away from heat sources
such as ra d i a t o r s, heat registers, stoves or other products
(including amplifiers) that produce heat.
2 6 . R e c h a r g e a ble battery - Charge voltage cannot be below 12V.
6
Page 4
Introduction
Introduction
Your new port a ble DVD player is
designed for you to enjoy all forms of
disc media.Its slim shape allows you to
easily carry it with you and enjoy
m ovies and music any w h e r e. Yo u r
player incorporates the latest digital
audio/video (AV) technologies to give
you the ultimate in listening and
viewing pleasure.
Your new player also supports CD and
M P 3 . Your player also has seve ra l
unique features, including an S-video
output (for greater picture clarity), large
a c t i ve LCD screen, multi-angle and
mu l t i - l a n g u a g e, Parental Control (to
p r event children from view i n g
i n a p p r o p riate content), and Ko d a k
Picture CD compatibility (so you can
show photos on your TV). This is a
truly multimedia machine designed for
the multimedia world to enjoy.
UNPACKING
First inventory the contents of your Portable DVD player
package:
Po rt a ble DV D P l ayer 1
Audio Cable 1 pair
S-Video Cable 1
Video & Coaxial Cable 1 pair
Ni-MH Battery Pack 1
Remote Control 1
External Power Adapter 1
Power Cord 1
Cigarette Lighter Adapter 1
Operating Manual 1
Stereo Headphone 1
If any item should be damaged or missing, please
contact your dealer without delay.
Keep the packaging materials, you may need them to
transport your player in the future.
WA R N I N G: Changes or modifications made to this equipment, not
expressly approved by us or parties authori zed by us will void all
m a nu facture w a r ra n t i e s.
7
8
Page 5
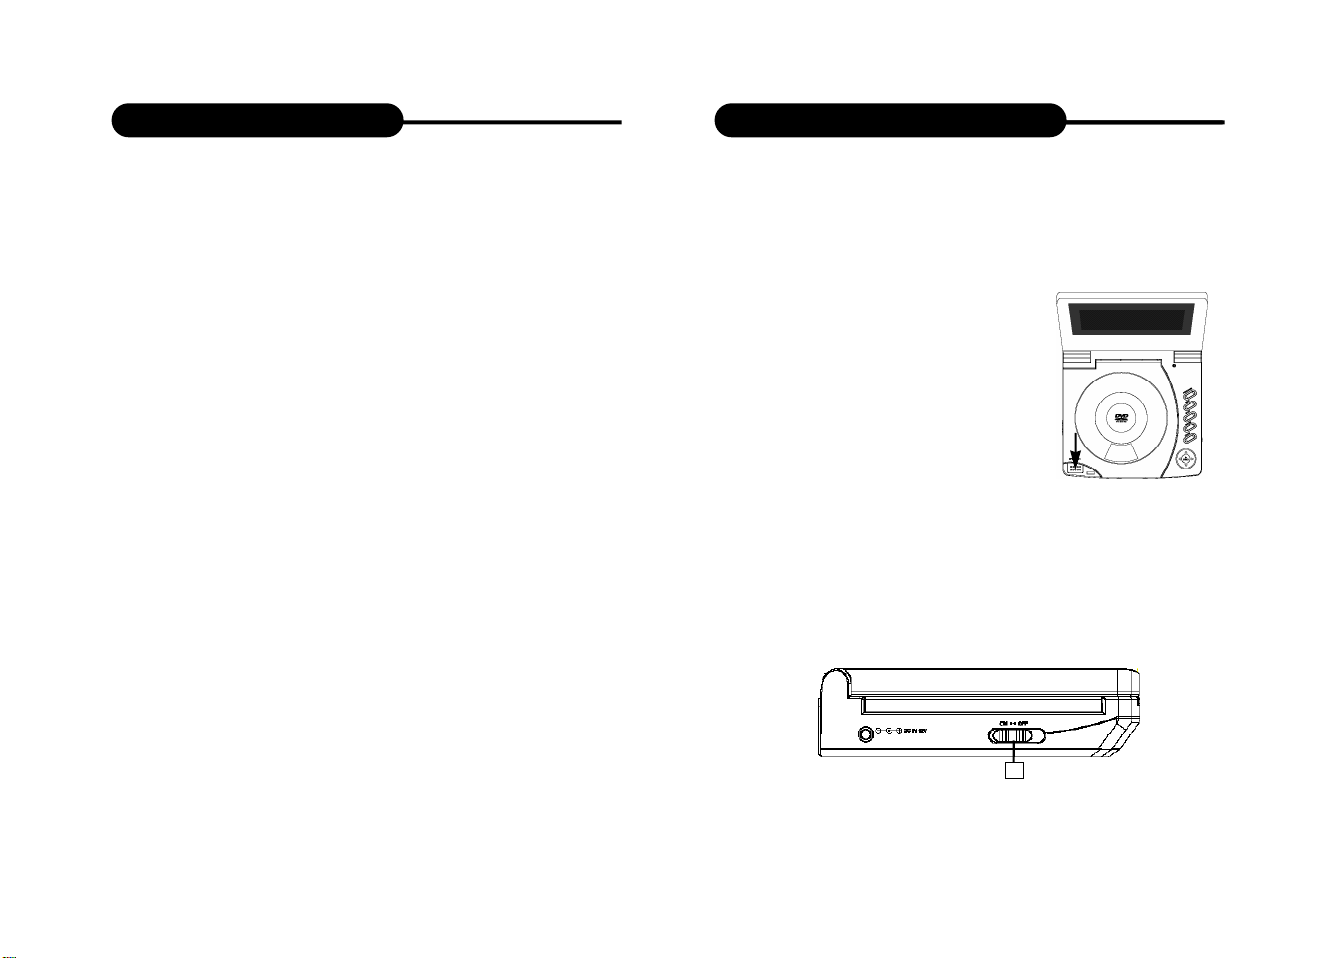
Table of Contents
Quick Starting Guide
Safety Precautions .......................... 1-2
Safety Information .......................... 3-6
Introduction .......................... 7-8
Table of Contents ............................ 9
Quick Starting Guide ........................ 10-11
Connecting to a TV ........................ 12-13
Connecting to Optional Equipment .............. 14-17
Playing Back a Disc ........................ 18-21
Playing Back your KODAK Picture CD ............ 22-23
JPEG Playback ........................ 24-25
MP3 Playback ................................ 26
Locating a Specific Title, Chapter or Track ............ 27
Playing Repeatedly ........................ 28-29
Playing in Favorite Order.......................... 30-31
Zooming a Picture .......................... 32
Selecting Subtitles .......................... 33
Using the On-Screen Display .................... 34
Selecting the Camera Angle .................... 35
Setting the Parental Lock .................... 36-37
Rechargeable Battery Installation & Use .......... 38-39
Battery Storage ................................ 40
Customizing the Function Settings .............. 41-42
Trouble Shooting Guide ...................... 43
1. Connecting to an External Power Source
Connect the power adapter (supplied with the player) to
the side input and to a wall outlet. Do not use any other
device otherwise specified by your dealer.
2. Open the protective cover
The cover opens to a maximum 135
o
only, so please do not try to open it
any further.
3.Press the open button on the left
to open the disc cover
4. Inserting a DVD disc
Align the center of the DVD disc with
the center of the disc guide. Press
gently down on the DVD to snap the disc into place, then
close the disc cover.
5. Slide the side power switch to ‘ON’.
5
9
10
Page 6
Quick Starting Guide
Connecting to a TV
6. Press the PLAY button on the
player face
In general, the DVD already inserted
into the player will start reading
automatically when power is turned
on.
The DV D p l ayer will immediately
start rendering the DVD program.
When you want to stop, press the STOP button, it will
return to the power-on logo.To power off the unit, slide the
ON/OFF switch to the right.
The DVD player will automatically power off in three
minutes after entering screen saver mode. To reset the
unit, first slide power switch to ‘OFF’, and then slide it to
‘ON’.
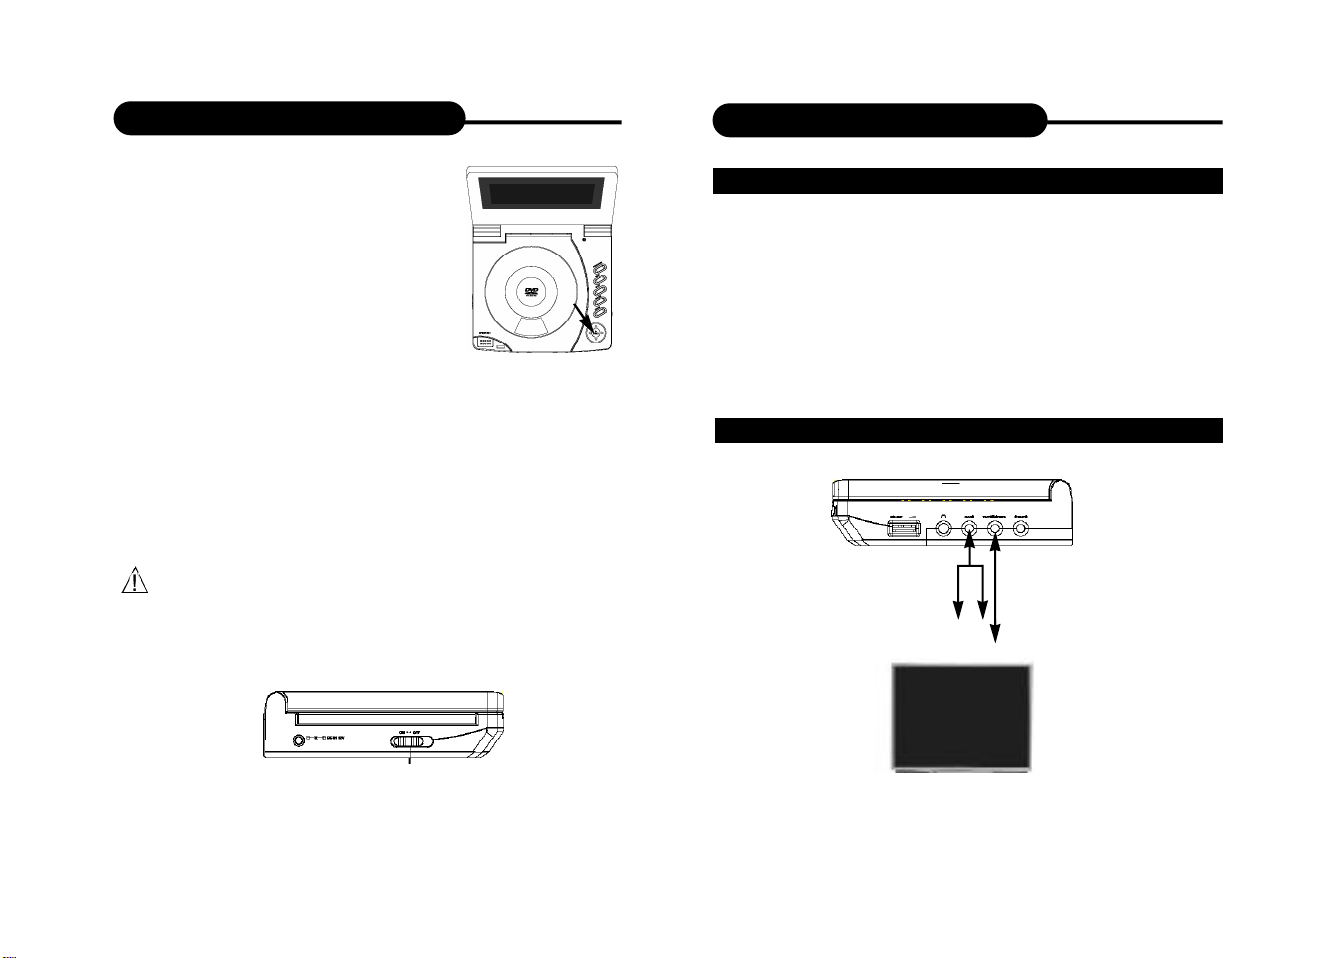
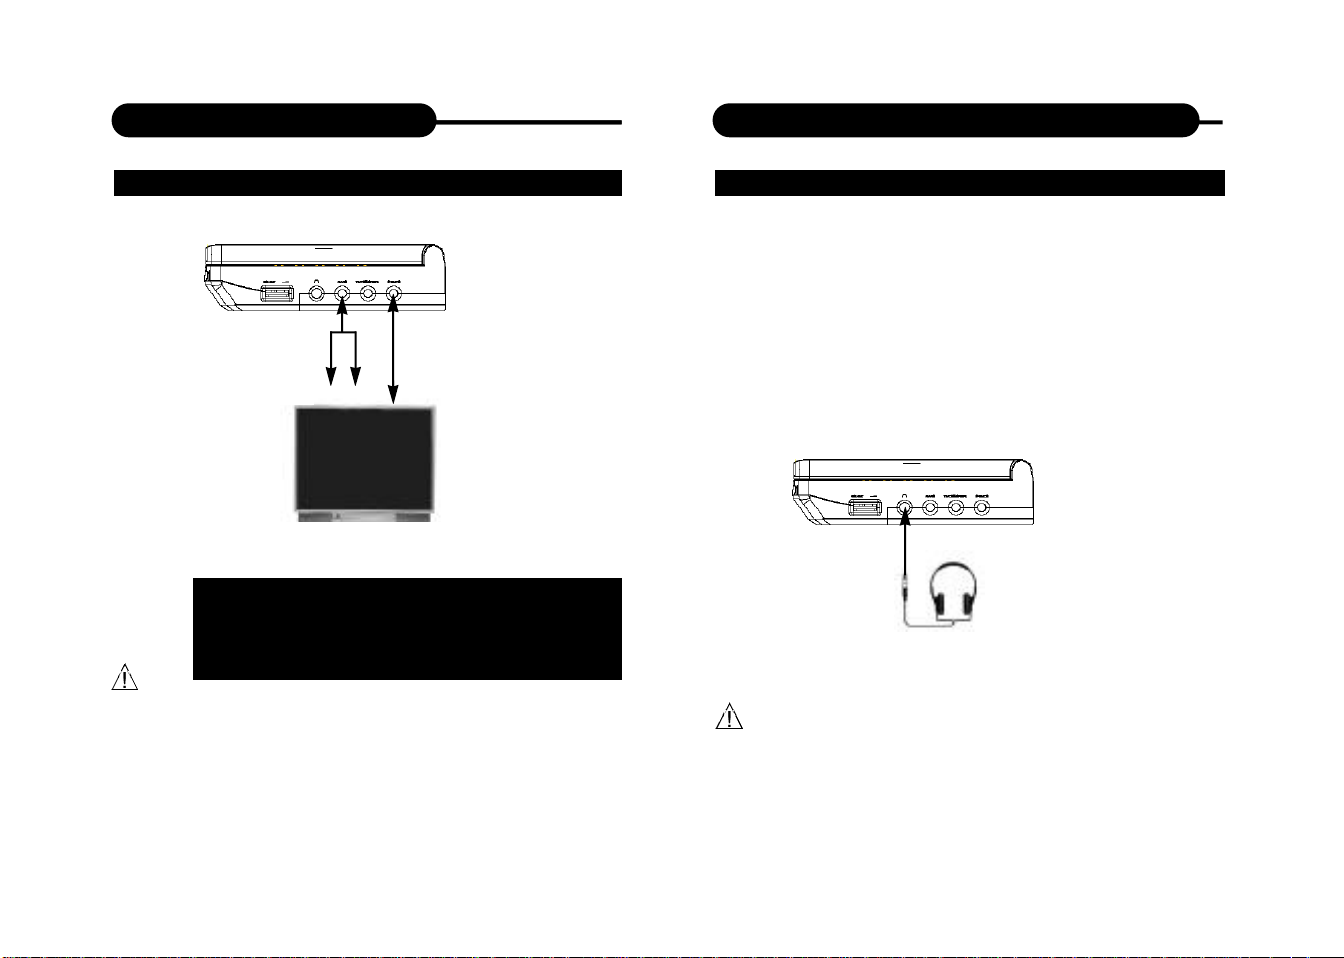
SETTING UP YOUR PLAYER
Step 1:connect the audio cables to AUDIO OUT of the
DVD player..
Step 2:connect the yellow cable to the VIDEO on the
side of your player.
(For TVs that support S-Video Output please follow the
diagram “BETTER” bellow.)
GOOD
TV Video Input
TV Audio Input
RedWhite
Yellow
ON/OFF
11
12
Page 7
Connecting to a TV
Connecting to Optional Equipment
BETTER
R e dWhite
TV Audio Input
TV S-Video input
Connect the portable DVD player with an
optional S -Video cable, if the TV has an S Video input. Do not connect the yellow video
cable if using the S -Video cable.
• Turn off the power and unplug both units before setting up
any connections.
CONNECTING HEADPHONES
1. Connect the headphones.
Headphones with a 3.5 mm stereo plug can be
connected.
2. Adjust the volume by turning the dial.
• Avoid listening to sound at levels which may be harmful to
your ears.
13
14
Page 8

Connecting to Optional Equipment
Connecting to Optional Equipment
Enjoying Dolby Pro Logic Surround Sound (GOOD)
Dolby Pro Logic Surround
Enjoy the dynamic realistic sound of Dolby Pro Logic
Surround by connecting an amplifier and speaker
system (right and left front speakers, a center speaker,
and one or two rear speakers).
Connection
Example
To audio
Front
speaker
(left)
To AUDIO
input
OUT
speaker
TV
Center
Yellow
speaker
(right)
ToVIDEO
OUT
Amplifier
equipped with
Dolby Pro
Logic Surround
Front
This product incorporates copyright protection
technology that is protected by method claims of
certain U.S. patents and other intellectual property
rights owned by Macrovision Corporation and other
rights owners. Use of this copyright protection
technology must be authorized by Macrovision
Corporation, and is intended for home and other
limited viewing uses only unless otherwise
authorized by Macrovision Corporation. Reverse
engineering or disassembly is prohibited.
It is forbidden by law to copy, broadcast, show, play in
public, and rent copyrighted material without permission.
DVD video discs are copy protected, and any recordings
made from these discs will be distorted.
Manufactured under license from Dolby Laboratories.
“Dolby” and the double-D symbol are trademarks of
Dolby Laboratories. Confidential Unpublished works.
c
1992-1997 Dolby Laboratories, Inc. All rights
reserved.
“DTS” and “DTS Digital Out” are trademarks of Digital
Theater Systems, Inc.
Rear
speaker
15
• Adjust the volume of your receiver to a comfortable
listening level to avoid any speaker damage.
• When connecting and disconnecting the DVD video player,
turn off the amplifier to avoid any speaker damage.
16
Page 9

Connecting to Optional Equipment
Playing Back a Disc
Enjoy Dolby Digital or DTS (BETTER)
Dolby Digital/DTS
Dolby Digital and DTS programming can deliver surround
sound with five discrete full range channels plus a sixth
channel for a subwoofer. You can enjoy your DVD with a
Dolby Digital System. All you need is to connect your
DVD player to a Dolby Digital/DTS receiver or a Dolby
Digital Ready receiver with an external decoder.
DVD SIDE
To PCM/BITSTREAM
Front
speaker
(left)
ToVIDEO OUT
TV
Front
speaker
(right)
CONTROLS FOR BASIC PLAYBACK
1. Open/Push
2. Enter
3. Direction keys
8
4. Zoom
7
6
5. Pause
5
6. Stop
4
7. Next
3
8. Previous
1
1
2
3
4
5
6
7
8
9
10
11
12
13
14
2
1. STANDBY
2. SETUP
3. DISPLAY
15
16
4. TITLE
17
5. REVERSE
18
6. FORWARD
19
20
7. PAUSE/STEP
21
8. PREVIOUS
22
9. NEXT
23
24
10. REPEAT
25
11. A-B REPEAT
26
12. ANGLE
13. ZOOM
14. NUMBERS
15. MUTE
16. MENU
17. GOTO
18. SUBTITLE
19. PLAY
20. DIRECTION
(UP/DOWN/
RIGHT/LEFT)
21. ENTER
22. STOP
23. AUDIO
24. PROGRAM
25. SLOW
26. SHIFT
Set "SPDIF Output" to "SPDIF/PCM" in "General Setup" from the
Setup Menu.
17
Note:
When you need to use the keys REPEAT, A-B, PRGM, AUDIO which
are combined with numbers, set shift on by pressing SHIFT, and set
shift off to use NUMBERS by pressing SHIFT again.
18
Page 10

Playing Back a Disc
Playing Back a Disc
HOWTO START PLAYBACK FROM THE MENU SCREEN
1. Press TITLE/MENU to
access the menu screen.
Title 1
Title 2
2. Press or
the number buttons to
select the title.
Title 3
Title 4
3. Press the ENTER or
PLAY button.
The DVD video player will
start playback from the title
selected.
Note:
ENTER 2x 4x
You also can input the
assigned number of the title
to select it directly.
HOWTO PAUSE PLAYBACK (STILL PLAYBACK)
Press the PAUSE/STEP once
during playback.
Press PAUSE/STEP repeatedly
during playback, the picture
PAUSE/STEP
will advance one frame each
time, then press PLAY button to
resume normal playback.
During the still playback the sound
is muted. MP3 CD, Audio CD and
Picture CD do not have the step
feature.
19
PLAY
HOWTO STOP PLAYBACK
Press the STOP button.
The player is stopped.
REV
FWD
STOP
FAST FORWARD & REWIND
You can playback a disc at 2x, 4x, 8x,
16x or 32x the normal speed for fast
forward or rewind.
2x 4x
8x
8x
16x 32x
16x 32x
Press the REV or FWD button during playback.
The playback speed becomes double the normal speed.
The playback speed changes, each time you press the
REV or FWD button.
TO RESUME NORMAL PLAYBACK.
Press PLAY.
PLAY
Note:
The function is invalid on some DVD discs.
20
PLAY
Page 11

Playing Back a Disc
Playing BackYour KODAK Picture CD
PLAYING IN SLOW-MOTION
A disc can also be played back in
slow-motion.
1. Press SHIFT to set shift on so
as to use the SLOW button.
TV SCREEN
1/2
1/2
1/4
1/4 normal speed1/2 normal speed
1/4
1/8 1/16
1/8 normal speed
1/8
1/16 normal speed
1/16
2. Press the SLOW button during playback
The playback speed becomes 1/2, 1/4, 1/8, or 1/16 of
the normal speed each time you press the SLOW
button.
TO RESUME NORMAL PLAYBACK.
Press PLAY.
PLAY
PLAY
SLOW
SHIFT
NORMAL
When a KODAK Picture CD is loaded, an automated slide
show is launched, Each picture in the current directory
will be displayed consecutively in a slide-show fashion
and will be scaled to fit most of the screen. Sixteen
slideshow transition modes are provided. Use “GOTO”
key to select: Customers can set “transition” effects
for every picture at any time during the slideshow.
mode 1:Wipe Top
mode 2:Wipe Bottom
mode 3:Wipe Left
mode 4: Wipe Right
mode 5: Diagonal Wipe Left Top
GOTO
mode 6: Diagonal Wipe Right Top
mode 7: Diagonal Wipe Left Bottom
mode 8: Diagonal Wipe Right Bottom
mode 9: Extend From Center H
mode 10: Extend From Center V
mode 11: Compress To Center H
mode 12: Compress To Center V
mode 13: Window H
mode 14: Window V
mode 15: Wipe From Edge To Center
RANDOM
NONE
• During REV, FWD and slow-motion playback, the
sound is muted.
• The function is invalid on some DVD discs.
21
To display an image indefinitely, press the PAUSE key.
T o view the Next or Previous picture press the or
keys.To resume the slideshow press the ENTER key.
22
Page 12

Playing BackYour KODAK Picture CD
JPEG Playback
IMAGE ROTATION
There are four modes to transformation: “Invert”, “Mirror”,
“Left”, and “Right”.These operations are allowed only
when a picture is being displayed normally, and will be
cancelled automatically when a new picture is displayed.
The arrow keys are used to select the different
transformation modes:
UP -Invert/Normal
DOWN -Mirror/Normal
LEFT -Turn left
RIGHT -Turn right
Note: The function is invalid in ZOOM mode.
REPEATING THE SLIDESHOW
At the end of your picture slideshow, each image is
reduced to a “thumbnail” sized display.To view your
slideshow presentation again, press button.
Important: Let the player complete it’s layout of twelve
pictures before pressing button again to view the
next twelve.When at the beginning, press ENTER and
your presentation will begin.
MENU
The MENU key is used to display thumbnail pictures
from the stop position. After it is enabled, up to twelve
scaled-down thumbnail pictures will be displayed on the
screen.The and can be used to display the NEXT
and PREVIOUS twelve pictures in the current directory.
Note: On the thumbnail screen, You can highlight MENU
and enter it to get help information.
23
H OW TO ST A RT PLA Y BACK FROM THE MENU SCREEN
You can use your DVD player to view photographs on the
disc need to be saved in the JPEG file format. For more
information about JPEGs please visit www.jpeg.com.
PLAYING BACK JPEG FILES
1. Place the CD on the disc tray.
2. Select a folder or a picture contained on the CD.
After the CD is loaded, a menu will appear on the
screen.
Press UP or DOWN to select a folder, and press
ENTER/PLAY to view folder contents (shown in right
column as below).
00:00 00:00
001\015
GIRL
AAAAAA
BBBBBB
CCCCCC
24
Page 13

JPEG Playback
MP3 Playback
3. Start playback
Use UP or DOWN to select one image and press
ENTER/PLAY to view the pictures.
The pictures will be displayed in a style of a slideshow,
there are many styles of transition effects such as Wipe
Top (default mode), Wipe Bottom, Wipe Left, Wipe Right,
Diagonal Wipe Left Top, Diagonal Wipe Right Top,
Extend from Centre H, Compress to Centre H, Window
H, etc., use the GOTO button to change the slide style.
4. Rotate an image
During the slide show, you can use arrow keys to rotate
an image:
Press UP to invert an image.
Press DOWN to mirror an image.
Press LEFT to rotate an image to the left.
Press RIGHT to rotate an image to the right.
5. Zoom
This feature allows you to view a picture at 50%, 75%
125%, 150% or 200% in several increments. Press the
ZOOM button. An on screen message (“Zoom On”) will
verify your selection. Use and keys to control the
amount of zoom in and out. Press the direction keys to
shift the zoom point.With Zoom Off, the picture is
scaled to fit most of your TV screen.
6. Menu
During the playback, press MENU to access thumbnail
menu.For previewing JPEG files, press MENU again to
return to JPEG folders.
CREATING YOUR OWN PICTURE CDS
Using your computer save pictures as JPEG format and
burn them on a CD-R disc, then you can watch on your
TV.
25 26
PLAYING AN MP3 FORMAT
1. Insert an MP3 CD, the DVD player will initialize
the disc when the tray is closed and the directory
(folder) will be shown in an MP3 MENU on screen.
2. Press UP/DOWN to select and highlight an MP3
file (song).
3. Press ENTER to play the MP3 file .
00:00 00:00
001\016
MP3
mp3
AAAAAA
BBBBBB
CCCCCC
Page 14

Locating a Specific Title, Chapter or Track
Playing Repeatedly
DVD DISCS ARE NORMALLY DIVIDED INTO TITLES
WHICH ARE SUB-DIVIDED INTO CHAPTERS.
MOREOVER, CD AND MP3 CD ARE DIVIDED INTO
TRACKS.
Chapter 1 Chapter 2 Chapter 1 Chapter 2 Chapter 3
TITLE 1
DVD Video Disc
TITLE 2
L O C ATING A TITLE USING THE TITLE MENU
You can locate a specific title using the title menu function, if a DV D
video disc contains a title menu .
1 . Press the TITLE bu t t o n
On the LCD or TV screen, the title menu
will appear.
PLAY
2 . Press the button to select
the title you want.
You can also directly locate a specific title
by pressing its assigned number with the
PREVIOUS
NEXT
SHIFT
number bu t t o n s.
3 .Press the PLAY bu t t o n
This will cause the DVD video player to start play b a ck from chapter
1 of the title selected.
You also can use skip buttons to select a title or track
d e s i r e d :
Press or button repeatedly till the one display s .
THIS DVD VIDEO PLAYER ALLOWS YOU TO
PLAYBACK A SPECIFIC TITLE, CHAPTER, TRACK,
OR SEGMENT REPEATEDLY. (TITLE REPEAT,
CHAPTER/TRACK REPEAT, A-B REPEAT)
HOWTO REPEAT A TITLE,CHAPTER, OR DISC
During normal playback, press the REPEAT button
(set shift on).
The repeat mode changes, each time you press the
REPEAT button.
CHAPTER
TITLE
ALL
Repeats the same chapter.
Repeats the same title.
Repeats the whole disc
Resumes normal playback.
REPEAT
SHIFT
27
28
Page 15

Playing Repeatedly
Playing in Favorite Order
HOWTO REPEAT A SPECIFIC SEGMENT
1. Press the A-B button at the beginning of the
segment in which you want to repeat playback
(point A) (set shift on).
2. Press the A-B button again at the end of the
segment (point B)
The DVD video player will automatically return to point A
and start to repeat playback of the selected segment (AB).
3. Press the A-B button to cancel the A-B
repeat function
The DVD video player will resume to normal playback.
A
AB
Set point A
Set point B
Resumes normal playback.
A-B
SHIFT
HOWTO SET TITLES, CHAPTERS, OR TRACKS IN A
FAVORITE ORDER
1. Press the PROGRAM button.
PROGRAM MENU displays on the screen.
PROGRAM:TT(01)/CH ( - - )
01 TT: CH: 06 TT: CH:
02 TT: CH: 07 TT: CH:
03 TT: CH: 08 TT: CH:
04 TT: CH: 09 TT: CH:
05 TT: CH: 10 TT: CH:
EXIT NEXT
2. Using the numbered button, select the items you
want in the order you want them programmed in.
The number of the item selected will be input into the
PROGRAM volume.
PROGRAM:TT(01)/CH ( - - )
01 TT: 03 CH: 01 06 TT: CH:
02 TT: CH: 07 TT: CH:
03 TT: CH: 08 TT: CH:
04 TT: CH: 09 TT: CH:
05 TT: CH: 10 TT: CH:
EXIT START NEXT
29
30
Page 16

Playing in Favorite Order
Zooming a Picture
3 . Highlight STA RT and press ENTER to start
program playback.
4. To clear the programmed,move the cursor to STOP
and then press ENTER to confirm it.
PROGRAM:TT(01)/CH ( - - )
01 TT: 03 CH: 01 06 TT: CH:
02 TT: CH: 07 TT: CH:
03 TT: CH: 08 TT: CH:
04 TT: CH: 09 TT: CH:
05 TT: CH: 10 TT: CH:
EXIT STOP NEXT
ZOOMING A PICTURE
This DVD video player allows you to zoom into a picture
as well as shift the zoom point.
Press ZOOM during normal playback
or slow - motion. (To use the ZOOM
button, it should be set ‘SHIFT ON’ by
pressing SHIFT.)
ZOOM
The player magnifies in the center of the picture.
If you press during zoom playback, the zoom
point shifts.
2x 3x 4x
Normal
Playback
To cancel the zoom function, press ZOOM again.
31
32
Page 17

Selecting Subtitles
Using the On-Screen Display
HOWTO DISPLAY SUBTITLES
You have the option to select a preferred subtitle
from those included on the DVD video disc.
Press the SUBTITLE button
during playback.
SUBTITLE 1
SUBTITLE OFF
01/03
02/03SUBTITLE 2
03/03SUBTITLE 3
To TURN OFF the subtitles.
Press the SUBTITLE during
playback until the subtitles
disappear.
SUBTITLE OFF
SUB-T
THIS UNIT ALLOWS YOU TO VIEW THE
OPERATIONAL STATUS AND DISC INFORMATION ON
YOUR TV SCREEN.
CHECKING THE OPERATIONAL STAT U S
With this function you can view on your TV the following:
-Current title
-Track number
-Total playing time
Current Title
Current Chapter
Title Elapsed
TT 01/12 CH 006/039 0:02:20
Title Remain
TT 01/12 CH 006/039 0:18:50
Chapter Elapsed
TT 01/12 CH 006/039 0:03:50
Chapter Remain
TT 01/12 CH 006/039 0:10:40
Display Off
Playing time
Total Chapter
Total Title
DISPLAY
Press the DISPLAY
during playback to
turn on the ON
SCREEN DISPLAY
Press it again to turn it
off.
33
34
Page 18

Selecting the Camera Angle
Setting the Parental Lock
THIS DVD VIDEO PLAYER ALLOWS YOU TO SELECT
FROM SEVERAL DIFFERENT ANGLES.
ANGLE 1 ANGLE 2
Selecting the camera angle
ANGLE
HOWTO CHANGE THE CAMERA ANGLE
If the DVD video disc was recorded with multiple angles,
you have the option to change the camera angle of the
scene you are watching.
Press the ANGLE button while playing back a scene
recorded with multiple angles (set shift on).
• You may only press the ANGLE button when the angle
icon is flashing on the DVD display.
• Press the corresponding number of your desired
angle.
2/2
1/2
• The angle function will not work on DVD video discs
that does not contains recorded with multiple angles.
35
YOU CAN USE THE PA R E N TAL LOCK FUNCTION
ONLY WITH DVD VIDEO DISCS EQUIPPED WITH THE
PARENTAL LOCK FEATURE.
SETTING THE PA R E N TAL LOCK
DVD video discs equipped with the parental lock function
are rated according to their content.The contents allowed by
a parental lock level and the way a DVD video disc can be
controlled may va ry from disc to disc. For ex a m p l e, if the
disc allowed, you could edit out violent scenes unsuitable fo r
children and replace them with more suitable scenes, or
l o ck out play b a ck of the disc all together.
1. Press STOP during
SETUP
playback
DIRECTION
2. Press SETUP
STOP
The SETUP MENU appears
on the screen.
3. Select
Preference Page,
press ENTER.
-- Preference Page --
Audio ENG
Subtitle ENG
Disc Menu ENG
Parental
Password
Default
Go To Preference Page
36
Page 19

Setting the Parental Lock
R e ch a rge a ble Battery Installation & Use
4. Select Parental, press ENTER.
5. Select ratings, press ENTER
1 KID SAFE
2 G
3 PG
4 PG 13
5 PGR
6 R
7 NC17
8 ADULT
OFF
6. Enter your password then press ENTER.
The pre-set password is 3308
Password
OK
7. Press SETUP to exit setup,
press ENTER to start.
TO CHANGE YOUR PA S S WO R D :
1. Follow step 4 to select password change.
2. Enter old password.
3. Enter new password.
4. Re-enter to confirm your new password.
5. Press ENTER.
6. Press SETUP to exit.
37
SETUP
DIRECTION
STOP
INSTALLING & REMOVING THE BATTERY PACK
1 .M a ke sure the unit is powe r e d
2
off and unplugged.
2 .Attach the battery pack to the
outlet of the unit as the
a r r owhead 1, and push it f o r ward as arrowhead 2 to
1
align them with each other till you hear a click sound.
R e m oving the Battery Pa ck
1 .M a ke sure the unit is powered off
and unplugged.
2 .Pull the battery pack bac k ward as
a r r owhead 3 while sliding the latch as 4
3
4
(at the bottom of the unit).
USE AND MAINTENANCE
THIS UNIT IS SUPPLIED WITH HIGHLY- E F F E C T I V E
RECHARGEABLE BATTERY (NI-MH). SUCH BATTERY PACK
A HIGH STO R AGE CAPACITY AND LOW LEVEL OF
DEGRADATION. THE LATTER MEANS THAT THE BATTERY
CAN ALSO BE RECHARGED WHEN ONLY PARTLY SPENT.
Plug the AC adapter into the battery.
Charging indicator
Please fully ch a rge the battery
prior to first use.
AC Adapter/charge input
38
Page 20

R e ch a rge a ble Battery Installation & Use
The provided battery can be recharged for about 300 times. I t
t a kes about 4-5 hours to recharge the battery, then the red
indicator is put out and the green one flashes. A fully charged
b a t t e ry can power the unit for about 2.5 hours. Powe r
consumption depends on the operations of the player such as
b rightness of the screen, volume level, etc.
R e ch a rge the battery when fully spent in order to maximize
its life.
N ever rec h a rge the battery already fully ch a rge d .
Under no circumstance should you short out the battery, store it
in a metal container, or leave it in a humid or damp env i r o n m e n t .
Store the battery in an airtight container if possibl e. R e c h a r g e
e f fe c t i veness will degrade when environmental tempera t u r e s
drop below 10 ºC or exceed 35 ºC.
Battery Storage
1 .S t o r age Temperature and Humidity
( S h o rt - t e r m )
In a dry location with low humidity (Max.85%), no corrosive gases, at a
t e m p e rature range of -20ºC to 45ºC.
In a location where humidity is extremely high or with temper a t u r e
b e l ow -20ºC or above 45ºC, the metallic parts of battery will rust and
result in electrolyte leakage due to expansion or contraction in part s
composed of organic materi a l s.
2 .Long-term Storage (2 ye a rs ,-20ºC to 35ºC)
As long-term storage can accelerate battery self-discharge and lead to
the deactivation of reactants, locations where the temperature ra n g e s
b e t ween 10ºC and 30ºC are suitable for long-term stora g e.
When charge for the first time after long-term stora g e, deactivation of
reactants may have led to increased battery voltage and decreased
b a t t e ry capacity.Restore such batteries to original perf o rmance through
repeating sev e ral cycles of charge and discharge.
When storing battery for more than 1 y e a r, charge at least once a y e a r
to prevent leakage and deteri o ration in perf o rmance due to selfd i s c h a r g e.When using a rapid charger of voltage detection type, carry
out charge and discharge at least once ev e ry 6 months.
39
N o t e :
To get the best perf o rm a n c e, charge your battery for more than 12
hours at the first time after unpacking, and carry out 3 cycles of charge
and discharge under proper conditions.
40
Page 21

Customizing the Function Settings
Customizing the Function Settings
THIS UNIT ALLOWS YOU TO CUSTOMIZE THE
PERFORMANCE TOYOUR PERSONAL PREFERENCE.
SETUP MENU
Normal/PS
Normal/LB
-- General Setup Page --
TV Display PS
Angle Mark On
OSD Lang ENG
SPDIF Output RAW
Captions Off
Screen Saver On
Go To General Setup Page
1.Press SETUP.
2.Press
to select category
(highlight), then
press ENTER.
3.Press SETUP to
quit the menu.
/ / /
-- Speaker Setup Page --
Downmix
Wide
On
Off
English
中文
French
Spanish
SPDIF Off
SPDIF/RAW
SPDIF/PCM
On
Off
Go To Speaker Setup Page
LT/RT
Stereo
41
-- Dolby Digital Setup --
Dual Mono
Dynamic
Go To Dolby Digital Setup
-- Video Setup Page--
Sharpness High
Brightness 00
Contrast 00
Saturation 00
Go ToVideo Setup Page
-- Preference Page --
Audio ENG
Subtitle* E N G
Disc Menu ENG
Parental
Password
Default
Go To Preference Page
N o t e :The Subtitle has the "OFF" option,
and neither of Audio and Disc Menu has
i t .
42
Stereo
L-Mono
R-Mono
MIX-Mono
High
Medium
Low
English
French
Spanish
Chinese
Japanese
Korean
Russian
Thai
Off
1 KID SAFE
2 G
3 PG
4 PG 13
5 PGR
6 R
7 NC17
8 ADULT
OFF
Change
RESET
FULL
3 / 4
1 / 2
1 / 4
OFF
0
Page 22

Tr o u ble Shooting Guide
Symptom
No power
No picture/sound
Distorted picture
Black & White
picture
The player does not
start playback
Correction
• Connect the power plug into the power port
securely.
• If playback through a TV, verify the
connection between them: audio cable, video
cable or S video cable.
• Make sure it is right in NTSC/PAL, the button
is on the rear panel of the unit.
• Damaged S conector (bent pin).
• Insert a playable disc.(Check the disc type
and color system).
• Place the disc with the playback side down
and correctly inside the guide.
• Clean the disc.
• Cancel the parental lock function or change
the parental lock level. (The Pre-set password
is 3308.)
• Reset the portable DVD player.
43
 Loading...