

Page 1
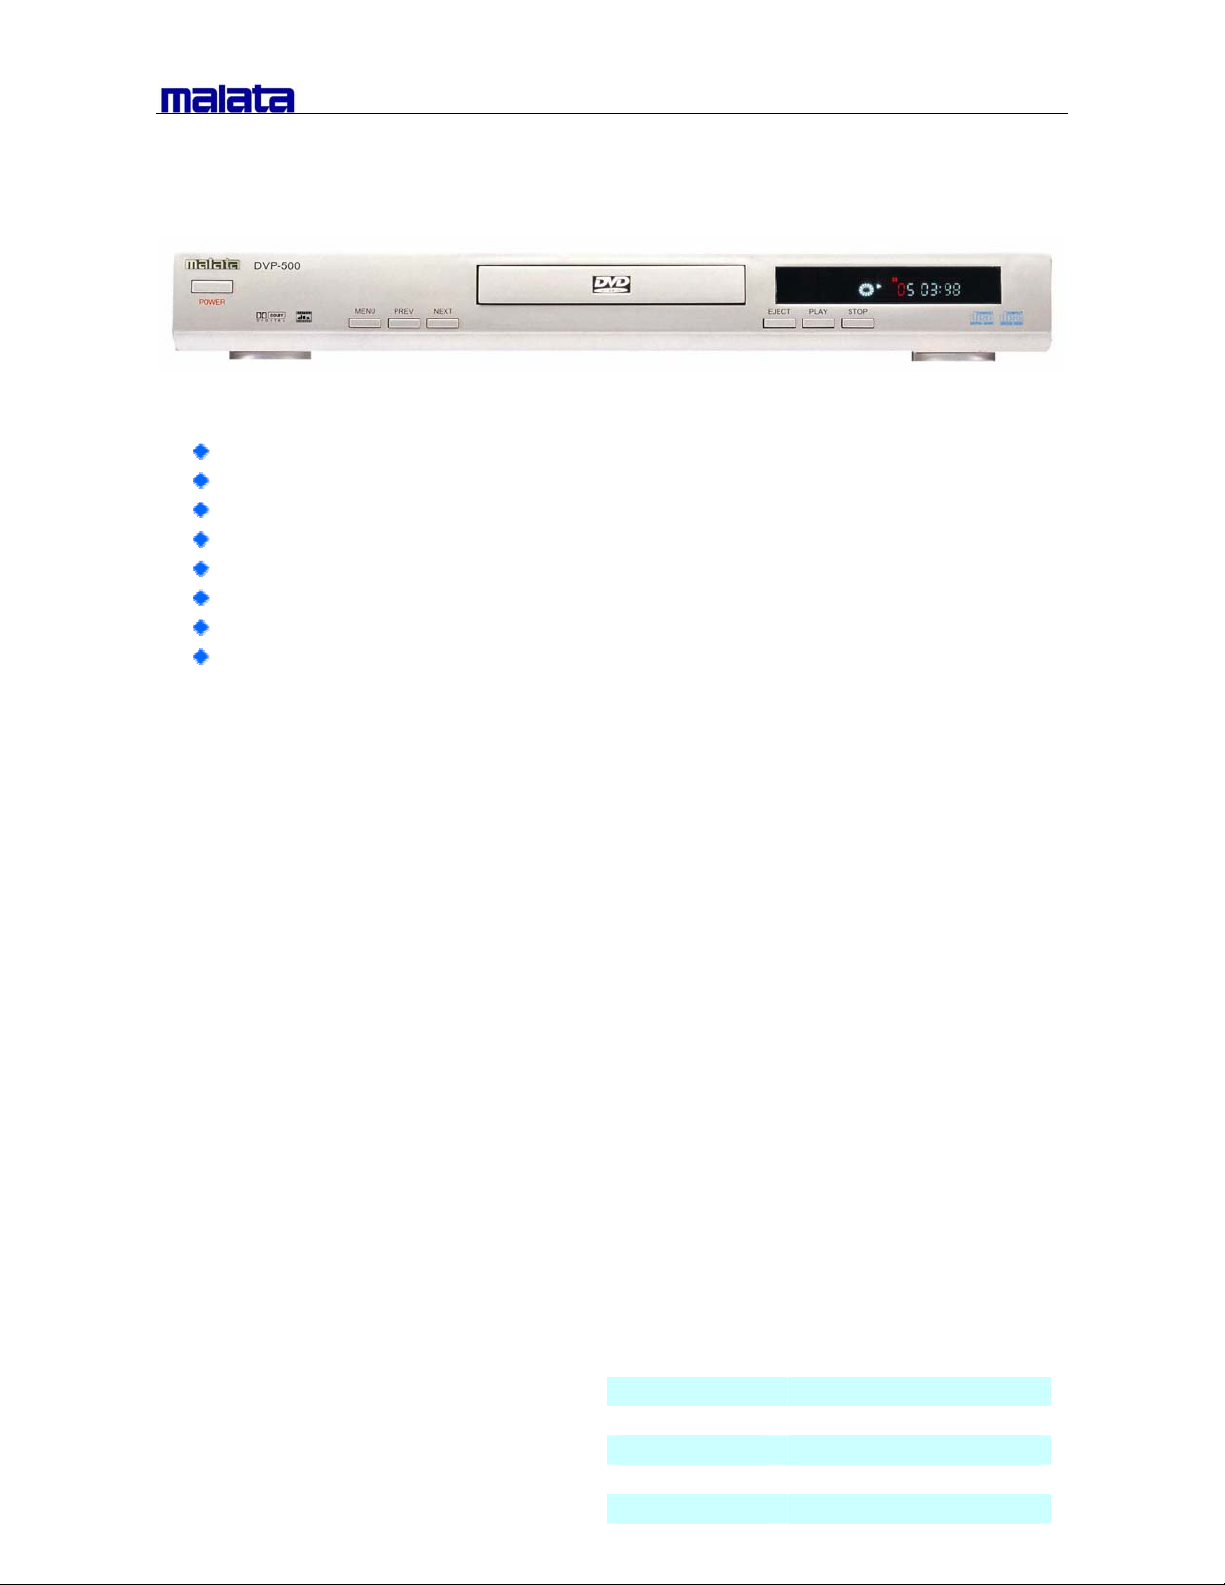
PROGRESSIVE SCAN DVD PLAYER
With progressive scan function for higher vivid picture
Fully compatible with DVD, CD, MP3, CD-R, CD-RW discs
Built in AC-3 double decoder
With fully VIDEO output jack (VIDEO, S-VIDEO, YPbPr/YCbCr)
Optical and coaxial digital audio output
Compatible with full DVD playback function: multi-angle, multi-language, parent control, etc.
Wider voltage range of power supply
Full function remote control
Feature
Compatible disc type DVD / VCD / CD / MP3 / CD-R / CD-RW
TV system PAL/NTSC/AUTO
TV type 4:3 Letter-Box / Pan-scan / 16:9 wide
Analog audio Built in Dolby digital 5.1 Channel decoding
Digital audio DTS / Dolby Digital /MPEG / PCM
Remote control Available
VFD display Available
Power supply AC 100-240V 50 / 60 Hz
VIDEO output
Composite Available (RCA) 5.1 channel output Available(RCA)
Component Available(YPbPr/YCbCr) Coaxial output Available
S-Video Available Optical Available
Sepcification
Audio DAC 96KHz 24Bit
Audio level 2 Vp_p (1KHz)
Frequency Response 20Hz-20KHz
Dynamic range 90dB
S/N ≥90dB
Channel separation 90 dB
Video DAC 10 bit
Video level 1 Vp-p (75Ohm)
Video resolution 500 lines
Video S/N 60 dB Gross weight
DG ≤3%
DP ≤5 deg Master carton
Power consumption 20w Container load
AUDIO output
Cabinet color Silver
Unit dimension
Page 2

SAFETY INSTRUCTIONS
This symbol indicates that dangerous
voltage instituting a risk of electric shock is
present within this unit.
This symbol indicates that there are
important operation and maintenance
!
instructions in the literature accompanying
the appliance.
CLASS 1 LASER PRODUCTCLASS 1 LASER PRODUCT
This product has been listed as class 1 laser
product. The mark is on the rear panel.
CAUTION
1. The product contains a low-power laser
device. In order to ensure the safety of the
laser device, do not remove any cover and
attempt to repair the unit. If any service is
needed, please contact the distributor or its
authorized service center.
2. To reduce the risk of electric shock do not
remove the cover (or back). No
user-serviceable parts inside. Refer servicing
to qualified service personnel. Unplug the
product from the wall outlet before servicing or
when it is unused for a long period of time.
3.
The manufacturer should not hold responsibi-
lity for the damage caused by any
substitutions and modifications of the product
without authorization from the manufacturer or
authorized unit.
WARNING
To reduce the risk of fire or electric shock, do
not expose this apparatus to rain or moisture.
NOTES
1. Read these instructions.
2. Keep these instructions.
3. Heed all warnings.
4. Follow all instructions
5. Do not use this apparatus near water.
6. Clean only with dry cloth.
7. Do not block any ventilation openings. Install
according to the manufacturer’s instructions.
8. Do not install near any heat sources such as
radiators, heat registers, stoves or other
apparatus (including amplifiers) that produce
heat.
9. Do not defeat the safety purpose of the
polarized or grounding-type plug. A polarized
plug has two blades with one wider than the
other. A grounding type plug has two blades
and a third grounding prong. The wide blade
or the third prong is provided for your safety. If
the provided plug does not fit into your outlet,
consult an electrician for replacement of the
obsolete outlet.
10.
Protect the power cord from being walked on
or pinched particularly at plugs, convenience
receptacles, and the point where they exit from
the apparatus.
11.
Only use attachments/accessories specified
by the manufacturer.
12.
Use only with the cart, stand, tripod, bracket,
or table specified by the manufacturer, or sold
with the apparatus. When a cart is used, use
caution when moving the cart/apparatus
combination to avoid injury from tip-over.
13.
Unplug the apparatus during lightning storms
or when unused for long periods of time.
14.
Refer all servicing to qualified service
personnel. Servicing is required when the
apparatus has been damaged in any way,
such as power-supply cord or plug is damaged,
liquid has been spilled or objects have fallen
into the apparatus, the apparatus has been
exposed to rain or moisture, does not operate
normally, or has been dropped.
- 1 -
Page 3

FEATURES
HIGH QUALITY PRODUCT
1. High Resolution
Adopt an MPEG2 decoding format to
achieve horizontal resolution more than
500 lines.
2. Excellent Timbre
Built-in Dolby AC-3 decoder and DTS
processor, can output digital audio
signals to realize high quality sound
effects.
3. Screen
Support 4:3 and 16:9 aspect ratios.
4. Special Function
Support multi-angle and multi-language
playback to enjoy unique video features.
5. Video Output
Standard Video, S-Video and YPbPr
output and easy PAL/NTSC shift. Support
the signal output of progressive picture.
6. Audio Output
5.1ch analog audio output, optical and
coaxial digital audio output can be
connected to any amplifying equip-
ments.
ADVANCED FUNCTIONS
1. Compatibility
Compatible with DVD, CD, CD-R, CD-RW,
MP3 and JPEG discs.
2. Parental Control
You can control the playback of disc
contents by using this function.
3. Content Display
Use color VFD and multi-language OSD
to display disc information clearly.
4. Zoom Function
The JPEG picture can be enlarged
relevant times for enjoyment.
5.
All Playback Functions
Fast forwardness and backwardness,
slow playback, step playback, repeat
playback and program playback.
6. Search By Time
Can search for the desired content fast
by time, especially for enjoying stories.
7. Last Memory Playback
Can continue playing from the stopped
point in power on status (for DVD discs).
- 2 -
Page 4
ABOUT DISCS
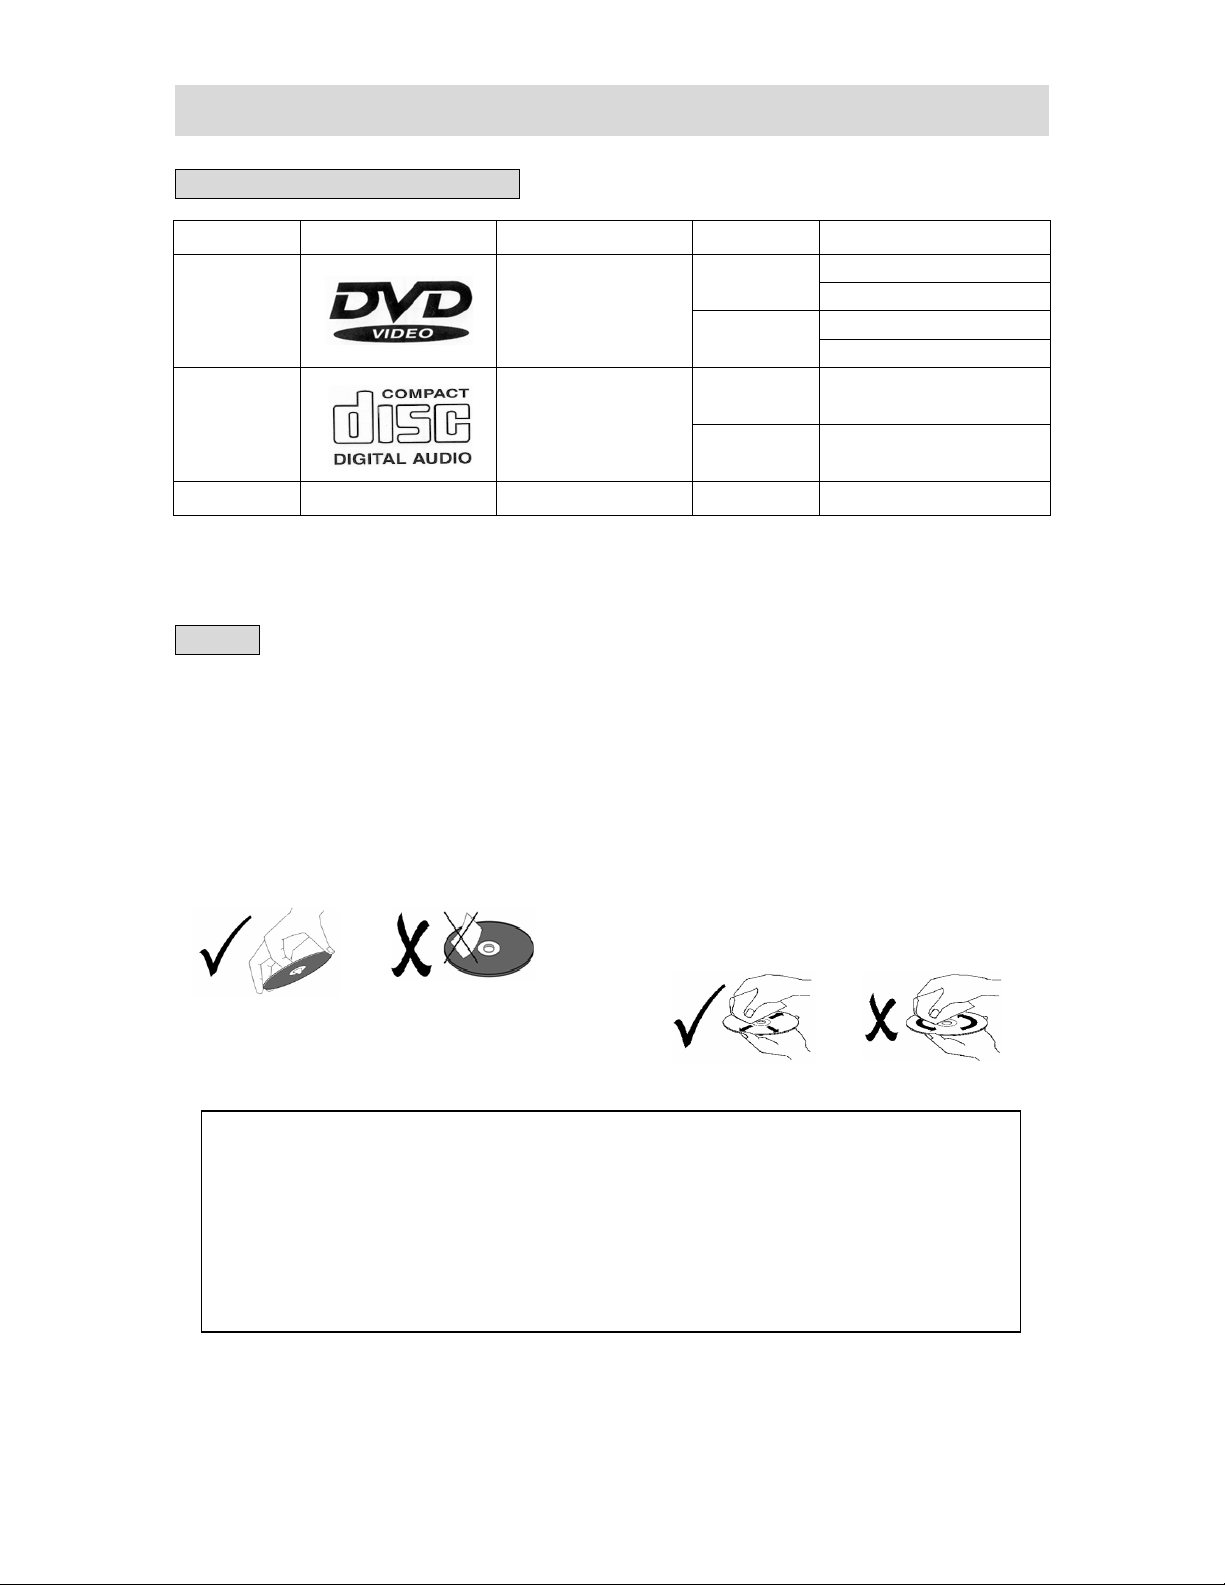
DISCS THAT CAN BE PLAYED
DISC LOGO CONTENTS SIZE MAXIMUM TIME
DVD
CD Audio
MP3 Audio 12cm 600min
◆ Software maker specifies the operation method of some DVD discs. Please refer to the
instruction manual of disc.
Audio + Video
(active picture)
12cm
8cm
12cm 74min
8cm 20min
NOTES
120min (one side)
240min (two sides)
80min (one side)
160min (two sides)
1. Using of Discs
Do not touch the playing surface of the
compact disc.
Do not stick paper and label on the disc.
Do not expose discs to direct sunlight.
Do not place discs near water or in dusty
place.
This product incorporates copyright protection technology that is protected by
method claims of certain U.S. patents and other intellectual property rights owned by
Macrovision Corporation and other rights owners. Use of this copyright protection
technology must be authorized by Macrovision Corporation, and is intended for home
and other limited viewing uses only unless otherwise authorized by Macrovision
Corporation. Reverse engineering or disassembly is prohibited.
2. Cleaning of Discs
If a disc has fingerprints or dust on it,
lightly wipe the disc with soft cloth (or similar)
from the center of the disc outward in a radial
manner.
Never use record cleaning sprays,
benzine, thinner, static electricity prevention
liquids or any other solvents to clean your
discs.
- 3 -
Page 5
PARTS INTRODUCTION
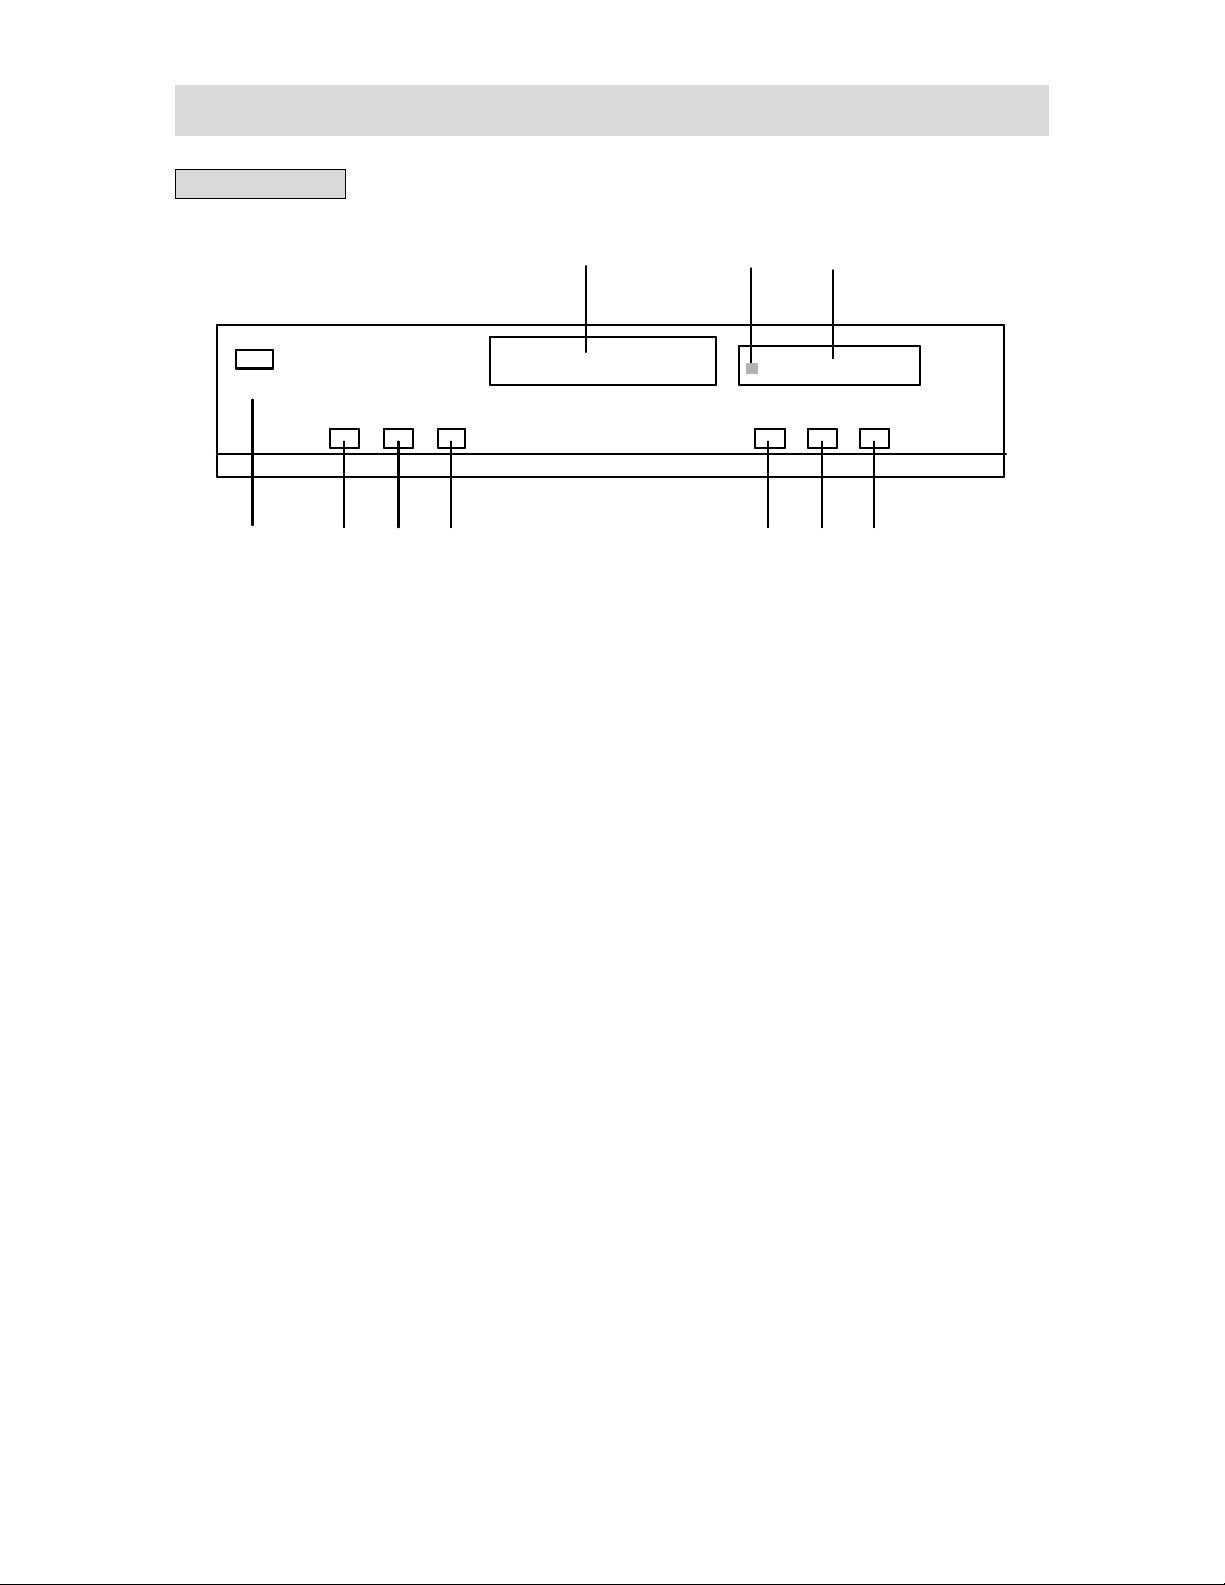
FRONT PANEL
10
POWER
POWER
1. POWER button
2. MENU button
-Press to display or close the disc menu.
3. PREV skip button
-Press to select the previous menu or
4. NEXT skip button
-Press to select the next menu or track.
5. EJECT button
1
1
-Press to turn on or off the power.
track.
-Press to open or close the disc tray.
MENU PR EV NE XT EJ ECT PL AY STOP
MENU PR EV NE XT EJ ECT PL AY STOP
23 5674
23 5674
10
6. PLAY button
-Press to begin the playback of the
inserted disc.
7. STOP button
-Press to stop the playback.
8. Display panel
9. Remote sensor
-Point the remote control at it for
operation.
10. Disc tray
98
98
- 4 -
Page 6
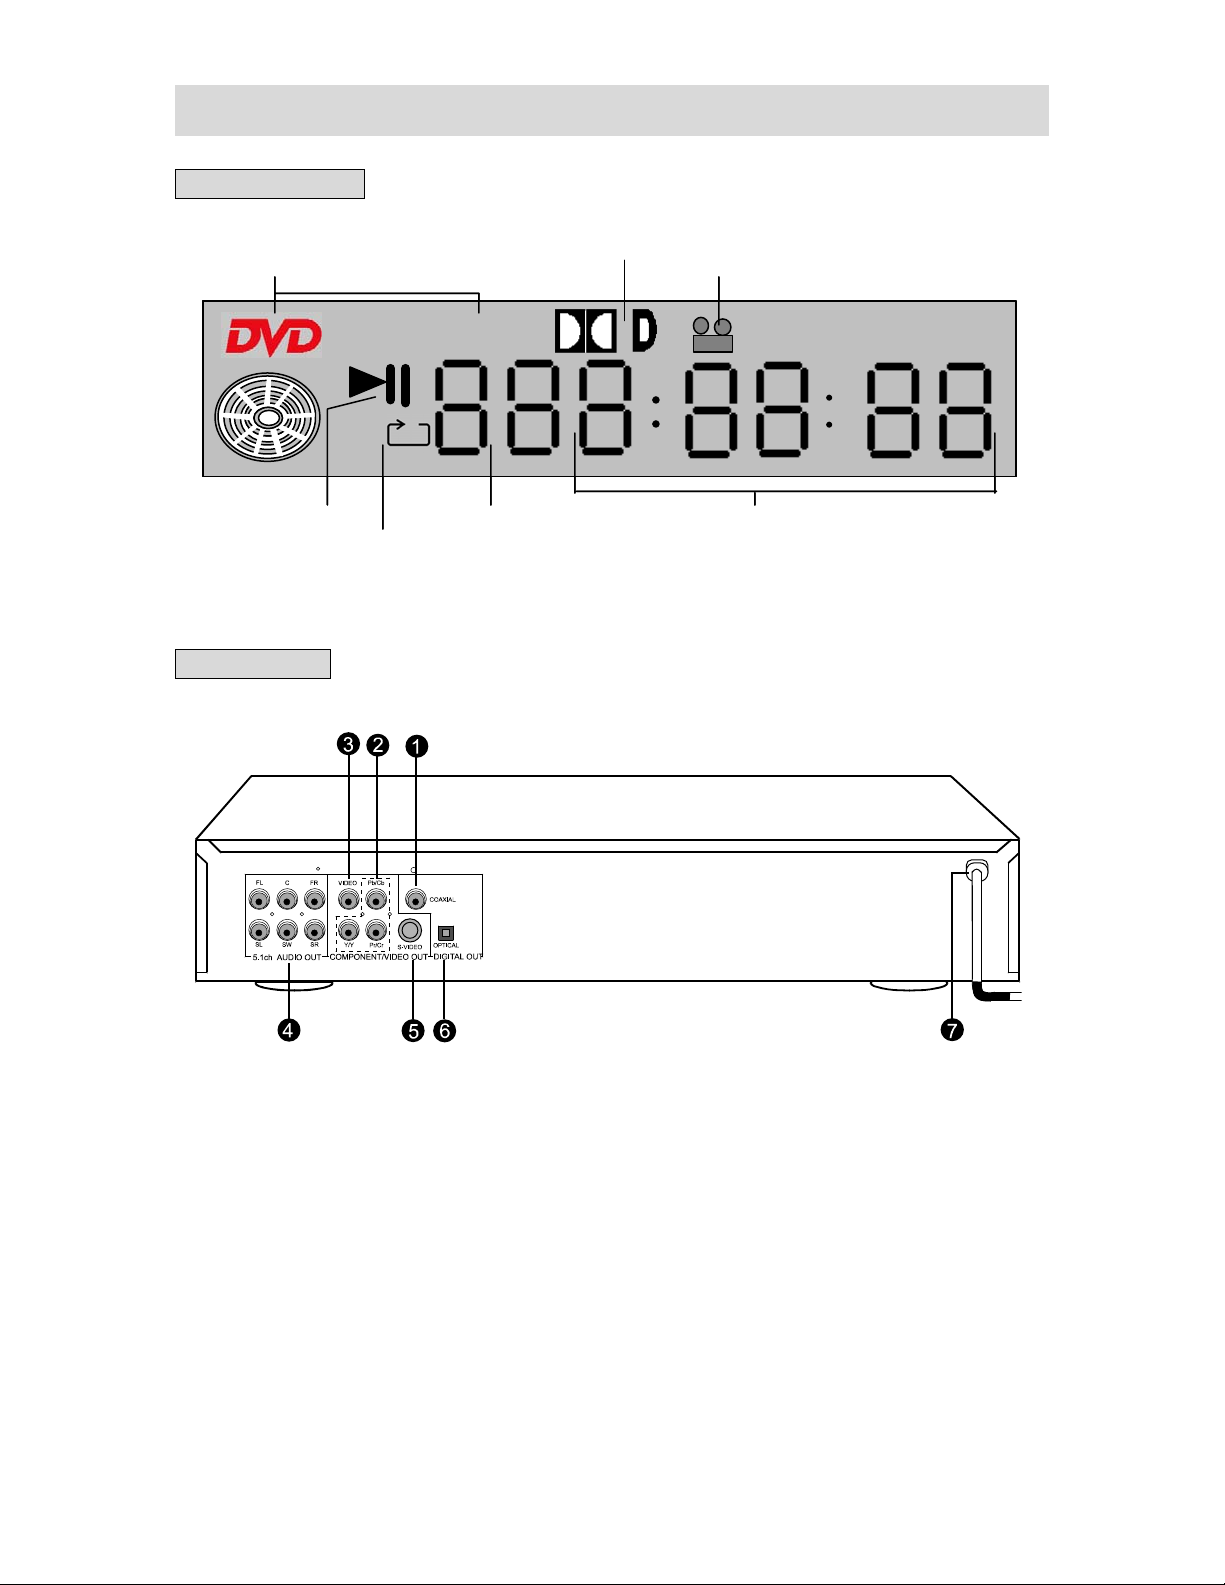
PARTS INTRODUCTION
DISPLAY PANEL
DOLBY DOUBL E-D
DISC TY PE
DISC TY PE
REAR PANEL
PL A Y / PA US E
PL A Y / PA US E
ALL
ALL
REPEAT
REPEAT
CD
CD
CHAPTER/TRACK PLAYING TIME
CHAPTER/TRACK PLAYING TIME
DOLBY DOUBL E-D
TIME
TIME
ANGLE
ANGLE
6
6
4
4
7
7
1. Coaxial digital audio output jack
2. Component output jacks
3. Video output jack
4. 5.1ch audio output jacks
- 5 -
5. S-Video output jack
6. Optical digital audio output jack
7. Power-supply cord
Page 7
PARTS INTRODUCTION
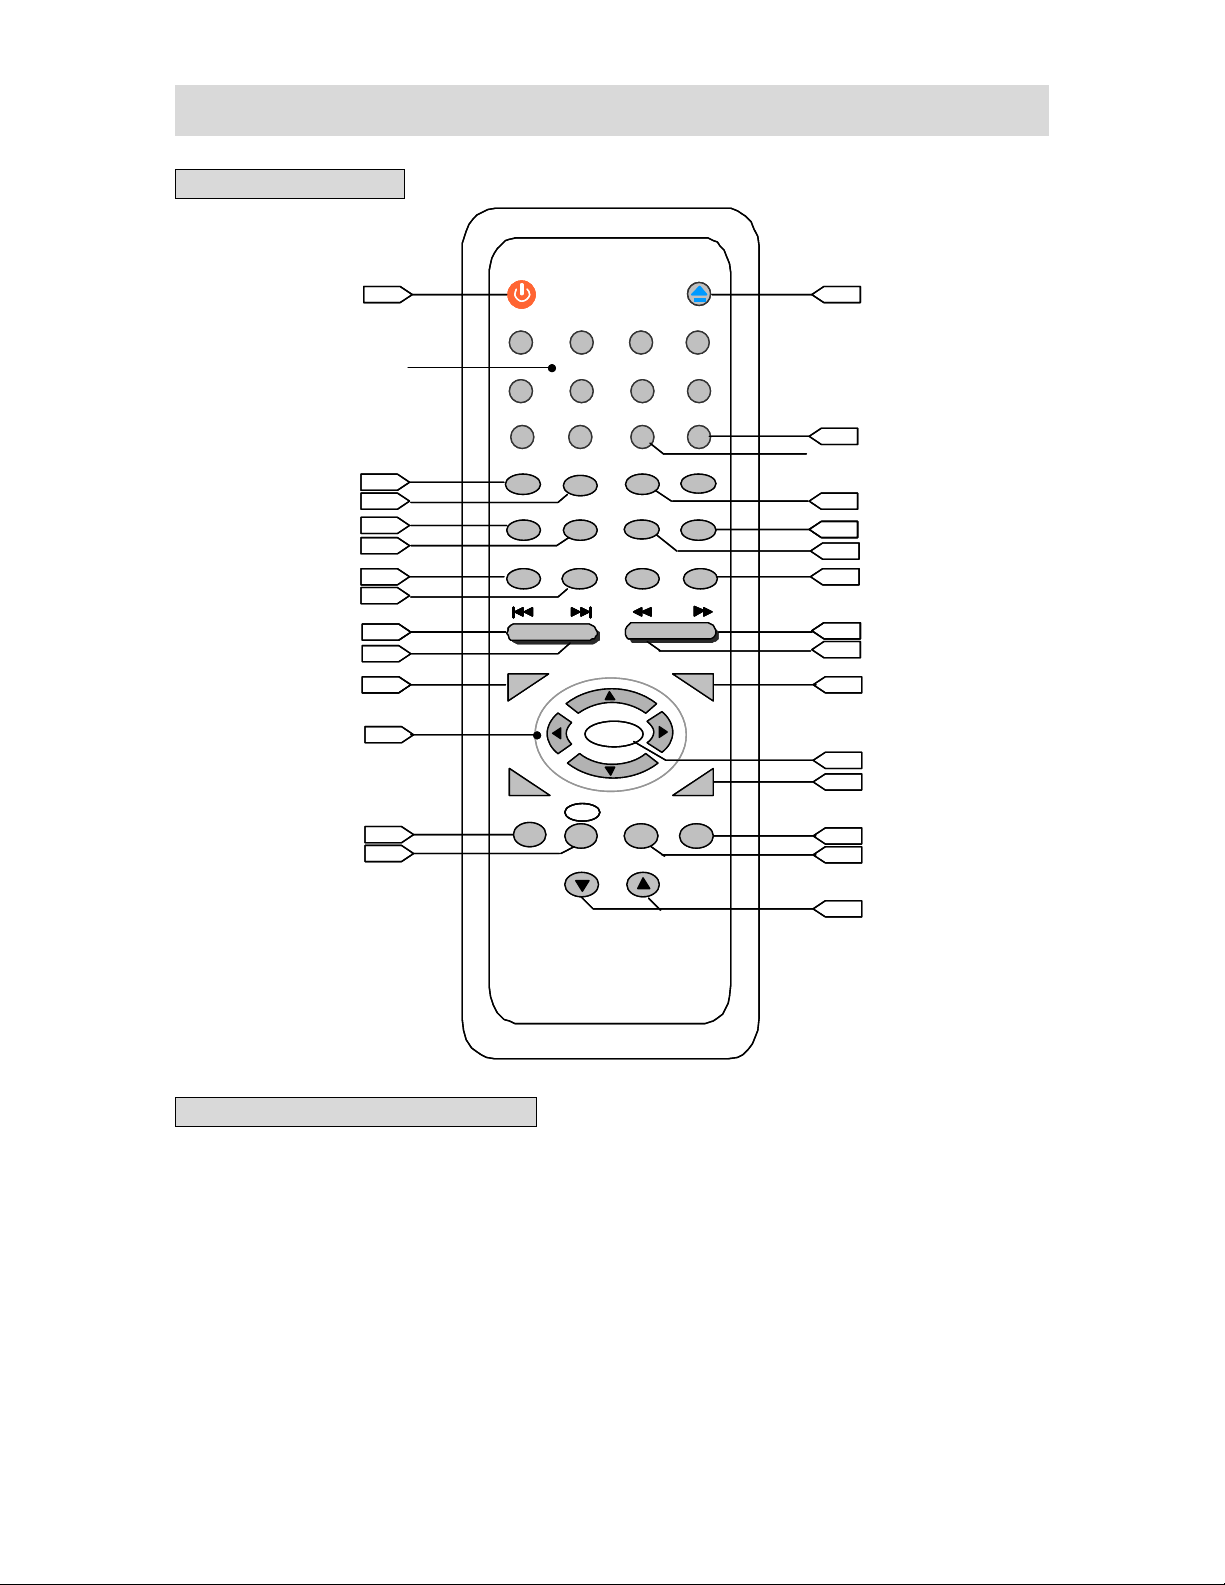
REMOTE CONTROL
POWER
15 10
15 10
POWER
1234
num ber buttons
num ber buttons
1234
56
56
0
0
9
(clear setup in stop status)
(clear setup in stop status)
PREV SKIP button
PREV SKIP button
NEXT SK IP button
NEXT SK IP button
direction buttons
direction buttons
14
14
14
14
11
11
11
11
14
14
15
15
12
1212
12
12
10
1010
13
13
9
SLOW STOP
SLOW STOP
CLEAR
CLEAR
MENU PLAY
MENU PLAY
OK
OK
TI TLE ZOO M
TI TLE ZOO M
shift button
(in interlaced or progressive status)
(in interlaced or progressive status)
shift button
15
15
15
15
OSD
PS
PSPS
-VOLUME +
-VOLUME +
OSD
USAGE OF REMOTE CONTROL
Open the battery case cover, and insert two “AAA” batteries into it in accordance with the
indications (+, -) inside the compartment. Point the remote control at remote sensor for
operation within an angle of 60°and a distance of 7m, and remove all obstructions.
◆ Normally batteries can last for around six months. If the remote control does not work,
replace the batteries.
◆ If the player is not used for a long time, take out the batteries to prevent leakage and
possible damage to the remote control.
7
7
+10
+10
AUDIO
AUDIO
SETUP
SETUP
OPEN/
OPEN/
CLOSE
CLOSE
MU TEREPEATA -BGOTO
MU TEREPEATA -BGOTO
PROGRAMANGLESUBTITLE
PROGRAMANGLESUBTITLE
PAUSE
PAUSE
VOCAL
VOCAL
8
8
P/N
P/N
STEP
STEP
8
8
+10 button
+10 button
14
14
15
1515
11
11
14
14
14
14
14
FWD SCAN button
FWD SCAN button
REV SC AN b u tto n
REV SC AN b u tto n
14
14
15
15
OK bu tton
10
OK bu tton
10
13
13
11
11
16
16
11
11
- 6 -
Page 8

SYSTEM CONNECTION
◆ Please turn off all relevant power before connection for the sake of safety.
◆ There are 5.1ch Audio Out, S-Video Out, Digital Audio Out (Optical, Coaxial) and
Component Out, etc. You can choose any one to connect.
PLAYER+TV
The connection is shown as following:
In this figure, there are VIDEO OUT, S-VIDEO OUT and COMPONENT OUT. If the TV has
S-VIDEO IN or COMPONENT IN jack, you can achieve more vivid picture by connecting this
jack.
REAR PANEL
1. Y Pb Pr connection
Composite video output is defaulted to be the original status of DVD player. If a displaying
equipment with Y Pb Pr jacks is connected, then you need to set up the player besides
connecting the jacks with three Y Pb Pr cables:
1) In stop status, press SETUP button to enter the main menu.
2) Use Up/Down direction button to select “VIDEO OUTPUT” in “PREFERENCES”.
3) Select “Y Pb Pr” output in “VIDEO OUTPUT” and then press OK button to exit.
4) Press PS button on remote control (shift in interlaced or progressive status) to shift to
progressive scanning output status.
5) Shift the displaying status of the TV to “Y PB PR”.
- 7 -
Page 9

SYSTEM CONNECTION
2. Y Cb Cr connection
If a displaying equipment with Y Cb Cr jacks is connected, then you need to set up the
player besides connecting the jacks with three Y Cb Cr cables:
1) In stop status, press SETUP button to enter the main menu.
2) Use Up/Down direction button to select “VIDEO OUTPUT” in “PREFERENCES”.
3) Select “Y CB CR” output in “VIDEO OUTPUT” and then press OK button to exit.
◆ Y Cb Cr is in progressive video status, so you needn’t to press PS button to shift.
◆ You can select any one of video out connections according to the TV.
3. Setup of the Player
You should set up the player according to the TV connected.
1) If TV color system is PAL, press P/N button to select PAL output.
2) If TV color system is NTSC, press P/N button to select NTSC output.
3) If TV color system is MULTI (full system), press P/N button to select MULTI output.
4) If wide screen TV is connected, set “TV DISPLAY” to be “WIDE” in general setup.
5) If normal TV is connected, set “TV DISPLAY” to be “NORMAL/PS” or “NORMAL/LB”.
◆ System shift should be only effective in stop status.
- 8 -
Page 10

SYSTEM CONNECTION
PLAYER+COMMON AMPLIFIER
◆ Make some relevant setup in “SPEAKER SETUP”.
◆ You can select any one of video out connections according to the TV.
PLAYER+AMPLIFIER WITH DIGITAL SIGNAL INPUT
◆ In “AUDIO SETUP”, set digital audio output to be “SPDIF/RAW” or “SPDIF/PCM”.
◆ During connection, one of optical or coaxial connection will do.
◆ You can select any one of video out connections according to the TV.
- 9 -
Page 11

OPERATION
Preparation:After connection, turn on the power of relevant equipment and select video input.
1. Turn on the player’s power
Press POWER button on front panel
to turn on the power and the player will
search for the disc automatically. If there is
a disc in, the player will play it.
2. Press EJECT button on front panel or
OPEN/CLOSE button on remote control to
open the disc tray.
Warning: Do not play bad quality discs in order not to damage the lens.
DVD PLAYBACK
MENU
Normally there is a selecting menu in DVD discs. You can use MENU button to enter
the selecting menu directly, and use direction buttons to choose the item you like and press
OK button to enter it.
TITLE & CHAPTER
Normally there are several titles in a DVD disc, and also there are several chapters in a
title. You can use PREV/NEXT SKIP button or direction buttons to select any one of titles or
chapters fast.
3. Load the disc into the disc tray
4. Press EJECT or OPEN/CLOSE button
to close the disc tray and begin to play the
disc.
Load the disc according
to the left figure in order
not to damage the disc
or the player.
- 10 -
Page 12

OPERATION
LANGUAGE
There are up to 8 kinds of audio languages in a DVD disc. When you play a
multi-language DVD disc, press AUDIO button on remote control to select different audio
language.
SUBTITLE
The DVD player can support up to 32 kinds of subtitles. When you play a multi-subtitle
disc, press SUBTITLE button to select different subtitle.
ANGLE
Multi-angle means that a scene is shot from different angles so that audience can watch
from any angle. If there are multiple angles in a scene, you can use ANGLE button to select
the angle you like to enjoy. Press ANGLE button continuously to view different angle.
AUDIO MODE
Press VOCAL button to select different audio mode. For example, you can select
different audio mode for DVD discs. It depends on discs.
VOLUME
During playback, press VOLUME+ button to increase the volume and press VOLUME-
button to decrease the volume.
- 11 -
Page 13

OPERATION
CD PLAYBACK
The player will play all tracks continuously in default status. You can press PREV/NEXT
SKIP button or number buttons to select a certain track.
MP3 PLAYBACK
MP3 is the third audio compression format of international standard MPEG, which
compresses the audio signal at the rate of 12:1. Using MP3 format, one disc can record
more than 600 minutes music, the timbre of which is similar with that of CD discs.
OPERATION
Load a MP3 disc in. After reading the disc “SMART NAVI” will be displayed on the
screen which is divided into three columns: Root (upper left), Subdirectory (upper right) and
Play Mode (lower). You can use Left/Right direction button to shift between them.
In stop status: press Left/Right direction button to move cursor to “PLAY MODE”
1.
column, use Up/Down direction button to select the play mode, and press Left/Right
direction button to confirm. (But in selecting program mode status, press OK button to
confirm.) You can also use PROGRAM or REPEAT button to select the play mode.
Press Left/Right direction button to move cursor to Subdirectory column, and use
Up/Down direction button or number buttons to select MP3 folder. Press OK button to
confirm.
Press Up/Down direction button or number buttons to select the track you like and
press OK button to confirm.
2. Press PREV/NEXT SKIP button to select the previous/next track in the same folder.
Press STOP button and then use direction buttons to return to the menu of last level.
3.
During programming, when all program options are finished, press STOP button first
4.
and then press PLAY button to start program playback.
- 12 -
Page 14

OPERATION
JPEG PLAYBACK
JPEG is a common picture format which has few bytes and low loss rate of picture.
Hundreds of pictures can be stored in a disc in this format. In order to realize real digital
album, use film to make ”PICTURE CD”, namely JPEG format.
OPERATION
1. Normal Playback
Load a JPEG disc in. After reading the disc “SMART NAVI” and “ROOT” (the left is the
menu of last level and the right is the menu of next level) will be displayed on the screen.
Use OK button and Left/Right direction button to select submenu with picture, and then use
Up/Down direction button to select the contents.
◆ Many discs have other contents besides pictures.
◆ Press
Up/Down direction button to select the play mode.
For example: choose “FOLDER” in “PLAY MODE”, and then use direction buttons to
select the name of picture file. Press OK button to confirm to play.
2. Picture Rotation
It can be operated only when the picture is normally displayed. Once another picture is
selected, it will be cancelled automatically. There are four kinds of rotational modes:
Inversion, Enantiomorphism, turning left side and turning right side. You can use direction
buttons to select:
“UP” ----- Inversion/Normal
“DOWN” ----- Enantiomorphism/Normal
“LEFT” ----- Turning left side
“RIGHT” ----- Turning right side
3. Zoom and Move of Picture
ZOOM button is used to turn on/off zoom function and move function.
When this function is turned on, use REV/FWD SCAN button to control zoom
proportion and TV screen will display relevant information. Then you can use direction
buttons to move the picture. When this function is turned off, the picture will resume back to
normal size.
◆ Influenced by making method, some JPEG discs can only be played normally but not
be rotated or zoomed.
Left/Right direction button to move cursor to “PLAY MODE” column and use
- 13 -
Page 15

PLAYBACK FUNCTIONS
STOP
During playback, press STOP button on remote control to stop playback. For DVD discs,
press STOP button once and the player will be in resumable status. If you press PLAY
0
button, the player will play from the stopped point.
PAUSE
Press PAUSE/STEP button on remote control to pause, and press it continuously to
achieve step-by-step playback.
REPEAT
1. Use REPEAT button to repeat a title, a chapter, a track and a disc respectively
according to different discs, and also to cancel repeat.
2.
Use A-B button to repeat section A to B. Press it once to set the starting point A, twice
to set the ending point B, and the third time to cancel repeat.
SEARCH BY TIME
You can use GOTO button to search by time, namely to play from a specific time.
During DVD playback, press GOTO button once and TV screen will display the title or
chapter, and then you can use number buttons or direction buttons to select any one of
them. Press GOTO button twice, then you can use number buttons to input the time you
desired (hour, minute, second); press OK button and the player will play from the inputted
time.
◆ Some DVD discs do not support search function.
◆ Some discs do not support
repeat function.
FAST FORWARDNESS & BACKWARDNESS
Press FWD/REV SCAN button to activate fast forwardness or backwardness.
SLOW FORWARDNESS & BACKWARDNESS
Press SLOW button to activate slow forwardness and backwardness.
- 14 -
Page 16

PLAYBACK FUNCTIONS
DISC INFORMATION DISPLAY
Press OSD button on remote control to display the disc information.
PROGRAM PLAYBACK
Use PROGRAM button to activate program playback of CD discs.
Operation steps:
1. In stop status, press PROGRAM button to enter program status.
2. Use number buttons to input contents according to prompts.
3. Repeat step 2 to program more contents.
4. Press PLAY button to confirm.
PLAY
Press PLAY button to start playback. Press POWER button on remote control to enter
standby status, and press it again to resume back to playback status.
SCAN TYPE
Press PS button (shift button) on the remote control to select the scan type of output
picture signal. If you have a TV with progressive scanning function, please select
progressive scanning output for more vivid picture. Progressive scanning output only aims
at component signal. If using a common TV, then please select progressive scanning
output. There is no picture in composite video status.
CLEAR
In stop status, press CLEAR button on remote control, then all functions will resume
back to the original status.
- 15 -
Page 17

SYSTEM SETUP
SETUP MENU
In stop status, press SETUP button on remote control to display a main menu
(GENERAL SETUP, SPEAKER SETUP, AUDIO SETUP, PREFERENCES & EXIT SETUP).
Operation steps:
1. Press SETUP button to enter the main menu.
2. Use Up/Down direction button to select the item you want to set and press OK
GENERAL SETUP
The general setup is shown as following:
button to enter it.
3. After entering the submenu, use also direction buttons to select the item you want
to set and press OK button to enter it.
4. Press SETUP button to exit from the setup menu.
1. TV DISPLAY (NORMAL/PS, NORMAL/LB & WIDE)
The player allows you to set the best screen proportion according to the disc.
2. PIC MODE (AUTO, FILM, VIDEO, SMART, SSMART)
You can set different picture according to your desire. Normally it is set to be
“AUTO”.
3. ANGLE MARK (ON & OFF)
You can select the angle you like to enjoy.
4. OSD LANG (ENGLISH, CHINESE, CHINESE F, FRENCH, GERMAN, ITALIAN,
SWEDISH, DANISH, JAPANESE, PORTUGUESE & SPANISH)
You can set the language according to your preference.
5. CAPTIONS (ON & OFF)
You can select to play the disc with hidden captions.
6. SCR SAVER (ON & OFF)
You can select “ON” to activate screen saver at the time of no operation. Select
“OFF” to turn off this function.
◆ After entering the submenu, select “MAIN PAGE” and press OK button to return to
the menu of last level.
- 16 -
Page 18

SYSTEM SETUP
SPEAKER SETUP
The speaker setup is shown as following:
1. DOWNMIX (LT/RT, STEREO, VSS & OFF)
AUDIO SETUP
The audio setup is shown as following:
Select different item to output channel left/right signal, common stereo signal and
virtual surround signal respectively.
2. CENTER (ON & OFF)
3. REAR (ON & OFF)
4. SUBWOOFER (ON & OFF)
5. CNTR DELAY
6. REAR DELAY
7. TEST TONE (ON & OFF)
Select “ON” to test the tone of many channels in turn.
◆
Only when DOWNMIX is in “OFF” status, the setup of center, rear and subwoofer
speakers can be carried out. The center and rear speakers should be turned on
before setting “CNTR DELAY” and “REAR DELAY”.
1. AUDIO OUT (ANALOG,
Select “SPDIF/RAW”, and the amplifier should have source code or AC-3 decoding
function. Select ”SPDIF/PCM”, and the amplifier should have PCM or AC-3 decoding
function.
2.
OP MODE (LINE OUT & RF REMOD)
You can select different item to do linear or radio frequency process to audio signal.
3. DUAL MONO (STEREO, L-MONO, R-MONO & MIX-MONO)
The function is used to set the output mode of channel left/right. DVD discs with
5.1ch will only be effective when setting to be “MIX-MONO”.
4. DYNAMIC
When “OP MODE” is set to be “LINE OUT”, select this item to adjust linear dynamic
compression rate to get different signal compression effects.
5. LPCM OUTPUT (LPCM 48K & LPCM 96K)
There are two sampling frequencies for selection.
SPDIF/RAW & SPDIF/PCM)
- 17 -
Page 19

SYSTEM SETUP
PREFERENCE
The preferences is shown as following:
1. TV TYPE (MULTI, NTSC & PAL)
You can select it according to the color system of TV connected.
2. VIDEO OUTPUT (S-VIDEO, Y PB/CB PR/CR & RGB)
You can select the appropriate video output.
3. LANGUAGE (ENGLISH, FRENCH, SPANISH, CHINESE, JAPANESE, GERMAN &
ITALIAN)
If a DVD disc has all above languages, then it will be effective to select the language
of audio, subtitle and disc menu; or else it will only display the language recorded in
the disc.
4. LOCAL (CHINA, FRANCE, HONG KONG, JAPAN, TAIWAN, GBR & USA)
As for the disc with local limitation, you can choose the area.
5. PARENTAL
DVD discs with parental function are divided into several levels. You can select
relevant level according to the disc and your desire. “NO_PARENTAL” is the default
mode of the player.
6. PASSWORD (CHANGE)
1) Press number buttons to input the old password 3308.
2) If you input a wrong password, please input the old password again until the
password is correct.
3) Press number buttons to input the new password.
4) Confirm the new password.
5) Press OK button to return to the main menu.
7. DEFAULTS (RESET)
If you select “RESET” in default mode, then all functional setup will return to the
original status.
8. SMART NAV (NO MENU & WITH MENU)
For CD-ROM (e.g. MP3 & JPEG) discs, the TV screen will display the detailed
structure of the disc file. For JPEG files, this item should be set to be “WITH MENU”.
If selecting “NO MENU”, then it will be suitable for playing MP3 discs.
◆ “PREFERENCES” will only be effective when the player is stopped.
- 18 -
Page 20

TROUBLESHOOTING
SYMPTOM
Cannot set to be 5.1ch output. -If the speaker setup is incorrect.
-If the disc is not loaded in.
-If the disc is loaded upside down.
-If the disc is dirty or warped.
The player does not play or displays
“NO DISC”.
There is no sound.
There is no picture.
There is no picture in composite video
status.
Picture move up and down. Unsteady.
Cannot continue to play and play a
section repeatedly.
The remote control does not work.
Others:
Static or other external interfere may cause the abnormity of the player. In this circumstance,
unplug the power-supply cord from the outlet and plug it in again to reset the player so that the
normal operation will be resumed. If you are still having problems, then please disconnect the
power and consult your service center or a qualified technician.
-If the local setup is not the same as the area code of
DVD discs.
-If water condensation have occurred.
If it occurs, take out the disc and leave the player on for
about one hour.
-If the system connection is incorrect.
-If the speaker power is not turned on.
-If the audio setup of DVD discs is incorrect.
-If the disc is dirty or warped.
If it occurs, clean it or press it with books about 4-5kg.
-If TV is not turned on or not in video mode.
-If the system connection is incorrect.
-If the player is set in progressive scanning status.
If it is true, press “PS” button to shift the setup status.
-If the signal system is incorrect.
If it is true, select correct system.
-If it is in A-B repeat status.
If it is true, press A-B button to cancel it.
-If the disc is dirty or damaged.
If it is true, clean it or select by time to skip the section.
-If there are obstructions between the remote control
and the player.
-If you do not point the remote control at remote sensor.
-If batteries are not inserted.
-If batteries are weak.
If it is true, replace the batteries.
CHECK ITEM
- 19 -
Page 21

SPECIFICATIONS
A
Laser wavelength 780/650nm
Video system MULTI/NTSC/PAL
Frequency response
Audio signal-to-noise ratio
Audio distortion + noise
Channel separation
Dynamic range
Audio
output
Video
Analog audio output
Digital audio output
Video output
20Hz~20kHz ±2.5dB
≥85dB
≤-70dB(1kHz)
≥70dB (1kHz)
≥80dB (1kHz)
Voltage: 2 V± , Impedance: 10kΩ
Voltage: 0.5V
Voltage: 1V
P-P
±0.2, Impedance: 75Ω,
P-P
Unbalanced negative
output
S-Video output
Voltage: Y: 1V
Power AC 120V, 60Hz
Power consumption
≤25W
0.2
1.0
, Impedance: 75Ω
C: 0.286V
P-P,
P-P,
Impedance: 75Ω
Dimensions
428×270×55mm
Weight (approx.) 3kg
DESIGN AND SPECIFICATIONS ARE SUBJECT TO CHANGE WITHOUT NOTICE
Manufactured under license from Dolby Laboratories. “Dolby”
and the double-D symbol are trademarks of Dolby Laboratories.
Confidential unpublished works. 1992-1997 Dolby Laboratories.
C
ll rights reserved.
- 20 -
 Loading...