

Page 1
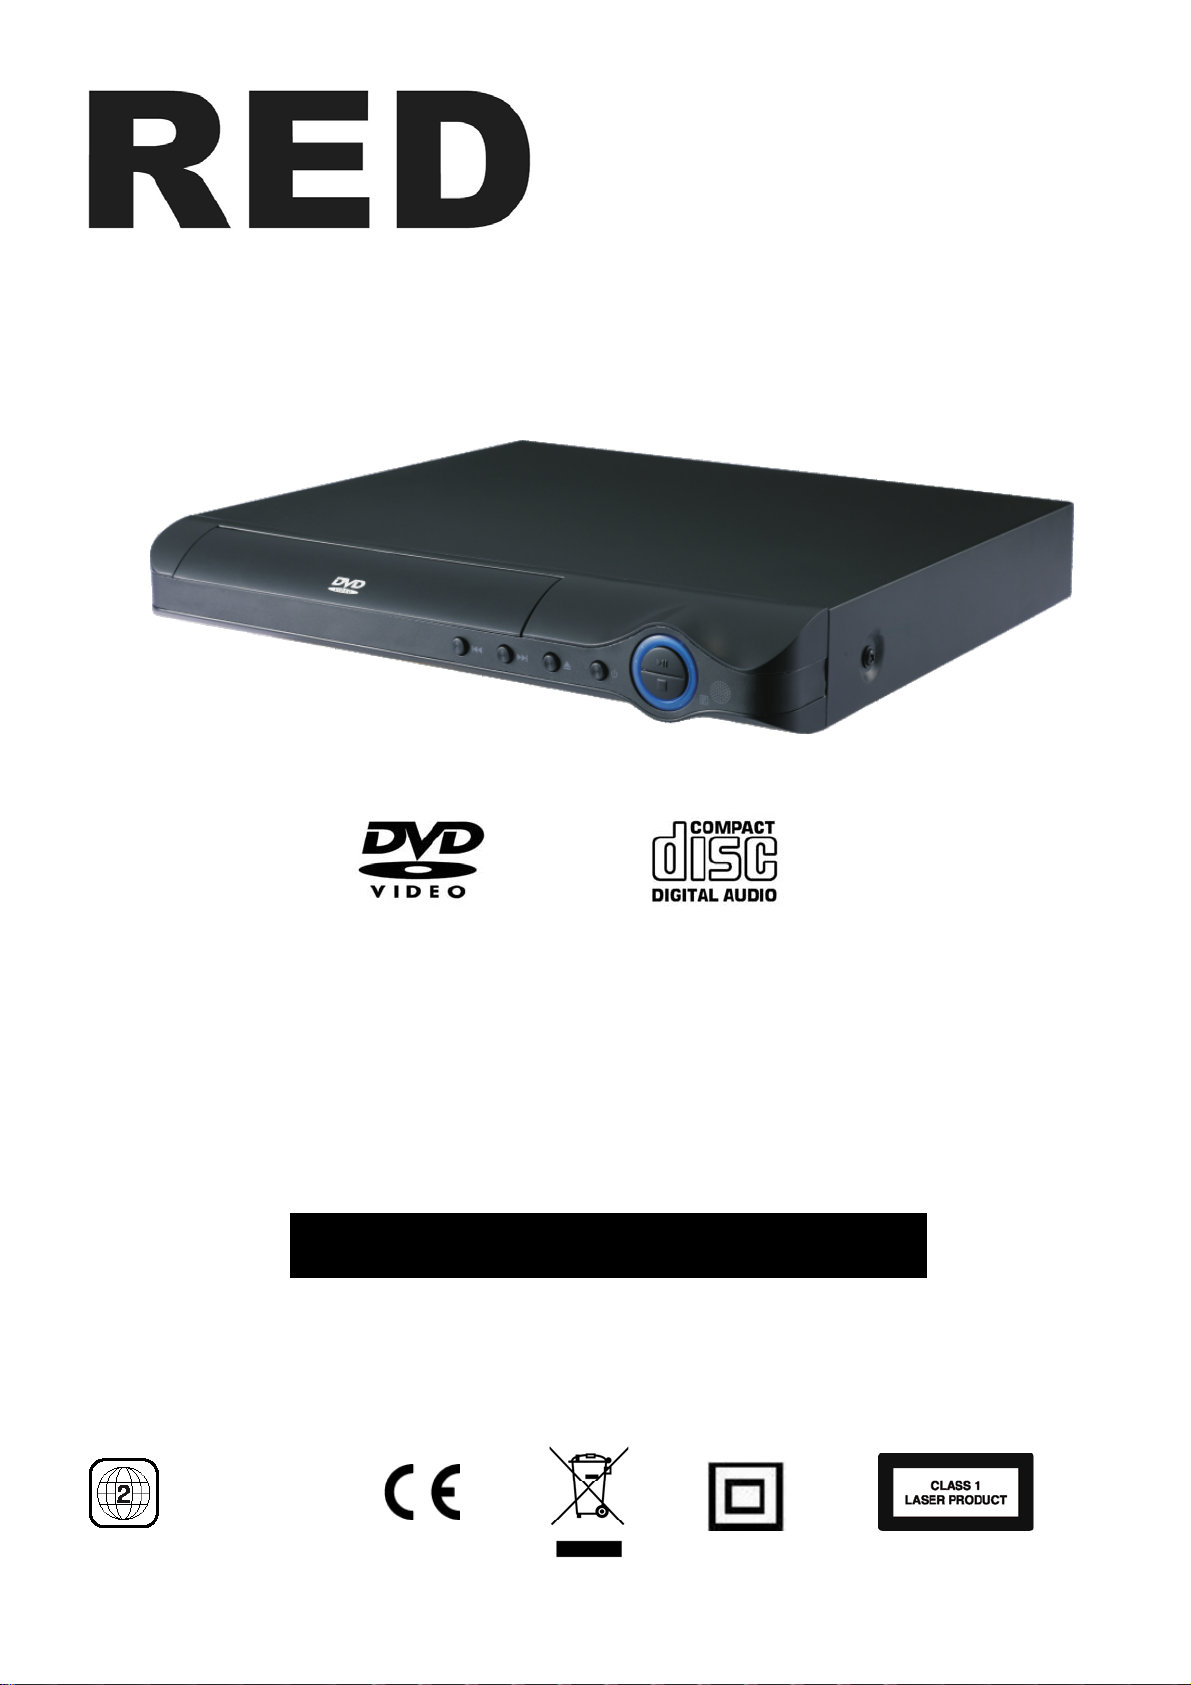
HDMI DVD Player
Model 585-160 / SKU 121665201(online)
110-240V~ 50/60Hz 10W
FOR HOUSEHOLD AND INDOOR USE ONLY
Please read these instructions before use and retain for future reference
Region code
Page 2
1. SAFETY
• PLACE THE APPLIANCE ON A FLAT, STABLE SURFACE WITH ADEQUATE VENTILATION AND AWAY
FROM OTHER SOURCES OF HEAT. MINIMUM DISTANCES AROUND THE APPLIANCE FOR
ADEQUATE VENTILATION IS 10CM. DO NOT COVER OR RESTRICT VENTILATION OPENINGS.
• CHILDREN SHOULD BE SUPERVISED TO ENSURE THEY DO NOT PLAY WITH THE APPLIANCE,
AND THE APPLIANCE AND CABLE SHOULD BE KEPT COMPLETELY OUT OF REACH OF YOUNG
CHILDREN.
• THIS APPLIANCE IS NOT DESIGNED FOR USE BY CHILDREN, OR PERSONS WITH REDUCED
PHYSICAL, SENSORY OR MENTAL CAPABILITIES, AND SHOULD NOT BE USED BY SUCH PERSONS
UNLESS THEY CAN DO SO SAFELY. WHERE NECESSARY, SUCH PERSONS (OR ANYONE WITH
LACK OF EXPERIENCE OR KNOWLEDGE) SHOULD FIRST BE GIVEN SUPERVISION OR
INSTRUCTION CONCERNING USE OF THE APPLIANCE BY A PERSON RESPONSIBLE FOR THEIR
SAFETY.
• CAUTION: REMEMBER NEVER LOOK DIRECTLY INTO THE LASER SOURCE.
• FULLY UNWIND THE CABLE BEFORE PLUGGING IN AND ENSURE THE CABLE IS POSITIONED
AWAY FROM AREAS WHERE IT IS LIKELY TO GET DAMAGED OR CAUSE A TRIP HAZARD.
• DO NOT OPERATE THE APPLIANCE IF DAMAGED OR AFTER IT MALFUNCTIONS. IN THE EVENT
THE SUPPLY CORD IS DAMAGED, IT MUST ONLY BE REPLACED BY A QUALIFIED SERVICE
ENGINEER, WITH A SUITABLY APPROVED PART.
• DO NOT PULL ON CABLE TO DISCONNECT FROM MAINS SUPPLY.
• KEEP APPLIANCE, CABLE AND PLUG DRY AND AWAY FROM AREAS WHERE IT IS LIKELY TO GET
SPLASHED. AVOID USING IN HOT, HUMID ENVIRONMENTS.
• DO NOT PLACE ITEMS WITH NAKED FLAMES OR CONTAINERS WITH LIQUIDS ON THIS
APPLIANCE.
• SWITCH OFF AND UNPLUG WHEN NOT IN USE AND BEFORE CLEANING OR SERVICING THE
APPLIANCE. SERVICING OF THIS APPLIANCE MUST ONLY BE CARRIED OUT BY A QUALIFIED
ELECTRICIAN.
• ALWAYS ENSURE THE MAINS PLUG IS READILY UNPLUGGABLE – DO NOT USE WITH ‘LOCKABLE’
SOCKETS OR PERMANENTLY WIRE TO MAINS.
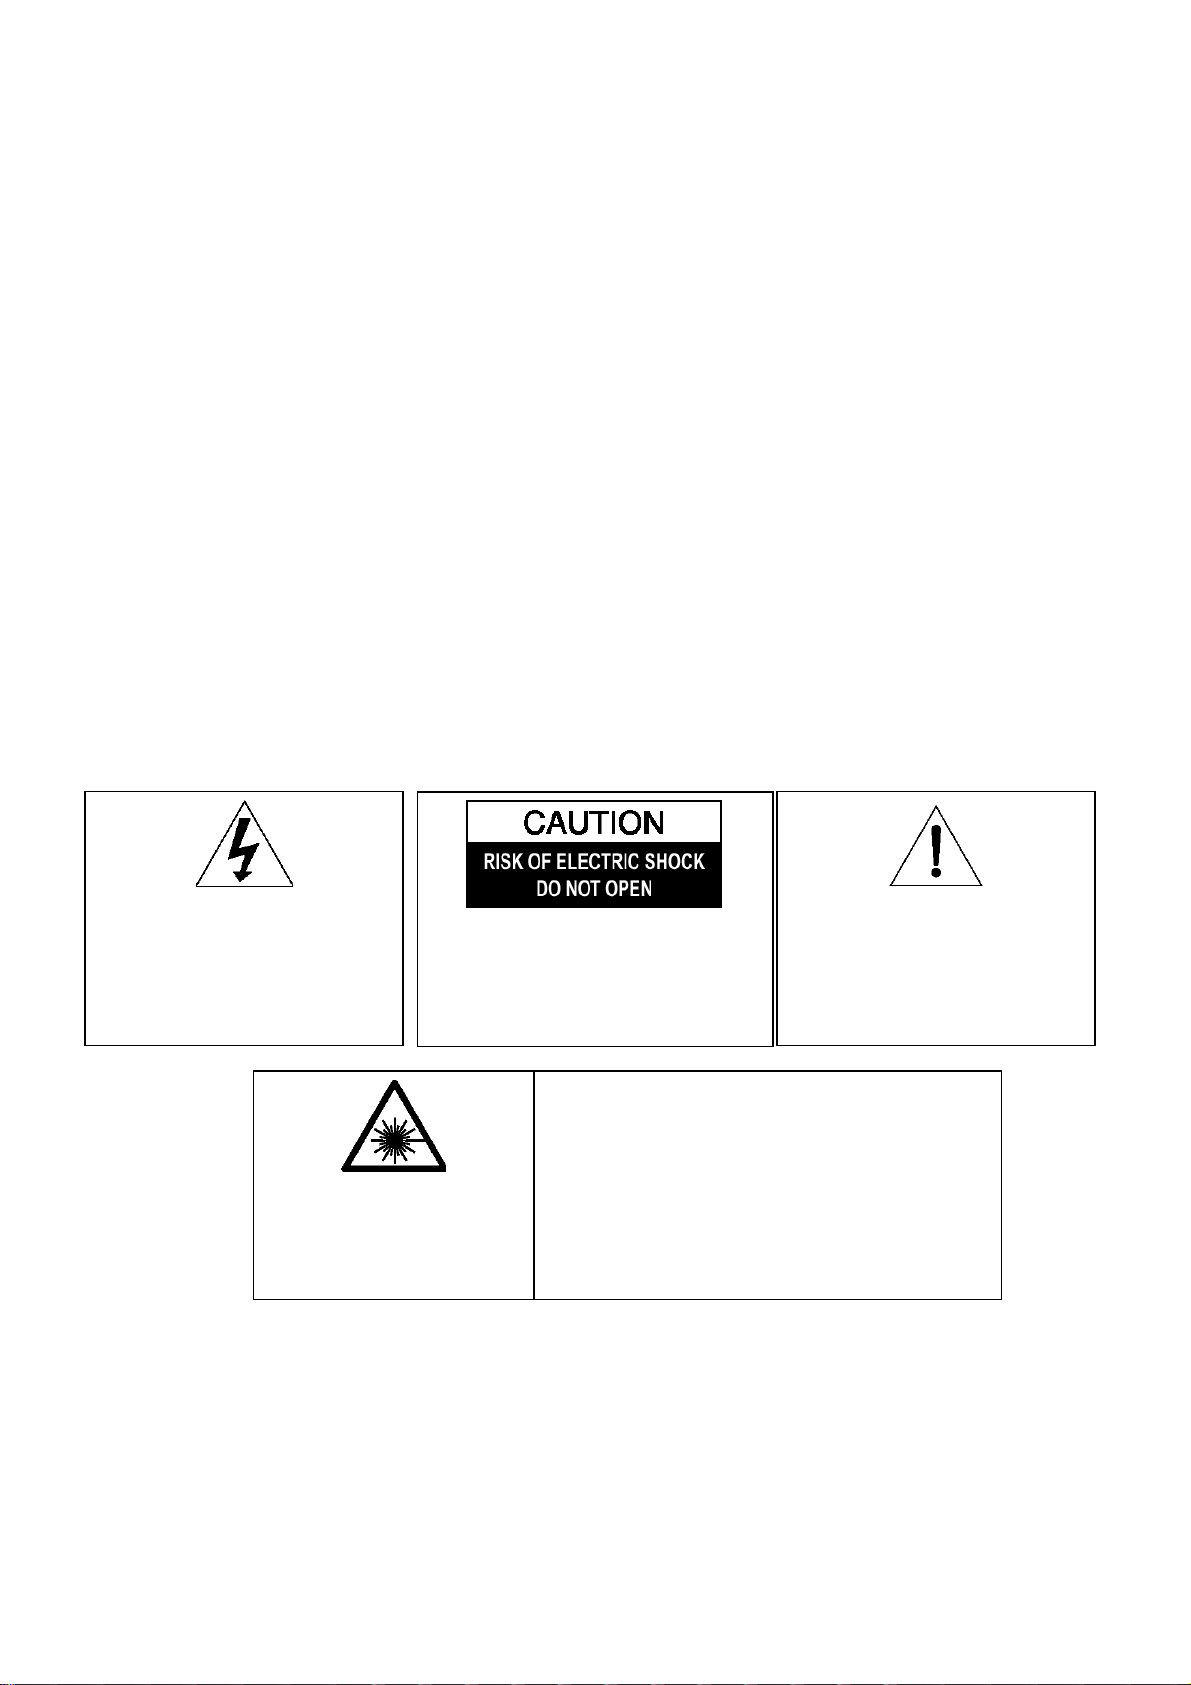
The lightning flash with arrow-head
symbol, within an equilateral triangle, is
intended to alert the user to the
presence of uninsulated "dangerous
voltage" within the product's enclosure
that may be of sufficient magnitude to
constitute a risk of electric shock.
INVISIBLE LASER RADIATION
WHEN OPEN AND INTERLOCK
FAILED OR DEFEATED.
AVOID DIRECT EXPOSURE TO
LASER BEAM.
WARNING: TO REDUCE THE RISK OF
ELECTRIC SHOCK, DO NOT REMOVE
COVER (OR BACK). NO USER
SERVICEABLE PARTS INSIDE, REFER
SERVICING TO QUALIFIED SERVICE
PERSONNEL.
LASER SAFETY
This unit employs an optical laser beam system in the CD
mechanism, designed with built -in safeguards. Do not
attempt to disassemble, refer to qualified service personnel.
Exposure to this invisible laser light beam may be harmful to
the human eye.
THIS IS A CLASS-1 LASER PRODUCT. USE OF
CONTROLS, OR ADJUSTMENTS OR PROCEDURES
OTHER THAN THOSE SPECIFIED HEREIN, MAY RESULT
IN HAZARDOUS LASER LIGHT BEAM EXPOSURE.
The exclamation point within an
equilateral triangle is intended to alert
the user to presence of important
operating and maintenance (servicing)
instructions in the literature
accompanying the appliance
2
Page 3
2. COMPATIBILITY 3. EXPLANATION OF DVD SYMBOLS
This DVD player is compatible with the following disc types
DVD 8 & 12cm Single sided, single and doubled layered
8 & 12cm Double sided, single layered
CD – DA 8 & 12cm discs
CD-R / CD-RW
CD-MP3
CD – Kodak picture
4. PARTS
DVD PLAYER
Region code
Dolby Digital Surround
Number of Audio Tracks
Number of Sub-titles
Screen Format
Angle Indicator
1. Disc tray
2. Previous () button
3. Next () button
1
4. Disc tray open / close (
5. Power ( ) button
6. Play/Pause ( ) button
2
3
4
5
7
6
8
) button
7. Stop (■) button
8. Remote sensor
1. Audio output (L)
2. Audio output (R)
3. Composite video output
4. HDMI output
3
5. Power cable
6. SCART socket
Page 4
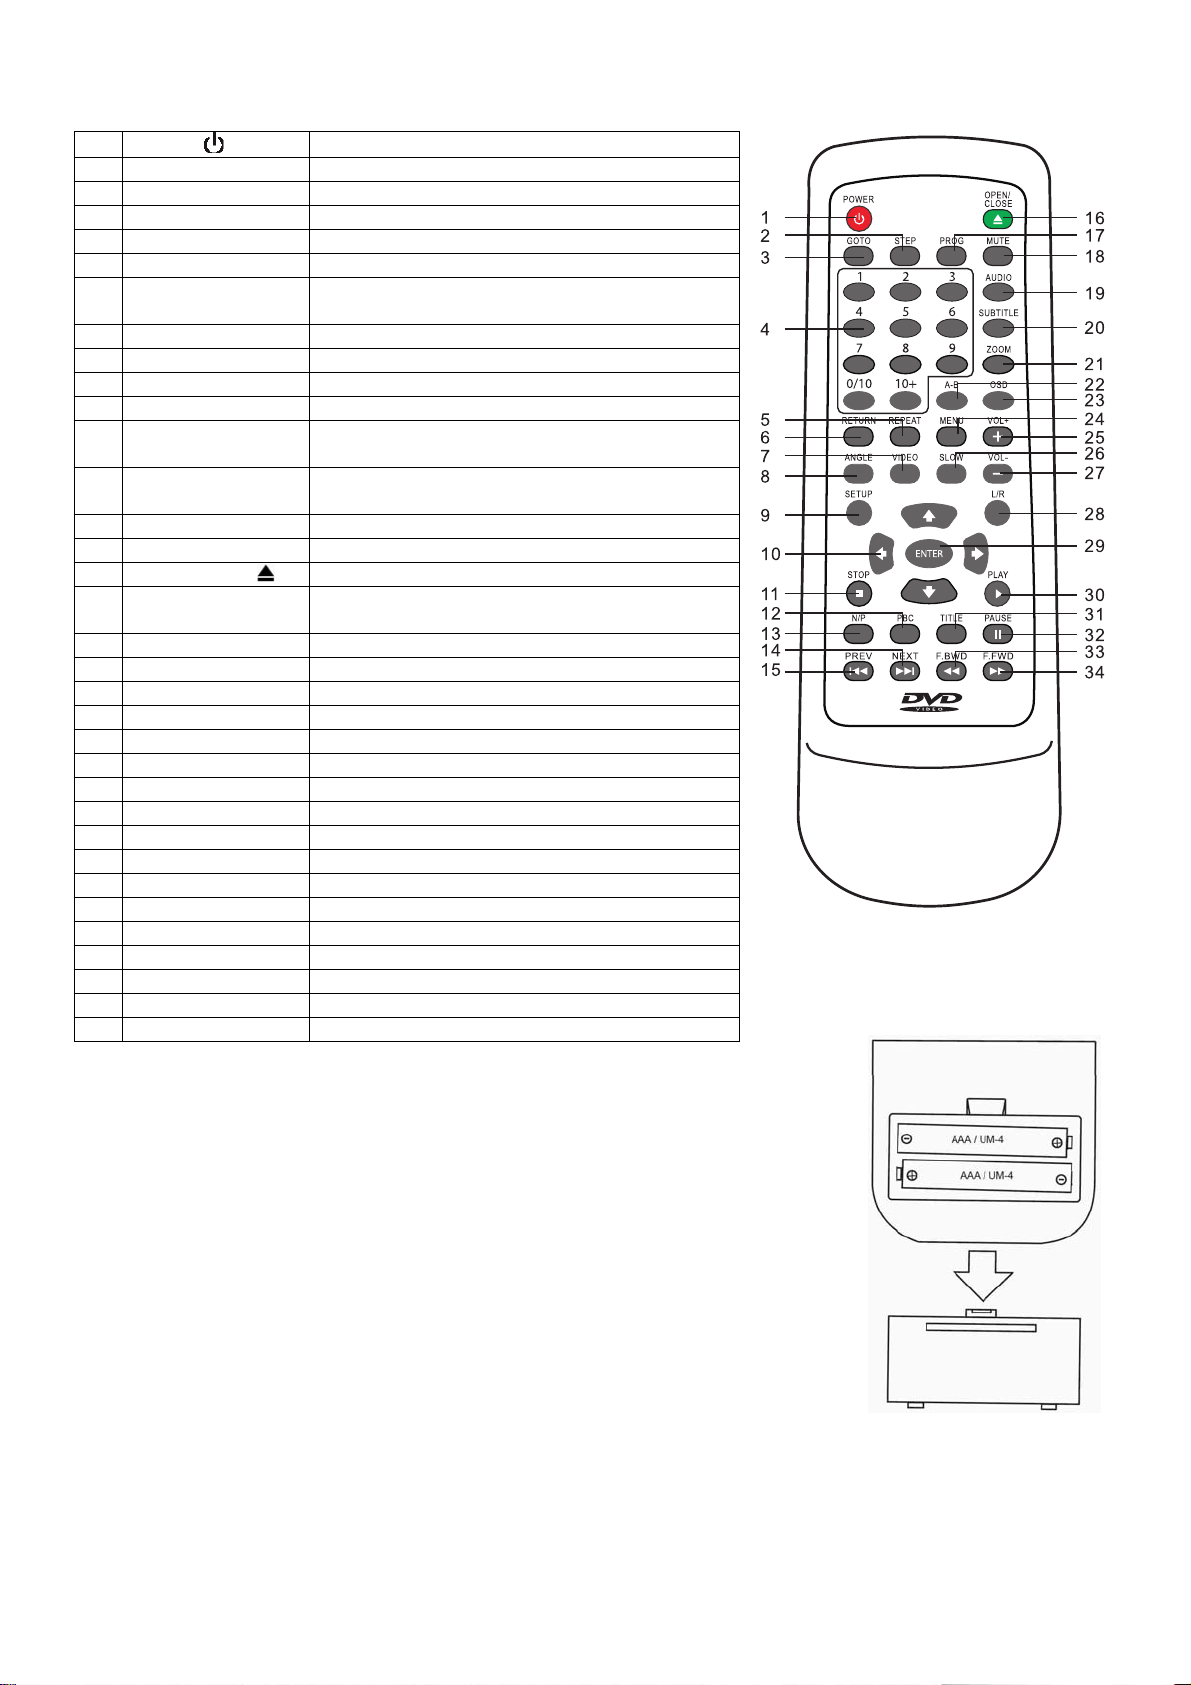
5. REMOTE CONTROL
5.1 Remote Control - functions
1
Power (
)
ON / Standby function
2 Step Frame advance
3 Goto Goes to a specific play time / point on a DVD
4 0 – 9 Number entry buttons
5 Repeat Accesses the repeat play mode
6 Return Returns to the disc menu
7 Video Changes video output mode between
CVBS/RGB
8 Angle Accesses different camera angles
9 Set up Accesses and exits the main setup menu
Í Ð Î Ï
10
Navigates left, down, right and up the menus
11 Stop () Stops play
12 PBC Selects PBC control on/ off (VCD play mode
only)
13 N/P Switches between NTSC, PAL and AUTO TV
type
14 Next () Advances to the next chapter or track
15 Prev () Returns to the previous chapter or track
16 Open / close ( ) Open and closes the disc tray
17 Prog Permits programming of a sequence of DVD
chapters to be played
18 Mute Cuts and restores the volume
19 Audio Selects the audio language
20 Subtitle Select and turns the subtitles on and off
21 Zoom Accesses the zoom feature (if available)
22 A-B Accesses the A-B repeat play mode
23 OSD Provides play status
24 Menu Accesses the menu of the disc
25 Vol + Increases volume
26 Slow Searches slowly through the disc
27 Vol - Decreases volume
28 L/R Selects mono or stereo sound (not DVDs)
29 Enter Selects item highlighted in menu
30 Play () Starts playing a disc.
31 Title Accesses the title menu of the DVD
32 Pause () Pauses a disc.
33 F. Bwd () Searches fast backward through the disc
34 F. Fwd () Searches fast forward through the disc
5.2 Remote control - installing the batteries
5.2.1 Open the battery compartment cover on the reverse of the remote
control.
5.2.2 Insert 2 x AAA 1.5V alkaline batteries in accordance with the diagram
in the battery compartment. Take care to observe the correct polarity
(+ and -) and refit the cover.
5.2.3 Do not expose the battery or the installed battery to excessive heat
(e.g. fire, sunshine or position close to radiators etc.).
Note
• Dispose of batteries responsibly at local authority household waste recycling facility.
• DO NOT dispose of batteries in a fire as the batteries may explode.
• Only use ‘AAA’ 1.5V batteries in this appliance.
• Be sure to insert correctly taking care to observe the correct polarity (+ and -).
• Use only batteries of the same or equivalent type as recommended.
• Do not recharge non-rechargeable batteries.
• If rechargeable batteries are used with this product they must be removed before being recharged.
• Never mix old and new batteries (replace all batteries at the same time).
• Never try to dismantle batteries.
• Do not short-circuit the supply terminals.
• Always remove exhausted or dead batteries from the product; do not dispose of in fire.
• Remove batteries from the product before extended storage.
4
Page 5

5.3 Remote control - use
To use the remote control unit, insert batteries into the battery compartment of the remote control unit.
Ensure that the POWER
transmitter on the remote control towards the remote control sensor on the DVD player and press the
function button of choice. Allow time for the remote to respond before pressing another button.
Use the remote handset no more than 6m from the remote sensor and at an angle of no greater than 30°.
6. CONNECTING DVD PLAYER
buttons on the TV and DVD player are switched on. Point the infrared
ALL EQUIPMENT MUST BE TURNED OFF AND DISCONNECTED FROM THE MAINS BEFORE
CAUTION !
INSTALLATION
5
Page 6

6. CONNECTING DVD PLAYER - continued
Television
To HDMI
input
HDMI Cable
(not included)
To HDMI
output
AC 110- 240V~
50/6 0Hz,1 0W
VID EO
VID EO OUT
ALL EQUIPMENT MUST BE TURNED OFF AND DISCONNECTED FROM THE MAINS BEFORE
CAUTION !
INSTALLATION
7. CONFIGURE THE TV
The DVD player is set to UK PAL TV type as standard; if NTSC is required, see section 19 for set up.
7.1 Place the DVD player horizontal on a flat level surface.
7.2 Connect the DVD player to your TV and / or audio system (as shown in the previous diagrams), plug in
and switch on at the mains. The blue power light will illuminate.
7.3 Insert the batteries into the remote control.
7.4 Press the STANDBY button on the DVD player to turn on the player and turn on the TV and amplifier (if
connected).
7.5 Select the video mode (AV) for the TV. If there is more than one video channel (AV1, AV2, etc) select the
source that the DVD player is connected to. See the TV instruction manual for tuning instructions if the set
does not automatically tune.
6
Page 7

8. PLAYING A DISC
8.1 Playing a disc - DVD
8.1.1 Switch on the DVD player at the mains (the blue power light will illuminate), turn on the TV and amplifier (if
connected) and press the POWER (
8.1.2 Press the OPEN / CLOSE (
) button (‘open’ will appear on the TV screen) and insert a disc (label side up).
) button.
For a double-sided disc place the disc with the A/1 up. Press the button again to close the disc tray (‘close’
will appear on the TV screen).
8.1.3 The unit will take a few seconds to download the initial data from the disc, the TV screen will show ‘loading’
and the disc type logo will be displayed in the top left corner of the TV screen.
8.1.4 The DVD menu / title will be displayed on screen where the casting information, product history, movie
introduction etc. can be accessed.
8.1.5 Using the NAVIGATION (Í Ð Î Ï) buttons, highlight the desired feature or enter the number of the
chapter using the number (0-9) buttons and then press the ENTER button to confirm the selection. The
disc will now start to play.
8.1.6 To pause the play, press the PAUSE () button, the pause indicator () will appear on the TV screen to
show that pause mode has been selected. Press the PLAY () button, the play indicator () will appear
on the TV and the disc will resume playing at the point that the disc was paused.
8.1.7 To stop play
) will appear on the TV
• Press the STOP () button ONCE, to stop the disc playing, the stop indicator (
I
screen. If the PLAY () button is pressed the disc will resume playing at the point at which it is stopped.
• Press STOP button TWICE, to stop the disc playing, the stop indicator () will appear on the TV screen to
show stop has been selected. If the PLAY () button is pressed the disc will restart at the beginning.
8.1.8 To adjust the volume to the desired level using the VOL (+ or -) buttons. The volume will appear on the
screen. The sound can be silenced by pressing the MUTE button on the remote control and the mute
indicator ‘
’ will appear in the upper left hand corner of the screen. Press the MUTE button a second time
to restore the sound.
8.1.9 To place the DVD player into standby mode, press the POWER (
remain illuminated. To turn the DVD player off at any time switch off at the mains.
) button. The blue power indicator will
8.2 Playing a disc - CD
8.2.1 Switch on the DVD player at the mains (the blue power light will illuminate), turn on the TV and amplifier (if
connected) and press the POWER (
) button.
8.2.2 Press the OPEN / CLOSE ( ) button (‘open’ will appear on the TV screen) and insert a disc (label side up).
For a double-sided disc place the disc with the A/1 up. Press the button again to close the disc tray (‘close’
will appear on the TV screen).
8.2.3 The unit will take a few seconds to download the initial data from the disc, the TV screen will show ‘loading’
and the CD will automatically start and CD disc menu will be displayed on the screen.
8.2.4 To pause the play, press the PAUSE () button, the pause indicator () will appear on the TV to show
that pause mode has been selected. Press the PLAY () button to resume playing at the point that the
disc was paused.
8.2.5 To adjust the volume to the desired level using the VOL (+ or -) buttons. The volume will appear on the
screen. The sound can be silenced by pressing the MUTE button on the remote control and the mute
indicator ‘
’ will appear in the upper left hand corner of the screen. Press the MUTE button a second time
to restore the sound.
8.2.6 To select a specific track to be played, enter the track number directly and the disc will start to play from
the track selected. Alternatively use the UP / DOWN (ÏÐ) buttons to highlight the desired track and then
press the ENTER button.
8.2.7 To activate the repeat function either use the REPEAT button (see section 11) or highlight REPEAT in the
menu using the NAVIGATION (Í Ð Î Ï) buttons and press the ENTER button repeatedly until the
desired repeat option (track, all CD or off) is displayed.
8.2.8 To activate the random or intro functions highlight MODE on the screen using the NAVIGATION
(Í Ð Î Ï) buttons and press the ENTER button.
• Press the ENTER button ONCE, to activate the random function. ‘Shuffle on’ will be displayed and the
next track will be randomly selected from the CD.
• Press the ENTER button TWICE to deselect the random function and activate the intro function. ‘Intro’ will
be displayed and the first 10 seconds of the track will play. When the desired track has been located,
press the ENTER button again and ‘normal’ will be shown in the display.
8.2.9 To stop play
I
• Press the STOP () button ONCE, to stop the disc playing, the stop indicator (
) will appear on the TV
screen. If the PLAY () button is pressed the disc will resume playing at the point at which it is stopped.
• Press STOP button TWICE, to stop the disc playing, the stop indicator () will appear on the TV screen to
show stop has been selected. If the PLAY () button is pressed the disc will restart at the beginning.
8.2.10 To place the DVD player into standby mode, press the POWER (
) button. The blue power indicator will
remain illuminated. To turn the DVD player off at any time switch off at the mains.
7
Page 8

8.3 Playing a disc – picture CD
8.3.1 Switch on the DVD player at the mains (the blue power light will illuminate), turn on the TV and amplifier (if
connected) and press the STANDBY (
8.3.2 Press the OPEN / CLOSE ( ) button (‘open’ will appear on the TV screen) and insert a disc (label side up).
For a double-sided disc place the disc with the A/1 up. Press the button again to close the disc tray (‘close’
will appear on the TV screen).
8.3.3 The unit will take a few seconds to download the initial data from the disc, the TV screen will show ‘loading’
and the disc will automatically start and a menu of the pictures on the disc will be displayed with a small
insert picture.
8.3.4 Press the ENTER button to start a slide show of the pictures on the disc.
8.3.5 Press the PAUSE () button to pause on a particular picture and the pause indicator () will be displayed.
Press the PLAY () or NEXT () buttons to restart the slide show.
8.3.6 Press the NEXT () button to advance to the next picture or the PREV () button to return to the previous
picture.
8.3.7 To rotate or flip a picture on the screen press the NAVIGATION (Í Ð Î Ï) buttons when viewing the
picture CD.
8.3.8 To select a specific picture, enter the picture number directly using the number buttons and the disc will
start to play from the picture selected.
8.3.9 After all pictures have been displayed, the slide show will stop and display will return to the disc menu.
8.3.10 To activate the repeat function press the REPEAT button
• Press the REPEAT button ONCE, to display the same picture continuously. The repeat indicator (repeat
single) will appear on the TV screen.
• Press the REPEAT button TWICE to repeat all pictures on the CD continuously. The repeat indicator
(repeat folder) will appear on the TV screen.
• Press the REPEAT button once more to turn off the repeat function. ‘Repeat off’ will appear on the TV
screen temporarily
8.3.11 To activate the random function highlight MODE on the screen using the NAVIGATION (Í Ð Î Ï)
buttons and press the ENTER button repeatedly until ‘shuffle on’ is displayed. Press the PLAY () button
to start a slide show and the next picture will be randomly selected from the disc. To deselect the random
function, return to the disc menu, highlight mode and press the ENTER button and ‘normal’ will be shown in
the display.
8.3.12 To stop play and return to the menu press the STOP () button.
8.3.13 To place the DVD player into standby mode, press the STANDBY (
will remain illuminated. To turn the DVD player off at any time switch off at the mains.
9. SKIP AND FAST SEARCH FUNCTIONS
9.1 To move forward to the next chapter or track on the disc, press the NEXT () button. Press again to
move to each successive chapter / track.
9.2 To return to the beginning of the chapter / track or move to the previous chapter / track; press the
PREV () button. Repeat to move to each previous chapter / track / picture.
9.3 To search forward at speed, press the FAST FORWARD () button. Press again to increase the search
speed in the sequence below.
9.4 To search backward at speed, press the FAST BACKWARD () button. Press again to increase the
search speed.
) button.
) button. The blue power indicator
9.5 When viewing DVD, press the SLOW button to select slow-motion forward at 1/2, 1/4, 1/6, 1/8 normal
speed without sound.
Note
• A DVD will not advance or reverse during the ‘Warning’ section of a disc.
• The player is muted during search mode.
• The fast-forward / back functions are not available for picture CDs.
• Skip and fast search functions may not be available when in pause or stop modes.
10. STEP FUNCTION
10.1 To advance the DVD frame by frame, press the STEP button. The first press of the button freezes the
frame and each subsequent press advances the DVD by one frame. The step indicator () will be
displayed on the screen.
10.2 Press the PLAY () button to resume playing at the point that the DVD was paused.
8
Page 9

11. REPEAT PLAY FUNCTIONS (in play mode)
11.1 To repeat a DVD chapter, title or CD track continuously, press the REPEAT button.
• Press the REPEAT button ONCE, to repeat the same DVD chapter or CD track continuously.
• Press the REPEAT button TWICE to repeat the DVD title or all tracks of the CD continuously.
• Press the REPEAT button once more to turn off the repeat function. ‘Repeat off’ will appear on the TV
screen temporarily.
11.2 To repeat between two specific points on a DVD (not CD) disc.
• Press the A - B button at the start of the section to be repeated. The repeat indicator (Rep A-) will appear
on the TV screen.
• Press the A - B button again at the end of the section. The repeat indicator (Rep A-B) will appear on the
TV screen to show that the REPEAT A-B function has been selected and the DVD or CD will be repeated
between the two points selected.
• Press A - B button once more to stop the repeat function. The repeat indicator (Rep AB off) will appear on
the TV screen briefly.
12. ZOOM FUNCTION
12.1 To enlarge the picture shown on screen, press the ZOOM button. Press repeatedly until the desired
magnification has been reached. The zoom selected will be shown in the screen.
12.2 Use the NAVIGATION (Í Ð Î Ï) buttons to adjust the position of the picture that is being viewed on
screen.
Note
• The picture quality is degraded as the zoom increases.
• The ZOOM function is not available for audio CDs.
13. ANGLE FUNCTION (not available on some DVD)
If viewing a DVD equipped with a multi-angle feature this function allows the scene being played to be
viewed from a number of viewing angles. Press the ANGLE button to switch to the next viewing angle.
The angle being viewed will be shown on the screen. If angle function not available on the disc being
viewed then a message will appear on the TV screen.
14. AUDIO MENU FUNCTION (not available on some DVD)
If listening to a DVD equipped with a multi-language feature this function allows the language of the
commentary being heard to be selected from those available on the disc. Press the AUDIO button
successively to switch to the next available language. The language selected will be shown on the screen.
15. GOTO FUNCTION
This function allows a disc to be played from a specific title, chapter, track, or picture and options
available will vary for each disc. For most DVD
15.1 To search for a specific title, press the GOTO button and use the NUMBER buttons to enter the desired
title number, press the ENTER button and play will start immediately. If listening to a CD enter the track
or time.
15.2 To search for a specific chapter, use the DOWN navigation button (Ð) to display ‘chapter’ and use the
NUMBER buttons enter the desired chapter, press the ENTER button and play will start immediately.
15.3 To search for a specific title time, use the DOWN navigation button (Ð) to display ‘time’ and use the
NUMBER buttons to enter the desired time (hour/minutes/seconds). Press the ENTER button and play
will start immediately.
16. SUBTITLE FUNCTION (not available on all DVD)
If viewing a DVD equipped with a multi-subtitle feature this function allows a subtitle to be selected from
those available on the disc. Press the SUBTITLE button successively to switch to the next available
subtitle. The subtitle selected will be shown on the screen.
17. PROGRAMMED PLAYBACK
This function allows a DVD to be programmed and played from a specific title or chapter.
17.1 Press the PROG button to display the programmed play screen.
17.2 Use the LEFT (Í) button to move to the left hand side of the screen and highlight the title field.
17.3 Enter the first title and chapter number to be played using the number buttons in the highlighted field. Use
the NAVIGATION (Í Ð Î Ï) button to move to the next field when the number has been entered.
17.4 Add the next title and chapter numbers to be watched and continue until all the desired title and chapters
have been programmed.
17.5 When all chapters have been programmed use the NAVIGATION (Í Ð Î Ï) buttons until ‘play’ is
highlighted and then press the ENTER button to start play.
17.6 The programmed chapters will play in sequence and the DVD player will stop automatically after all the
programmed titles / chapters have played.
9
Page 10

18. QUICK ACCESS BUTTONS
MENU Press the MENU button to display the DVD root, CD or picture CD menu and select the
desired option. Press the button again to resume play.
TITLE Press the TITLE button to return to the DVD title menu and select the desired option.
SET UP Press the SETUP button to display the set up menu. See section 19 for further explanation.
OSD Press the OSD button to display a summary of play settings on the screen for the DVD disc
being played. Press OSD button repeatedly to scroll through the displays in the sequence
below. Press the OSD button seven times to clear the display and return to normal viewing
19. SET UP MENU (in play or stop modes)
Various features of the player can be changed in the set up menu.
19.1 Press the SETUP button and the general set up menu is displayed.
19.2 Use the UP / DOWN buttons (ÏÐ) until the desired feature is displayed. Use the RIGHT (Î) to enter the
feature menu.
19.3 Use the UP / DOWN buttons (ÏÐ) until the desired function is highlighted and press the ENTER button to
enter the option submenu for this function.
19.4 Use the UP / DOWN buttons (ÏÐ) to navigate to the desired option and press the ENTER button to
select and confirm.
19.5 Use the LEFT (Í) button to move to another feature or press the SET UP button to exit this function.
SET UP MENU
/ FEATURE
Language
Video
Audio Setup Down
Rating
SUB MENU /
FUNCTIONS
Language English
Subtitle Varies by disc English Sets the language of the subtitles
Audio Varies by disc English Sets the language being heard
DVD menu Varies by disc English Sets the language of disc menu
Aspect ratio 4:3
TV System NTSC
Video out Composite
HD resolution Auto
sampling
Parental
control
Set password 8888 Select to change password.
Use default
settings
Screen saver Off
OPTIONS DEFAULT
SETTING
English Sets the language of the display menus
Français
Español
Deutsch
Italiano
4:3 Sets the aspect ratio – choose the aspect that
16:9
PAL Selects the video system
PAL
AUTO
HD Selects the video source output
RGB
HD
Auto Sets the definition of the video output signal
480p / 576p
720p
1080i
1080p
Off
On
1 Kid Safe
2 G
3 PG
4 PG-13
5 PG-R
6 R
7 NC-17
8 Adult
Yes
No
On
Off Select to switch down sampling on or off
8 Adult Select to set censorship level of programmes
Select to return to the default OSD settings. Misc
On Select to switch screen saver function on or off. If
Explanation
corresponds to the TV the player is connected to.
viewed without a password being entered.
screen saver function is switched on the screen will
go blank after approximately 3 minutes without DVD
activity.
10
Page 11

20. SETTING THE PARENTAL LOCK
Some DVD’s have a parental level assigned to the complete disc or particular scenes on the disc. This
feature allows the viewing limit to be set and settings are region specific. To activate the parental settings
20.1 Press the SETUP button, use the UP / DOWN buttons (ÏÐ) to display the RATING menu.
20.2 Use the RIGHT (Î) button to highlight the parental control feature and then press the ENTER button.
20.3 Using the NUMBER buttons, enter the password (default setting is 8888) and press the ENTER button to
confirm. If the correct password has been entered the screen will briefly display ‘correct password’.
20.4 Use the ENTER button or the RIGHT (Î) button to display the rating options available.
20.5 Use the UP / DOWN buttons (ÏÐ) to highlight the parental rating of choice and press the ENTER button to
confirm. The parental lock and viewing level have now been set.
20.6 If the rating on a DVD is higher than the parental rating set, the DVD will display a screen and it will
necessary to enter the password before the disc will play.
Note
Kid safe Suitable for all ages but especially for young children.
G Suitable for all ages.
PG Contains mature themes, may not be suitable for small children under 8 years old.
PG13 Contains mature themes, may not be suitable for children under 13 years old.
PGR Recommended that parents restrict children under 17 from viewing or only view only when supervised by a
parent or adult guardian.
R Contains mature themes (usually sex and/or violence). Children under 17 not admitted without an adult.
NC17 No children under age 17; not recommended for children under age 17.
ADULT Material to be viewed only by adults due to graphic sexual scenes, violence or language.
21. CHANGING THE PASSWORD
21.1 Press the SETUP button and use the UP / DOWN buttons (ÏÐ) to display the RATING menu.
21.2 Use the RIGHT (Î) button to enter the rating menu then use the UP / DOWN buttons (ÏÐ) to highlight
SET PASSWORD and press the ENTER button to enter this option.
21.3 Use the NUMBER (0-9) buttons and enter the default / old password (default password is 8888) and press
the ENTER button to confirm.
21.4 With SET PASSWORD still highlighted press the ENTER button again. ‘New password’ will be displayed
and use the NUMBER buttons to enter a new password. Press the ENTER button again and ‘Confirm’ will
be displayed.
21.5 Re-enter the new password and press the ENTER button to confirm. ‘Set password successful’ will be
displayed and the new password is now set.
Note See troubleshooting section for action to be taken for forgotten passwords.
22. CARE AND MAINTENANCE
DVD player
• Wipe with a soft cloth. If the cabinet is very dirty, unplug from the mains and dampen the cloth with a weak
solution of washing up liquid and water and wipe clean. Allow it to dry thoroughly before using.
• Should it become necessary to replace the fuse in the plug, please replace with a 3A fuse that conforms
with BS 1362.
Caring for discs
To obtain the best sound and picture quality from discs treat with care. Dirty, scratched or warped discs will
cause broken or intermittent sound and pictures.
• Store discs in their original cases and avoid using in dusty environments
• When holding the disc, take care not to touch the playing surface.
• Do not place the discs in warm or sunny locations
• Never write on the playing surface of the disc or on the label surface with a ballpoint pen.
• Do not stick labels onto discs.
• Do not bend discs.
• Wipe any dust or fingerprints form the disc using a soft cloth. Wipe from the centre of the disc to the
outside and never in a circular motion. Do not use conventional record cleaners, anti static agents,
benzene, thinners or solvents.
11
Page 12

23. TROUBLESHOOTING GUIDE
Observation Potential cause / solution
No power (blue front panel
light does not come on)
Blue front panel light does
not switch off
The remote control does
not work
The DVD player does not
play
No picture Is the TV set switched on?
Picture noise / distorted Is the disc dirty or damaged?
Picture not full screen Has the correct TV display been selected for the TV being used? See set up menu - video.
No, poor, or intermittent
sound
Skip / Search function
does not work
Lost or forgotten password Enter 8888
Is the power lead connected to the mains socket correctly?
Does the socket that is being used have power?
This is normal. The blue light stays on in standby (off) mode. To switch off completely,
unplug or switch off at mains.
Are the batteries exhausted?
Have the batteries been correctly fitted?
Are there obstacles in the between the remote and the sensor on the DVD player?
Is the remote too far away from the sensor?
Has the standby button been pressed?
Is there a disc loaded?
Has the disc been loaded upside down?
Is the region code of the disc compatible with the DVD player?
Is the disc type compatible with the DVD player?
Is the DVD rating above the parental level set?
Is the disc dirty or damaged?
Has the TV been turned to AV signal?
Are the connection cables correctly fitted and undamaged?
Has a DVD or Picture disc been inserted?
Is the disc dirty or damaged?
Is the DVD player connected directly to the TV set?
Does the TV set colour controls need adjusting?
Some picture distortion is normal during rapid advance or reverse
Has the mute button on the TV been pressed?
Is the TV volume control set at minimum?
Has the TV been switched on?
Are the connection cables correctly fitted and undamaged?
Note: there is no sound output during pause / frame advance / slow and search functions
Some discs are programmed so that these functions do not work in certain sections e.g.
during warnings or during display of legal information.
Single chapter discs do not permit the use of skip function
24. TECHNICAL SPECIFICATION
24.1 Rated voltage 110-240V~ 50/60Hz
Power consumption 10W
Power consumption (standby) <1W
24.2 CD/DVD
Laser Semiconductor Laser, Wavelength 650nm
Signal system PAL, NTSC
Frequency response (audio) 20Hz to 20kHz
Signal to noise ratio (audio) >60dB (1kHz NOP, 20kHz LPF/A – filter)
Dynamic range (audio) >85dB
Harmonic distortion (audio) 0.2% (1kHz)
24.3 VIDEO
Video output 1.0V (p-p), 75 Ohm
24.4 GENERAL
Operating conditions Temperature: 5°C to 35°C
Humidity 5% to 90%
Operating position Horizontal
25. RECYCLING ELECTRICAL PRODUCTS
You should now recycle your waste electrical goods and in doing so help the environment.
This symbol means an electrical product should not be disposed of with normal household waste. Please
ensure it is taken to a suitable facility for disposal when finished with.
Visit www.recycle-more.co.uk, click on “bank locator” and enter your postcode to find your nearest
recycling site.
We care about our quality and what you think, Produced in China for
If you have any comments, good and bad, Sainsbury’s Supermarkets Ltd,
Please call our Careline 0800 636 262 33 Holborn,
or visit www.sainsburys.co.uk London EC1N 2HT.
Your statutory rights are not affected.
12
 Loading...