

Current Audio FastLoc CS650FL, FastLoc CS651FL, FastLoc CS654FL, FastLoc CS801FL, FastLoc CS802FL User's Installation Manual
...Page 1
SPECIFICATIONS
for
CS65FL Series
CS650FL
CS651FL
CS654FL
Driver with Butyl
Rubber Surround
MetaPlex
Composite
Injection Molder
Carbon Fiber
Woven Carbon
Fiber
Tweeter, 1",
Diffraction-less,
Dome
Silk Ferrofluid
Cooled
Aluminum
Ferrofluid Cooled
Ceramic Coated
Aluminum
Ferrofluid Cooled
Frequency Response
42Hz-20kHz
40Hz-20kHz
35Hz-21kHz
Power handling
5-100 Watts
5-125 Watts
5-150Watts
SPL @ 1 Watt/1
meter
90db
90db
91.5db
Impedance 8 ohm
Nominal
Fixed Crossovers
3 Position
Crossovers
3 Position
Crossovers
Diameter x Depth
10 ¼”"(260mm) x
3 3/4"(97mm)
10 ¼”"(260mm) x
3 3/4"(97mm)
10 ¼”"(260mm) x
3 3/4"(97mm)
Grille Diameter
13" (330mm)
13" (330mm)
13" (330mm)
Retro-fit Cutout
Diameter
8 ¼" (209.6mm)
8 ¼" (209.6mm)
8 ¼" (209.6mm)
CS FastLoc™ Series Ceiling Speaker User’s Installation Guide
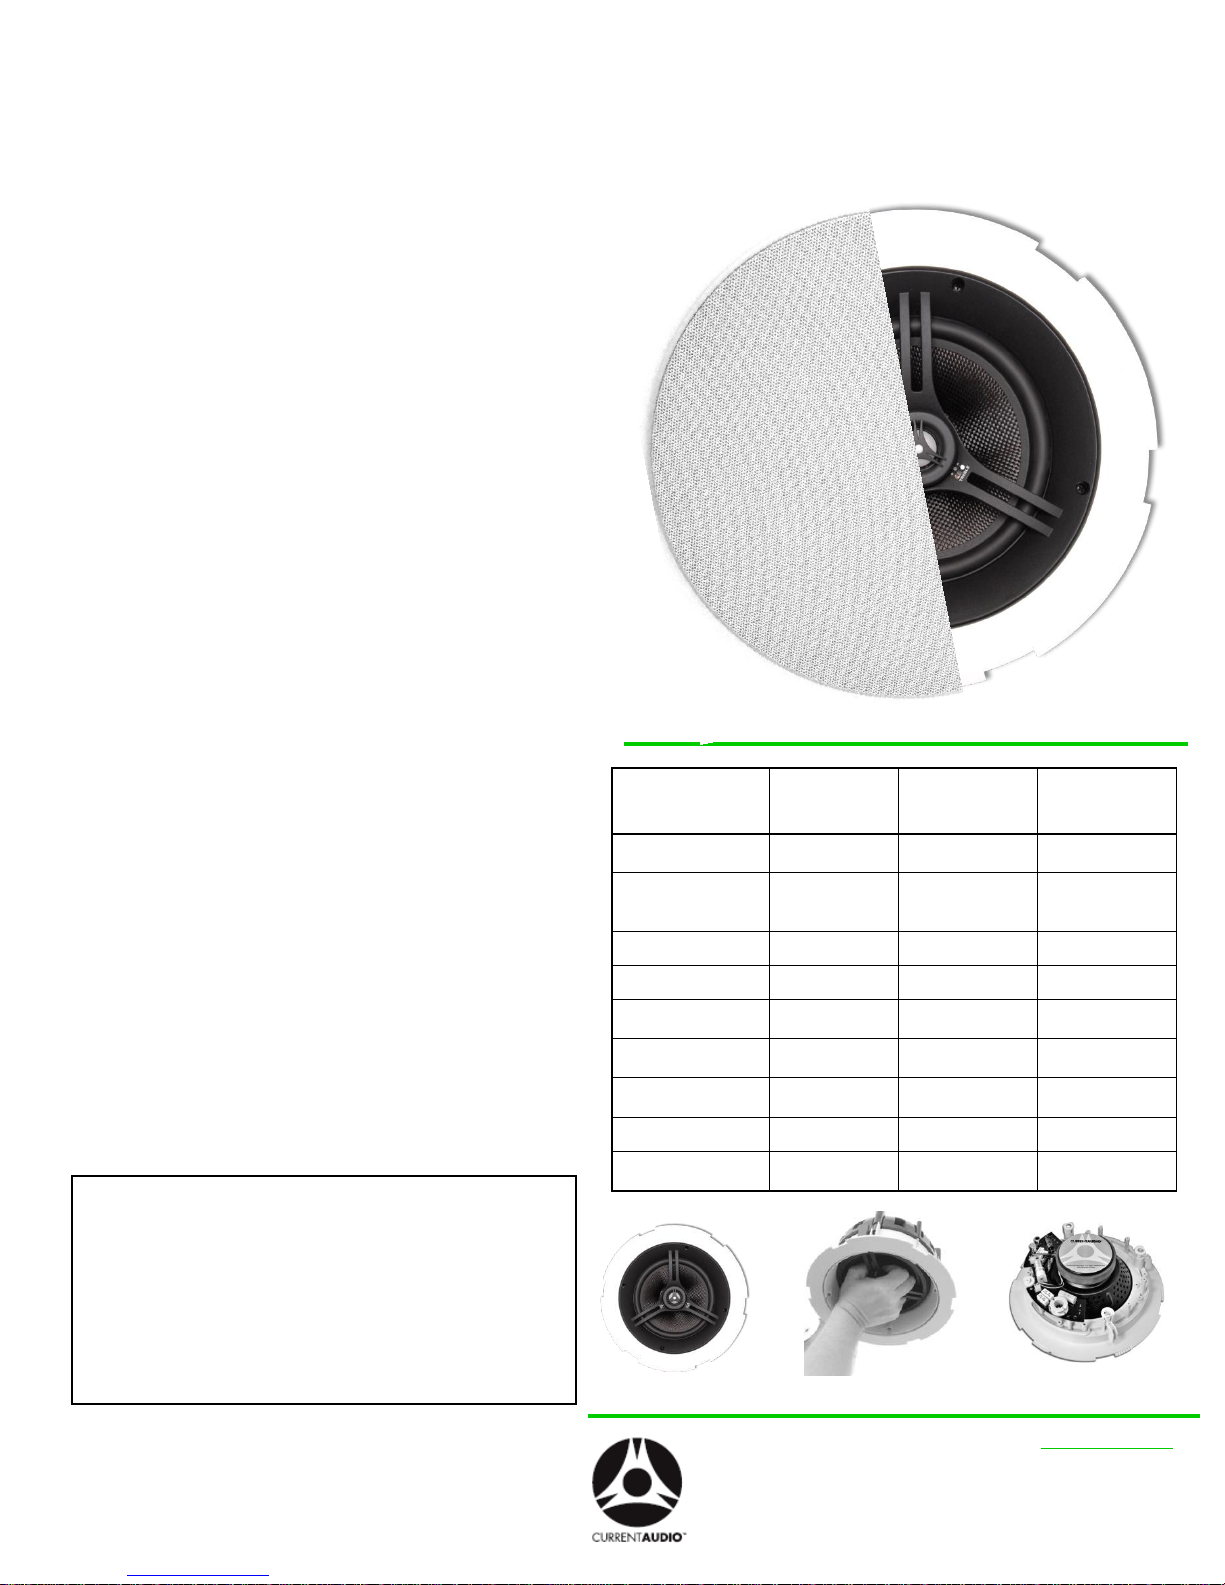
Low Profile, In-Ceiling, Coaxial, Infinite
Baffle Loudspeaker with FastLoc™ Grille
The easy to install CSFL series speakers are a full range ceiling
loudspeaker that incorporates high tech woofer materials with a butyl
rubber surround and the Patent Pending stat-of the- art diffractionless
dome Ferrofluid cooled tweeter. The Patent Pending pivoting tweeter
allows for deeper penetration into the room and concentrated sound to
the sweet spot.
This revolutionary combination provides superior and more natural sound
for both foreground and background applications.
The Infinite Baffle design makes it the ideal choice for typical applications
in open beam attic or enclosed ceilings.
For efficiency and consistency the CS series are timbre matched to the
FIT series and WS series of speakers.
In addition, most of the CS speakers incorporate a 3 position equalization
switch, one each for bass and treble to fine tune the acoustics and allow
for various room surfaces.
These speakers feature the innovative FastLoc™ zero edge quick
connect grille. Architects and designers have resisted the size of the
traditional bezel. The FastLoc™ feature, found only at Current Audio,
exhibits the smallest exposed bezel that virtually disappears into the
ceiling. But the major feature is the Patent Pending design that allows for
rapid install that conforms to uneven surfaces. The grille is anodized
aluminum, not steel. It will not rust like magnetic grilles. The FastLoc™
feature prevents the grille from falling off even in earthquakes and does
not collect ferric dust on magnets that cause multiple sunbursts around
the edge.
The speaker grille color is white, and is a close match to Frazee White
Shadow 181. It can be painted to match any décor. The speaker
enclosure is a durable UV-resistant material that allows for both indoor
and outdoor installations. Unlike other grilles that use magnets to hold
them on they must be made of steel that will rust. The perforated powdercoated aluminum alloy grill is long-lasting, corrosion resistant and rustfree.
Four built-in expanding transverse dog leg clamps permit installation with
or without pre-wire construction brackets in drywall or material with
thickness of 7/32” to 1 3/16”.
Electrical connection, up to 12 gauge wire, is made by two gold plated
constant tension spring-loaded terminals.
With our limited 5 year warranty you are assured years of superior
trouble free operation.
Part Number 92400 CS650FL; 92017 CS651FL;
92016 CS654FL;
92013 CS801FL; 92113 CS802FL;
92014 CS804FL: 92070 R70VT 70Volt Xrmr
Manual URL www.currentaudio.com
Accessories NC6CB; NC8CB
New Construction Bracket
Volume Control ZL45R, ZL60S, SpeKap
Specifications subject to change without notice.
www.currentaudio.com
1830 John Towers Avenue El Cajon, CA 92020 Sales 866-927-7181
©2011 Current Audio LLC
CS FL Series 10132011 RPA
Page 2
CS FastLoc™ Series Ceiling Speaker User’s Installation Guide
SPECIFICATIONS for CS80FL Series
CS801FL CS802FL CS804FL
8” Driver with Butyl Rubber Surround
Tweeter, 1", Diffraction-less Pivoting, Dome
Frequency Response
Power handling
SPL @ 1 Watt/1 meter
Impedance 8 ohm Nominal
Overall Diameter x Depth
Grille Diameter 13" (330mm)
Retro-fit Cutout Diameter
Injection Molder Carbon Fiber Aluminum Woven Carbon Fiber
Aluminum Ferrofluid Cooled Aluminum Ferrofluid Cooled
35Hz-20kHz 38Hz-20kHz 33Hz-21kHz
5-150 Watts 5-150 Watts 5-150Watts
90db 91db 91.5db
3 Position Crossovers 3 Position Crossover s 3 Position Crossover s
11 1/4"(286mm) X 4 3/8"(111mm)
9 3/4" (248mm) 9 3/4" (248mm) 9 3/4" (248mm)
11 3/16"(286mm) X 4 3/8"(111mm)
13" (330mm) 13" (330mm)
Ceramic Coated Aluminum
Ferrofluid Cooled
11 3/16"(286mm) X 4 3/8"(111mm)
Packaging and Enclosed Parts
Please inspect your pack for damaged or missing parts. Notify your supplier if any discrepancies occur.
There are four (4) parts in the package: Two (2) main speaker housings and two (2) grilles.
Only simple hand tool s are required for assembly and installation.
Required tools: #2 Phillips screwdriver only , if you have new construction brackets previously installed.
Drywall Hand saw if no New Construction Brackets were installed. A saber saw may be required if you are cutting into plywood.
Painting the Speaker Grille
If grille requires painting , carefully remove the white scrim cloth on the inside of the FastLoc Grille and save for reinstallation. This cloth is provided for
aesthetic purpose only. Either spray paint the grille or use a stiff stipple paint brush. Do Not clog the perforated holes as this will impede the acoustics of
the speaker. No masking is required on the wall or speaker baffle like on conventional speakers. With this system the grille can be easily color updated
anytime.
1 Cut Hole for FastLoc™ Speaker
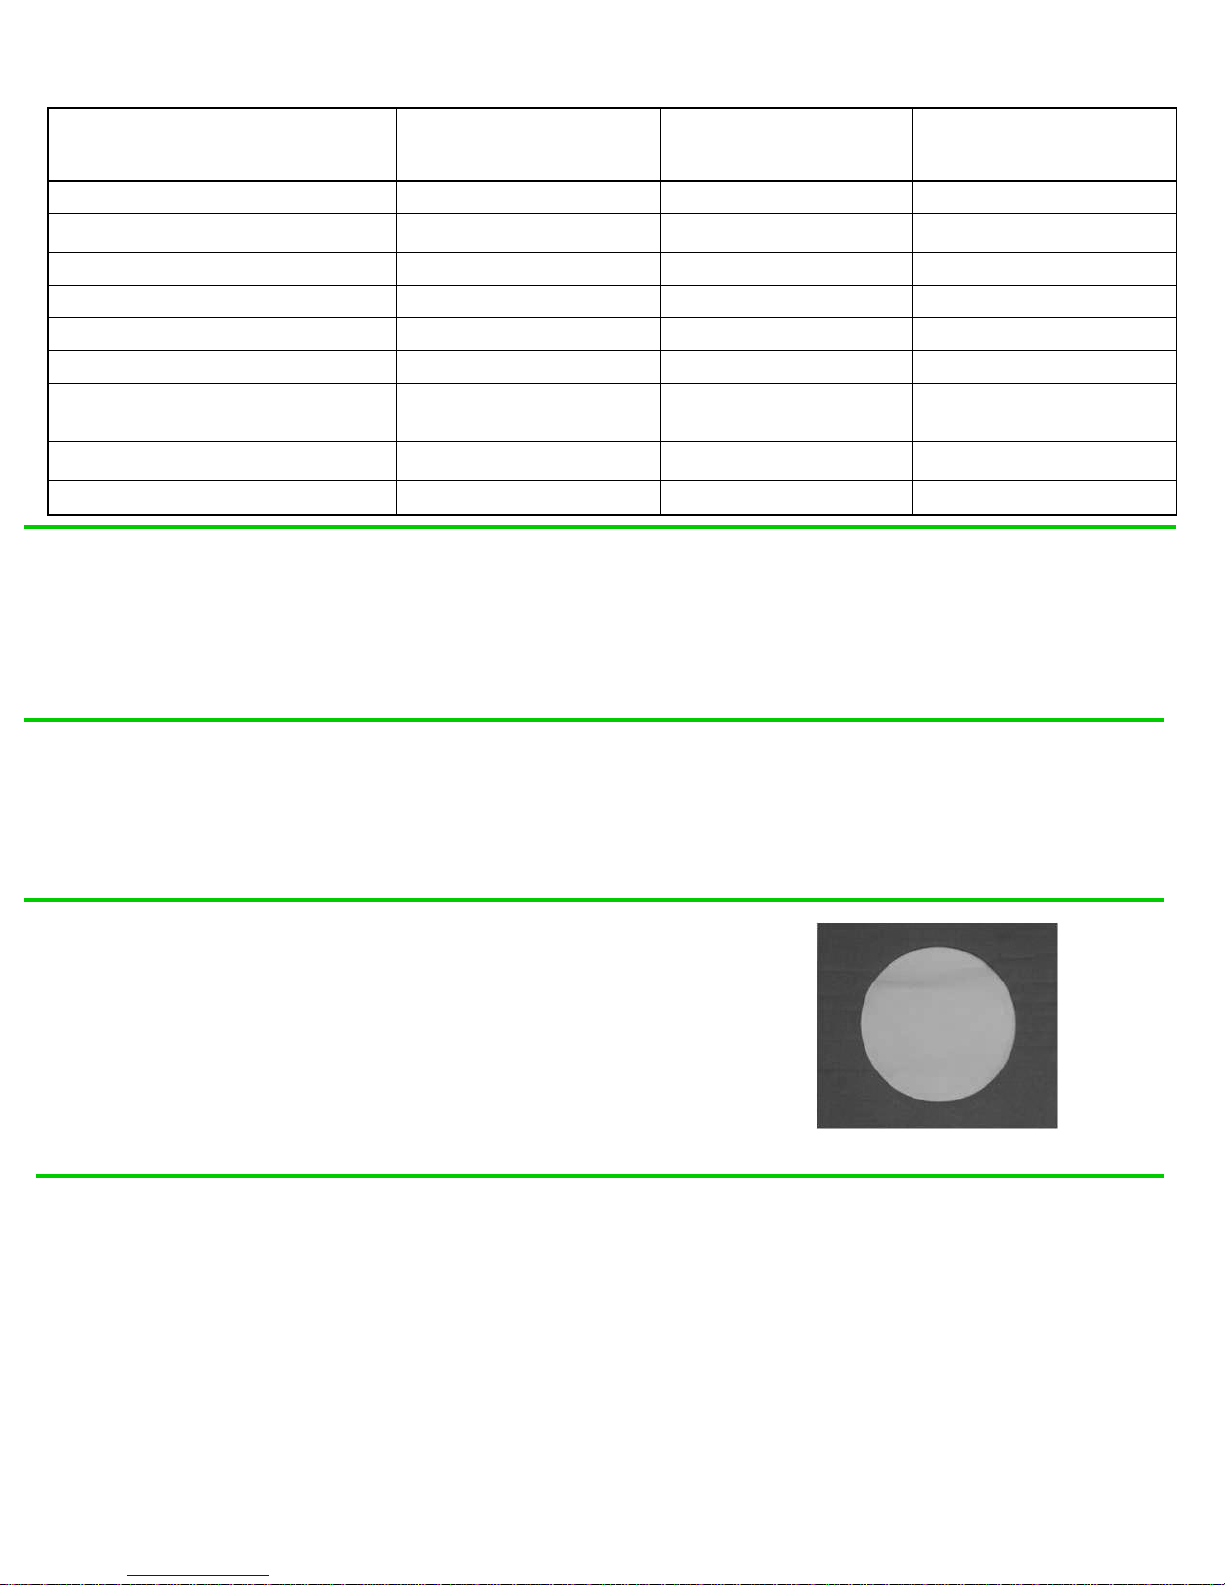
Using the supplied Trace Template, place the cutout template against the ceiling and trace along the
inside circle. It is suggested to cut a small pilot hole to verify no obstructions, such as pipes or beams,
that could hinder the install.
Carefully cut out the ceiling material along the circle. A drywall saw is perfect for this step. Hold a box
or trash can under your cutting to catch the debris.
NOTE: A stud finder may be helpful to locate the ceiling beams. You want to layout the hole to the side
of any beams.
2 Connect Wires to FastLoc™ Crossover
After you have cut your desired hole from the template, locate the speaker wire for that speaker.
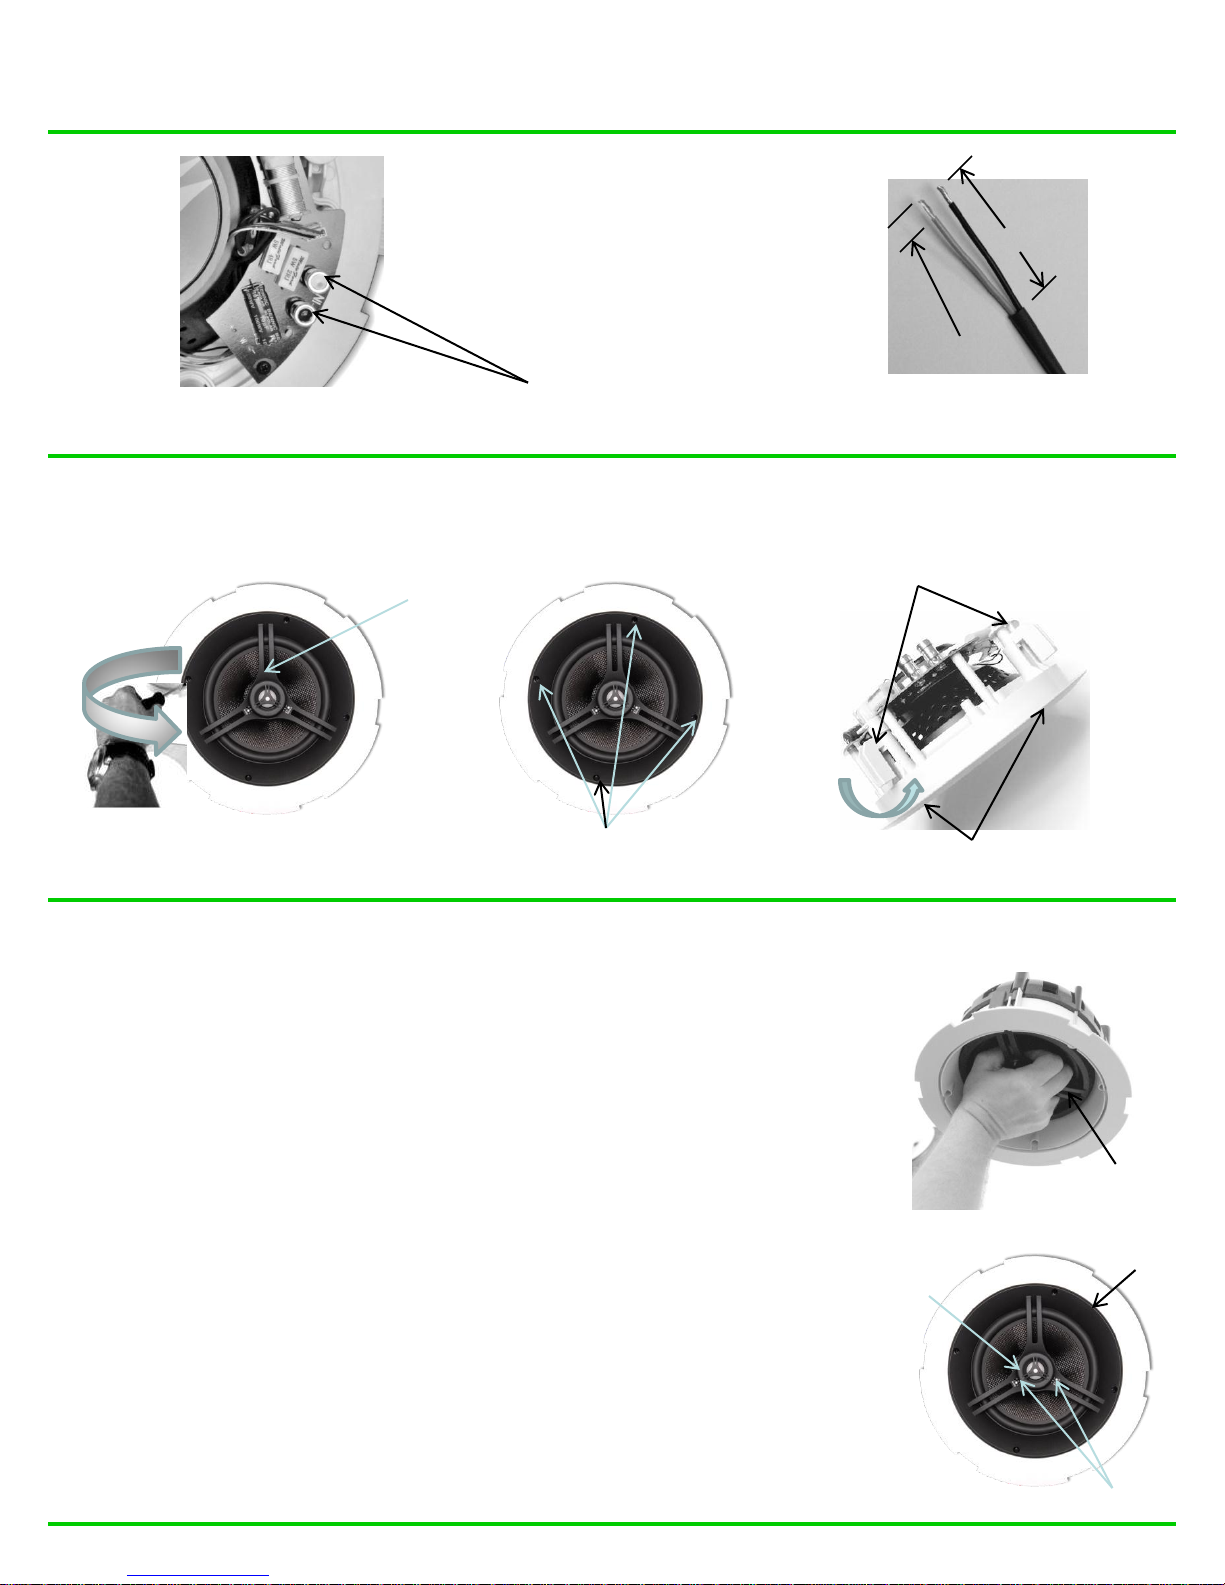
Pull enough wire slack down to attach the 2 conductor wire to the gold plated constant tension spring-loaded terminals.
Remove about 2” of the outer jacket then strip about ½” insulation from each wire and slightly twist the strands to ensure all strands can be inserted into
the hole. Refer to the next pictures for location of the gold plated constant tension spring-loaded terminals and strip gauge.
Push down on the RED (+) colored Terminal and insert the Red or copper colored conductor all the way up to the insulation into the hole at the bottom of
the terminal. Now release your finger from the terminal. Next do the same to the Black or silver colored conductor and insert into the BLACK (-) colored
Terminal. Make sure there are NO whiskers from the strands that could cause a short. The other end of these wires will be connected to your amplifier or
volume control.
Note: Sometimes your wire color may be White (+) and Green (-).
You now have a connection with the proper tension for continued operation that will not wiggle out or cause poor connection.
Specifications subject to change without notice.
Trace Template
CS FL Series 10132011 RPA
Page 3
CS FastLoc™ Series Ceiling Speaker User’s Installation Guide
Remove
Outer
Jacket
RED
2”
BLACK
3 Prepare the Speaker for Install
With the grille removed, loosen the four (4) Dog-Leg screws a ½ turn counterclockwise with a #2 Philips screwdriver.
Gold Plated
Constant Tension
Spring-loaded
Terminals
Turn CCW to Loosen
Tweeter Bridge
Dog-Leg Screws
Dog Legs (4)
Turn Screw CW to Expand and Tighten
Strip to ½”
4 Install FastLoc™ Speaker
Grab and hold the speaker by the built-in Tweeter Bridge Handle as shown. Do Not put fingers into
the tweeter material in the center of the speaker.
WARNING! Denting or deforming the tweeter dome will change the acoustics of the speaker.
Insert the connected speaker into the ceiling hole and with a #2 Phillips screwdriver tighten the four
(4) Dog-leg screws (clockwise) until the Dog-legs open and clamp the speaker to the ceiling. If
using a power drill or electric screw gun use the lowest torque setting. Over tightening may cause
improper fit of the grille, damage to drywall and or damage to speaker.
Adjust the Tweeter position to your ear area at the “Sweet Spot” by slighting pushing on the outer
edge of the tweeter with your thumb.
Make the crossover Contour Switch adjustments before installing grille.
The Bass and Treble switches on the Tweeter Bridge (as shown in section 4) allows for contour
adjustment. Moving the switch to (+) increases the Bass or Treble 3db and to (-) reduces it by 3db. In
the (O) setting you achieve a flat frequency response.
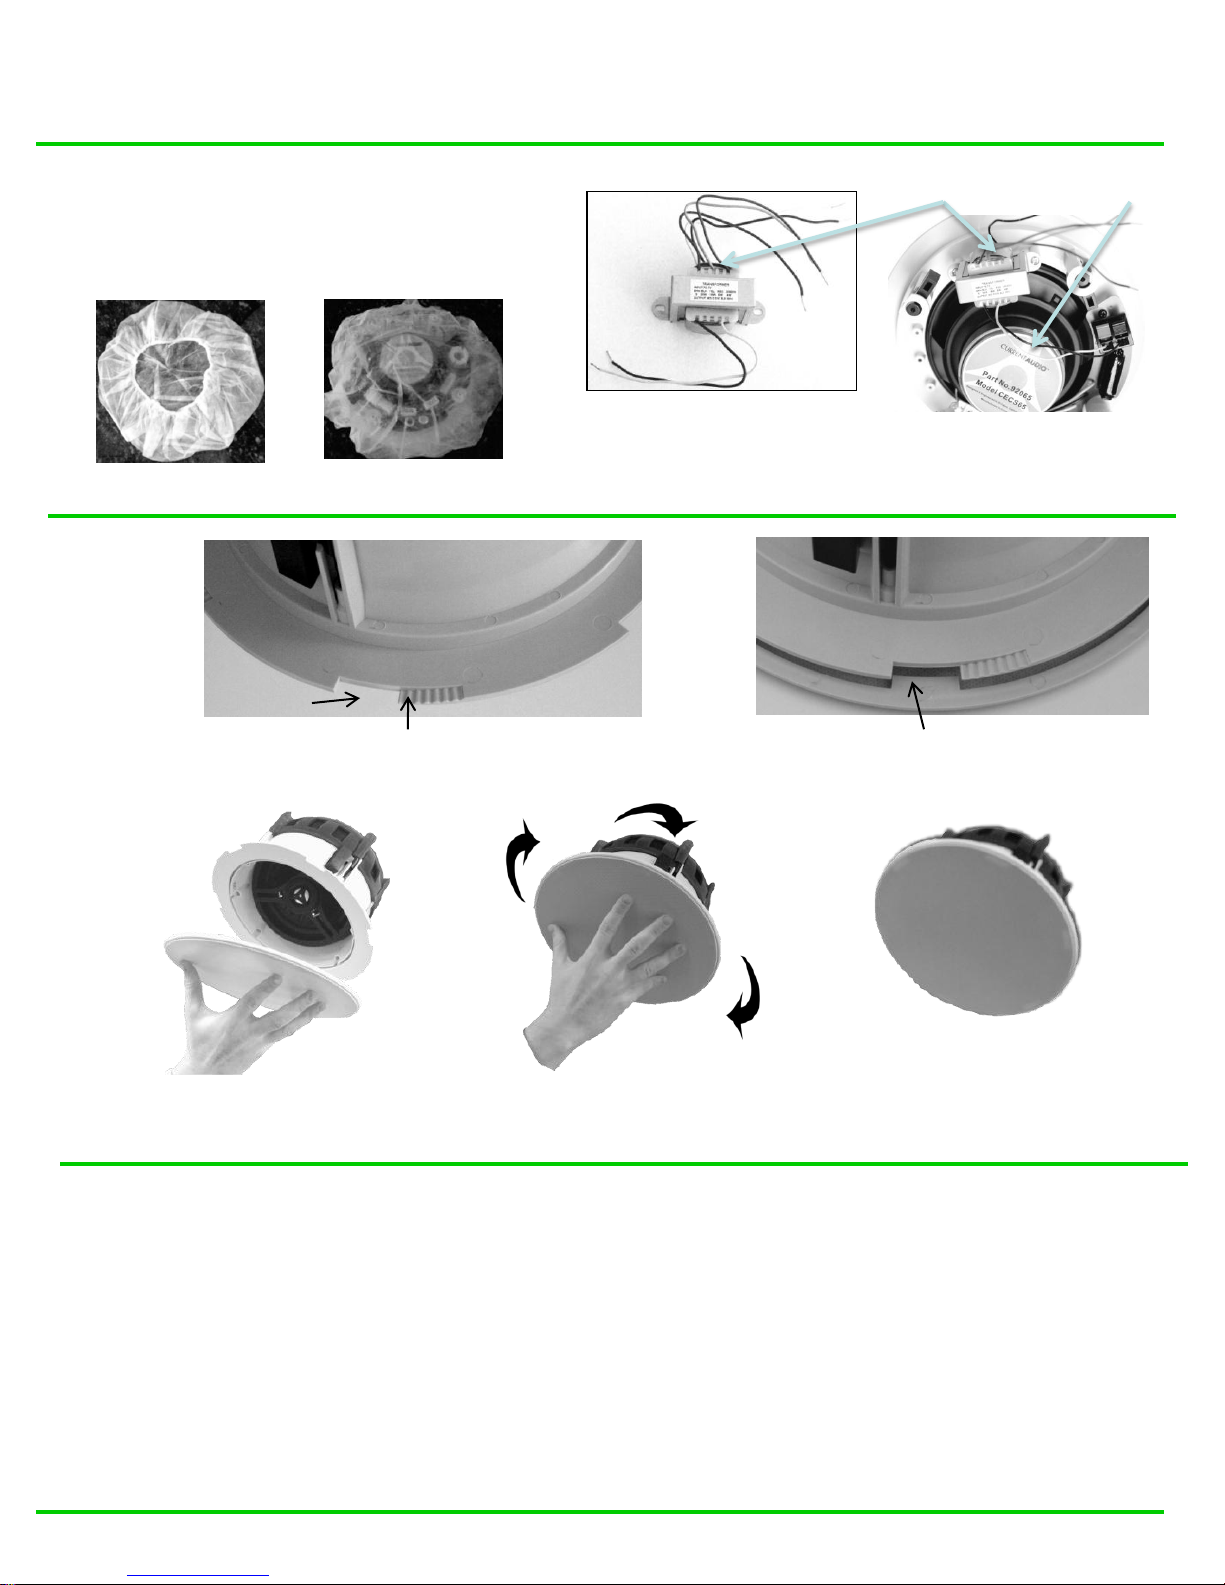
NOTE: If you have blown-in insulation and/or a potential rodent problem I suggest you install the SpeKap.
It is a breathable membrane that will keep rodent droppings, debris, and insulation from entering the back
of the speaker that could change the performance of the speaker. See figure on next page.
NOTE: The R70VT transformer adapts any Current Audio 8 Ohm speaker for use with multi-speaker
70 Volt commercial distributed public address and sound systems. The CS65 and CECS series have
stand-offs for direct mounting the R70VT. It features a high power, low insertion loss, wide frequency
response quality line matching transformer design.
The transformer has multiple primary taps of 30-16-8-4 watts with the secondary at 8 Ohms. See figure on
next page.
Specifications subject to change without notice.
Tweeter Bridge
Baffle Housing
Tweeter. Push Here
Contour Switches
CS FL Series 10132011 RPA
Page 4
CS FastLoc™ Series Ceiling Speaker User’s Installation Guide
SpeKap
Keeps Debris, Rodent Droppings and Insulation
Breathable Membrane
out of the Speaker
30,16,8,4 Watt Taps
8 ohm output
30-16-8-4 Watt Taps 8 ohm output
R70VT
70 Volt to 8 ohm
Directly attaches to stand-offs
on the CE Series and all CS65
Series
Notch
R70VT Mounted on CECS
Grille Tab Speaker Detents
Step 1, Align Tabs to Notches Step 2, Twist CW Step 3, Rotate and Lock
Limited 5 Year Warranty
Current Audio, LLC speakers and accessories are warranted to be free from defects in materials and or workmanship to the original retail
purchaser for a period of 5 years provided the equipment was purchased and installed from a Current Audio, LLC Authorized Dealer.
In the event of defective materials and or workmanship, Current Audio, LLC will, without charge, repair or replace, at its option, the defective
product. In order to make claim under this Warranty and to obtain performance of any obligation under warranty, please contact Current
Audio. Instructions will be given on how to return the defective product to Current Audio. Returned products must be shipped prepaid. Proof of
purchase must be provided with the product.
The Warranty does not apply to damage not resulting from defective materials and or workmanship while in the possession of the original
consumer or due to unreasonable use by the original consumer, which includes but not limited to improper installation, negligence,
unauthorized repair or modification, aesthetic deterioration from the environment. Products purchased by unauthorized sources will void the
warranty and not be honored.
Current Audio, LLC is not liable for any incidental or consequential damages, so the above limitations or inclusion may not apply to you. This
warranty gives you specific legal rights, and you may have other rights, which vary from state to state within the United States.
Specifications subject to change without notice.
CS FL Series 10132011 RPA
 Loading...