

Page 1
Quick Installation Guide
Connecting the Ramp Timer Pro to the Orbit Marine PRO
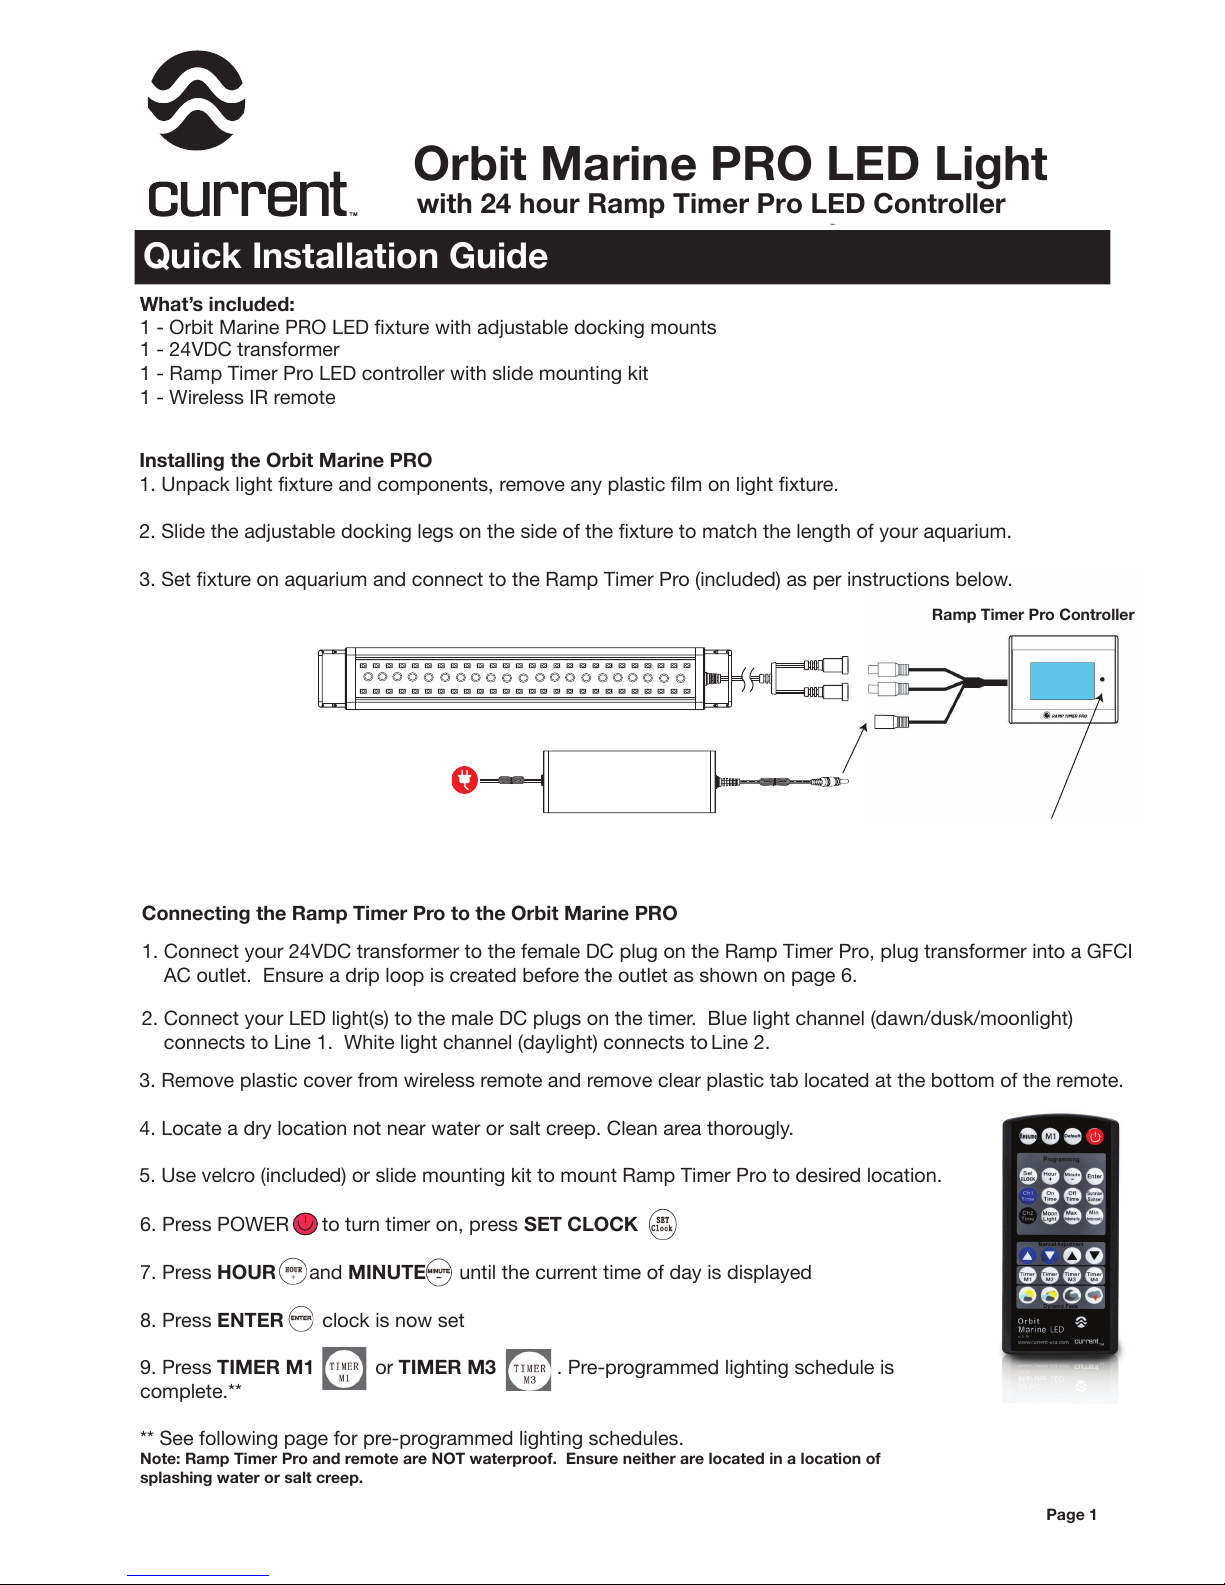
1. Connect your 24VDC transformer to the female DC plug on the Ramp Timer Pro, plug transformer into a GFCI
2. Connect your LED light(s) to the male DC plugs on the timer. Blue light channel (dawn/dusk/moonlight)
connects to Line 1. White light channel (daylight) connects to Line 2.
3. Remove plastic cover from wireless remote and remove clear plastic tab located at the bottom of the remote.
4. Locate a dry location not near water or salt creep. Clean area thorougly.
5. Use velcro (included) or slide mounting kit to mount Ramp Timer Pro to desired location.
Page 1
6. Press POWER to turn timer on, press SET CLOCK
7. Press HOUR and MINUTE until the current time of day is displayed
8. Press ENTER clock is now set
9. Press TIMER M1 or TIMER M3 . Pre-programmed lighting schedule is
complete.**
** See following page for pre-programmed lighting schedules.
Note: Ramp Timer Pro and remote are NOT waterproof. Ensure neither are located in a location of
splashing water or salt creep.
Installing the Orbit Marine PRO
1. Unpack light fixture and components, remove any plastic film on light fixture.
2. Slide the adjustable docking legs on the side of the fixture to match the length of your aquarium.
3. Set fixture on aquarium and connect to the Ramp Timer Pro (included) as per instructions below.
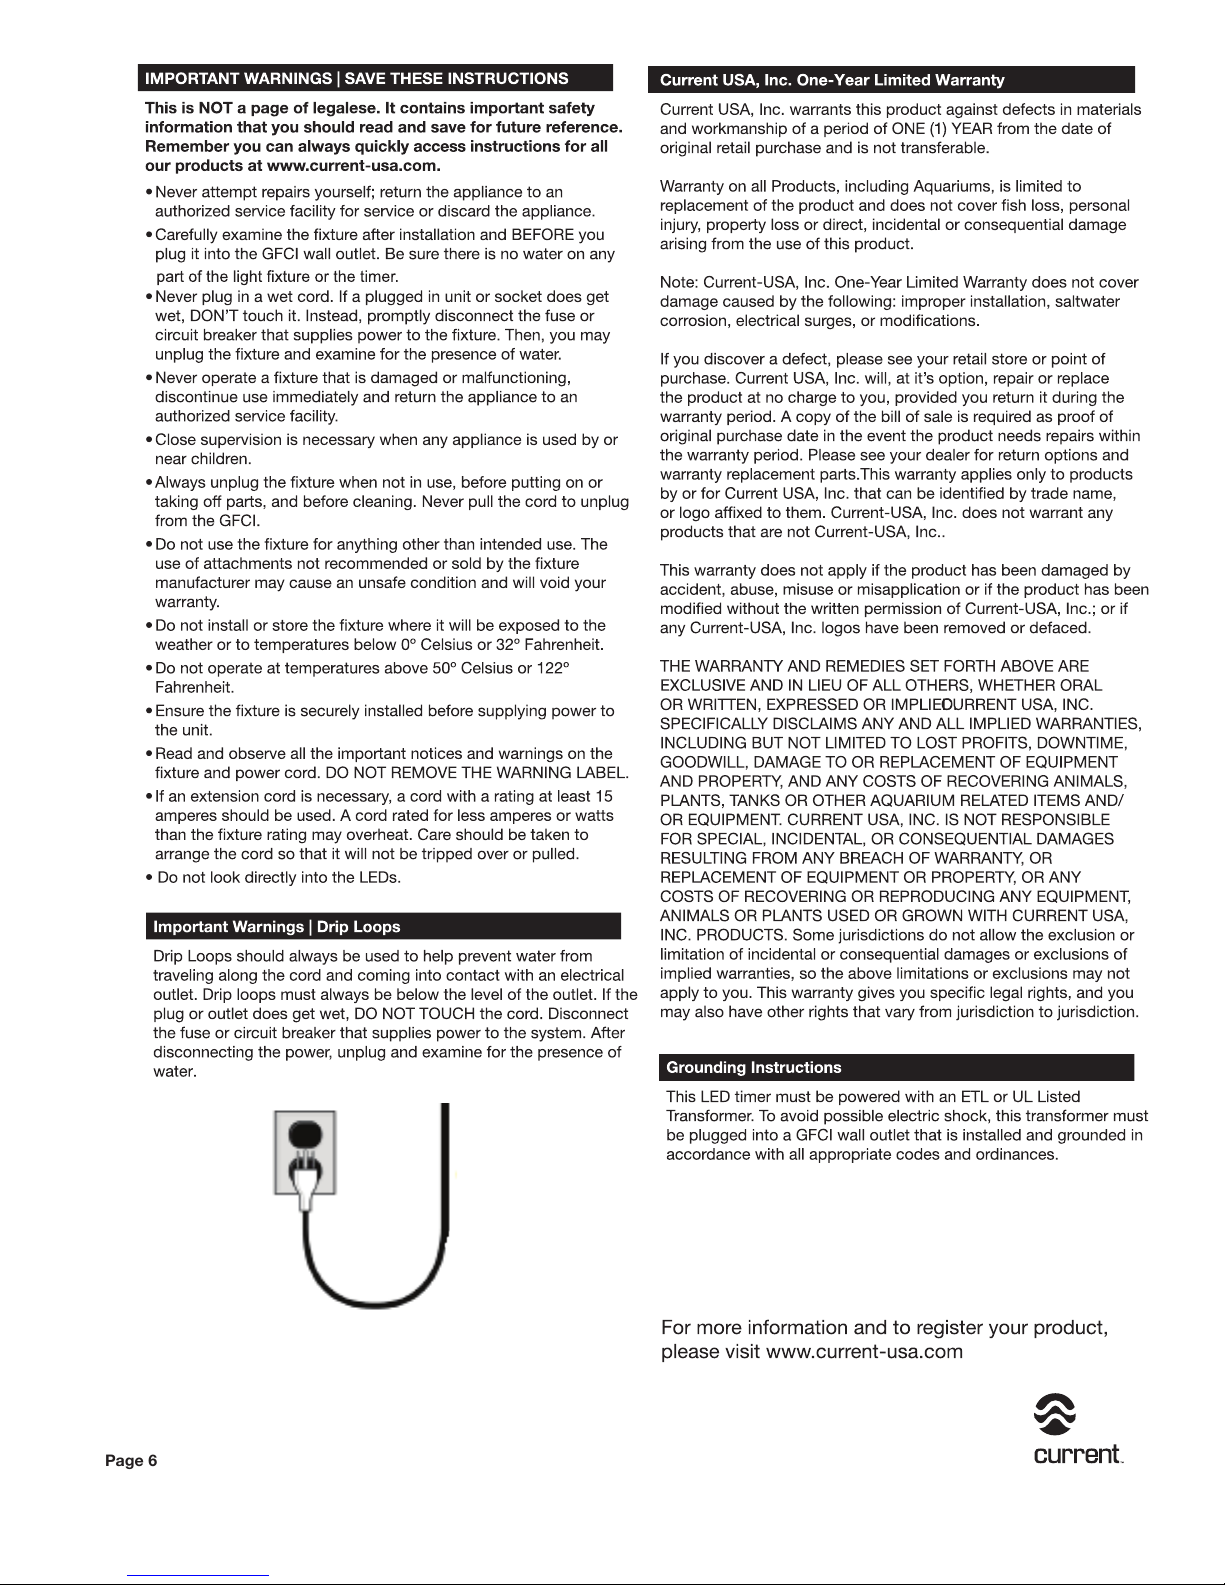
AC outlet. Ensure a drip loop is created before the outlet as shown on page 6.
Orbit Marine PRO LED Light
with 24 hour Ramp Timer Pro LED Controller
Ramp Timer Pro Controller
What’s included:
1 - Orbit Marine PRO LED fixture with adjustable docking mounts
1 - 24VDC transformer
1 - Ramp Timer Pro LED controller with slide mounting kit
1 - Wireless IR remote
AC Power
GFCI Outlet
24VDC
Transformer
IR Sensor
Orbit Marine Pro
Page 2

Detailed Installation Instructions
Please read the following guides before following the detailed programming
instructions located on page 4.
Programming Feature Guide
The Ramp Timer Pro features two independent lighting channels with the following:
- Program on/off times for each channel
- Adjustable intensity (0-100%) for each channel
- Adjustable ramp up (sunrise) / dim down (sunset) (0-30 minutes)
- Adjustable moonlight duration (0-6 hours)
- On-demand color spectrum adjustment
- On-demand weather simulation including cloud cover, fading moonlight and storm with lightning
- Four memory locations for storing custom lighting schedules each are pre-programmed by default, see below.
Pre-programmed Lighting Schedule Guide
The Ramp Timer Pro features four pre-programmed lighting schedules. These schedules are located in memory buttons labeled TIMER M1,
TIMER M2, TIMER M3, TIMER M4. To customize any of the settings, please follow the detailed Programming Instructions located on Page 4.
Using the graph and table below, select from any one of the pre-programmed lighting schedules. Once you select a lighting program, simply
press TIMER M1, TIMER M2, TIMER M3 or TIMER M4 and the controller will automatically enter into the selected lighting schedule.
p0015
Page 2
Page 3
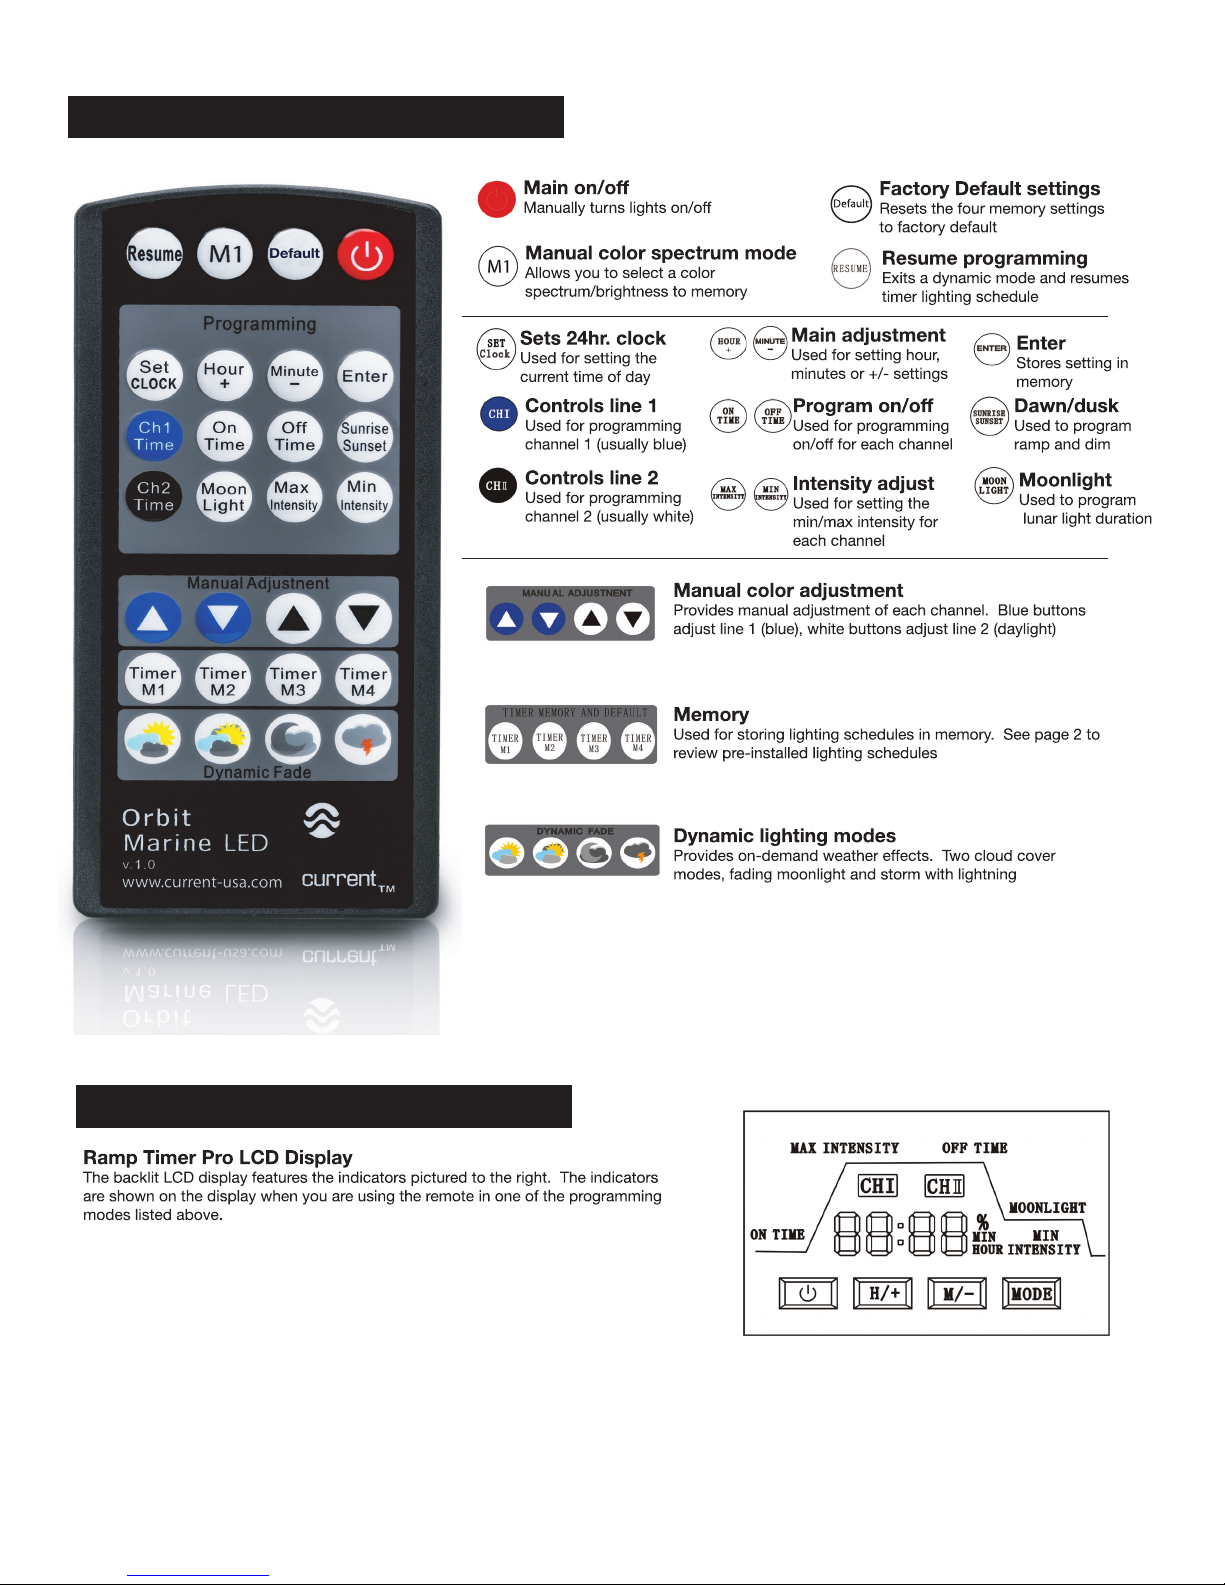
Wireless Infrared IR Remote Guide
When using your wireless remote, point the remote directly
at the IR sensor located on the Ramp Timer Pro. It is
important to have a direct line of sight between the remote
and the controller.
Digital LCD Display Guide
Page 3
Sunrise
Sunset
Please note: the backlit blue LED on the Ramp Timer Pro will automatically turn off
after approximately 30 seconds when a programming feature is complete.
Page 4
Detailed Programming Instructions
The following detailed steps will guide you through customizing and programming your Ramp Timer Pro.
Please be sure to follow our Quick Installation Guide and set the clock before following the below steps.
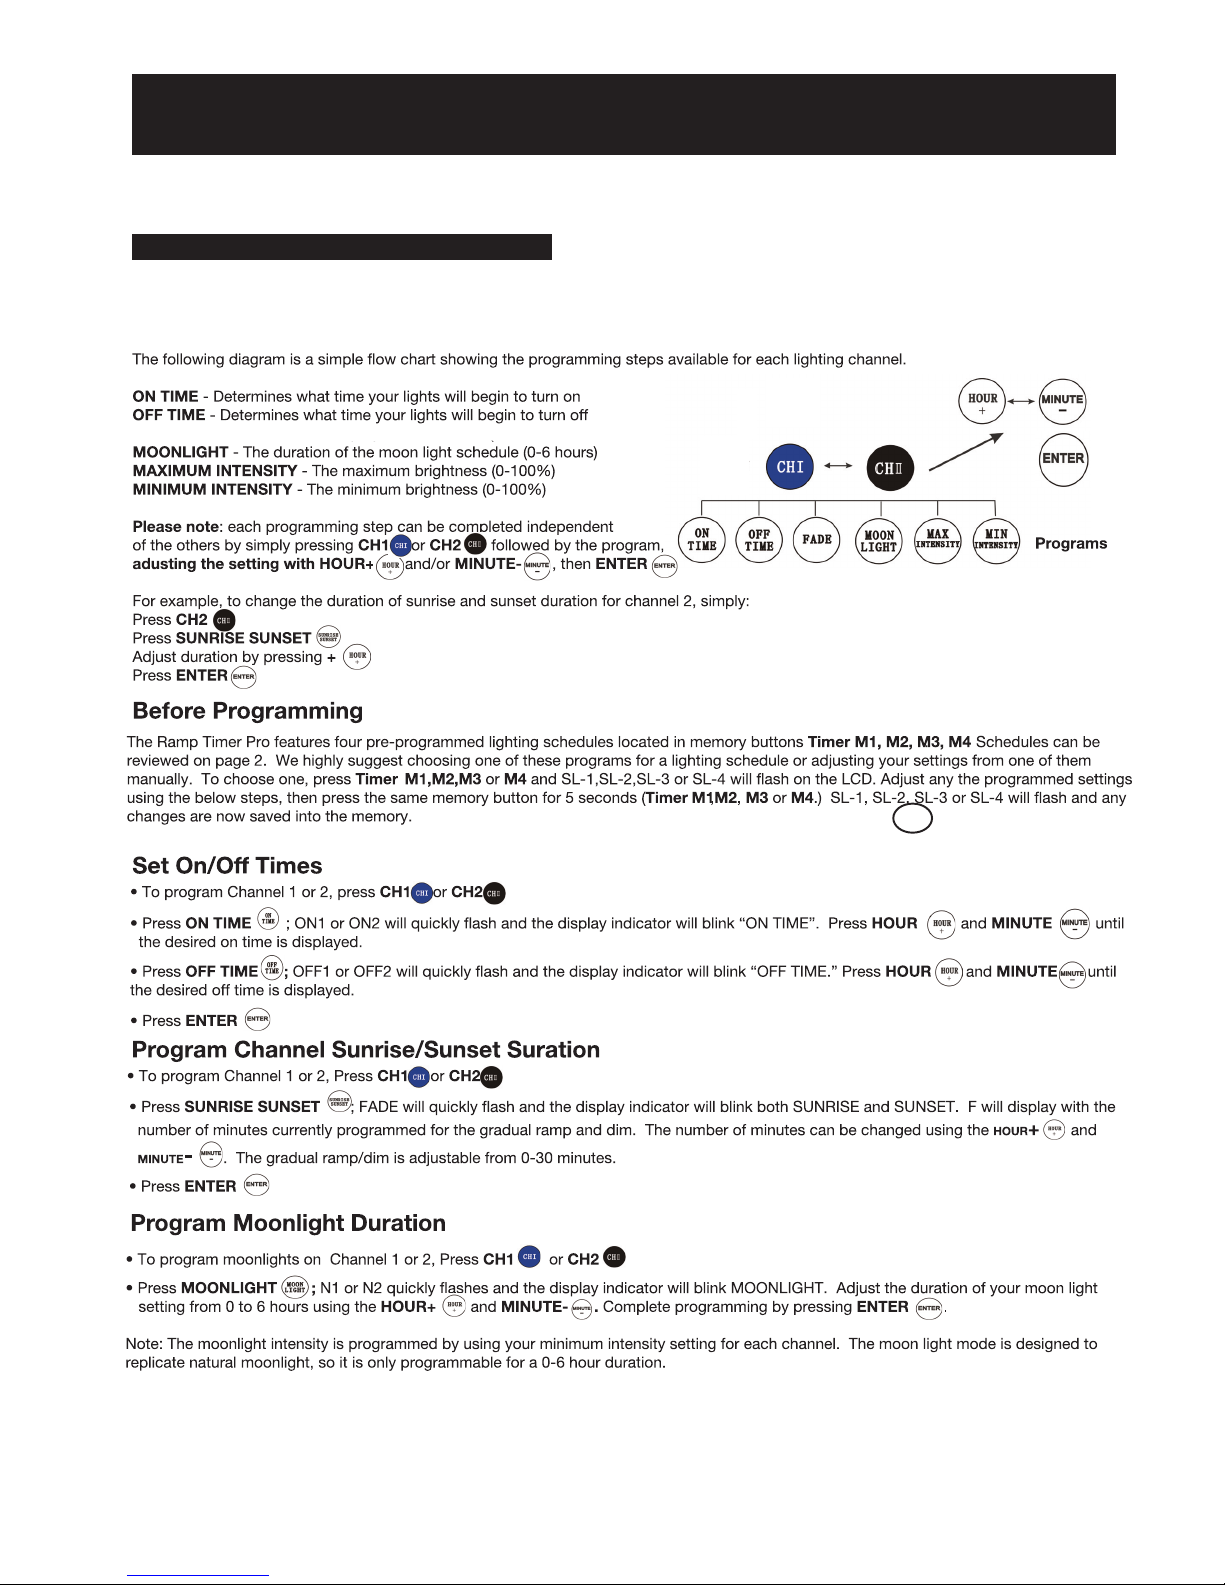
Programming Individual Lighting Channels
The Ramp Timer Pro features two channels of lighting which can be independently controlled. Channel 1/Line 1 should be connected to your
blue spectrum lights for dawn/dusk/actinic/moon lighting; Channel 2/Line 2 should be connected to your white spectrum lights for daylight.
SUNRISE/SUNSET FADE - The duration of the ramp up and dim down (0-30 minutes)
To reset the memory settings to the factory default, press DEFAULT for 5 seconds (see pg. 5).
Default
This will reset the controller memory for all four memory settings.
Page 4
Page 5
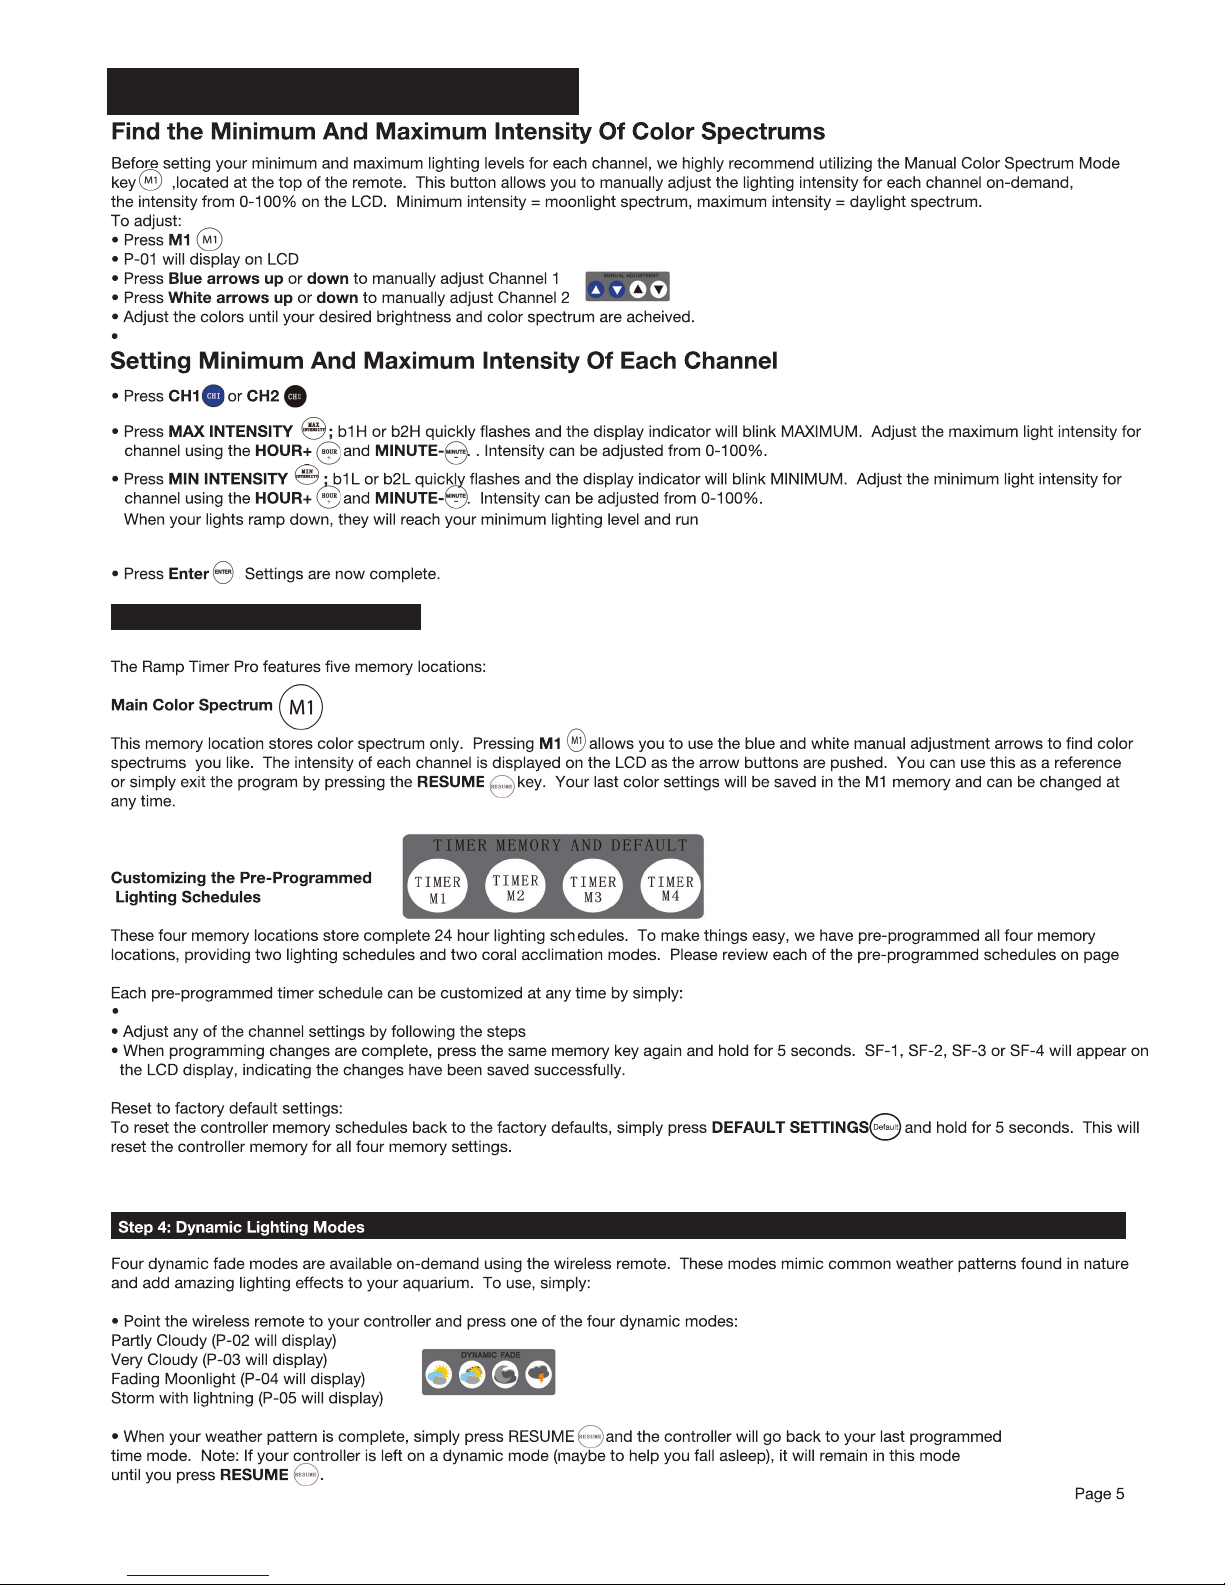
Programming Light Channels continued
The intensity % can be used as a reference when programming your minimum and maximum settings.
per the programmed moonlight duration time (0-6 hours.)
Memory Functions
and will display
Press TIMER M1, TIMER M2, TIMER M3, or TIMER M4. SL-1, SL-2, SL-3 or SL-4 will display on the screen.
.
2.
Page 6
Page 6
AC Protected
GFCI Outlet
Drip Loop
AC
Power Cord
 Loading...