

Page 1
INSTRUCTION
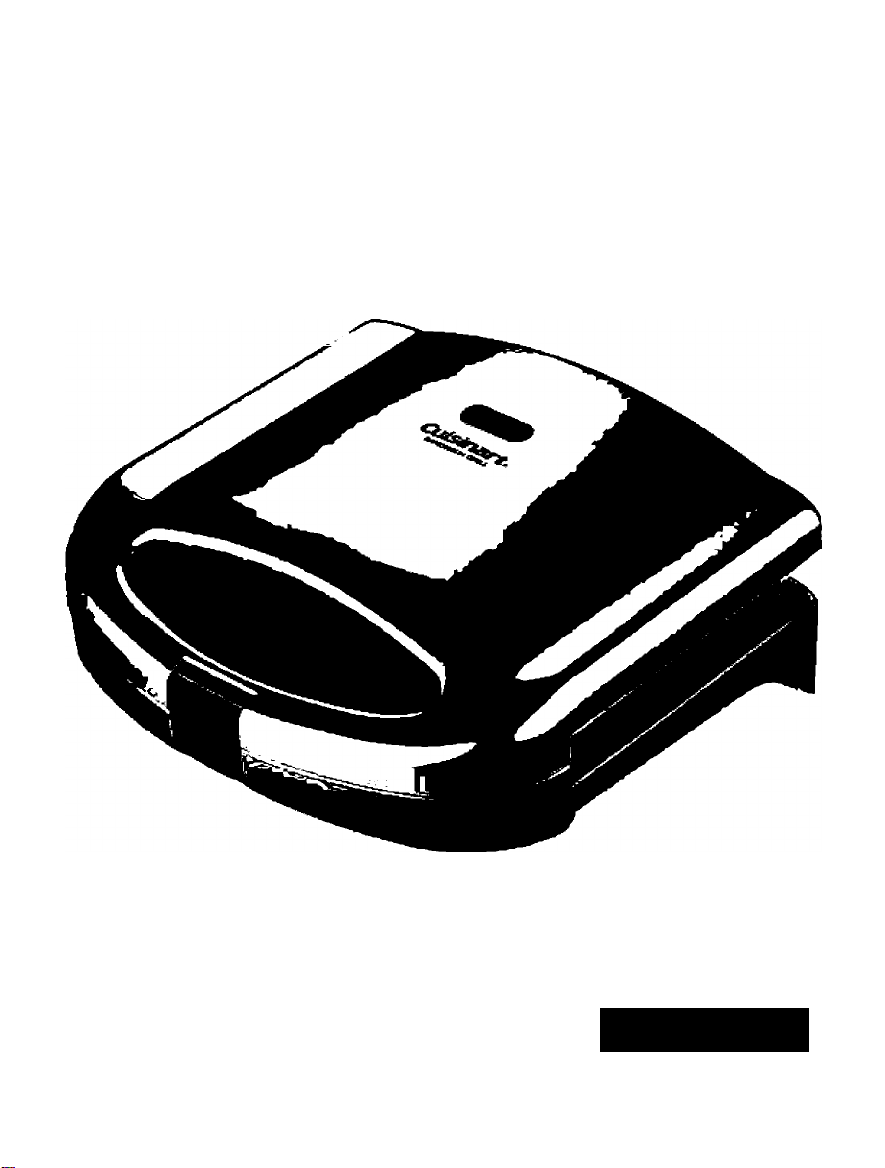
Cuisinart
AND RECIPE
BOOKLET
Sandwich Grill
For your safety and continued enjoyment of this product, always read the instruction book carefully before using.
WM-SW2N
Page 2

Page 3

IMPORTANT
SAVE THESE
SAFEGUARDS
When using an electrical appliance, basic safety
precautions should always be followed, Including
the following:
1. READ ALL INSTRUCTIONS.
2. Unplug from outlet when not in use and before
cleaning. Allow to cool before cleaning
appliance.
3. Do not touch hot surfaces. Use handles and knobs.
4. To protect against fire, electrical shock, and Injury
to persons, DO NOT IMMERSE CORD, PLUG,
OR UNIT in water or other liquids.
5. Close supervision Is necessary when any
appliance Is used by or near children.
6. Do not operate any appliance with a damaged
cord or plug or after the appliance malfunctions or
has been damaged in any manner. Return appli
ance to the nearest Culsinart Authorized Service
Facility for examination, repair, or adjustment.
7. The use of accessory attachments not
recommended by Culsinart may result in fire,
electrical shock, or Injury to persons.
8. Do not use outdoors.
9. Do not let power cord hang over edge of table or
counter, or touch hot surfaces.
10. Do not place on or near a hot gas or electric
burner, or In a heated oven.
11. Unplug the unit when finished cooking.
12. Do not use appliance for other than Intended use.
13. Extreme caution must be used when moving an
appliance containing hot oil or other hot liquids.
14. To disconnect, remove plug from wall outlet.
15. WARNING: TO REDUCE THE RISK OF FIRE
OR ELECTRIC SHOCK, REPAIR SHOULD BE
DONE ONLY BY AUTHORIZED PERSONNEL.
DO NOT REMOVE THE BASE PANEL.
NO USER SERVICEABLE PARTS ARE INSIDE.
16. Do not operate your appliance In an appliance
garage or under a wall cabinet. When storing in
an appliance garage always unplug the unit
from the electrical outlet. Not doing so could
create a risk of fire, especially if the appliance
touches the walls of the garage or the door
touches the unit as It closes.
INSTRUCTIONS
FOR HOUSEHOLD
USE ONLY
SPECIAL CORD SET INSTRUCTIONS
A short power-supply cord is provided to reduce the
risks resulting from becoming entangled in or tripping
over a longer cord.
Longer extension cords are available and may be used
If care is exercised In their use.
If a long extension cord is used, the marked electrical
rating of the extension cord should be at least as great
as the electrical rating of the appliance, and the longer
cord should be arranged so that it will not drape over
the countertop or tabletop where It can be pulled on by
children or animals, or tripped over unintentionally.
NOTICE
This appliance has a polarized plug (one blade is wider
than the other). To reduce the risk of electric shock,
this plug will fit In a polarized outlet only one way.
If the plug does not fit fully in the outlet, reverse the
plug. If It still does not fit, contact a qualified electri
cian. Do not attempt to modify the plug In any way.
TABLE OF CONTENTS
Important Safeguards...................................................3
Features and Benefits
Instructions for Use......................................................4
Tips and Hints................................................................5
Suggested Sandwiches................................................6
Recipes...........................................................................7
Cleaning and Maintenance
Storage...........................................................................8
Warranty.........................................................................8
..................................................
..........................................
4
8
Page 4

FEATURES AND BENEFITS INSTRUCTIONS FOR USE
1. Indicator UghtB
• Red light illuminates when Sandwich Grill
is plugged in and preheating
• Gneen light Illuminates when Sandwich Grill
is ready to cook
• Green light Illuminates again when food
Is ready to eat
2. Lock Down Lid
• Lock on handle secures contents while
cooking
3. Rubber Feet (not ahown)
• Will not mark countertop
• Keeps unit steady
4. Honatlek Plataa
• Wipe clean after use
5. Cord Storage (not ahown)
• Cord wraps around base for easy storage
6. BPA Free (not ahown)
• All materials that come In contact with food
are BPA free
Note: The cooking plates of this Cuisinart* Sandwich
Grill have been treated with a special nonstick
coating. Before the first use, we suggest
you season the plates with cooking spray or oil.
If using oil, apply with a paper towel or pastry
brush. You may find it helpful to repeat this
process before each use of the Sandwich Grill.
1. Before using your Cuisinait® Sandwich Grill for the
first time, remove all protective paper and
wrapping. Remove any dust from shipping by
wiping the plates with a damp cloth.
2. To preheat the Sandwich Grill, dose lid and plug
cord into a wall outlet. The red light will go on to
signal power. The green Indicator light will go on
when unit Is ready to use.
Note: The first time you use your Sandwich Grill,
it may have a slight odor and may smoke a bit.
This is normal, and common to appliances with
a nonstick surface.
3. When the green indicator light goes on, place
ingredients on bottom plate according to recipes
provided. Close the lid and lock it.
4. The green light will go off and the red light will once
again Illuminate. It may take several seconds for
the red light to come on. This is normal.
5. Once the food is ready to eat, the green light
will come on again.*
6. Remove food by gently loosening the edges
with a heatproof plastic spatula. Never use
metal utensils, as they may damage the nonstick
coating.
7. Always disconnect the plug from the wall
outlet once cooking Is completed.
* See specific instaictions for cooking eggs on page 7.
Page 5

TIPS AND HINTS FOR
USING YOUR CUISINART®
SANDWICH GRILL
Preheat Cuisinart? Sandwich Grill completely before
using. For quick-to-assemble sandwiches and pas
tries, preheat the Sandwich Grill while preparing the
food to be grilled.
Close the lid of the Sandwich Grill while preheating.
When preparing more than one batch of sandwiches,
keep lid closed to maintain even heat.
You may use a variety of breads with excellent results
In the Cuisinart® Sandwich Grill, from whole wheat to
cinnamon-raisin for sweeter sandwiches. Breads that
are a “standard” thickness (approximately inch) are
best.
For best results, we recommend that the bread be as
close as possible to the size of the sandwich plate
(5 X 41i inches). Breads may be trimmed prior to
cooking to fit as needed. Bread selections may be
hand sliced from whole loaves. (Use the scraps to
make fresh bread crumbs or In sweet or savory bread
puddings. Visit
Butter, margarine, or olive oil are recommended for
coating the outside of bread when making sand
wiches. “Light” versions of margarines are not rec
ommended, as they do not withstand heat (check
manufacturer's labels for cooking recommendations
for best results).
Have butter or margarine at room temperature
when spreading on bread, or melt and apply with a
pastry brush.
For best results, moist ingredients such as sliced
tomatoes or fruits, pickles, etc., should be blotted or
patted dry with a paper towel. Sauces, such as tomato
sauce or salsa, can be drained for a short time in a
strainer lined with a coffee filter to remove excess
liquid.
Use well-drained leftover cooked vegetables or
thawed, well-drained frozen vegetables as additions to
your sandwiches and omelet.
Firm-texture breads will yield a crispier sandwich than
breads with a softer texture.
Use a heatproof rubber spatula or wooden utensil
to lift sandwich/pastry/omelet from the Cuisinart'
Sandwich Grill. Avoid using metal utensils, which may
scratch the nonstick coating of the Sandwich Grill.
www.cuisinart.com for recipes).
For best results, allow hot sandwiches to rest for 2-3
minutes before cutting and serving. The fillings will be
very hot, and will run less if allowed to cool slightly.
Unplug the Sandwich Grill and allow unit to cool
completely with lid open before cleaning. When cool,
brush excess crumbs from Sandwich Grill with a soft
pastry brush, then gently wipe clean with a dampened
soft cloth such as one made of microfiber.
Page 6

SUGGESTED SANDWICHES
Sandwich fillings can be as iimitless as your personal taste and imagination. You may create your own versions of
traditional favorites (childhood or diner comfort foods) or combine favorite ingredients to make your own classics.
To assemble sandwiches, lightly coat one side of each slice of bread (or the outside of a roll, pita loaf or English muf
fin) with butter, margarine or olive oil. Lay 2 slices of bread, coated side down, on work surface. Assemble sandwiches
in layers and top with remaining bread, coated side up. Place on preheated Sandwich Grill. Use firm pressure to close
lid; lock and cook. Green indicator light will go off and red light will come on (this may not happen immediately).
When green indicator light comes on again, sandwich is cooked.
Add 15-30 seconds additional cooking time If a toastier sandwich Is preferred. Remove sandwiches using a heatproof
plastic spatula. Let sandwiches rest for 2-3 minutes, then cut and sen/e.
Sandwich*
Grilled Mozzarella,
Tomato & Fresh
Basil Sandwiches
Hot Grilled
Reubens
Grilled Cubano
Sandwiches
Toasted Chicken
Divan Sandwich
Grilled Tuna Melt 8 slices white, wheat or rye
Bread/Spread
4 slices Italian or sourdough
Italian bread, hand-sliced
artisan bread, paninl-type
rolls, spilt pita loaves
3 teaspoons extra virgin olive oil
4 slices rye bread
2-3 teaspoons softened
butter or margarine
4 slices firm white bread or
2 sandwich rolls
3-4 teaspoons unsalted butter,
softened or olive oil
4 slices white or wheat bread
or 2 pita loaves, spilt and
trimmed to fit sandwich
plate
2-3 teaspoons unsalted
butter, softened
bread
2-4 teaspoons unsalted butter,
softened
Filling
2 ounces sliced mozzarella cheese
(regular or fresh), thinly sliced
4 large fresh basil leaves, cut Into thin shreds
6 thin slices fresh ripe tomato, patted dry
kosher salt and freshly ground pepper to taste
1 ounce Swiss cheese (about 2 slices)
1 ounce thinly sliced corned beef
1 tablespoon sauerkraut, squeezed dry
2 teaspoons Russian or Thousand Island
dressing
1 ounce thinly sliced roast pork
1 ounce thinly sliced ham
1 ounce thinly sliced Swiss Cheese
(about 2 slices)
2 teaspoons yellow or Dijon mustard
6 thin sliced dill pickle chips, drained
2 ounces diced cooked chicken
4 tablespoons thawed, drained frozen
chopped broccoli or leftover cooked
chopped broccoli
2 ounces sliced Swiss, Cheddar, muenster or
Gouda cheese
1-2 teaspoons Dijon mustard
1 (5-ounce) can water-packed tuna, well drained
1 tablespoon sweet pickle relish
1 tablespoon finely chopped onion
2 tablespoons “light" or regular mayonnaise
4 slices Swiss, Cheddar, Monterey Jack, or
muenster cheese
Combine tuna, relish, onion, and mayonnaise to
make tuna salad. Add salt and pepper to taste.
Toasted
PepperonI Pizza
Melts
‘All make enough for two sandwiches, except for the Grilled Tuna Melt which makes enough for four sandwiches.
4 slices white Italian or Italian
sourdough bread, or 2 pita
loaves, split and trimmed
2-3 teaspoons extra virgin olive oil
2 tablespoons very thick tomato or
marinara sauce
1 ounce sliced mozzarella cheese
(regular or fresh)
a ounce thinly sliced pepperonI
(about 8 slices)
Page 7

RECIPES
PEPPER AND CHEESE OMELETS
When making filled omelets, the filling reduces the
amount of egg needed. Resist the urge to overfill the
omelets or the egg may run out before it is cooked.
Makes 2 servings
1 large egg
kosher salt and freshly ground pepper to taste
1 tablespoon finely chopped bell pepper
1 tablespoon shredded Cheddar
melted butter or cooking spray
Preheat the sandwich grill. Put the egg and salt and
pepper In a small bowl. Use a whisk to beat until just
frothy. When green indicator light comes on, open
Sandwich Grill and lightly coat with melted butter or
cooking spray. Divide the bell pepper evenly among
the four quarters of the sandwich plates; sprinkle
evenly with the shredded cheese. Pour the egg mixture
evenly over the vegetables and cheese being sure to
only pour In the wells of each plate. Close the lid and
lock. Cook for about 2 minutes. Open Sandwich Grill
and remove omelets using a heatproof plastic spatula.
Serve Immediately.
Nutritional information per serving:
Calories 52 (63% from fat) • carb. 1g • pro. 4g
• fat 4g • sat. fat 2g • chol. 97mg • sod. 124mg
• ca/c. 40mg • fiber Og
Eggs or Egg Whites for Breakfast Sandwiches:
Use a whisk to combine either 2 large eggs or 3 large
egg whites with salt and pepper to taste. Preheat
Sandwich Grill, butter or lightly coat with nonstick
cooking spray and pour the egg/egg white mixture
evenly into the wells of the bottom plates. Cook for 2
minutes for whole eggs, or 3 minutes for egg whites.
Remove and serve Immediately. These are nice and
dense and are perfect for your favorite breakfast sand
wich. Serve two pieces per bagel, English muffin, hard
roll or toast and top with cheese, sausage or bacon.
Fluffy Scrambled Eggs or Whites:
Use a whisk to combine 1 large egg or 2 large egg
whites with 2 tablespoons of milk and salt and pep
per to taste. Preheat Sandwich Grill, butter or lightly
coat with nonstick cooking spray and pour the egg/
egg white mixture evenly into the wells of the bottom
plates. Cook for 2 minutes for whole eggs or 3 minutes
for egg whites. Remove and sen/e immediately.
These eggs are light and fluffy - top with finely
chopped chives for a little extra flavor.
Note: When cooking eggs, it is very Important not to
over fill the plates. They should not go above the wells
In the bottom plates. Use our recipes as guidelines to
make your favorite combinations.
FRUIT TARTS
Use your Sandwich Grill to make this quick and easy
dessert that can be served plain or topped with Ice
cream while still warm. Fruit tarts are also a nice
alternative to packaged toaster pastries for breakfast.
Makes 2 servings
4 slices firm bread - white, wheat, or sweet, such
as raisin, cinnamon swirl, or challah
2-3 teaspoons unsalted butter, softened
4 tablespoons canned fruit pie filling
(apple, cherry, peach, blueberry)
Preheat the Sandwich Grill. Spread one side of each
bread slice with butter. Top the unbuttered side of
each slice with half the pie filling (2 tablespoons).
Cover with remaining bread slices, buttered side up.
When green indicator light is on, place the "tarts" on
the bottom plates and use firm pressure to close and
lock the Sandwich Grill. Cook until the green indicator
light comes on again. Remove “tarts" and
let cool for about 5 minutes before cutting and serving
(filling will be very hot). Serve plain, dusted with
powdered sugar, or with a favorite Ice cream or
frozen yogurt.
Nutritional information per serving
(based on Cherry Pie Filling):
Calories 294 (15% from fat) • carb. 53g • pro. 8g
• fet 5g • sat. fat 2g • chol. 5mg • sod. 375mg
• calc. 40mg • fiber 4g
FRUIT DANISH VARIATION:
Combine 1 ounce light or regular cream cheese with
1 tablespoon liquid pasteurized egg product (such as
EggBeaters'^, 1 teaspoon granulated sugar and
14 teaspoon pure vanilla extract and stir until smooth.
Spread mixture on unbuttered sides of 2 slices of
buttered bread. Top mixture with 2 tablespoons fruit
pie filling and remaining slices of bread, butter side
up. Place on preheated Sandwich Grill and cook until
green indicator light comes on. If using cheny filling,
you may also add 1 tablespoon chocolate chips.
Page 8

CLEANING AND MAINTENANCE
Once you have finished cooking in the Sandwich Griii,
remove piug from electricai outiet. Leave top lid open
so plates begin to cool.
Never take your Sandwich Grill apart for cleaning.
Simply brush crumbs from grooves, and absorb any
excess cooking oil or excess fillings by wiping with a dry
cloth or paper towel.
You may clean the cooking plates by wiping with a
damp cloth as well. This will prevent staining or stick
ing from buildup of oil or fillings. Be certain plates have
cooled completely before cleaning. If food adheres to
plates, simply pour a little cooking oil onto area and let
stand approximately 5 minutes, allowing buildup to
soften for easy removal.
To clean exterior, wipe with a soft dry cloth. Never use
an abrasive cleanser or harsh pad. NEVER IMMERSE
CORD, PLUG OR UNIT IN WATER OR OTHER
LIQUID. DO NOT PUT IN DISHWASHER.
Any other servicing should be performed by an
authorized service representative.
STORAGE
store with cord wrapped securely around base.
For compact storage, stand Sandwich Grill upright on
back end. The Sandwich Grill has been designed with
a special latch so lid stays closed during storage.
WARRANTY
Limited Three-Year Warranty
This warranty Is available to consumers only. You are
a consumer If you own a Cuisinarf Sandwich Grill
that was purchased at retail for personal, family or
household use. Except as otherwise required under
applicable law, this warranty is not available to retailers
or other commercial purchasers or owners.
We warrant that your Cuisinart® Sandwich Grill will be
free of defects in materials and workmanship under
normal home use for 3 years from the date of original
purchase.
We recommend that you visit our website,
www.cuisinart.com for a fast, efficient way to com
plete your product registration. However, product reg
istration does not eliminate the need for the consumer
to maintain the original proof of purchase in order to
obtain the warranty benefits. In the event that you do
not have proof of purchase date, the purchase date
for purposes of this warranty will be the date of manu
facture.
If your Culsinatb Sandwich Grill should prove to be
defective within the warranty period, we will repair it,
or if we think necessary, replace it. To obtain warranty
sen/lce, simply call our toll-free number
1-800-726-0190 for additional information from our
Customer Service Representatives, or send the
defective product to Customer Service at Cuisinart,
7811 North Glen Harbor Blvd., Glendale, AZ 85307.
To facilitate the speed and accuracy of your return,
please enclose $10.00 for shipping and handling of the
product.
Please pay by check or money order (California resi
dents need only supply proof of purchase and should
call 1-800-726-0190 for shipping instructions).
NOTE: For added protection and secure handling of
any Culsinatt* product that is being returned, we rec
ommend you use a traceable. Insured delivery service.
Cuisinart cannot be held responsible for in-transIt
damage or for packages that are not delivered to us.
Lost and/or damaged products are not covered under
warranty. Please be sure to include your return
address, daytime phone number, description of the
product defect, product model number (located on
bottom of product), original date of purchase, and any
other information pertinent to the product’s return.
CALIFORNIA RESIDENTS ONLY:
California law provides that for In-Warranty Service,
California residents have the option of returning a
nonconforming product (A) to the store where it was
purchased or (B) to another retail store which sells
Cuisinart products of the same type.
The retail store shall then, at its discretion, either repair
the product, refer the consumer to an independent
repair facility, replace the product, or refund the pur
chase price less the amount directly attributable to the
consumer’s prior usage of the product. If the above
two options do not result in the appropriate relief to
the consumer, the consumer may then take the prod
uct to an independent repair facility if service or repair
can be economically accomplished. Cuisinart and not
the consumer will be responsible for the reasonable
cost of such service, repair, replacement, or refund for
nonconforming products under warranty.
Page 9

California residents may also, according to their
preference, return nonconforming products directly to
Cuisinart for repair, or if necessary, replacement, by
calling our Consumer Service Center toll-free at
1 -800-726-0190. Cuisinart will be responsible for the
cost of the repair, replacement, and shipping and han
dling for such products under warranty.
BEFORE RETURNING YOUR CUISINART®
PRODUCT
If you are experiencing problems with your Cuisinart*
product, we suggest that you call our Cuisinart* Service
Center at 1-800-726-0190 before returning the product
for service. If servicing is needed, a Representative
can confirm whether the product is under warranty and
direct you to the nearest service location.
Your Cuisinart* Sandwich Grill has been manufactured
to the strictest specifications and has been designed
for use only in 120-volt outlets and only with autho
rized accessories and replacement parts. This warranty
expressly excludes any defects or damages caused by
attempted use of this unit with a converter, as well as by
use with accessories, replacement parts or repair ser
vice other than those authorized by Cuisinart. This war
ranty does not cover any damage caused by accident,
misuse, shipment or other than ordinary household use.
This warranty excludes all incidental or consequential
damages. Some states do not allow the exclusion or
limitation of these damages, so these exclusions may
not apply to you. You may also have other rights, which
vary from state to state.
Important: If the nonconforming product is to be ser
viced by someone other than Cuisinart's Authorized
Service Center, please remind the servicer to call our
Consumer Service Center at 1-800-726-0190 to ensure
that the problem is properly diagnosed, the product is
serviced with the correct parts, and the product is still
under warranty.
Page 10

NOTES:
10
Page 11

NOTES:
Page 12

T3
Cuisinart
SAVOR THE GOOD LIFE®
JiU,
t
Hand
Blenders
Cuisinart offers an extensive assortment of top quaiity products to make iife in the
kitchen easier than ever. Try some of our other countertop appiiances and
□
Food
Processors
Toaster Ovens Blenders
cookware, and Savor the Good Life®.
Cookware
www.cuisinart.com
East Windsor, NJ 08520
Any trademarks or sen/ice marks of third - parties referred to herein
are the trademarks or service marks of their respective owners.
Mlnl-Prep
©2012 Cuisinart
150 Milford Road
Printed in China
12CE132924
IB-11500A
Page 13

IB Size: 152 MM (W) X 203 MM (H)
Total Pages: 12pp
Die Cut: New
Material:
Coating: GLOSS VANISHING IN COVER
Colors Breakdown:
Reference #:
COVER: 157GSM MATT ARTPAPER,
INSIDE: 120GSM GLOSS ARTPAPER
COVER: 4C+1C(BLACK)
INSIDE: 1C + 1C
WMSW2N IB-11500A
UPC/EAN code:
Nil
 Loading...