

Page 1
INSTRUCTION BOOKLET
Recipe
Booklet
Reverse Side
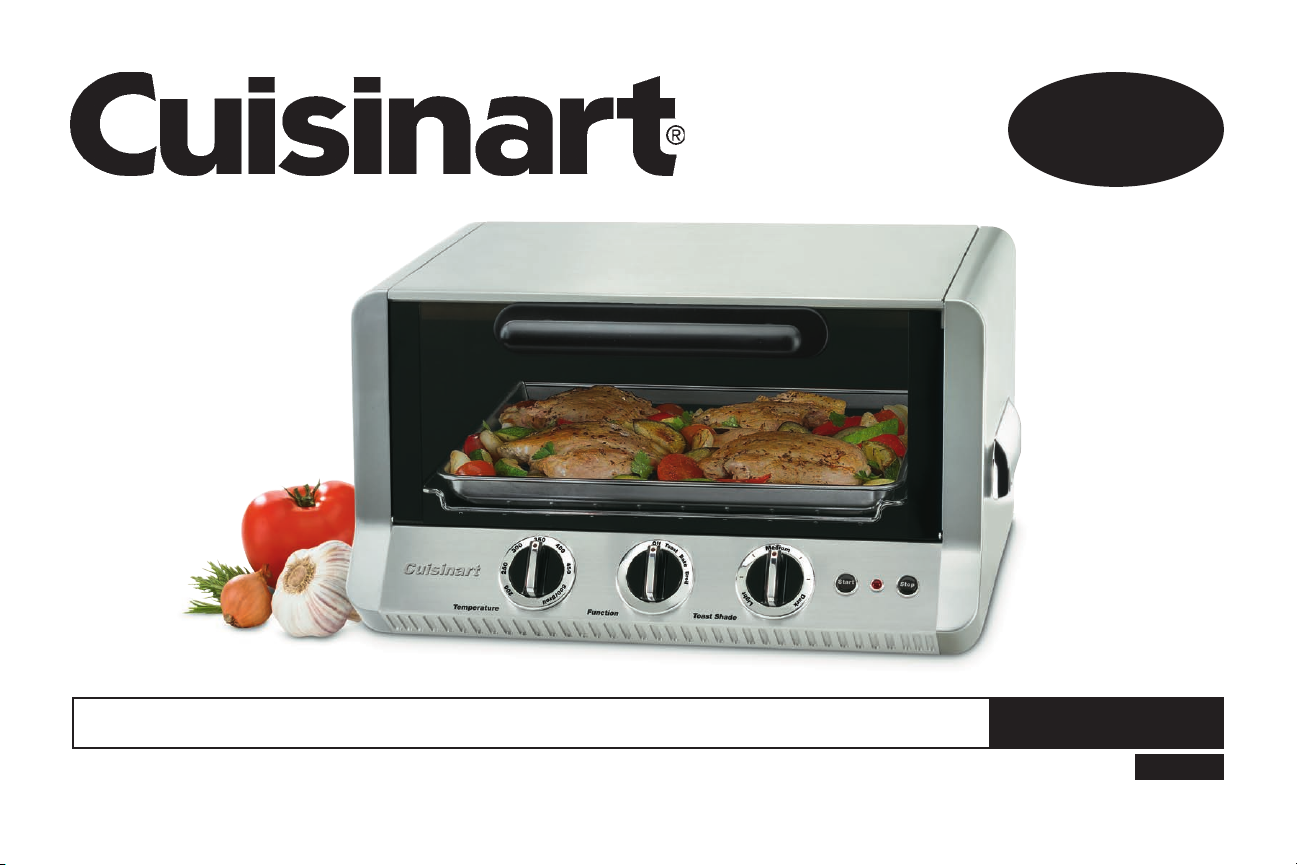
Cuisinart® Classic Toaster Oven Broiler
For your safety and continued enjoyment of this product, always read the instruction book carefully before using.
TOB-50BC
G IB-7332
Page 2

CONTENTS
Important Safeguards. . . . . . . . . . . . . . . . . . . . . . . . . . . . . . . . . . . . . . . . 2
Special Cord Set Instructions . . . . . . . . . . . . . . . . . . . . . . . . . . . . . . . . . 3
Introduction . . . . . . . . . . . . . . . . . . . . . . . . . . . . . . . . . . . . . . . . . . . . . . . 4
Features and Benefits . . . . . . . . . . . . . . . . . . . . . . . . . . . . . . . . . . . . . . . 4
Before the First Use . . . . . . . . . . . . . . . . . . . . . . . . . . . . . . . . . . . . . . . . . . 5
General Guidelines . . . . . . . . . . . . . . . . . . . . . . . . . . . . . . . . . . . . . . . . . . 5
Use and Care
Broil . . . . . . . . . . . . . . . . . . . . . . . . . . . . . . . . . . . . . . . . . . . . . . . . . . . . . 5
Bake . . . . . . . . . . . . . . . . . . . . . . . . . . . . . . . . . . . . . . . . . . . . . . . . . . . . . 5
Toast. . . . . . . . . . . . . . . . . . . . . . . . . . . . . . . . . . . . . . . . . . . . . . . . . . . . . 5
Cleaning and Maintenance . . . . . . . . . . . . . . . . . . . . . . . . . . . . . . . . . . . 6
Oven Rack Positions . . . . . . . . . . . . . . . . . . . . . . . . . . . . . . . . . . . . . . . . 6
Recipes. . . . . . . . . . . . . . . . . . . . . . . . . . . . . . . . . . . . . . . . . . . . . . . . . . . 7
Warranty . . . . . . . . . . . . . . . . . . . . . . . . . . . . . . . . . . . . . . . . . . . . . . . . . 22
IMPORTANT SAFEGUARDS
When using an electrical appliance, basic safety precautions should
always be followed, including the following:
1. Read all instructions.
2. Do not touch hot surfaces. Use handles.
3. To protect against electrical shock, do not place any part of the
toaster oven broiler in water or other liquid. See instructions for
cleaning.
4. This appliance should not be used by, on or near children or
individuals with certain disabilities.
5. UNPLUG FROM OUTLET WHEN NOT IN USE AND BEFORE
CLEANING. Allow to cool before cleaning or handling.
6. Do not operate any appliance with a damaged cord or plug or
after the appliance has malfunctioned or has been dropped or
damaged in any way or is not operating properly. Return the
toaster oven broiler to the store or retailer where purchased for
examination, or repair.
7. The use of accessory attachments not recommended by
Cuisinart may cause injury.
8. Do not use outdoors.
9. Do not let cord hang over the edge of the table or countertop
where it could be pulled on inadvertently by children or pets, or
touch hot surfaces, which could damage the cord.
10. Do not place toaster oven broiler on or near a hot gas or electric
burner or in a heated oven.
11. Do not use this toaster oven broiler for anything other than its
intended purpose.
12. Extreme caution should be exercised when using containers
constructed of materials other than metal or glass in the toaster
oven broiler.
2
Page 3

13. To avoid burns, use extreme caution when removing tray or
disposing of hot grease.
14. When not in use, always unplug the unit. Do not store any
materials other than manufacturer’s recommended accessories
in this oven.
15. Do not place any of the following materials in the oven: paper,
cardboard, plastic and similar products.
16. Do not cover crumb tray or any part of the oven with metal foil.
This will cause overheating of the oven.
17. Oversize foods, metal foil packages and utensils must not be
inserted in the toaster oven broiler, as they may involve a risk of
fire or electric shock.
18. A fire may occur if the toaster oven broiler is covered or
touching flammable materials such as curtains, draperies, and
walls, when in operation. Do not store any items on top of the
appliance when in operation. Do not operate under wall
cabinets.
19. Do not clean with metal scouring pads. Pieces can break off the
pad and touch electrical parts, involving a risk of electric shock.
20. Do not attempt to dislodge food when the toaster oven broiler is
plugged into electrical outlet.
21. Warning: To avoid possibility of fire, NEVER leave toaster oven
broiler unattended during use.
22. Use recommended temperature settings for baking and roasting.
23. Do not rest cooking utensils or baking dishes on glass door.
24. Turn the function dial to the off position to turn off toaster oven
broiler.
SAVE THESE INSTRUCTIONS
Please read and keep these instructions handy. These instructions will
help you to use your Cuisinart® Toaster Oven Broiler to its fullest so that
you will achieve consistent, professional results.
SPECIAL CORD SET INSTRUCTIONS
A short power supply cord is provided to reduce the risks resulting from
becoming entangled in or tripping over a longer cord.
Longer extension cords are available and may be used if care is
exercised in their use.
If a long extension cord is used, the marked electrical rating of the
extension cord must be at least as great as the electrical rating of the
appliance, and the longer cord should be arranged so that it will not
drape over the countertop or tabletop where it can be tripped over or
pulled on by children.
NOTICE
This appliance has a polarized plug (one blade is wider than the other).
As a safety feature, this plug will fit in a polarized outlet only one way. If
the plug does not fit fully in the outlet, reverse the plug. If it still does
not fit, contact a qualified electrician. Do not attempt to defeat this
safety feature.
3
Page 4
FOR HOUSEHOLD USE ONLY
NOT INTENDED FOR COMMERCIAL
USE
INTRODUCTION
You’ll love how easily our Cuisinart® Classic Toaster Oven Broiler does
everything from breakfast toast to family meals. Toast 6 slices of bread,
bagels or muffins, or bake or broil a family-sized entrée. This countertop
oven is big enough to handle many of your everyday full-size oven
tasks. We’ve simplified the controls to make the whole process easier
than ever. Check out our recipes in the back of the book, and enjoy!
FEATURES AND BENEFITS
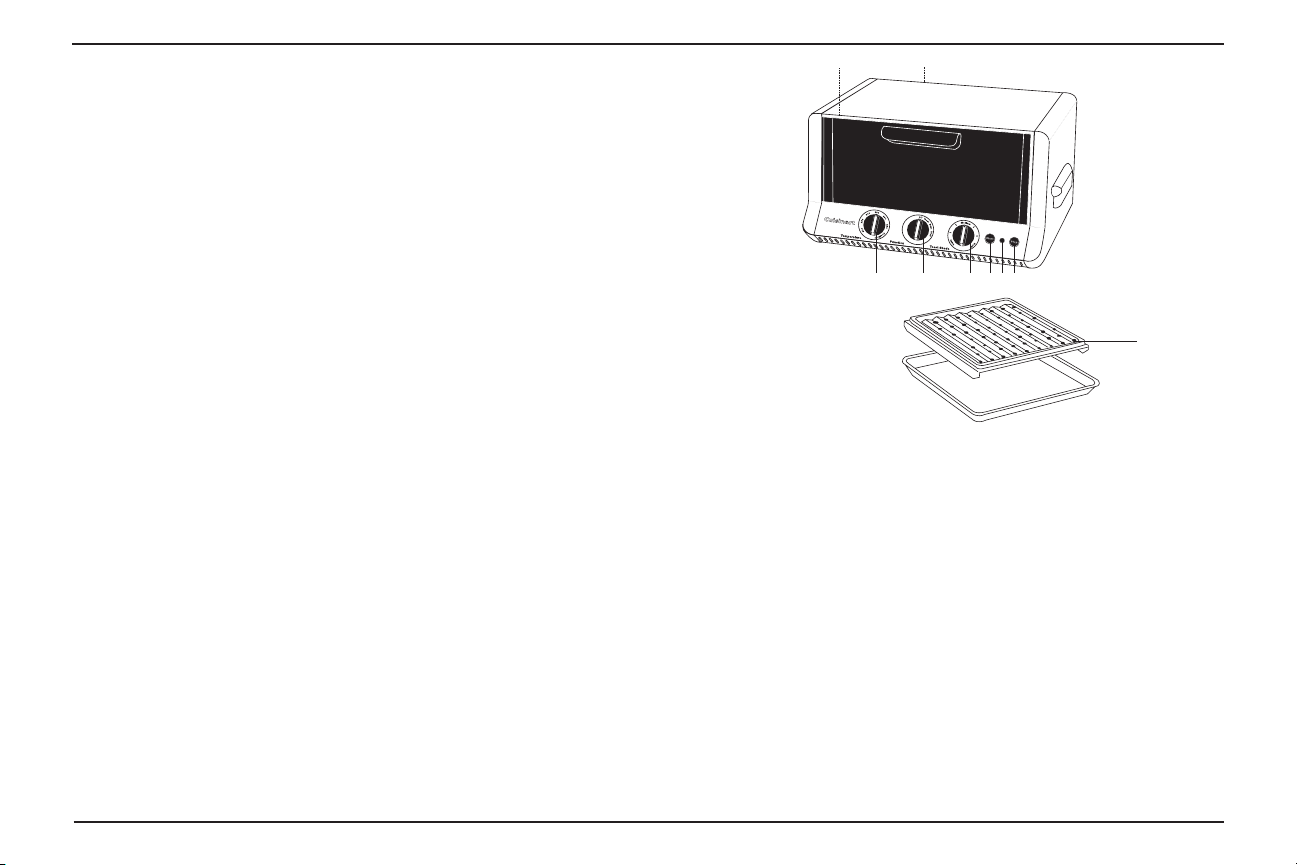
1. Temperature Dial
Select desired temperature for the baking or broiling
function.
2. Function Dial
Select cooking method – bake, broil or toast.
3. Toast Shade Dial
Select the desired toast shade – light, medium or dark.
4. Toasting Start Button
Push button to start toasting function.
5. Toasting Stop Button
Push button to stop toasting in mid-cycle and shut off oven.
6. Oven On Indicator
Indicator light will remain lit when oven is in use.
10 9
1 2 3 4 6 5
Broiling pan & drip tray
11
7. Oven Rack (not shown)
Has two positions. The top position has a 50% stop feature so
the rack stops halfway out of the oven. It can be removed by lifting the front of the rack and sliding it out.
8. Slide-out Crumb Tray (not shown)
Slides out from bottom of the toaster oven broiler for easy
cleaning.
9. Cord Storage
Takes up excess cord and keeps countertop neat.
10. Easy-Clean Interior
The sides of the oven are coated, providing an easy-to-clean
surface.
11. Broiling Pan and Baking Pan/Drip Tray
A pan is included for your convenience. The broiling pan’s has
two positions to accommodate a variety of meats, poultry, and
fish for broiling. The Drip Tray/Baking Pan must be used when
broiling. It can be used alone when baking or roasting.
4
Page 5

BEFORE THE FIRST USE
Place your oven on a flat surface.
Before using your oven, move it two to four inches away from the wall or
from any objects on the countertop. Do not use on heat-sensitive
surface.
DO NOT STORE OBJECTS ON THE TOP OF THE OVEN. IF YOU DO,
REMOVE ALL OBJECTS BEFORE YOU TURN ON YOUR OVEN. THE
EXTERIOR WALLS GET VERY HOT WHEN IN USE. KEEP OUT OF
REACH OF CHILDREN.
GENERAL GUIDELINES
Baking: Baking function can be used as you would normally use your
kitchen oven for roasting meats including chicken, or baking cakes,
cookies and more.
Broiling: Broiling function can be used for beef, chicken, pork, fish and
more. It also can be used to top-brown casseroles and gratins.
Caution: Aluminum foil is not recommended for covering the drip tray.
Foil is extremely dangerous when broiling fatty foods. Grease will
accumulate and may catch fire. The use of foil is not recommended, but
if foil is used to cover broiling pan, be sure foil is tucked neatly around
the pan and does not touch the walls or heating rods. Never cover
crumb tray.
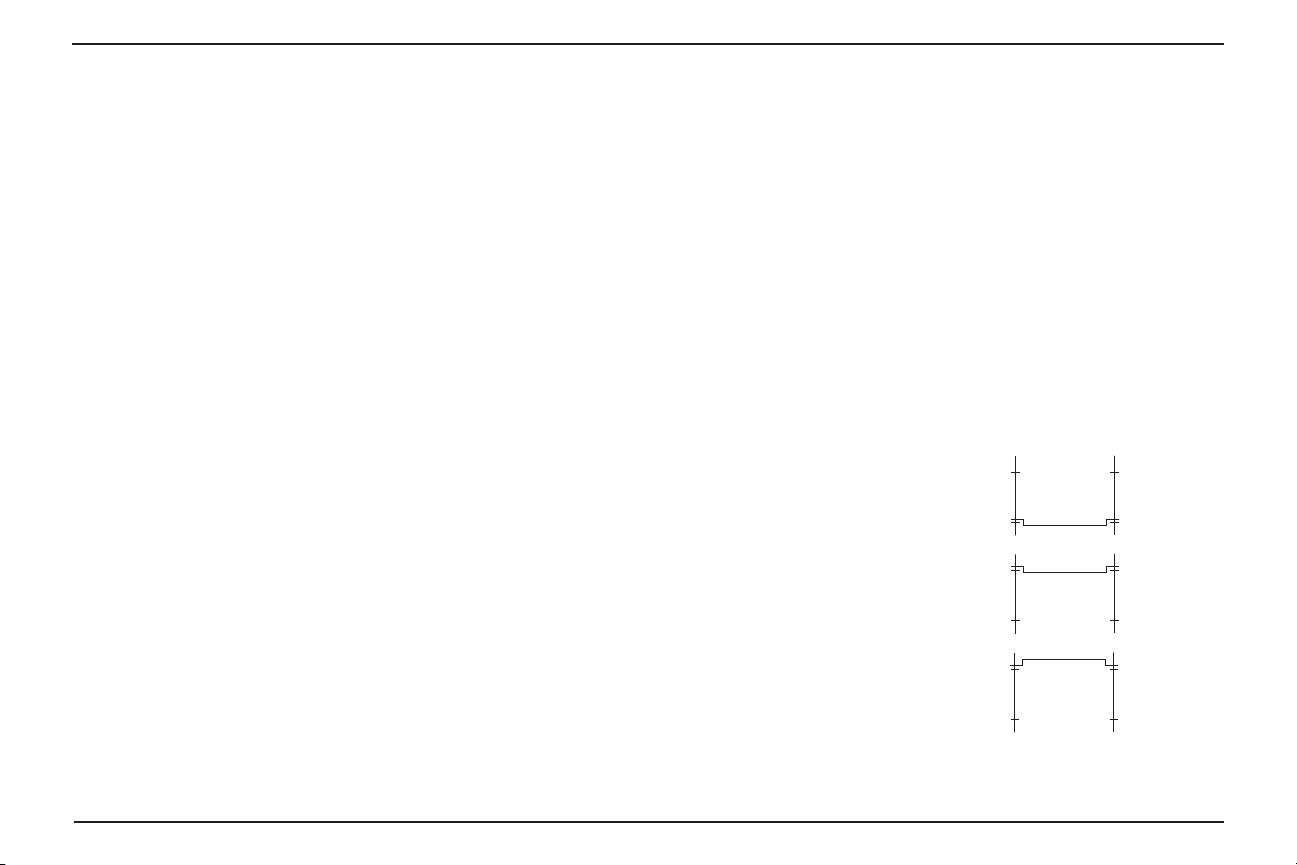
Toasting: Always have the rack in rack position B, as indicated in the
diagram on page 6, for even toasting. Always center your item/items in
the middle of the rack.
WARNING: Placing the rack in the bottom position or in the top position
with the rack upwards while toasting may result in a fire. Refer to rack
position diagram for proper use.
Turning off the toaster oven broiler: Turn the function dial to off position.
The indicator will turn off.
USE AND CARE
Unwind the power cord. Check that the crumb tray is in place and that
there is nothing in the oven. Plug power cord into the wall outlet.
Broil
When broiling, add approximately ¼ cup water to the bottom of the
broiling pan to reduce sizzling and splattering. Place the broiling pan in
the drip tray. Note: There are two positions for the broiling pan so that a
variety of thicknesses of foods can be broiled. Also, the oven rack can
be turned up or down depending on the thickness of the food being
broiled. In most cases the oven rack should be in the higher position
(position C – see rack position diagram on page 6).
To broil, set temperature and function dials to broil. Preheat oven for
five minutes with door closed. After the five-minute preheat period,
place the broiling pan in the oven. Always leave door ajar when broiling.
Caution: Never use glass oven dishes to broil.
To stop broil operation, turn function dial to off position.
Bake
To bake, turn the temperature dial to the desired temperature and turn
function dial to bake position. Make sure oven rack is in position A –
see rack position diagram on page 6. The oven indicator light will turn
on. Preheat oven for five to ten minutes (time will vary depending upon
desired temperature); then begin to bake.
Toast
To toast, make sure the oven rack is in rack position B, as indicated in
the diagram on page 6. If toasting two items, center them in the middle
of the rack. Four items should be evenly spaced – two in front, two in
back. Six items should be evenly spaced – three in front, three in back.
Close the glass door.
Set function dial to toast. Turn toast shade dial to desired browning
setting. Press Start button to begin toasting.
5
Page 6
When the toasting cycle is finished, the oven will beep 5 times and turn
off. If you wish to stop the toasting cycle before it is finished, simply
press the Stop button. The toaster oven broiler will cancel your toast
cycle.
Important: The oven rack must be in rack position B as indicated in the
diagram on this page.
CLEANING AND MAINTENANCE
Always allow the oven to cool completely before cleaning.
1. Always unplug the oven from the electrical outlet.
2. Do not use abrasive cleansers, as they will damage the finish.
Simply wipe the exterior with a clean damp cloth and dry
thoroughly. Apply the cleansing agent to a cloth, not to the
toaster oven, before cleaning.
3. To clean interior walls, use a damp cloth and a mild liquid soap
solution or a spray solution on a sponge. Never use harsh
abrasives or corrosive products. These could damage the oven
surface. Never use metal scouring pads, etc. on interior of oven.
4. To remove crumbs, slide out the crumb tray and discard crumbs.
Wipe clean and replace. Crumb tray is dishwasher-safe. To
remove baked-on grease, soak the tray in hot sudsy water or
use nonabrasive cleaners. Never operate the oven without the
crumb tray in place.
5. Wire rack, broiling pan and drip tray are dishwasher-safe. If
heavily soiled, soak in hot sudsy water or use a nylon scouring
pad or nylon brush.
6. Never wrap the cord around the outside of the oven. Use the
cord storage cleats on the back of the oven.
IMPORTANT
After cooking greasy foods and after your oven has cooled, always
clean top interior of oven. If this is done on a regular basis, your oven
will perform like new. Removing the grease will help to keep toasting
consistent, cycle after cycle.
All of our recipes have been tested in our kitchen and specially
developed to work in the Cuisinart® Classic Toaster Oven Broiler. These
mouth-watering recipes are just a sampling of what the Cuisinart®
Classic Toaster Oven Broiler can do.
Oven rack positions
Each recipe gives you step-by-step
directions and will even tell you
where the oven rack should be
positioned for best results.
Please refer to the diagram for oven
rack positions. Each position is
described with a letter that is referred
to in the recipe.
Rack Position
A
Rack Position
B
Rack Position
C
6
Page 7

RECIPES
Jammy Muffins
Get your ingredients all ready to mix the night before – combine dry
ingredients and cover; combine egg, milk, yogurt and vanilla; cover and
refrigerate. In the morning mix and bake for fresh warm muffins.
Makes 6 regular muffins
1½ teaspoons + 3 tablespoons granulated sugar
½ teaspoon ground cinnamon
cooking spray
1 cup unbleached all-purpose flour
1¼ teaspoons baking powder
¼ teaspoon baking soda
¹⁄8 teaspoon salt
1 large egg
¼ cup lowfat milk
2 tablespoons plain lowfat yogurt
¼ teaspoon vanilla extract
4 teaspoons jam or marmalade (not jelly)
Place the rack in position A, preheat toaster oven to 400°F. Combine 1½
teaspoons granulated sugar with cinnamon and reserve. Lightly coat a
standard 6-cup muffin tin with cooking spray.
Place flour, 3 tablespoons granulated sugar, baking powder, baking
soda, and salt in a medium bowl. Stir to blend. Place egg in a small
bowl and stir until smooth. Add milk and yogurt to beaten egg and stir
until smooth, then stir in vanilla. Add the liquid mixture to the dry
ingredients and whisk until just smooth – do not overmix – the muffins
can become tough and rubbery. Divide the batter evenly among the
prepared muffin cups. Top each in the center with about ¾ teaspoon
jam or marmalade. Sprinkle muffins with the sugar/cinnamon mixture.
Bake in toaster oven for 18 to 20 minutes, rotating the muffin tin after
approximately 9 minutes. Turn out onto a rack and cool for at least
5 to 10 minutes (the jam will be hot enough to burn) before serving.
Nutritional information per muffin:
Calories 138 (9% from fat) • carb. 28g • pro. 4g • fat 1g • sat. fat 0g
• chol. 36mg • sod. 196mg • calc. 46mg • fiber 1g
Parmesan Chive Corn Muffins
These muffins are delicious served warm from the oven with soups or
stews.
Makes six 2½-inch muffins
cooking spray
½ cup all-purpose flour
½ cup yellow cornmeal
2 tablespoons firmly packed brown sugar
1 teaspoon cream of tartar
¼ teaspoon baking soda
¹⁄8 teaspoon salt
1 large egg, lightly beaten
½ cup milk (can use whole, 2%, 1% or nonfat)
2 tablespoons unsalted butter, melted and cooled
¼ cup freshly grated Parmesan
1 tablespoon chopped fresh chives
Place the rack in Position A, and preheat toaster oven to 400ºF. Lightly
coat a standard 6-cup muffin tin with cooking spray.
7
Page 8

In a small mixing bowl, combine the flour, cornmeal, brown sugar,
cream of tartar, baking soda and salt; stir to combine and completely
break up any lumps in the brown sugar.
In a 1-cup glass measure combine the egg, milk and melted cooled
butter. Add the liquid ingredients, the grated Parmesan and the chives
all at once to the dry ingredients. Stir until just moistened. Fill the
prepared muffin cups with the batter.
Bake in the preheated 400ºF oven for about 20 minutes, until lightly
browned. Remove from pan and serve warm.
For plain corn muffins, follow the recipe, omitting the Parmesan and
chives.
Nutritional information per muffin (made with 2% milk):
Calories 166 (36% from fat) • carb. 22g • pro. 5g • fat 7g • sat. fat 4g
• chol. 50g • sod. 259g • calc. 86mg • fiber 1g
wheel, cut the sheet in half crosswise, then cut each piece into eight
strips, 6 x ½ inches each. Twist each strip 3 to 4 times; pinch ends to
seal. Place on a tray and refrigerate for at least 30 minutes.
Ten minutes before baking, place the rack in position B; preheat the
toaster oven to 425ºF. Line the broiler pan (without drip tray) with a
sheet of parchment paper.
Arrange 8 puff pastry twists evenly on the parchment-lined pan. Bake
for 11 to 13 minutes at 425º F until puffed and crispy. Remove from the
pan with tongs or a spatula and place on a rack to cool. Arrange the
second batch on the same pan and repeat. Serve slightly warm or at
room temperature.
Nutritional information per twist:
Calories 84 (51% from fat) • carb. 9g • pro. 2g • fat 5g • sat. fat 1g
• chol. 0 mg • sod. 66mg • calc. 8mg • fiber 0g
Pesto Cheese Twists
Serve these an appetizer, or with soup in place of crackers.
Makes sixteen 5-inch twists
1 sheet puff pastry, thawed at room temperature for
20 to 30 minutes
1 tablespoon prepared pesto
1 tablespoon grated Parmesan or Asiago
1 egg white, beaten until foamy
On a lightly floured surface, roll the thawed puff pastry until it
measures 10 x 12 inches; use a pastry wheel to cut the puff pastry in
half crosswise. Combine the pesto, grated cheese and half the beaten
egg white (discard the remaining egg white). Spread the pesto mixture
over one of the half-sheets using an offset spatula; top with the second
half-sheet. Use a rolling pin to lightly roll together. With the pastry
8
Quick Cheese Nachos
Homemade nachos make a great quick snack or appetizer.
Serve with sour cream, guacamole and your favorite salsa.
Makes 2 servings
15 full-sized baked tortilla chips (about 2¼ ounces)
²⁄3 cup refried beans
¼ cup jalapeño pepper slices, drained
¼ cup chopped scallions
¼ cup sliced black olives, drained
1 cup shredded extra-sharp Cheddar
(can use lowfat)
Place rack in position A and preheat on broil setting. Arrange chips in
11x7-inch baking pan that has been lined with foil. Distribute the
remaining ingredients over the chips, as evenly as possible in the order
Page 9

listed, ending with the shredded cheese. Place in the oven and broil
until cheese is bubbly, about 4 minutes. Serve immediately.
Nutritional information per serving (made with lowfat cheese):
Calories 543 (40% from fat) • carb. 43g • pro. 39g • fat 25g • sat. fat 1g
• chol. 60mg • sod. 1560mg • calc. 910mg • fiber 4g
Melted Cheese Sandwiches
The next two sandwiches are classic toaster-oven fare, quick and easy
hot sandwiches for any time of day or night.
parsley, green onion, mayonnaise and half the cheese. Stir gently to
combine.
Divide crab mixture evenly among the four toasted English muffin
halves and spread evenly. Sprinkle each with ¼ of the remaining
cheese. Arrange the sandwiches on the prepared baking tray. Broil on
rack position B until golden, toasty, hot, and cheese is melted, about 4
to 5 minutes.
Nutritional information per serving (one open-faced sandwich):
Calories 355 (42% from fat) • carb. 33g • pro. 29g • fat 16g • sat. fat 2g
• chol. 102mg • sod. 808mg • calc. 360mg • fiber 2g
Toasted Crab & Cheddar Melts
A classic open-faced toasted sandwich. Serve with a green salad for
supper, or for Sunday brunch.
Makes 4 open-faced sandwiches
2 sandwich-size English muffins, split
12 ounces lump crab meat, drained
½ cup finely chopped celery
¹⁄3 cup chopped fresh parsley
2 tablespoons finely chopped green onion
½ cup lowfat mayonnaise
1 cup shredded sharp Cheddar (can use lowfat)
Toast English muffin in toaster oven on light setting; let cool completely.
Line the baking pan with foil; preheat toaster oven on broil setting.
Pick crab over carefully to remove shell and cartilage bits, taking care
not to break up large lumps, and place in a medium bowl. Add celery,
Hot Smoked Turkey & Havarti
Sandwiches with Avocado
Makes 4 open-faced sandwiches
4 slices good quality whole wheat or pumpernickel bread
(about 5 x 3½ x ½ inches)
6 tablespoons lowfat mayonnaise
1 tablespoon Dijon-style mustard
1 tablespoon chopped fresh parsley
1½ teaspoons tarragon
¹⁄8 teaspoon freshly ground pepper
12 ounces thinly sliced smoked turkey
12-16 thin slices Italian tomato (slice, then place on layered
paper towels to drain)
6 ounces sliced Havarti (can also use Cheddar,
Swiss, provolone, Gouda)
1 avocado (ripe but firm), peeled and sliced
9
Page 10

Toast bread on medium setting (or to taste). Reserve.
Preheat toaster oven to 400°F. Line baking pan with foil. In small bowl,
combine mayonnaise, mustard, parsley, tarragon, and pepper; mix well.
Spread mayonnaise mixture on one side of each slice of toasted bread.
Top each evenly with one quarter of the smoked turkey, one quarter of
the sliced tomatoes, and one quarter of the cheese. Place on foil-lined
baking pan, evenly spaced in position B. Place in toaster oven and bake
until cheese is bubbly and browned, about 4 to 6 minutes. Garnish with
sliced avocado and serve hot.
Nutritional information per serving (one open-faced sandwich):
Calories 493 (55% from fat) • carb. 25g • pro. 19g • fat 29g • sat. fat 13g
• chol. 92mg • sod. 1329mg • calc. 258mg • fiber 6g
Soy Glazed Salmon with Dijon-Dill Sauce
The Dijon-dill sauce may be made ahead if you are entertaining.
Place the yogurt, mustard, olive oil, shallot, dill weed, sugar, ½
teaspoon salt, and 1⁄4 teaspoon pepper in a medium bowl. Stir with a
whisk to blend. Let stand 30 minutes or longer to allow flavors to
develop. The sauce may be done up to a day ahead. Makes about 1¼
cups sauce.
Brush the salmon fillets with the soy sauce and sprinkle with the
remaining salt and pepper. Let sit for 15 minutes at room temperature.
Place the rack in the toaster oven in position B and preheat on the broil
setting. Place the drip pan in the broiling pan so that the fish will be
about 1½ to 2 inches from the upper element. Lightly coat the broiler
pan rack with cooking spray and add ¼ cup of water to the drip pan.
Arrange the salmon fillets skin down on the prepared pan. Place in the
oven in position B and broil with the oven door ajar for 14 to 18 minutes;
salmon should test 145°–150ºF when tested with an instant-read
thermometer. Serve hot or chilled with the Dijon-dill sauce.
*For a thicker sauce, strain the yogurt for 1 hour or longer using a
yogurt strainer or a strainer lined with a coffee filter; discard the whey
(liquid).
**For a richer sauce, use lowfat sour cream.
Makes 4 servings
²⁄3 cup nonfat plain yogurt* or lowfat sour cream**
½ cup grainy Dijon-style mustard
2 tablespoons extra virgin olive oil
1 small shallot (½ ounce), peeled and finely chopped
¾ ounce fresh dill weed, finely chopped
2 teaspoons sugar
1 teaspoon kosher salt, divided
½ teaspoon freshly ground black pepper
4 6-ounce portions salmon fillet, skin on
1 tablespoon soy sauce
10
Nutritional information per serving (sauce made with nonfat yogurt):
Calories 321 (36% from fat) • carb. 14g • pro. 36g • fat 13g • sat. fat 2g
• chol. 89mg • sod. 1448mg • calc. 86mg • fiber 0g
Page 11

Oven Baked Scampi
Serve over linguine cooked al dente, or with crusty bread to dip in the
sauce.
Makes 2 to 3 servings
1 pound large (21-30 count) shrimp
2 tablespoons unsalted butter, melted
2 tablespoons extra virgin olive oil
2 tablespoons finely minced shallot
1-2 cloves garlic, peeled and finely minced
1 teaspoon herbes de Provence or Italian herb blend
½ teaspoon dry mustard
¼ teaspoon kosher salt
¹⁄8 teaspoon freshly ground black pepper
¼ cup dry vermouth
¹⁄3 cup fresh bread crumbs
2 tablespoons chopped fresh Italian parsley
1 tablespoon freshly squeezed lemon juice
lemon wedges
Peel shrimp, leaving tail on. De-vein and partially butterfly; reserve.
Preheat toaster oven to 425°F.
Combine melted butter, olive oil, shallot, garlic, herbes de Provence, dry
mustard, salt, and pepper. Spread half of this mixture in a 1¼-quart
ovenproof oval dish. Arrange shrimp evenly over the butter/oil mixture.
Pour the vermouth and the remaining butter/oil mixture over the shrimp.
Place in rack position B. Bake for 8 to 9 minutes. Remove from oven,
stir gently to loosen – shrimp should be beginning to curl and be
somewhat opaque and “shrimp” in color. Sprinkle evenly with
breadcrumbs and half the chopped parsley. Return to the oven for an
additional 3 to 4 minutes.
Remove from oven, drizzle with lemon juice and sprinkle with remaining
chopped parsley. Serve with additional lemon wedges.
Nutritional information per serving (3 servings):
Calories 366 (47% from fat) • carb. 11g • pro. 34g • fat 19g • sat. fat 6g
• chol. 316mg • sod. 526mg • calc. 96mg • fiber 1g
Mushroom Meatloaf
This meatloaf makes out-of-this-world sandwiches the next day (if there
is any left)!
Makes 6 servings (12 slices)
cooking spray
½ tablespoon extra virgin olive oil
4 ounces mushrooms, thinly sliced or finely chopped
1 carrot, peeled and finely chopped
1 large celery stalk, finely chopped
1 medium onion, finely chopped
1 clove garlic, finely minced
1 teaspoon thyme
2 slices firm white bread, torn into pieces
½ cup milk (can use whole, 2%, 1% or nonfat milk)
1 large egg
¾ pound ground veal
¾ pound lean ground pork or dark-meat turkey
1 teaspoon kosher salt
½ teaspoon freshly ground black pepper
11
Page 12

Place the rack in position A and preheat toaster oven to 350º F. Lightly
coat a 6-cup loaf pan (8½ x 4½ x 2½ inches) with cooking spray. Heat
the oil in a 10-inch skillet over medium heat. Add the mushrooms,
carrot, celery, onion and garlic. Cook until tender, 4 to 5 minutes. Add
the thyme and cook for 1 minute. Remove from the heat, transfer to a
shallow bowl and let cool completely.
Place the torn bread in a large bowl. Stir in the milk and egg and let
stand for 2 to 3 minutes. Add the cooled cooked vegetable mixture, the
ground meat, salt and pepper; mix well to combine. Pack mixture into
the prepared loaf pan. Bake for 1¼ hours. Allow the meatloaf to rest in
the pan for 10 minutes. Drain excess fat if necessary, turn the loaf out of
the pan and slice to serve.
Nutritional information per serving (2 slices; made with 1% milk):
Calories 312 (54% from fat) • carb. 11g • pro. 24g • fat 19g • sat. fat 7g
• chol. 124g • sod. 329mg • calc. 60mg • fiber 1g
Broiled Hamburgers or Cheeseburgers
Makes 4 burgers
cooking spray
24 ounces lean ground sirloin or ground round
kosher salt and freshly ground pepper to taste
4 slices cheese (Cheddar, Swiss), optional
Preheat toaster oven on broil setting. Line the baking pan with
aluminum foil, and insert baking/broiling rack. Lightly coat the broiling
rack into rack position B with cooking spray.
Divide meat into four 6-ounce portions and shape into 4-inch burgers.
Lightly season with kosher salt and freshly ground pepper on both
sides. Arrange the burgers, evenly spaced, on the rack and broil to
taste*, about 4 to 8 minutes per side. For cheeseburgers, top with sliced
cheese one minute before second side is done. Serve hot on toasted
bun, roll, or English muffin with desired condiments and
accompaniments such as lettuce, sliced tomato, onion, etc.
*Times will be dependent on temperature and thickness of meat. Test
with an instant-read thermometer.
Rare: 120°-125°F (red center)
Medium-Rare: 125°-140°F (pink center)
Medium: 145°-155°F (gray-barely pink center)
Well Done: 160°F (gray)
Nutritional information per serving (one hamburger):
Calories 325 (15% from fat) • carb. 0g • pro. 50g • fat 12g • sat. fat 4g
• chol. 133mg • sod. 109mg • calc. 9mg • fiber 0g
Spicy London Broil
This dry rub has bold, spicy flavors – not overbearing, but not for the
faint-hearted. If you prefer milder flavors, cut back on the cayenne just a
bit.
Makes 4 to 6 servings
1½ teaspoons ground cumin
1½ teaspoons sugar
1½ teaspoons kosher salt
1¼ teaspoons thyme
1 teaspoon freshly ground black pepper
¼-½ teaspoon cayenne
1½ pounds top round London broil, about 1¼ inches thick
cooking spray
12
Page 13

In a small bowl, combine the cumin, sugar, salt, thyme, pepper and
cayenne; blend. Rub the spice mixture evenly on the meat. Place on a
non-metallic plate, cover with plastic wrap and refrigerate until 20
minutes before cooking. The spice rub may be put on the meat up to 24
hours before cooking. The longer it is on the meat, the more intense the
flavor will be.
Place the rack in position B and preheat toaster oven on broil setting,
keeping door ajar. Put ¼ cup of water in the bottom of the drip tray;
position the drip tray so that the meat will be about 1 inch from the
upper element. Lightly coat the broiling rack with cooking spray and
arrange the meat on it. Broil with the door ajar for 16 to 20 minutes; turn
the London broil halfway through cooking time, until meat is done to
desired taste*. Let stand for 10 minutes before carving to allow the
juices to set; the meat will continue to cook during this time. Test for
appropriate doneness with an instant-read thermometer. After the meat
has rested, slice across the grain in very thin slices to serve.
*Times will be dependent on temperature and thickness of meat.
Test with an instant-read thermometer.
Rare: 120°-125°F (red center)
Medium-Rare: 125°-140°F (pink center)
Medium: 145°-155°F (gray-barely pink center)
Well-Done: 160°F (gray)
Nutritional information per serving (based on 6 servings):
Calories 211 (48% from fat) • carb. 1g • pro. 25g • fat 11g • sat. fat 4g
• chol. 67mg • sod. 392mg • calc. 12mg • fiber 0g
Teriyaki Glazed Chicken Breasts
Make the teriyaki marinade ahead and have it on hand. Serve with rice
and steamed fresh vegetables.
Makes 4 servings
½ cup soy sauce (can use low sodium)
¼ cup rice wine vinegar
3 tablespoons dry sherry or mirin
1½ tablespoons finely chopped fresh ginger
3 tablespoons brown sugar
4 boneless, skinless chicken breast halves,
about 6 to 8 ounces each
In a 1-quart nonreactive saucepan, combine the soy, rice wine vinegar,
sherry, ginger, and brown sugar. Bring to a boil, then reduce the heat
and simmer for 15 minutes. Strain, discard the solids, and let cool
completely.
Rinse the chicken and pat dry. Place the chicken between two sheets of
plastic wrap and pound to an even thickness of ½ inch with a flat
mallet. Put the flattened chicken breasts in a resealable plastic bag and
pour half the teriyaki marinade over them. Press the air out and let
marinate for 15 minutes at room temperature. Reserve and refrigerate
the remaining marinade in a glass storage jar (it will keep refrigerated
for up to 2 weeks).
Place the rack in position C and preheat toaster oven on broil setting,
keeping door ajar. Place the drip tray in the broiling pan so that the
flattened chicken breast halves will be about 1 inch from the upper
element. Add ¼ cup of water to the drip tray and arrange the chicken
“skin” side down on the broiling rack. Broil with the door ajar, about 6 to
8 minutes. Turn chicken and continue cooking until juices run clear,
about 6 to 8 minutes longer. (Internal temperature of chicken should be
170ºF.)
13
Page 14

Nutritional information per serving:
Calories 348 (8% from fat) • carb. 20g • pro. 55g • fat 3g • sat. fat 1g
• chol. 132mg • sod. 2870mg • calc. 49mg • fiber 0g
Lemon Thyme Roast Chicken
Roast a succulent chicken without turning on the large oven.
to roast for another 20 to 25 minutes. (Internal temperature of the
chicken should be 170ºF when tested in the breast, and 180ºF when
tested in the dark meat; juices should run clear.)
Turn off oven and remove the chicken to a platter. Let stand 10 to 15
minutes before carving. Cover loosely with foil if desired (but skin will
lose its crispness).
*You can use other herbs such as basil, marjoram, oregano, or
rosemary.
Makes 2 servings
cooking spray
½ small broiler/fryer chicken, about 1½ to 2 pounds
(no larger)
1 tablespoon extra virgin olive oil
1 tablespoon freshly squeezed lemon juice
½ teaspoon dry thyme*
½ teaspoon kosher salt
¼ teaspoon freshly ground black pepper
1 4-inch sprig fresh thyme*
1 clove garlic, peeled and cut in half
1 small onion (about 2 ounces), peeled and quartered
4 strips lemon zest, 3x½ inches each
Place the rack in position A and preheat toaster oven to 400ºF. Rinse
chicken with cold water and pat dry. Place the broiling pan in the drip
tray in the lower rack position A; add ¼ cup water to the pan and lightly
coat the broiling rack with cooking spray.
Rub chicken skin with olive oil and lemon juice. Combine the thyme, salt
and pepper. Rub half the mixture in the cavity of the chicken and half on
the skin of the chicken. Place the thyme sprig, garlic halves, onion
quarters and lemon zest on the prepared pan. Arrange the seasoned
chicken on top of the vegetables and herbs, place in toaster oven and
roast for 20 minutes, then lower the temperature to 350ºF and continue
14
Nutritional information per serving:
Calories 576 (66% from fat) • carb. 4g • pro. 44g • fat 42g • sat. fat 11g
• chol. 174mg • sod. 664mg • calc. 39mg • fiber 1g
Chicken, Vegetable & White Bean Burritos
Makes 4 servings
cooking spray or olive oil from pan
2 teaspoons good quality olive oil
2 cups shredded zucchini
8 green onions, trimmed and chopped
¼ cup chopped flat parsley or cilantro
1 can (15-ounce) white beans, drained, rinsed and drained
again
¼ teaspoon kosher salt
2 cups shredded cooked chicken
1 tomato (6 ounces), cored, seeded and chopped
1 jalapeño pepper, seeded and chopped
2 tablespoons fresh lime juice
8 ounces shredded low-fat Cheddar or Monterey Jack,
about 2 cups
Page 15

4 9-inch flour tortillas (can use flavored such as sun-dried
tomato)
guacamole, sour cream and salsa for garnish
Place the rack in position B and preheat toaster oven to 350ºF. Spray a
7x11-inch baking dish with cooking spray, or coat with olive oil.
In a medium nonstick skillet, heat half the olive oil over medium heat.
Add the shredded zucchini and cook until lightly browned, tender and
no longer watery, about 8 to 10 minutes. Stir in one quarter of the green
onions and half the chopped parsley/cilantro. Remove and reserve.
Heat remaining oil in the pan over medium heat. Add a third of the
remaining green onions, the remaining chopped parsley, drained white
beans and salt to the pan. Cook for 2 to 3 minutes. Use the back of a
wooden spoon or a potato masher to mash the beans (the beans
should be just partially mashed), and cook until heated through, about 3
to 4 minutes. Transfer to a bowl and let cool. Place the shredded
chicken in a medium bowl. Stir in the chopped tomato, chopped
jalapeño, lime juice, half the cheese and half of the remaining green
onions.
Spread one quarter of the bean mixture in a line just below the center of
each tortilla. Top each with one quarter of the cooled zucchini and one
quarter of the chicken mixture. Sprinkle each with 2 tablespoons of the
remaining cheese. Roll the burritos and place them seam side down in
the prepared baking dish. Cover with a sheet of foil that has been
sprayed with cooking spray; bake for 15 minutes. Remove the foil and
sprinkle evenly with the remaining cheese and chopped green onions.
Continue to bake until the cheese is melted, about 12 to 15 minutes
longer. Serve with guacamole, salsa and sour cream for garnish.
Nutritional information per burrito:
Calories 529 (31% from fat) • carb. 38g • pro. 55g • fat 19g • sat. fat 2g
• chol. 114mg • sod. 997mg • calc. 513mg • fiber 6g
Oven Roasted BBQ Baby Back Ribs
Makes 2 to 4 servings
cooking spray
2 racks pork baby back ribs, about 8 ribs each
(1¾ to 2 pounds total)
½ teaspoon kosher salt
½ teaspoon dried minced onion
½ teaspoon thyme
¼ teaspoon granulated garlic
¼ teaspoon paprika
¼ teaspoon freshly ground black pepper
barbecue sauce, homemade or purchased
Place the rack in position A and preheat toaster oven to 375°F.
Place roasting rack in baking pan. Lightly coat with cooking spray.
Remove “paper” skin from underside of ribs. Combine salt, minced
onion, thyme, garlic, paprika, and black pepper. Rub evenly over both
sides of each rack of ribs. Arrange ribs on prepared roasting rack.
Cover loosely with foil and bake for 50 to 60 minutes.
Remove ribs from oven. Increase oven temperature to 450°F. Turn ribs
over and brush with half the BBQ sauce. Roast for 12 to 15 minutes.
Turn, coat top of ribs with sauce and roast for an additional 12 to 15
minutes. Remove from oven and let rest for 10 minutes. Cut into
individual ribs and serve. You can heat additional sauce to serve with
ribs.
Nutritional information per serving, without barbecue sauce:
Calories 549 (71% from fat) • carb. 1g • pro. 39g • fat 42g • sat. fat 15g
• chol. 156mg • sod. 299mg •calc. 66mg • fiber 0g
15
Page 16

Asian 5-Spice Pork Tenderloin
Makes 4 to 6 servings
2 tablespoons light soy sauce
2 tablespoons brown sugar
1 tablespoon hoisin sauce
1 tablespoon dry sherry or mirin
1 tablespoon minced fresh ginger
1 tablespoon minced green onion
2 teaspoons Asian toasted sesame oil*
1-2 cloves garlic, peeled and minced
½ teaspoon 5-spice powder*
½ teaspoon kosher salt
1 pork tenderloin, about 1¼ to 1½ pounds
½ cup chicken stock
Combine the soy sauce, brown sugar, hoisin sauce, sherry, ginger,
green onion, sesame oil, garlic, 5-spice powder and salt in a resealable
freezer-weight bag and stir. Trim any excess fat and silver skin from the
pork tenderloin. Place the pork tenderloin in the marinade for 30
minutes at room temperature or up to 8 hours in the refrigerator.
Place the rack in position A and preheat toaster oven to 450°F. Line the
baking pan with foil; then place the roasting rack in the pan.
Remove tenderloin from marinade, allowing excess to drain off. Place
excess marinade in a small saucepan with the chicken stock. Turn the
narrow end of the tenderloin under and attach with a toothpick or
skewer so that the tenderloin is an even thickness.
Roast the tenderloin for 15 to 18 minutes, turning after 9 minutes. While
the pork is roasting, heat the reserved marinade until it bubbles for 5
minutes; lower heat and cook until reduced by half and thickened – this
can be served as a sauce for the pork. When pork has reached an
internal temperature of 150°F when tested with an instant-read
thermometer, remove it from oven. Cover loosely and let rest for 10 to
15 minutes before slicing. Slice the tenderloin crosswise into thin slices
and serve with sauce.
*Can be found in most well-stocked grocery stores or in any Asian
grocery store.
Nutritional information per serving (6 servings):
Calories 166 (29% from fat) • carb. 6g • pro. 22g • fat 5g • sat. fat 1g
• chol. 58mg • sod. 706mg • calc. 17mg • fiber 0g
Baked Potatoes
Why turn on the big oven just to bake potatoes when the toaster oven
does such a good job?
Makes 4 servings
4 Idaho or russet potatoes, about 8-11ounces each
1 teaspoon extra virgin olive oil
Place the rack in position B and preheat the toaster oven to 400ºF.
Scrub the potatoes thoroughly and dry. Lightly rub each potato with ¼
teaspoon of the olive oil. Use a fork to prick potatoes about 6 to 8
times. Place directly on the rack and bake until soft and easily pierced
with a knife, about 55 to 60 minutes. Remove from the oven.
To serve, pinch open the top, fluff the interior with a fork and serve
topped with butter, extra virgin olive oil, margarine, or sour cream, as
desired. Add kosher or sea salt and freshly ground pepper to taste.
Variation: Substitute sweet potatoes or yams for baking potatoes.
Nutritional information per serving (8-oz. potato):
Calories 167 (1% from fat) • carb. 36g • pro. 4g • fat 1g • sat. fat 0g
• chol. 0mg • sod. 12mg • calc. 14mg • fiber 5g
16
Page 17

Twice Baked Sour Cream
& Chive Potatoes
Herb Roasted Sweet Potato Wedges
Sweet potatoes are one of the most nutritious vegetables – and they are
delicious when roasted with olive oil and herbs.
Makes 4 servings
4 Idaho or russet potatoes, about 7-8 ounces each
¹⁄3 cup lowfat milk
1 tablespoon + 1 teaspoon unsalted butter
½ cup sour cream or lowfat sour cream
¼ teaspoon kosher salt
¼ teaspoon freshly ground pepper (black or white)
3 tablespoons + 1 tablespoon chopped fresh chives
Prepare and bake potatoes as in Baked Potatoes (previous recipe), but
do not pinch open – just slit slightly with a knife to allow steam to vent.
When cool enough to handle, cut off top quarter of each potato and
scoop out cooked potato, leaving a ¼-inch-thick potato shell. Reserve
cooked potato and skin shells. Using rack position B, preheat toaster
oven to 375°F.
Place cooked potato in a medium bowl. Add milk and 1 tablespoon
butter. Using a potato masher or hand mixer, mash/beat until smooth.
Add sour cream, salt, pepper, and 3 tablespoons chives. Mash/beat to
combine completely. Generously fill the potato shells with sour cream
and chive potato mixture. (Potatoes may be prepared a day ahead to
this point – cover and refrigerate.) Arrange potatoes on baking tray (can
line with a sheet of aluminum foil). Melt remaining teaspoon of butter
and drizzle on potatoes. Bake for 35 to 45 minutes (add 5 to 10 minutes
to baking time if potatoes were prepared ahead and refrigerated), until
potatoes are hot and golden on the tops. Sprinkle hot potatoes with
remaining tablespoon of chopped chives to serve.
Nutritional information per serving (8-ounce potato):
Calories 263 (35% from fat) • carb. 38g • pro. 6g • fat 10g • sat. fat 6g
• chol. 25mg • sod. 121mg • calc. 76mg • fiber 3g
Makes 2 to 4 side dish servings
cooking spray
2 sweet potatoes, about 1 pound total
1 tablespoon extra virgin olive oil
½ teaspoon dry herbs (thyme, rosemary, basil, oregano,
savory)
½ teaspoon kosher salt
Using rack position A, preheat toaster oven to 425°F. Line the baking
pan with aluminum foil. Lightly coat with cooking spray.
Scrub the sweet potatoes and trim as necessary; do not peel. Cut each
potato in half lengthwise. Cut each half into four equal wedges. Toss
potato wedges in olive oil, herbs and salt. Arrange on prepared pan and
bake for 20 to 25 minutes until potato wedges are tender, browned and
crispy. Serve hot.
Note: You may also prepare this recipe using russet potatoes, new red
or white potatoes, or Yukon Gold potatoes. Cooking times will vary
depending on potato used.
Nutritional information per serving (4 servings):
Calories 162 (19% from fat) • carb. 31mg • pro. 2g • fat 5g • sat. fat 0g
• chol. 0mg • sod. 176mg • calc. 20mg • fiber 4g
17
Page 18

Savory Fontina &
Prosciutto Bread Pudding
A great side dish, brunch dish, or even supper when served with a
green salad.
of aluminum foil with cooking spray and cover dish loosely, sprayed
side down.
Using rack position A, preheat toaster oven to 375°F. Bake covered
bread pudding for 50 to 55 minutes. Uncover and bake for an additional
15 minutes. Let rest 10 minutes before serving.
Makes 6 to 8 servings
cooking spray
1 teaspoon extra virgin olive oil
1 cup chopped onion
6 slices prosciutto, cut into slivers
½ teaspoon Italian herbs or herbes de Provence
4 cups bread cubes (½-inch) from crusty French or Italian
bread
1 cup (4 ounces) shredded fontina cheese
2 tablespoons freshly grated Reggiano Parmigiano
4 large eggs (can use egg substitute)
2 cups fat-free evaporated milk (can use half-and-half)
½ teaspoon (or to taste) Tabasco® or other hot sauce
Lightly coat an 8-cup (8-inch square, round or oval gratin) ovenproof
ceramic dish with cooking spray. Heat olive oil in a 10-inch non-stick
skillet over medium heat and add chopped onion and prosciutto to pan.
Cook, stirring, over medium heat until onion is translucent and
prosciutto just begins to curl. Stir in herbs and let cool.
Place bread cubes in a medium bowl with cheeses. Stir to combine.
Add cooled onion mixture and combine. Transfer to the prepared
baking dish. In the bowl, whisk the eggs until smooth. Add the
evaporated milk and whisk until blended. Add hot sauce and blend.
Slowly pour over bread mixture. Press mixture lightly with the back of a
spoon and allow to rest for at least 1 hour before baking (can be
prepared several hours ahead or the night before). Lightly coat a sheet
Nutritional information per serving (based on 8 servings):
Calories 480 (28% from fat) • carb. 60g • pro. 26g • fat 15g • sat. fat 7g
• chol. 149mg • sod. 512mg • calc. 389mg • fiber 2g
Tomato-Potato Gratin
A slight change from traditional potatoes au gratin, these are excellent
served with grilled swordfish or steak.
Makes 6 servings
1½ tablespoons extra virgin olive oil
2 medium onions, cut into thin slices
(can use 3-mm slicing disc of Cuisinart® food processor)
1½ cups chopped plum tomatoes (3-4 tomatoes, cored and
seeded)
¾ teaspoon kosher salt
1 teaspoon fresh rosemary (½ teaspoon dried), chopped
½ teaspoon fresh thyme (¼ teaspoon dried), chopped
¼ teaspoon freshly ground black pepper
¹⁄3 cup grated Parmesan or Asiago
1½ pounds baking potatoes, scrubbed, peeled if desired, cut
into ¹⁄8 -inch slices (can use 3 or 4mm slicing disc of the
Cuisinart food processor)
18
Page 19

Place the rack in position B and preheat toaster oven to 400ºF. Brush
an 8x11-inch oval or 8x8-inch square baking dish with olive oil.
In a 12-inch nonstick fry pan, heat the 1½ tablespoons olive oil over
moderately low heat. Add the onions and cook, stirring occasionally,
until they are translucent, about 5 minutes. Remove from the heat and
stir in the chopped plum tomatoes and ¼ teaspoon of the salt.
In a small bowl, combine the rosemary, thyme, remaining salt, pepper
and cheese. Spread half the tomato/onion mixture in the prepared
baking dish. Layer half the potato slices evenly on top. Sprinkle with
half the herb and Parmesan mixture. Repeat. Cover with aluminum foil
and bake for 40 to 45 minutes, until potatoes are tender when tested
with a fork. When tender, remove the foil and bake for an additional 15
to 20 minutes, until the potatoes are golden.
Nutritional information per serving:
Calories 167 (27% from fat) • carb. 26g • pro. 5g • fat 5g • sat. fat 1g
• chol. 4mg • sod. 273mg • calc. 90mg • fiber 3g
¼ teaspoon freshly ground pepper
¼ cup freshly grated Reggiano Parmasiano
Preheat the toaster oven to 350ºF.
Trim the ends of the zucchini. Cut into ¼-inch-thick slices. Cut the
tomatoes into ¼-inch-thick slices. (This can be done using a Cuisinart®
food processor and the 6mm slicing disc.) Stack the basil, roll, then cut
into very thin strips with a sharp knife to produce a shred. Set aside.
Rub the garlic clove over the bottom of an 8x8-inch glass or ceramic
baking dish, and discard the garlic. Brush with 1 teaspoon of the olive
oil.
Arrange the zucchini and tomato slices in a single layer, overlapping
them tightly. Season with the salt and pepper. Scatter the shredded
basil evenly over the zucchini and tomatoes. Drizzle with the remaining
olive oil, then sprinkle evenly with the grated cheese.
Bake for 25 to 30 minutes, until the zucchini is tender. Serve hot or at
room temperature.
Summertime Zucchini,
Tomato & Basil Bake
While this side dish is best in the summer with garden fresh vegetables,
our markets make it easy to get these ingredients all year ’round.
Makes 4 servings
2 medium green zucchini, each 1½ inches in diameter
6 ripe plum tomatoes
10 large fresh basil leaves
1 large clove garlic, peeled and halved
1 tablespoon extra virgin olive oil
½ teaspoon kosher salt
Nutritional information per serving:
Calories 89 (52% from fat) • carb. 7g • pro. 4g • fat 6g • sat. fat 2g
• chol. 5mg • sod. 286mg • calc. 96mg • fiber 3g
19
Page 20

Orzo-Stuffed Squash
This is a perfect complement to grilled meats or seafood, or a delicious
vegetarian entrée.
Makes 4 servings
cooking spray
4 medium yellow squash (6-8 ounces each)
2 teaspoons + 1 teaspoon extra virgin olive oil
1 clove garlic, chopped
½ cup minced red onion
½ cup finely chopped red bell pepper
1 teaspoon basil
1 cup cooked orzo, pastina, or rice
1 tablespoon chopped flat parsley
½ teaspoon kosher salt
¼ teaspoon freshly ground black pepper
3 ounces shredded sharp Cheddar
(can use reduced fat)
Steam squash for 12 to 15 minutes until crisp-tender. When cool
enough to handle, cut a lengthwise strip from the top of each squash
and reserve; scoop out the pulp from the lids and the shells, discarding
the seeds and leaving ¼-inch-thick shells. Invert the shells on a cooling
rack over a towel and let drain for 30 minutes. Chop the squash lids and
reserve.
Melt 2 teaspoons olive oil in a 10-inch nonstick skillet over medium
heat. Add the chopped garlic, onion and pepper and cook until tender,
3 to 5 minutes. Stir in the reserved chopped basil, chopped squash,
orzo or rice, parsley, salt and pepper. Remove from the heat and let
cool for 5 minutes. Stir in the shredded cheese. Rub each squash shell
with ¼ teaspoon extra virgin oil. Stuff the squash shells generously with
the orzo/vegetable mixture. The recipe may be done ahead to this point,
covered and refrigerated.
Place the rack in position A and preheat toaster oven to 400ºF. Lightly
coat an 11x7-inch baking dish with cooking spray. Arrange the stuffed
squash in the baking dish. Bake until the squash are golden brown and
heated through, 20 to 25 minutes. Serve hot.
Nutritional information per serving:
Calories 185 (36% from fat) • carb. 21g • pro. 9g • fat 8g • sat. fat 1g
• chol. 11mg • sod. 274mg • calc. 205mg • fiber 5g
Cranberry Ginger Apple Crisp
An old favorite with a twist – dried cranberries and bits of crystallized
ginger.
Makes 8 servings
cooking spray
1 cup rolled oats
½ cup brown sugar, packed
¹⁄3 cup all-purpose flour
1 teaspoon cinnamon
¼ teaspoon salt
6 tablespoons unsalted butter, melted (¾ stick)
1½ pounds tart apples, peeled, cored, quartered
and cut into ¼-inch slices*
1 tablespoon freshly squeezed lemon juice
½ cup dried cranberries
2 tablespoons chopped crystallized ginger
½ cup granulated sugar
2 tablespoons honey
1 teaspoon vanilla
20
Page 21

Place the rack in position A and preheat the toaster oven to 350ºF.
Lightly coat an 8x8-inch (6-cup) glass or ceramic baking dish with
cooking spray.
In a medium bowl, combine the rolled oats with the brown sugar, flour,
cinnamon and salt. Add the melted butter and stir until the mixture is
evenly moistened. Use your fingers to pinch the mixture into large
crumbs.
In a medium bowl, toss the sliced apples with the lemon juice,
cranberries, chopped ginger, granulated sugar, honey, and vanilla.
Spoon the apple mixture evenly in the prepared baking dish. Sprinkle
evenly with the reserved crumb mixture.
Bake for 40 to 45 minutes, until the apples are tender and the filling is
bubbling. Let rest for 20 to 30 minutes before serving. Serve warm or at
room temperature with vanilla ice cream or frozen yogurt, or freshly
whipped cream.
*For ease in slicing, use the Cuisinart® food processor fitted with the
4mm slicing disc.
Nutritional information per serving:
Calories 334 (27% from fat) • carb. 57g • pro. 2g • fat 9g • sat. fat 6g
• chol. 23mg • sod. 82mg • calc. 36mg • fiber 4g
¹⁄3 cup unsweetened cocoa
½ teaspoon salt
2 teaspoons vanilla extract
¾ cup semisweet chocolate chips
1 cup coarsely chopped pecans or walnuts
Place the rack in position A and preheat the toaster oven to 350ºF.
Lightly coat a 9-inch pie tin with cooking spray.
Beat the eggs in a medium bowl until frothy. Stir in the sugars, beat until
smooth. Stir in the melted butter. Add the flour, cocoa and salt; stir to
combine. Add the vanilla, chocolate chips and nuts; stir. Pour into the
prepared pan.
Bake for 22 to 25 minutes, until just barely set (pie will not test done in
the center – do not overbake). Remove from the oven and let cool
completely on a rack before cutting. If you wish to serve it warm, let it
cool to set, then re-warm gently for about 10 to 5 minutes at 200ºF. Cut
into wedges and serve. Very good when topped with ice cream or
frozen yogurt, and a drizzle of fudge or chocolate sauce.
Variation: Substitute milk chocolate, white chocolate, peanut butter or
butterscotch chips for the chocolate chips; substitute other nuts such
as peanuts, hazelnuts or almonds.
Chocolate Chip Brownie Pie
This old favorite is pure comfort food.
Serves 8 to 10
cooking spray
2 large eggs
½ cup granulated sugar
½ cup packed light brown sugar
½ cup unsalted butter, melted (1 stick)
½ cup all-purpose flour
Nutritional information per serving (based on 10 servings):
Calories 3681 (53% from fat) • carb. 39g • pro. 6g • fat 22g • sat. fat 9g
• chol. 67mg • sod. 136mg • calc. 30mg • fiber 3g
21
Page 22

Raspberry Almond Oat Bars
Makes 16 bars
cooking spray
1 cup rolled oats
1 cup all-purpose flour
²⁄3 cup packed light brown sugar
¼ teaspoon baking soda
¼ teaspoon salt
1½ teaspoons vanilla
½ cup unsalted butter, cut into ½-inch pieces
¼ cup chopped almonds
1 jar (10-ounce) raspberry preserves (about 1 cup)
Place the rack in position B and preheat the toaster oven to 325ºF.
Lightly spray a 7x11-inch baking pan with cooking spray.
Place oats, flour, brown sugar, baking soda and salt in a medium bowl
and stir to blend. Add vanilla and butter, and using a pastry blender or
two forks, cut butter into dry ingredients until the mixture is evenly
moist and crumbly. Remove ½ cup of the mixture. Stir chopped nuts
into one of the half cups of the crumb mixture and reserve for topping.
Press the oatmeal mixture without the nuts evenly into the prepared
baking pan. Spread the raspberry preserves over the top. Sprinkle with
the reserved oat/nut mixture. Bake for 20 to 25 minutes, or until golden.
Let cool completely in the baking pan set on a wire rack. Cut into bars.
Nutritional information per bar:
Calories 199 (32% from fat) • carb. 32g • pro. 2g • fat 7g • sat. fat 4g
• chol. 16mg • sod. 60mg • calc. 18mg • fiber 1g
WARRANTY
LIMITED THREE-YEAR WARRANTY
This warranty supersedes all previous warranties on the Cuisinart®
Classic Toaster Oven Broiler.
This warranty is available to consumers only. You are a consumer if you
own a Cuisinart® Classic Toaster Oven Broiler that was purchased at
retail for personal, family or household use. Except as otherwise
required under applicable state law, this warranty is not available to
retailers or other commercial purchasers or owners.
We warrant that your Cuisinart® Classic Toaster Oven Broiler will be free
of defects in material or workmanship under normal home use for three
years from the date of original purchase.
We suggest that you complete and return the enclosed product
registration card promptly to facilitate verification of the date of original
purchase.
However, return of the product registration is not a condition of these
warranties.
If your Cuisinart® Classic Toaster Oven Broiler should prove to be
defective within the warranty period, we will repair it, or if we think
necessary, replace it. To obtain warranty service, please call our
Consumer Service Center toll-free at 1-800-726-0190 or write to:
Cuisinart
150 Milford Road
East Windsor, NJ 08520
To facilitate the speed and accuracy of your return, please also enclose
$10.00 for shipping and handling of the product (California residents
need only supply proof of purchase and should call 1-800-726-0190 for
shipping instructions). Please also be sure to include a return address,
description of the product defect, product serial number, and any other
22
Page 23

information pertinent to the product’s return. Please pay by check or
money order.
NOTE: For added protection and secure handling of any Cuisinart®
product that is being returned, we recommend you use a traceable,
insured delivery service. Cuisinart cannot be held responsible for intransit damage or for packages that are not delivered to us. Lost and/or
damaged products are not covered under warranty.
Your Cuisinart® Classic Toaster Oven Broiler has been manufactured to
strict specifications and has been designed for use with the Cuisinart®
Classic Toaster Oven Broiler accessories and replacement parts. These
warranties expressly exclude any defects or damages caused by
accessories, replacement parts or repair service other than those that
have been authorized by Cuisinart.
These warranties do not cover any damage caused by accident,
misuse, shipment or other than ordinary household use.
These warranties exclude all incidental or consequential damages.
Some states do not allow the exclusion of or limitation of incidental or
consequential damages, so the foregoing limitation may not apply to
you.
CALIFORNIA RESIDENTS ONLY
California law provides that for In-Warranty Service, California residents
have the option of returning a nonconforming product (A) to the store
where it was purchased or (B) to another retail store which sells
Cuisinart® products of the same type. The retail store shall then,
according to its preference, either repair the product, refer the
consumer to an independent repair facility, replace the product, or
refund the purchase price less the amount directly attributable to the
consumer’s prior usage of the product. If the above two options do not
result in the appropriate relief to the consumer, the consumer may then
take the product to an independent repair facility if service or repair can
be economically accomplished. Cuisinart and not the consumer will be
responsible for the reasonable cost of such service, repair,
replacement, or refund for nonconforming products under warranty.
California residents may also, according to their preference, return
nonconforming products directly to Cuisinart for repair or, if necessary,
replacement by calling our Consumer Service Center toll-free at 800726-0190. Cuisinart will be responsible for the cost of the repair,
replacement, and shipping and handling for such nonconforming
products under warranty.
BEFORE RETURNING YOUR CUISINART® PRODUCT
Important: If the nonconforming product is to be serviced by someone
other than Cuisinart’s Authorized Service Center, please remind the
servicer to call our Consumer Service Center to ensure that the problem
is properly diagnosed, the product serviced with the correct parts, and
to ensure that the product is still under warranty.
23
Page 24
Coffeemakers
Food
Processors
Cuisinart offers an extensive assortment of top quality products to make life in the
kitchen easier than ever. Try some of our other countertop appliances and
cookware, and Savor the Good Life®.
Any other trademarks or service marks referred to herein are
the trademarks or service marks of their respective owners.
Wafflemakers Toasters
www.cuisinart.com
Cookware
Hand
Blenders
©2007 Cuisinart
Cuisinart® is a registered
trademark of Cuisinart
150 Milford Road
East Windsor, NJ 08520
Printed in China
07CU26014
Page 25
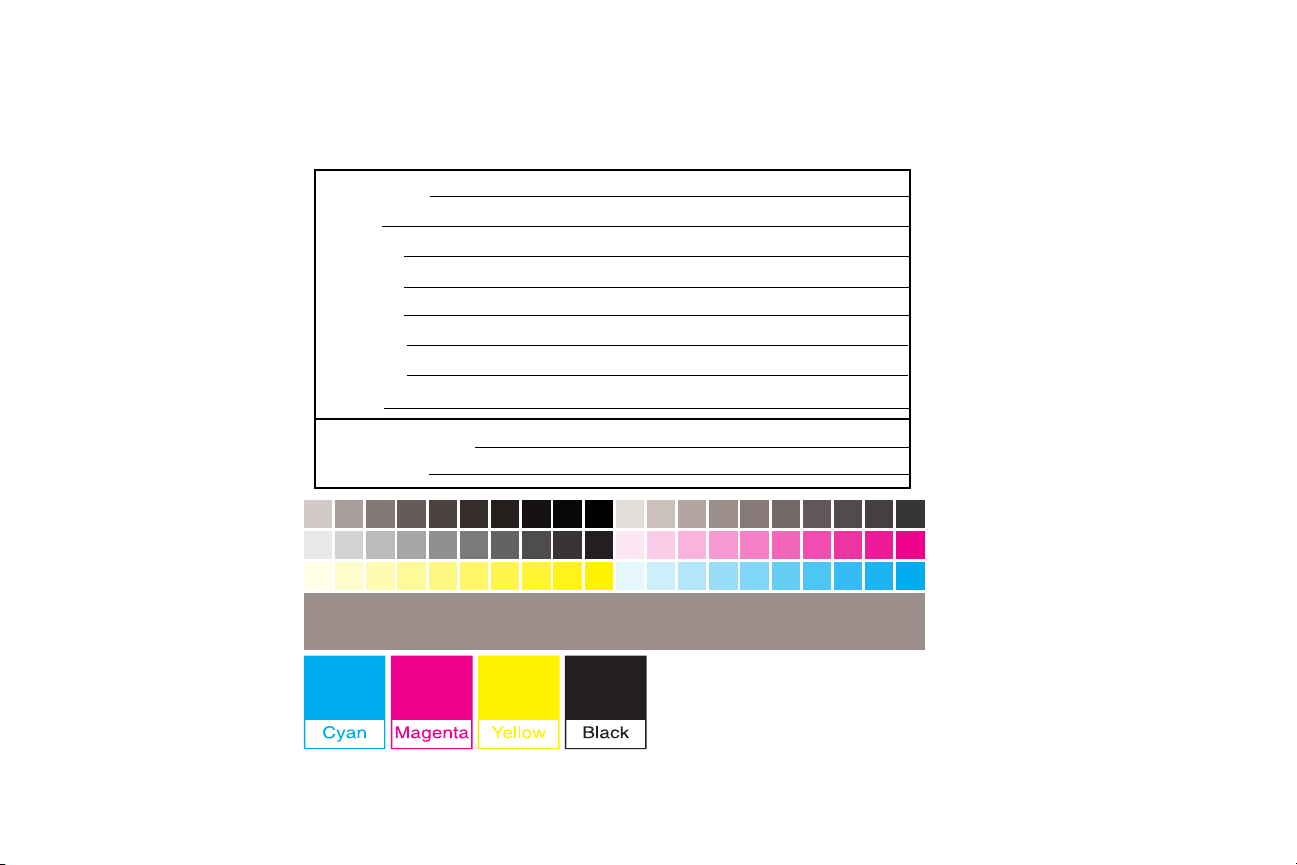
Version no.:
Siz
e : 229MM(W)X152MM(H) (Saddle Stitched 24PP)
Material:
Coating:
IB-7332
COVER:157GSM MATT ARTPAPER
INSERT:120GSM GLOSS ARTPAPER
VARNSHING IN COVER
Color: COVER:{4C(CMYK)+1C(BK)}
INSIDE:{1C(BK)+1C(BK)}
Date:
JAN-16-2007
Co-ordinator: ASTOR
Hugo Descr
iption :
TOB50BC IB-7332(1,0) BOOK
Hugo code : GEW0574IB-1-1
OPERATOR:YAN
 Loading...