


Cuisinart Mini-Prep DLC-1, DLC-1BCH, DLC-1SS, DLC-1SSW - Mini-Prep Processor Instruction And Recipe Booklet

DLC-1
INSTRUCTION AND
RECIPE BOOKLET


appliance malfunctions, or is dropped or
damaged in any manner. Return the
appliance to the nearest authorized
Cuisinart
®
Service Facility for
examination, repair, electrical or
mechanical adjustment.
7. The use of attachments not
recommended or sold by Cuisinart
may cause fire, electric shock or injury.
8. Do not let cord hang over edge of table
or counter, or touch hot surfaces.
9. Do not use outdoors.
10. Keep hands and utensils away from
moving blade while processing food
to reduce the risk of severe injury to
persons, or damage to the food
processor. A scraper may be used,
but must be used only when the
food processor is not running.
11. Blade is sharp. Handle carefully when
removing, inserting or cleaning.
12. To reduce the risk of injury, never place
cutting blade on base without first
putting prep bowl properly in place.
13. Be certain cover is securely locked in
place before operating appliance. Do not
attempt to remove cover until blade has
stopped rotating.
14. Do not attempt to defeat the cover
interlock mechanism.
15. Check prep bowl for presence of foreign
objects before using.
SAVE THESE
INSTRUCTIONS
NOTICE
This appliance has a polarized plug
(one blade is wider than the other).
As a safety feature, this plug will fit in a
polarized outlet only one way. If the plug
does not fit fully in the outlet, reverse the
plug. If it still does not fit, contact a
qualified electrician. Do not attempt to
defeat this safety feature.
INTRODUCTION
The Cuisinart®Mini-Prep®Processor
handles a variety of food preparation
tasks including chopping, grinding,
puréeing, emulsifying and blending.
The patented two-position blade
provides a super-sharp edge for the
delicate chopping of herbs, and for
blending and puréeing other soft foods,
while the blunt edge offers a powerful
cutting surface to grind through coffee
beans, spices and other hard foods.
Two operating speeds with pulse
activation give maximum control for
precision processing.
A powerful high-speed motor works
hard and fast to accomplish any small
job with ease. Chop herbs, onions,
garlic; grind coffee beans, spices,
hard cheese; purée baby foods; blend
mayonnaise and flavored butters all
with the same compact appliance.
The Mini- Prep
®
takes up a minimum
of counter space and stores neatly on
the countertop or in a cabinet.
1
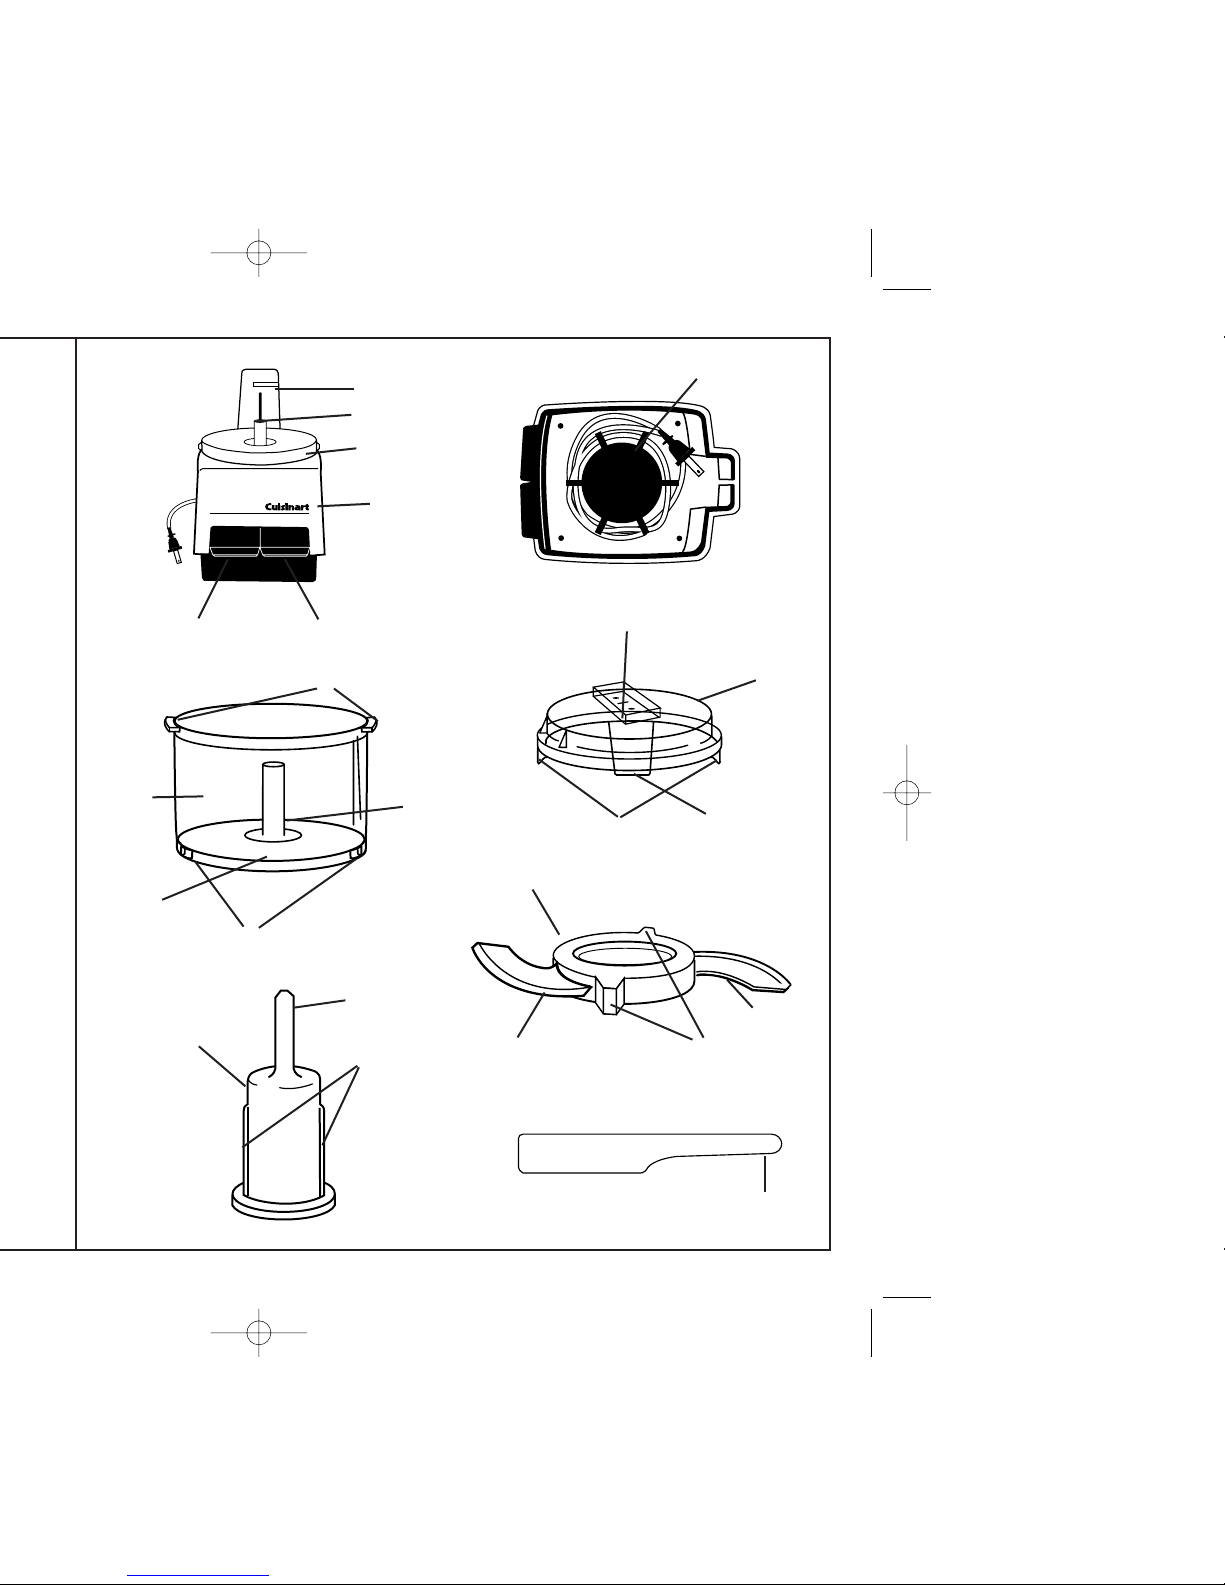
MINI PREP PROCESSOR
LO
HI
F
B
E
L
J
K
H
A
D
Q
M
R
U
T
P
N
Z
C
G
I
X
Y
V
W
HOLDING RIBS (grips) ONLY. DO NOT
TOUCH THE RAZOR-SHARP BLADES.
Note these important features of the
Blade Assembly.
• The Assembly can be placed over
the Sheath in two different ways.
If you hold it this way (A), you will
see the word "Sharp" on the blade.
Assemble the blade this side up to use
the sharp edge. (See the section on
processing food for information about
when to use the sharp edge.)
If you hold it this way (B), you will see
no writing on the blade. Assemble the
blade this side up to use the blunt edge.
(See the section on processing food
for infor-mation about when to use the
blunt edge.)
• There are notches (C) on opposite
sides of the interior of the hub.
These
fit over ridges on the sides of
the Sheath.
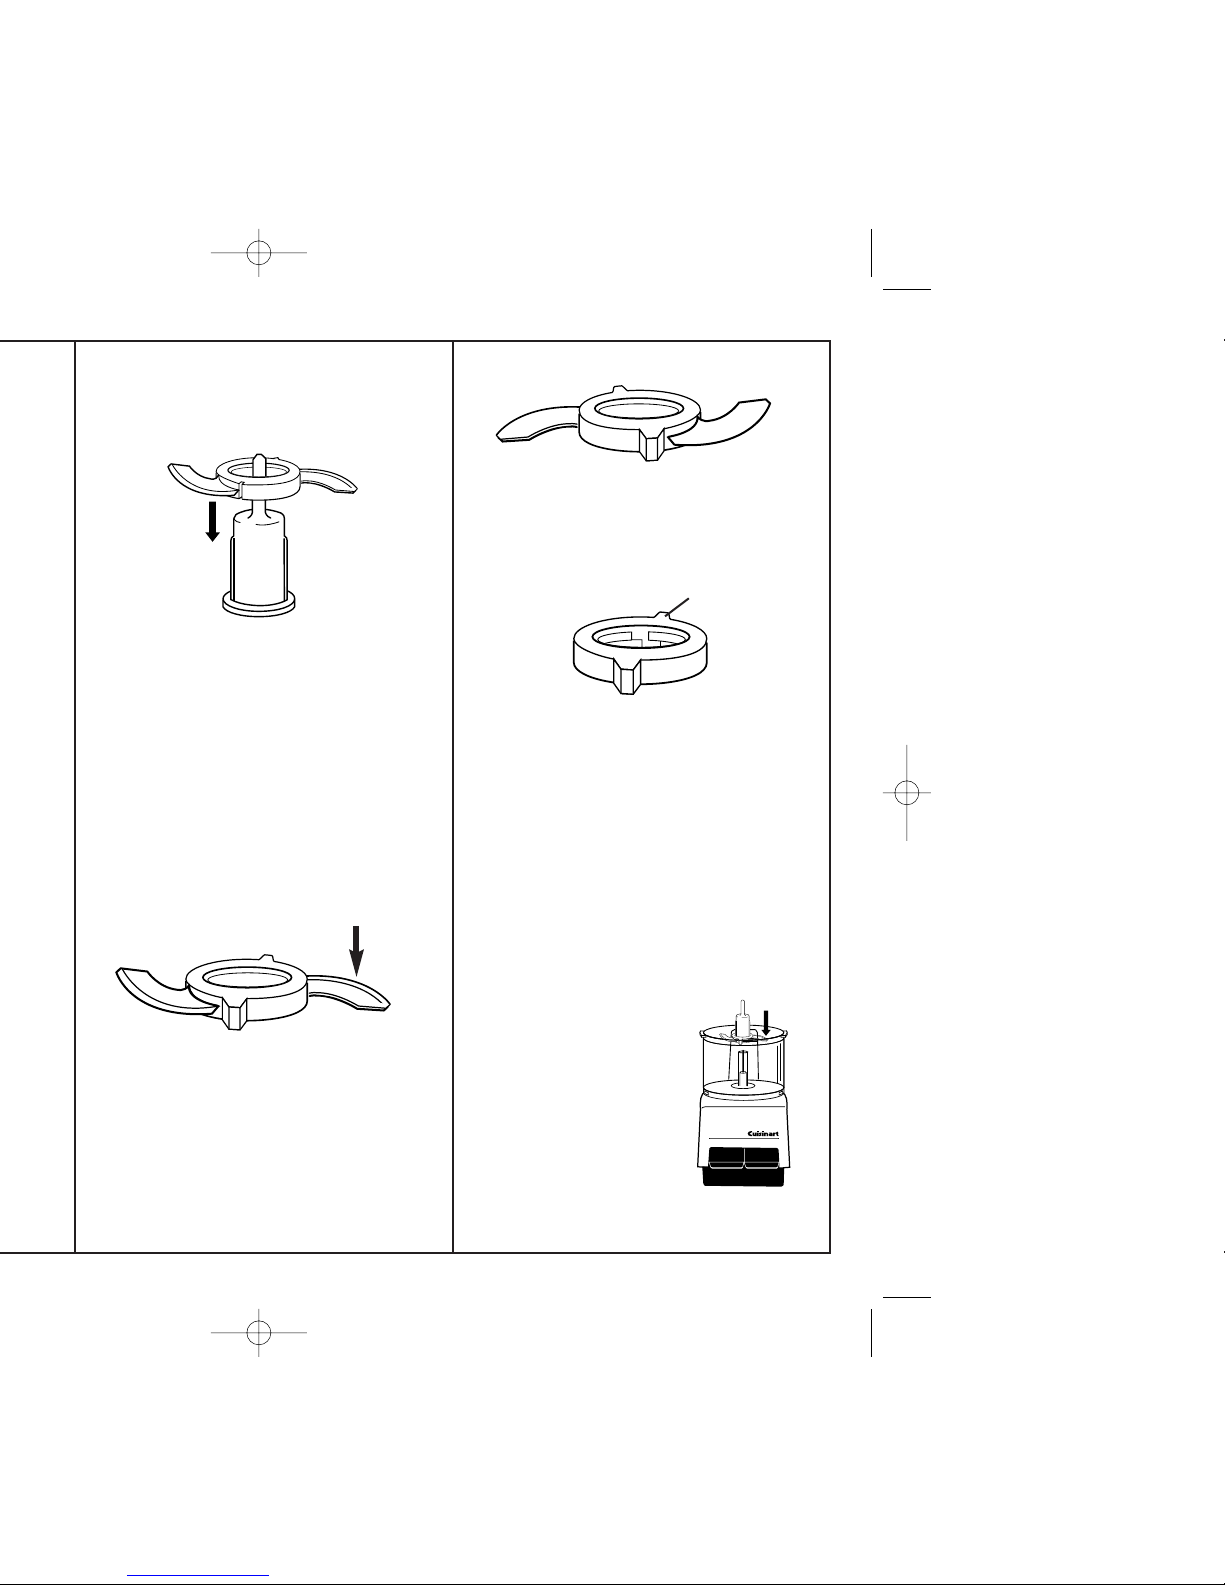
Place the Sheath, handle side up,
on a flat surface. Pick up the Blade
Assembly by its hub holding ribs (grips)
and line up the notches in the interior of
the hub with the ridges on the sides of
the Sheath. Let the Blade Assembly
slide down to the bottom of the Sheath.
Lift the Sheath by its handle. Hold the
Blade Assembly by its hub holding
ribs (grips) and turn it very slightly
clockwise. This locks it in place on
the Sheath and prevents it from
sliding up during processing.
4. Hold the Sheath by
its top handle, place
it over the central
opening of the Bowl,
and slide the Sheath
down over the motor
shaft. The lower blade
on the Blade Assembly
3
A.
SHARP SIDE
B.
BLUNT SIDE UP
C.
Notch
MINI PREP PROCESSOR
LO
HI