

Page 1

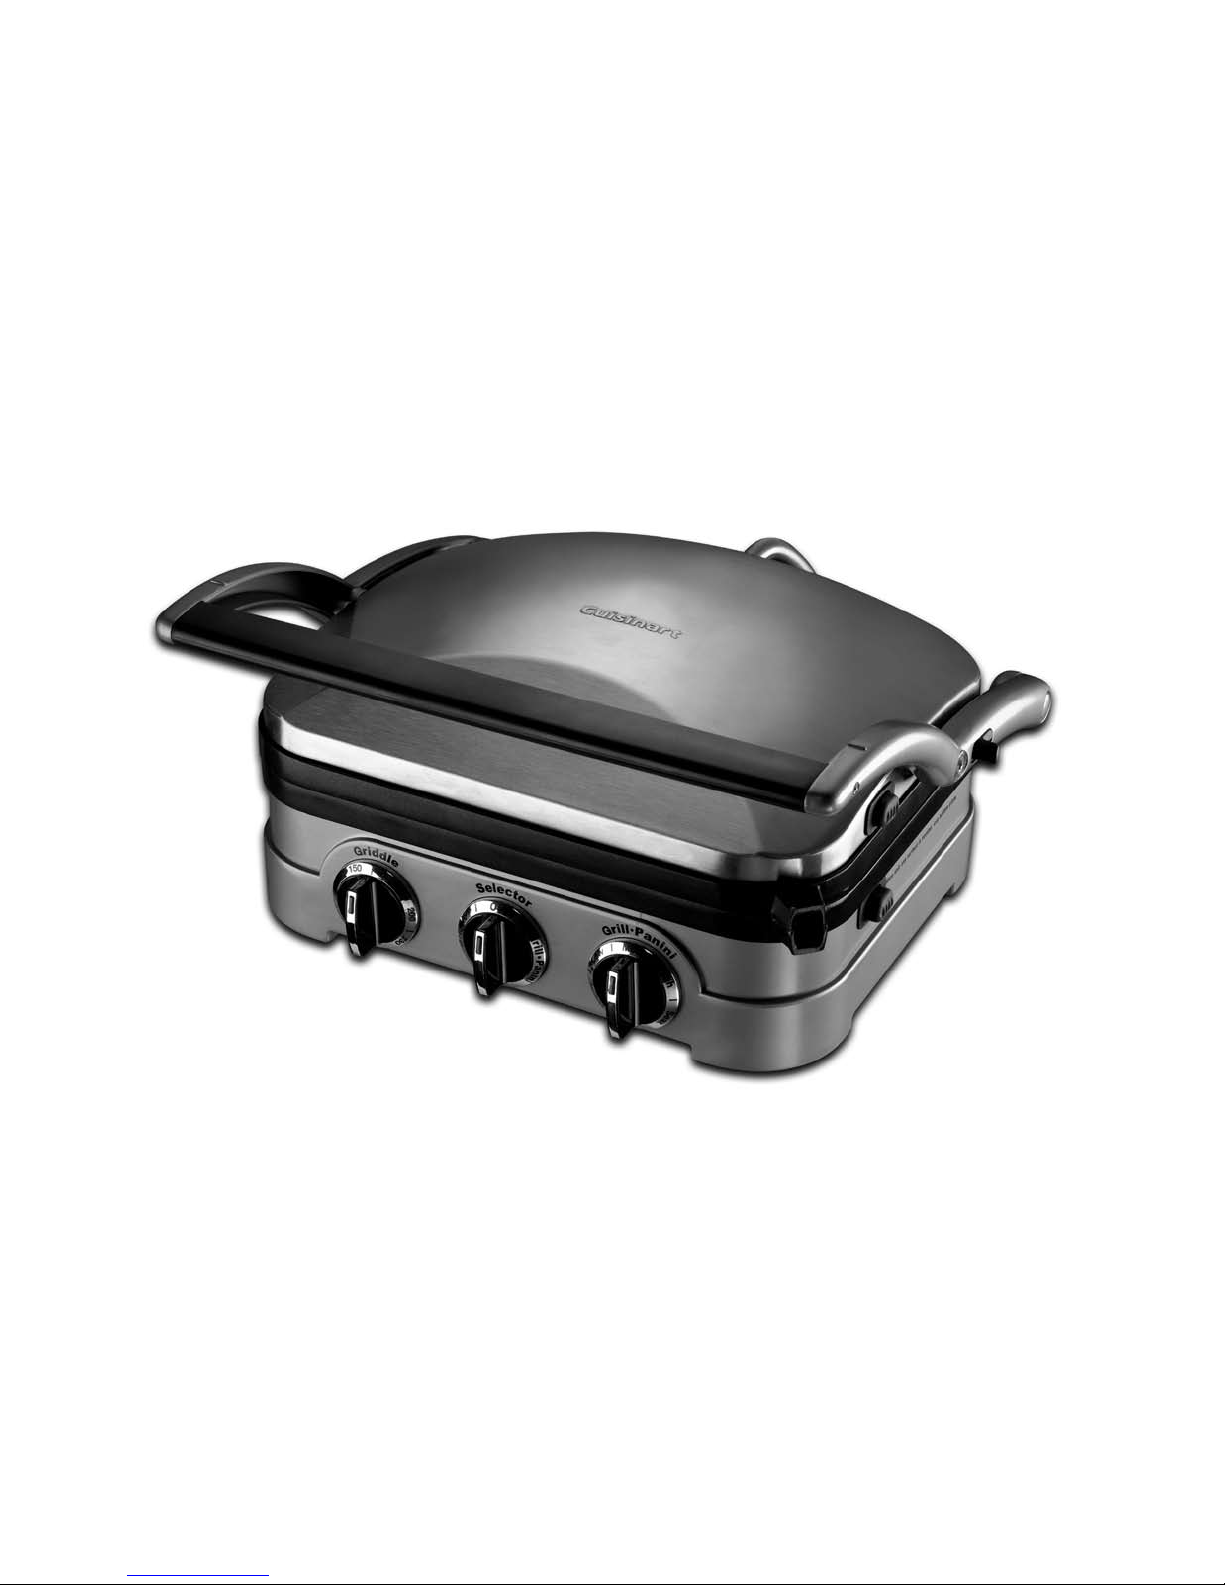
Griddle & Grill
GR4NU
Page 2
Page 3

3
Congratulations on your purchase of the Cuisinart Griddle & Grill.
For over 30 years Cuisinart’s aim has been to produce the very nest kitchen equipment
so that cooks at home as well as professional chefs have the tools to express their
creativity.
All Cuisinart products are engineered for exceptionally long life, and designed to be
easy to use as well as to give excellent performance day after day. That is why they have
come to be regarded as the dening machines in their eld by chefs across the world.
Cuisinart, technology with taste.
Page 4

4
Contents
Contents . . . . . . . . . . . . . . . . . . . . . . . . . . . . . . . . . . . . . . . . . 4
Product Description . . . . . . . . . . . . . . . . . . . . . . . . . . . . . . . . . . . 5
Safety Cautions . . . . . . . . . . . . . . . . . . . . . . . . . . . . . . . . . . . . . 6
Instructions for Use . . . . . . . . . . . . . . . . . . . . . . . . . . . . . . . . . . . 9
A Selecting Grill & Griddle Position . . . . . . . . . . . . . . . . . . . . . . . . . . . . . . 9
B Fitting And Removing The Plates . . . . . . . . . . . . . . . . . . . . . . . . . . . . . . . 10
C Positioning The Drip Tray . . . . . . . . . . . . . . . . . . . . . . . . . . . . . . . . . . 11
D Using The Griddle & Grill . . . . . . . . . . . . . . . . . . . . . . . . . . . . . . . . . . 12
E Hints and Tips . . . . . . . . . . . . . . . . . . . . . . . . . . . . . . . . . . . . . . . . 13
Cleaning & Maintenance . . . . . . . . . . . . . . . . . . . . . . . . . . . . . . . . 16
UK Guarantee . . . . . . . . . . . . . . . . . . . . . . . . . . . . . . . . . . . . . . 17
UK After Sales Service . . . . . . . . . . . . . . . . . . . . . . . . . . . . . . . . . 18
Recipes . . . . . . . . . . . . . . . . . . . . . . . . . . . . . . . . . . . . . . . . . . 19
Page 5
5
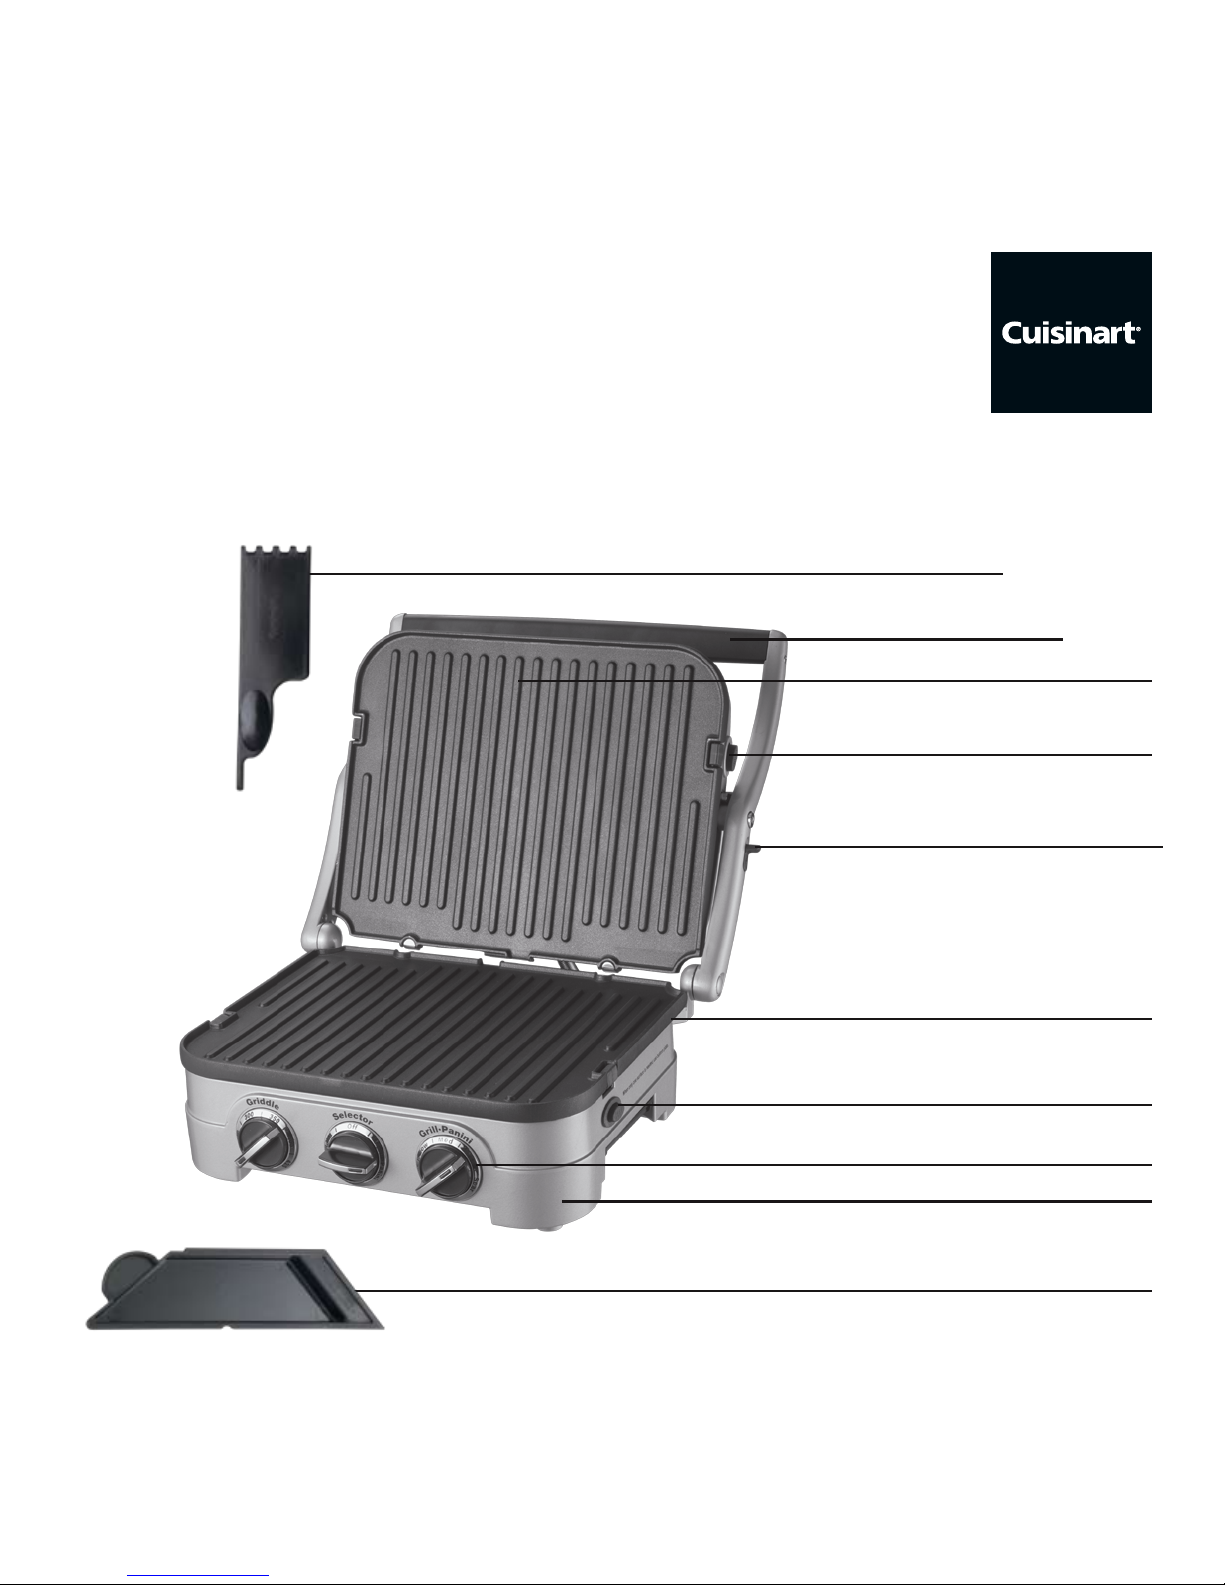
Product Description
Upper Reversible Plate
Handle
Scraping Tool
Hinge Release Lever
Upper Plate Release Button
Housing Base
Lower Reversible Plate
Controls
DripTray
Lower Plate Release Button
Page 6

6
Read all the instructions thoroughly before using the appliance and keep in a safe place for future
reference
Safety Cautions
Always follow these safety cautions when using this appliance to avoid personal injury or damage to the
appliance. This appliance should be used only as described within this instruction book.
n Before rst use, remove all packaging materials and any promotional labels or stickers from the grill.
n Do not use this appliance if the lead is damaged. In the event of lead damage discontinue use immediately.
If the lead is damaged it must be replaced by a special lead available from the manufacturer or its service
agent. (See “UK After Sales Service”).
n Do not use the appliance if it has fallen or shows signs of damage. Discontinue use immediately and contact
Cuisinart (see “UK After Sales Service”).
n Do not touch hot surfaces; use handle.
n This appliance should not be used by adults or children whose lack of experience, product knowledge or
disability might cause a hazard, unless they have been correctly instructed and are adequately supervised.
n Children should always be supervised to ensure that they do not play with this product.
n Unplug from the mains when not in use and before cleaning. Allow to cool completely before fitting or
removing parts and before cleaning the appliance.
n Do not use accessories or attachments with this appliance other than those recommended by Cuisinart.
n Do not leave the lead hanging over the edge of a kitchen table or worktop. Avoid contact between the
lead and hot surfaces.
n Do not place on or near hot gas or electric burners or in a heated oven.
n Do not use the appliance for anything other than its intended use.
n To disconnect, turn the control to ‘Off ’ setting, and then remove the plug from the mains.
n Always ensure that your hands are dry before removing the plug from the mains socket.
n To protect against fire, electric shock or personal injury, do not immerse cord, plug or housing base in water
or other liquids.
Page 7

7
n No repair should be carried out by the user. Return the appliance to the Cuisinart UK After Sales Services
for inspection or repair/replacement (see “UK After Sales Service”).
n For indoor use only.
n For domestic use only.
n This appliance complies with the basic requirements of Directives 2004/108/EC (Electromagnetic
Compatibility) and 2006/95/EC (Safety of domestic electrical appliances) amended by Directive 93/68/EEC
(CE Marking).
WARNING: A cut off plug inserted into a 13 amp outlet is a serious safety (shock) hazard. Ensure the cut
off plug is disposed of safely.
UK Wiring Instructions
n Your Cuisinart Griddle and Grill includes a BS 13 amp moulded (fused) mains plug on the supply cord.
n Should it be necessary at any stage to remove this moulded plug and replace it with a re-wireable BS 13
amp mains plug, the re-wiring should be completed as follows: (NB The moulded plug should be disposed
of safely)
Class I (1) Earthed Appliance
The wires in the mains lead are coloured in accordance with the following code:
GREEN & YELLOW = EARTH
BLUE = NEUTRAL BROWN = LIVE
As the colours of the wire may not correspond with the coloured markings identifying the terminals in your
plug, proceed as follows:
Page 8
8
n The wire which is coloured GREEN and YELLOW must be connected to the terminal in the plug which is
marked with the letter E or or coloured green or yellow or green and yellow.
n The wire which is coloured BLUE must be connected to the terminal which is marked with the letter N
or coloured black.
n The wire which is coloured BROWN must be connected to the terminal which is marked with the letter
L or coloured red.
With this appliance, if a 13 amp plug is used, a 13 amp fuse should be fitted. If any other type of plug is used,
a 10 amp fuse must be fitted, either in the plug or at the distribution board.
WARNING: A cut off plug inserted into a 13 amp socket is a serious safety (shock) hazard. Ensure that the
cut off plug is disposed of safely.
WARNING: Polythene bags over the product or packaging may be dangerous. To avoid danger of
suffocation, keep away from babies and children. These bags are not toys.
The temperature of all surfaces marked with this symbol will be very hot when the appliance is in
use. DO NOT TOUCH these surfaces as possible injury could occur.
n The symbol on the product or on its packaging indicates that this product may not be treated as
household waste. Instead it should be handed over to the applicable collection point for the recycling of
electrical and electronic equipment.
By ensuring this product is disposed of correctly, you will help prevent potential negative consequences for
the environment and human health, which could otherwise be caused by inappropriate waste handling of
this product. For more detailed information about the recycling of this product, please contact your local
council office or your household waste disposal service.
Page 9

9
Instructions for Use
A Selecting Griddle & Grill Position
The appliance has 3 positions:
Closed Position
n Upper plate/cover rests at on lower plate/base. This is the start and heating position when using the
appliance as a contact grill or panini press function.
Open Position
n Upper plate/cover is open and in the upright position. Open the cover to this position to add or remove
food from the appliance when using the contact grill or panini press function.
n To adjust the appliance to this position, simply lift the handle until it comes into a fully upright position.
The unit will stay in this position until you close the cover or continue to open it to the Flat Position.
Flat Position
n Upper plate/cover is level with the lower plate/base. The handle rests on the work surface and the upper
and lower plates are level to create one large cooking surface. The appliance is in this position when it is
used as an open grill or griddle.
n To adjust the appliance to this position, simply lift the handle to the open position. With your left hand on
the handle, use your right hand to push up the Hinge Lock with light pressure. Pulling the handle slightly
downwards will assist in opening the hinge. Continue opening the cover, ensuring the upper plate opens
at to prevent damage to the appliance. The unit will stay in this position until you lift the cover off the
table and return it to the closed position.
n N.B: We recommend this is carried out when the product is not switched on as guidance may be
required.
Page 10

10
B Fitting And Removing The Plates
To t the plates:
n Place the appliance in the at position with the controls directly in front of you (refer to section
‘‘Selecting Griddle & Grill Position’’)
n Each plate is embossed with ‘Lower’ or ‘Upper’. Select the ‘Lower’ plate that you intend to cook with
(grill or griddle). Hold it at with the ‘Lower’ sign facing up.
n Align the two cut outs at the back of the plate with the brackets on the bottom of the housing base.
Tilt the back of the plate and slide it underneath the brackets. Push down the front end of the plate
until it locks into place.
n Select the matching plate (grill or griddle) and with the ‘Upper’ embossed sign facing up and the grease
spout pointing away from you. Align the plate with the brackets and push down the front to the lock
into position.
To remove the plates:
n Adjust the appliance to the at position (refer to section A, Selecting Griddle & Grill Position).
n Locate the plate release buttons on the right side of the units’ upper and lower housing. Press the
‘Upper’ release button rmly and the Upper plate will pop up slightly from the base. Lift the plate up and
slide out from under the brackets in the centre.
n Press the button on the Lower housing and repeat the above method to remove the Lower plate.
n N.B: Always allow the appliance to cool for at least 30 minutes before removing the plates.
Page 11

11
C Positioning The Drip Tray
One side of the base has a slot provided for the drip tray. Slide the drip tray into the base according to the
instruction on the tray.
N.B. Grease should be safely disposed of after cooking. The drip cups can be cleaned in the dishwasher.
Page 12

12
D Using The Griddle & Grill
Once you have chosen the assembly, plates and placed the drip cups in position, plug the cord into the mains
socket, you are now ready to begin cooking.
1. Using the contact grill/griddle
n Turn the Selector to the right to choose the Grill/ Panini function. When the control is in place a red light
will illuminate to indicate that the power is on.
n Turn the Grill/Panini Control to the desired temperature for cooking.
n Once the appliance has reached temperature a green light inside the chosen control will illuminate. The
appliance is now ready to cook. The light will continue to turn on and off as the thermostat regulates the
temperature. This is normal. N.B. The rst time you use the appliance, it may have a slight odor and may
smoke a little. This is normal and common to appliances with a nonstick surface.
2. Using the open and at grill/griddle
n Turn the Selector to the left to choose the Griddle function. When the control is in place a red light will
illuminate to indicate that the power is on.
n Turn the Griddle control to the desired temperature for cooking.
n Once the appliance has reached temperature a green light inside the chosen control will illuminate. The
appliance is now ready to cook. The light will continue to turn on and off as the thermostat regulates the
temperature. This is normal.
Page 13
13
E Hints and Tips
Using the contact grill/Panini press
n The Griddle & Grill has been designed with a unique handle that allows you to adjust the cover to the
thickness of the food, and leave to cook. Simply rest the cover evenly on the top of the food you wish to
cook.
n When using the appliance as a contact grill, the grill plates are recommended.
n When cooking with the contact grill cooking time will be reduced because you are cooking both sides of
the food at the same time.
n When cooking more than one piece of food in the contact grill, it is important
that the thickness of the food is consistent to allow the cover to close evenly
on the food.
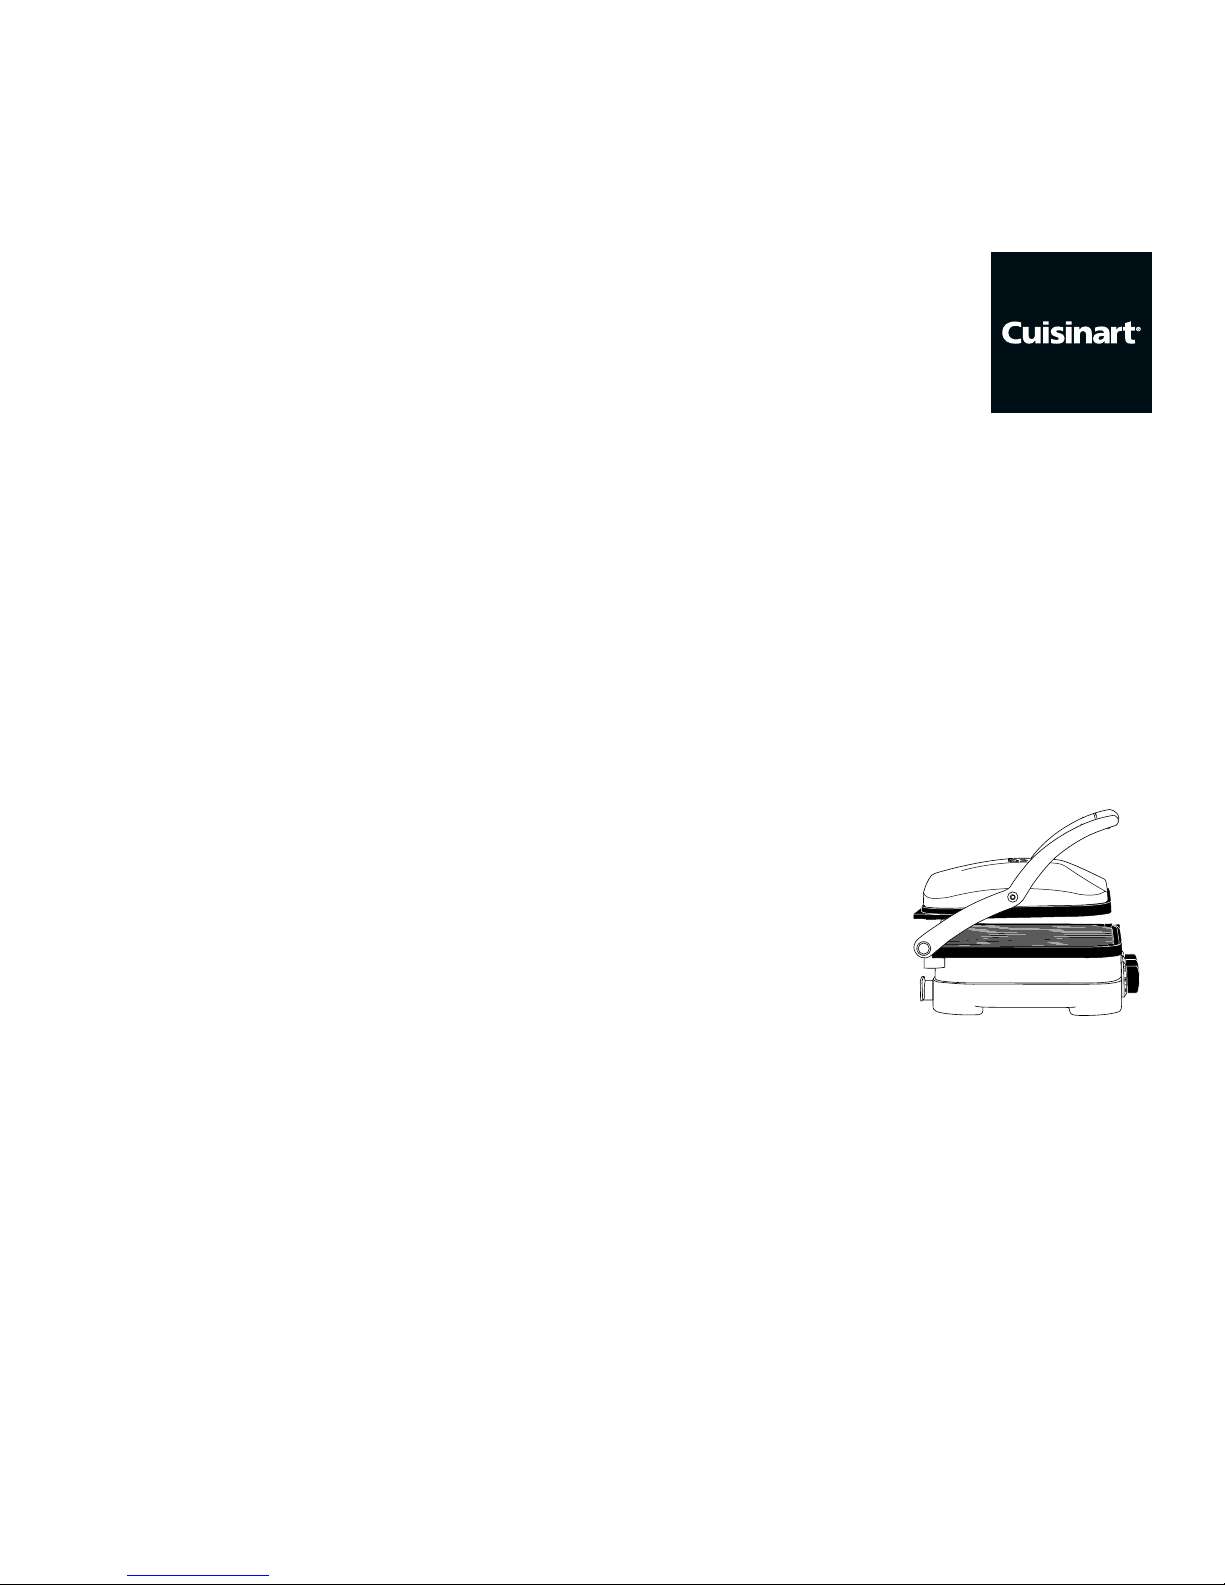
n Use the appliance as a Panini press to grill sandwiches and breads. A Panini can
include any combination of ingredients such as vegetables, meat and cheese
layered between two pieces of fresh bread, e.g. Foccacia or Ciabatta
n When using the appliance as a Panini press, the grill plates are recommended
because they give a traditional-style Panini sandwich with grill marks on the
bread. However, depending upon the type of sandwich you are preparing, you
may wish to use the griddle plates. This functions in the same manner but without leaving griddle marks.
n Light pressure can be applied to the handle to press and heat the sandwich to your liking.
n When cooking more than one Panini it is important that the thickness of each sandwich is consistent so
the cover will close evenly on the Panini.
Page 14

14
Using the open and at grill
n Use the appliance in the at position to cook burgers, steak, boneless poultry cuts, sh and vegetables.
n Cooking on a at grill is most versatile. It enables you to cook different types of foods on separate plates
without combining their avours or cooking large amounts of the same type of food.
n The at position also accommodates different cuts of meat with varying thickness, allowing you to cook
each piece to your liking.
n When cooking in the at position you will need to turn the food over during cooking to cook it throu-
ghly.
n If you intend to use the Grill in a at position but you do not need the entire surface, use the bottom
plate.
n Using the grill is a healthier method of cooking. The ribs on the grill plate combined with the grease spout
at the corner of the plate, allow the grease to drain from the meat, reducing its fat content.
Page 15

15
Using the open and at griddle
n Use the griddle to cook a variety of foods e.g. pancakes, eggs, French toast, hash browns, bacon and
sausages.
n The at position gives a large surface area, enabling you to cook different types of foods on separate plates
without combining their avours or cooking a variety of different foods or a large amount of the same type
of food.
n The open and at positions accommodate varying thicknesses of foods, allowing you to cook each piece
to your liking.
n In the open and at positions, the foods you are cooking will have to be turned over to cook through.
n If you intend to use the appliance in a at position, but you do not need the entire surface, use the bottom
plate.
Page 16

16
Cleaning & Maintenance
n Before rst use an after every use, clean each part thoroughly.
n Once you have nished cooking, turn the selector control to the ‘Off’ position and unplug the power cord
from the mains and allow the appliance to cool for at least 30 minutes before handling.
n When cold use the scraper to remove any leftover food from the cooking plates. The scraper can be
washed by hand or in the dishwasher.
n Dispose of grease from the drip cups. The drip cups can be cleaned by hand or in the dishwasher.
n The cooking plates can be washed by hand or in the dishwasher. Do not use metallic objects such as knives
when cleaning. This will damage the non stick coating. Use wooden or heatproof plastic utensils only.
n If you have been cooking seafood, wipe the cooking plate with lemon juice to prevent seafood avour
transferring to the next recipe.
n The housing base, cover and control knobs can be wiped clean with a soft, dry cloth. For tough stains
dampen cloth. Never use an abrasive cleaner or harsh pad.
n In between recipes, scrape excess food buildup through the grease channel and into the drip cups, then
wipe off any residue with a paper towel before proceeding with the next recipe.
n Never leave plastic utensils in contact with the hot grill plate.
n Make sure all the parts are clean and dry before storing.
n Never wrap the cord around the outside of the grill.
n Never immerse the plug, lead or housing in water or any other liquid.
Page 17

17
Guarantee
n This Cuisinart appliance is guaranteed for domestic consumer use for 5 years.
n The guarantee covers defects under normal use from date of purchase and ceases to be valid in the event
of alteration or repair by unauthorized persons.
n If the appliance does not perform satisfactorily due to defects of material or manufacture, it will be
repaired or replaced by the manufacturer (see UK after sales service for details).
n This guarantee is only valid in the United Kingdom (including Northern Ireland, Republic of Ireland,
the Channel Islands and the Isle of Man).
n No responsibility will be accepted for any damage caused in transit.
n A charge may be made if goods are returned outside the relevant guarantee period or if the product
is returned unnecessarily.
n The manufacturer reserves the right to amend terms and specications without prior notice.
n This guarantee in no way affects your statutory rights.
Page 18

18
UK After Sales Service
For further advice on using your Cuisinart Griddle and Grill and other products in the Cuisinart range,
contact the Cuisinart Customer Care Line on 0870 240 6902 (09:00 to 17:00 hrs Monday to Friday) or
alternatively, email your enquiry to [email protected].
In Guarantee
Firstly, please call the Cuisinart Helpline 0870 240 6902.
Return the product to the Cuisinart Service Centre at the following address:
Cuisinart Service Centre
P.O. Box 506
WIGAN
WN1 9AA
Enclose your name and address, together with proof of purchase and details of the fault. Cuisinart will
either repair or replace the product, as appropriate.
Out of Guarantee
Contact the Cuisinart Customer Care Line on 0870 240 6902 (09:00 to 17:00 hrs Monday to Friday) or,
alternatively, email your enquiry to [email protected] for details of the standard repair or replacement charge. If you wish to proceed with the repair or replacement, return the product to the Cuisinart
Service Centre at the following address:
Cuisinart Service Centre
P.O. Box 506
WIGAN
WN1 9AA
Enclose your name, address and contact number along with details of the fault.
Page 19

19
Recipes
Snacks
BLT . . . . . . . . . . . . . . . . . . . . . . . . . . . . . . . . . . . . . . . . . . . . . . . 20
Grilled Mozzarella, Tomato and Basil Panini . . . . . . . . . . . . . . . . . . . . . . . . . . . 21
Chicken and Vegetable Panini . . . . . . . . . . . . . . . . . . . . . . . . . . . . . . . . . . 22
Ham and Brie Panini. . . . . . . . . . . . . . . . . . . . . . . . . . . . . . . . . . . . . . . 23
Side dishes
Grilled beans and feta . . . . . . . . . . . . . . . . . . . . . . . . . . . . . . . . . . . . . . 24
Mains
Beef Burgers. . . . . . . . . . . . . . . . . . . . . . . . . . . . . . . . . . . . . . . . . . . 25
Chicken Quesadillas. . . . . . . . . . . . . . . . . . . . . . . . . . . . . . . . . . . . . . . 26
Honey Dijon Grilled Turkey Cutlets . . . . . . . . . . . . . . . . . . . . . . . . . . . . . . . 27
Teryaki Grilled Chicken and Pineapple . . . . . . . . . . . . . . . . . . . . . . . . . . . . . 28
Sweets
Grilled Bananas with Vanilla Yoghurt Cream . . . . . . . . . . . . . . . . . . . . . . . . . . . 29
Breakfast Pancakes with Maple Syrup . . . . . . . . . . . . . . . . . . . . . . . . . . . . . . 30
Blueberry Oat Buttermilk Pancakes . . . . . . . . . . . . . . . . . . . . . . . . . . . . . . . 32
Page 20

20
BLT
Serves 2
Plates: Grill
Position: Closed
Selector: Grill/Panini
6 Slices white or whole meal bread
4 rashers of bacon
2 tsp butter
6 lettuce leaves, shredded
2 tomatoes, thinly sliced
1 tbsp mayonnaise
n Preheat the Grill plates on Medium/High.
n Cut the rind off of the bacon and grill on each side for 3-5 minutes or until cooked through and crispy.
Remove and set aside.
n Spread one side of each piece of bread with the butter.
n Place one piece of bread, butter side up, on a serving plate. Place 1 slice of bacon on the bread and layer
with a quarter of the lettuce, a few slices of tomato followed by a second slice of bread. Repeat these
layers nishing with a third slice of bread butter side down.
n Repeat this with the remaining ingredients to make 2 triple deck sandwiches.
n Place both sandwiches on the bottom grill plate. Close the lid, pressing lightly for 20-30 seconds. Cook
for 3-6 minutes, or until the bread is golden and crispy and the bacon is hot.
Page 21

21
Grilled Mozzarella, Tomato and Basil Panini
Serves 2
Plates: Grill
Position: Closed
Selector: Grill/Panini
4 medium slices Focaccia / 4 Panini
1 tbsp extra virgin olive oil
100g mozzarella, sliced
4-6 thin tomato slices
Salt and freshly ground black pepper
8 basil leaves
n Preheat the grill plates on High.
n Lightly brush one side of each slice of bread with olive oil. Place two slices on the work surface, oil side
down.
n Layer with the cheese and tomato, season lightly if desired.
n Shred the basil leaves and sprinkle over the tomato. Top with the remaining slices of bread, oil side up.
n Place the sandwiches on the lower grill plate. Close the lid, press lightly for 30 seconds and bake for 3-4
minutes until the bread is golden and crispy and the cheese has melted.
n Serve hot.
Page 22

22
Chicken and Vegetable Panini
Serves 4
Plates: Grill
Position: Closed
Selector: Grill/Panini
4 Panini rolls
400g cooked chicken
300g ready marinated and roasted vegetables
100g mozzarella, grated
25g butter
Salt and freshly ground black pepper
n Preheat the grill plates on High.
n Open each Panini and butter. Divide the remaining ingredients evenly between each Panini and layer,
starting with the chicken, then vegetables and nally sprinkle with the cheese.
n Season with salt and pepper and close each Panini.
n Place the sandwiches on the lower grill plate. Close the lid, pressing lightly for 30 seconds and bake for
3-4 minutes or until the bread is golden and crispy and the cheese has melted.
n Serve hot.
Page 23

23
Ham and Brie Panini
Serves 2
Plates: Grill
Position: Closed
Selector: Grill/Panini
2 individual Ciabatta or Panini
4 tbsp pesto
1 ripe tomato thickly sliced
2 thick slices ham
4 thick slices Brie
Salt and freshly ground black pepper
n Preheat the Grill plates on High.
n Slice Ciabatta/Panini in half lengthways, spread the bottom half of each with pesto.
n Arrange the tomato on top, and layer this with the ham and brie. Season well.
n Close the rolls and place on the bottom grill plate. Close the lid, pressing lightly for 20-30 seconds and
cook for 3-4 minutes, or until the bread is golden and crispy and the cheese has melted.
Page 24

24
Grilled Green Beans with Feta
Serves 4
Plates: Grill
Position: Closed
Selector: Grill/Panini
450g green beans, rinsed
1½ teaspoons extra virgin olive oil
¼ teaspoon salt
1 tablespoon fresh lemon juice
½ teaspoon basil
¹⁄8 teaspoon freshly ground black pepper
30g crumbled Feta cheese
n Insert the plates on their grill side.
n Preheat the Cuisinart
®
Griddle & Grill to High with the unit closed. Remove tips and tops from green
beans. Put into a bowl and drizzle with olive oil. Toss to coat. When the Griddle & Grill is hot, arrange half
the green beans on the bottom grill plate. Close and grill for 5 to 6 minutes. Using a pair of heatproof
tongs for nonstick cookware, remove the green beans and transfer to a bowl. Sprinkle with half the salt.
Grill remaining green beans and add to the bowl. Sprinkle with the remaining salt, lemon juice, basil and
pepper; toss to coat.
n Arrange green beans in a shallow serving bowl and sprinkle with crumbled Feta cheese.
Page 25

25
Beef Burgers
Serve 4
Plates: Griddle
Position: Flat
Selector: Griddle
700g freshly ground beef
1 tsp dried mix herbs
Salt and freshly ground black pepper
n Preheat the Griddle plates on High.
n Mix the beef and herbs together in a mixing bowl and season well. Divide into 4 and shape into burgers.
n Place the burgers onto the lower griddle plate and cook on each side for approximately 5 minutes, or
until thoroughly cooked and browned.
n Serve in burger buns with a fresh salad.
Page 26

26
Chicken Quesadillas
Serves 4
Plates: Griddle
Position: Closed
Selector: Grill/Panini
4 our tortillas
25g butter, melted
150g cooked chicken, shredded
50g grated cheddar cheese
75g pitted black olives
1 large onion, peeled and sliced
1 tbsp nely chopped jalapeno pepper
Salsa
n Lightly brush one side of each tortilla with 1 tsp melted butter.
n Place on the work surface, buttered side down. Preheat the griddle plates on Low-Medium.
n Place the chicken, cheese, olives, onion and pepper in a medium bowl and mix together well. Divide the
mixture equally among the 4 tortillas, placing to one side of the tortilla, fold each tortilla in half.
n When the plates have preheated, place 2 quesadillas on the bottom griddle and close. Bake for 5-6
minutes, or until the chicken is hot, the cheese has melted and the tortillas are lightly golden brown
and crispy. Place on a serving plate and keep warm and repeat with the remaining 2 quesadillas.
Serve hot with salsa.
Page 27

27
Honey Dijon Grilled Turkey Cutlets
Serves 4
Plates: Grill
Position: Closed
Selector: Grill/Panini
2 tbsp dry sherry
2 tbsp Dijon mustard
2 tbsp honey
1 tbsp light soy sauce
2 cm piece fresh ginger, peeled and grated
4 turkey breasts, approx 125g each, 2.5cm thick
n To make the marinade, place the sherry, mustard, honey, soy and ginger in a bowl, whisk well to blend.
n Place the turkey in the marinade, cover and leave to marinate for 15 minutes at room temperature.
n Preheat the grill plates on High. When preheated drain the turkey and arrange the breasts on the bottom
grill plate. Discard the remaining marinade.
n Close the lid and grill for approximately 5 minutes, or until the turkey is thoroughly cooked, remove and
serve.
Tip: For a stronger avour, place the covered chicken in its marinade in the fridge and leave up to 12 hours,
remove from the fridge and allow to stand for 15 minutes before grilling.
Page 28

28
Teriyaki Grilled Chicken and Pineapple
Serves 4
Plates: Grill
Position: Flat
Selector: Grill/ Panini
4 tbsp soy sauce
3 tbsp rice vinegar
2 tbsp dry or medium dry sherry
2 tbsp brown sugar, packed
3cm piece fresh ginger, peeled and grated
700g boneless, skinless chicken breasts
8 slices pineapple
n Place the soy sauce, rice vinegar, sherry, sugar and ginger in a bowl and mix together well to make a
marinnade.
n Poor half the marinade over the chicken and leave to marinate for 20-30 minutes. Poor the remaining
half over the pineapple slices and marinate for 20-30 minutes.
n Preheat the grill plates on High. Drain the pineapple, and reserve the marinade in a sauce pan.
When ready, grill the pineapple slices for 2-3 minutes on each side. Remove, cover loosely on a serving
plate and keep warm.
n Drain the chicken and add the marinade to the saucepan and bring to the boil. Reduce the heat to low
and simmer until the chicken is ready. Arrange the chicken on the grill and cook for 5-6 minutes on each
side or until thoroughly cooked and the juices run clear.
n Transfer to a warm plate, pour the simmered reserved sauce over the chicken and serve with the
pineapple and rice.
Page 29

29
Grilled Bananas with Vanilla Yoghurt Cream
Serves 4
Plates: Grill
Position: Flat
Selector: Grill/Panini
175ml low fat yoghurt
2 tbsp brown sugar
1 tsp vanilla extract
75ml double cream
4 medium bananas
2 tbsp unsalted butter, melted
1-2 tbsp crystallised ginger
n Place the yoghurt, sugar and vanilla in a medium bowl. Whisk together until smooth. Whip the cream
until stiff peaks form, fold into the yoghurt mixture and refrigerate until ready to use.
n Slice the bananas diagonally into 2cm slices, the longer the better.
n Place in a bowl and drizzle with melted butter, toss very gently to coat evenly.
n Preheat the grill plates on Medium-High. When ready, arrange the bananas evenly spaced on both sides
of the grill.
n Grill for 2-3 minutes on each side. Arrange in 4 dishes and top with vanilla yogurt cream. Sprinkle with
candied ginger to serve.
Page 30

30
Breakfast Pancakes with Maple Syrup
Makes 8 Pancakes
Plates: Griddle
Position: Flat
Selector: Griddle
225g plain our, sifted
1 tsp baking powder
1 tsp bicarbonate of soda
Pinch of salt
1 tbsp castor sugar
450ml buttermilk
2 medium eggs
25g butter, melted
100ml milk
To serve:
Maple syrup
Chopped Pecans
n Preheat the Griddle plates on High.
n Place the our, baking powder, bicarbonate of soda, salt and sugar into a mixing bowl and mix together.
Page 31

31
n In a separate bowl, whisk together the buttermilk, eggs and butter. Pour into the our mixture and whisk
together. Gradually add the milk whilst whisking until combined.
n Using 3 tbsp of the mixture per pancake, pour individual pancakes onto the griddle plate, evenly spacing
them. Cook on one side until browned and then ip over and cook until browned on the other side.
n Serve hot drizzled with maple syrup and a sprinkling of pecans.
Page 32

32
Blueberry Oat Buttermilk Pancakes
Makes 16 pancakes
Plates: Griddle
Position: Flat
Selector: Griddle
170g blueberries (fresh or frozen)
110g plain our
115g rolled oats
35g wholemeal our
55g brown sugar
1 teaspoon baking soda
½ teaspoon salt
460-500mls buttermilk
2 large eggs, lightly beaten
3 tablespoons vegetable oil
n Put the blueberries into a small bowl. Sprinkle with 1 tablespoon of the our and toss to coat; reserve.
Preheat Cuisinart® Griddle & Grill to 200°C with unit closed.
n Put the remaining our, oats, wholemeal our, brown sugar (break up any lumps), baking soda, and salt
into a medium bowl; stir with a whisk. Put the buttermilk, eggs and oil into a small bowl; stir.
n Add the liquid mixture to the dry ingredients and stir with a whisk until blended. Gently fold in the blue-
berries.
n When Griddle & Grill has preheated, open unit to extend at. Drop the batter onto the grill plates, using
a quarter of a cup measure. Cook the pancakes for 3 to 3 1/2 minutes. When pancakes are bubbling on
the top, turn and cook for an additional 2 1/2 to 3 minutes. Blueberry Oat Pancakes are best served hot.
Page 33

33
Pancakes can be kept warm by placing them on a rack on a baking sheet in a low (100°C) oven while cooking the remainder. Serve with maple syrup and butter as desired.
Page 34

34
Page 35

Page 36

www.cuisinart.co.uk
IB-10/455
 Loading...