

Page 1

INSTRUCTION AND
RECIPE BOOKLET
Flavor Duo™ Frozen Yogurt-Ice Cream & Sorbet Maker
For your safety and continued enjoyment of this product, always read the instruction book carefully before using.
ICE-40 Series
Page 2

IMPORTANT SAFEGUARDS
When using an electrical appliance, especially when children are present,
basic safety precautions should always be taken to reduce the risk of fire,
electric shock, and/or injury, including the following:
1. READ ALL INSTRUCTIONS BEFORE USING.
2. To protect against risk of electric shock, do not place cord, plug, or base of
appliance in water or any other liquid.
3. This appliance should not be used by or near children or individuals with
certain disabilities.
4. Always unplug from outlet when not in use, before putting on or taking off
parts, and before cleaning.
5. Avoid contact with moving parts. Keep hands, hair, clothing, as well as
spatulas and other utensils away during operation to reduce the risk of injury and/or damage to the appliance.
6. Do not operate any appliance with a damaged cord or plug, or after the
appliance malfunctions, or is dropped or damaged in any manner. Return
the appliance to the store or retailer where it was purchased for examination or repair.
7. The use of attachments not recommended by Cuisinart may cause fire,
electric shock or risk of injuries.
8. Do not use outdoors.
9. Do not let cord hang over edge of table or counter, or touch hot surfaces.
10. Keep hands and utensils out of freezer bowls while in use to reduce the
risk of injury to persons or to the appliance itself. DO NOT USE SHARP
OBJECTS OR UTENSILS INSIDE THE FREEZER BOWLS! Sharp objects will
scratch and damage the inside of them. A rubber spatula or wooden spoon
may be used when the appliance is in the OFF position.
11. This appliance is for household use. Any servicing other than cleaning
and user maintenance should be done only by authorized Cuisinart Repair
Personnel.
12. Do not use the freezer bowls on flames, hot plates or stoves. Do not
expose to heat source. Do not wash in dishwasher; doing so may cause
risk of fire, electric shock or injury.
13. Do not operate your appliance in an appliance garage or under a wall cabinet. When storing in an appliance garage, always unplug the unit from the
electrical outlet. Not doing so could create a risk of fire, especially if the appliance touches the walls of the garage or the door touches the unit as it closes.
SAVE THESE INSTRUCTIONS
FOR HOUSEHOLD USE ONLY
NOTICE
This appliance has a polarized plug (one blade is wider than the other). To
reduce the risk of electric shock, this plug will fit in a polarized outlet only one
way. If the plug does not fit fully in the outlet, reverse the plug. If it still does not
fit, contact a qualified electrician. Do not attempt to defeat this safety feature.
CAUTION
This appliance is for household use. Any servicing other than cleaning
and user maintenance should be performed by an authorized ser vice
representative.
• Do not immerse base in water.
• To reduce the risk of fire or electric shock, do not disassemble the base.
NOTE: The base does not contain any user-serviceable parts.
• Repairs should be made only by authorized personnel.
• Check voltage to be sure that the voltage indicated on the name plate
agrees with your voltage.
• Never clean with scouring powders or hard implements.
2
Page 3

CONTENTS
Important Safeguards ...................................................................................................... 2
Features and Benefits ...................................................................................................... 3
Before Using for the First Time ........................................................................................ 3
Freezing Time and Bowl Preparation .............................................................................. 4
Making Frozen Desserts or Drinks .................................................................................. 4
Adding Ingredients ........................................................................................................... 4
Cleaning Storage and maintenance ................................................................................ 4
Recipes and Recipe Tips ................................................................................................. 5
Warranty ...........................................................................................................................15
FEATURES AND BENEFITS
1. Ingredient Spouts
Pour recipe ingredients through the spout. Also use to add ingredients,
like chips or nuts, without interrupting the freezing cycle.
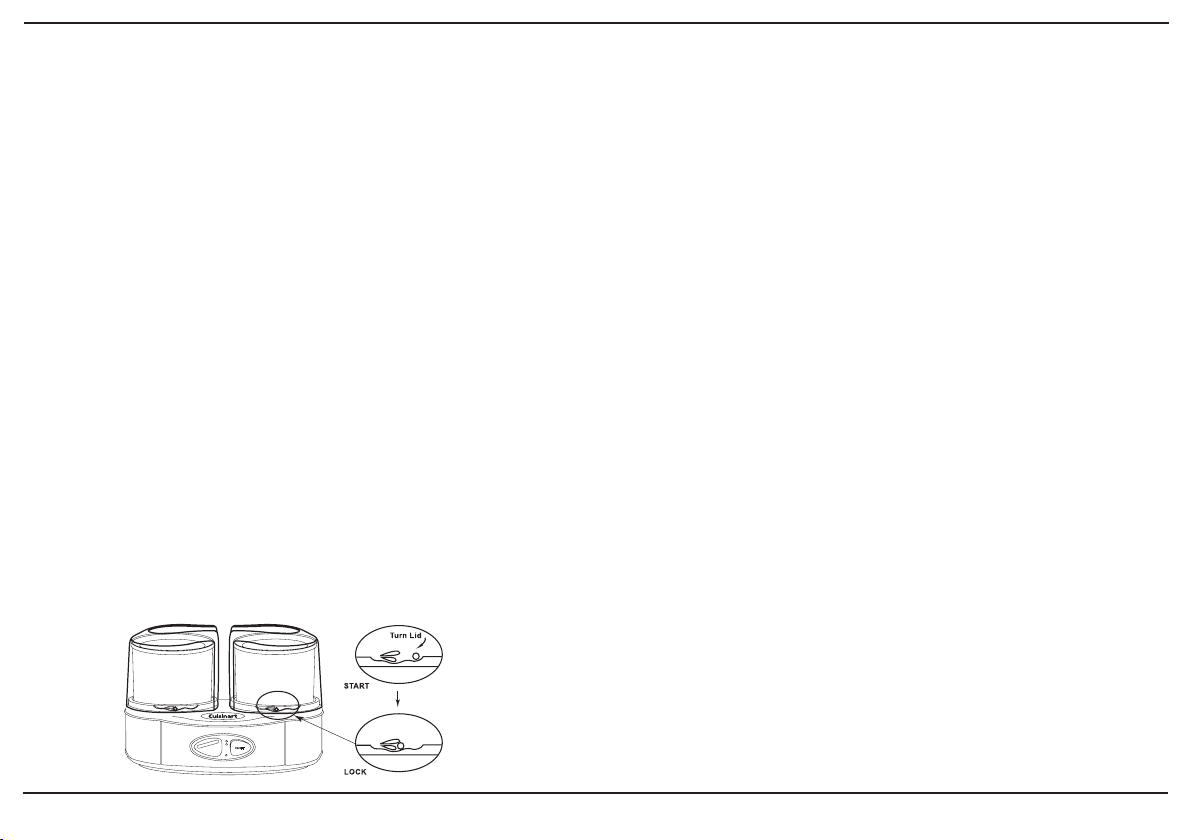
2. Easy-Lock Lids
Transparent, so you can watch the freezing process as it progresses.
Designed to easily lock to the base.
3. Mixing Arms
Mix and aerate ingredients in freezer bowls to create frozen dessert
or drink.
4. Freezer Bowls
Contain cooling liquid between a double insulated wall to create fast
and even freezing. Double wall keeps the bowls cool and at an even
temperature.
5. Base
Contains heavy-duty motor strong enough to handle ice cream, frozen
yogurt, sherbet, sorbet, and frozen drinks.
6. One- or Two-Bowl Button
Gives you the option of making a double or single batch.
7. ON/OFF Switch
8. Cord Storage (not shown)
Unused cord is easily pushed into the base to keep counters neat
and safe.
1
2
3
4
5
6
7
BEFORE USING FOR THE FIRST TIME
DO NOT immerse the motor base in water. Wipe it with a moist cloth. Wash the
lids, freezer bowls and mixing arms in warm, soapy water to remove any dust or
residue from the manufacturing and shipping process. DO NOT clean any of the
parts with abrasive cleaners or hard implements.
3
Page 4
FREEZING TIME AND BOWL PREPARATION
The freezer bowls must be completely frozen before you begin your recipe.
The length of time needed to reach the frozen state depends on how cold
your freezer is. For the most convenient frozen desserts and drinks, leave your
freezer bowls in the freezer at all times. You can take them out any time for
immediate use. In general, freezing time is about 24 hours. To determine
whether the bowl is completely frozen, shake it. If you do not hear liquid
moving, the cooling liquid is frozen. Before freezing, wash and dr y the bowl.
Wrap it in a plastic bag to prevent freezer burn. We recommend that you
place the freezer bowls in the back of your freezer where it is coldest.
Reminder: Your freezer should be set to 0°F to ensure proper freezing
of all foods.
MAKING FROZEN DESSERTS OR DRINKS
1. Prepare recipe ingredients from pages that follow or from your own
recipe. Cuisinart recipes begin on page 5. If you use your own recipe, be
sure it yields 1 quart or less. For best results, prepare ingredients in a
container that is easy to pour from.
2. Remove the freezer bowl(s) from the freezer. (Remove plastic bag if you
have wrapped freezer bowls.) Place freezer bowls on the center of the base.
NOTE: Bowls will begin to defrost quickly once they have been removed
from freezer. Use them immediately after removing from freezer.
3. Place mixing arm(s) in freezer bowl(s). Arm does not fit tightly. It just
rests in the center of the bowl, with the circle side facing up.
4. Place lid(s) on base. Easy-lock lid mechanism allows lids to rest on
base in one position. Set lid(s) slightly off center and turn clockwise to
lock in place.
5. Choose the one- or two-bowl switch position. If you choose one bowl
only, use the right side of the unit. Always select this prior to turning on
the unit.
6. Press ON/OFF switch. Freezer bowls will begin to turn. If you chose to
make only one batch, only the right bowl will begin to turn.
7. Immediately pour ingredients through ingredient spout(s).
8. Frozen desserts or drinks will be done in 20 to 30 minutes. The time will
depend on the recipe, and the volume of the dessert or drink you are making. When the mixture has thickened to your liking, it is done. If you desire a
firmer consistency, transfer the dessert or drink to an airtight container and
store in the freezer for two or more hours.
NOTE: Do not store frozen desserts or drinks in the freezer bowl.
Desserts and drinks will stick to the side of the freezer bowl and may
damage the bowl. Store only in a plastic, airtight container.
ADDING INGREDIENTS
Ingredients such as chips and nuts should be added about 5 minutes before
the recipe is complete. Once the dessert or drink has begun to thicken, add the
ingredients through the ingredient spout. Nuts and other ingredients should be
no larger than a chocolate chip.
SAFETY FEATURE
The Cuisinart® Flavor Duo™ is equipped with a safety feature that automatically
stops the unit if the motor overheats. This may occur if the desser t or drink is
extremely thick, if the unit has been running for an excessively long period of
time, or if added ingredients (nuts, etc.), are in extremely large pieces. To reset
the unit, put the ON/OFF switch in the OFF position. Let the unit cool off.
After a few minutes, you may turn the unit on again and continue making the
dessert or drink.
CLEANING STORAGE AND MAINTENANCE
Cleaning
Clean the freezer bowls, mixing arms and lids in warm, soapy water.
DO NOT PUT FREEZER BOWLS IN THE DISHWASHER. DO NOT CLEAN WITH
4
Page 5

ABRASIVE CLEANSERS OR IMPLEMENTS.
Wipe motor base clean with damp cloth.
Dry all parts thoroughly.
Storage
DO NOT put freezer bowls in freezer if bowls are wet.
DO NOT store lids, mixing arms, or base in freezer.
You may store the freezer bowls in the freezer for convenient, immediate use.
Before freezing, wrap the bowls in a plastic bag to prevent freezer burn.
Do not store frozen desserts or drinks in the freezer bowls in the freezer for
more than 30 minutes at a time.
Transfer frozen desserts or drinks to an airtight container for longer storage in
the f ree zer.
Maintenance
Any other servicing should be performed by an authorized service representative.
RECIPE TIPS
The recipes that follow offer you a variety of options for delicious frozen drinks
and desserts. You may create or use recipes of your own, as long as they yield
no more than 1 quart.
Recipe Tips
®
• Frozen desserts from the Cuisinart
Because of this, the desserts and drinks do not have the same characteristics
as commercially prepared frozen desserts and drinks. Most store-bought
versions use gums and preservatives to make them firmer. If you desire a
firmer consistency, transfer the dessert or drink to an airtight container
and store in the freezer until desired consistency is reached, usually two
or more hours.
• Some recipes use precooked ingredients. For best results, the mixture should
be chilled overnight before using. Or, chill the recipe over an ice bath, until it is
completely cooled, before using.
• To make an ice bath, fill a large container with ice and water. Place saucepan
or other container into the ice bath. Cool precooked ingredients completely.
• Prior to freezing, most recipes may be stored in the refrigerator for up to
3 days.
• You may substitute lower-fat creams (e.g., half and half) and milk (reduced fat
Flavor Duo™ use pure, fresh ingredients.
or lowfat) for heavy cream and whole milk used in many recipes. However,
keep in mind that the higher the fat content, the richer and creamier the result.
Using lower-fat substitutes may change the taste, consistency and texture of
the dessert. When substituting, be sure to use the same volume of the substitute as you would have used of the original item. For example, if the recipe
calls for 2 cups of cream, use a total of 2 cups of the substitute (such as 1 cup
cream, 1 cup whole milk).
• You may substitute artificial sweeteners for sugar. If the recipe is to be precooked, add the sweetener after the heating process is complete and ingredients have cooked. Stir the mixture thoroughly to dissolve the sweetener.
• In recipes that use alcohol, add the alcohol during the last 2 minutes
of mixing. Otherwise, the alcohol may impede the freezing process.
• When making sorbet, be sure to test the ripeness and sweetness of the fruit
before you use it. The freezing process reduces the sweetness of the fruit so
that it will taste less sweet than the recipe mixture. If the fruit tastes tart, add
sugar to the recipe. If the fruit is very ripe or sweet, reduce the amount of
sugar in the recipe.
• The Cuisinar t recipes listed below will yield up to 1 quart of dessert or drink.
When pouring ingredients in through the ingredient spout, DO NOT fill the
freezer bowl higher than ¼" from the top of the freezer bowl. The ingredients
will increase in volume during the freezing process.
• When making more than one recipe at a time, be sure the freezer bowl is
completely frozen before each use.
• Make sure mixing arm and lid are in place and that you have chosen the
one- or two-bowl button position before turning on machine.
• Well-chilled mixtures may require shorter mixing times.
RECIPES
ICE CREAM
Simple Vanilla ................................................................................................................... 6
Simple Chocolate ............................................................................................................. 6
Peanut Butter Cup ............................................................................................................ 6
Fresh Strawberry .............................................................................................................. 7
Rich Vanilla Bean .............................................................................................................. 7
Fresh Mint with Chocolate Cookies ................................................................................ 8
Pistachio ........................................................................................................................... 8
Coffee................................................................................................................................ 9
5
Page 6

ALTERNATIVE (DAIRY-FREE) ICE CREAM
Chocolate-Coconut............................................................................................................9
GE LATI
Basic Vanilla .................................................................................................................. 10
Chocolate-Hazelnut ...................................................................................................... 10
Lemon .............................................................................................................................11
FROZEN YOGURTS
Mango .............................................................................................................................11
Chocolate Pretzel ...........................................................................................................11
Honey-Almond ............................................................................................................... 12
SORBETS
Dark Chocolate .............................................................................................................. 12
Raspberry-Mint.............................................................................................................. 13
Pineapple ....................................................................................................................... 13
SAUCES
Caramel .......................................................................................................................... 13
Hot Fudge .......................................................................................................................14
in freezer for about 2 hours. Remove from freezer about 15 minutes before
serving.
Nutritional information per serving (based on ½ cup):
Calories 301 (67% from fat) • carb. 22g • pro. 2g • fat 23g • sat. fat 14g
• chol. 86mg • sod. 61mg • calc. 77mg • fiber 0g
SIMPLE CHOCOLATE ICE CREAM
For a real treat, serve this with our Hot Fudge Sauce on page 13.
Makes about 3½ cups (seven ½-cup servings)
1
∕
cup cocoa powder, sifted
3
¼ cup granulated sugar
2 tablespoons plus 2 teaspoons packed brown sugar
Small pinch kosher salt
¾ cup whole milk
1¾ cups heavy cream
1 teaspoon pure vanilla extract
SIMPLE VANILLA ICE CREAM
This ice cream can easily be dressed up by adding your favorite chopped
candies or sprinkles at the end of churning.
Makes about 3 cups (six ½-cup servings)
¾ cup whole milk
½ cup plus 1 tablespoon granulated sugar
Small pinch kosher salt
1½ cups heavy cream
2 teaspoons pure vanilla extract
1. In a medium bowl, use a hand mixer on low speed or whisk to combine the
milk, sugar and salt until the sugar is dissolved.
Stir in the heavy cream and vanilla extract. Cover and refrigerate at least 2
hours, or overnight.
2. Turn the machine ON, pour mixture into the freezer bowl and let mix until
thickened, resembling a soft serve consistency. Timing can vary between
10 and 25 minutes. Transfer the ice cream to an airtight container and place
1. Put the cocoa, sugars and salt in a medium bowl; whisk to combine, breaking up any larger pieces with your fingers. Add the milk and, using a hand
mixer on low speed or a whisk, beat to combine until the dry ingredients are
dissolved. Stir in the heavy cream and vanilla extract. Cover and refrigerate
at least 2 hours, or overnight.
2. Turn the machine ON, pour mixture into the freezer bowl and let mix until
thickened, resembling a soft serve consistency. Timing can vary between
10 and 25 minutes. Transfer the ice cream to an airtight container and place
in freezer for about 2 hours. Remove from freezer about 15 minutes before
serving.
Nutritional information per serving (based on ½ cup):
Calories 283 (72% from fat) • carb. 17g • pro. 3g • fat 23g • sat. fat 14g
• chol. 85mg • sod. 55mg • calc. 71mg • fiber 1g
PEANUT BUTTER CUP ICE CREAM
One of the easiest ice creams to make, the rich peanut butter flavor in this
ice cream will have your friends and family in awe.
6
Page 7

Makes about 3 cups (six ½-cup servings)
½ cup good quality creamy peanut butter
1
∕
cup granulated sugar
3
Small pinch kosher salt
½ cup whole milk
1 cup heavy cream
½ teaspoon pure vanilla extract
½ cup chopped chocolate peanut butter cup candies
(about 9 miniature peanut butter cups)
1. In a medium mixing bowl, use a hand mixer on low speed to combine the
peanut butter, sugar and salt until smooth. Add the milk and mix on low speed
until the sugar is dissolved, about 1 to 2 minutes. Stir in the heavy cream and
vanilla extract. Cover and refrigerate at least 2 hours, or overnight. Whisk mixture again before churning.
2 Turn the machine ON, pour mixture into the freezer bowl and let mix until thick-
ened, resembling a soft serve consistency. When the ice cream is almost fully
churned, gradually add the chopped candy into the churning ice cream. Allow
to mix thoroughly. Timing can vary between 10 and 25 minutes. Transfer the ice
cream to an airtight container and place in freezer for about 2 hours. Remove
from freezer about 15 minutes before serving.
Nutritional information per serving (based on ½ cup):
Calories 380 (67% from fat) • carb. 23g • pro. 9g • fat 29g • sat. fat 13g
• chol. 58mg • sod. 92mg • calc. 59mg • fiber 2g
FRESH STRAWBERRY ICE CREAM
Best made when strawberries are at their peak, this ice cream is light, sweet
and fruity.
Makes about 3½ cups (seven ½-cup servings)
1 cup fresh strawberries, hulled*
½ cup whole milk
½ cup granulated sugar
Small pinch kosher salt
1 cup heavy cream
1 teaspoon pure vanilla extract
1. Put the strawberries into the bowl of a food processor fitted with the chopping
blade. Pulse strawberries until rough/fine chopped (depending on preference).
2. In a medium bowl, use a hand mixer on low speed or whisk to combine the
milk, sugar and salt until the sugar is dissolved. Stir in the heavy cream and
vanilla extract. Stir in reserved strawberries with all juices. Cover and refrigerate at least 2 hours, or overnight. Whisk mixture together again before churning.
3. Turn the machine ON, pour mixture into the freezer bowl and let mix until
thickened, resembling a soft serve consistency. Timing can vary between 10
and 25 minutes. Transfer the ice cream to an airtight container and place in
freezer for about 2 hours. Remove from freezer about 15 minutes before serving.
*Thawed, frozen strawberries may be substituted if fresh strawberries are not
available.
Nutritional information per serving (based on ½ cup):
Calories 190 (60% from fat) • carb. 17g • pro. 1g • fat 12g • sat. fat 8g•
chol. 48mg • sod. 28mg • calc. 25mg • fiber 0g
RICH VANILLA BEAN ICE CREAM
For the true vanilla lover, be sure to use fresh vanilla beans to
capture the intense flavor.
Makes about 3 cups (six ½-cup servings)
1¼ cups whole milk
1¼ cups heavy cream
2
∕
cup granulated sugar, divided
3
Small pinch kosher salt
½ whole vanilla bean, halved and seeds scraped
4 large egg yolks
1. In a medium saucepan set over medium-low heat, add the milk, cream, half of
the sugar, salt and the scraped vanilla bean (including the pod). Whisk to combine and bring the mixture just to a boil.
2. While the milk/cream mixture is heating, combine the yolks and remaining
7
Page 8

sugar in a medium bowl. Using a hand mixer on low speed or whisk, beat
until mixture is pale and thick.
1
3. Once the milk /cream mixture has come to a slight boil, whisk about
/3 of
the hot mixture into the yolk/sugar mixture. Add another 1/3 of the mixture,
then return the combined mixture to the saucepan. Using a wooden spoon,
stir the mixture constantly over low heat until it thickens slightly and coats
the back of the spoon. This mixture must NOT boil or the yolks will overcook
– the process should only take a few minutes.
4. Let ice cream base come to room temperature. Then cover and refrigerate at
least 2 hours, or overnight. Before churning, pour the mixture through a fine
mesh strainer and discard the vanilla pod.
5. Turn the machine ON, pour mixture into the freezer bowl and let mix until
thickened, resembling a soft serve consistency. Timing can vary between
10 and 25 minutes. Transfer the ice cream to an airtight container and place
in freezer for about 2 hours. Remove from freezer about 15 minutes before
serving.
Nutritional information per serving (based on ½ cup):
Calories 329 (62% from fat) • carb. 27g • pro. 4g • fat 23g • sat. fat 14g
• chol. 198mg • sod. 74mg • calc. 110mg • fiber 0g
FRESH MINT WITH CHOCOLATE COOKIES ICE CREAM
Always a winning combination, fresh mint and chocolate take the forefront
in this rich and creamy ice cream.
Makes about 3½ cups (seven ½-cup servings)
1¼ cups whole milk
1¼ cups heavy cream
2
∕
cup granulated sugar, divided
3
1
∕
teaspoon kosher salt
8
1 teaspoon pure vanilla extract
1½ cups fresh mint leaves, packed
4 large egg yolks
¾ cup crushed chocolate sandwich cookies
(about 6 cookies)
1. In a medium saucepan set over medium-low heat, add the milk, cream, half
of the granulated sugar, salt, vanilla extract and mint leaves. Whisk to com-
bine and bring the mixture just to a boil.
2. While the milk/cream mixture is heating, combine the yolks and remaining
sugar in a medium bowl. Using a hand mixer on low speed or a whisk, beat
until mixture is pale and thick.
3. Once the milk /cream mixture has just come to a boil, slowly whisk about
1
/
of the hot mixture into the yolk/sugar mixture. Whisk in another
3
1
/
of the
3
mixture and return the combined mixture to the saucepan. Using a wooden
spoon, stir the mixture constantly over low heat until it thickens slightly and
coats the back of the spoon. This mixture must NOT boil or the yolks will
overcook – the process should only take a few minutes.
4. Bring the ice cream base to room temperature. Then cover and refrigerate at
least 2 hours, or overnight. Before churning, pour the custard through a fine
mesh strainer. Discard the mint leaves for a less intense mint flavor, strain
and discard mint leaves before refrigeration.
5. Turn the machine ON, pour mixture into the freezer bowl and let mix until
thickened, resembling a soft serce consistency. When the ice cream is
almost fully churned, gradually add the crushed cookies. Allow to mix thoroughly. Timing can vary between 10 and 25 minutes. Transfer the ice cream
to an airtight container and place in freezer for about 2 hours. Remove from
freezer about 15 minutes before serving.
Nutritional information per serving (based on ½ cup):
Calories 334 (57% from fat) • carb. 32g • pro. 5g • fat 22g • sat. fat 12g
• chol. 170mg • sod. 142mg • calc. 133mg • fiber 2g
PISTACHIO ICE CREAM
An old standby takes center stage in the Cuisinart® Flavor Duo™ Ice Cream,
Frozen Yogurt, & Sorbet Maker.
Makes about 3 cups (six-cup servings)
1 cup whole milk
1 cup heavy cream
½ cup plus 2 tablespoons granulated sugar, divided
Small pinch kosher salt
3 large egg yolks
¾ cup shelled, roasted, unsalted pistachios
½ teaspoon almond extract
8
Page 9

1. In a medium saucepan set over medium-low heat, combine the milk, cream,
¼ cup of the sugar, and salt. Whisk to combine and bring the mixture just to
a boil.
2. While the milk/cream mixture is heating, combine the yolks and ¼ cup of the
sugar in a medium bowl. Using a hand mixer on low speed or a whisk, beat
until mixture is pale and thick.
3. In the bowl of a food processor fitted with the chopping blade, combine the
pistachios with the remaining 2 tablespoons sugar. Pulse to roughly chop the
nuts and set aside.
1
/
4. Once the milk/cream mixture has just come to a boil, whisk about
1
/
hot mixture into the yolk/sugar mixture. Add another
of the mixture and
3
of the
3
return the combined mixture to the saucepan. Using a wooden spoon, stir the
mixture constantly over low heat until it thickens slightly and coats the back
of the spoon. This mixture must NOT boil or the yolks will overcook – the process should only take a few minutes.
5. Pour the mixture through a fine mesh strainer into a medium bowl. Stir in the
chopped pistachios and the almond extract. Let the base come to room temperature. Then cover and refrigerate at least 2 hours, or overnight.
6. Turn the machine ON, pour mixture into the freezer bowl and let mix until
thickened, resembling a soft serve consistency. Timing can vary between
10 and 25 minutes. Transfer the ice cream to an airtight container and place
in freezer for about 2 hours. Remove from freezer about 15 minutes before
serving.
Nutritional analysis per serving (based on ½ cup):
Calories 358 (61% from fat) • carb. 29g • pro. 7g • fat 25g • sat. fat 12g
• chol. 152mg • sod. 66mg • calc. 103mg • fiber g
COFFEE ICE CREAM
For a richer coffee flavor, use instant espresso.
Makes about 3½ cups (seven ½-cup servings)
¾ cup whole milk
2
∕
cup granulated sugar
3
2 tablespoons instant coffee or espresso
Small pinch kosher salt
1½ cups heavy cream
1 teaspoon pure vanilla extract
1. In a medium bowl, use a hand mixer or a whisk to combine the milk,
granulated sugar, espresso powder and salt until the sugar and espresso
are dissolved, about 1 to 2 minutes on low speed. Stir in the heavy cream
and vanilla extract. Cover and refrigerate for at least 2 hours, or overnight.
Stir again before churning.
2. Turn the machine ON, pour mixture into the freezer bowl and let mix until
thickened, resembling a soft serve consistency. Timing can vary between
10 and 25 minutes. Transfer the ice cream to an airtight container and place
in freezer for about 2 hours. Remove from freezer about 15 minutes before
serving.
Nutritional information per serving (based on ½ cup):
Calories 265 (65% from fat) • carb. 21g • pro. 1g • fat 18g • sat. fat 13g
• chol. 72 mg • sod. 33mg • calc. 32mg • fiber 0g
CHOCOLATE-COCONUT ICE CREAM
A delicious and creamy non-dairy frozen treat. Be sure to mix the batter very
well before freezing to avoid any clumps in the final product. If you can only
find large cans of coconut milk, make sure to stir the contents of the can before
using what you need (round up to 22 ounces).
Makes about 3½ cups (seven ½-cup servings)
½ cup cocoa powder, sifted
½ cup granulated sugar
¼ cup packed light brown sugar
Pinch kosher salt
4 small cans (5.46 ounces each) coconut milk (do not use “lite”)
1 teaspoon pure vanilla extract
1. Using a blender or in a bowl with an immersion blender on low speed, mix
all ingredients together until very smooth with no clumps.
2. Cover and refrigerate 2 hours, or overnight. Whisk mixture again before
churning.
3. T urn the machine ON, pour mixture into the freezer bowl and let mix until
9
Page 10

thickened, resembling a soft serve consistency. Timing can vary between 10
and 25 minutes. Transfer the ice cream to an airtight container and place in
freezer for about 2 hours. Remove from freezer about 15 minutes before serving.
Nutritional information per serving (based on ½ cup):
Calories 256 (57% from fat) • carb. 26g • pro. 2g • fat 17g • sat. fat 16g
• chol. 0mg • sod. 44mg • calc. 5mg • fiber 1g
BASIC VANILLA GELATO
Drizzle in melted chocolate for a decadent stracciatela gelato.
Makes about 3½ cups (seven ½-cup servings)
1 cup heavy cream
3 cups whole milk, divided
1 cup granulated sugar
2 tablespoons cornstarch
Pinch kosher salt
½ teaspoon pure vanilla extract
1 tablespoon liquid pectin
1. In a medium saucepan, combine cream and 2 cups of the milk. Set over
medium/medium-low heat and bring to a simmer.
2. While cream/milk mixture is heating, put the remaining milk, sugar, cornstarch, salt and vanilla extract into a small-medium mixing bowl. Whisk to
combine.
3. Once cream/milk mixture comes to a simmer, add the milk/sugar mixture and
stir until fully combined. While still set over medium/medium-low heat, continuously stir until mixture comes to a strong simmer and thickens slightly,
so it just coats the back of a spoon (this will take no more than 20 minutes,
depending on the stove being used).
4. Remove pan from heat, stir in pectin, strain and cool to room temperature.
Cover and refrigerate at least 2 hours, or overnight. Whisk mixture again
before churning.
5. Turn the machine ON, pour mixture into the freezer bowl and let mix until
thickened, resembling a soft serve consistency. Timing can vary between
10 and 25 minutes. Transfer the gelato to an airtight container and place
in freezer for about 2 hours. Remove from freezer about 15 minutes before
serving.
Nutritional information per serving (based on ½ cup):
Calories 302 (46% from fat) • carb. 37g • pro. 4g • fat 16g • sat. fat 10g
• chol. 62mg • sod. 88mg • calc. 151mg • fiber 0g
CHOCOL ATE- H AZELNUT GELATO
A standard in many gelateria, bring the flavors of Italy to your kitchen with this
recipe.
Makes about 3½ cups (seven ½-cup servings)
1
1
∕
cup heavy cream
3
2
∕
cups whole milk, divided
1
3
1
∕
cup granulated sugar
3
1½ tablespoons cornstarch
Small pinch kosher salt
¾ cup chocolate-hazelnut spread
1
∕
cup chopped hazelnuts
3
1. In a medium saucepan, combine the cream and 1
over medium/medium-low heat and bring to a simmer.
2. While cream/milk mixture is heating, put the remaining
cornstarch and salt into a small-medium mixing bowl. Whisk to combine.
3. Once cream/milk mixture comes to a simmer, add the milk/sugar mixture
and stir until fully combined. Slowly whisk in the chocolate-hazelnut spread.
While still set over medium/medium-low heat, continuously stir until mixture
comes to a strong simmer and thickens slightly so it just coats the back of
a spoon (this will take about 10 to 15 minutes, depending on the stove being
used).
4. Remove pan from heat, strain and cool to room temperature. Cover and
refrigerate at least 2 hours, or overnight. Whisk mixture together again before
churning.
5. Turn the machine ON, pour mixture into the freezer bowl and let mix until
thickened, resembling a soft serve consistency. When the gelato is almost
fully churned, gradually add the hazelnuts. Allow to mix thoroughly. Timing can
vary between 10 and 25 minutes. Transfer the gelato to an airtight container
and place in freezer for about 2 hours. Remove from freezer about 15 minutes
1
/
cups of the milk. Set
3
1
/
cup of milk, sugar,
3
10
Page 11

before serving.
Nutritional information per serving (based on ½ cup):
Calories 445 (63% from fat) • carb. 36g • pro. 6g • fat 32g • sat. fat 21g
• chol. 70mg • sod. 80mg • calc. 144mg • fiber 3g
serving.
Nutritional information serving (based on ½ cup):
Calories 321 (40% from fat) • carb. 46g • pro 3g • fat 13g • sat fat 9g
• chol 57mg • sod. 70mg • calc. 120mg • fiber 1g
LEMON GELATO
The perfect amount of sweet and tart for this classic gelato flavor.
Makes about 3½ cups (seven ½-cup servings)
1 cup heavy cream
2 cups whole milk, divided
½ cup lemon zest (from about 6 medium lemons)
1¼ cups granulated sugar
2 tablespoons cornstarch
Pinch kosher salt
1 teaspoon pure vanilla extract
1 tablespoon liquid pectin
1 cup lemon juice (from about 4–6 medium lemons)
1. In a medium saucepan, combine the cream and 1 cup of the milk. Set over
medium/medium-low heat and bring to a simmer.
2. While cream/milk mixture is heating, put the remaining milk, lemon zest,
sugar, cornstarch, salt and vanilla extract into a small-medium mixing bowl.
Whisk to combine.
3. Once cream/milk mixture comes to a simmer, add the milk/sugar mixture
and stir until fully combined. While still set over medium/medium-low heat,
continuously stir until mixture comes to a strong simmer and thickens slightly
so it just coats the back of a spoon (this will take no more than 20 minutes,
depending on the stove being used).
4. Remove pan from heat, stir in pectin, strain and cool to room temperature.
Stir in the lemon juice, cover and refrigerate at least 2 hours, or overnight.
Whisk mixture together again before churning.
5. Turn the machine ON, pour mixture into the freezer bowl and let mix until
thickened, resembling a soft serve consistency. Timing can vary between
10 and 25 minutes. Transfer the gelato to an airtight container and place
in freezer for about 2 hours. Remove from freezer about 15 minutes before
MANGO FROZEN YOGURT
We use frozen mango to make this a quick, simple dessert, but for a more
intense flavor, use ripe, fresh mango.
Makes about 3 cups (six ½-cup servings)
1 cup whole milk, plain Greek yogurt
¼ cup granulated sugar
2 cups frozen mango pieces, thawed
1 teaspoon fresh lime juice
Small pinch kosher salt
1. Put all of the ingredients into a food processor or blender. Purée until completely smooth, stopping to scrape down the sides of the bowl or jar as needed. Strain mixture into a medium mixing bowl, cover and refrigerate at least 2
hours, or overnight.
2. Turn the machine ON, pour mixture into the freezer bowl and let mix until
thickened, resembling a soft serve consistency. Timing can vary between 10
and 25 minutes. Transfer the frozen yogurt to an air tight container and place
in freezer for about 2 hours. Remove from freezer about 15 minutes before
serving.
Nutritional information per serving (based on ½ cup):
Calories 130 (7% from fat) • carb. 27g • pro. 4g • fat 1g • sat. fat 1g
• chol. 5mg • sod. 65mg • calc. 182mg • fiber 2g
CHOCOLATE PRETZEL FROZEN YOGURT
The combination of the chocolate and the salt from the pretzel is a standout in
this tangy and sweet desser t.
Makes about 4 cups (eight ½-cup servings)
2 cups whole milk, plain Greek yogurt
½ cup granulated sugar
11
Page 12

¼ cup cocoa powder, sifted
Small pinch kosher salt
1 cup whole milk
½ teaspoon pure vanilla extract
½ cup chopped chocolate- or yogurt-covered pretzels
1. In a large mixing bowl, whisk together all ingredients except the pretzels, until
the dry ingredients have dissolved. Cover and refrigerate at least 2 hours, or
overnight.
2. Turn the machine ON, pour mixture into the freezer bowl and let mix until
thickened, resembling a soft serve consistency. When the frozen yogur t
is almost fully churned, gradually add the chopped pretzels. Allow to mix
thoroughly. Timing can vary between 10 and 25 minutes. Transfer the frozen
yogurt to an airtight container and place in freezer for about 2 hours. Remove
from freezer about 15 minutes before serving.
Nutritional information per serving (based on ½ cup):
Calories 202 (23% from fat) • carb. 34g • pro. 5g • fat 5g • sat. fat 3g
• chol. 6mg • sod. 188mg • calc. 153mg • fiber 1g
HONEY-ALMOND FROZEN YOGURT
The flavors of this are like eating a bowl of Greek yogurt topped with honey.
Makes about 4 cups (eight ½-cup servings)
2 cups heavy cream
¼ cup honey
¼ cup granulated sugar
Small pinch kosher salt
1½ cups whole milk, plain Greek yogurt
1 teaspoon pure almond extract
½ cup sliced almonds
1. In a small to medium saucepan, combine the cream, honey, sugar and salt.
Bring to a simmer, whisking occasionally to combine ingredients. Cool to
room temperature.
2. In a medium mixing bowl, whisk the yogurt and almond extract together until
combined. Slowly whisk in the cooled cream/honey mixture and continue to
whisk until combined. Cover and refrigerate at least 2 hours, or overnight.
Whisk mixture again before pouring into the ice cream maker.
3. Turn the machine ON, pour mixture into the freezer bowl and let mix until
thickened, resembling a soft serve consistency. When the yogurt is almost
fully churned, gradually add the sliced almonds. Allow to mix thoroughly.
Timing can vary between 10 and 25 minutes. Transfer the frozen yogurt to an
airtight container and place in freezer for about 2 hours. Remove from freezer
about 15 minutes before serving.
Calories 311 (67% from fat) • carb. 20g • pro. 5g • fat 23g • sat. fat 16g
Nutritional information per serving (based on ½ cup):
• chol. 80mg • sod. 56mg • calc. 72mg • fiber 1g
DARK CHOCOLATE SORBET
A step away from ordinary sorbets, our Dark Chocolate Sorbet is a decadent
treat.
Makes about 4 cups (eight ½-cup servings)
2 cups water
1 cup plus 2 tablespoons granulated sugar
¼ teaspoon kosher salt
2 ounces unsweetened chocolate, chopped
2 ounces bittersweet chocolate, chopped
2
∕
cup cocoa powder, sifted
3
¾ teaspoon pure vanilla extract
1. Prepare simple syrup with the water, sugar and salt by adding all three to a
medium saucepan set over medium-low heat. Cook mixture until the sugar is
fully dissolved.
2. While syrup is cooking, put the chopped chocolate in a medium bowl;
reser ve.
3. Put the cocoa powder in another medium bowl and gradually add the hot
simple syrup to the powder, whisking constantly until smooth. Pour mixture
over the chopped chocolate. Let sit for 5 minutes to melt the chocolate; add
the vanilla extract and stir to combine. Cool to room temperature. Cover, and
refrigerate at least 2 hours, or overnight.
4. Turn the machine ON, pour mixture into the freezer bowl and let mix until
thickened, resembling a soft serve consistency. Timing can vary between
10 and 25 minutes. Transfer the sorbet to an airtight container and place
12
Page 13

in freezer for about 2 hours. Remove from freezer about 15 minutes before
serving.
Nutritional information per serving (based on ½ cup):
Calories 208 (29% from fat) • carb. 38g • pro. 3g • fat 8g • sat. fat 4g
• chol. 0mg • sod. 68mg • calc. 8mg • fiber 3g
RASPBERRY-MINT SORBET
The perfect pairing of flavors for a light dessert.
Makes about 4 cups (eight ½-cup servings)
1½ cups water
1 cup granulated sugar
½ cup packed mint leaves
Small pinch kosher salt
3 cups frozen raspberries, thawed
1. Prepare simple syrup with the water and sugar by adding both to a medium
saucepan set over medium-low heat. Cook mixture until the sugar is fully
dissolved.
2. Once the simple syrup is ready, remove from heat and add the mint leaves
and salt. Let the mixture steep for 15 to 20 minutes. If you desire a milder
mint flavor, remove and discard the mint leaves after steeping.
3. In a blender, combine the simple syrup/mint texture and the raspberries and
blend the mixture until smooth. (Strain mixture through a fine mesh strainer
into a medium bowl. Allow to cool to room temperature. Cover and refrigerate
at least 2 hours, or overnight).
4. Turn the machine ON, pour mixture into the freezer bowl and let mix until
thickened, resembling a soft serve consistency. Timing can vary between
10 and 25 minutes. Transfer the sorbet to an airtight container and place
in freezer for about 2 hours. Remove from freezer about 15 minutes before
serving.
Nutritional information per serving (based on ½ cup):
Calories 190 (1% from fat) • carb. 50g • pro. 1g • fat 0g • sat. fat 0g
• chol. 0mg • sod. 10mg • calc. 19mg • fiber 4g
PINEAPPLE SORBET
For a taste of the tropics, prepare this sorbet for your family and friends.
Makes about 3½ cups (seven ½-cup servings)
1 cup water
½ cup granulated sugar
Small pinch kosher salt
2 heaping cups chopped pineapple (fresh or frozen, thawed, not
canned)
1. Prepare simple syrup by adding the water, sugar and salt (if using fresh pineapple, the core can be added to the pot as well) to a medium saucepan set
over medium-low heat. Cook until the sugar is fully dissolved. Discard the
core and remove from heat and bring to room temperature.
2. In a blender, combine the simple syrup and the cubed pineapple and blend
until smooth. Strain mixture through a fine mesh strainer into a medium bowl.
Cover and refrigerate at least 2 hours, or overnight.
3. Turn the machine ON, pour mixture into the freezer bowl and let mix until
thickened, resembling a soft serve consistency. Timing can vary between
10 and 25 minutes. Transfer the sorbet to an airtight container and place
in freezer for about 2 hours. Remove from freezer about 15 minutes before
serving.
Nutritional information per serving (based on ½ cup):
Calories 82 (1% from fat) • carb. 21g • pro. 0g • fat 0g • sat. fat 0g
• chol. 0mg • sod. 12mg • calc. 8mg • fiber 1g
CARAMEL SAUCE
While we love this sauce on ice cream, it can also be used as a
dipping sauce for fruit and cake.
Makes about ¾ cup
¾ cup granulated sugar
½ teaspoon kosher salt
¼ cup water (enough so that the consistency when mixed with the
sugar and salt is similar to wet sand)
1 tablespoon light corn syrup
1
∕
cup heavy cream
3
13
Page 14

3 tablespoons unsalted butter, cut into ½-inch cubes
1. In a medium, heavy-bottomed saucepan, stir together the sugar, salt, water
and corn syrup. Be sure to clean the inside walls of the pan if there is any
sugar on the sides (a clean, wet pastry brush works best). Set over medium-low heat, to keep the mixture at a low simmer, and cook until the sugar
mixture turns a ver y light amber color (about 15 to 20 minutes). Keep a close
eye on the caramel sauce as it can burn easily.
2. Once the sugar mixture has a light amber color, take it off the stove and
slowly and carefully stir in the cream. After the cream has been incorporated, slowly whisk in the butter, one piece at a time, continually whisking to
emulsify until all the butter has been added. Use immediately, or keep warm
over a pot of warm water.
Nutritional information per serving (2 tablespoons):
Calories 198 (46% from fat) • carb. 27g • pro. 0g • fat 10g • sat. fat 7g
• chol. 33mg • sod. 184mg • calc. 9mg • fiber 0g
HOT FUDGE SAUCE
No sundae bar is complete without homemade hot fudge.
Makes about 2 cups
²∕³ cup heavy cream
1
∕
cup light corn syrup
3
1
∕
cup packed light brown sugar
3
¼ cup cocoa powder, sifted
¼ teaspoon kosher salt
2 tablespoons unsalted butter
1 teaspoon pure vanilla extract
6 ounces semisweet chocolate, chopped
1. In a heavy-bottomed saucepan, combine all ingredients except for
semisweet chocolate. Set over medium-low heat and bring to a slight boil.
Add chocolate and whisk to combine.
Calories 133 (53% from fat) • carb. 15g • pro. 1g • fat 8g • sat. fat 5g
Nutritional information per serving (2 tablespoons):
• chol. 18mg • sod. 15mg • calc. 11mg • fiber 1g
14
Page 15

WARRANTY
LIMITED THREE-YEAR
WARRANTY
(U.S. AND CANADA ONLY)
This warranty is (U.S. and Canada only) available to consumers only. You are
a consumer if you own a Cuisinart
Sorbet Maker that was purchased at retail for personal, family or household use.
Except as otherwise required under applicable law, this warranty is not available
to retailers or other commercial purchasers or owners.
We warrant that your Cuisinart
Maker will be free of defects in materials and workmanship under normal home
use for 3 years from the date of original purchase.
We suggest you complete and return the enclosed product registration card
promptly to facilitate verification of the date of original purchase. However, return
of the product registration card does not eliminate the need for the consumer to
maintain the original proof of purchase in order to obtain the warranty benefits.
In the event that you do not have proof of purchase date, the purchase date for
purposes of this warranty will be the date of manufacture.
If your Cuisinart
should prove to be defective within the warranty period, we will repair it, or if we
think necessary, replace it. To obtain warranty ser vice, simply call our toll-free
number 1-800-726-0190 for additional information from our Consumer Service
Representatives, or send the defective product to Consumer Service at Cuisinar t,
7475 North Glen Harbor Blvd., Glendale, AZ 85307.
To facilitate the speed and accuracy of your return, please enclose $15.00 for
shipping and handling of the product. Please pay by check or money order made
payable to Cuisinart (California residents need only supply proof of purchase and
should call 1-800-726-0190 for shipping instructions).
NOTE: For added protection and secure handling of any Cuisinar t product that
is being returned, we recommend you use a traceable, insured delivery service.
Cuisinart cannot be held responsible for in-transit damage or for packages that
are not delivered to us. Lost and/or damaged products are not covered under
warranty. Please be sure to include your return address, daytime phone number,
description of the product defect, product model number (located on bottom of
product), original date of purchase, and any other information pertinent to the
product’s return.
Your Cuisinart® Flavor Duo
manufactured to the strictest specifications and has been designed for use only
®
Flavor DuoTM Frozen Yogurt-Ice Cream & Sorbet Maker
®
Flavor DuoTM Frozen Yogurt-Ice Cream &
®
Flavor DuoTM Frozen Yogurt-Ice Cream & Sorbet
TM
Frozen Yogurt-Ice Cream & Sorbet Maker has been
in 120-volt outlets and only with authorized accessories and replacement parts.
This warranty expressly excludes any defects or damages caused by attempted
use of this unit with a converter, as well as use with accessories, replacement
parts or repair service other than those authorized by Cuisinart. This warranty
does not cover any damage caused by accident, misuse, shipment or other than
ordinary household use. This warranty excludes all incidental or consequential
damages. Some states do not allow the exclusion or limitation of these damages,
so these exclusions may not apply to you. This warranty gives you specific legal
rights and you may also have other rights, which vary from state to state.
CALIFORNIA RESIDENTS ONLY:
California law provides that for In-Warranty Service, California residents have
the option of returning a nonconforming product (A) to the store where it was
purchased or (B) to another retail store which sells Cuisinart products of the
same type. The retail store shall then, at its discretion, either repair the product,
refer the consumer to an independent repair facility, replace the product, or
refund the purchase price less the amount directly attributable to the consumer’s
prior usage of the product. If the above two options do not result in the
appropriate relief to the consumer, the consumer may then take the product to an
independent repair facility if service or repair can be economically accomplished.
Cuisinart and not the consumer will be responsible for the reasonable cost of
such service, repair, replacement, or refund for nonconforming products under
warr anty.
California residents may also, according to their preference, return nonconform
ing products directly to Cuisinart for repair, or if necessary, replacement, by calling our Consumer Service Center toll-free at 1-800-726-0190. Cuisinart will be
responsible for the cost of the repair, replacement, and shipping and handling for
such products under warranty.
product serviced. If servicing is needed, a
-
Representative can confirm whether the product is under warranty and direct
you to the nearest service location.
Important: If the nonconforming product is to be serviced by someone other
than Cuisinart’s Authorized Service Center, please remind the servicer to call our
Consumer Service Center at 1-800-726-0190 to ensure that the problem is
properly diagnosed, the product is serviced with the correct parts, and the
product is still under warranty.
15
Page 16

Any other trademarks or service marks of third parties
referred to herein are the trademarks or service marks
of their respective owners.
©2018 Cuisinart
150 Milford Road
East Windsor, NJ 08520
Printed in China
18CE050296
N IB-15482-ESP
16
Page 17

16
N IB-15482-ESP
18CE050296
Impreso en China
East Windsor, NJ 08520
150 Milford Road
©2018 Cuisinart
a sus titulares respectivos.
servicio mencionadas en este documento pertenecen
Todas las marcas registradas, comerciales o de
Page 18

15
los daños causados por accesorios, piezas o reparaciones no autorizados
de repuesto autorizados solamente. Esta garantía excluye expresamente
diseñado para uso sobre corriente de 120 V, usando accesorios y piezas
Este aparato satisface las más altas exigencias de fabricación y ha sido
repararlo y asegurarse de que el producto aún esté bajo garantía.
diagnosticar el problema correctamente, usar las piezas correctas para
llamar al servicio posventa de Cuisinart al 1-800-726-0190 a fin de
autorizado, por favor informe al personal del centro de servicio que deben
Importante: si debe llevar el producto defectuoso a un centro de servicio no
centro de servicio más cercano.
confirmará si su producto sigue bajo garantía y le indicará la dirección del
Un representante le
®
productos defectuosos durante el período de garantía.
responsable por los gastos de reparación, reemplazo, manejo y envío de los
se debe llamar a nuestro servicio posventa al 1-800-726-0190. Cuisinart será
defectuoso directamente a Cuisinart para que lo reparen o lo cambien. Para esto,
Los residentes de California también pueden, si lo desean, mandar el producto
reembolso de los productos defectuosos durante el período de garantía.
Cuisinart será responsable por los gastos de servicio, reparación, reemplazo o
económica.
independiente, siempre que se pueda ajustar o reparar el producto de manera
no satisfacen al consumidor, podrá llevar el producto a un centro de servicio
del producto por el consumidor hasta que este se dañó. Si estas dos opciones
consumidor el precio original del producto, menos la cantidad imputable al uso
a un centro de servicio independiente, cambiará el producto o reembolsará al
de este tipo. La tienda, a su opción, reparará el producto, referirá al consumidor
a la tienda donde lo compraron o (B) a otra tienda que venda productos Cuisinart
Los residentes del estado de California pueden (A) regresar el producto defectuoso
La ley del estado de California ofrece dos opciones bajo el período de garantía.
RESIDENTES DE CALIFORNIA SOLAMENTE
7475 North
Para obtener servicio bajo esta garantía, llame a nuestra línea
Estado a otro.
legales específicos y usted puede tener otros derechos que varían de un
mencionadas pueden no regir para usted. Esta garantía le otorga derechos
de daños incidentales o consecuentes, de modo que las limitaciones
A
que
®
Usted es un consumidor si posee un aparato Cuisinart
o consecuentes. Algunos Estados no permiten la exclusión o limitación
accidente. Esta garantía excluye expresamente todos los daños incidentales
y no es válida en caso de daños causados por mal uso, negligencia o
voltaje. Esta garantía no cubre el uso institucional o comercial del producto,
por Cuisinart, así como los daños causados por el uso de un convertidor de
teléfono, la descripción del problema, así como cualquier información pertinente.
no serán cubiertos bajo esta garantía. Recuerde incluir su nombre, dirección y
una dirección equivocada. Los productos perdidos o dañados durante el envío
por los daños ocurridos durante el transporte o por los paquetes enviados a
método de entrega con seguro y seguimiento. Cuisinart no será responsable
NOTA: para mayor seguridad, le aconsejamos que mande su paquete por un
0190 para recibir instrucciones de envío.
California solo necesitan dar una prueba de compra y deben llamar al 1-800-726postal de US$15.00 para cubrir los gastos de manejo y envío. Los residentes de
Regrese el aparato defectuoso, junto con su recibo de compra y un cheque o giro
Glen Harbor Blvd., Glendale, AZ 85307.
directa gratuita al 1-800-726-0190 o regrese el aparato defectuoso a:
nuestra opción).
durante el período de garantía, lo reparemos o reemplazaremos (a
Si este aparato presentara algún defecto de materiales o fabricación
la fecha de fabricación.
En ausencia del recibo de compra, el período de garantía será calculado a partir de
necesario regresar el formulario de registro para recibir servicio bajo esta garantía.
fin de facilitar la verificación de la fecha de compra original. Sin embargo, no es
Le aconsejamos que llene y regrese por correo el formulario de registro adjunto a
según las instrucciones.
siempre que el aparato haya sido utilizado para uso doméstico y
fabricación durante 3 años después de la fecha de compra original,
Cuisinart garantiza este aparato contra todo defecto de materiales o
detallistas, los demás comerciantes ni los dueños.
excepción de los estados donde la ley lo permita, esta garantía no es para los
fue comprado en una tienda para uso personal, familiar o casero.
solamente.
Esta garantía es para los consumidores que residen en los EE.UU. y en Canadá
SOLAMENTE)
(VÁLIDA EN LOS EE.UU. Y EN CANADÁ
GARANTÍA LIMITADA DE TRES AÑOS
Page 19

14
Fibra 0 g
Grasa saturada 7 g • Colesterol 33 mg • Sodio 184 mg • Calcio 9 mg
Calorías 198 (46 % de grasa) • Carbohidratos 27 g • Proteínas 0 g • Grasa 10 g
Información nutricional por porción (2 cucharadas):
Grasa saturada 5 g • Colesterol 18 mg • Sodio 15 mg • Calcio 11 mg • Fibra 1 g
Calorías 133 (53 % de grasa) • Carbohidratos 15 g • Proteínas 1 g • Grasa 8 g
Información nutricional por porción (2 cucharadas):
justo hasta que empiece a hervir. Agregar el chocolate y batir para mezclar.
cacerola mediana de fondo pesado; revolver. Calentar a fuego medio-lento,
1. Colocar todos los ingredientes, excepto el chocolate semidulce, en una
6 onzas (170 g) de chocolate semidulce, picado
1 cucharadita de extracto natural de vainilla
2 cucharadas (30 g) de mantequilla sin sal
¼ cucharadita de sal kosher
¼ taza (30 g) de cacao en polvo, tamizado
3
∕
taza llena (65 g) de azúcar rubia (azúcar de caña integral)
1
3
∕
taza (80 ml) de jarabe de maíz claro
1
²∕³ taza (160 ml) de crema líquida para batir (“heavy cream”)
Rinde aproximadamente 2 tazas (475 ml)
La salsa de chocolate caliente casera completa cualquier copa helada.
SALSA DE CHOCOLATE CALIENTE
SALSA DE CARAMELO
inmediatamente o mantener caliente a baño María.
agregar la mantequilla, pedazo por pedazo, batiendo constantemente. Usar
fuego y añadir lentamente la crema. Después de haber incorporado la crema,
2. Después de que la mezcla haya adquirido un color ambarina claro, retirar del
Vigilar la cocción para que el caramelo no se queme.
a 20 minutos, hasta que la mezcla adquiera un color ambarino muy claro.
para que el azúcar no adhiera a ellos. Cocinar a fuego medio-lento por 15
de fondo pesado; revolver. Limpiar los costados con una brocha húmeda
1. Colocar el azúcar, la sal, el agua y el jarabe de maíz en una cacerola mediana
3 cucharadas (45 g) de mantequilla sin sal, en pedacitos
3
∕
taza (80 ml) de crema líquida para batir (“heavy cream”)
1
1 cucharada de jarabe de maíz claro
¼ taza (60 ml) de agua
½ cucharadita de sal kosher
¾ taza (150 g) de azúcar granulada
Rinde aproximadamente ¾ de taza (175 ml)
para mojar frutas o pastel.
Aunque nos encanta esta salsa con helado, también es perfecta
Page 20

13
3. Licuar el jarabe simple y las frambuesas hasta obtener una mezcla suave.
Grasa saturada 0 g • Colesterol 0 mg • Sodio 12 mg • Calcio 8 mg • Fibra 1 g
Información nutricional por porción de ½ taza (120 ml):
Calorías 82 (1 % de grasa) • Carbohidratos 21 g • Proteínas 0 g • Grasa 0 g
aproximadamente 2 horas. Sacar del congelador 15 minutos antes de servir.
10 y 25 minutos. Poner el sorbete en un recipiente hermético y congelar por
mezcle hasta que se espese. El tiempo de congelamiento puede variar entre
3. Encender la máquina y verter la mezcla en el tazón congelador; dejar que se
Cubrir y refrigerar por 2 a 12 horas.
Colar la mezcla con un colador de malla fina y colocar en un tazón mediano.
2. Licuar el jarabe simple y los cubos de piña hasta obtener una mezcla suave.
temperatura ambiente.
que el azúcar esté disuelto. Tirar el corazón de la piña y dejar enfriar a
un jarabe simple (si usa piña fresca, incluir el corazón también). Cocer hasta
1. Poner a calentar el agua, el azúcar y la sal a fuego medio-lento para preparar
SORBETE DE FRAMBUESA CON MENTA
desea que el sorbete tenga un sabor a menta más ligera, colar y tirar la menta.
2. Agregar la menta y la sal al jarabe simple. Dejar enfriar por 15 a 20 minutos. Si
jarabe simple. Cocer hasta que el azúcar esté disuelto.
1. Poner a calentar a fuego medio-lento el agua y el azúcar para preparar un
3 tazas (500 g) de frambuesas congeladas, descongeladas
1 pizca pequeña de sal kosher
½ taza llena (30 g) de menta fresca
1 taza (200 g) de azúcar granulada
1½ tazas (355 ml) de agua
Rinde aproximadamente 8 porciones de ½ taza (120 ml)
Este postre ligero logra la combinación perfecta de sabores.
piña enlatada)
2 tazas llenas (450 g) de cubos de piña (fresca o descongelada; no usar
1 pizca pequeña de sal kosher
½ taza (100 g) de azúcar granulada
1 taza (235 ml) de agua
Rinde aproximadamente 13 porciones de ½ taza (120 ml)
amigos.
Este refrescante sorbete con sabor tropical les encantará a su familia y a sus
Información nutricional por porción de ½ taza (120 ml):
SORBETE DE PIÑA
Grasa saturada 0g • Colesterol 0 mg • Sodio 10 mg • Calcio 19 mg • Fibra 4 g
Información nutricional por porción de ½ taza (120 ml):
Calorías 190 (1 % de grasa) • Carbohidratos 50 g • Proteínas 1 g • Grasa 0 g
aproximadamente 2 horas. Sacar del congelador 15 minutos antes de servir.
10 y 25 minutos. Poner el sorbete en un recipiente hermético y congelar por
mezcle hasta que se espese. El tiempo de congelamiento puede variar entre
4. Encender la máquina y verter la mezcla en el tazón congelador; dejar que se
Dejar enfriar a temperatura ambiente. Cubrir y refrigerar por 2 a 12 horas.
Colar la mezcla con un colador de malla fina y colocar en un tazón mediano.
Grasa saturada 4 g • Colesterol 0 mg • Sodio 68 mg • Calcio 8 mg • Fibra 3 g
Calorías 208 (29 % de grasa) • Carbohidratos 38 g • Proteínas 3 g • Grasa 8 g
aproximadamente 2 horas. Sacar del congelador 15 minutos antes de servir.
10 y 25 minutos. Poner el sorbete en un recipiente hermético y congelar por
mezcle hasta que se espese. El tiempo de congelamiento puede variar entre
4. Encender la máquina y verter la mezcla en el tazón congelador; dejar que se
temperatura ambiente. Cubrir y refrigerar por 2 a 12 horas.
el chocolate, y luego agregar la vainilla y revolver para mezclar. Dejar enfriar a
mezcla sobre el chocolate picado. Dejar reposar por 5 minutos para derretir
poco, batiendo constantemente, hasta obtener una mezcla suave. Verter la
3. Colocar el cacao en un tazón mediano y agregar el jarabe simple poco a
2. Poner el chocolate picado en un tazón mediano; reservar.
un jarabe simple. Cocer hasta que el azúcar esté disuelto.
1. Poner a calentar el agua, el azúcar y la sal a fuego medio-lento, para preparar
¾ cucharadita de extracto natural de vainilla
3
∕
taza (80 g) de cacao en polvo, tamizado
2
2 onzas (140 g) de chocolate semiamargo, picado
2 onzas (115 g) de chocolate amargo, picado
Page 21

Fibra 1 g
12
¼ cucharadita de sal kosher
1 taza + 2 cucharadas (210 g) de azúcar granulada
2 tazas (475 ml) de agua
Rinde aproximadamente 8 porciones de ½ taza (120 ml)
Nuestro sorbete de chocolate oscuro es algo exquisito.
SORBETE DE CHOCOLATE AMARGO
Grasa saturada 16 g • Colesterol 80 mg • Sodio 56 mg • Calcio 72 mg
Calorías 311 (67 % de grasa) • Carbohidratos 20 g • Proteínas 5 g • Grasa 23 g
Información nutricional por porción de ½ taza (120 ml):
Sacar del congelador 15 minutos antes de servir.
de yogur en un recipiente hermético y congelar por aproximadamente 2 horas.
tiempo de congelamiento puede variar entre 10 y 25 minutos. Poner el helado
agregar los “pretzels” picados y las almendras. Dejar que se combine todo. El
mezcle hasta que se espese. Unos minutos antes del final del congelamiento,
3. Encender la máquina y verter la mezcla en el tazón congelador; dejar que se
echarla en el tazón congelador.
continuamente. Cubrir y refrigerar por 2 a 12 horas. Batir la mezcla antes de
revolver. Agregar lentamente la mezcla enfriada de crema/miel, batiendo
2. Colocar el yogur y el extracto de almendra en un tazón pequeño;
cuando. Dejar enfriar a temperatura ambiente.
mediana; revolver. Cocer justo hasta que empiece a hervir, batiendo de vez en
1. Colocar la crema, la miel, el azúcar y la sal en una cacerola pequeña a
½ taza (45 g) de almendras en láminas
1 cucharadita de extracto natural de almendra
1½ tazas (355 ml) de yogur griego de leche entera
1 pizca pequeña de sal kosher
¼ taza (50 g) de azúcar granulada
¼ taza (85 g) de miel
2 tazas (475 ml) de crema líquida para batir (“heavy cream”)
Rinde aproximadamente 8 porciones de ½ taza (120 ml)
Este helado de yogur tiene el mismo sabor que yogur griego con miel.
HELADO DE YOGUR DE MIEL CON ALMENDRAS
Fibra 1 g
Grasa saturada 3 g • Colesterol 6 mg • Sodio 188 mg • Calcio 153 mg
Calorías 202 (23 % de grasa) • Carbohidratos 34 g • Proteínas 5 g • Grasa 5 g
Información nutricional por porción de ½ taza (120 ml):
del congelador 15 minutos antes de servir.
en un recipiente hermético y congelar por aproximadamente 2 horas. Sacar
congelamiento puede variar entre 10 y 25 minutos. Poner el helado de yogur
agregar los “pretzels” picados. Dejar que se combine todo. El tiempo de
mezcle hasta que se espese. Unos minutos antes del final del congelamiento,
2. Encender la máquina y verter la mezcla en el tazón congelador; dejar que se
a 12 horas.
batir hasta que los ingredientes secos estén disueltos. Cubrir y refrigerar por 2
1. Colocar todos los ingredientes (excepto los “pretzels”) en un tazón grande;
½ taza (35 g) de “pretzels” cubiertos con chocolate o yogur, picados
½ cucharadita de extracto natural de vainilla
1 taza (235 ml) de leche entera
1 pizca pequeña de sal kosher
¼ taza (30 g) de cacao en polvo, tamizado
½ taza (100 g) de azúcar granulada
2 tazas (475 ml) de yogur griego de leche entera
Rinde aproximadamente 8 porciones de ½ taza (120 ml)
La combinación del chocolate y de los “pretzels” es perfecta.
CON “PRETZELS”
HELADO DE YOGUR DE CHOCOLATE
Fibra 2g
Grasa saturada 1 g • Colesterol 5 mg • Sodio 65 mg • Calcio 182 mg
Calorías 130 (7 % de grasa) • Carbohidratos 27 g • Proteínas 4 g • Grasa 1 g
Información nutricional por porción de ½ taza (120 ml):
Page 22

11
Fibra 1 g
antes de servir.
y congelar por aproximadamente 2 horas. Sacar del congelador 15 minutos
entre 10 y 25 minutos. Poner el helado de yogur en un recipiente hermético
se mezcle hasta que se espese. El tiempo de congelamiento puede variar
2. Encender la máquina y verter la mezcla en el tazón congelador; dejar que
recipiente mediano, cubrir y refrigerar por 2 a 12 horas.
suave, raspando el bol/la jarra de vez en cuando. Colar la mezcla, poner en un
o la jarra de una licuadora. Procesar/licuar hasta conseguir una mezcla muy
1. Colocar todos los ingredientes en el bol de una procesadora de alimentos
1 pizca pequeña de sal kosher
1 cucharadita de jugo de lima/limón verde fresco
2 tazas (600 g) de cubos de mango congelados, descongelados
¼ taza (50 g) de azúcar granulada
1 taza (235 ml) de yogur griego de leche entera
Rinde aproximadamente 3 porciones de ½ taza (120 ml)
y rápido, pero puede usar mango fresco para un sabor más intenso.
Usamos mango congelado para hacer de este helado de yogur un postre simple
HELADO DE YOGUR DE MANGO
Grasa saturada 9 g • Colesterol 57 mg • Sodio 70 mg • Calcio 120 mg
Calorías 321 (40 % de grasa) • Carbohidratos 46 g • Proteínas 3 g • Grasa 13g
Información nutricional por porción de ½ taza (120 ml):
aproximadamente 2 horas. Sacar del congelador 15 minutos antes de servir.
10 y 25 minutos. Poner el gelato en un recipiente hermético y congelar por
mezcle hasta que se espese. El tiempo de congelamiento puede variar entre
5. Encender la máquina y verter la mezcla en el tazón congelador; dejar que se
por 2–12 horas. Batir de nuevo antes de empezar la preparación.
temperatura ambiente. Agregar el jugo de limón y revolver; cubrir y refrigerar
4. Retirar del fuego, agregar la pectina y revolver; colar y dejar enfriar a
que la mezcla hierva y se espese ligeramente.
lento durante aproximadamente 20 minutos, revolviendo continuamente, hasta
leche/azúcar y revolver para mezclar. Seguir cociendo a fuego medio/medio-
3. Cuando la mezcla de crema/leche empiece a hervir, agregar la mezcla de
Fibra 3 g
GELATO DE LIMÓN
Información nutricional por porción de ½ taza (120 ml):
en un tazón mediano. Revolver, batiendo.
2. Colocar la leche restante, la ralladura, el azúcar, la maicena, la sal y la vainilla
fuego medio/medio-lento, justo hasta que empiece a hervir.
1. In a medium saucepan, combine the cream and 1 cup of the milk. Calentar a
1 taza (235 ml) de jugo de limón (de 4–6 limones medianos)
1 cucharada de pectina líquida
1 cucharadita de extracto natural de vainilla
1 pizca de sal kosher
2 cucharadas de maicena
1¼ tazas (250 g) de azúcar granulada
½ taza (30 g) de ralladura (de aproximadamente 6 limones medianos)
2 tazas (475 ml) de leche entera
1 taza (235 ml) de crema líquida para batir (“heavy cream”)
Rinde aproximadamente 13 porciones de ½ taza (120 ml)
Este gelato clásico es la mezcla perfecta de sabores dulces y agrios.
Grasa saturada 21 g • Colesterol 70 mg • Sodio 80 mg • Calcio 144 mg
Calorías 445 (63 % de grasa) • Carbohidratos 36 g • Proteínas 6 g • Grasa 32 g
de servir.
congelar por aproximadamente 2 horas. Sacar del congelador 15 minutos antes
puede variar entre 10 y 25 minutos. Poner el gelato en un recipiente hermético y
agregar las avellanas. Dejar que se combine todo. El tiempo de congelamiento
mezcle hasta que se espese. Unos minutos antes del final del congelamiento,
5. Encender la máquina y verter la mezcla en el tazón congelador; dejar que se
refrigerar por 2 a 12 horas. Batir de nuevo antes de empezar la preparación.
4. Retirar del fuego, colar y dejar enfriar a temperatura ambiente. Cubrir y
espese ligeramente.
10 a 15 minutos, revolviendo continuamente, hasta que la mezcla hierva y se
cacao y avellanas, batiendo. Seguir cocinando a fuego medio/medio-lento por
leche/azúcar y revolver para mezclar. Agregar progresivamente la crema de
3. Cuando la mezcla de crema/leche empiece a hervir, agregar la mezcla de
Page 23

10
Fibra 0 g
Revolver, batiendo.
2. Colocar la leche restante, el azúcar, la maicena y la sal en un tazón mediano.
Calentar a fuego medio/medio-lento, justo hasta que empiece a hervir.
3
∕
tazas (355 ml) de la leche en una cacerola mediana.
1
1. Colocar la crema y 1
3
∕
taza (40 g) de avellanas picadas
1
¾ taza (175 g) de crema para untar de chocolate con avellanas
1 pizca pequeña de sal kosher
1½ cucharadas de maicena
3
∕
taza (135 g) de azúcar granulada
2
3
1
∕
tazas (395 ml) de leche entera
2
3
∕
taza (315 ml) de crema líquida para batir (“heavy cream”)
1
1
Rinde aproximadamente 13 porciones de ½ taza (120 ml)
Esta receta clásica trae sabores italianos a su cocina.
GELATO DE CHOCOLATE CON AVELLANAS
Grasa saturada 10 g • Colesterol 62 mg • Sodio 88 mg • Calcio 151 mg
Información nutricional por porción de ½ taza (120 ml):
Calorías 302 (46 % de grasa) • Carbohidratos 37 g • Proteínas 4 g • Grasa 16 g
aproximadamente 2 horas. Sacar del congelador 15 minutos antes de servir.
10 y 25 minutos. Poner el gelato en un recipiente hermético y congelar por
mezcle hasta que se espese. El tiempo de congelamiento puede variar entre
5. Encender la máquina y verter la mezcla en el tazón congelador; dejar que se
antes de empezar la preparación.
temperatura ambiente. Cubrir y refrigerar por 2 a 12 horas. Batir de nuevo
4. Retirar del fuego, agregar la pectina y revolver; colar y dejar enfriar a
que la mezcla hierva y se espese ligeramente.
lento durante aproximadamente 20 minutos, revolviendo continuamente, hasta
leche/azúcar y revolver para mezclar. Seguir cociendo a fuego medio/medio-
3. Cuando la mezcla de crema/leche empiece a hervir, agregar la mezcla de
mediano. Revolver, batiendo.
2. Colocar la leche restante, el azúcar, la maicena, la sal y la vainilla en un tazón
Calentar a fuego medio/medio-lento, justo hasta que empiece a hervir.
1. Colocar la crema y 2 tazas (475 ml) de la leche en una cacerola mediana.
1 cucharada de pectina líquida
½ cucharadita de extracto natural de vainilla
1 pizca de sal kosher
2 cucharadas de maicena
1 taza (200 g) de azúcar granulada
3 tazas (710 ml) de leche entera
1 taza (235 ml) de crema líquida para batir (“heavy cream”)
Rinde aproximadamente 13 porciones de ½ taza (120 ml)
Añada chocolate derretido para preparar un gelato stracciatella exquisito.
GELATO DE VAINILLA BÁSICO
Grasa saturada 16 g • Colesterol 0 mg • Sodio 44 mg • Calcio 5 mg • Fibra 1 g
Calorías 256 (57 % de grasa) • Carbohidratos 26 g • Proteínas 2 g • Grasa 17 g
Información nutricional por porción de ½ taza (120 ml):
minutos antes de servir.
hermético y congelar por aproximadamente 2 horas. Sacar del congelador 15
puede variar entre 10 y 25 minutos. Poner el helado en un recipiente
dejar que se mezcle hasta que se espese. El tiempo de congelamiento
3. Encender la máquina y verter la mezcla en el tazón congelador;
preparación.
2. Cubrir y refrigerar por 2 a 12 horas. Batir de nuevo antes de empezar la
1. Licuar todos los ingredientes, usando una licuadora o una licuadora de mano.
1 cucharadita de extracto natural de vainilla
4 latas de 5.46 onzas (160 ml) de leche de coco regular
1 pizca de sal kosher
¼ taza (50 g) de azúcar rubia (azúcar de caña integral)
½ taza (100 g) de azúcar granulada
½ taza (60 g) de cacao en polvo, tamizado
Rinde aproximadamente 13 porciones de ½ taza (120 ml)
leche que necesita para la receta.
de leche de coco grande, cerciórese de revolver el contenido antes de medir la
los ingredientes antes de congelarlos para evitar los grumos. Si usa una lata
Un delicioso postre helado cremoso, sin lácteos. Cerciórese de bien mezclar
HELADO DE CHOCOLATE DE LECHE DE COCO
Page 24

Fibra 0 g
9
aproximadamente 2 horas. Sacar del congelador 15 minutos antes de servir.
10 y 25 minutos. Poner el helado en un recipiente hermético y congelar por
3
⁄
2
mezcle hasta que se espese. El tiempo de congelamiento puede variar entre
6. Encender la máquina y verter la mezcla en el tazón congelador; dejar que se
temperatura ambiente. Cubrir y refrigerar por 2 a 12 horas.
Agregar los pistachos picados y el extracto de almendra. Dejar enfriar a
5. Colar la mezcla con un colador de malla fina y colocar en un tazón mediano.
Grasa saturada 13 g • Colesterol 72 mg • Sodio 33 mg • Calcio 32 mg
Calorías 265 (65 % de grasa) • Carbohidratos 21 g • Proteínas 1 g • Grasa 18 g
Información nutricional por porción de ½ taza (120 ml):
3
/
de la leche, y luego regresar toda la mezcla en la olla. Cocinar
aproximadamente 2 horas. Sacar del congelador 15 minutos antes de servir.
10 y 25 minutos. Poner el helado en un recipiente hermético y congelar por
1
3
/
de la mezcla a la mezcla de azúcar/yema, batiendo.
1
mezcle hasta que se espese. El tiempo de congelamiento puede variar entre
2. Encender la máquina y verter la mezcla en el tazón congelador; dejar que se
Revolver antes de empezar la preparación.
vainilla. Cubrir y refrigerar por 2 a 12 horas.
el azúcar se disuelva (aprox. 1 a 2 minutos). Agregar la crema líquida y la
mediano; revolver, usando una batidora de mano a baja velocidad, hasta que
1. Colocar la leche, el azúcar y el café/expreso instantáneo y la sal en un tazón
1 cucharadita de extracto natural de vainilla
1½ tazas (355 ml) de crema líquida para batir (“heavy cream”)
demasiado las yemas (el proceso debería tomar solamente unos minutos).
que la mezcla se espese. NO permitir que la mezcla hierva; esto cocinaría
a fuego lento, revolviendo continuamente con un cucharón de madera, hasta
Agregar otro
aproximadamente
4. Después de que empiece a hervir la mezcla de leche/crema, agregar, batiendo,
equipada con cuchilla de metal. Pulsar para picar grueso; reservar.
3. Colocar los pistachos y el azúcar restante en una procesadora de alimentos
obtener una mezcla espesa y clara.
mediano y mezclar. Batir, con una batidora de mano a velocidad baja, hasta
2. Mientras tanto, colocar las yemas y ¼ taza (50 g) de azúcar en un tazón
calentando justo hasta que la mezcla empiece a hervir.
mediana; poner a calentar a fuego medio-lento. Batir para mezclar y seguir
1. Colocar la leche, la crema, ¼ taza (50 g) del azúcar y la sal en una cacerola
Fibra 2 g
1 pizca pequeña de sal kosher
2 cucharadas de café instantáneo
1 taza (135 g) de azúcar granulada
¾ taza (175 ml) de leche entera
Rinde aproximadamente 13 porciones de ½ taza (120 ml)
Para un sabor a café más intenso, use café expreso instantáneo.
HELADO DE CAFÉ
½ cucharadita de extracto de almendra
¾ taza (150 g) de pistachos asados sin sal
3 yemas de huevo grande
1 pizca pequeña de sal kosher
½ taza + 2 cucharadas (110 g) de azúcar granulada
1 taza (235 ml) de crema líquida para batir (“heavy cream”)
1 taza (235 ml) de leche entera
Rinde aproximadamente 3 porciones de ½ taza (120 ml)
.
Grasa saturada 12 g • Colesterol 152 mg • Sodio 66 mg • Calcio 103 mg
Calorías 358 (61 % de grasa) • Carbohidratos 29 g • Proteínas 7 g • Grasa 25 g
Información nutricional por porción:
®
HELADO DE PISTACHO
para hacer helados Cuisinart
Este helado clásico será el centro de atención cuando lo prepara con su máquina
Page 25

8
Fibra 2g
Información nutricional por porción de ½ taza (120 ml):
3
/
de la leche, y luego regresar toda la mezcla en
1
3
/
de la leche caliente a la mezcla de
1
Grasa saturada 12 g • Colesterol 170 mg • Sodio 142 mg • Calcio 133 mg
Calorías 334 (57 % de grasa) • Carbohidratos 32 g • Proteínas 5 g • Grasa 22 g
congelador 15 minutos antes de servir.
recipiente hermético y congelar por aproximadamente 2 horas. Sacar del
HELADO DE MENTA FRESCA
congelamiento puede variar entre 10 y 25 minutos. Poner el helado en un
agregar las galletas picadas. Dejar que se combine todo. El tiempo de
mezcle hasta que se espese. Unos minutos antes del final del congelamiento,
Calcio 110 mg • Fibra 0 g
5. Encender la máquina y verter la mezcla en el tazón congelador; dejar que se
mezcla con una licuadora de mano.
menta, o, si desea que el helado tenga un sabor a menta más intenso, licuar la
Antes de congelar, colar la mezcla con un colador de malla fina. Colar y tirar la
4. Dejar enfriar a temperatura ambiente. Cubrir y refrigerar por 2 a 12 horas.
minutos).
esto cocinaría demasiado las yemas (el proceso debería tomar solamente unos
de madera, hasta que la mezcla se espese. NO permitir que la mezcla hierva;
la olla. Cocinar a fuego lento, revolviendo continuamente con un cucharón
azúcar/yema. Agregar otro
3. Agregar, batiendo, aproximadamente
mezcla espesa y clara.
mezclar. Batir, con una batidora de mano a velocidad baja, hasta obtener una
2. Mientras tanto, colocar las yemas y el resto del azúcar en un tazón mediano y
y seguir calentando justo hasta que la mezcla empiece a hervir.
⁄3 de la leche, y luego regresar toda la mezcla en la
1
⁄3 de la leche caliente a la mezcla de azúcar/yema,
1
una cacerola mediana; poner a calentar fuego medio-lento. Batir para mezclar
1. Colocar la leche, la crema, la mitad del azúcar, la sal, la vainilla y la menta en
(aproximadamente 6 galletas)
¾ taza (75 g) de sándwiches de chocolate picados
4 yemas de huevo grande
1½ tazas llenas (150 g) de hojas de menta
1 cucharadita de extracto natural de vainilla
3
∕
cucharadita de sal kosher
2
8
∕
taza (25 g) de azúcar granulada
1
1¼ tazas (295 ml) de crema líquida para batir (“heavy cream”)
1¼ tazas (295 ml) de leche entera
Rinde aproximadamente 13 porciones de ½ taza (120 ml)
ganadera. Este helado rico y cremoso no es una excepción.
La mezcla de la menta fresca con chocolate siempre es una combinación
CON GALLETAS DE CHOCOLATE
Grasa 23 g Grasa saturada 14 g • Colesterol 198 mg • Sodio 74 mg
Calorías 329 (62 % de grasa) • Carbohidratos 27 g • Proteínas 4 g
Información nutricional por porción de ½ taza (120 ml):
aproximadamente 2 horas. Sacar del congelador 15 minutos antes de servir.
10 y 25 minutos. Poner el helado en un recipiente hermético y congelar por
mezcle hasta que se espese. El tiempo de congelamiento puede variar entre
5. Encender la máquina y verter la mezcla en el tazón congelador; dejar que se
Antes de congelar, colar la mezcla con un colador de malla fina y tirar la vaina.
4. Dejar enfriar a temperatura ambiente. Cubrir y refrigerar por 2 a 12 horas.
minutos).
cocinaría demasiado las yemas (el proceso debería tomar solamente unos
madera, hasta que la mezcla se espese. NO permitir que la mezcla hierva; esto
olla. Cocinar a fuego lento, revolviendo continuamente con un cucharón de
batiendo. Agregar otro
3. Agregar aproximadamente
una mezcla espesa y clara.
mezclar. Batir a velocidad baja, usando una batidora de mano, hasta obtener
2. Mientras tanto, colocar las yemas y el resto del azúcar en un tazón mediano y
empiece a hervir.
medio-lento. Batir para mezclar y seguir calentando justo hasta que la mezcla
(incluso las semillas) en una cacerola mediana; poner a calentar a fuego
1. Colocar la leche, la crema, la mitad del azúcar, la sal y la vaina de vainilla
4 yemas de huevo grande
½ vaina de vainilla, abierta
1 pizca pequeña de sal kosher
3
∕
taza (135g) de azúcar granulada
2
Page 26

7
1¼ tazas (295 ml) de crema líquida para batir (“heavy cream”)
1¼ tazas (295 ml) de leche entera
Rinde aproximadamente 3 porciones de ½ taza (120 ml)
Helado con intenso sabor a vainilla, para los amantes de la vainilla.
HELADO DE VAINILLA TRADICIONAL
Grasa saturada 8g • Colesterol 48 mg • Sodio 28 mg • Calcio 25 mg • Fibra 0 g
Calorías 190 (60 % de grasa) • Carbohidratos 17 g • Proteínas 1 g • Grasa 12 g
Información nutricional por porción de ½ taza (120 ml):
descongeladas a temperatura ambiente.
* Si fresas frescas no están disponibles, puede usar fresas congeladas,
aproximadamente 2 horas. Sacar del congelador 15 minutos antes de servir.
10 y 25 minutos. Poner el helado en un recipiente hermético y congelar por
mezcle hasta que se espese. El tiempo de congelamiento puede variar entre
3. Encender la máquina y verter la mezcla en el tazón congelador; dejar que se
preparación.
Cubrir y refrigerar por 2 a 12 horas. Batir de nuevo antes de empezar la
disuelto. Agregar la crema líquida y la vainilla. Añadir las fresas con su jugo.
batidor o una batidora de mano a velocidad baja, hasta que el azúcar esté
2. Colocar la leche, el azúcar y la sal en un tazón mediano y batir, usando un
gusto).
cuchilla de metal. Pulsar hasta obtener la textura deseada (fina o gruesa, al
1. Poner las fresas en el bol de una procesadora de alimentos equipada con
1 cucharadita de extracto natural de vainilla
1 taza (235 ml) de crema líquida para batir (“heavy cream”)
1 pizca pequeña de sal kosher
½ taza (100 g) de azúcar granulada
½ taza (120 ml) de leche entera
1 taza (200 g) de fresas frescas*
Rinde aproximadamente 13 porciones de ½ taza (120 ml)
están en temporada.
Helado ligero y dulce con delicioso sabor a fresas; aún mejor cuando las fresas
HELADO DE FRESAS FRESCAS
Fibra 2g
Grasa saturada 13 g • Colesterol 58 mg • Sodio 92 mg • Calcio 59 mg
Información nutricional por porción de ½ taza (120 ml):
Calorías 380 (67 % de grasa) • Carbohidratos 23 g • Proteínas 9 g • Grasa 29 g •
de servir.
congelar por aproximadamente 2 horas. Sacar del congelador 15 minutos antes
puede variar entre 10 y 25 minutos. Poner el helado en un recipiente hermético y
agregar los bombones. Dejar que se combine todo. El tiempo de congelamiento
mezcle hasta que se espese. Unos minutos antes del final del congelamiento,
Encender la máquina y verter la mezcla en el tazón congelador; dejar que se
antes de empezar la preparación.
la crema líquida y la vainilla. Cubrir y refrigerar por 2 a 12 horas. Batir de nuevo
minutos, hasta que la mezcla esté suave y el azúcar se haya disuelto. Agregar
mezcla homogénea. Añadir la leche y mezclar a velocidad baja por 1 a 2
mezclar, usando una batidora de mano a velocidad baja, hasta obtener una
1. Colocar la mantequilla de maní, el azúcar y la sal en un tazón mediano y
(aproximadamente 9 mino-bombones)
½ taza (75 g) de bombones de chocolate y mantequilla de maní picados
½ cucharadita de extracto natural de vainilla
1 taza (235 ml) de crema líquida para batir (“heavy cream”)
½ taza (120 ml) de leche entera
1 pizca pequeña de sal kosher
3
∕
taza (65 g) de azúcar granulada
1
½ taza (115 g) de mantequilla de maní cremosa de buena calidad
Rinde aproximadamente 3 porciones de ½ taza (120 ml)
dejará a todo el mundo con la boca abierta.
Muy fácil de preparar, este helado con rico sabor a mantequilla de maní
HELADO DE MANTEQUILLA DE MANÍ
Grasa saturada 14 g • Colesterol 85 mg • Sodio 55 mg • Calcio 71 mg • Fibra 1 g
Información nutricional por porción de ½ taza (120 ml):
Calorías 283 (72 % de grasa) • Carbohidratos 17 g • Proteínas 3 g • Grasa 23 g
aproximadamente 2 horas. Sacar del congelador 15 minutos antes de servir.
Page 27

6
Fibra 0 g
10 y 25 minutos. Poner el helado en un recipiente hermético y congelar por
mezcle hasta que se espese. El tiempo de congelamiento puede variar entre
2. Encender la máquina y verter la mezcla en el tazón congelador; dejar que se
y refrigerar por 2 a 12 horas.
ingredientes secos estén disueltos. Agregar la crema líquida y la vainilla. Cubrir
usando un batidor o una batidora de mano a velocidad baja, hasta que los
rompiendo los pedazos grandes entre sus dedos. Agregar la leche y mezclar,
1. Colocar el cacao, el azúcar y la sal en un tazón mediano; batir para mezclar,
HELADO DE VAINILLA SIMPLE
1 cucharadita de extracto natural de vainilla
1¾ tazas (415 ml) de crema líquida para batir (“heavy cream”)
¾ taza (175 ml) de leche entera
pizca pequeña de sal kosher
2 cucharadas + 2 cucharaditas (25 g) de azúcar granulada
¼ taza (50 g) de azúcar granulada
3
∕
taza (40 g) de cacao en polvo, tamizado
1
Rinde aproximadamente 13 porciones de ½ taza (120 ml)
Sirva este sabroso helado con nuestra salsa de chocolate caliente (página 13).
HELADO DE CHOCOLATE SIMPLE
Grasa saturada 14 g • Colesterol 86 mg • Sodio 61 mg • Calcio 77 mg
Información nutricional por porción de ½ taza (120 ml):
Calorías 301 (67 % de grasa) • Carbohidratos 22 g • Proteínas 2 g • Grasa 23 g
aproximadamente 2 horas. Sacar del congelador 15 minutos antes de servir.
10 y 25 minutos. Poner el helado en un recipiente hermético y congelar por
mezcle hasta que se espese. El tiempo de congelamiento puede variar entre
2. Encender la máquina y verter la mezcla en el tazón congelador; dejar que se
Agregar la crema líquida y la vainilla. Cubrir y refrigerar por 2 a 12 horas.
disuelto.
batidor o una batidora de mano a velocidad baja, hasta que el azúcar esté
1. Colocar la leche, el azúcar y la sal en un tazón mediano y batir, usando un
2 cucharaditas de extracto natural de vainilla
1½ tazas (355 ml) de crema líquida para batir (“heavy cream”)
1 pizca pequeña de sal kosher
½ taza + 1 cucharada (110 g) de azúcar granulada
¾ taza (175 ml) de leche entera
Rinde aproximadamente 3 porciones de ½ taza (120 ml)
últimos minutos del congelamiento.
Para “personalizar” este helado clásico, añada dulces picados o chispas en los
Salsa de chocolate caliente ........................................................................................... 14
Salsa de caramelo .......................................................................................................... 14
SALSAS
Sorbete de piña .............................................................................................................. 13
Sorbete de frambuesa con menta ................................................................................. 13
Sorbete de chocolate amargo ....................................................................................... 12
SORBETES
Helado de yogur de miel y almendras ........................................................................... 12
Helado de yogur de chocolate con “pretzels” ............................................................... 12
Helado de yogur de mango ........................................................................................... 11
HELADOS DE YOGUR
Gelato de limón .............................................................................................................. 11
Gelato de chocolate con avellanas ............................................................................... 10
Gelato de vainilla básico ................................................................................................ 10
GELATI
Helado de chocolate de leche de coco ......................................................................... 10
HELADO SIN LÁCTEOS
Helado de Café ................................................................................................................ 9
Helado de pistacho .......................................................................................................... 9
Helado de menta fresca con galletas de chocolate ........................................................ 8
Helado de vainilla natural ................................................................................................. 7
Helado de fresa fresca ..................................................................................................... 7
Helado de bombones de maní ......................................................................................... 7
Helado de chocolate simple ............................................................................................ 6
Helado de vainilla simple ................................................................................................. 6
HELADOS
RECETAS
Page 28

5
• Por lo general, cuanto más helada una mezcla, más rápido se congelará.
que ha elegido “un tazón” o “dos tazones” antes de encender la máquina.
• Asegúrese de que la paleta mezcladora y la tapa están debidamente puestas y
completamente congelado antes de preparar la receta siguiente.
• Cuando prepare más de una receta, asegúrese de que el tazón está
congelamiento.
de la orilla, ya que los ingredientes se expanden durante el proceso de
o bebida helada. No llene el tazón congelador hasta más de ¼ de pulgada
• Nuestras recetas rinden hasta 1 cuarto de galón (945 ml) de postre helado
azúcar de lo indicado en la receta.
sabe ácida, agregue azúcar. Si la fruta está muy madura o dulce, utilice menos
frutas; por eso el helado sabrá menos dulce que la mezcla inicial. Si la fruta
frutas antes de usarlas. El proceso de congelación reduce la dulzura de las
• Cuando prepare sorbete, cerciórese del grado de maduración y dulzura de las
congelamiento porque el alcohol puede impedir el proceso de congelación.
• Si la receta incluye alcohol, agregue este en los últimos 2 minutos del
bien la mezcla para que el edulcorante se disuelva.
receta se precocine, añada el edulcorante después de la cocción. Revuelva
• Puede sustituir el azúcar con edulcorantes artificiales. Si es necesario que la
de leche entera).
(475 ml) de producto sustituto (p. ej., 1 taza/235 ml de crema y 1 taza/235 ml
ejemplo, si la receta incluye 2 tazas (475 ml) de crema, use un total de 2 tazas
volumen de producto sustituto que hubiera usado para el producto original. Por
la preparación final. Cuando haga la sustitución, asegúrese de usar el mismo
sustitutos bajos en grasa puede alterar el sabor, la consistencia y textura de
más alto sea el contenido de grasa, más rico y cremoso será el resultado. Usar
(semidescremada o descremada). Sin embargo, tenga presente que mientras
recetas con cremas bajas en grasa (p. ej., crema líquida “half-and-half”) y leche
• Puede sustituir la crema líquida para batir y leche entera usadas en muchas
3 días.
• La mayoría de las mezclas pueden conservarse en el refrigerador durante hasta
los ingredientes precocinados.
Coloque la cacerola o el recipiente en el baño de hielo. Enfríe completamente
• Para hacer el baño de hielo, llene un recipiente grande con hielo y agua.
completamente en un baño de hielo antes de empezar la preparación.
óptimos, refrigere los ingredientes calientes por una noche, o enfríelos
™
Flavor Duo
®
• Algunas recetas usan ingredientes precocinados. Para obtener resultados
deseada, por lo general dos horas o más.
un recipiente hermético y congélela hasta que adquiera la consistencia
Si usted desea una consistencia más firme, ponga la preparación en
cuales muchas veces contienen gomas y conservantes para darles firmeza.
características que los postres helados preparados de forma comercial, los
emplean ingredientes frescos y puros; por lo tanto no tienen las mismas
• Los postres helados preparados con la máquina Cuisinart
Consejos
ml).
sus propias recetas, siempre y cuando no rindan más de 1 cuarto de galón (945
preparar deliciosos postres helados y bebidas heladas. Usted puede crear o usar
Las recetas ofrecidas a continuación le brindan una variedad de opciones para
CONSEJOS DE PREPARACIÓN
Cualquier otro servicio debe ser realizado por un técnico autorizado.
Mantenimiento
en el congelador.
Guárdelos en un recipiente hermético para optimizar su tiempo de conservación
por más de 30 minutos.
No deje los postres helados o las bebidas heladas en los tazones congeladores
en una bolsa plástica para evitar la quemadura por congelación.
cuando los necesite. Antes de colocarlos en el congelador, envuelva los tazones
Guarde los tazones congeladores en el congelador para que siempre estén listos
NO guarde las tapas, las paletas mezcladoras ni la base en el congelador.
NO ponga los tazones congeladores en el congelador si están mojados.
Almacenaje
Seque bien todas las piezas.
Limpie la base con un paño ligeramente humedecido.
MATERIALES ABRASIVOS, NI UTENSILIOS DUROS.
UTILICE PRODUCTOS/
NUNCA LAVE LOS TAZONES CONGELADORES EN EL LAVAVAJILLAS. NO
jabonosa tibia.
Limpie los tazones congeladores, las paletas mezcladoras y las tapas en agua
Limpieza
LIMPIEZA ALMACENAJE Y MANTENIMIENTO
Page 29

cuenta con un sistema
™
Flavor Duo
®
4
CERRAR
preparación.
Después de unos minutos, encienda nuevamente la máquina y continúe con la
reiniciar el aparato, apáguelo. Permita que se enfríe.
los ingredientes que se agregan (fruto seco, etc.) es demasiado grande. Para
máquina ha estado funcionando por un tiempo excesivo, o si el tamaño de
del motor. Esto puede ocurrir si la preparación es demasiado espesa, si la
de seguridad que apaga automáticamente el aparato en caso de recalentamiento
Su máquina para hacer helados Cuisinart
ENCENDER
Girar la tapa
MECANISMO DE SEGURIDAD
secos no debe ser mayor al de chispas de chocolate.
ingredientes secos por la boca de alimentación. El tamaño de los ingredientes
que la bebida o el postre helado hayan empezado a espesarse, agregue los
deben ser agregados en los últimos 5 minutos del congelamiento. Una vez
Los ingredientes secos tales como las chispas de chocolate o las nueces
ADICIÓN DE INGREDIENTES SECOS
Guarde las preparaciones en recipientes herméticos solamente.
los ingredientes pegarán a las paredes del tazón, lo que puede dañarlo.
NOTA: no guarde las bebidas o postres helados en el tazón congelador;
recipiente hermético y congélela por un mínimo de 2 horas.
a su gusto. Si desea una consistencia más firme, ponga la preparación en un
cantidad preparada. Apague el aparato cuando la mezcla se haya espesado
minutos. Nota: el tiempo de preparación depende de la receta y de la
8. Sus bebidas o postres helados estarán listos en tan solo 20 a 30
en la(s) tapa(s).
7. Agregue inmediatamente los ingredientes, vertiéndolos por la abertura
derecho empezará a girar.
Nota: si ha elegido la posición “un tazón”, entonces solamente el tazón
6. Presione el botón ON/OFF; los tazones congeladores empezarán a girar.
unidad. Siempre haga esta selección antes de encender la unidad.
solamente un tazón, entonces coloque el tazón en el lado derecho de la
un tazón (un círculo) o dos tazones (dos círculos). Nota: si desea usar
5. Ponga el botón de selección de los tazones en la posición deseada:
horario para bloquear.
Ubique la(s) tapa(s) de forma ligeramente descentrada y gire en sentido
permite que las tapas descansen sobre la base en solamente una posición.
4. Coloque la(s) tapa(s) sobre la base. El mecanismo de cierre de la tapa
parte circular apuntando hacia arriba.
paleta no queda ajustada; simplemente descansa en el centro del tazón, la
3. Coloque la(s) paleta(s) mezcladora(s) en el/los tazón/tazones. Nota: la
después de sacarlos del congelador.
de haberlos sacado del congelador. Por lo tanto, úselos inmediatamente
NOTA: los tazones comenzarán a descongelarse rápidamente después
máquina.
bolsa plástica, si la usó). Coloque el/los tazón/tazones sobre la base de la
2. Saque el/los tazón/tazones congelador(es) del congelador (quite la
del que sea fácil verter.
(945ml). Para mejores resultados, prepare los ingredientes en un recipiente
sus propias recetas, asegúrese de que no rinden más de 1 cuarto de galón
continuación). Nota: las recetas Cuisinart empiezan en la página 5. Si usa
1. Prepare los ingredientes de la receta (véase nuestras recetas a
PREPARACIÓN DE BEBIDAS Y POSTRES HELADOS
congelamiento adecuado de toda comida.
Nota: su congelador debe estar a una temperatura de 0 °F (-18 °C) para asegurar el
coloque los tazones en el fondo del congelador, donde es más frío.
una bolsa plástica para evitar la quemadura por congelación. Le recomendamos que
entonces el tazón está listo. Lave y seque el tazón antes de congelarlo. Envuélvalo en
completamente congelado, agítelo. Si no escucha ningún movimiento de líquido,
de congelación es de aproximadamente 24 horas. Para saber si el tazón está
congelador; así estarán listos en cualquier momento. Por lo general, el tiempo
tan frío esté su congelador. Para mayor conveniencia, guarde los tazones en el
a preparar la receta. El tiempo necesario para congelar el tazón depende de qué
Cerciórese de que los tazones están completamente congelados antes de empezar
PREPARACIÓN/CONGELAMIENTO DEL TAZÓN
Page 30

3
limpia y segura.
El cable se hunde en la base para guardarlo y así mantener la encimera
piezas de la máquina con limpiadores/materiales abrasivos o utensilios duros.
acumulado durante el proceso de fabricación y envío. NO limpie ninguna de las
en agua jabonosa tibia para quitar el polvo o cualquier residuo que se haya
humedecido. Lave las tapas, los tazones congeladores y las paletas mezcladoras
NO sumerja el bloque-motor en agua. Límpielo con un paño ligeramente
ANTES DEL PRIMER USO
7
6
5
4
8. Espacio para guardar el cable (no ilustrado)
7. Botón de encendido/apagado
Permite elegir uno o dos tazones.
6. Botón de selección de los tazones
preparar helados, helados de yogur, sorbetes y bebidas heladas.
Equipada con un resistente motor, lo suficientemente fuerte como para
5. Base
tazones fríos, a una temperatura constante.
enfriamiento rápido y uniforme. La pared con doble aislamiento mantiene los
Contienen un líquido congelante en una pared con doble aislamiento para un
4. Tazones congeladores
helado.
Mezclan los ingredientes e incorporan aire para preparar la bebida o el postre
3. Paletas mezcladoras
Diseñadas para fijarse fácilmente a la base.
Transparentes, para poder vigilar el proceso de congelamiento.
2. Tapas fáciles de cerrar
congelamiento.
tales como chispas de chocolate o fruto seco sin interrumpir el ciclo de
Para agregar los ingredientes de la receta, o agregar ingredientes secos
1. Bocas de alimentación
PIEZAS Y CARACTERÍSTICAS
3
2
1
Garantía ........................................................................................................................... 15
Recetas y consejos ........................................................................................................... 5
Limpieza almacenaje y mantenimiento ............................................................................ 5
Adición de ingredientes secos .......................................................................................... 4
Preparación de bebidas y postres helados ...................................................................... 4
Preparación/congelamiento del tazón ............................................................................. 4
Antes del primer uso ........................................................................................................ 3
Piezas y características .................................................................................................... 3
Medidas de seguridad importantes .................................................................................. 2
ÍNDICE
Page 31

2
duros.
• Nunca limpie la máquina con productos/materiales abrasivos o utensilios
su casa.
• Asegúrese de que el voltaje indicado en la máquina coincide con el voltaje de
• Las reparaciones deben ser realizadas únicamente por personal autorizado.
por el usuario.
NOTA: la base no contiene ninguna pieza que pueda ser reparada/cambiada
• Para reducir el riesgo de incendio o descarga eléctrica, no desarme la base.
• No sumerja la base en agua.
personal de servicio autorizado.
limpieza y el mantenimiento por parte del usuario, debe ser llevada a cabo por
Para uso doméstico solamente. Toda operación de mantenimiento, excepto la
PRECAUCIÓN
electricista. No intente ir en contra de esta función de seguridad.
de corriente, inviértala. Si aun así no entra completamente, comuníquese con un
de una sola manera en las tomas de corriente polarizadas. Si no entra en la toma
ancha que la otra). Como medida de seguridad, aquel enchufe se podrá enchufar
El cable de este aparato está dotado de un enchufe polarizado (una pata es más
AVISO
SOLAMENTE
PARA USO DOMÉSTICO
GUARDE ESTAS INSTRUCCIONES
cuando cierra.
especialmente si este toca las paredes o la puerta del armario/gabinete
gabinete. Dejar el aparato conectado representa un riesgo de incendio,
Siempre desconecte el aparato antes de guardarlo en un armario/
13. No haga funcionar el aparato debajo o dentro de un armario/gabinete.
eléctrica o heridas.
No lo lave en el lavavajillas; esto puede provocar un incendio, una descarga
caliente, ni en un horno caliente. No los exponga a ninguna fuente de calor.
12. No coloque los tazones congeladores sobre un quemador a gas o eléctrico
debe ser llevada a cabo por personal de servicio autorizado.
mantenimiento, excepto la limpieza y el mantenimiento por parte del usuario,
11. Este aparato es para uso doméstico solamente. Toda operación de
siempre que la máquina esté apagada (“OFF”).
tazones. Puede utilizar una espátula de goma o una cuchara de madera,
TAZONES CONGELADORES; esto puede rayar y dañar el interior de los
NUNCA INTRODUZCA OBJETOS O UTENSILIOS PUNZANTES EN LOS
y utensilios fuera de los tazones congeladores durante el funcionamiento.
10. Para reducir el riesgo de heridas o daños a la máquina, mantenga las manos
que tenga contacto con superficies calientes.
9. No permita que el cable cuelgue del borde de la encimera o de la mesa, ni
8. No lo utilice en exteriores.
incendio, descarga eléctrica o heridas.
7. El uso de accesorios no recomendados por Cuisinart presenta un riesgo de
su revisión y reparación.
regréselo a un centro de servicio autorizado o al lugar donde lo compró para
un mal funcionamiento, después de que se haya caído o si está dañado;
6. No utilice este aparato si el cable o el enchufe están dañados, después de
utensilios lejos del aparato durante el funcionamiento.
daños a la máquina, mantenga los dedos, cabello, ropa, espátulas y otros
5. Evite el contacto con las piezas móviles. Para evitar el riesgo de heridas o
sacar piezas y antes de limpiarlo.
4. Siempre desconecte el aparato cuando no está en uso, antes de instalar/
discapacidades.
3. Este aparato no debe ser usado por o cerca de niños o personas con ciertas
ni la base del aparato en agua ni en ningún otro líquido.
2. Para reducir el riesgo de descarga eléctrica, no sumerja el cable, el enchufe
1. LEA TODAS LAS INSTRUCCIONES ANTES DE USARLO.
descarga eléctrica o heridas, incluso las siguientes:
tomar precauciones básicas de seguridad para reducir el riesgo de incendio,
Al usar aparatos eléctricos, especialmente en presencia de niños, siempre debe
IMPORTANTES
MEDIDAS DE SEGURIDAD
Page 32
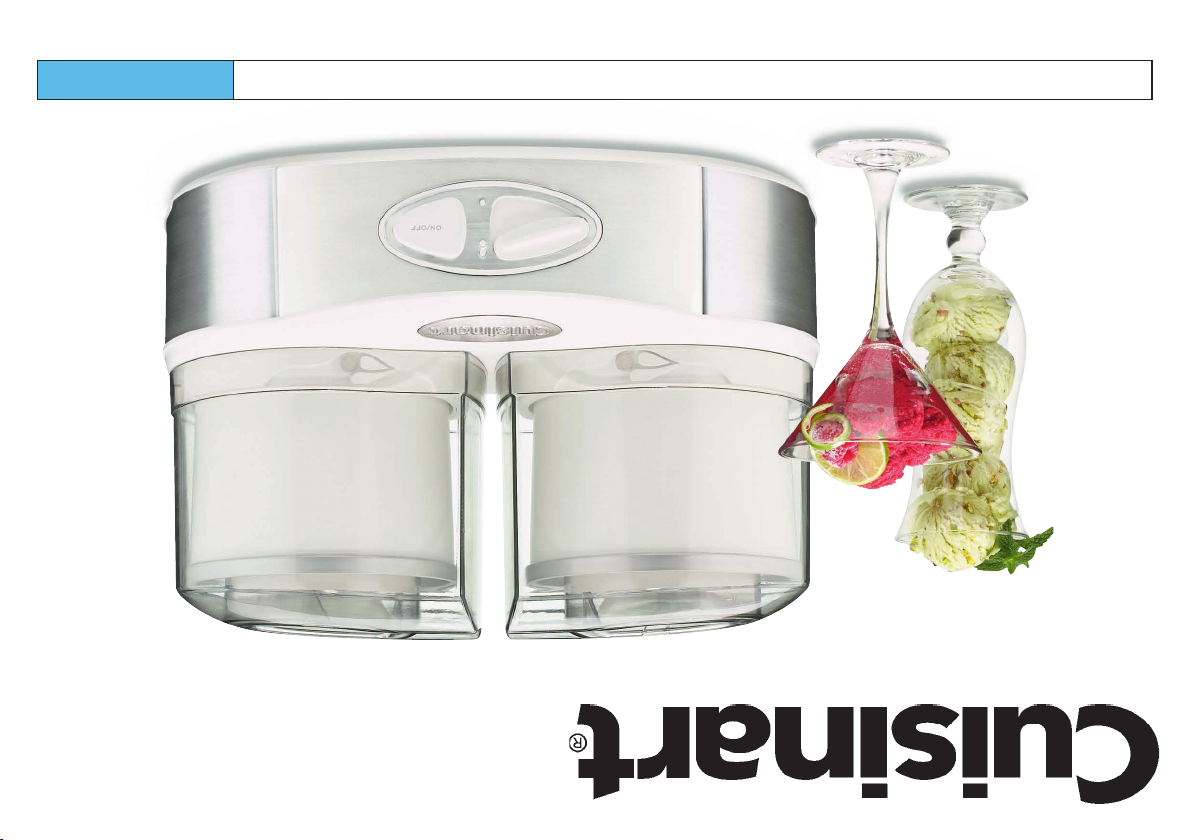
Para su seguridad y para disfrutar plenamente de este producto, siempre lea cuidadosamente las instrucciones antes de usarlo.
Serie ICE-40
™
Máquina para hacer helados, helados de yogur y sorbetes Flavor Duo
Y LIBRO DE RECETAS
MANUAL DE INSTRUCCIONES
Page 33

Version no: N ICE40 Series IB-15482-ESP
SIZE: 210mm x 148mm
Pages: 32pp
Paper:
105GSM gloss artpaper for whole book
Color: Cover:4c+1c(BLACK)
Inside:1c+1c
Coating: gloss varnishing in cover
Conair: Conair By
Kingsly Peng
Date: 02/27/2018
SUN HING PRINTING CO., LTD.
 Loading...