

Page 1
For your safety and continued enjoyment of this product, always read the instruction book
carefully before using.
INSTRUCTION/RECIPE
BOOKLET
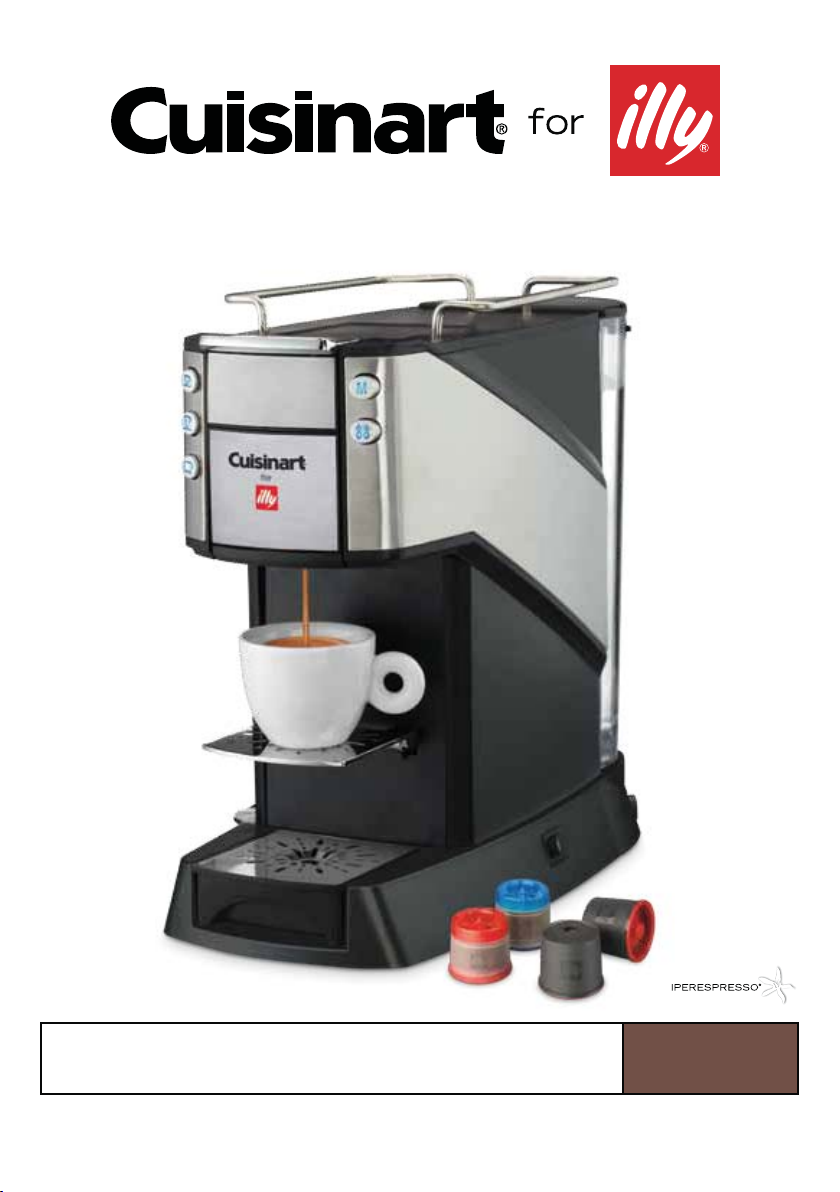
Buona Tazza® Single Serve Espresso
& Coffee Machine
EM-400 SERIES
Page 2

Page 3

2
IMPORTANT
SAFEGUARDS
We at Cuisinart are very safety conscious.
We design and manufa cture c onsumer products
with the safety of you, our valued customer,
foremost in mind. When using electrical
appliances, basic safety precautions should
always be followed, including the following:
1. CAREFULLY READ ALL INSTRUCTIONS
BEFORE OPERATING APPLIANCE, AND
SAVE THIS MANUAL FOR FUTURE
REFERENCE.
2. Unplug from outlet when not in use and
before cleaning. Allow to cool before
putting on or taking off parts, and
before cleaning the appliance.
3. To protect against fire, electrical shock and
injury to persons, do not immerse the
appliance, cord or plug in water or any
other liquids.
4. This appliance is for household use only.
5. Do not operate the unit with the brewing
head open. Scalding may occur if the
brewing head is opened during brewing
cycle.
6. Do not use this appliance for anything
other than its intended use.
7. This appliance should not be used by or
near children or individuals with certain
disabilities.
8. Do not leave the appliance unattended
when in use.
9. Do not touch hot surfaces. Use handles
or knobs.
10 . Always use the appliance on a dry,
level surface.
11 . To disconnect, turn all controls off, then
remove plug from power outlet.
12 . Do not place this appliance on or near a
hot gas or electric burner, or where it could
touch a heated oven.
13 . Do not let the cord hang over the edge of
a table or counter or touch hot surfaces or
become knotted.
14. The use of accessory attachments not
recommended by Cuisinart may cause a
risk of injury to persons, fire or electrical
shock.
15. Strictly follow cleaning and care
instructions.
16 . Do not use outdoors.
17 . Do not use in moving vehicles or boats.
18 . Always switch the appliance off, and then
remove plug from the power outlet when
the appliance is not being used and before
cleaning.
19 . An extension cord is not recommended.
However, if one is needed, the extension
cord should be a grounded type and its
electrical rating must be the same or
higher wattage as the appliance. Regularly
inspect the supply cord, plug and actual
appliance for any damage. If any damage
is found, immediately cease use of the
appliance and call Cuisinart Consumer
Service at 1-800-726-0190.
20 . For any maintenance other than cleaning,
call Cuisinart Consumer Service at 1-800726-0190.
21 . Re fer servicing to q ualified per son nel.
22 . Do not operate any appliance with a
damaged cord or plug or after the
appliance malfunctions, or has been
damaged in any manner. Return appliance
to the nearest authorized service facility for
examination, repair or adjustment.
23 . Do not operate your appliance in an
appliance garage or under a wall cabinet.
When storing in an appliance garage
always unplug the unit from the
electrical outlet. Not doing so could
create a risk of fire, especially if the
appliance touches the walls of the garage
or the door touches the unit as it closes.
Page 4
3
SAVE THESE
INSTRUCTIONS
FOR HOUSEHOLD
USE ONLY
WARNING: RISK OF FIRE OR
ELECTRIC SHOCK
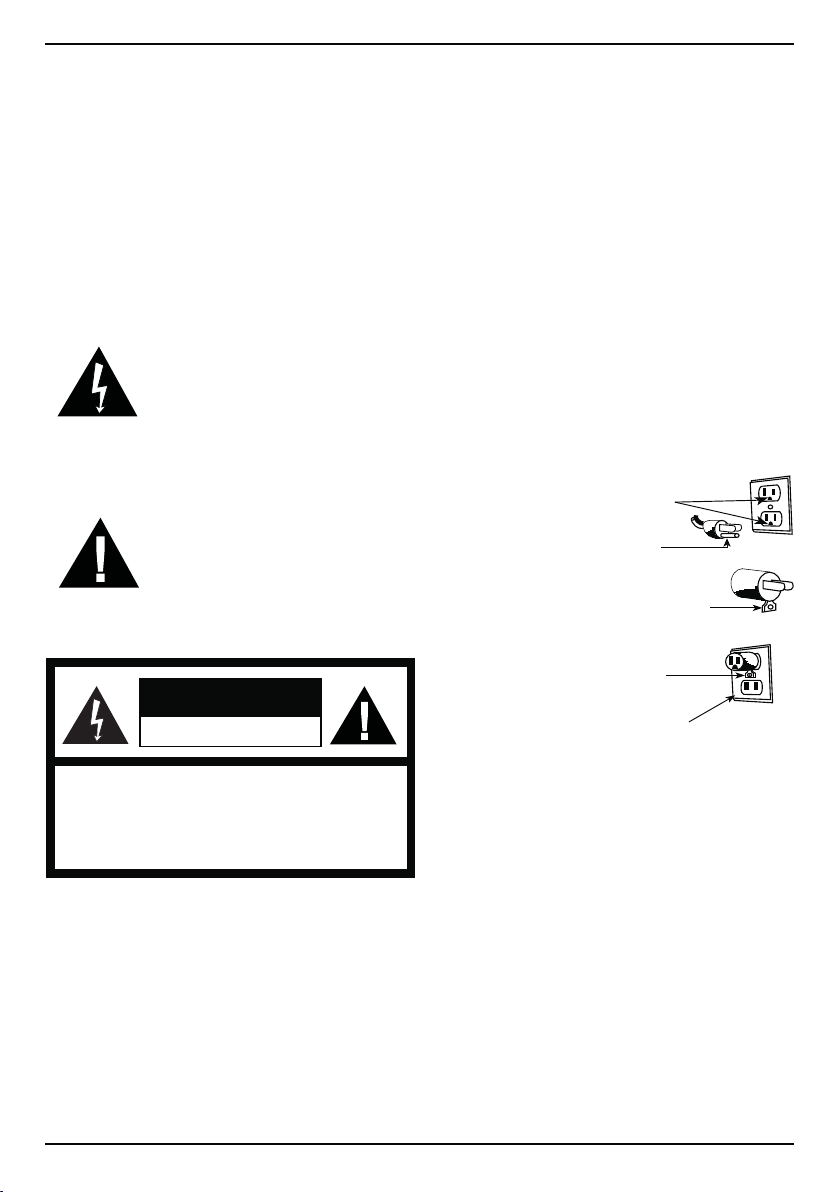
The lightning flash with
arrowhead symbol within an
equilateral triangle is intended to
alert the user to the presence of
uninsulated dangerous voltage
within the product’s enclosure
that may be of sufficient
magnitude to constitute a risk of
fire or electric shock to persons.
The exclamation point within an
equilateral triangle is intended to
alert the user to the presence of
important operating and
maintenance (servicing)
instructions in the literature
accompanying the appliance.
SPECIAL SAFETY
INSTRUCTIONS
1. Use only cold water in the water reservoir.
Do not use any other liquid.
2. Never use the machine without water in it.
NOTE: For safety reasons it is recommended
you plug your Cuisinart appliance directly into
the power outlet. Use in conjunction with a
power strip or extension cord is not
recommended.
SPECIAL CORD SET
INSTRUCTIONS
A short power-supply cord is provided to
reduce the risks resulting from becoming
entangled in or tripping over a longer cord.
Longer extension cords are available and may
be used if care is exercised in their use.
If a long extension cord is used, the marked
electrical rating of the extension cord must be
at least as great as the electrical rating of the
appliance. The extension cord should be a
grounding-type 3-wire cord, and the longer cord
should be arranged so that it will not drape over
the countertop or tabletop where it can be
pulled on by children or tripped over.
NOTICE
If you have a
die-cast metal unit, for
your protection it is
equipped with a
3-conductor cord set
that has a molded
3-prong groundingtype plug, and should
be used in
combination with a
properly connected
grounding-type outlet
as shown in Figure A.
If a grounding-type outlet is not available, an
adapter, as shown in Figure B, may be obtained
so that a 2-slot wall outlet can be used with a
3-prong plug. As shown in Figure C, the adapter
must be grounded by attaching its grounding
lug under the screw of the outlet cover plate.
NOTE: Do not remove the grounding prong.
CAUTION: Before using an adapter, it must
be determined that the outlet cover plate
screw is properly grounded. If in doubt,
consult a licensed electrician. Never use
an adapter unless you are sure it is
properly grounded.
NOTE: Use of an adapter is not permitted
in Canada.
WARNIN G: TO REDUC E THE RISK OF FIRE OR ELEC TRIC SHOCK ,
DO NOT REMOVE COV ER (OR BACK)
NO USE R-SERVICE ABLE PARTS I NSIDE
REPAIR SHOULD BE D ONE BY AUTH ORIZED SERV ICE PERSON NEL ONLY
WARNING
RISK OF FIRE O R ELECT RIC SHOC K
DO NOT OPEN
Grounding
Prong
B. Adapter
Grounding Lug
C. Cover
Mounting
Screw
Cover of
Grounded
Outlet Box
A. Circuit Grounding
Conductor Connected
Properly
Page 5

4
CONTENTS
Important Safeguards . . . . . . . . . . . . . . . . . . .2
Unpacking Instructions . . . . . . . . . . . . . . . . . .4
Introduction . . . . . . . . . . . . . . . . . . . . . . . . . . . 4
Features and Benefits . . . . . . . . . . . . . . . . . . .5
Preparing Your Espresso Machine . . . . . . . . .6
Using Your Espresso Machine . . . . . . . . . . . .6
Programming . . . . . . . . . . . . . . . . . . . . . . . . . 7
Temperature Controls ...................7
Cleaning and Maintenance ..............8
Troubleshooting ........................9
Recipes . . . . . . . . . . . . . . . . . . . . . . . . . . . .11
Warranty . . . . . . . . . . . . . . . . . . . . . . . . . . . .17
IMPORTANT UNPACKING
INSTRUCTIONS
1. Place the box on a large, sturdy, flat surface.
2. Remove the instruction book and any other
literature.
3. Remove the sample pack of illy
®
iperEspresso® capsules.
4. Turn the box so that the backside of the
machine is down, and slide the espresso
maker from the box.
5. After the espresso maker has been removed,
place the box and the side pulp-molded
inserts out of the way.
6. Remove all packing materials, tape, etc.
We suggest you save all packing materials in
the event that future shipping of the machine is
needed. Keep all plastic bags away from
children.
INTRODUCTION
Cuisinart and illy are proud to introduce
the Buona Tazza® Single Serve Espresso &
Coffee Machine. Powered by Cuisinart, the
machine features the proprietary illy®
iperEspresso® capsule system. The
combination of Cuisinart’s excellence in coffeemakers and illy’s legendary coffee heritage
allows you to savor the extraordinarily smooth
taste of an illy® espresso or traditional coffee.
Page 6
5
14
1
6
7
9
10
8
11
12
5
3
2
13
17
15
18
16
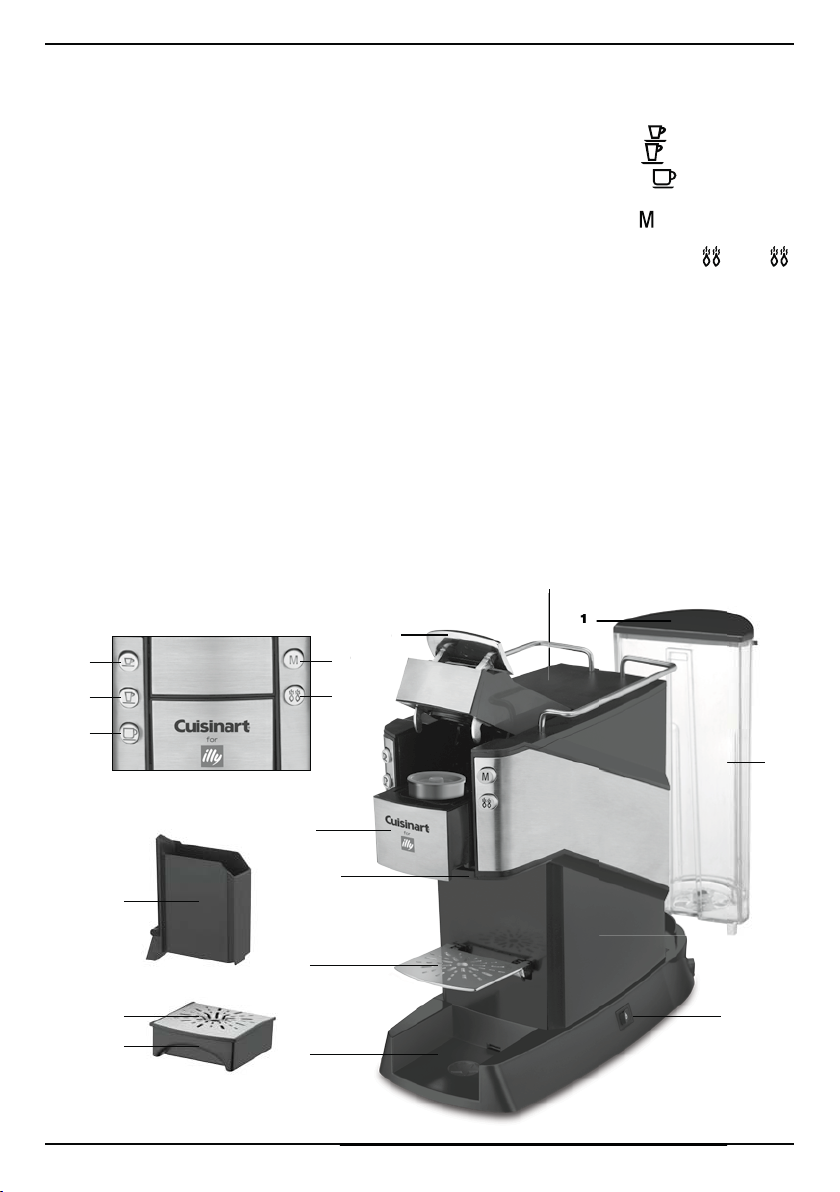
1. Water Reservoir Lid
2.
Removable 34-ounce Water Reservoir
3.
Cup-Warming Plate
Convenient place to warm cups.
4.
19 Bar Pump (not shown)
5.
Brew Head Lever
Use the die-cast metal lever to open and
close the brew head.
6. Brew Head
Holds illy® iperEspresso® capsules.
7.
Brewing Spout
Strategically positioned for optimal results.
8.
Used Capsule Container
Holds approximately 10 capsules. Also
contains some residual liquid left after
brewing.
9.
Espresso Cup Tray
Folds up when taller mugs need to be used.
10.
Drip Tray Grate
11.
Coffee Tray/Removable Drip Tray
12. Travel Mug Tray
13.
Power Switch
14.
Short Espresso Button
15.
Long Espresso Button
16. Traditional Coffee Button
17.
Manual/Custom Setting/
Programmable Button
18. Temperature Setting Button
Default temp setting is extra-hot
. Push
to turn off extra-hot, if hot setting is desired.
19. Energy-Saver Mode (not shown)
Saves 50% of power after 30 minutes of
non-use.
20. Auto-Off Mode (not shown)
Shuts off after 60 minutes of non-use.
21. Power Cord (not shown)
22. BPA Free (not shown)
All materials that come in contact with liquid
are BPA free.
23. Sample Capsule Pack (not shown)
Choose from a selection of 100% Arabica
varieties!
5
7
8
FEATURES AND BENEFITS
Page 7
PREPARING YOUR
ESPRESSO MACHINE
1.
Place the espresso machine on a dry, stable
countertop or other flat, sturdy surface where
you will be using the machine.
2. IMPORTANT: For first-time use or if the
machine has not been used for some time,
it is important that it is rinsed as follows:
Remove the lid of the water reservoir. Using
the handle, lift the water reservoir off the base
and fill with fresh, cold drinking water.
Replace the water reservoir on the base, and
cover with the lid. Using the tracks as a
guide, slide the water reservoir back into
position and push down firmly to engage.
Important: The unit will not function unless
the water reservoir is properly in place.
3. Insert the plug into a power outlet. Press the
power button once to turn the espresso
machine on. All of the controls on the front
of the machine will flash while it’s preheating. Lights will turn steady when the unit
is in ready mode (approximately 1 minute).
4. Make sure the drip tray and grate are
in place.
5. Place a mug on the drip tray.
6. Press the MANUAL
button and allow the
water to run through for approximately 5 to
10 seconds. Press once more to stop.
7. If desired, place espresso cups on the
warming plate.
8. The machine is now in preheat/ready mode
and ready to use.
NOTE: If the water reservoir is empty or not
properly positioned, the unit will not function.
The SHORT
, LONG and COFFEE
LEDs will flash quickly. Turn off the machine, fill
the water reservoir, and turn the machine back
on. We recommend brewing a short espresso
without a capsule in place to prime the
machine. The machine is now ready to use.
USING YOUR
ESPRESSO MACHINE
Always make sure you have water in the
reservoir, a capsule in the brew head, and
that the appropriate tray is being used.
NOTE: This machine is designed
exclusively for use with illy
®
iperEspresso®
capsule system. No other type of capsule,
pod, or coffee can be used.
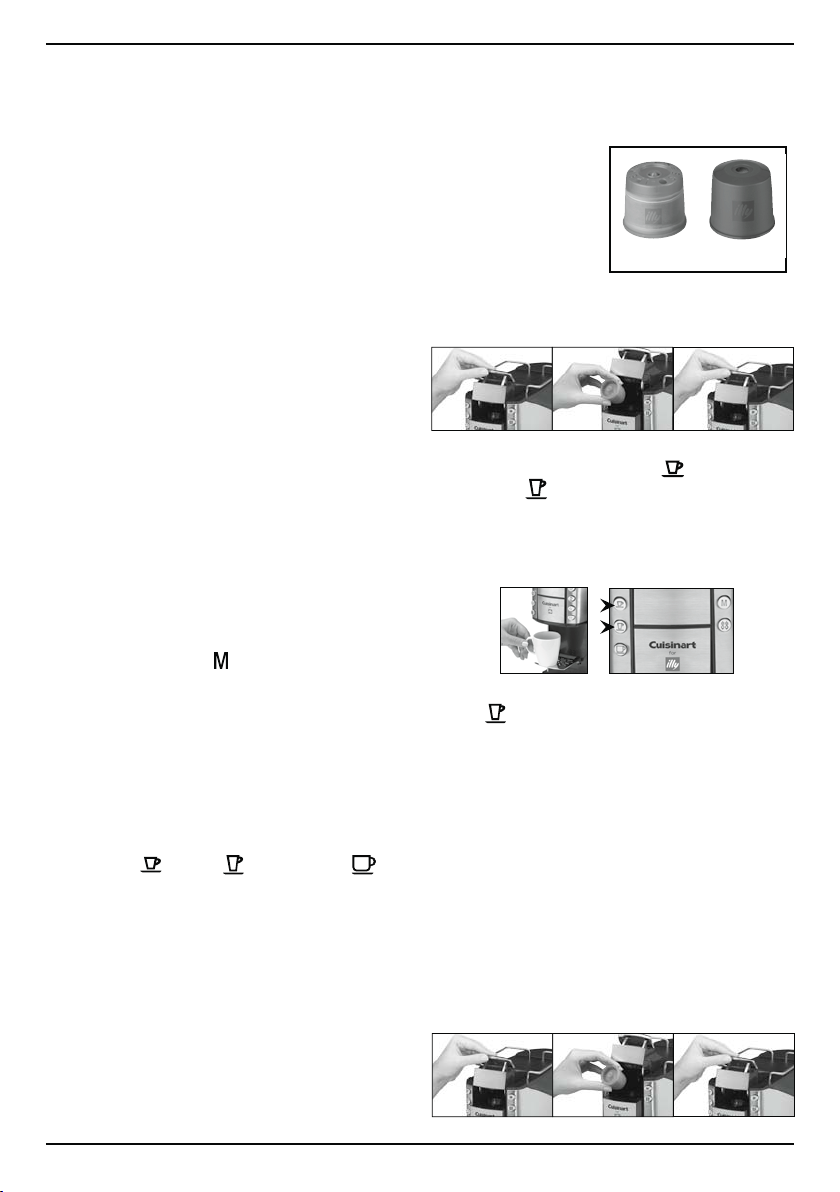
To make espresso,
use an illy
®
espresso
capsule. To make a
traditional coffee, use
an illy
®
coffee capsule.
Short or Long
Pre-Programmed
Espresso
1. Using the lever, open the brew head, insert an
espresso capsule, and close the brew head.
2. With an espresso cup on the espresso cup
tray, select either a SHORT
(1.2 ounces)
or LONG
(3 ounces) espresso. (The
chosen setting and, if applicable, the
temperature setting LEDs remain on, while all
the other LEDs are off. Once all LEDs are on
again, the machine is ready for the next cycle.)
For optimal results, we recommend using the
LONG
button with the blue Lungo
iperEspresso® capsule. Using this setting with
other iperEspresso® varieties will alter the taste.
NOTE: As part of the iperEspresso® capsule’s
patented technology, the brewing process is
completely self-contained in the capsule and
coffee does not come into contact with the brew
head. So there is no need to rinse in-between
cycles as there will be no transfer of flavor.
CAUTION: Scalding may occur if the brewing
head is opened during brewing cycle.
Pre-Programmed Coffee
1. Using the lever, open the brew head, insert a
coffee capsule, and close the brew head.
6
Coffee
Capsule
Espresso
Capsule
Page 8
7
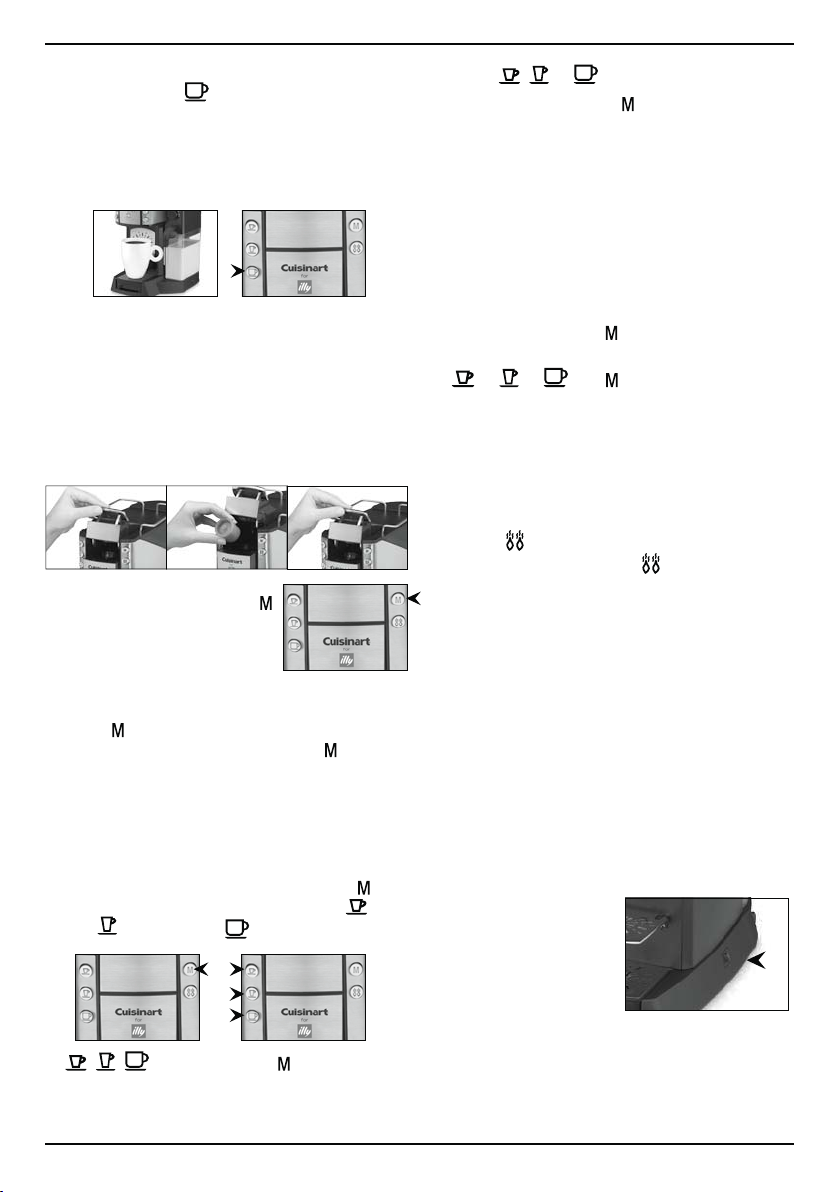
2. With a coffee cup or mug on the drip tray,
select COFFEE
(approximately 6 ounces).
(The coffee setting and, if applicable, the
temperature setting LEDs remain on, while all
the other LEDs are off. Once all LEDs are on
again, the machine is ready for the next
cycle.)
CAUTION: Scalding may occur if the brewing
head is opened during brewing cycle.
Reminder: There is no need to rinse in-between
cycles as there will be no transfer of flavor. See
Espresso section NOTE on previous page.
Manual/Adjustable Strength Control
1. Using the lever, open the brew head, insert a
capsule, and close the brew head.
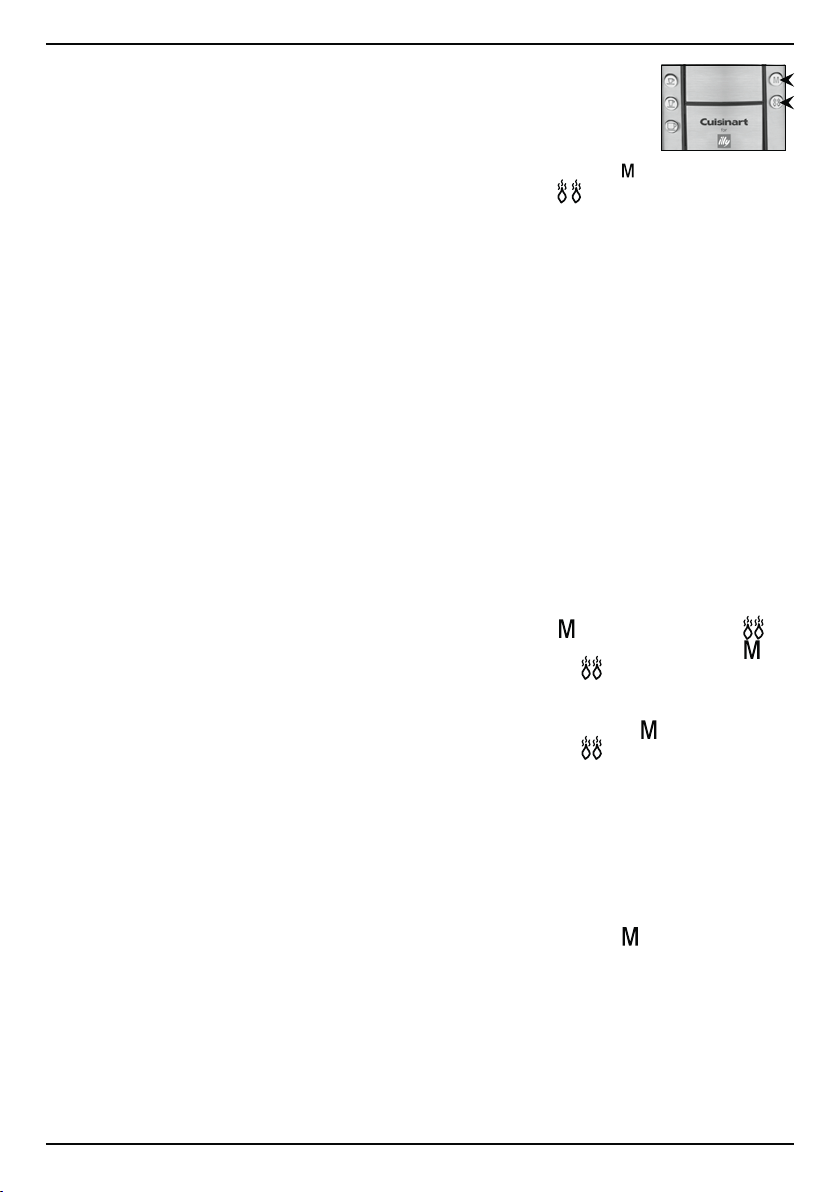
2.
For adjustable strength
control, use the MANUAL
button to adjust the length
of time espresso or coffee
is dispensing – the longer
you allow it to flow, the
lighter it will be.
Press to start dispensing. When your
cup is filled to desired level, press
again
to stop. Manual function will time-out after
90 seconds.
PROGRAMMING
A CUSTOM SETTING
At ready mode, press and hold MANUAL
for 3 seconds to customize the SHORT
,
LONG
and COFFEE output.
1.
, , are flashing and is ON. If no
action is taken within 30 seconds, unit
returns to preheat/ready mode.
2. Press
, or button.
a. Chosen setting and
LEDs remain on.
b. Espresso/coffee is dispensed.
c. When desired amount is dispensed into
cup, press chosen setting again to stop.
That will be the programmed amount and
unit will return to preheat/ready mode.
d. If no action is taken during dispensing
within 90 seconds, unit returns to preheat/
ready mode. Setting will not be changed.
To reset any setting to factory default (at ready
mode), press and hold
and chosen setting at
the same time for 3 seconds.
1.
or or and LEDs flash 3 times.
2. Default setting is on and unit will return to
preheat/ready mode.
TEMPERATURE
CONTROLS
Extra-hot is the default setting. If hot is
desired, press and hold the
button for 3
seconds to allow the temperature to decrease.
The flashing light will turn off when it has
reached the lower temperature.
ENERGY-SAVER MODE
After 30 minutes of non-use the espresso
machine will automatically switch to sleep
mode and all the control lights will be dimmed
by about 50%. When any button is pressed,
the espresso machine will return to preheat
mode and all the lights will flash. The machine
is ready to operate when all the lights are
steady again.
AUTO-OFF MODE
Following the 30-minute
Energy Saver cycle, if
there is an additional 30
minutes of non-use, the
espresso machine will
turn off. Press the
power button to turn on
again.
Page 9
CLEANING AND
MAINTENANCE
Cleaning Used Capsule Container
Container holds approximately 10 capsules and
some residual liquid after brewing. Be sure to
empty the container of any used capsules
periodically. The container is top-shelf
dishwasher safe and may also be cleaned with
warm, soapy water.
Cleaning External Parts
We recommend regular cleaning of the
espresso maker’s external components.
Cleaning the Housing
Never immerse the machine in water or other
liquids. The housing may be cleaned with a
soapy, damp, non-abrasive cloth.
Cleaning the Drip Tray
To remove the drip tray, simply slide it toward
you, keeping it level at all times in order to
prevent spills. The drip tray and drip tray plate
are top-shelf dishwasher safe. It may also be
cleaned with a soapy, damp, non-abrasive
cloth. Do not clean drip tray with cleansers,
steel wool pads or other abrasive materials.
Cleaning the Water Reservoir
Water reservoir is top-shelf dishwasher safe.
It is normal over time for discoloration, spotting
or staining to appear in the water reservoir. This
will vary depending on the mineral content of
the bottled or filtered water used, but will not
affect the operation of the machine. However,
be sure to clean the water reservoir regularly to
minimize buildup.
Decalcification
Mineral content in water varies from place to
place. Depending on the mineral content of
the water in your area, calcium deposits or
scale may build up in your machine.
Though scale is non-toxic, it can hinder
performance. Descaling the machine will
help maintain the heating element and other
parts that come into contact with water.
For
optimal performance, descale your machine
every 3 to 6 months. It is possible with heavy
use and/or hard water for calcium to build up
faster, making it necessary to descale more
often. Some indications that it is time to
decalcify may be longer brewing times,
excessive steaming, lower coffee temperatures
and brews of less than a full cup. If you
experience any of these,
decalcify immediately. If you
do not experience any of the
above, the unit will notify you
when it is time to decalcify
by flashing the MANUAL
and
TEMPERATURE
LEDs quickly for 10
seconds after preheat/ready mode. This will
happen every time you turn on the unit or wake
up the unit from sleep mode until you decalcify.
NOTE: The unit can still be used until you
decalcify.
To begin, you will need the following:
6 ounces distilled white vinegar
6 ounce water
1 large (12 ounces) ceramic mug or container
(do not use paper cup)
Step 1: Vinegar Rinse
r 'JMMXBUFSSFTFSWPJSXJUIPVODFTPG
water and 6 ounces of white vinegar and
replace.
r 1MBDFUIFDFSBNJDNVHPSDPOUBJOFSPOUIF
drip tray.
r -JGUCSFXIFBEMFWFSUPNBLFTVSFUIFSFJT
no capsule inside.
r $MPTFUIFCSFXIFBEBOEQSFTTBOEIPME
the MANUAL
and TEMPERATURE
buttons for 3 seconds. The MANUAL
and
TEMPERATURE
LEDs will flash during
the phase of cleaning which takes
approximately 5-10 minutes. When
complete, the MANUAL
and
TEMPERATURE
LEDs will hold steady.
r %JTDBSEUIFDPOUFOUTPGUIFDFSBNJDNVHPS
container.
Step 2: Fresh Water Rinse
r 'JMMUIFXBUFSSFTFSWPJSXJUIDMFBOGSFTI
water.
r 3FQMBDFUIFDFSBNJDNVHPSDPOUBJOFS
on the drip tray.
r
Press the MANUAL
button and the unit
will dispense water for approximately 90
seconds.
r
This will clean the machine’s plumbing
and remove any residual vinegar taste.
r
The machine is now ready for normal use.
Maintenance: Any other servicing should be
performed by an authorized service
representative.
8
Page 10
9
TROUBLESHOOTING
Problem: Machine does not have power.
Solution:
r .BLFTVSFUIFNBDIJOFJTTFDVSFMZ
plugged in.
r 3FTFUZPVSIPNFTDJSDVJUCSFBLFS
r $POGJSNUIFQPXFSIBTCFFOUVSOFEPOBOE
the controls are illuminated.
Problem: Machine will not brew.
Solution:
r 5VSOPGGBOEVOQMVHUIFNBDIJOFGPS
seconds or more. When you plug the
machine back in, be sure to turn the power
back on.
r .BLFTVSFUIFSFJTXBUFSJOUIFSFTFSWPJS
r .BLFTVSFUIFSFTFSWPJSJTQSPQFSMZJOTUBMMFE
r .BLFTVSFCSFXIFBEJTDPNQMFUFMZDMPTFE
Problem:
Chlorine or mineral taste
in coffee.
Solution:
r $POTJEFSVTJOHCPUUMFEPSGJMUFSFEXBUFS
Problem: Doesn’t brew a full cup.
Solution:
r 5VSOPGGBOEVOQMVHUIFNBDIJOFGPS
seconds or more. When you plug the
machine back in, be sure to turn the power
back on.
r %FDBMDJGZUIFNBDIJOFSFGFSUPQBHF
Problem: The used capsule will not fall
into the capsule container.
Solution:
r $IFDLUPTFFJGUIFDBQTVMFDPOUBJOFSJTGVMM
Empty the capsule container and then try
again. (You may need to manually remove
the used capsule from the brew head.)
Problem:
I want to reset the espresso/
coffee programming.
Solution:
r 4FFQBHFGPSJOTUSVDUJPOT
Problem: The control lights are not as
bright as they were.
Solution:
r 5IFNBDIJOFIBTBOFOFSHZTBWJOHGFBUVSF
that dims the lights and power by about 50%
after 30 minutes of non-use. Restore full
power by pressing any button.
Problem: Machine turned off.
Solution:
r 5IFNBDIJOFTBVUPPGGGFBUVSFUVSOT
the unit off after 60 minutes of non-use.
Problem: Espresso/coffee is too hot.
Solution:
t If hot is desired, press and hold the
TEMPERATURE
button for 3 seconds to
allow the temp to decrease. The flashing light
will turn off when it has reached lower
temperature.
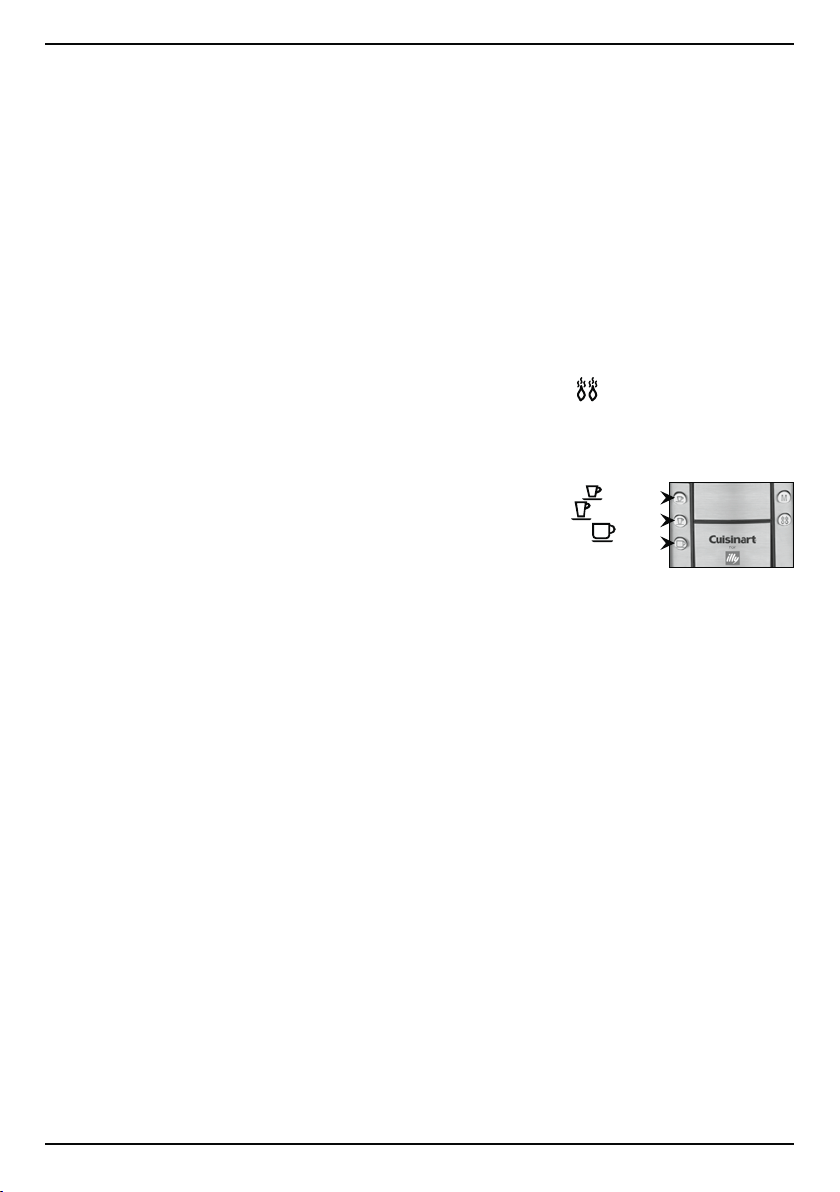
Problem: SHORT /
LONG
/ and
COFFEE
buttons flash.
Solution:
t Refill the water reservoir or make sure it is
properly engaged on the base.
Problem:
Machine takes longer than
normal to brew.
Solution:
r 5VSOPGGBOEVOQMVHUIFNBDIJOFGPS
seconds or more. When you plug the
machine back in, be sure to turn the power
back on.
r %FDBMDJGZUIFNBDIJOFSFGFSUPQBHF
Problem:
Coffee temperature is lower
than normal.
Solution:
r 5VSOPGGBOEVOQMVHUIFNBDIJOFGPS
seconds or more. When you plug the
machine back in, be sure to turn the power
back on.
r %FDBMDJGZUIFNBDIJOFSFGFSUPQBHF
Page 11
10
Problem:
SHORT /LONG
buttons flash
quickly; all buttons
are non-functional.
Solution:
r *OEJDBUFTUIFDPGGFFCPJMFSEFUFDUTIJHI
temperature. Unplug the unit, and let it cool
down for approximately 10 minutes.
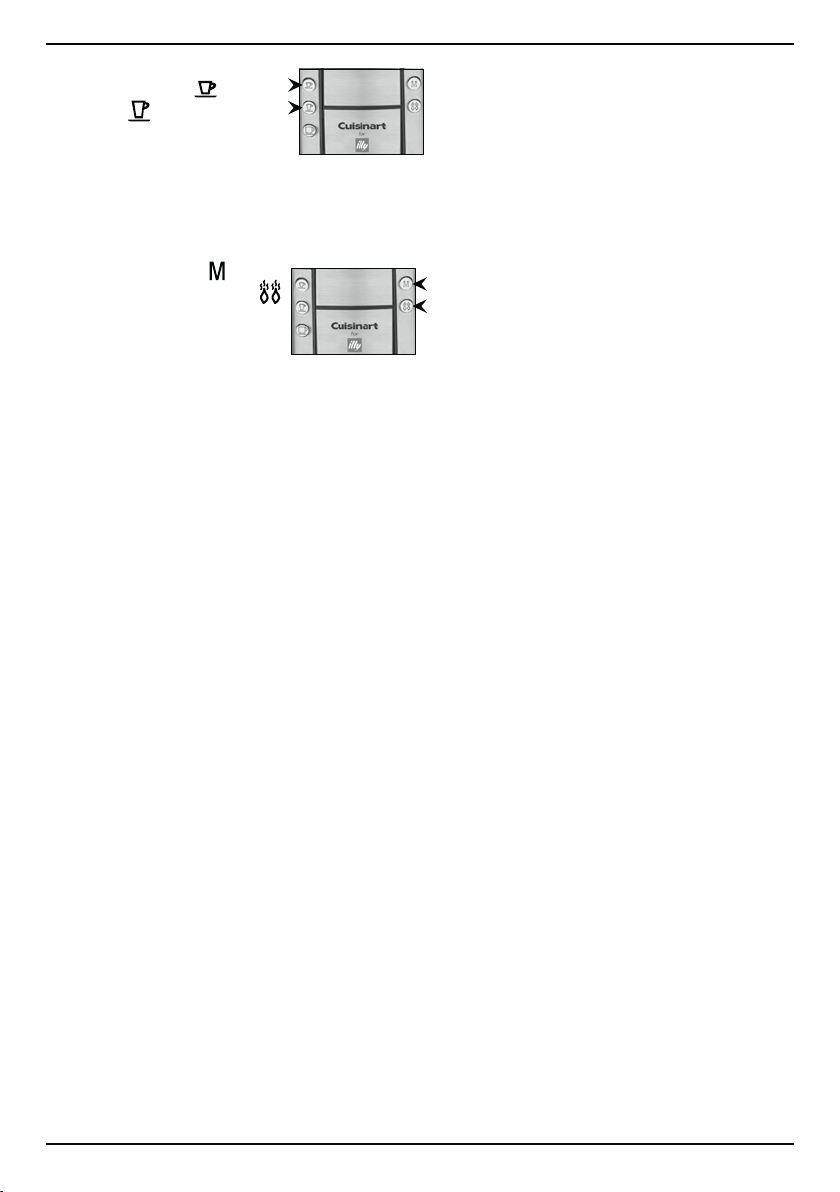
Problem:
MANUAL
, and
TEMPERATURE
buttons flash
quickly for 10
seconds after preheat/ready mode
.
Solution:
r *OEJDBUFTUIBUUIFVOJUOFFETUPCF
decalcified. Please follow decalcification
procedure on page 8.
NOTE: The unit can still be used until
you decalcify.
Page 12

11
RECIPES
Steaming/Frothing Instructions ..................... 11
Espresso Macchiato ...................................... 11
Espresso Breve .............................................. 11
Coffee with Steamed Milk ............................. 12
Cappuccino .................................................... 12
Café Latte....................................................... 12
Soy Latte ........................................................ 12
Flavored Latte ................................................ 12
Mochaccino ................................................... 13
Caffè Mocha .................................................. 13
Iced Cappuccino............................................ 13
Frozen Latte ................................................... 13
Espresso Shake ............................................. 14
Espresso Martini ............................................ 14
Caffè Coretto.................................................. 14
Granita ............................................................ 14
Affogato .......................................................... 15
Espresso Gelato ............................................. 15
Tiramisù .......................................................... 15
Ham Steak with Red-Eye Gravy.................... 16
Espresso-Marinated Flank Steak .............. 16
Steaming/Frothing Instructions
When steaming milk at home for delicious
coffee-based drinks, always start with fresh,
cold milk and steam only what you are going
to use right away. For best results, we prefer
using non-fat or skim milk, which produces
light, voluminous foam, but feel free to
experiment. Keep in mind that the consistency
of the foam will vary depending on what type
of milk is used. It is always best to froth your
milk right before serving.
To Steam and Froth Milk at Home:
Fill a small to medium saucepan, no more
than halfway, with cold milk and place over
medium heat. Heat the milk until steam begins
rising off the surface, but no bubbles have
formed. Remove the pan from the heat and
using a frother or immersion blender on low
speed, process milk until the desired amount
of froth is produced. If you do not own a
frother or an immersion blender, you can whip
the milk by hand with a wire whisk, but be
ready to put some effort into it! Pour the milk
into your espresso or coffee, using a spoon to
hold back the foam. Scoop foam on top and
serve.
Alternately, if using a microwave, pour milk
into microwave-safe mug or container and
heat until steam begins to rise off the milk’s
surface (be careful milk does not boil over).
Carefully remove from microwave and froth
milk as described above.
Espresso Macchiato
A simple spot of foam makes this drink a classic.
Makes 1 serving
1 illy® iperEspresso® espresso capsule
1 tablespoon frothed milk
1. Place an espresso cup on the espresso
cup tray.
2.
Using the lever, open the brew head, insert
the capsule and close the brew head. Press
Short
to start the brewing process.
3. When the brewing process is complete,
use a large spoon to place one tablespoon
of the foam on top of the espresso.
4. Serve immediately.
Espresso Breve
American version of a latte – substituting
half & half for milk.
Makes 1 serving
1 illy® iperEspresso® espresso
capsule
3
⁄4
to 1 cup steamed half & half
1. Place a mug on the coffee tray.
2. Using the lever, open the brew head,
insert the capsule and close the brew
head. Press the Short
button to start
the brewing process.
3. When the brewing process is complete,
pour the cream into the espresso and
serve immediately.
Page 13

12
Coffee with Steamed Milk
What a perfect way to start your morning!
Makes 1 serving
1 illy® iperEspresso® coffee capsule
1 cup steamed whole milk
1. Place mug on the coffee or travel mug tray.
2. Using the lever, open the brew head,
insert the capsule, close the brew head.
Press COFFEE
button.
3. When brewing process is completed, pour
the steamed milk into the coffee. Stir
lightly and serve immediately.
Cappuccino
A thick layer of foam and bit of milk let the
boldness of the coffee shine through
in this popular drink.
Makes 1 serving
1 illy® iperEspresso® espresso capsule
½ cup steamed and frothed skim milk
1. Place a mug on the coffee tray.
2. Using the lever, open the brew head,
insert the capsule and close the brew
head. Press the Short
button to start
the brewing process.
3. When the brewing process is complete,
pour the milk into the espresso and top
with 2 to 3 tablespoons of foam. Serve
immediately.
Caffé Latte
Similar to a cappuccino, this drink contains more
milk, which makes it creamy.
Makes 1 serving
1 illy® iperEspresso® espresso capsule
1 cup steamed and frothed skim milk
1. Put a mug on the coffee tray.
2. Using the lever, open the brew head,
insert the capsule and close the brew
head. Press the Short
button to start
the brewing process.
3. When the brewing process is complete,
slowly pour the steamed milk into the
espresso. Top with foam and serve
immediately.
Soy Latte
This is a delicious non-dairy alternative.
Makes 1 serving
1 illy® iperEspresso® espresso capsule
1 cup steamed and frothed soy milk
1. Put a mug on the coffee tray.
2. Using the lever, open the brew head,
insert the capsule and close the brew
head. Press the Short
button to start
the brewing process.
3. When the brewing process is complete,
slowly pour the steamed soy milk into the
espresso and top with a bit of the foam.
Serve immediately.
Flavored Latte
Any type of flavored syrup can be used
in this recipe.
Makes 1 serving
1 tablespoon flavored syrup
1 illy
®
iperEspresso® espresso capsule
1 cup steamed and frothed skim milk
1. Put the syrup into a mug and place on
the coffee tray.
2. Using the lever, open the brew head,
insert the capsule and close the brew
head. Press the Short
button to start
the brewing process.
3. When the brewing process is complete,
slowly pour the steamed milk into the
espresso and lightly stir. Top with a bit of
the foam and serve immediately.
Page 14

13
Mochaccino
Chocolate cappuccino –
what could be better?!
Makes 1 serving
2 tablespoons chocolate syrup
1 illy
®
iperEspresso® espresso capsule
½ cup steamed and frothed skim milk
1 teaspoon shaved bittersweet
chocolate or unsweetened cocoa
powder (for garnish)
1. Swirl half of the chocolate syrup around
the inside of a mug and place on the
coffee tray.
2. Using the lever, open the brew head,
insert the capsule and close the brew
head. Press the Short
button to start
the brewing process.
3. When brewing process is complete, stir in
the remaining chocolate syrup and a small
amount of the steamed milk. Top with a
large dollop of foam and sprinkle with the
shaved chocolate or cocoa. Serve
immediately.
Caffè Mocha
This ultra-rich drink makes a perfect ending
to any special meal.
Makes 1 serving
1 illy® iperEspresso® espresso capsule
1 tablespoon chocolate syrup
1 cup steamed and frothed skim milk
2 tablespoons whipped cream
1 teaspoon shaved bittersweet
chocolate or unsweetened cocoa
powder (for garnish)
1. Put a mug on the coffee tray.
2. Using the lever, open the brew head,
insert the capsule and close the brew
head. Press the Short
button to start
the brewing process.
3.
When brewing process is complete, stir in
the chocolate syrup and some of the
steamed milk. Top with a small amount of
foam and then with the whipped cream and
chocolate or cocoa. Serve immediately.
Iced Cappuccino
Cool down during the warmer months with
this refreshing drink.
Makes 1 serving
1 illy® iperEspresso® espresso capsule
4 ice cubes
1
⁄3
cup whole milk*
½ cup cold skim milk
1. Using the lever, open the brew head,
insert the capsule and close the brew
head. Press the Short
button to start
the brewing process.
2. When the brewing process is complete,
set the espresso aside and let cool to at
least room temperature. Once cool, put
the ice cubes and whole milk into a tall
glass. Stir in the espresso.
3. Put skim milk in a small measuring cup or
container and froth with an immersion
blender, frother, or whisk. Top the
cappuccino with the foam and serve
immediately.
*Skim milk can be used; however we like
the extra richness the whole milk provides
for this icy treat.
Frozen Latte
You will never need to go out for coffee when
you can make this frosty treat at home.
Makes 3 cups
2 illy® iperEspresso® Lungo espresso
capsules
1 cup steamed and frothed skim milk
2 tablespoons granulated sugar
6 heavy cream ice cubes*
6 ice cubes
1. Put a mug on the coffee tray.
2. Using the lever, open the brew head,
insert the capsule and close the brew
head. Press the Long
button to start
the brewing process.
3. When the brewing process is complete,
insert a new capsule into the brew head
and press the Long
button.
Page 15

14
4. Stir in milk and sugar to dissolve and cool
to at least room temperature.
5. Put beverage, cream and regular ice
cubes in a Cuisinart
®
blender jar. Cover
and blend on highest speed until smooth,
about 1 minute.
6. Serve immediately.
Note:
For an iced mocha, add 2–3 tablespoons
of chocolate syrup while blending.
*To make heavy cream ice cubes, pour heavy
cream into ice cube trays and freeze overnight.
Espresso Shake
Thick and delicious!
Makes about 3 cups
1 cup brewed espresso, chilled
2 cups coffee ice cream
1. Put espresso and ice cream into a
Cuisinart
®
blender jar.
2. Cover and blend on lowest speed until
smooth, about 1 minute.
Espresso Martini
A delicious cocktail that packs a punch.
Makes 1½ cups, about three ½-cup servings
10 ice cubes
½ cup vodka
½ cup brewed espresso, chilled
4 tablespoons rum-and-coffee liqueur
Espresso beans for garnish
1. Put the ice cubes, vodka, espresso and
rum-and-coffee liqueur into a cocktail
shaker. Shake really well until fully mixed
and chilled.
2. Pour equally into 3 martini glasses.
3. Add an espresso bean or two to each
glass for garnish and serve immediately.
Note: For a sweeter martini, add a swirl of
chocolate syrup to each glass.
Caffè Coretto
The perfect closer.
Makes 1 serving
1 illy® iperEspresso® Lungo espresso
capsule
1 ounce sambuca
1. Put a small espresso cup on the espresso
cup tray.
2. Using the lever, open the brew head,
insert the capsule, close the brew head
and press the Long.
Pour the sambuca
into a brandy snifter.
3. Serve both espresso and sambuca
together. Pour espresso into sambuca
before drinking.
Granita
A light and simple dessert.
Makes 4 servings
4 illy® iperEspresso® Lungo espresso
capsules
2 tablespoons granulated sugar
1 cup whipped cream
1 teaspoon shaved bittersweet or
semisweet chocolate for garnish
1. Put a tall, 16-ounce glass on the coffee or
travel cup tray. Using the lever, open the
brew head, insert the capsule and close
the brew head. Press the Long
button
to fill the cup (about a ½ cup). Continue
with remaining capsules.
2. Stir sugar into the hot espresso to
dissolve and pour mixture into a freezersafe container. Leave to cool to room
temperature.
3. Once cool, cover with plastic wrap and
place in the freezer. Every hour, for about
5 hours total, scrape the mixture with a
fork to allow crystals to form.
4. To serve, layer equal amounts of granita
and whipped cream in a parfait glass.
Garnish with shaved chocolate.
Page 16

15
Affogato
Dessert for two. Scoop your ice cream in
advance and save in the freezer
until ready to serve.
Makes 2 servings
2 scoops vanilla ice cream
2 illy
®
iperEspresso® espresso capsules
1. Scoop ice cream into two individual
bowls. Put an espresso cup on the
espresso cup tray. Have an additional
espresso cup ready.
2. Using the lever, open the brew head,
insert the capsule, close the brew head
and press the Short
button.
3. When the brewing process is complete,
repeat, and pour each espresso over the
ice cream and serve immediately.
Espresso Gelato
For an extra jolt, add some dark
chocolate-covered espresso beans toward
the end of freezing.
Makes about 4 cups (eight ½-cup servings)
1 cup heavy cream
2 cups whole milk, divided
1 cup brewed espresso
1 cup granulated sugar
2 tablespoons cornstarch
Pinch sea or kosher salt
1 tablespoon liquid pectin
1. In a medium saucepan, combine cream
and 1½ cups of the milk. Set over
medium/medium-low heat and bring to a
simmer.
2. While cream/milk mixture is heating, put
the remaining milk, espresso, sugar,
cornstarch and salt into a small/medium
mixing bowl. Whisk to combine.
3. Once cream/milk mixture comes to a
simmer, add the milk/sugar mixture and
stir until fully combined. While still set
over medium/medium-low heat, stir
continuously until mixture boils and
thickens so that it can coat the back of a
spoon (this will take about 15 minutes,
depending on the stove being used).
4. Remove pan from heat, stir in pectin,
strain and cool to room temperature.
Cover and refrigerate overnight.
5. Whisk mixture together again before
pouring into the ice cream maker. Pour
the mixture into the mixing bowl of the
Cuisinart
®
Ice Cream Maker. Mix until
thickened, about 30 minutes. The gelato
will have a soft, creamy texture. If a firmer
consistency is desired, transfer to an
airtight container and place in freezer for
about 2 hours. Remove from freezer about
15 minutes before serving.
Tiramisù
A simple variation of the Italian classic.
Makes 9 servings
1 container (8 ounces) mascarpone
cheese, room temperature
1 cup chilled heavy cream
¼
cup, plus 2 tablespoons confectioners’
sugar
2 tablespoons, plus 1 teaspoon dark
rum, divided
1½ cups brewed espresso, cooled
28 Savoiardi (crisp Italian ladyfingers)
¼ cup unsweetened cocoa powder, for
garnish
1. Beat the mascarpone in a medium bowl
using a Cuisinart
®
hand mixer until
lightened and slightly whipped. In another
bowl, whip the heavy cream to soft peaks,
adding the confectioners’ sugar a little at
a time while whipping. Add 1 teaspoon of
the rum and whip briefly to incorporate.
Gently fold the whipped cream into the
mascarpone,
1
⁄3
at a time, until completely
incorporated.
2. In a shallow bowl, mix the espresso with
the remaining 2 tablespoons of rum.
Working with one ladyfinger at a time, dip
the cookie into the espresso, soaking
each side for a few seconds, and transfer
to a 9-inch square baking pan or dish.
Repeat with 13 more of the ladyfingers,
arranging in the bottom of the dish to
cover the entire surface. It should be a
tight fit.
Page 17

16
3. Evenly spread half of the mascarpone
cream over the ladyfingers, covering the
entire surface. Dip the remaining
ladyfingers and arrange over the cream.
Spread an even layer of the remaining
mascarpone mixture on top. Cover with
plastic wrap and chill for at least 6 hours.
4. Before serving, pour the cocoa powder
into a small strainer and dust over the top
of the tiramisù.
Ham Steak with
Red-Eye Gravy
A twist on the Southern breakfast staple.
Serve alongside biscuits and grits.
Makes 2 servings
1 teaspoon oil
1 7-ounce smoked ham steak,
¼-inch thick
½ cup brewed espresso
1 teaspoon granulated sugar
1 tablespoon unsalted butter, chilled
1. Put the oil into a 10-inch skillet and place
over medium-high heat. Once the oil is
hot and shimmers, add the ham steak.
Cook until browned, about 5 to 6 minutes
per side. Remove ham to a plate and set
aside.
2. Add the coffee to the skillet and stir with
a wooden spoon, scraping up any bits on
the bottom of the pan. Stir in the sugar to
dissolve. Simmer the mixture until it has
reduced by about
1
⁄3
to ½. Right before
taking the pan off the heat, swirl in the
butter until incorporated. Remove the pan
from the heat.
3. Slice the steak in half and spoon gravy
over the top or serve on the side.
Espresso-Marinated
Flank Steak
Espresso becomes the star in this
easy-to-prepare marinade.
Makes 4 servings
1 cup brewed espresso, cooled
2 tablespoons molasses
2 tablespoons fresh lemon juice
1 tablespoon apple cider vinegar
¼ teaspoon ground black pepper
¼ teaspoon crushed red pepper
1 pound flank steak
1 teaspoon kosher salt
1. Whisk together the espresso, molasses,
lemon juice, apple cider vinegar and both
peppers in a bowl. Add the flank steak
and make sure it is submerged in the
marinade. Refrigerate overnight.
2. Preheat a Cuisinart
®
Griddler® fitted with
grill plates in the open position to Sear.
When grill is ready, remove as much
excess marinade as possible and season
with the salt. Grill about 5 to 6 minutes
per side for medium rare.
3. Let steak rest for 5 minutes before slicing
and serving.
Page 18

17
FULL TWO-YEAR
WARRANTY
This warranty is available for U.S. customers only.
Yo u a r e a co n s um e r i f yo u ow n a C u is i na r t
®
Buona
Ta zz a
®
Single Serve Espresso & Coffee Machine
that was purchased at retail for personal, family or
household use. Except as otherwise required
under applicable law, this warranty is not available
to retailers or other commercial purchasers or
owners. We warrant that your Cuisinart
®
Buona
Ta zz a
®
Single Serve Espresso & Coffee Machine
will be free of defects in materials and
workmanship under normal home use for 2 years
from the date of original purchase.
We recommend that you visit our website,
www.cuisinart.com for a fast, efficient way to
complete your product registration. However,
product registration does not eliminate the need
for the consumer to maintain the original proof of
purchase in order to obtain the warranty benefits.
In the event that you do not have proof of
purchase date, the purchase date for purposes of
this warranty will be the date of manufacture.
California Residents Only
California law provides that for In-Warranty
Service, California residents have the option of
returning a nonconforming product (A) to the store
where it was purchased or (B) to another retail
store that sells Cuisinart products of the same
type. The retail store shall then, according to its
preference, either repair the product, refer the
consumer to an independent repair facility, replace
the product, or refund the purchase price less the
amount directly attributable to the consumer’s
prior usage of the product. If either of the above
two options does not result in the appropriate
relief to the consumer, the consumer may then
take the product to an independent repair facility,
if service or repair can be economically
accomplished. Cuisinart and not the consumer will
be responsible for the reasonable cost of such
service, repair, replacement, or refund for
nonconforming products under warranty. California
residents may also, according to their preference,
return nonconforming products directly to
Cuisinart for repair or, if necessary, replacement by
calling our Consumer Service Center toll-free at
1-800-726-0190. Cuisinart will be responsible for
the cost of the repair, replacement, and shipping
and handling for such nonconforming products
under warranty.
BEFORE RETURNING YOUR
CUISINART PRODUCT
If your Cuisinart
®
Buona Tazza® Single Serve
Espresso & Coffee Machine should prove to be
defective within the warranty period, we will repair
or, if we think necessary, replace it. To obtain
warranty service, please call our Consumer
Service Center toll-free at 1-800-726-0190 or write
to: Cuisinart, 7475 North Glen Harbor Blvd.,
Glendale, AZ 85307. To facilitate the speed and
accuracy of your return, enclose $10.00 for
shipping and handling. (California residents need
only supply a proof of purchase and should call
1-800-726-0190 for shipping instructions.) Be sure
to include your return address, phone number,
description of the product’s defect, product serial
number, and any other information pertinent to the
return. Please pay by check or money order.
NOTE: For added protection and secure handling
of any Cuisinart product that is being returned, we
recommend you use a traceable, insured delivery
service. Cuisinart cannot be held responsible for
in-transit damage or for packages that are not
delivered to us. Lost and/or damaged products are
not covered under warranty.
Yo ur C ui s i na r t
®
Buona Tazza® Single Serve
Espresso & Coffee Machine has been
manufactured to the strictest specifications and
has been designed for use only in 120 volt outlets
and only with authorized accessories and
replacement parts. This warranty expressly
excludes any defects or damages caused by
attempted use of this unit with a converter, as well
as use with accessories, replacement parts or
repair service other than those authorized by
Cuisinart. This warranty does not cover any
damage caused by accident, misuse, shipment or
other than ordinary household use. This warranty
excludes all incidental or consequential damages.
Some states do not allow the exclusion or
limitation of these damages, so these exclusions
may not apply to you. You may also have other
rights, which vary from state to state.
Important: If the nonconforming product is to
be serviced by someone other than Cuisinart’s
Authorized Service Center, please remind the
servicer to call our Consumer Service Center
at 1-800-726-0190 to ensure that the problem
is properly diagnosed, the product is serviced
with the correct parts, and to ensure that the
product is still under warranty.
Page 19
18
NOTES:
Page 20

©2015 Cuisinart
150 Milford Road
East Windsor, NJ 08520
Printed in China
14CE007193
Trademarks or service marks referred to herein are the trademarks
or service marks of their respective owners.
IB-13154-ESP
 Loading...