

Page 1
INSTRUCTION
& RECIPE BOOKLET
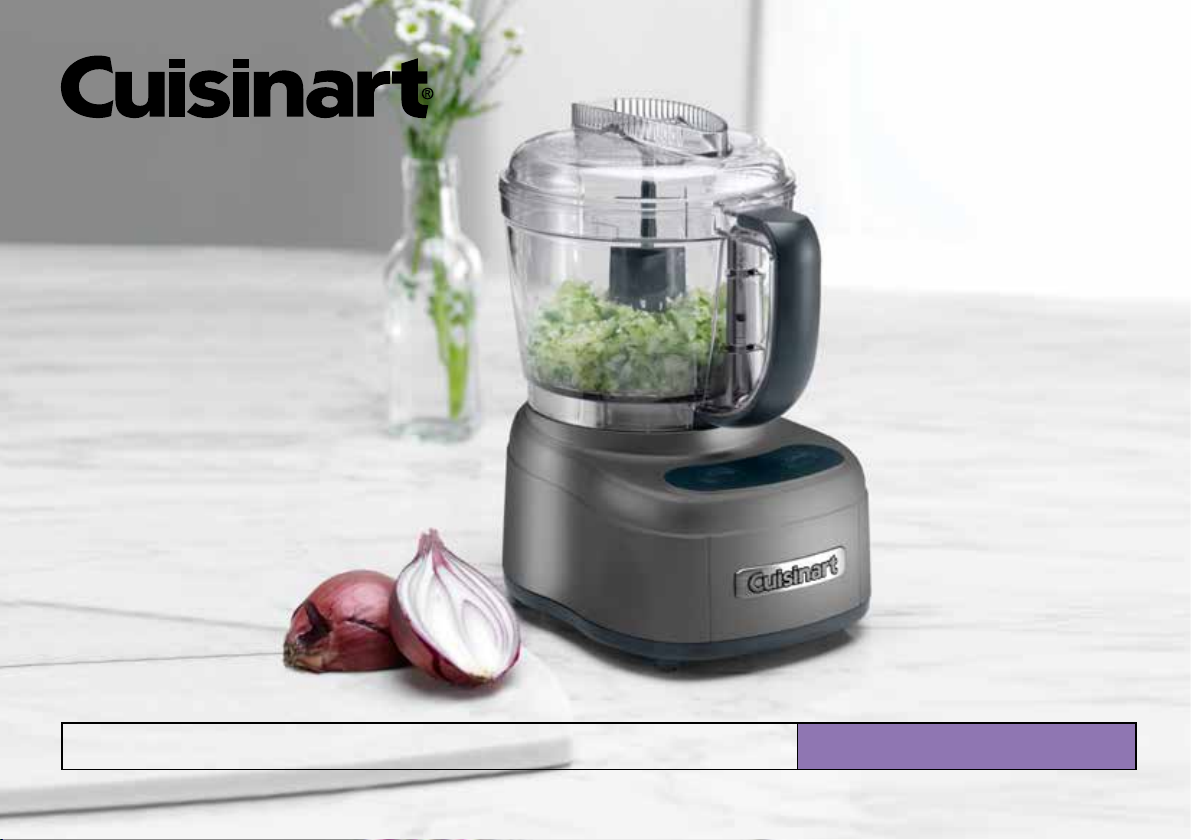
Cuisinart® Mini Prep Pro
For your safety and continued enjoyment of this product, always read the instruction book carefully before using.
ECH-4GMXA
Page 2

Page 3

IMPORTANT UNPACKING
INSTRUCTIONS
This package contains a Cuisinart® Mini Prep Pro,
as well as a metal chopping and grinding blade,
spatula and instruction/recipe booklet.
CAUTION: THE CUTTING BLADE HAS VERY SHARP
EDGES.
To avoid injury when unpacking, please follow these
instructions:
1. Place the box on a table or kitchen counter.
Be sure the box is right side up.
2. Lift and remove the cardboard lid from the work
bowl cover.
3. Grasping the work bowl handle, lift the unit up and out
of the box and place on the tabletop.
4. Turn the work bowl clockwise to unlock it from the unit
base. Lift up and remove.
5. CAREFULLY REMOVE THE METAL BLADE BY
GRASPING THE CENTRE WHITE HUB AND
LIFTING IT STRAIGHT UP. NEVER TOUCH THE
BLADE, AS IT IS RAZOR SHARP.
6. Read the instructions thoroughly before using the
appliance.
IMPORTANT
SAFEGUARDS
When using an electrical appliance, basic safety
precautions should always be adhered to, including
the following:
1. Read all instructions.
2. To protect against risk of electric shock, do not put
3. Close supervision is necessary when any appliance
4. Always unplug unit from outlet when not in use,
5. Avoid contact with moving parts.
6. Do not operate any appliance with a damaged cord
CONTENTS
Important Safeguards ..........................................3
Introduction .........................................................4
Assembly Instructions .........................................4
Tips for Processing Food ....................................5
Processing Food .................................................5
Cleaning, Storage and Maintenance ...................6
Troubleshooting ................................................... 6
Operating Techniques Chart ................................7
Recipes ................................................................9
10. Keep hands and utensils away from moving blade
motor base in water or other liquids.
is used by or near children or individuals with certain
disabilities.
before putting on or taking off parts, before
cleaning, and before removing food from bowl.
To unplug, grasp plug and pull from electrical
outlet. Never pull cord.
or plug or after the appliance malfunctions, or if
appliance has been dropped or damaged in any
manner, or dropped into water. Return the appliance
to the nearest authorised Consumer Service Centre
(see Warranty for details) for examination, repair, and
electrical or mechanical adjustment.
7. The use of attachments not recommended or sold by
Cuisinart may cause fire, electric shock or injury.
8. Do not let cord hang over edge of table or counter,
or touch hot surfaces, including the stove.
9. Do not use outdoors.
while processing to prevent the risk of severe injury
to persons or damage to the chopper/grinder.
A scraper may be used, but must only be used when
the chopper/grinder is not running.
The blade is extremely sharp. Handle carefully
11.
when removing, inserting or cleaning. Always
allow blade to stop moving before removing cover.
12. To reduce the risk of injury, never place cutting blade
on base without first putting work bowl properly in
place.
13. Be certain cover is securely locked in place before
operating appliance. Do not attempt to remove cover
until blade has stopped rotating.
14. Do not attempt to defeat the cover interlock
mechanism, as serious injury may result.
15. Before using, check work bowl for presence of
foreign objects.
16. Do not operate your appliance in an appliance
garage or under a wall cabinet. When storing in an
appliance garage, always unplug the unit from the
electrical outlet. Not doing so could create a risk of
fire, especially if the appliance touches the walls of
the garage or the door touches the unit as it closes.
17. This appliance is not intended for use by persons
(including children) with reduced physical, sensory
or mental capabilities, or lack of experience and
knowledge, unless they have been given supervision
or instruction concerning use of the appliance by a
person responsible for their safety.
18. Children should be supervised to ensure that they do
not play with the appliance.
19. This appliance is intended to be used in household
and similar applications such as:
–
staff kitchen areas in shops, offices and other working
environments;
– farm houses;
–
by clients in hotels, motels and other residential type
environments;
– bed and breakfast type environments.
3
Page 4

SAVE THESE
INSTRUCTIONS - FOR
HOUSEHOLD USE ONLY
INTRODUCTION
Congratulations on your new Cuisinart® Mini Prep
Pro. It handles a variety of food preparation tasks,
such as chopping, grinding, puréeing, emulsifying,
and blending. The patented SmartPower
auto-reversing blade features an incredibly sharp
edge for delicate chopping and puréeing soft foods.
The reverse edge is blunt, to grind through spices
and harder foods. The exclusive BladeLock System
enables the blade to lock into the bowl, so you can
now pour ingredients out of the bowl without first
having to remove the blade.
The powerful, high-speed motor works hard and
fast to accomplish small jobs with ease. Chop
herbs, onions, garlic; grind spices, hard cheese;
purée baby foods; blend homemade mayo and
flavoured butter – all in this one, compact machine.
You have virtually unlimited options with the
®
Cuisinart
Mini Prep Pro. Enjoy!
ASSEMBLY INSTRUCTIONS
1. With the base unit on the tabletop, place the work
bowl firmly on the motor base. Back of bowl must face
column at back of chopper/grinder.
2. Turn the work bowl counterclockwise to lock
onto base.
3. CAREFULLY pick up the blade by its hub and place
on the Centre stem until it drops to the bottom of the
stem. Firmly push to ensure that the blade is locked
into position. IMPORTANT: HANDLE WITH CARE –
The blade is razor sharp.
4. Add food ingredients.
5. Place the cover on the work bowl with the small
tab to the left of the work bowl handle.
6. Turn cover counterclockwise (toward handle) to
securely lock.
7. Plug unit into wall socket.
8. You are ready to Chop/Grind.
Cuisinart®
SmartPower
Blade with
BladeLock
System
Cover
4-Cup
Work Bowl
with Handle
Motor Base
Spatula (not shown)
4
Page 5

TIPS FOR PROCESSING FOOD
PREPARING THE FOOD
Never operate the Cuisinart. Mini Prep Pro without
ingredients in the work bowl.
Always process foods in order, from dry to wet, to avoid
having to clean bowl and blade between each task.
Size
Always cut large pieces of food into smaller pieces of
even size – about 1-2cm or as specified in the Operating
Techniques Chart on pages 7 & 8. If you don’t start with
pieces that are small and uniform, you will not get an
even chop.
Quantity
Do not overload the work bowl. Overloading causes
inconsistent results and strains the motor. As a rule of
thumb, remember most foods should not reach more
2
than
⁄3 of the way up the work bowl. Use the quantities
given in the chart and recipe section as a guide.
NOTE: Due to the powerful motor provided with this
unit, it is recommended to use one hand to support the
®
Cuisinart
Mini Prep Pro during operation.
Selecting the Right Operating Control
Use the Chop function for chopping, puréeing and mixing.
It is the right choice, for example, for chopping soft, deli
cate foods such as herbs, celery, onions, garlic and most
cheeses. It is also the right choice for puréeing cooked
vegetables, making mayonnaise, and mixing salad dressing.
Pulse action is best when you are using the Chop
function. Two or three pulses are often enough. Be sure
to check the food frequently to prevent overprocessing.
If you overprocess, you are likely to get a watery paste
instead of a fine chop.
Use the Grind function for grinding spices, and for
chopping hard foods such as peppercorns, seeds,
chocolate and nuts.
Continuous-hold action is best when you are using the
Grind function. You may have to operate the Cuisinart
Mini Prep Pro for several seconds with some foods to
achieve the desired results – or as long as 20 seconds
for some seeds.
When you operate the unit for more than 10 seconds, use
a pulse action every 10 seconds or so to allow food to
drop to the bottom of the work bowl. This provides more
consistent results.
Never operate the Cuisinart
continuously for longer than 1 minute at a time.
NOTE: The work bowl and cover may become scratched
when you use them for grinding grains and spices.
This does not affect the performance of the Cuisinart® Mini
Prep Pro. However, you may want to reserve the original
bowl for grinding, and purchase an additional bowl and
cover set for other uses. These are available from the
Cuisinart Consumer Service Department, which you can
reach by dialing our toll-free number: 1800-808-971.
Adding Liquid
You can add liquids such as water, oil or flavouring while
the machine is running. For example, you might want to
add oil when making mayonnaise or salad dressing.
Pour the liquid through the opening in the cover.
IMPORTANT: Add liquid through only one opening at a
time. The other opening must be left free to allow air to
escape. If both openings are blocked, liquid cannot flow
smoothly into the bowl.
Removing Food from the Sides of the Bowl
Occasionally, food will stick to the sides of the bowl
as you process. Stop the machine to clear food away.
AFTER THE BLADE HAS STOPPED MOVING, remove
the cover, and use the spatula to scrape the food from
the sides of the bowl back into the Centre. Do not put
hands into bowl unless unit is unplugged.
NOTE: HANDLE WITH CARE – the blade is razor sharp.
®
Mini Prep Pro
PROCESSING FOOD
®
1. Place the work bowl firmly on the motor base.
Opening at back of bowl must face column at back
of the
Cuisinart® Mini Prep Pro
clockwise to lock in place.
2. Insert the SmartPower Blade. Carefully pick up the
blade by its hub and place on the Centre stem until it
drops to the bottom of the stem. Firmly push to lock
the blade into position. NEVER TOUCH THE BLADE
ITSELF. THE BLADE IS RAZOR SHARP.
3. Place food in the assembled work bowl. Be sure
the food is cut into even, small pieces, and the bowl
is not overloaded.
4. Lock the cover into position.
5. Press the appropriate Chop or Grind control,
depending on the food you are processing.
6. When you have finished processing the food, stop
the machine by releasing the control button.
7.
WHEN THE BLADE STOPS MOVING,unplug the unit.
8. Remove cover and work bowl.
a. Turn work bowl cover clockwise to remove.
b. Turn work bowl clockwise to unlock it and lift it
off base.
9. To remove liquids and sauces from bowl:
Simply pour ingredients out of work bowl. Our convenient BladeLock System keeps the blade safely in place.
10. To remove thicker ingredients from bowl:
Carefully remove the SmartPower Blade by holding
the stem on the top and gently pulling up to
disengage blade lock. Remove food with spatula.
You can also remove ingredients while the bowl is
still on the base.
NOTE: HANDLE WITH CARE – THE BLADE IS RAZOR SHARP.
Tips: Always process foods in order, from dry to wet, to
avoid having to clean bowl and blade between each task.
Never operate the
ingredients in the work bowl.
Cuisinart® Mini Prep Pro
. Turn bowl counter-
without
5
Page 6

CLEANING, STORAGE AND
MAINTENANCE
To simplify cleaning, rinse the work bowl, cover, and
blade immediately after each use, so that food won’t dry
on them. Wash blade, work bowl, cover, and spatula in
warm, soapy water. Rinse and dry. Wash the blade
carefully.
Avoid leaving blade in soapy water where it may
disappear from sight. The work bowl and cover can be
washed on the top rack of a dishwasher. Insert the work
bowl upside down and the cover right side up. Put the
blade and spatula in the cutlery basket. Unload the
dishwasher carefully to avoid contact with the sharp
blade. Wipe the motor base clean with a damp sponge
or cloth. Dry it immediately. Never submerge the motor
base or the plug in water or other liquids.
The Cuisinart
countertop. When it is not in use, be sure to leave it
unplugged. The hidden cord storage underneath the
motor base will help to keep any excess cord off the
countertop. Store the unit assembled to prevent loss of
parts. Store the blade as you would sharp knives – out of
the reach of children.
The
HOUSEHOLD USE ONLY.
Maintenance: Any service other than cleaning and
normal user maintenance should be performed by an
authorised Cuisinart Service Representative.
®
Mini Prep Pro stores neatly on the
Cuisinart® Mini Prep Pro
is intended for
TROUBLESHOOTING
Motor doesn’t start or blade doesn’t rotate.
• Check plug is securely inserted into outlet.
• Check work bowl and cover are securely locked into
place.
• Be sure to press only one operation control button at
a time.
• This appliance comes with a resettable protection
device to prevent damage to the motor in the case of
extreme overload. Should unit shut off unexpectedly,
unplug it and let it cool for at least 15 minutes before
continuing.
Food is unevenly chopped.
• Try cutting food into smaller, even-sized pieces.
• Try processing smaller amounts of food per batch.
Food is chopped too fine or is watery.
• The food has been overprocessed. Use brief pulses,
or process for a shorter time. Let blade stop completely between pulses.
Food collects on work bowl cover or sides of prep
bowl.
• This is normal; turn machine off. When blade stops
rotating, remove cover and blade then clean bowl
and cover with spatula.
Food catches on blade.
• You may be processing too much food.
Carefully remove blade & clean food with spatula.
6
Page 7

OPERATING TECHNIQUES CHART
With the Cuisinart®
the way up the work bowl.
Food Operation/Technique Comments/Notes
Anchovies Chop. Pulse to desired consistency. Drain first. Cut in half.
Bread for crumbs Chop. Pulse to break up, then process continuously
Butter Alternate pulsing between Chop and Grind and then
Celery Chop. Pulse to desired size. Cut into 1cm-long pieces.
Cheese – hard (Parmesan,
Asiago, Romano, etc.)
Cheese – soft
(cream cheese, etc.)
Chocolate Chop. Pulse to break up, then process continuously
Cinnamon sticks, nutmeg,
other hard spices
Citrus zest Chop. Pulse to break up, then process continuously
Cookies, for crumbs, hard
Amaretti or macaroons
Fruits, cooked; fresh or
frozen (thawed) berries
Garlic Chop. Pulse to chop roughly, then process
Mini Prep Pro
until desired crumb size is reached.
run continuously on Chop.
Chop. Pulse 10 times, then process continuously
until desired consistency.
Chop. Pulse to break up, then process continuously
to “cream.”
until desired chop size is achieved.
Grind. Pulse to break up, about 5 times, then
process continuously until finely chopped.
until finely chopped.
Chop. Pulse 5 times to break up, then process
continuously until finely chopped.
Chop. Pulse to break up, then process continuously
until desired consistency.
continuously for fine chop.
you can chop, grind or purée a variety of foods. As a rule of thumb, most foods should not reach more than
Use day-old, hard bread for dry crumbs; fresh bread for moist crumbs. Cut or break into
pieces no larger than 2cm. For buttered crumbs, add 1 teaspoon of melted butter per
slice after crumbs have started to form, and process to combine and coat.
Cut into 1cm pieces. Best at room temperature. Process up to ¾ cup at a time. Add
freshly chopped citrus zest, garlic, herbs or shallots to create compound butters.
Remove and discard rind or reserve for another use. Cut into 1cm pieces. If possible,
remove from refrigerator 20–30 minutes before processing. Process up to 120g at
a time.
Best at room temperature. Cut into 5cm pieces. Process up to 360g at a time.
Process no more than 45g at a time. For best results, chill chocolate for 3–5 minutes in
freezer before chopping. Cut baking chocolate squares into 1cm pieces to chop.
Break up to 2 cinnamon sticks into 2cm pieces. Up to ¼ cup of all other spices can be
processed. Hard spices may cause scratches on the work bowl and cover.*
Use vegetable peeler to remove zest (color only) from citrus; scrape off any white with
sharp knife. Cut strips in half. Adding a small amount of sugar or salt will help achieve a
finer texture.
Hard cookies only. Break up into 2cm or smaller pieces. For buttered crumbs, add 1
teaspoon of melted butter per graham cracker sheet or for every 3 cookies.
Cooked fruits may be processed to make baby foods or purées; liquid may be added
for consistency. To process fresh or frozen (thawed) berries for sauce, pulse to chop,
then process until puréed (sugar may be added to taste). Fill work bowl up to ²∕³ of the
way full.
Peel garlic cloves first. Scrape work bowl sides and bottom as needed.
²
∕
of
³
*Surface scratches that may occur will not impair the function of the Cuisinart® Mini Prep Pro. You may want to consider purchasing a second work bowl specifically for these tasks.
7
Page 8

Food Operation/Technique Comments/Notes
Ginger root, fresh Chop. Pulse to break up, then process continuously
Green onions, scallions Chop. Pulse to chop to desired consistency. Trim and cut into 2cm pieces.
Herbs, fresh Chop. Pulse to chop to desired consistency. Rinse and dry completely. Remove leaves from stems to chop.
Horseradish Chop. Pulse to chop to desired consistency. Peel first. Cut into 1cm pieces. Process up to 120g at a time.
Leeks Chop. Pulse to chop to desired consistency. Trim off root end and tough outer skin. Wash thoroughly to remove sand and grit; dry
Meats Chop. Pulse to chop, or process continuously
Mushrooms Chop. Pulse to chop to desired consistency. Choose firm, fresh mushrooms. Cut into quarters or even-size pieces, no larger than
Nuts Chop. Pulse to chop to desired consistency. Or
Olives Chop. Pulse to chop to desired consistency. Use only pitted olives. Drain well for best results.
Onions Chop. Pulse 5–10 times to chop to desired size. Peel; cut into 2cm or smaller pieces of similar size.
Peppercorns Grind. Pulse first, then process continuously until
Peppers, fresh Chop. Pulse to chop to desired consistency. Core, seed and cut into 1cm pieces. Do not overprocess.
Seeds, dried berries Grind. Pulse to break up, then process continuously
Shallots Chop. Pulse 5–10 times to chop to desired
Vegetables, cooked Chop. Pulse 5–10 times to chop, then process
to reach desired consistency.
to desired consistency (add liquid as needed to
process to puréed consistency). For best results,
do not process for over 30 seconds.
Grind. Pulse first then process continuously until
desired consistency.
desired consistency.
to desired consistency.
consistency.
continuously until desired consistency is reached.
Peel first; cut into 1cm pieces or slices. Scrape work bowl sides and bottom as needed.
Process up to 120g at a time.
completely. Cut into 1cm pieces.
Uncooked meats should be cold, but not frozen; cut up to 300g into 1cm pieces,
trimmed of gristle and soft fat; some hard fat may remain. Cooked meats can be cold
or warm; cut up to 300g into 1cm pieces. Add liquid (water, broth or from cooking) as
needed to process to puréed consistency.
2cm.
Toast nuts first for maximum flavour. Allow to cool completely before chopping. Process
up to 1 cup at a time.
Combine peppercorns with dried herbs or spices or coarse salt to create rubs and
seasonings. Hard peppercorns may scratch work bowl and cover.*
Coriander, cumin, dill, fennel, sesame, poppy, and juniper berries.
Peel first; cut into quarters, or pieces no larger than 2cm.
Cook vegetables until tender. Process to a smooth purée for baby food or sauces; may
need to add liquid for consistency. Fill work bowl up to ²∕³ of the way full.
*Surface scratches that may occur will not impair the function of the Cuisinart® Mini Prep Pro. You may want to consider purchasing a second work bowl specifically for these tasks.
8
Page 9

RECIPES
CHUNKY GUACAMOLE
Our fresh guacamole is perfect for the Sunday game or served
alongside quesadillas for a festive dinner.
Makes about 11/3 cups
1 small garlic clove, peeled
½ jalapeño, seeded, cut into 2cm pieces
1 green onion, cut into 2cm pieces
1 tablespoon fresh coriander leaves, stems
discarded
2 ripe avocados, halved, pitted
2 tablespoons fresh lime juice
¾ teaspoon flaked salt
1. Put the garlic, jalapeño, green onion and coriander in
the work bowl. Pulse on Chop to roughly but evenly
chop, about 8 to 10 pulses.
2. Scrape down the sides of the bowl. Scoop out the flesh
of the avocados, in pieces, and put directly into the
work bowl; add the lime juice and salt. Alternate pulsing between Chop and Grind and then run on Chop
continuously to achieve desired consistency.
TAPENADE
This spread goes great with fresh, crusty bread. Spread on
sandwiches or even bake a thin layer onto salmon or chicken.
Makes about 11/3 cups
1 garlic clove, peeled
3 tablespoons packed fresh parsley leaves
1½ cups pitted black olives, such as Kalamata or
Niçoise
1½ cups pitted green olives
¼ cup capers, drained and rinsed
1½ teaspoons fresh lemon juice
1½ teaspoons Dijon mustard
½ teaspoon freshly ground black pepper
2 tablespoons extra virgin olive oil
Put all ingredients in the work bowl. Pulse on Chop to
evenly chop the ingredients, and then run on Chop
continuously until desired consistency is achieved.
HUMMUS
Serve this brightly flavoured dip with warm pita
Makes about 12/3 cups
1 garlic clove
1 can (450g ) chickpeas, rinsed and drained
1
/3 cup tahini
1
/3 cup plus 2 tablespoons cold water
2 tablespoons fresh lemon juice
½ to ¾ teaspoon flaked salt (to taste)
¼ teaspoon ground cumin
Extra virgin olive oil, for finishing
Pinch za’atar (optional), for finishing
1. Put the garIic in the work bowl. Run on Chop continu-
ously to finely chop. Add remaining ingredients to the
work bowl. Pulse on Chop to start processing ingredients. Continue pulsing to process until smooth and
creamy.
2. Taste and adjust seasoning as desired. To serve, drizzle
with olive oil and sprinkle with za’atar (if using).
for a satisfying snack.
9
Page 10

MAYONNAISE
Taste the difference in homemade mayonnaise.
Makes about 2/3 cup
2 large egg yolks
1 tablespoon water
1 teaspoon fresh lemon juice
½ teaspoon flaked salt
½ teaspoon Dijon mustard
2
/3 cup vegetable oil
1. Put the egg yolks, water, lemon juice, salt, and mustard in the work bowl and press Chop to process until
smooth, about 15 seconds. While running on Chop
continuously, add the oil slowly through one of the
drizzle holes on the cover until all oil is incorporated
and the mayonnaise is emulsified and homogenous.
2. Taste and adjust seasoning accordingly.
Note: For fresh herb mayonnaise: Process
packed fresh herbs (e.g., parsley, dill, tarragon, basil, etc.),
stems removed, with the yolks before adding the oil.
For a bolder-flavoured mayonnaise, increase the salt by
¼ teaspoon, the Dijon by ½ teaspoon and lemon juice
to 1 tablespoon.
1
/3 cup firmly
APPLE CRISP
This is your no-frills autumn dessert that can be prepared
and baked in under an hour. Any type of apple will do,
but we like to use a mix of tart and sweet varieties.
Makes about 6 to 8 servings
Topping:
1 cup rolled oats (not quick cooking)
1
/3 cup unbleached, all-purpose flour
2
/3 cup packed light brown sugar
¼ teaspoon flaked salt
¼ teaspoon ground cinnamon
Pinch ground ginger
6 tablespoons unsalted butter, cold and cubed
Filling:
5 to 6 medium apples (about 1kg), peeled, cored and
cut into 2cm pieces
1 tablespoon fresh lemon juice
1
/3 cup white sugar
1 teaspoon ground cinnamon
½ teaspoon pure vanilla extract
Pinch flaked salt
1. Preheat oven with rack in the middle position to 190ºC.
2. Put all of the topping ingredients, except for the butter,
in the work bowl. Pulse on Chop to combine, about
4 to 6 pulses. Add the butter and pulse on Chop until
butter is in small pieces, about 5 to 6 pulses. Reserve.
3. Put the apples in a 23x23cm square baking pan.
Sprinkle the lemon juice evenly over the apples and
then add the remaining ingredients. Gently toss to
evenly coat the apples.
4. Cover the apple mixture with the prepared topping.
Transfer pan to the preheated oven and cook until filling
is bubbling and the top is browned and crispy, about
40 to 45 minutes.
5. Allow to cool for 5 minutes prior to serving.
APPLESAUCE
Homemade applesauce is a quick (and healthy!) comfort food
for the entire family. Our version does not call for any sugar, but
some varieties of apples may call for a teaspoon or two.
Makes about 11/3 cups
3 medium to large apples (about 450g), peeled
or not peeled, cored and cut into 2cm pieces
(if you leave the peel on, the applesauce will
have a beautiful, rosy hue)
½ teaspoon ground cinnamon
Pinch ground nutmeg
Pinch flaked salt
½ cup water
½ teaspoon fresh lemon juice
1. Put all of the ingredients, except the lemon juice, into
a medium saucepan. Cover and set over medium-high
heat to bring to a boil. Once boiling, partially cover and
reduce heat to maintain a simmer. Allow to cook until
apples are very tender, about 20 to 25 minutes (keep an
eye on the water, you may need to add a tablespoon or
so during cooking – you do not want it to dry out).
2. Transfer apple mixture to the work bowl. Add the lemon
juice and then alternate pulsing between Chop and
Grind, until desired consistency is achieved.
3. Taste and adjust seasoning as desired. Serve warm or
chilled.
10
Page 11

WEIGHTS, MEASURES AND CONVERSIONS
Liquids
Metric cup imperial
30 ml 1 fl oz
60 ml ¼ cup 2 fl oz
80 ml 3 ½ fl oz
100ml
cup 2 ¾ fl oz
125ml½ cup 4 fl oz
150ml5 fl oz
180ml¾ cup 6 fl oz
200ml7 fl oz
250ml1 cup 8 ¾ fl oz
310ml1 ¼ cups 10 ½ fl oz
375ml1 ½ cups 13 fl oz
430ml1 ¾ cups 15 fl oz
475ml 16 fl oz
500ml2 cups 17 fl oz
625ml2 ½ cups 21 ½ fl oz
750ml3 cups 26 fl oz
1L 4 cups 35 fl oz
1.25L 5 cups 44 fl oz
1.5L 6 cups 52 fl oz
2L 8 cups 70 fl oz
2.5L 10 cups 88 fl oz
ºF=
9 X ºC
5
+ 32
ºC=
5(ºF - 32)
9
20º
20º
30º
40º
50º
60º
70º
80º
90º
100º
110º230º
220º
210º
200º
190º
180º
170º
160º
150º
140º
130º
120º
110º
100º
90º
80º
70º
60º
50º
40º
30º
20º
10º
10º
10º
0º
0º
Fahrenheit
Celsius
Temperature ºF / ºC
Metric cup & spoon sizes
cupmetric
¼ cup 60ml
cup 80ml
½ cup 125ml
1 cup 250ml
spoonmetric
¼ teaspoon 1.25ml
½ teaspoon 2.5ml
1 teaspoon 5ml
2 teaspoon 10ml
1 tablespoon (equal to 4 teaspoons) 20ml
11
Page 12

Any other trademarks or service marks referred to herein are
the trademarks or service marks of their respective owners.
www.cuisinart.com.au
©2019 Cuisinart
Suite 101 Ground Floor
18 Rodborough Rd
Frenchs Forest NSW, 2086
Australia
Visit our Website:
www.cuisinart.com.au
Printed in China
IB-19/269
 Loading...