

Page 1
Page 2
Introduction
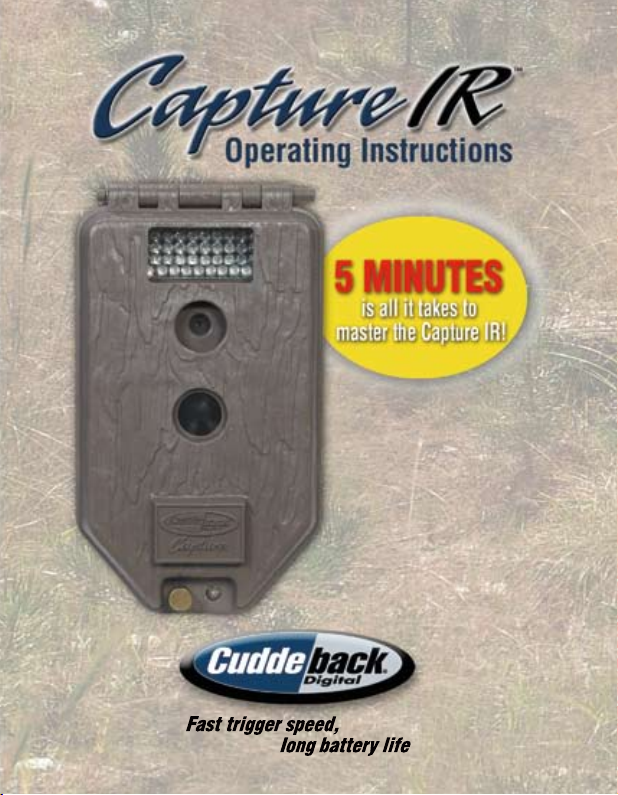
Thank you for purchasing a Cuddeback Capture IR digital scouting camera.
Capture IR is so easy to use that you may feel you do not need to read this manual.
However, we recommend you spend 5 minutes reading this manual to familiarize
yourself with the not-so-obvious features of the Capture IR. At the very least, we
recommend you read how to check your Capture IR.
What you need
Before you can use your Capture IR, you will need the following items:
1. One or more Secure Digital (SD) cards. We recommend sizes up to 2 GB,
with 1 GB being the preferred size. The higher the number on the card, the
more images that can be saved on the card. DO NOT USE SDHC CARDS.
2. Four D Cell batteries (we recommend Rayovac, Duracell or Energizer
brand batteries).
3. An optional padlock if you want to prevent tampering. The shaft of the padlock
must be ¼ inch or smaller to fit through the Capture IR’s padlock opening.
Page 3
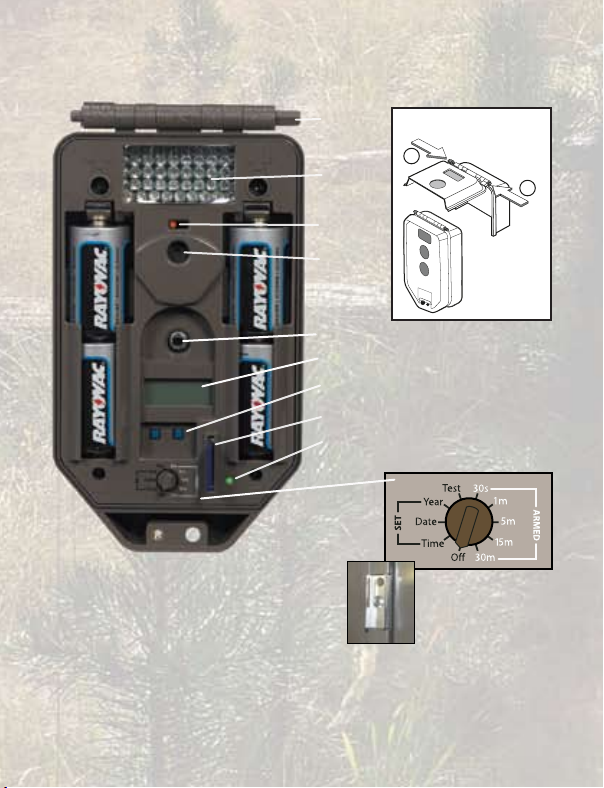
STEP 1 – Familiarize yourself with Capture IR
Take a moment to familiarize yourself with Capture IR’s features.
Hinge rod
IR
illuminator
Red LED
Camera
window
Heat-in-motion sensor
LCD screen
Operation keys
SD card port
Green LED
STEP 2 – Turning Capture IR on
“Stay-open” cover
2
1
1. Push hinge rod
left to hold open
2. Push hinge rod
right to close
Rotary switch
1. Mount the supplied tree bracket to the
back of the camera with the supplied screw.
2. Turn the rotary switch to the OFF position.
3. Install 4 new alkaline D cell batteries. Make sure to observe correct polarity.
4. A series of numbers will be displayed. These are the Capture IR’s hardware and
software version numbers.
5. Wait until the LCD display goes blank and the green and red LEDs turn off.
6. Install SD card into the SD card port. We recommend a 1 GB size card.
Page 4

STEP 3 – Setting up Capture IR
Turn the Rotary Switch to:
1. Time position, press A to set hour and B to set minutes.
Time is AM/PM format.
2. Date position, press A to set month and B to set date.
3. Year position, press A to go back and B to go forward.
STEP 4 – Attaching Capture IR to a tree
1.
Attach Capture IR to a tree with the supplied strap.
2. W
e recommend mounting Capture IR about 3 feet off the ground.
3.
Best image quality will be obtained if you position Capture IR about
10 to 15 feet from where animals are expected.
4. Capture IR can detect animals that are right in front of it out to 50
feet or more. Detection range will vary greatly with air temperature,
animal size and movement speed.
5. Remove any vegetation and obstructions from the Capture IR’s field
of view that may interfere with the motion sensor or camera.
6. Aim and align the Capture IR as required. The Capture IR’s TEST feature,
as explained next, can assist in this process.
STEP 5 – Test mode is used to check
Capture IR’s detection zone
1.
Turn the rotary switch to TEST.
2.
Close the cover and completely tighten the thumb screw.
Detection range will be very short if the cover is left open.
3.
Walk in front of Capture IR. The RED LED will illuminate when
you are detected.
4.
When you are satisfied that Capture IR is aimed correctly, proceed
to Step 6.
Page 5

6. Remove the SD card and/or press the A key to see additional data.
Here is a list of additional data that will be displayed as you press
the A key:
1. Images saved: 2. Free space: 3. Time:
4. Date: 5. Year: 6. Test:
7. Armed:
To rearm Capture IR
There are 3 ways to rearm Capture IR:
1. If the Rotary Switch is still in one of the
armed positions, you can close the cover
and leave. Capture IR will automatically
rearm itself within 10 minutes.
2. If the Rotary Switch is not in one of the armed positions, turn the
rotary switch to one of the armed positions to rearm the camera.
3. If the Rotary Switch is in one of the armed positions and the
camera is not armed, you can arm Capture IR immediately by
pressing the A key until the delay setting is displayed.
Page 6

STEP 6 – Arming Capture IR
1. You must arm Capture IR before it will record any images. Turn the
Rotary Switch to one of the 5 ARMED settings.
2. These settings represent the amount of time Capture IR will idle after
taking a picture before it will rearm itself to be ready for the
next picture.
a. 30 Seconds – game trails d. 15 Minutes – feed stations
b. 1 Minute – scrapes e. 30 Minutes – feed stations
c. 5 Minutes – food plots and feed stations
3. When Capture IR is initially armed, the delay
setting will be displayed on the LCD.
4. After 5 seconds, a countdown will be
displayed, starting at 40 and counting down
toward 0. When this counter reaches 0,
Capture IR is armed. This gives you time to
leave the area without triggering an image.
5. After an image is taken, Capture IR will display
a Countdown timer that represents your
armed setting.
if the Capture IR is armed
it will be rearmed if it is idle.
This allows you to determine
and how long before
Delay setting is displayed
Countdown is displayed
Countdown timer
STEP 7 – Checking Capture IR
To retrieve Capture IR images
1. Loosen the thumb screw (and remove padlock if installed).
2. Open the cover (numbers may or may not be displayed on the LCD).
3. Press the A key.
4. The number of images saved will be displayed on the LCD.
5. Wait until the green LED goes off before removing the SD card!
Page 7

STEP 8 – Viewing images
There are various methods of viewing Capture IR images.
CuddeView Field Viewer: Cuddeback’s CuddeView 4-in-1 viewer will allow
you to view images, copy the images to a CF card, erase the images from
the SD card, and then put the original SD card back into Capture IR. CuddeView
allows you to use one CF card to record images from multiple cameras.
See www.cuddeback.com for more information on CuddeView.
Personal Computer (PC or MAC): Replace the SD card with a fresh SD card
and take the original SD card with you to view on your PC or other device.
Digital Camera: You can view the images with an optional viewer or a pointand-shoot camera that is able to read Capture IR images (NOTE: not all
cameras can view Capture IR images, please test any camera before purchasing).
SD-based
Using Capture IR without SD card
When Capture IR is used without an SD card, images are stored in Capture IR’s
internal image memory. Capture IR features an internal memory of about 30 MB.
This may allow storage of up to 100 images. Images can be transferred from
internal memory to an SD card.
If you use the Capture IR without an SD card, follow these steps to transfer the
images from the internal memory to an SD card.
1. Turn the Rotary Switch to OFF, and wait until the LCD goes blank.
2. Wait until the green LED turns off and then install an SD card.
3. Turn the Rotary Switch to any other setting, such as Set Time.
The green LED will turn on.
4. When the green LED turns off,
the images have been copied from the internal memory to the SD card.
DO NOT REMOVE or INSTALL the SD CARD WHEN THE GREEN LED IS ON.
(NOTE: You may need to wait up to 3 minutes)
Page 8

Keep your Capture IR up-to-date
You can easily update the software in Capture IR. This feature allows your
Capture IR to stay current with the latest software features. We are constantly
looking for ways to improve the performance and quality of our products.
In many cases, a software update is all that is required. Please visit our web
site www.cuddeback.com, click on "Product Support," then click "Firmware
Updates." The latest software updates will be available on this web page. We
recommend you occasionally check this web page for updates. Every season,
before you take your cameras into the field, check for updates.
Online warranty registration
Your Capture IR purchase comes standard with a 90 day warranty. You can
extend this warranty to 1 year, free of charge, by registering your Capture IR
online within 21 days of purchase. Registration has numerous
advantages to you:
1. Extends warranty from 90 days to 1 year.
2. Allows us to contact you when updates are available for your product.
3. Allows us to verify your warranty in the event you lose your product
sales receipt.
Note: We will not sell your email address.
Enter the Cuddeback Photo Contest
We encourage you to enter your favorite images
into the online Cuddeback Photo Contest.
Visit cuddeback.com for details!
Non Typical, Inc. • 860 Park Lane • Park Falls, WI 54552
715-762-2260 • Fx: 715-762-2719
www.cuddeback.com
9212
 Loading...