

Cube MTB, Road bike, Trekking Handbook

| 1
MTB/ ROAD BIKE/ TREKKING
Handbook
MTb/ Road bike/ TRekking
englisH

Company details
Manufacturer: Pending System GmbH & Co. KG
Ludwig-Hüttner-Straße 5-7
95679 Waldershof
Germany
www.cube.eu
Info@cube.eu
Consultancy: Andreas Zauhar, Dipl.-Ing. FH
von der IHK für München und Obb.
öentlich bestellter und vereidigter
Sachverständiger für Fahrradschäden
und -bewertungen.
Ocially approved for Munich and
Upper Bavaria Chamber of Trade and
Industry and Ocial expert in matters
of bicycle damage and evalution
Horner Straße 12d
D-83329 Waging-Tettenhausen
Tel.: +49 8681 477 9284
Fax: +49 8681 477 9285
mob.: +49 160 979 17438
www.andreas-zauhar.de
andreas.zauhar@t-online.de
Sticker frame serial number (attached on top tube)

| 3
MTB/ ROAD BIKE/ TREKKING
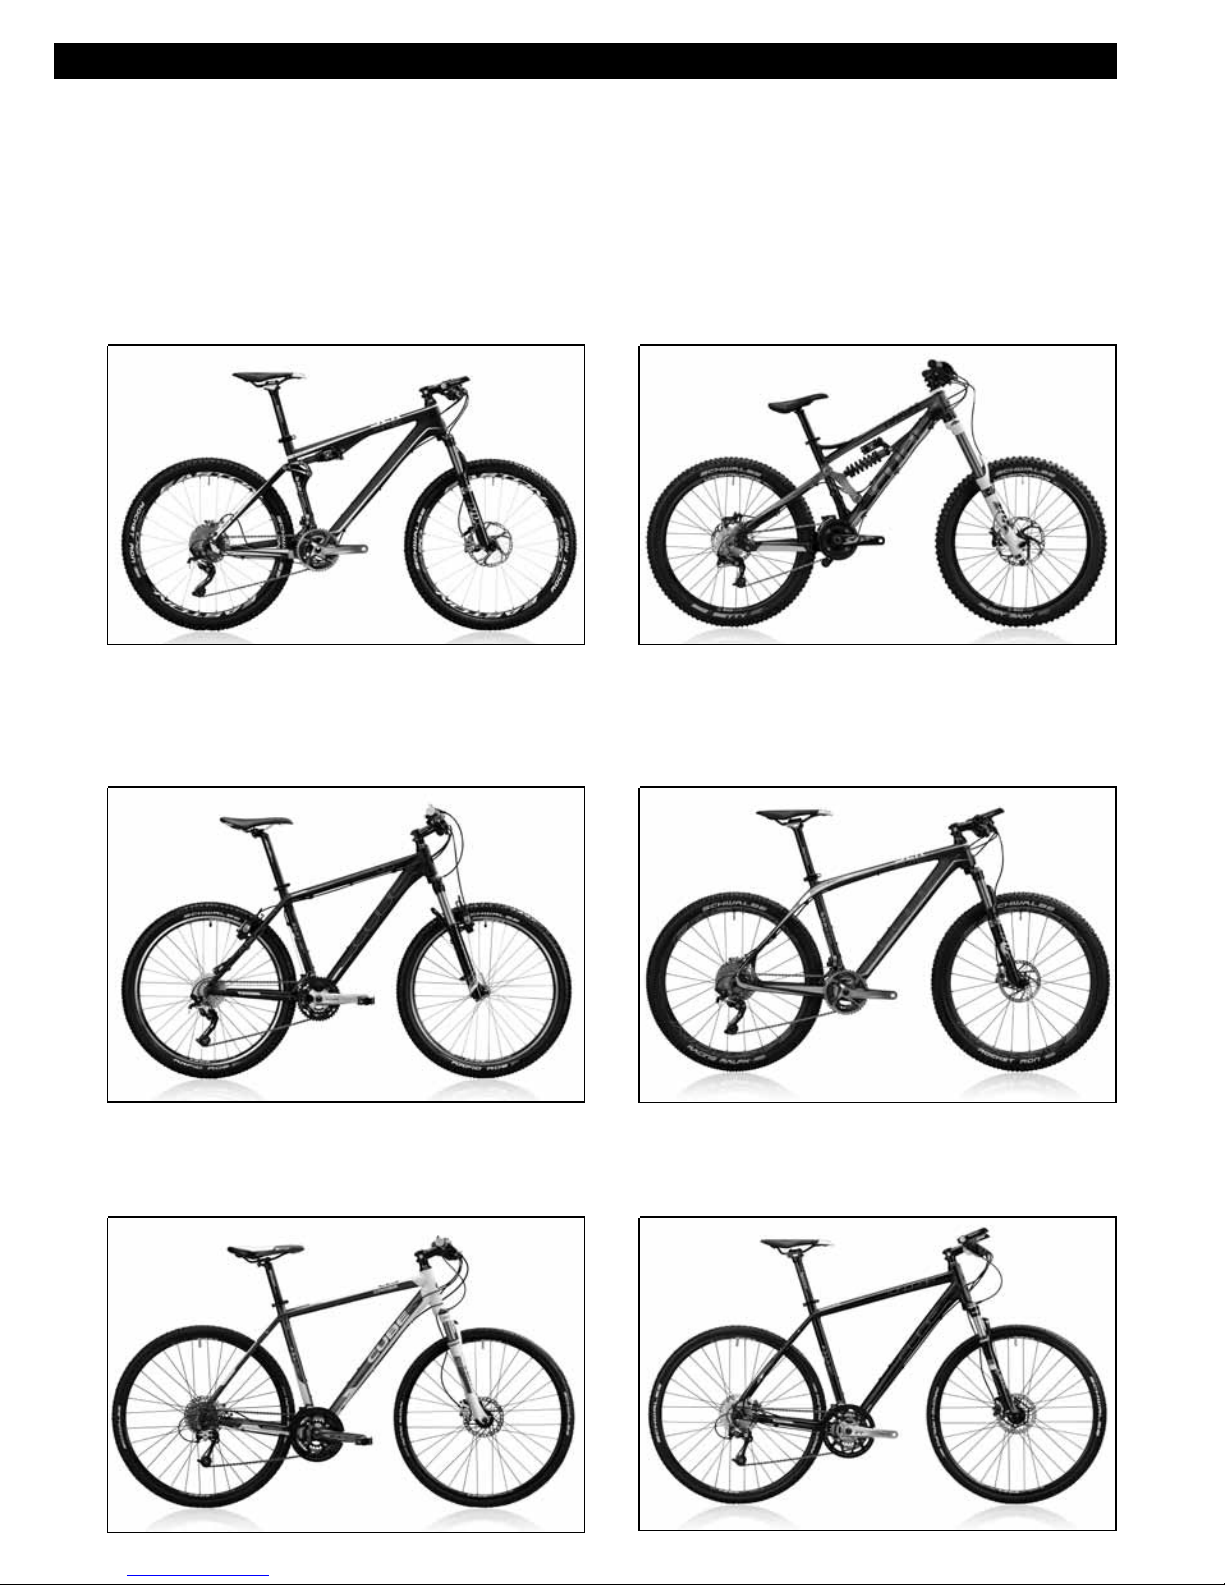
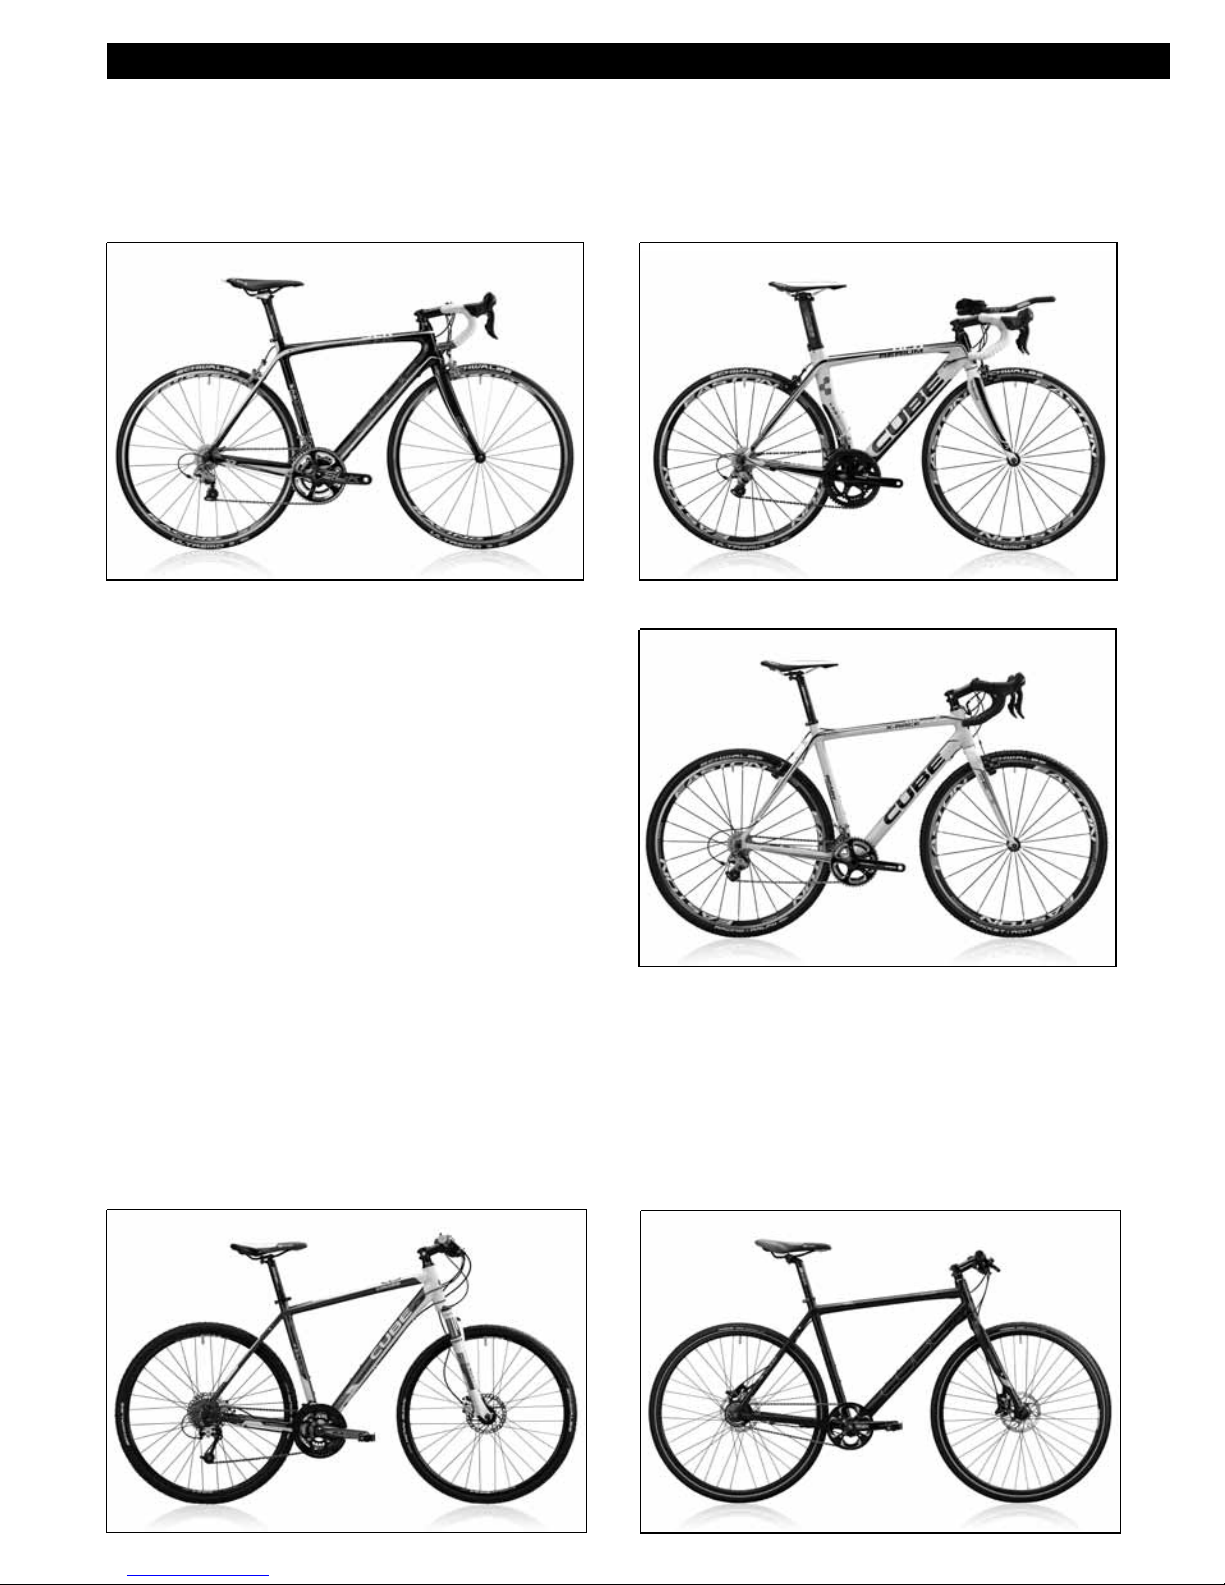
In the following image you will nd a bike which shows all necessary parts, listed in the manual.
We choosed an example of the wide range of bikes on the market.
01 chain rings
02 crankset
03 pedals
04 front derailleur
05 chain
06 rear derailleur
07 sprocket cluster
08 shifter
09 brake levers
10 brakes
10 a brake disc
10 b brake caliper
10 c brakebooster
11 quick-release axles
12 hubs
13 seat post
14 seat clamp
15 frame
15 a chain stay
15 b seat stay
15 c linkage
16 fork
17 rear shock
18 wheels
19 bar
20 stem
21 head set
22 rear carrier
23 light system
24 mud guard
1
2
3
24
16
22
10
7
6
5
23
21
20
8
18
12
10
4
15
14
13
23
19
11
9
15 a
15 b
10 c

MTB/ ROAD BIKE/ TREKKING
7
1
2
4
17
19
18
12
11
9
20
15
14
5
13
21
10
6
15 a
3
17
10
13
14
21
20
18
4
1
5
7
6
11
8
2
15
19
9
10
16
15 b
15 c
21
12
15 a
15 b
12
3
10 b
10 a

| 5
MTB/ ROAD BIKE/ TREKKING
Content
1 About this Owner’sManual ............... 07
1.1 Conventions .......................................................... 07
1.1.1 Symbol.................................................................... 07
1.1.2 Location indications ........................................... 07
1.1.3 List of abbreviations............................................ 07
1.1.4 Denition of Terms ....................................... 07-08
1.2 Owner’s Manual ............................................. 08-09
1.2.1 Scope of Application ......................................... 09
1.2.2 Accompanying documentation ...................... 09
1.2.3 Pictures ................................................................... 09
2 For your safety ..................................... 09
2.1 Use your bicycle as intended ............................ 09
2.1.1 Who may use your bicycle? ............................... 10
2.1.2 How may you ride your bicycle? ...................... 10
2.1.3 Where may you ride your bicycle? ............. 10-11
2.1.4 In what condition must your bike be
when you ride it? .................................................. 11
2.1.5 Accessories and modication ...................... 11-12
2.1.6 Transport of children, baggage,
bicycle trailers ........................................................ 12
2.1.7 Roller training ........................................................ 13
2.2 Other hazards ....................................................... 13
2.2.1 Hazards caused by faulty
nal assembly ...................................................... 13
2.2.2 Hazards caused by improper use .................... 13
2.2.3 Risk of burns .......................................................... 13
2.2.4 Other hazards and safety notes ................. 13-14
2.3 Disposal .................................................................. 14
3 Included with your bike and
Technical Details .................................. 14
3.1 Scorpe of supply ................................................... 14
3.2 Technical data ....................................................... 14
3.3 Torques of screw connections ......................... 15
4 Assembly and function ....................... 15
4.1 Categories .............................................................. 15
4.2 Mountain bike ....................................................... 16
4.2.1 Fully .......................................................................... 16
4.2.2 Hardtails .................................................................. 16
4.3 Crossbike ................................................................. 16
4.4 Racing bike / Triathlon ........................................ 17
4.5 Cyclo-cross .............................................................. 17
4.6 Fitness bikes / Urban bikes ................................ 17
4.7 Trekking bike ......................................................... 18
4.8 General information ............................................ 18
4.8.1 Brakes ....................................................................... 18
4.8.2 Gear shift ................................................................. 18
4.8.3 Frame and fork ...................................................... 18
4.9 Frame material / information
on carbon material ............................................... 19
4.9.1 Information on the frame construction ........ 19
4.9.2 How to use your carbon
parts correctly .................................................. 19-20
5 Bicycle frame/
Bicycle frame set ................................. 20
6 Before using for the rst time ............ 21
7 Before every trip ............................ 21-22
7.1 Check the road wheels ...................................... 22
7.1.1 Check tting ......................................................... 23
7.1.2 Check the rims ...................................................... 23
7.1.3 Check tyres ...................................................... 24-25
7.1.4 Other checks ......................................................... 25
7.2 Check saddle and seat post .............................. 26
7.3 Handlebars, check stem ................................ 26-27
7.4 Check handlebar-mounted parts ................... 27
7.5 Check the fork bearing ................................. 27-28
7.6 Check suspension fork ...................................... 28
7.7 Check the rear wheel suspension ................... 28
7.8 Check the brakes ............................................ 28-29
7.8.1 Check rim brakes and cable
(racing bike version) ...................................... 29-30
7.8.2 Check rim brakes and cable
(mountain bike version) ..................................... 30
7.8.3 Check hydraulic rim brakes ............................... 31
7.8.4 Check hydraulic disc brake .......................... 31-32
7.8.5 Check back-pedal brake ..................................... 32

7.9 Check drive train and chain ............................... 32
7.10 Check lighting set ................................................ 33
7.11 Check carrier .......................................................... 33
7.12 Check splash guards (mudguards) .................. 33
7.13 Other checks ................................................... 33-34
8 Adjusting and Using your bike ........... 34
8.1 Adjusting the adjustable
stem (optional) ..................................................... 34
8.2 Adjust saddle position ................................. 34-35
8.3 Adjust saddle height ............................................ 35
8.4 Adjust suspension fork ....................................... 35
8.5 Adjust rear suspension ...................................... 36
8.6 Service the gear ............................................. 36-37
8.6.1 Shimano Rapidre/ Shimano Rapidre
2-Way-Release/Shimano EZ Fire ..................... 38
8.6.2 SRAM gear shift .................................................... 39
8.6.3 Twist grip shift ....................................................... 39
8.6.4 Shimano STI .......................................................... 40
8.6.5 Sram Force / Rival / Red ..................................... 40
8.7 Service the brakes ................................................ 41
8.8 Operate the quick-release action .............. 41-44
8.9 Using click-in pedals (optional) ................. 44-45
8.10 Loading the carrier .............................................. 46
9 During riding (Troubleshooting) .......... 46
9.1 Gears and drive train .......................................... 47
9.1.2 Brake ........................................................................ 48
9.3 Frame and suspension ................................. 48-49
9.4 Splash guard,
carrier and lighting set ....................................... 49
9.5 Road wheels and tryes ....................................... 50
10 After falls or accidents ........................ 51
11 Transporting your bike ....................... 51
11.1 Fit and remove road wheels ............................. 52
11.1.1 All categories/series except the
category racing bike/triathlon ................ 52-56
11.1.2 Race/ Triathlon ............................................... 56-59
11.2 Remove and replace saddle post
and saddle ....................................................... 59-60
12 Cleaning and caring
for your bike .................................... 61-63
13 Storing your bike for a
lengthy period ..................................... 64
14 Guarantee and Warranty .................... 64
14.1 Warranty ................................................................ 64
14.2 Frame Guarantee ................................................. 64
14.3 Frame Guarantee conditions ........................... 64
15 Handover inspection checklist ........... 65
Hand over certicate .......................... 66

| 7
MTB/ ROAD BIKE/ TREKKING
HANDBOOK
MOUNTAIN, CROSS AND FITNESS BIKES
ENGLISH
TREKKING AND CITY BIKE, ROAD BIKE
8 |
MTB/ ROAD BIKE/ TREKKING
1.1 Conventions
1.1.1 Symbol
Note!
Draws your attention to items requiring
your particular attention.
Warning!
Points out to you the possibility of slight
personal injury and possible material
damage.
Danger!
Points out to you the possibility of grave
personal injury even leading to death.
Risk of burns!
Temperature exceeds 45°C (temperature at
which egg white sets) and can cause burns
on humans.
1.1.2 Location indications
If this Owner‘s Manual states „right“, „left“, „front“ or
„back“ this always means as seen when looking „in
the direction of travel“.
1.1.3 List of abbreviations
1.1.4 Denition of Terms
Run-out
A radial lack of true on the rim is
colloquially known as a „run-out“.
Dear Customer
We would like to thank you for your choice of a
bike from our Company and thank you for your
trust. With this purchase you have a high-quality,
environmentally friendly means of travel which
will give you a lot of pleasure and at the same
time promote your health.
Your cycle dealer is also very important to you for
advice and nal assembly.
He is your point of contact for servicing, inspections, modications and all types of repairs.
Should you have any questions regarding our
product please contact your cycle dealer.
1 About thisOwner‘s
Manual
Bar conventional unit for air pressure.
Torque
Also called tightening torque.
Indicates how “tight” a screw has
been tightened.
DIN
German Institute for Standardization.
EN
European standard (often related
to DIN).
Specialist
dealer /specialist work-
shop
In Germany: In this Owner’s Manual the term “specialist dealer” and/
or “specialist workshop” indicates a dealer trained as a bicycle
mechanic and/or cycle mechanic
authorised by the competent
Chamber of Trade to operate a
specialist workshop.
Similarly the latter must be authorised by the manufacturer of this
cycle to check and conrm correct
assembly and roadworthiness of
this cycle.
Handforce
The force an average adult human
can exert with his hand using low
to medium eort.
IHK
In Germany: Chamber of Industry
and Commerce
MTB Mountainbike
Nm Newton meter; unit for torque
Pedelec Pedal Electric Cycle
psi
pounds per square inch; American
unit for pressure;
1 psi = 0.06897 bar
StVO German Highway Code
StVZO
German Road Trac Licensing
Regulations
| 9
MTB/ ROAD BIKE/ TREKKING
Incorrect
tightening
A loose screw can often be recognised by a projecting screw head.
You nd the used technical terms for bicycle parts in the plate in the cu sheets
or at the individual pictures
Laws:
StVO (German Road Trac Act)
and StVZO (German Roas Licensing
Regulation) are laws that are only applicable in Germany.
Before using your bicycle for the rst
time, please inform yourself about the
laws applying to the use of your bicycle in your home country. Contact the
relevant authorities and your specialist
dealer on this matter.
Correct tigh-
tening
The term “correct tightening„
indicates the state in which screw
heads t tight to the component
over their entire surface.
10 |
MTB/ ROAD BIKE/ TREKKING
•
If you encounter phrases such as “...have all
...”, “... have your bicycle ...” or the like, please
note that they always address and refer to
the child or the juvenile and his/her bicycle.
•
Go through this Owner’s Manual together
and explain all chapters to your child, especially regarding the hazard warnings.
•
As legal guardian it is your responsibility to
ensure the safety of this bicycle and its safe use.
1.2 .1 Scope of Application
This Owner‘s Manual applies to: Please take information
specic to your bicycle from the Owner‘s Manual for
your bicycle model 2012. Please read Chapters 4 for
information.
This operating manual is only valid if it was with
the bicycle at the time of purchase.• Please observe
separate information, if available.
Risk of Personal Injury and Material
Damage!
Please take information specic to your
bicycle from the Owner‘s Manual for
your bicycle model.
•
This Owner‘s Manual is not suitable for learning
to ride a bicycle.
•
This Owner‘s Manual is not suitable for learning
riding techniques.
1.2.2 Accompanying documentation
•
Owner‘s Manual specic to your bicycle
model. Parts Instructions.
Risk of Personal Injury and Material
Damage!
Due to the large number of existing
bicycle parts it is impossible to provide
a totally exhaustive set of instructions
valid for all.
For our Pedelec/E-bikes it’s very important to read the additional separate
instruction manual for the Cube EPO
Pedelec as well as this general Cube
instruction manual.
•
It is possible that components mounted to
this bicycle have not been described in this
operating manual.
•
Please therefore always observe the
accompanying parts instructions.
•
Their instructions basically take precedence over any contrary instructions in
the following text.
•
Please consult your specialist retailer as to
the accuracy and validity of this operating
manual.
•
For more information, please consult your
specialist retailer.
1.2.3 Pictures
The pictures related to the descriptions
can be found right before or after the
respective texts.
2 For your safety
2.1 Use your bicycle as intended
2.1.1 Who may use your bicycle?
Risk of Personal Injury and Material
Damage!
•
The rider must be able to ride a bicycle, i.e.
he must possess a basic knowledge of the
use of a bicycle and have the necessary
sense of balance required to control and
steer a bicycle.
•
The rider must have be of the correct physical size for this bicycle (please consult your
dealer).
•
Children and teenagers must be able to operate the bicycle for certain.
The operating equipments (e.g. brake levers)
must be suitable for child‘s hands
You driving technique courses are oered by dierent facilities or coaches and
it helps to improve your driving technique and the operation of your bicycle.

| 11
MTB/ ROAD BIKE/ TREKKING
2.1.2 How may you ride your bicycle?
Risk of Personal Injury and Material
Damage!
•
Sit with your bottom on the saddle or
ride out of the saddle, i.e. pedalling in a
standing position.
•
Hold the left handlebar grip with our left
hand and the right hand handlebar grip
with your right hand. Place your left foot
on the left pedal and your right foot on the
right pedal.
•
Place your left foot on the left pedal and
your right foot on the right pedal.
•
Only use the bicycle as a pure means of
travel.
2.1. 3 Where may you ride your bicycle?
All bicycles by this manufacturer are
classied into Categories. You will nd
your bicycle‘s Category in your Service
Card. (Last Page)
This is entered by your dealer on
purchase (see also Chapter 4).
Risk of Personal Injury and Material
Damage!
Your safety on these roads and tracks
depends on your speed.
In the case of jumps and high speed there is basically a risk of falling. Only jump
and ride at high speed when you have
rmly mastered this riding technique.
The higher your speed, the bigger is the
risk you take!
Please note that all roads and paths
may be damaged and/or have obstacles
which may adversely aect your riding
safety and damage your bicycle.
In such locations ride particularly slowly
and carefully. Push or carry your bicycle
over such subsurface if necessary.
Touring: Paths, no jumps
Cross-country: Paths, no jumps
Urban: Paths, no jumps
Marathon: Unprepared paths,
no jumps
All Mountain: Unprepared paths,
jumps up to 0.5 metres
in height
Enduro: Unprepared paths at high
speed, jumps up to 1 m in
height
Freeride: Sports park/ bikepark
Dirt bike/BMX: Sports park/ bikepark
Kids: Paths, no jumps
Traveller: Paths, no jumps
Countrylite: Paths, no jumps
Downhill: Sports park/ bikepark
Road Racing: Paths, no jumps
Bikes of every
category with
racing wheel or
tyres simil ar to
racing wheel:
Roads and paths are classied
as follows:
•
Road: Asphalted
•
Path: Sand, gravel or similar subsurface (e.g.
forest pathway, eld track)
•
Prepared hiking trail: No or not many roots,
sleepers, stones, ledges etc.
•
Unprepared hiking trail: Roots, sleepers,
stones, ledges etc.
•
Sports park: Area specially designed for
free riding, downhill, 4X and dirt bikes
Free riding: Artistic and athletic use, rapid
descents in open terrain.
•
Downhill: Descents on tracks specically
designed for this purpose at high to very
high speeds.4X and dirt bikes: similar tracks
for BMX bikes.
Roads, no jumps
12 |
MTB/ ROAD BIKE/ TREKKING
For the duration of participating in
races racing bikes are exempt from this
regulation.
•
White front reector (often integrated into
the front headlight) and a red reector at
the rear
•
Two yellow reectors each for the front
and rear whhels; alternatively Tyres with
reective stripes on both sides
•
Two yellow reectors for both right and
left pedals
All lighting components and reectors
must be ocially approved.
Approval can be recognised by a „K“,
marking, a wavy line and a multi-digit
number.
For regulation tting of these parts
please consult your dealer.
2.1.4 In what condition must your bike be
when you ride it?
Your new bike is an item of sports
equipment and may not be used on
public roads unless equipped to StVZO
specication. In order to meet current
StVZO requirements your bike must
have the following equipment t listed
here in extract form.
Please take the full wording of the regulations for trips in Germany from the
StVZO or consult your dealer.
You will nd the exact legal guidelines
with detailed information online under
the following address:
http://www.gesetze-im-internet.de/stvzo/
When using outside Germany please observe the trac regulations prevailing
in your country. For this please consult
your dealer or the competent authority.
•
Two independently operating brakes
•
A bell
•
Dynamo-powered lighting for front (whitel
light) and rear (red light)
Racing bikes under 11 kg are exempt
from the dynamo regulation.
Racing bikes exempt from the dynamo
regulation must carry battery-powered
lighting in the daytime.
2.1.5 Accessories and modication
Risk of Personal Injury and Material
Damage!
Many cyclists like to modify their bikes
and to custom them to their particular wishes. Saddles, handlebars, pedals, brakes,
tyres and suspension elements -there are
may possibilities for changing your bike
subsequently.
Working on bikes, including work which
is assumed to be very simple, requires
sound training, sound knowledge and a
great deal of experience.
Unprofessional work on your bike can
lead to dangerous riding situations, falling, accidents and material damage.
•
Only use accessories that have been certied according to EN standards. Bike computers and bottle holders are an exception,
provided they were selected and tted by a
specialist dealer.
•
Consult your specialist dealer when choosing accessories for your bicycle.
•
When riding your bicycle at high speed,
with a sporty riding style (e.g. riding
fast over edges, speed reduction ramps,
bumps, etc.), or in the bike park, there is
always an increased risk of falls.
•
Only ride at high speeds if you can control
your bicycle in every situation.
•
Adjust the use of your bicycle to your
riding skills
•
Adjust your bike to for the required use
and your riding ability, and use the appropriate protective equipment.

| 13
MTB/ ROAD BIKE/ TREKKING
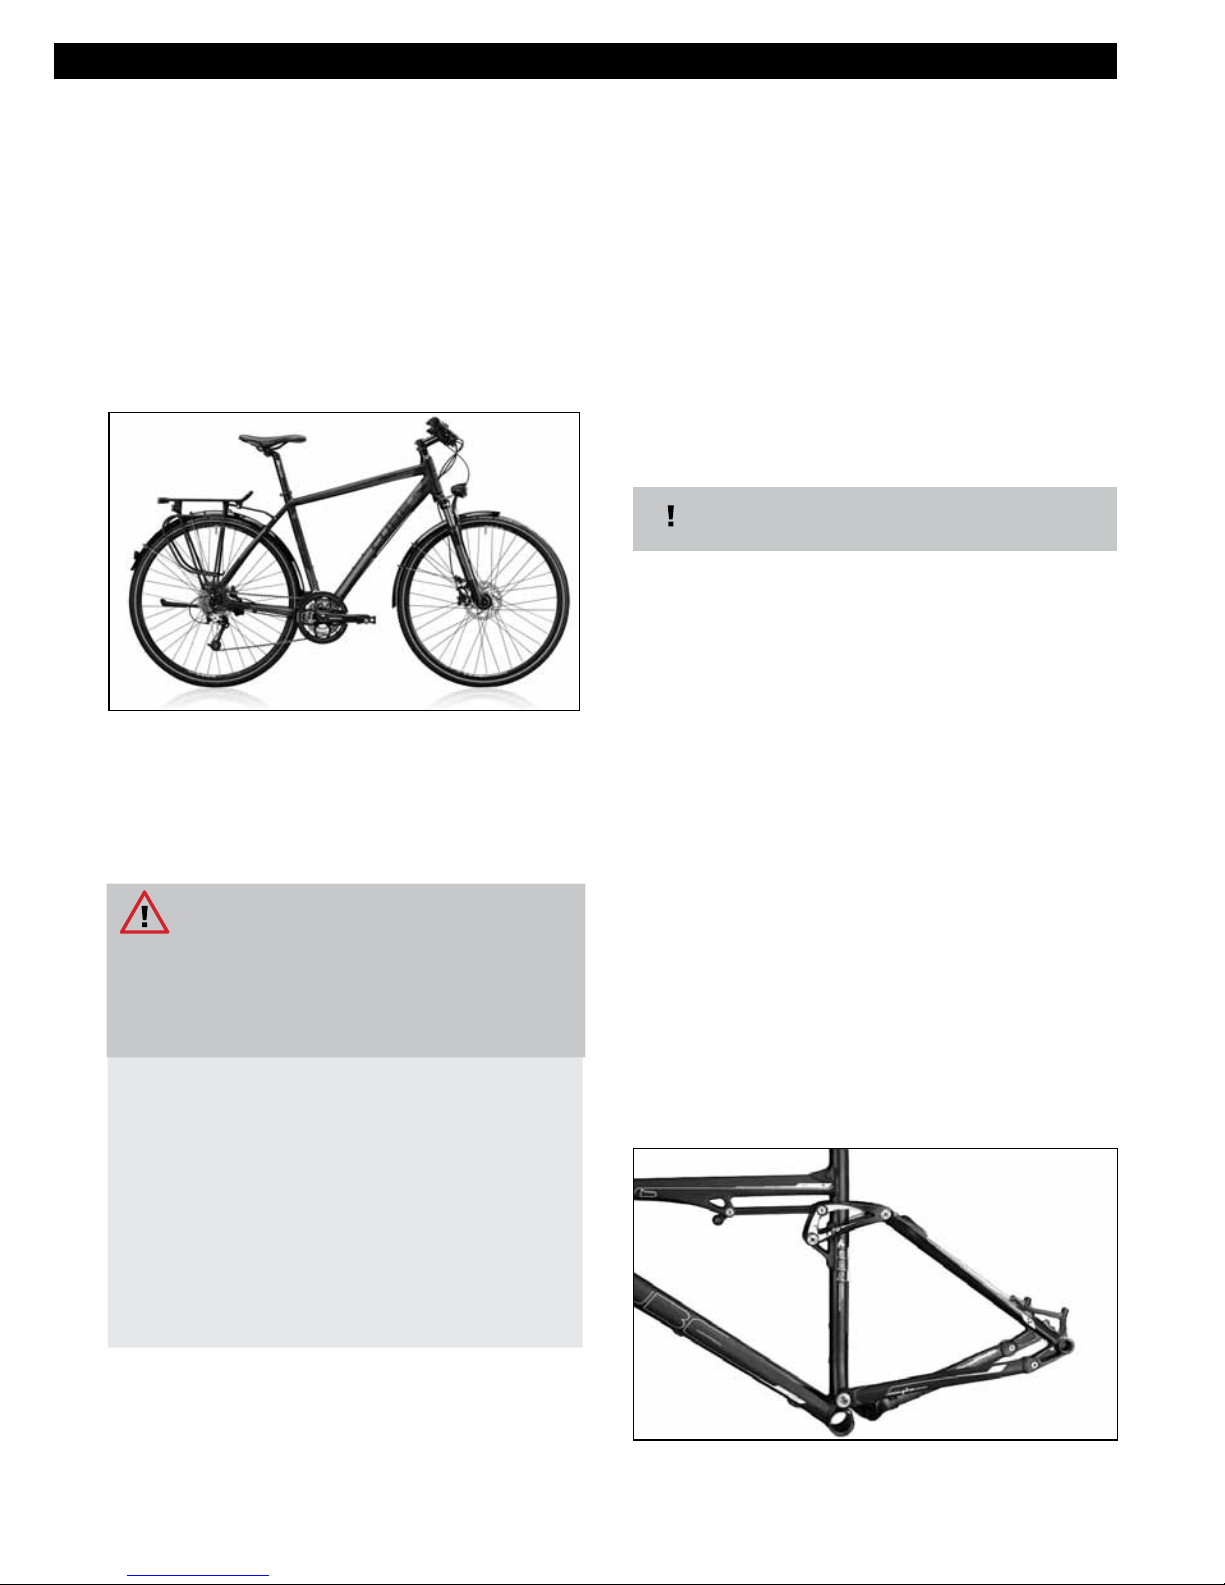
2.1.6 Transport of children, baggage,
bicycle trailers
Risk of Personal Injury and Material
Damage!
The transport of children and baggage is
accompanied by certain risks. Many bicycle frames are not suited for the tting
of bicycle racks and child seats.
Only transport your baggage in/on
suitable carrying systems. These can be
bicycle backpacks or bicycle racks that
have been approved by the manufacturer. Please consult your specialist dealer
on this matter.
Bicycle racks may only be tted to mounting elements intended for this purpose
(see picture below) of the following
series/models.
– Cross
– Trekking/City
– MTB with mounting option intended
for this purpose
•
Child seats may only be tted to suitable
bicycle racks. Please consult your specialist
dealer on this matter.
•
admissible total weight even with your
children and/or baggage (see chart in
chapter 3.2).
•
Ensure a safe loading. No item of the baggage may come in touch with the moving
bicycle parts (running wheel, drive, chain,
brakes) or may interfere with the functions
or the handling of your bicycle.
•
Do not exceed the admissible total weight,
see chapter 3.2.
•
Determine the admissible total weight by
lifting your bicycle up, including the entire
additional load (not including your children)
and the weight of y Make sure that you do
not reach the our bicycle clothing, and by
standing on an ocially calibrated scale
while lifting your bicycle up.
•
Please determine the weight of the children
by using bathroom scales and add their
weights to the total weight.
•
•
•
•
Additional loads will aect the bicycle’s
riding behaviour.
Additional loads will result in a longer
braking distance.
Adjust your riding style accordingly!
The tting and use of bicycle trailers on
our bicycles is not allowed, provided they
have not been specically approved for
the respective bicycle model.
•
Our company prohibits replacing the front
fork for modication purposes. If replacing
the fork becomes necessary during repairs,
only a fork may be used that is identical in
construction and has been approved by our
company for your bicycle model.
Consult our authorized specialist dealer.
•
The retrotting of electrical drives to any of
our bicycles is not allowed.
•
Any part of your bicycle must not be changed with regard to its condition.
•
Have all tting of parts, modications, servicing and any other work carried out only by
your specialist workshop.
•
Please note that the person who carries out
the changes on the bicycle is also liable for
them.
•
The maximum additional load amounts to 25 kg.
WARNING:
Some bicycle racks have a lower admissible additional load.
Please refer to the specications provided by the manufacturer of the bicycle
rack.

14 |
MTB/ ROAD BIKE/ TREKKING
2.2 Other hazards
2.2.1 Hazards caused by faulty nal
assembly
Risk of Personal Injury and Material
Damage!
Unprofessional nal assembly of this
bike can lead to dangerous riding situations, falling, accidents and material
damage.
Have correct nal assembly and adjustment of the right seat position for you
conrmed by your dealer. Use the printed
form in this Owner‘s manual on.
2.2.2 Hazards caused by improper use
Risk of Personal Injury and Material
Damage!
Unprofessional nal assembly of this
bike can lead to dangerous riding situations, falling, accidents and material
damage.
•
•
Please observe the instructions set out in
chapter 2.1.3
Always check if your bicycle meets the
requirements of the intended use (see
chapters 2.1, 4.1.
2.2.3 Risk of burns
Risk of Personal Injury and Material
Damage!
Risk of burns!
After long descents, the bicycle rims and
brake disks can get very hot.
•
Do not touch the rims or brake disks immediately after a descent.
•
Let the rims and brake disks cool down before you touch them.
•
In order to check the temperature, touch
the rims and brake disks very briey with
your bare nger. If they are hot, wait a few
minutes and repeat the test until the rims
and brake disks have cooled down.
2.1.7 Roller training
Risk of Personal Injury and Material
Damage!
Roller training:
The use of roller trainers that are xed
tightly to the frame, the handlebar or the
fork can damage your bicycle.
The use of roller trainers which are xed
tightly to the bicycle’s fork, handlebar or
frame is not allowed.
Carbon frames are generally only suitable for the use on a free roller trainer
(no xation).
2.2.4 Other hazards and safety notes
Risk of Personal Injury and Material
Damage!
Failure to observe the instructions contained in this Owner‘s Manual may result
in dangerous riding situations, falls,
accidents and material damage.
•
Comply with the applicable trac regulations of your country.
•
Wear a helmet when cycling.
•
Cycle defensively and with foresight.
•
Do not cycle under the inuence of alcohol.
•
Cycle in a manner that ensures you have
control of the bicycle at all times and that
you will not get into diculty in sudden
dangerous situations.
•
When cycling make sure that you wear suitable clothing that does not restrict the operation of the bicycle or impair your vision.
•
Wetness can aect the eciency of the brakes. The braking distance is increased.
•
Only cycle wearing tight-tting leg wear.
Baggy clothing can get caught in the bicycle
and lead to serious accidents.
•
Do not exceed the admissible total weight,
see chapter 3.2.
•
Please refer to the care and maintenance
information in sections 12 and 13.

| 15
MTB/ ROAD BIKE/ TREKKING
3 Included with your bike and
Technical Details
3.1 Scope of supply
•
Complete bicycle, partially without
pedals or
•
Frame set
including the Owner’s Manual and delivery
certicate as well as all other relevant instructions of manufacturers whose parts were
used for the bicycle.
In case of carbon frames or pedelecs, please
observe the instructions set out in the additional Owner’s Manual.
3.2 Technical data
Admissible total weight
=
Bicycle including entire additional load
and attachment parts
+
Body weight incl. clothing and baggage
(backpag)
Risk of Personal Injury and Material
Damage!
New technical ndings can result in changes to the models, their technical data
and even in entirely new models.
•
Please observe the separate instructions,
if available.
•
Please consult your specialist dealer
regarding the actuality and validity of this
Owner’s Manual.
Permissible
total weight
Racing bicycle 115 kg
MTB: 115 k g
Trekking bicycle: 115 kg +
25 kg
equipped
Trekking bicycle fully
equipped
115 kg +
25 kg
equipped
Child‘s bike up to 16“ (*) 30 kg
Child‘s bike up to 20“ (*) 105 kg
BMX 105 kg
(*): 16“ or 20“ indicates the wheel size.
This is indicated on the tyre Please consult your dealer.
Please note that the use of light-weight
components, e.g. special running wheels,
will reduce the load carrying capacity of
the whole bicycle.
For further information, please refer to
the parts instructions provided by the
respective manufacturer.
Example 1:
Wheel sets for a racing bike with an admissible total weight of 90 kg will decrease the
admissible total weight of the racing bike
from 115 kg to 90 kg.
Example 2:
Bicycle racks with an admissible total weight
of 20 kg will decrease the admissible weight
of the trekking bike from 140 kg to 135 kg.
2.3 Disposal
Dispose of your bike properly at the end
of its life.
Ask your dealer or contact to a recycling
center.
Risk of Personal Injury and Material
Damage!
Spinning running wheels can injure your
hands and other body parts.
•
Keep your hands and other body parts away
from spinning running wheels!
•
Keep your hands and other body parts away
from moving parts (e.g. suspension, steering
lever, brakes, ...)!
•
Make sure that children on possibly tted
child seats can not touch any spinning
running wheel or moving parts.

16 |
MTB/ ROAD BIKE/ TREKKING
You will nd the category and model further
information of your bicycle in delivery certicate, last page of this maunal.
During the purchase, please check if everything has been lled out completely and
correc tly with the help of your bicycle dealer.
4 Assembly and function
4.1 Categories
We divide our bicycles into the following
categories. Within these categories,
there are dierent series.
•
Mountain bike
- Fully (= front and rear wheel suspension,
see also chapter 4.2.1)
- Hardtail (= front wheel suspension, no rear
wheel suspension, see also chapter 4.2.2)
3.3 Torques of screw connections
Part
Manufac-
turer
Model/Type Connection
Type of
Connection
Torque (Nm)
seat post
Syntace P6
clamping
saddle
2 screws 6-8
Easton EA30 2 screws 8
RFR
1 screw
+ 1 putti ng
wheel
8-10
Scape 2 screws 8-10
FSA SL-2 8 0 1 screw 16,5
Triathlon aluminium 2 screws 8-10
Ritchey TT Stubby 1 screw 12
seat post Triathlon carbon
clamping
saddle sledge
2 screws 5-6
seat post clamp / frame
aluminium
clamping seat
post
1 screw 5-8
titanium 1 screw 5-8
carbon frame 1 screw 5-6
carbon seat
post
1 screw
5-6
please also refer to
seat post manual
Tria aluminium 2 screws 4-5
Tria carbon
2 screws
specication
1 screw
2-3
2-3
bottlecage / frame any any
screw joint
bottle cage
2 screws 3
cable guide clamp any any each screw 3
rear carrier any any
screw joint
rear carrier
each screw 6
•
Cross bike
•
Cyclocross
•
Racing bike
•
Fitnessbikes/ Urban
•
Trekking bike
•
Pedelec
| 17
MTB/ ROAD BIKE/ TREKKING
4.2.1 Fully
Fully refers to mountain bikes with front and rear wheel suspension whose range of application is dened
by the spring travel and the equipment. The range of application (see chapter 2.1.3) must be dened
together with your specialist dealer.
4.2.2 Hardtails
Hardtails refers to mountain bikes with front suspension whose range of application is dened by the
spring travel and equipment. The range of application (see chapter 2.1.3) must be dened with your
specialist dealer.
4.3 Crossbike
Has the same equipment characteristics as mountain bikes, running wheels with a rim diameter of
28 inches (622mm) and a tyre width of up to 42 mm.
4.2 Mountain bike
Not equipped in accordance with StVZO, derailleur gear, rim or disk brakes, running wheels with rim dia
meter of 26 inches (559 mm) or 29 inches (622 mm).
18 |
MTB/ ROAD BIKE/ TREKKING
4.4 Racing bike / Triathlon
Not equipped in accordance with StVZO, derailleur gear, rim breaks, running wheels with rim diameter of
28 inches (662 mm).
4.5 Cyclo-cross
Not equipped in accordance with StVZO,
derailleur gear, running wheels with rim
diameter of 28 inches (662mm).
Additional features:
- lug tyres
- cantilever or disk brake
4.6 Fitness bikes / Urban bikes
Not equipped in accordance with StVZO,
derailleur or hub gear, running wheels with
rim diameter of 28 inches (662 mm).
Additional features:
- straight handlebar or handlebar similar to
mountain bike
- tyre with 25 mm to 42 mm
- rim or disk brakes
| 19
MTB/ ROAD BIKE/ TREKKING
•
Familiarise yourself with the operation of
the brakes.
•
Determine which brake lever operates the
front brake and which one operates the
back brake.
•
Operate the respective brake lever several
times in the static position. You can observe
opening and closing action of the brake
blocks or brake calipers on the respective
disk or rim.
4.8.2
Gear shift
Your bicycle is equipped with
•
a derailleur gear and a crank set with one,
two or three chainwheels. This gear shift
will provide you with the optimal gear for
ever y.
speed and will, for example, enable you to
ride uphill more easily.
•
This is how you can determine the number
of gears: Derailleur gear: Multiply the
number of the front chainwheels with the
number of sprocket wheels in the back,
e. g. 2 chainwheels x 10 sprocket wheels =
20 gears.
•
Hub gear: Please take the indication on
the hub shell or on the gearshift lever into
account.
4.7 Trekking bike
Equipment in accordance with StVZO,
equipped with derailleur or hub gear, rim
brakes, backpedal brakes or disk brakes,
bicycle rack, splashguard (“mudguards”),
running wheels with rim diameter of 28
inches (662mm).
Additional features
– tyre width of up to 42mm
– lighting equipment, reectors and bell
4.8 General information
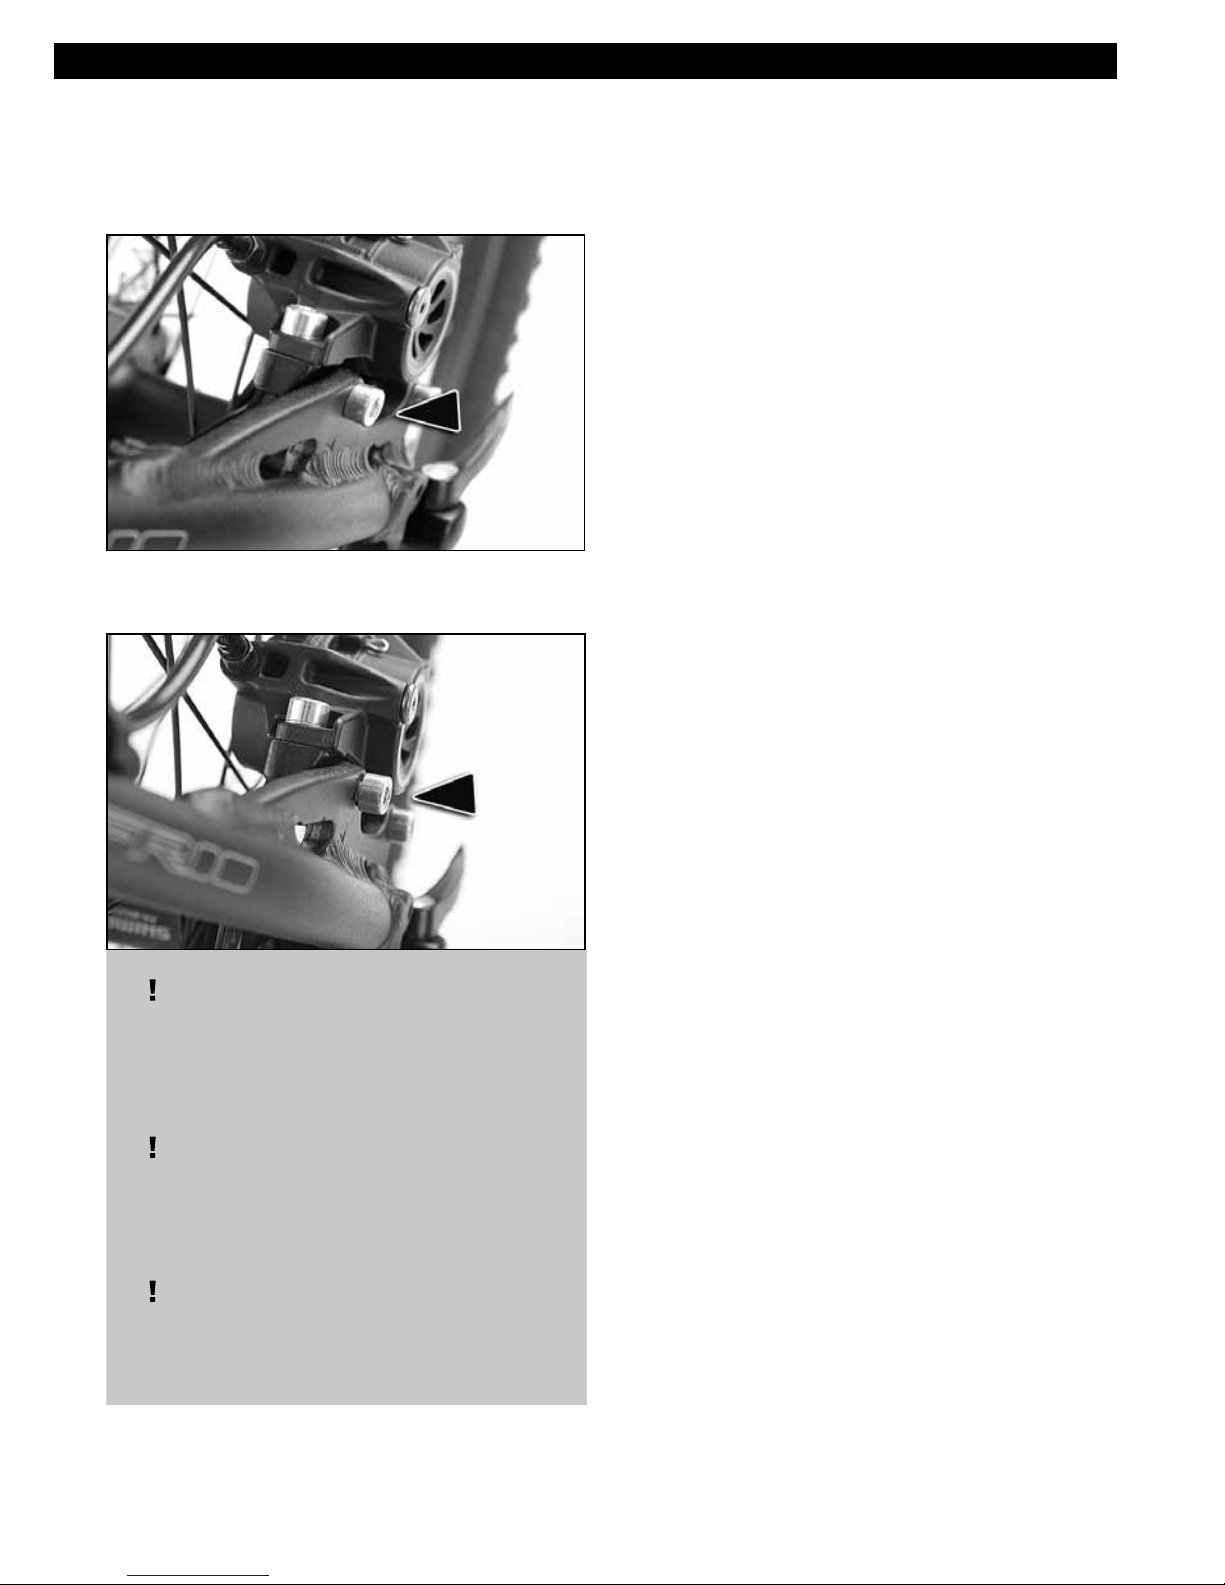
4.8.1 Brakes
Your bicycle is equipped with one or two
in dependently operated rim or disk brakes
(see chapter 4.1 - 4.7).
Risk of Personal Injury and Material
Damage!
Incorrect operation of the brakes can
lead to hazardous riding situations, falls,
accidents and material damage.
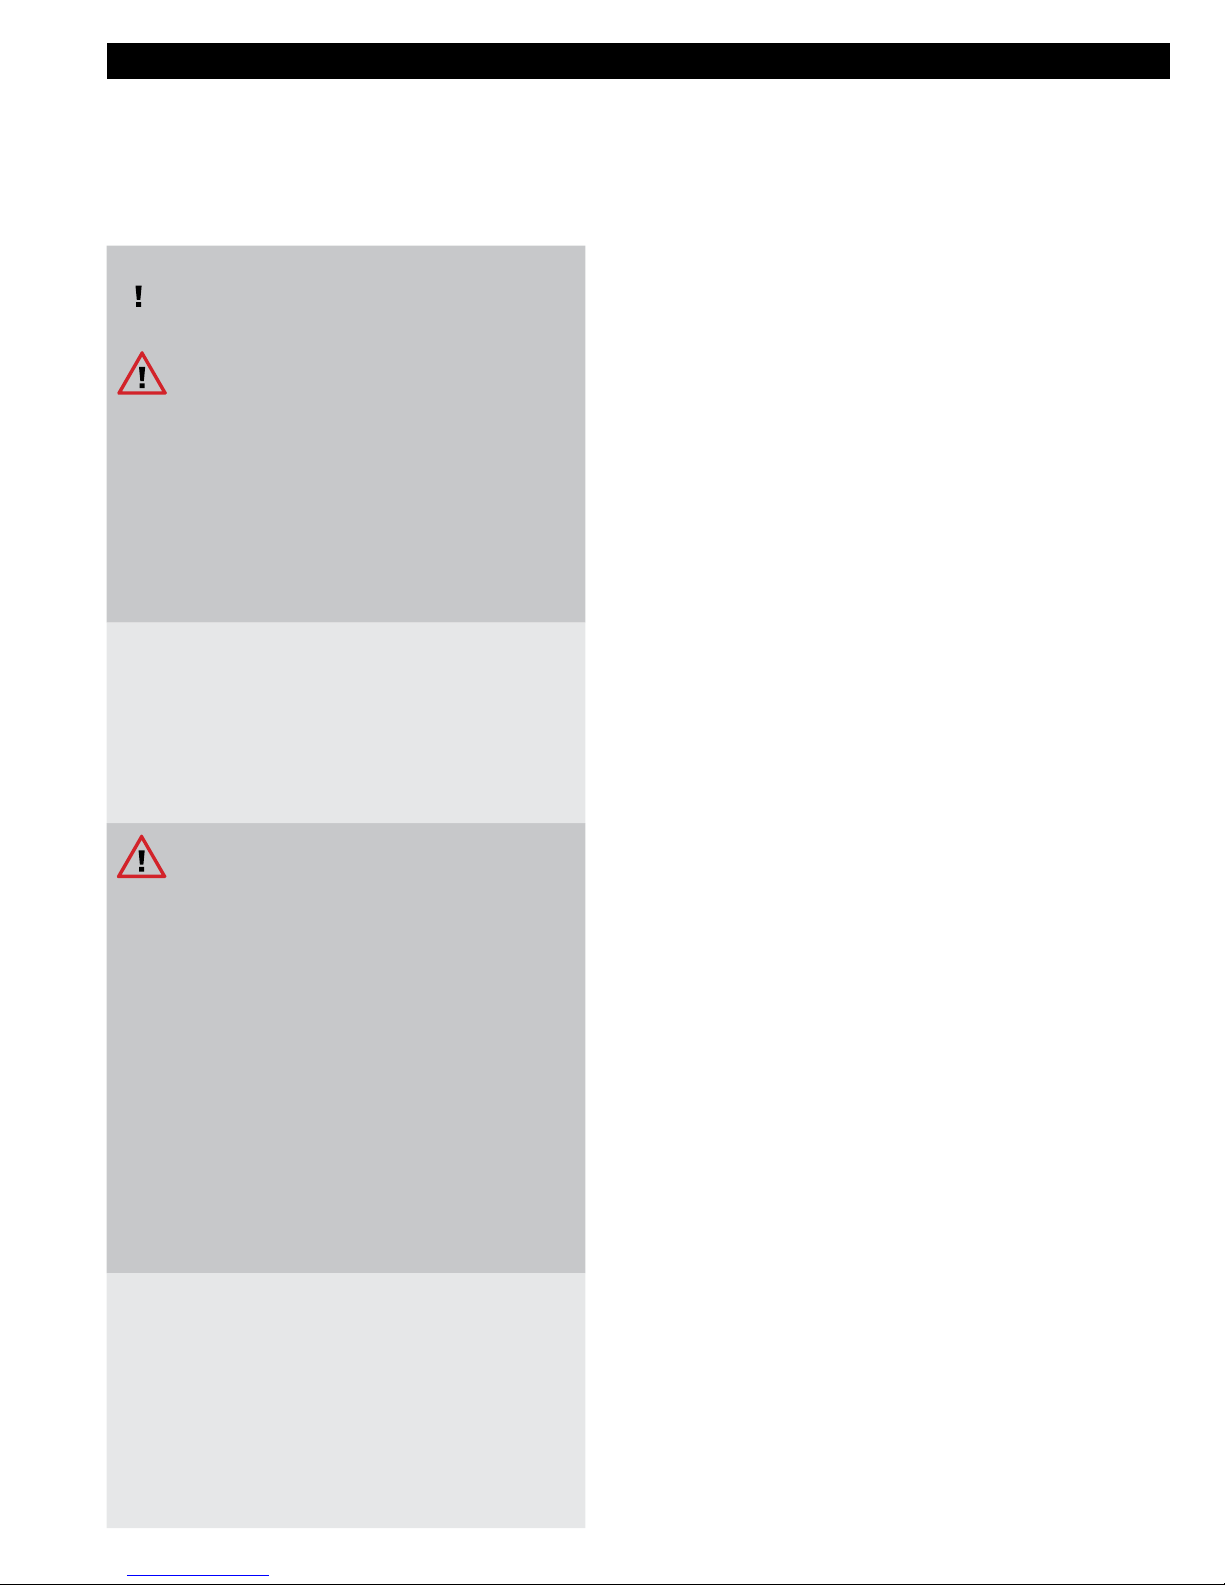
four-joint frame
You can easily count the number of joints. The support
for the spring element is not considered a join.
4.8.3 Frame and fork
Bicycle frames are available in the
following versions:
• without suspension: rigid fork and rigid
frame, available for the following series
- Racing bike
- Cyclo-cross
- Fitness / Urban
- Trekking (not all models)
• semi-suspended (“hardtail”): with suspension
fork und rigid frame, available for the
following series
– Mountain bike
– Cross
– Trekking (not all models)
• fully suspended (“Fully” or “Full Suspension”):
with suspension fork and rear wheel
suspension.
There are dierent suspension systems with
dierent numbers of joints for bicycles with full
suspension.
20 |
MTB/ ROAD BIKE/ TREKKING
4.9 frame material / information
on carbon material
Modern bicycle frames consist of aluminium alloys,
carbon, steel or titanium.
You can nd your frame material under
point 16, in the handover certicate, or
by consulting your specialist retailer.
Gefahr von Personen- und
Sachschäden!
Carbon is a modern material used in bicycle and vehicle construction. However,
carbon components are highly sensitive.
Errors in its assembly or use could lead
to breakages and therefore hazardous
driving conditions, falls, accidents and
material damage.
•
It is imperative that you observe all of the
following information regarding the use of
carbon parts.
•
Should you have any questions relating to
the use of carbon parts, please consult your
specialist retailer.
Risk of Personal Injury and Material
Damage!
Shock and impact loads which may occur
as a result of unintended use (see chapters 2.1.3 and 4.1) or stone-chipping, may
lead to inconspicuous damage in the
carbon bres and/or delamination (= a
dissolution of the bonded carbon layers).
Such damage, combined with the forces
arising from the operation of the bicycle
can suddenly break carbon parts and
therefore lead to dangerous driving
conditions, falls, accidents and material
damage
•
Your bicycle must solely be used for the intended purpose (see chapters 2.1.3 and 4.1)
•
After falls or other large mechanical stresses
which are not prescribed under the normal
biking operations, carbon frames and components should no longer be used.
•
Please consult your authorised specialist
retailer immediately after a fall.
4.9.1 Information on frame
construction
These high-end products are produced by hand.
Deviations in nish may therefore occur, however,
this represents no grounds for complaints.
4.9.2 How to use your carbon
parts correctly
1. Do not, under any circumstances, mount
brackets, screws, clamps or other elements which exert mechanical pressure
on the carbon tube.
2. Clamping onto bike stands or other wall
brackets:
•
Never clamp your bicycle around the carbon
tube or carbon seatpost in the clamping
jaws of a bike stand.
3. Please take care when using shackle
locks! These may, under certain circumstances, cause damage to your frame.
•
When using shackle locks, please ensure
that these only touch the respective carbon
tube at the most, and are not exerting
pressure.
4. Saddle clamp / seatpost:
•
The prescribed tightening torque of the
saddle clamp bolt is 5-6 Nm.
•
The seat tube must not be scoured or mechanically processed in any other way.
•
Please consult your authorised specialist
retailer immediately after a fall.
•
The seatposts and seat tubes must not be
lubricated. Only a carbon assembly paste
may be used.
•
Aluminium seatposts may only be mounted
using a carbon assembly paste.
•
The seat clamp may not be closed if the seat
post has been removed.
Carbon is a more commonly used term for carbonbre reinforced plastic. This describes a bre-plastic
composite material in which the carbon bres are
embedded in several layers in a plastic matrix.

| 21
MTB/ ROAD BIKE/ TREKKING
5. Bottle holder:
•
The thread sets are provided for attaching
standard bottle holders. The maximum tightening torque of the screws for attaching the
bottle holder to the frame is 4 Nm.
6. Bicycle rollers
•
The use of bicycle rollers with xed clamps is
not permitted. By rmly restricting the dropouts and quick-release hub axles, mechanical
stresses occur which strongly exceed those
permitted for normal cycling operations. This
may result in damage to the bicycle frame.
7. Transport:
•
Due care must be taken when transporting
wheels with carbon frames.
•
The frame should particularly be protected
against contact with other parts using a
cover for example.
•
No carrier or other such systems which use
clamping elements for xing and mounting
may be used. These clamping forces may
lead to damage of the tubes or dropouts.
•
Do not place any objects on the frame.
•
Please ensure that the bicycle is in a xed and
stable position during transport.
5 Bicycle frame /
Bicycle frame set
Risk of Personal Injury and Material
Damage!
An incorrect mounting of the frame may
result in severe injuries caused by falling!
You can purchase some of our bicycle
frames separately and can have them
assembled according to your individual
wishes. Please make sure to consider the
following important notes.
•
The assembly of our frames may only be carried out by specialist dealers that have beeb
authorized by us.
•
The person assembling the frame into a
complete bicycle is considered to be the
manufacturer and is liable for any possible
assembly faults and defects.
•
This Owner’s Manual is not an assembly
instruction for your bicycle frame.
•
Only use trademarked equipment that has
been certied according to EN standards and
is suitable for this frame for the assembly. You
can recognize the right equipment with the
help of the included documentation containing the following information:
- manufacturer information with complete
address.
- information regarding conducted inspec-
tions and inspection guidelines with EN
number.
- detailed and clear product information and
assembly notes in your national language.
•
If you have questions regarding suitable
accessories, please consult your specialist
dealer.
•
Please consider the information regarding
front forks in chapter 2.1.5
Risk of Personal Injury and Material
Damage!
Only rigid and unsprung front forks that
have been approved by our company
may be built into the frame. Please consult your authorized specialist dealer.
- Racing bike, all models
- Fitness / Urban, all models
- Cyclo-cross, all models
- Trekking with rigid fork geometry,
all models
 Loading...