

Page 1

Service Manual
RZT Zero Turn Rider
NOTE: These materials are prepared for use by trained technicians who are experienced in the service and repair of equipment of the
kind described in this publication, and are not intended for use by untrained or inexperienced individuals. Such individuals should seek
the assistance of an authorized service technician or dealer. Read, understand, and follow all directions when working on this equipment. This includes the contents of the Operators Manual, which came with your equipment. No liability can be accepted for any inaccuracies or omission in this publication, although every care has been take to make it as complete and accurate as possible. The right
is reserved to make changes at any time to this document without prior notice and without incurring an obligation to make such
changes to previously published documents. All information contained in this publication is based on product information available at
the time of publication. Photographs and illustrations used in this publication are for reference use only and may not depict actual
model and component parts.
MTD Products Inc. - Product Training and Education Department
FORM NUMBER - 769-01636
12/2004
Page 2

Page 3

TABLE OF CONTENTS
Cub Cadet RZT
Deck Leveling ............................................................................................................... 1
PTO / Deck Belt Replacement ...................................................................................... 2
Deck Removal ............................................................................................................... 2
Drive Belt Replacement ................................................................................................ 3
Servicing Electric PTO Clutch ....................................................................................... 3
Transmission Replacement .......................................................................................... 4
Steering Linkage: Adustment ........................................................................................ 6
Pivot Bar ....................................................................................................................... 9
Seat Removal ............................................................................................................. 10
Console Removal ........................................................................................................ 11
Battery Removal ......................................................................................................... 13
Fuel Tank Removal ..................................................................................................... 14
Control Shaft Replacement ......................................................................................... 15
Deck Lift Shaft Replacement ...................................................................................... 17
Electrical System Components ................................................................................... 20
Page 4

Page 5
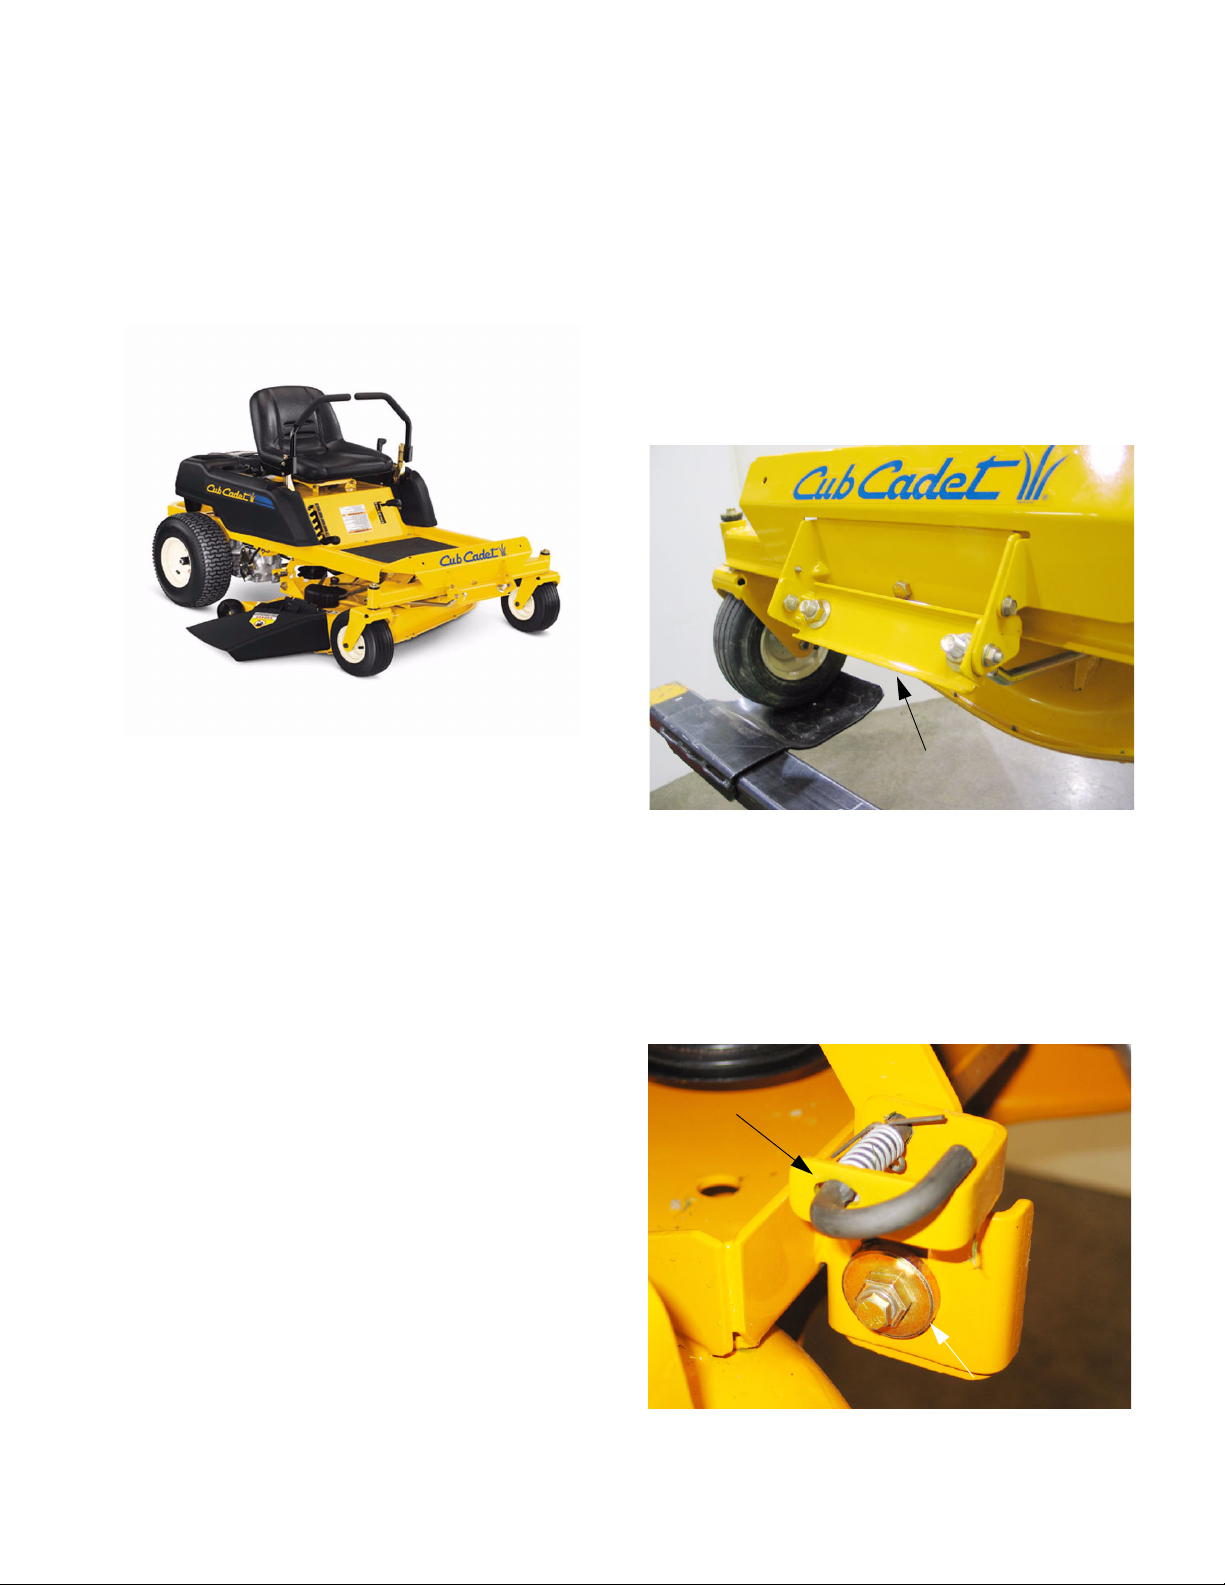
Cub Cadet RZT 22
617AA5A7P710
1D224G20073
2004 is the first year for the RZT. There are two models RZT17 and RZT22. Now for the ‘05 model year is
Kohler Command 19 HP model witha 50” deck.
This series of riders has the unique feature of not having to reset the PTO switch if the end users tries to
mow in reverse. Once one lapbar is moved in to neutral
or forward the PTO will turn back on.
The “RZT 17” has a 17 HP Briggs & Stratton Intek
which is a single cylinder engine with full pressure lubrication. The engine drives the dual hydrogear EZT
Hydrostatic transmissions and the electric PTO. The
PTO runs the 3-in-1blades on the 42” twin blade
stamped deck. On the front of the stamped frame is a
large pivoting front axle. All this with the 3 gallon fuel
tank will provide many hours of fun and relaxing mowing.
1. DECK LEVELING
1.1. To adjust the deck pitch, front to back, loosen or
tighten the jam nuts located on the front stabilizer bracket using a 15/16” socket and a 15/16”
wrench. The correct deck pitch should be 1/8” to
1/4” lower in the front than in the back, as measured from the blade tips. See Figure 1.1.
Front deck hanger bracket
Figure 1.1
1.2. To level the deck, side to side, loosen the screw
on the left side adjustment gear using a 1/2”
socket. Using a 3/4” wrench, run the gear up or
down as necessary until each outside blade tip
is the same distance from the ground.
See Figure 1.2.
Deck hanger rod
The “RZT 22” is very similar to the RZT 17 except for
the twin cylinder, 22 HP Briggs & Stratton Intek. There
are also 4 wheels, instead of 2, on the 50” triple blade
stamped deck.
All versions of the Cub Cadet RZT (and White ZT) are
bagger capable.
Deck adjustment gear
Figure 1.2
1
Page 6
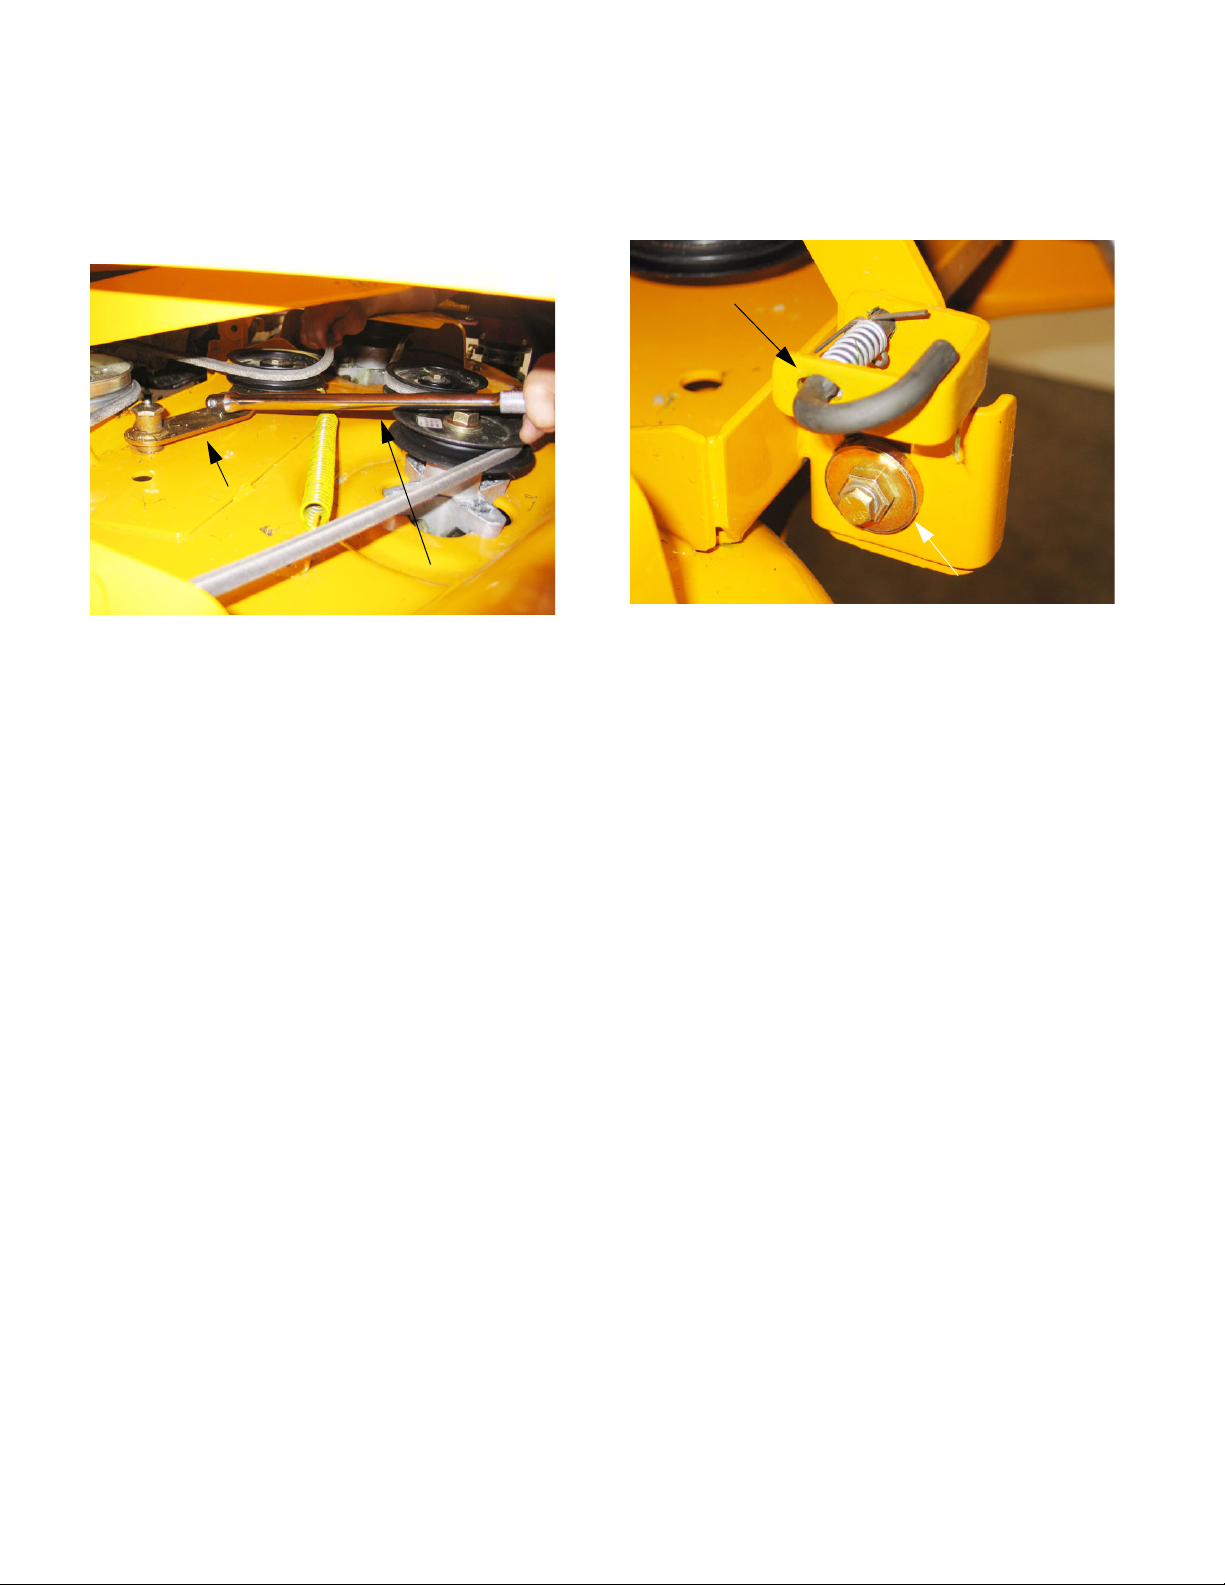
2. PTO / DECK BELT REPLACEMENT
3. DECK REMOVAL
2.1. Insert a 1/2” breaker bar into the square hole in
the tensioner arm located on top of the deck.
See Figure 2.1.
Idler arm
1/2” Breaker bar
Figure 2.1
2.2. Pivot the tensioner arm and pulley to slacken the
belt.
3.1. Release the deck J pins from the rear hanger
arms. See Figure 3.1.
Deck hanger rod
Deck adjustment gear
Figure 3.1
3.2. Slide the deck forward until the front stabilizer
bar can be lifted away from the front mounting
bracket.
2.3. Remove the belt from the two stationary idler
pulleys and spindle pulleys.
NOTE: The spindle covers do not need to be
removed.
2.4. Remove the belt from the clutch.
3.3. Slide the deck out from underneath the unit.
2
Page 7
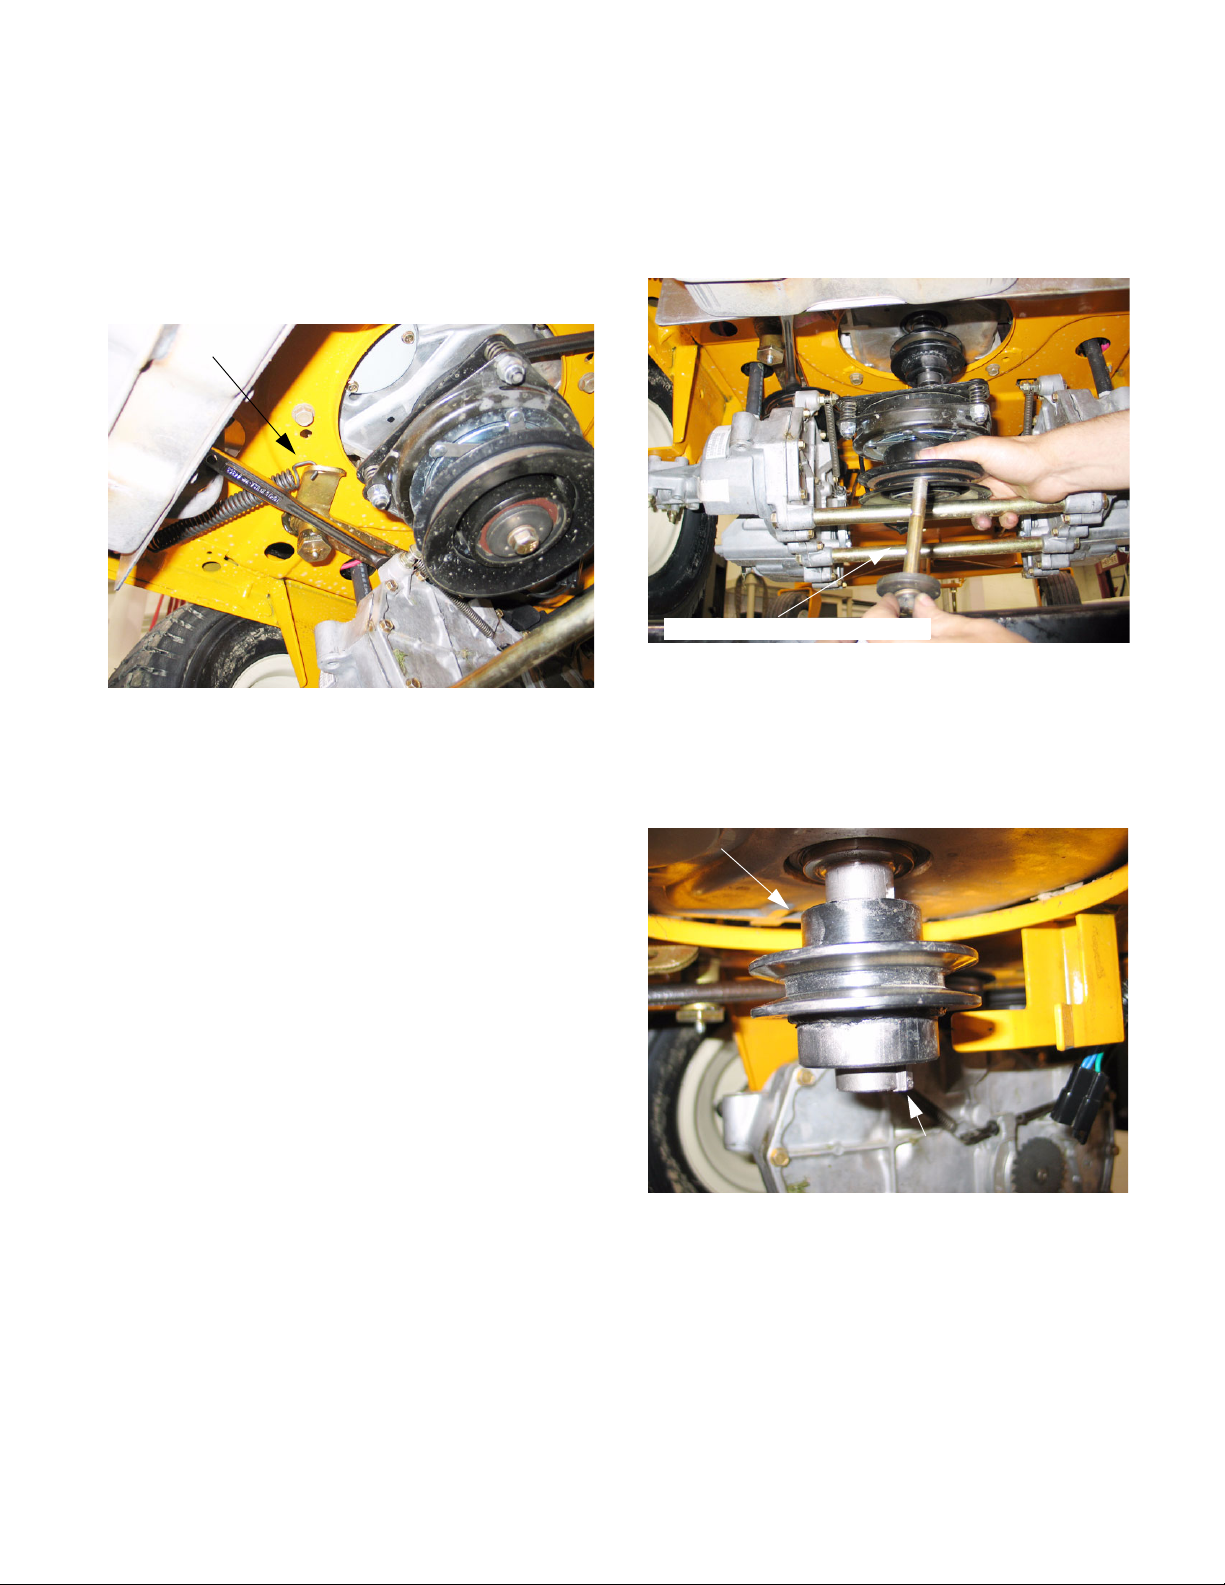
4. DRIVE BELT REPLACEMENT
5. SERVICING ELECTRIC PTO CLUTCH
4.1. Insert a 1/2” breaker bar into the square hole on
the tensioner arm.
4.2. Pull the breaker bar to the right until it can be
braced in position at the pivot point of the tensioner arm. See Figure 4.2.
Idler arm
Figure 4.2
4.3. Remove the belt from the transmission pulleys,
tensioner pulley and the crankshaft pulley.
5.1. Unplug the clutch.
5.2. Using a 9/16” socket and an impact wrench,
remove the clutch bolt. See Figure 5.2.
7/16-20 x 4.0 Hex cap screw
Figure 5.2
5.3. Lower the clutch off of the crankshaft.
5.4. Remove the crankshaft key.
5.5. Remove the crankshaft pulley. See Figure 5.5.
Crankshaft pulley
Key
Figure 5.5
3
Page 8
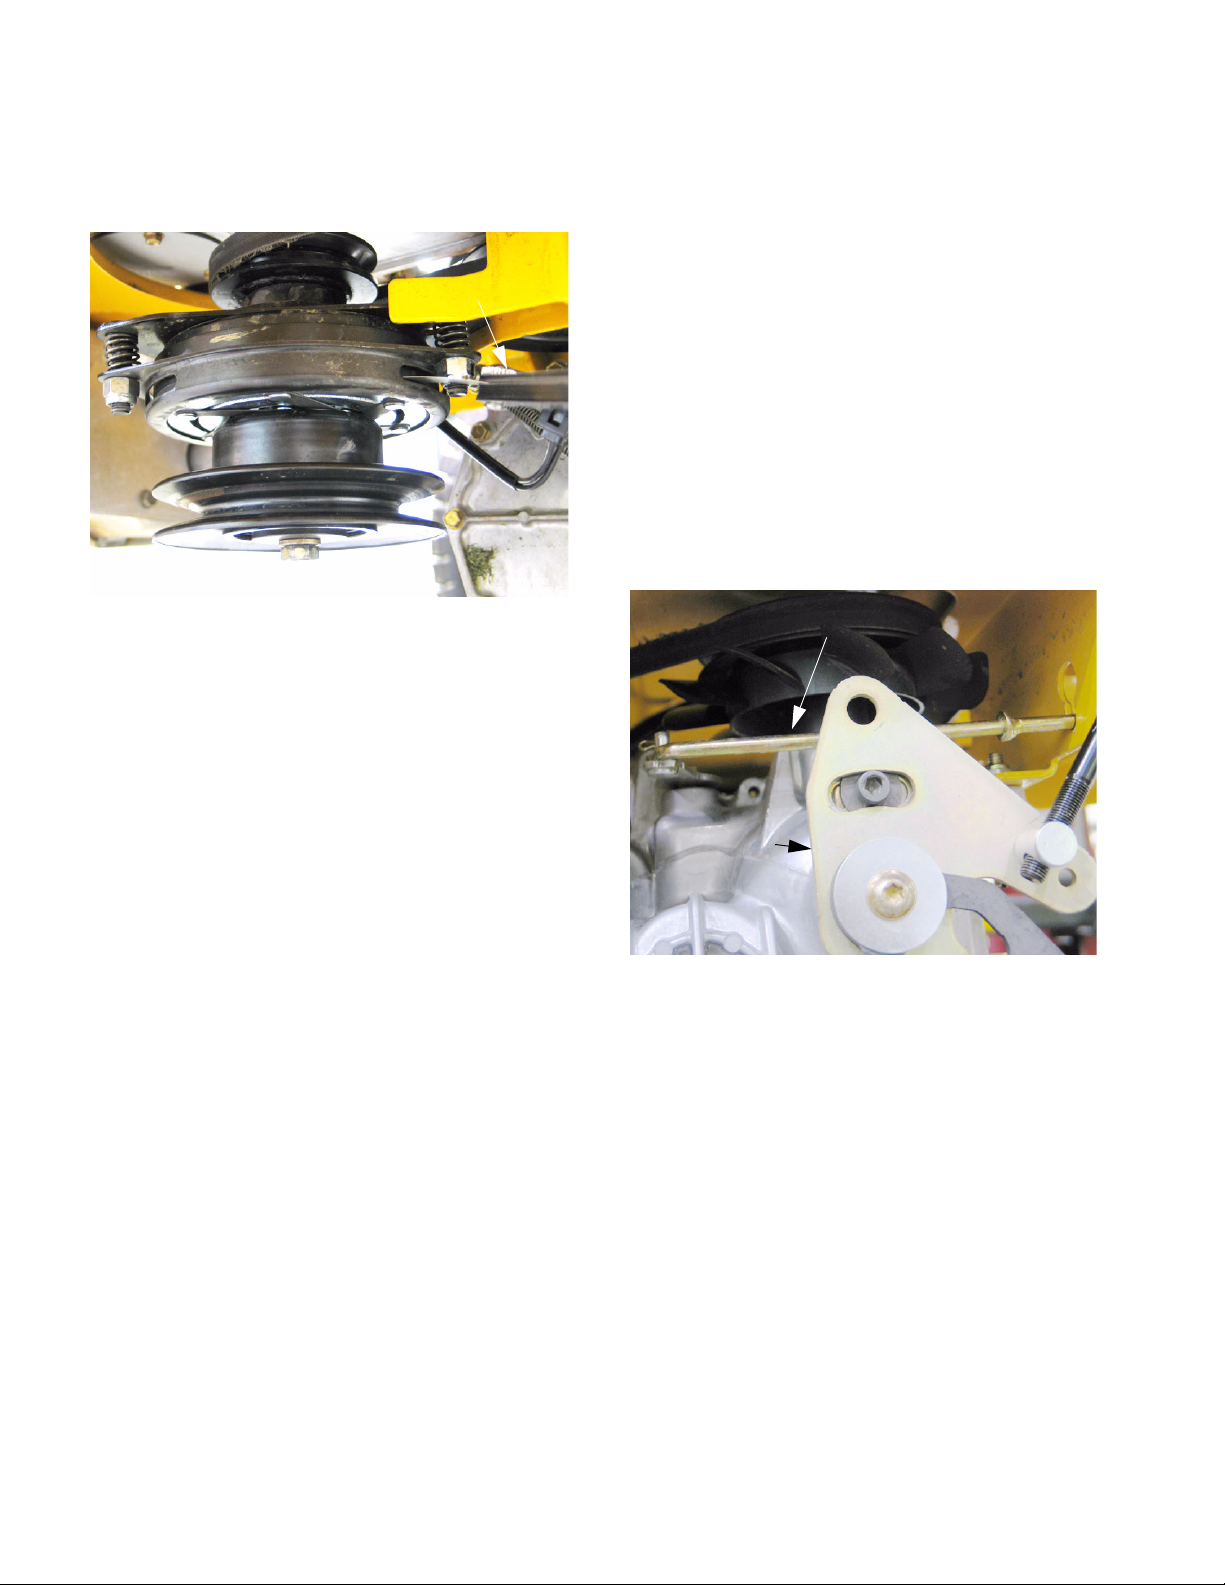
5.6. Use a 9/16” socket to adjust the air gap on the
clutch to between.010” and.015”.
See Figure 5.6.
.012 Feeler gage
6. TRANSMISSION REPLACEMENT
6.1. Insert a 1/2” breaker bar into the square hole on
the tensioner arm.
6.2. Pull the breaker bar to the right until it can be
braced in position at the pivot point of the tensioner arm.
6.3. Remove the belt from the transmission pulleys,
tensioner pulley and the crankshaft pulley.
6.4. Remove the four lug nuts securing the rear
wheel to the axle hub.
NOTE: Insure the lap bar control rods and brake
rods are not rubbing against the frame.
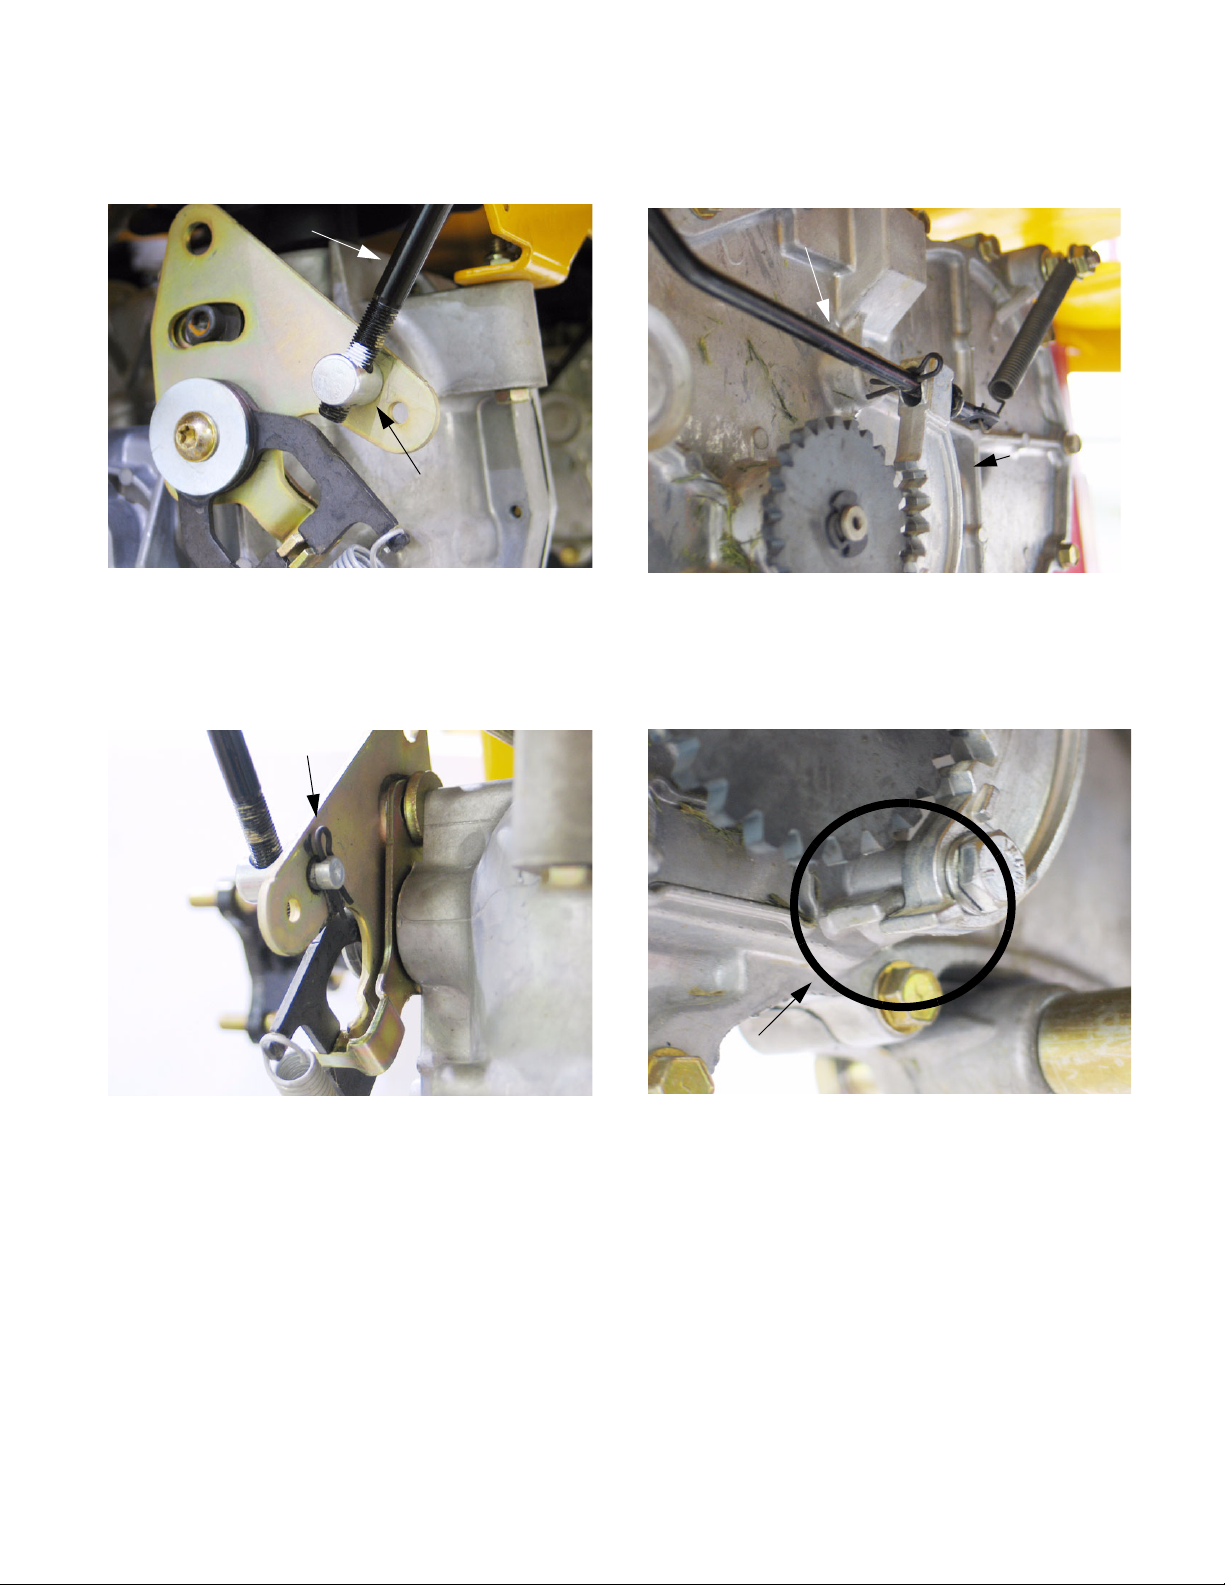
6.5. Remove the cotter pin securing the bypass rod
to the transmission bypass arm. Remove the
bypass rod. See Figure 6.5.
Figure 5.6
NOTE: Clutch adjustment can be done with the
clutch in the unit. If a new clutch is being put in
the adjustment can be done on the bench.
Bypass rod
Neutral
adjustment
plate
Figure 6.5
4
Page 9
6.6. Mark the lap bar control rod threads near the clevis pin. See Figure 6.6.
6.8. Disconnect the brake return spring from the
brake arm. See Figure 6.8.
Lap bar control rod
Ferrule
Figure 6.6
6.7. Remove the hairpin securing the lap bar control
rod to the transmission return assembly.
See Figure 6.7.
Hair pin
Brake rod
Brake arm
Figure 6.8
6.9. Remove the bolt securing the brake arm to the
transmission using a 7/16” socket.
See Figure 6.9.
Figure 6.7
Note proper installation
Figure 6.9
NOTE: A spacer is located between the brake
arm and transmission housing.
NOTE: During installation, the bottom ridge of
the brake arm needs to be below the embossment on the transmission housing. Improper
installation will prevent the brake from engaging.
6.10. Remove both bolts securing the tubular transmission brace using a 5/8” socket.
NOTE: When installing the brace bolts use loctite 242.
5
Page 10

6.11. Remove the front transmission mounting bolt
using a 1/2” wrench and a 1/2” socket.
NOTE: Secure the transmission or use another
technician to support the transmission while performing the next step.
6.12. Remove both transmission mounting bolts
securing the transmission to the mounting
bracket using two 1/2” wrenches.
See Figure 6.12.
Transmission Mounting Bolts
Figure 6.12
6.13. Rotate the transmission out and down until the
fan is clear of the front transmission mounting
bracket, and remove it from the frame.
7. STEERING LINKAGE: ADJUSTMENT
7.1. Begin to adjust the steering by confirming that
both EZTs are correctly adjusted for neutral control. See Figure 7.1.
Neutral
adjustment
plate
Figure 7.1
7.2. Lift and safely support the rear of the mower.
7.3. Disconnect the ferrule at the EZT end of each
lap bar control rod from the neutral return
assembly on each of the EZTs. The ferrules are
secured to the neutral return assemblies with
hairpin clips. See Figure 7.3.
6.14. Installation notes:
• Lift transmission into place and start all threaded
fasteners before tightening any individual fasteners.
• The remainder of the installation process consists of reversing the removal process.
• Tighten the lug nuts to a torque of 350-500 inlbs.
• Tighten the center wheel hub nut to a torque of
100-160 ftlb.
Ferrule
Figure 7.3
NOTE: In the course of normal service, it is very
unusual for the neutral return assemblies to
require adjustment unless someone has previously tampered with it. It is necessary to check
the adjustment because the rest of the proce-
6
Page 11

dure counts on the neutral control being correctly adjusted.
7.4. Start the engine. With the control rods disconnected, the EZT should self-center to neutral.
The wheels should not rotate. If either wheel
rotates, the neutral return assembly on the EZT
that drives that wheel needs to be adjusted.
7.5. To adjust the neutral return assembly, loosen
the socket head cap screw that holds the centering bracket in position on the housing using a 1/
4” allen wrench. See Figure 7.5.
Neutral adjustment screw
7.7. Align the post on the ferrule with the hole that it
seats into on the neutral return assembly.
Thread the ferrule up or down the length of the
control rod to center the lap bar in the neutral
recess in the control console. See Figure 7.7.
Right lap bar
Figure 7.7
7.8. When each ferrule is in the correct position,
secure it to the neutral control assembly with a
hairpin clip.
Figure 7.5
7.6. Rotate the assembly in whichever direction
causes the wheels to stop rotating. The point
where the wheels do not rotate with the engine
at full throttle is true neutral. Tighten the socket
head cap screw at true neutral.
7.9. Lower the machine to the ground. Test the operation of the hydros in a safe space.
7.10. Adjust the stop bolts so that it tracks as straight
as possible with both lap bars pushed to the full
forward position. See Figure 7.10.
Stop bolt
Figure 7.10
7
Page 12

7.11. The socket head cap screws that secure the
neutral return assemblies to the EZTs act as a
travel stop at the EZT end of the linkage. The lap
bar pivot brackets should contact the stop
screws before the socket head cap screw contacts the end of the slot on the neutral bracket.
See Figure 7.11.
Neutral adjustment screw
Figure 7.11
NOTE: With one lap bar in the reverse position,
and the PTO turned on, the PTO clutch should
turn off as soon as the second lap bar crosses
the threshold from neutral into reverse. Repeat
test for each side.
NOTE: When at least one lap bar is in the neutral or forward position, the PTO clutch will operate. There is not a relay to re-set by cycling the
PTO switch off and on again, as is the case with
Cub Cadet front engine residential equipment.
7.14. If the reverse safety switch adjustment is not
correct, loosen the reverse safety switch bracket
using a 3/8” wrench. Pivot the bracket and
switch to a position that results in correct operation, then tighten the bracket. See Figure 7.14.
7.12. If the lap bars are not aligned with each-other,
they may be adjusted using the slotted mounting
where they connect to the lap bar pivot brackets.
See Figure 7.12.
Lap bar adjustments
Figure 7.12
7.13. After final adjustment, test the operation of the
reverse safety switches. They should turn the
PTO clutch off whenever both lap bars are in the
reverse position.
Reverse safety switch
Figure 7.14
NOTE: It is not necessary to remove either con-
trol console to reach the reverse safety switches,
but it may be necessary to temporarily disconnect the blue wires in order to reach the mounting screws for the brackets.
8
Page 13

8. PIVOT BAR
8.1. Safely lift and support the front of unit.
8.2. Disconnect the - (negative) lead to the battery.
8.5. Lightly grease the wheel spacers during re
assembly. Using a grease gun fill the rest of the
cavity AFTER the wheel assembly has been
mounted.
8.3. Using two 9/16” wrenches remove wheel assembly from caster bracket. See Figure 8.3.
Grease fitting
Figure 8.3
NOTE: Be careful not to drop spacers on both
sides of wheel assembly.
8.4. Remove center wheel spacer and inspect all
spacers for damage. See Figure 8.4.
8.6. Remove both caster wheel assemblies using a
9/16” wrench. See Figure 8.6.
Caster
wheel
bracket
Figure 8.6
8.7. Inspect flange bearing on top and bottom of
pivot axle. Replace if damaged. See Figure 8.7.
Wheel spacer
Figure 8.4
NOTE: Be sure to use a good quality grease
during reassembly.
NOTE: There are none replaceable 3/4” roller
bearing in the wheel hub.
.79 x .347
Spacer
Flat washer
Figure 8.7
NOTE: Assure proper order during reassembly.
From the top down in this order: hex head cap
screw, lock washer, flat washer, flange bearing,
pivot axle, flange bearing, flat washer, and
caster bracket.
NOTE: Be sure to use a good quality grease
during reassembly.
9
Page 14

8.8. Using a grease gun, fill the rest of the cavity
AFTER final assembly. Filling before final
assembly will allow the flange bearings to be
pushed out.
8.9. Remove both hex cap screws securing the axle
shaft to the frame. This will be done with a 3/4”
wrench. See Figure 8.9.
1/2-13 x 1.25 hex cap screws
9. SEAT REMOVAL
9.1. Disconnect the - (negative) lead to the battery.
9.2. Flip the seat forward. Keep one hand on back of
seat to prevent seat from trying to bite back.
See Figure 9.2.
Wing knobs
Figure 9.2
Figure 8.9
NOTE: Use removable threadlocking compound
such as “Loctite 242” during reassembly.
8.10. The axle shaft may be removed and inspected
for wear.
8.11. Inspect the flange bearing on each side of the
pivot axle for wear. Replace as needed.
See Figure 8.11.
Flange bearing
9.3. Remove both wing knobs from under seat. Keep
track of washers and spacers. See Figure 9.3.
Seat spacer
Figure 9.3
9.4. Slide seat forward to align seat spacers with
large hole in seat mounting bracket. Carefully lift
the seat out.
Figure 8.11
8.12. AFTER reassembly use a good quality grease to
fill the axle shaft chamber.
10
Page 15

9.5. Disconnect wires from the seat safety switch.
See Figure 9.5.
Seat safety switch
Figure 9.5
NOTE: Failure to reconnect seat safety switch
will cause unit not to run.
10. CONSOLE REMOVAL
The console needs to be removed to do many of the
following procedures. Removing the right and left console are very similar.
Under or attached to the left side console there is the
neutral switch, starter solenoid, three relays, 20 amp
fuse, choke knob (if applicable), hour meter, throttle
lever and reverse safety switch.
Under or attached to the right side console there is
neutral switch, key switch, reverse safety switch, and
pto switch.
LEFT SIDE CONSOLE
RIGHT SIDE CONSOLE
11
Page 16

10.1. Disconnect the - (negative) lead to the battery.
10.2. Using a 1/2” wrench, remove the three screws
securing the console to the seat frame.
See Figure 10.2.
5/16-18 x .625 screws
10.5. The two other screws are located under the console mounting bracket. See Figure 10.5.
#12-16 x .500 screws
Figure 10.5
Figure 10.2
10.3. From underneath remove the four #12-16 selftapping hex head screws. This can be accomplished by using a 5/16” socket with an extension.
10.4. There are two screws hidden in the tubular
frame at the front end of the console and the
rear of the console. See Figure 10.4.
#12-16 x .500 screw
NOTE: If the console mounting bracket is slotted, where it is attached to the seat frame box, it
may be easier to loosen the mounting screws
from the seat frame and leave bracket mounted
to the console.
10.6. Using two 1/2” wrenches remove the screw connecting the lapbar pivot bracket to control hub.
See Figure 10.6.
Lap bar pivot screw
Figure 10.4
Figure 10.6
10.7. Remove the lapbar and set to the side in a clean
safe area.
NOTE: Unscrew fuel cap when removing the left
side.
10.8. Carefully remove console from unit.
12
Page 17

10.9. If any electrical connections are present disconnect or remove switch from console.
See Figure 10.9.
Relays
PTO switch
Solenoid
Key switch
Reverse
switch
11. BATTERY REMOVAL
The battery can be removed two different ways.
Depending on the final out come of the work that needs
to be preformed is which technique you will use.
When just replacing a battery the fuel pump needs to
be removed.
If for any reason the right side control console has to
be removed in conjunction with removal of the battery,
the fuel pump will NOT have to be removed.
NOTE: THE FOLLOWING STEPS ARE FOR
BATTERY REMOVAL WITH OUT THE
REMOVING THE RIGHT SIDE CONSOLE.
11.1. Disconnect the - (negative) lead to the battery.
11.2. Disconnect the + (positive) lead to the battery.
11.3. Disconnect the battery strap from frame.
Figure 10.9
NOTE: The throttle cable and choke knob does
not need to be removed. The console can be
flipped up on the unit and secured safely.
NOTE: There is different throttle and choke
cable routing for the different models.
NOTE: Not all models have a choke knob.
11.4. Using a 3/8” wrench remove the two screws
securing the fuel pump to the engine. The hoses
don’t need to be removed. See Figure 11.4.
Fuel pump
Figure 11.4
NOTE: When reinstalling the battery make sure
strap is hooked under the seat box before placing battery in the unit.
11.5. Battery can be pulled up and to the side to
remove.
NOTE: THE FOLLOWING STEPS ARE FOR
BATTERY REMOVAL WITH THE REMOVAL
OF THE RIGHT SIDE CONSOLE.
11.6. Disconnect the - (negative) lead to the battery.
11.7. Disconnect the + (positive) lead to the battery.
11.8. Disconnect the battery strap from frame.
13
Page 18

11.9. Remove right side console as per “CONSOLE
REMOVAL” of this manual.
11.10. With the right side console removed the battery
will slip out the side easily. See Figure 11.10.
Battery strap
Figure 11.10
12. FUEL TANK REMOVAL
12.1. Perform the “SEAT REMOVAL” section of this
manual.
12.2. Remove the battery per “BATTERY REMOVAL”
section.
NOTE: The right side console does NOT need to
be removed.
12.3. Remove the two screws securing the fuel tank
mounting wire to the frame using a 1/2” socket.
See Figure 12.3.
Fuel tank mounting screws
Figure 12.3
12.4. Remove fuel tank mounting wire and set off to
the side.
12.5. Disconnect electrical connector between the
tank and the engine to allow room for the tank to
slide out. See Figure 12.5.
Electrical connector
14
Figure 12.5
Page 19

12.6. Remove the left console as described in the
“CONSOLE REMOVAL” section of this manual.
12.7. Rotate tank upward and slide out toward the
side. See Figure 12.7.
Fuel tank
Figure 12.7
13. CONTROL SHAFT REPLACEMENT
13.1. Disconnect the - (negative) lead to the battery.
13.2. Remove appropriate side console. refer to
“CONSOLE REMOVAL” section of this manual.
13.3. Disconnect the ferrule from the return to neutral
assembly. See Figure 13.3.
Control arm
12.8. Disconnect the fuel line from the fuel pump and
carefully remove fuel tank from unit.
NOTE: Make sure to clean up any spilled fuel.
NOTE: During reassembly be certain to recon-
nect electrical connector and fuel line.
NOTE: This would a good time to change the
fuel filter.
Figure 13.3
13.4. Remove hex head cap screw and flat washer
securing the control hub to the control shaft.
See Figure 13.4.
Control hub
Figure 13.4
13.5. Remove hair pin securing the lapbar control rod
to the control hub.
15
Page 20

13.6. While rotating the control hub forward the lapbar
control rod can be disconnected and removed.
See Figure 13.6.
Hair pins
Lap bar control rod
Figure 13.6
13.7. Pull the control hub off the control shaft.
See Figure 13.7.
Control shaft
13.9. The control shaft can be removed from underneath the seat frame box. See Figure 13.9.
Control shaft
Brake switch
Figure 13.9
13.10.Inspect hex flange bearing and control shaft.
Replace as needed.
NOTE: Applying anti-seize compound to the
double “D” end of the control shaft will aid in
future removal of the shaft.
NOTE: Undertaking the “DECK REMOVAL”
section of this manual will make this procedure a
little less painful but, is not necessary.
Reverse safety switch
Figure 13.7
13.8. Remove outboard hex flange bearing. Inspect
and replace as needed.
16
Page 21

14. DECK LIFT SHAFT REPLACEMENT
14.1. The following section of this manual need to be
accomplished:
DECK REMOVAL
SEAT REMOVAL
14.5. Carefully lift the fuel tank and remove the hex
head cap screw under the rear of the fuel tank
securing the seat box frame to the frame. Using
a 1/2 “wrench will help immensely
NOTE: The fuel tank does NOT need to be
taken out.
CONSOLE REMOVAL, RIGHT AND LEFT SIDE
BATTERY REMOVAL
NOTE: THE DECK LIFT SHAFT ALSO DOU-
BLES AS THE FULCRUM POINT FOR THE
PARKING BRAKE ROD AND HANDLE.
14.2. Remove the two screws securing the fuel tank
mounting wire to the frame using a 1/2” socket.
See Figure 14.2.
Fuel tank mounting screws
Figure 14.2
14.6. Using the same 1/2” wrench remove the other
eight screws hold down the seat box frame.
There area total two in the rear, two on each
side and three in the front for a tally of nine.
See Figure 14.6.
5/16-18 x .625 hex head washer screws
Figure 14.6
14.7. Disconnect the lapbar control rods from the
return to neutral brackets. See Figure 14.7.
Lapbar control rod
14.3. Remove fuel tank mounting wire and set off to
the side.
14.4. Disconnect the electrical connection between
the fuel tank and the engine. This will allow room
for the fuel tank to be moved to get a wrench
underneath.
Figure 14.7
17
Page 22

14.8. Using two 9/16” wrenches remove the bolt, nut,
and spring on the brake handle on the left handle side of the deck lift shaft. See Figure 14.8.
Brake handle
14.10.Remove the only large hairpin going through the
center of the deck lift shaft on the left side of the
shaft. See Figure 14.10.
Deck
Deck
lift
shaft
Large hairpin
Figure 14.8
NOTE: When reassembling tighten screw.030
past flush to end of screw.
14.9. Remove the hairpins securing the deck lift
cables the deck lift shaft. See Figure 14.9.
Deck lift cable
Figure 14.9
Figure 14.10
NOTE: By removing this hairpin it will allow the
concentric brake cross shaft to slide to the right
to disconnecting the brake rods.
14.11. Remove the hairpin keeping the brake rods connected to the concentric brake cross shaft.
14.12.Slide the concentric brake cross shaft to the right
allowing the brake rods to come out of the hole
in the shaft. See Figure 14.12.
Brake rod
Figure 14.12
14.13.Remove rubber handle from the deck lift rod.
18
Page 23

14.14.Carefully release the tension on the deck lift
handle torsion spring. See Figure 14.14.
Torsion spring
Figure 14.14
14.17.Place a piece of 2 x 4 or something equivalent
under the front, left side of the seat box frame.
This will allow enough clearance for deck lift
assembly to slip out the back easily.
See Figure 14.17.
2 x 4 or equivalent
NOTE: Putting the deck lift handle in the lowest
cutting position will make this task much easier.
14.15.Remove the E-clips on the ends of the deck lift
shaft. See Figure 14.15.
Deck lift shaft
Figure 14.15
14.16.Remove both hex flange bearings.
Figure 14.17
14.18.Shuffle the deck lift assembly to the left till the
right side falls out of the seat box.
14.19.From this point the deck lift shaft and deck lift
handle will slip of the rear of the unit where the
battery was. See Figure 14.19.
Deck lift shaft
Figure 14.19
19
NOTE: The outer hex flange bearing on the deck
lift shaft can be replaced with out removing the
shaft.
NOTE: The split flange bearing on the deck lift
handle can be replaced with out removing the
deck lift shaft or deck lift handle.
Page 24

15. ELECTRICAL SYSTEM COMPONENTS
This section is intended to help technicians identify the
location and function of specific components on the
RZT electrical system.
15.1. The SEAT SAFETY SWITCH is located under
the seat assembly. See Figure 15.1.
-The contacts on the switch are normally closed. This
is indicated with the initials N.C.on the side of the
spades.
-When the seat is unoccupied this will energize relay #
1 & 2.
NOTE: The seat safety switch has nothing to do
with the starting circuit.
Seat safety switch
15.2. The PARKING BRAKE SWITCH is located
under the seat box frame. See Figure 15.2.
-Both sets of contacts are normally open (N.O.).
-When the switch is activated the red wire supplies
power to the seat switch. The red/white wire is for an
indicator light on the hour meter. An orange wire goes
to the starter solenoid. The orange/white wire goes to
the PTO switch.
Brake switch
Figure 15.1
Figure 15.2
NOTE: The brake switch is part of the start cur-
cuit.
20
Page 25

15.3. The NEUTRAL SWITCHES are in the console
on each side of the unit. They are normally open/
normally closed switches. See Figure 15.3.
15.4. The REVERSE SWITCHES are located just
under the lapbars in the console.
See Figure 15.4.
-The two inner terminals are N.C. They have a yellow/
white wire which supply a ground to center set of
spades on the PTO switch and spade 87 on the brake
relay.
-The two outer terminals are N.O. The left switch has a
yellow/white wire which goes to the key switch and a
orange that goes to the right neutral switch. The right
neutral switch has the orange wire and a orange/black
wire which leads to the PTO switch.
Neutral switch
-There are two of these switches.
-These are normally closed switches (N.C.).
-The switches need to be set-up in a way that when the
lapbar(s) are pulled to the rear the switch opens the circuit and eliminates power to the PTO from that switch.
-One lapbar can be pulled back at a time but, if both
are pulled back that will cut power to the PTO. Returning one or both lapbars to neural will reengage the
PTO. This is done by wiring the switches in parallel
-If the reverse safety switch adjustment is not correct,
loosen the reverse safety switch bracket using a 3/8”
wrench. Pivot the bracket and switch to a position that
results in correct operation, then tighten the bracket.
Reverse safety switch
Figure 15.3
NOTE: These switches are part of the starting
circuit.
Figure 15.4
NOTE: It is not necessary to remove either con-
trol console to reach the reverse safety switches,
but it may be necessary to temporarily disconnect the blue wires in order to reach the mounting screws for the brackets.
21
Page 26

15.5. The PTO switch is located on the right console
behind the key switch. This switch is part of the
start circuit, PTO run circuit, and reverse safety
circuit.
See Figure 15.5.
- The first set of terminals are in the start circuit. The
orange/white wire connects to the brake switch and the
orange/black wire goes to the neutral switches. The
PTO switch needs to be in the off position to start the
unit.
-The second set of terminals are part of the reverse
safety circuit. They consists of yellow/black wire connecting to the terminal “30” of the PTO relay and the
yellow/white wire which connects to terminal “87” on
the brake relay and neutral switches.
-The third and final set of terminals, PTO run circuit,
consists of blue wire from the reverse safety switches
and a red wire from the run line.
NOTE: If you are checking for power at the PTO
switch, you should have 12 volts at the red wire
and no voltage at the blue wire with the PTO
switch turned off. With the PTO switch on you
will have 12 volts at both the blue and red wires.
Be sure all other condition are being meet for the
PTO to run properly.
15.6. The KEY SWITCH is located on right console in
front of the PTO switch.
-There was a midyear change to the key switch. Units
with serial number before 1F014G20062 should have
key switch 725-04019 (Delta switch number 6900-31P)
and Harness 725-04170. When the old key switch is
turned to the start position it doesn’t energize the fuel
shut off solenoid. This will not allow fuel to flow to the
carburetor while the engine is cranking. To correct this,
there is a new key switch (725-04228) and a harness
adapter (725-04229). This is available in kit 759-04058
(service advisory CC-451)
-A new wiring harness 759-04170A should be on all
models with serial numbers above 1F224G20001.
These models will NOT need the harness adapter
(759-04058) and will already have the proper key
switch.
-To check for the proper key switch perform the follow-
ing test.
NOTE: A multimeter or continuity tester will be
need for this section.
Turn key to OFF position and check for continuity you
should have continuity between G and M only.
PTO switch
Key switch
Figure 15.5
Neutral switch
Turn key to the RUN you should have continuity
between L and B.
Turn and hold key in the Start position you should have
continuity between L, B, and S.
-If this is the case then you have the most current
switch. The old key switch is usually identical to the
new switch. The difference being that the old switch
when turned to START would have continuity between
B and S only.
22
Page 27

-The BRAKE RELAY should have a consistent ground
(terminal 86) and will receive power (terminal 85) when
the brake switch is activated.
Brake relay
15.7. There are three RELAYS in the electrical system
of the RZT. They are located under the right side
console toward the rear. See Figure 15.7.
-The relays are assessable from under the rear of the
console
-To replace a relay, the console does not need to be
removed.
Seat relay
15.8. The STARTER SOLENOID is located under the
right console just to the right of the relays.
See Figure 15.8.
- Be certain that there is a good path to ground by mak-
ing sure there is a star washer under the mounting tab
on the starter solenoid.
PTO relay
Figure 15.7
-When testing by feel a click should be felt when activated.
-Starting from the left they should be in the order of
SEAT, PTO, and, BRAKE
-The SEAT RELAY should have a consistent ground
(terminal 86) and will receive power (terminal 85) when
the seat switch is activated.
-The PTO RELAY should have a consistent ground
(terminal 86) and will also receive power (terminal 85)
when the seat switch is activated.
23
Page 28

Starter solenoid
Figure 15.8
24
Page 29

25
Page 30

26
 Loading...