

Page 1
________INSTRUCTION MANUAL_______
341 3D Pedometer with Clip
VIDEO INSTRUCTIONS: www.csxpro.com/341
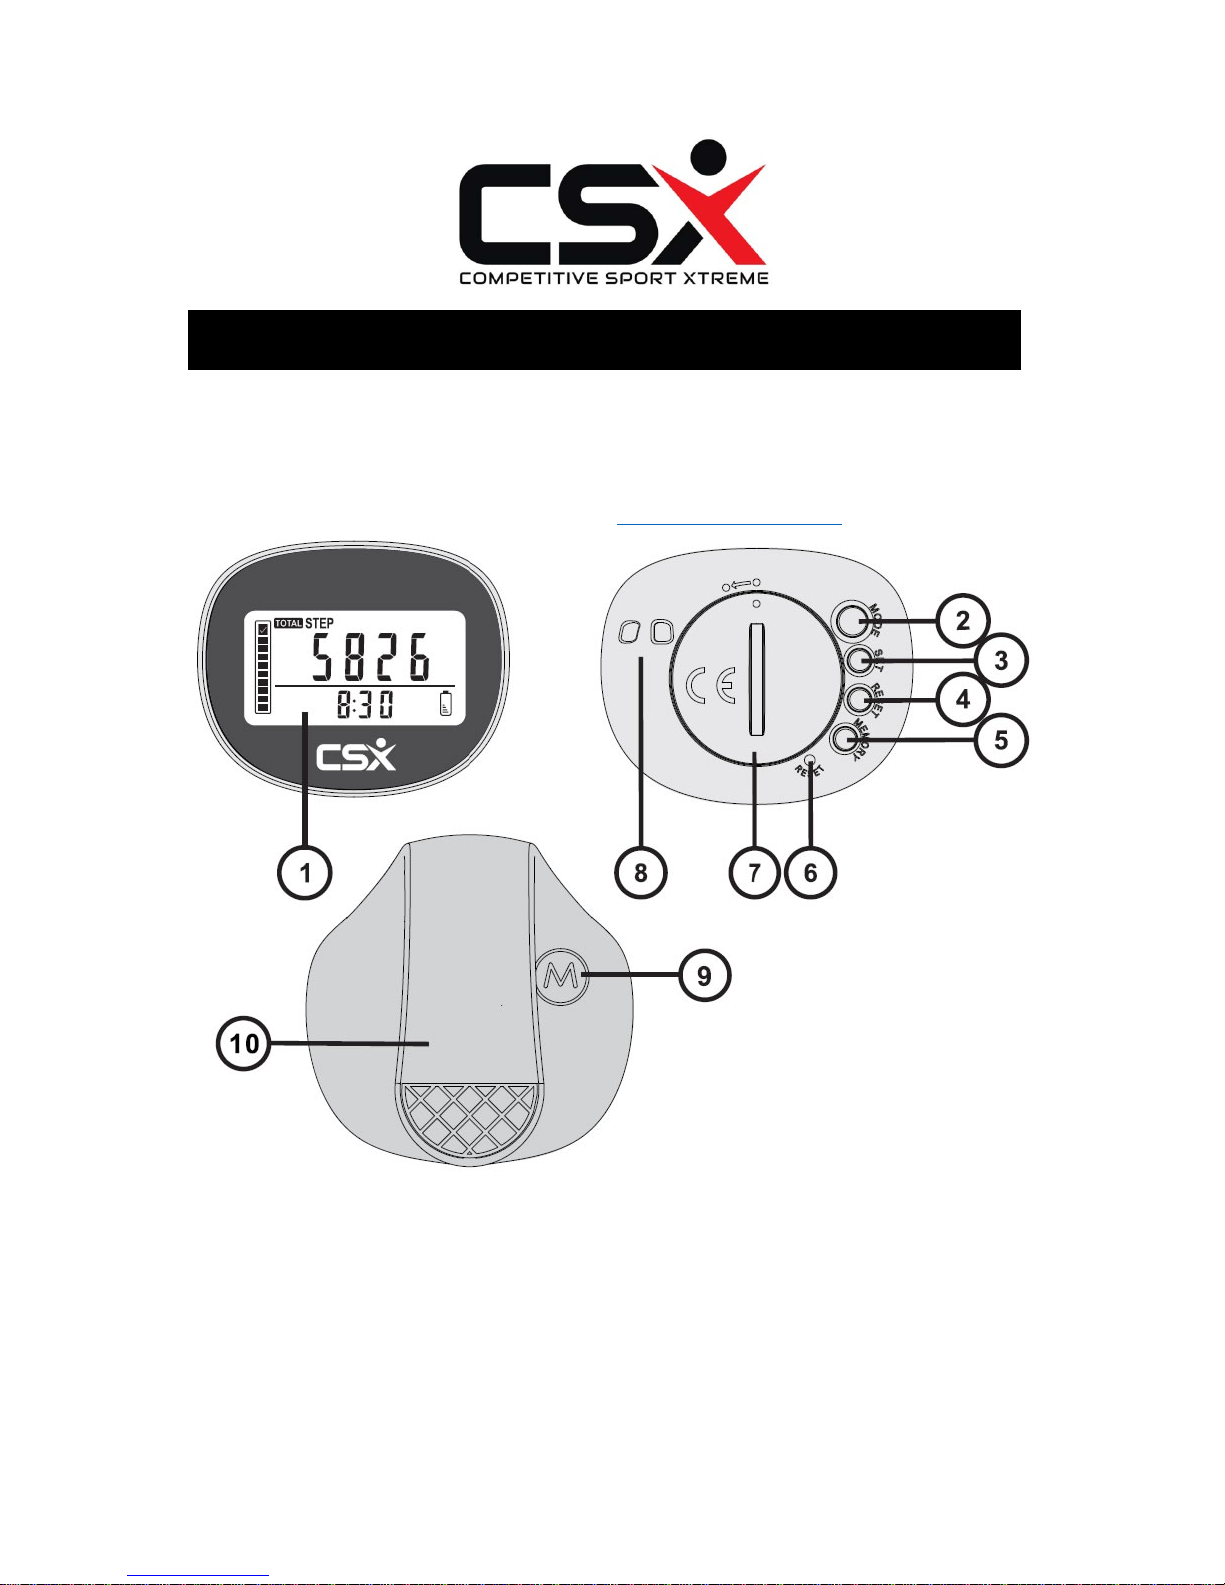
1. FUNCTION
1. LCD Display 6. System RESET Button
2. MODE Button 7. Battery Cover
3. SET Button 8. Lanyard Hole
4. RESET Button 9. MODE Button (Silicone holder)
5. MEMORY Button 10. Belt Clip (silicone holder)
Page 2
2. FEATURES
PEDOMETER
- 3D Silent Pedometer Sensor
- Step counter up to 99999 steps
- Distance walked up to 999.99 KM / 999.99 Miles
- Calories burned up to 9999.9 Kcal
- Metric and Imperial unit selection
- 10 Steps Error Correction
TARGET
- Set your daily walking steps target
CLOCK
- Display format 12/24 hours
ACTIVITY TIME
- Record your daily activity time during walking
7 DAY MEMORY
- Record your pedometer activities up to 7 days
LOW BATTERY INDICATOR
- Battery icon appears when battery power is low
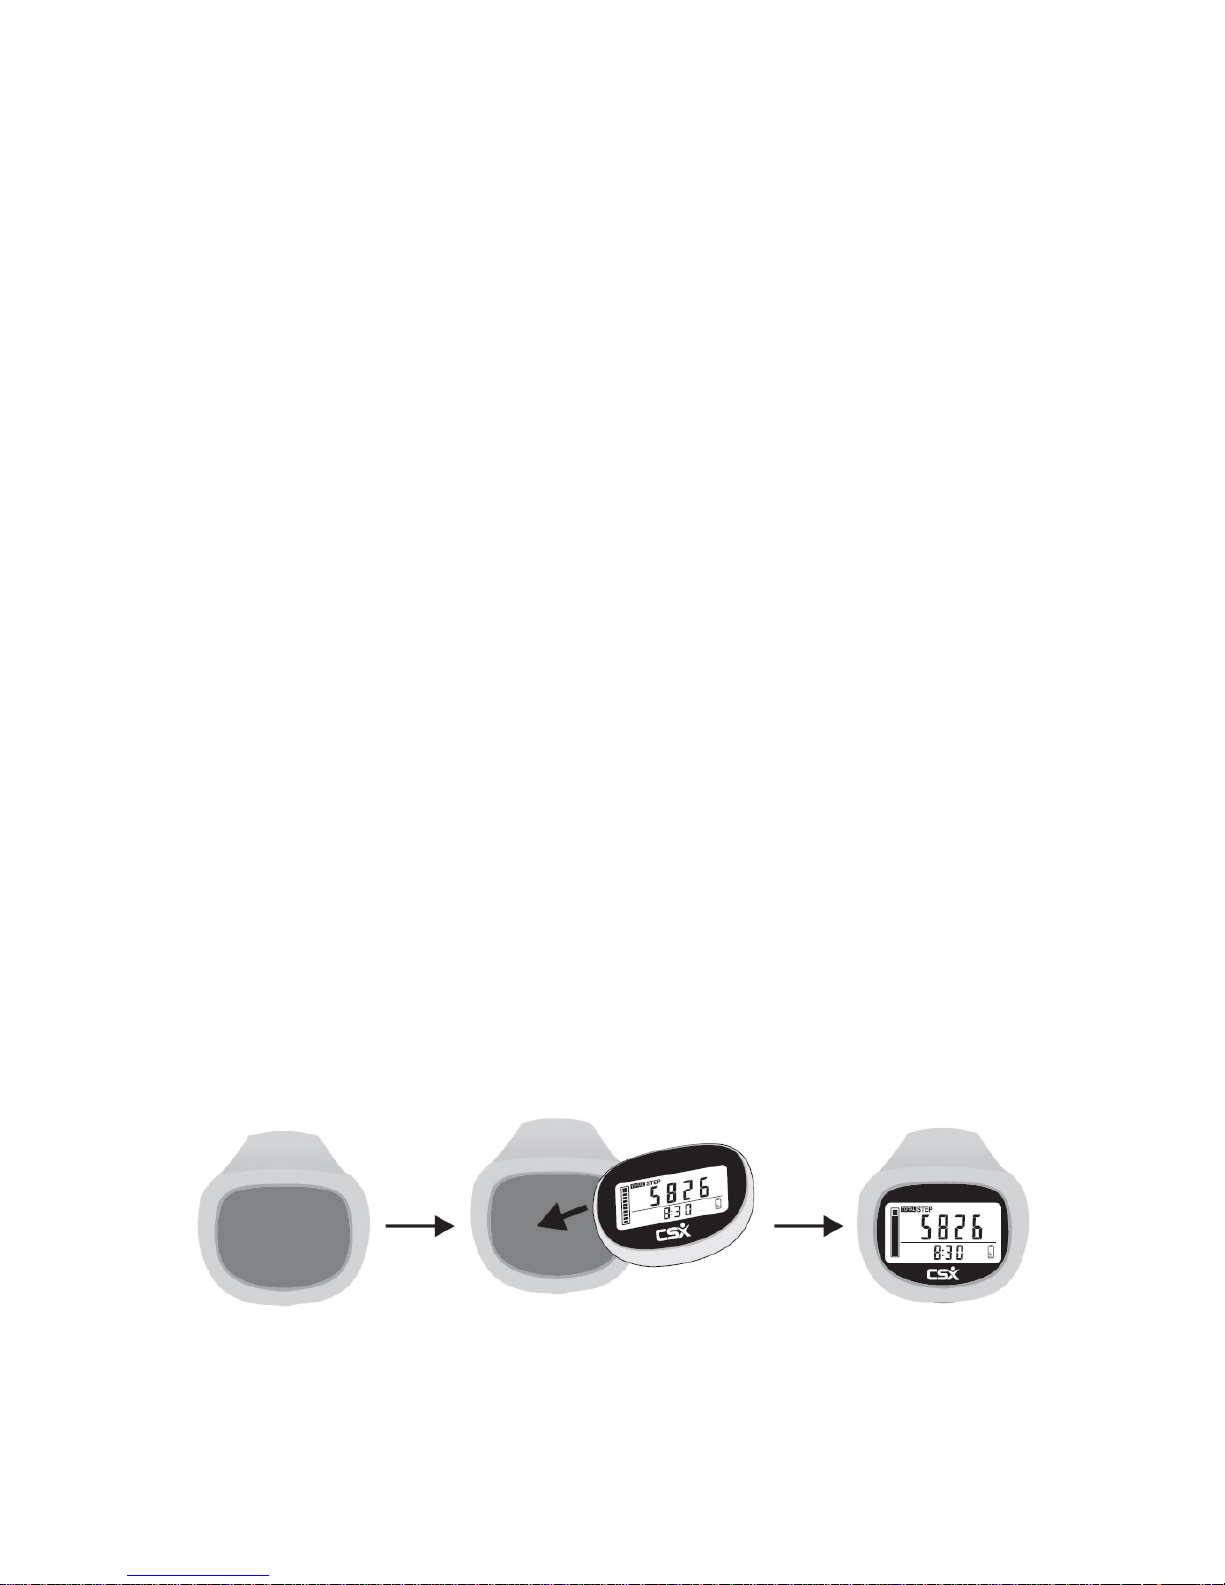
3. USING THE SILICONE HOLDER
Slide the pedometer into the silicone holder like in the example below:
Page 3
5. BEFORE SETTING UP YOUR PEDOMETER
Before you setup your pedometer you need the following information:
1) Clock Time
2) Your Stride Length (centimeters or inches): _______________
3) Your Weight (kilograms or pounds): _____________________
4) Your Daily Target Number of Steps: _____________________
Note: If you wish the pedometer to display the distance walked in miles you will
need to record your stride length in inches and weight in pounds. If you wish the
pedometer to display the distance walked in kilometers you will need to record your
stride length in centimeters and weight in kilograms.
(If you do not have time to measure your stride length and weight you can use the
default values provided by the pedometer)
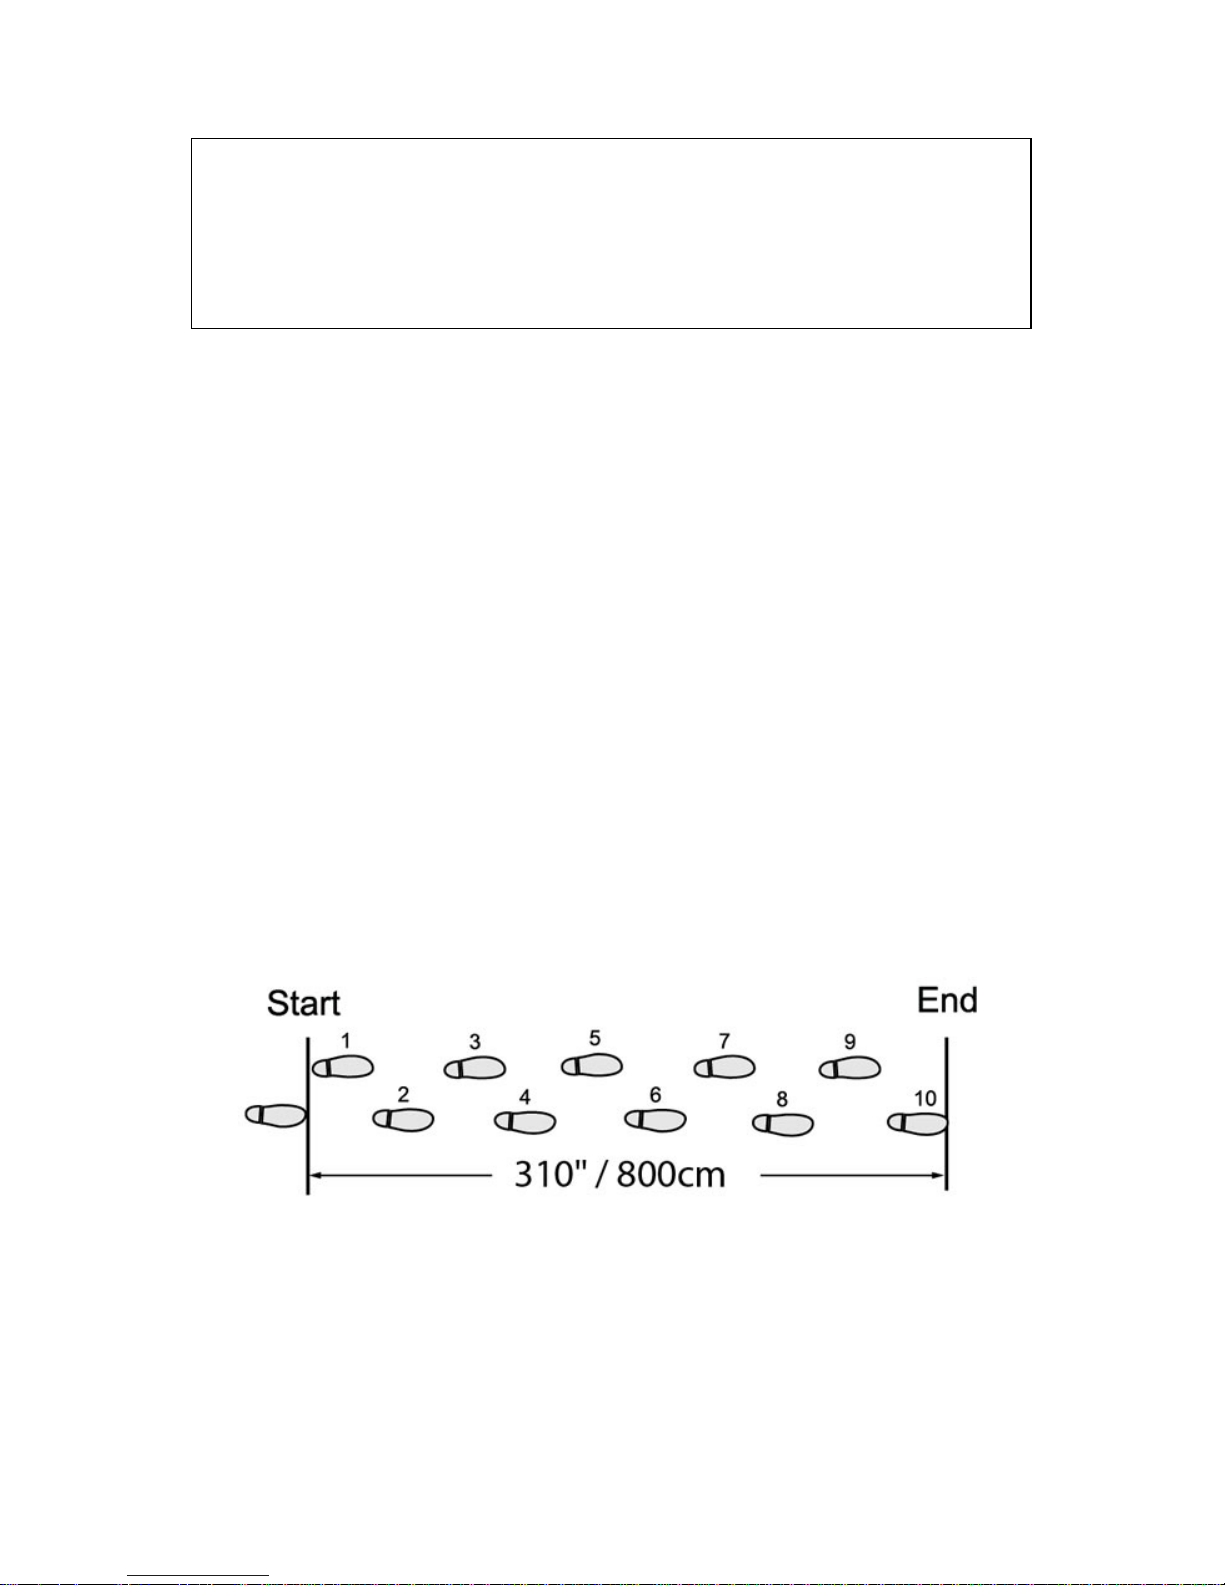
6. MEASURING YOUR STRIDE LENGTH
a) As above illustration, walk 10 steps with your normal stride
b) Measure the distance from start to end
c) Calculate your stride by dividing the total distance by 10
Example:
Total Distance = 310”. Therefore, stride = 310” / 10 paces = 31”
Total Distance = 800cm. Therefore, stride = 800cm / 10 paces = 80cm
4. GETTING STARTED / FIRST TIME USE
- Pull battery insulator tab to activate the pedometer.
- If LCD display is not functioning normal and showing abnormal characters,
please perform a “SYSTEM RESET.” See section (18).
Page 4
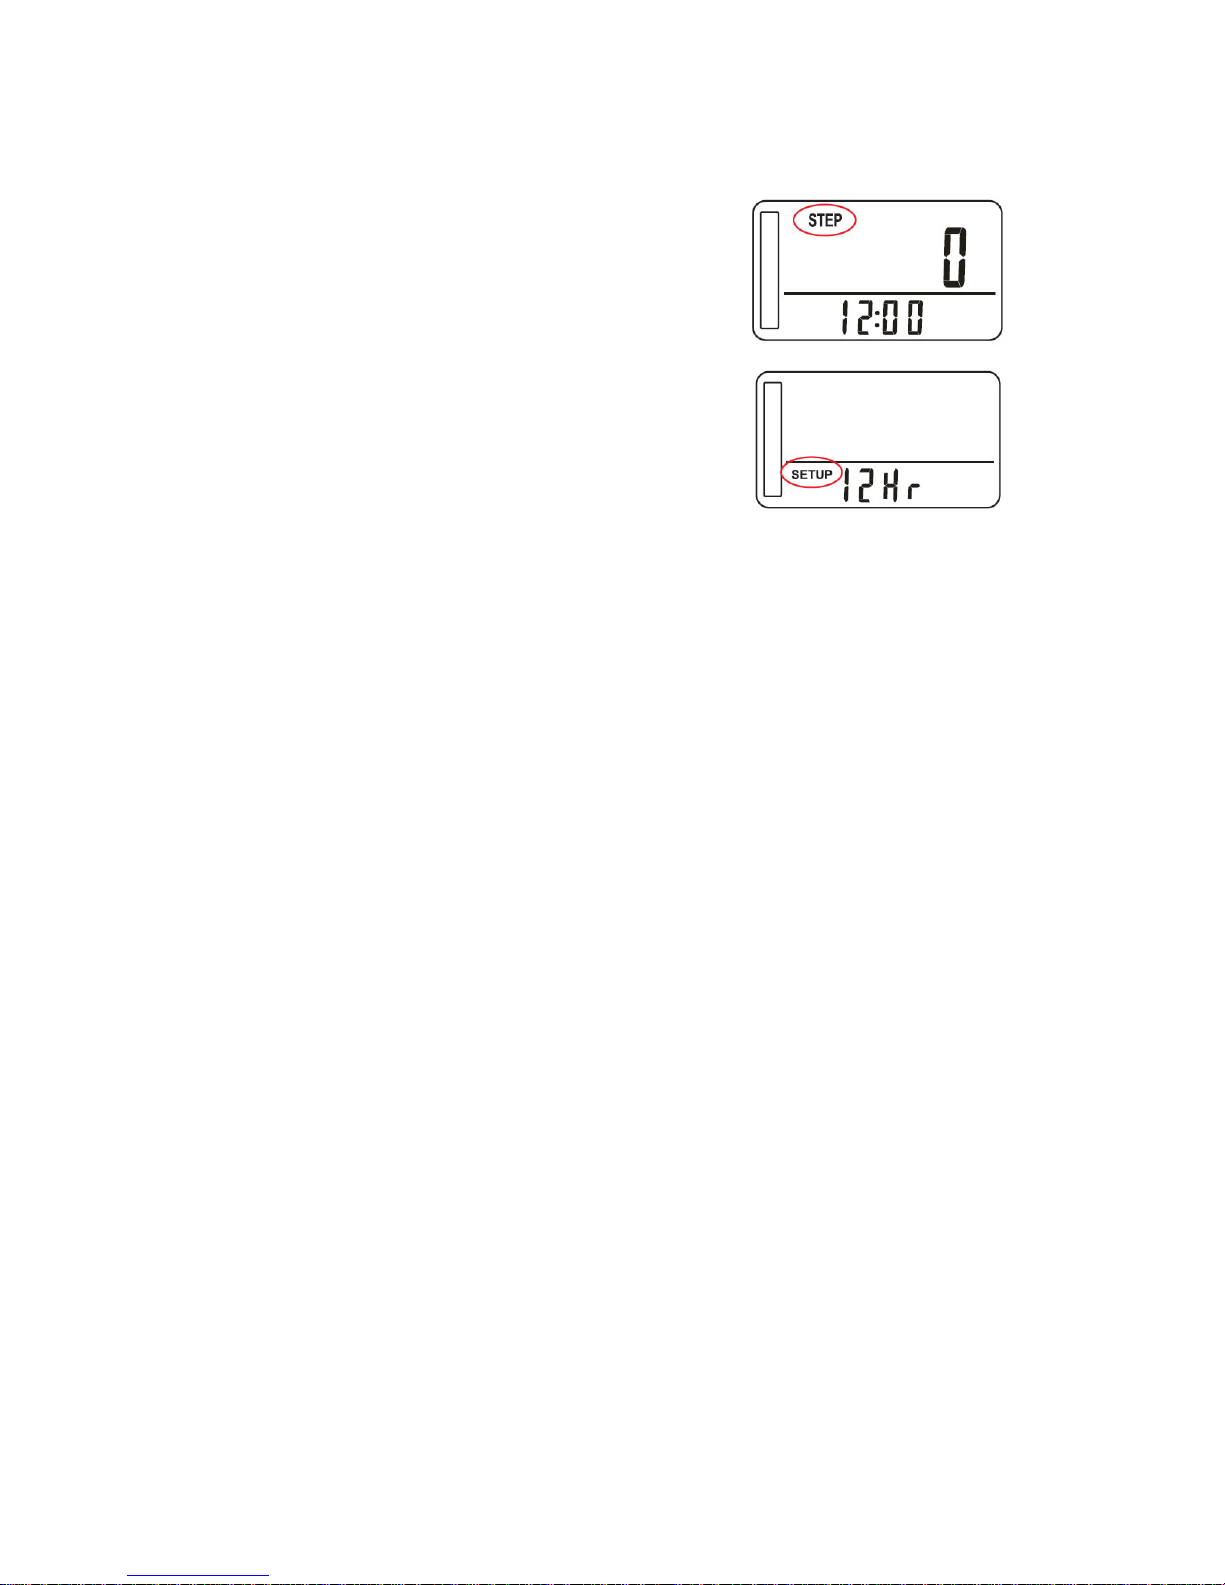
7. QUICK TIPS FOR SETUP AND ENTERING DATA
1) To enter “SETUP” press the MODE button until
the display shows “STEP” mode
2) Press and hold the SET button for at least 4
seconds
3) The display will start to Flash
In general
- Press the SET button to move through the
options
- Press the RESET button to increase a value
- Press the MODE button to decrease a value
- Holding down either the RESET or MODE buttons increases / decreases the
numbers rapidly
To exit setup mode
Do not press any buttons, after 10 seconds the pedometer will exit setup mode and
store the information you entered.
Page 5

8. QUICK SETUP STEP BY STEP
• Press the MODE button until the display shows "STEP" (not total step)
• Press SET for about 4 seconds (the display will flash)
• Press the MODE button to select either 24hr (military) time or 12hr
(24hr recommended – then you don’t have to worry about am / pm)
• Press SET
• The MODE button decreases the hour, the RESET button increases it
• Press SET
• The MODE button decreases the minutes, the RESET button increases it
• Press SET
• Press the MODE button to select CM (distance measured will be kilometers) or
IN (distance measured will be miles)
• Press SET
• The default stride length will begin to flash, press the MODE button to
decrease the number and the RESET button to increase the number
• Press SET
• The default weight will begin to flash, press the MODE button to decrease the
number and the RESET button to increase the number
• Press SET
• The default step target will begin to flash (5000 steps) press the MODE button
to decrease the number and the RESET button to increase the number
• Press SET
If you need to change any of the settings you can go back into SETUP at any time by
pressing the SET button for 4 seconds when in STEP mode.
9. PEDOMETER FUNCTION
Your steps are detected via the walking movement. You can place the pedometer
inside your pocket, handbag / backpack or attach it using the strap. TIP: If you hang
the pedometer around your neck, place it under your clothes to prevent the
pedometer bouncing as this may cause the pedometer to count extra steps.
Page 6
10. TEN STEPS ERROR CORRECTION
To avoid counting sudden movements as steps, the counter will not count any
movement less than 10 consecutive steps. Once you have walked 10 consecutive
steps the pedometer will then begin counting 11, 12, 13 etc.
IMPROPER STEP COUNTING
The pedometer may not count steps correctly in the following conditions:
- Irregular motion such as swinging and vibrating
- Inconsistent walking pace
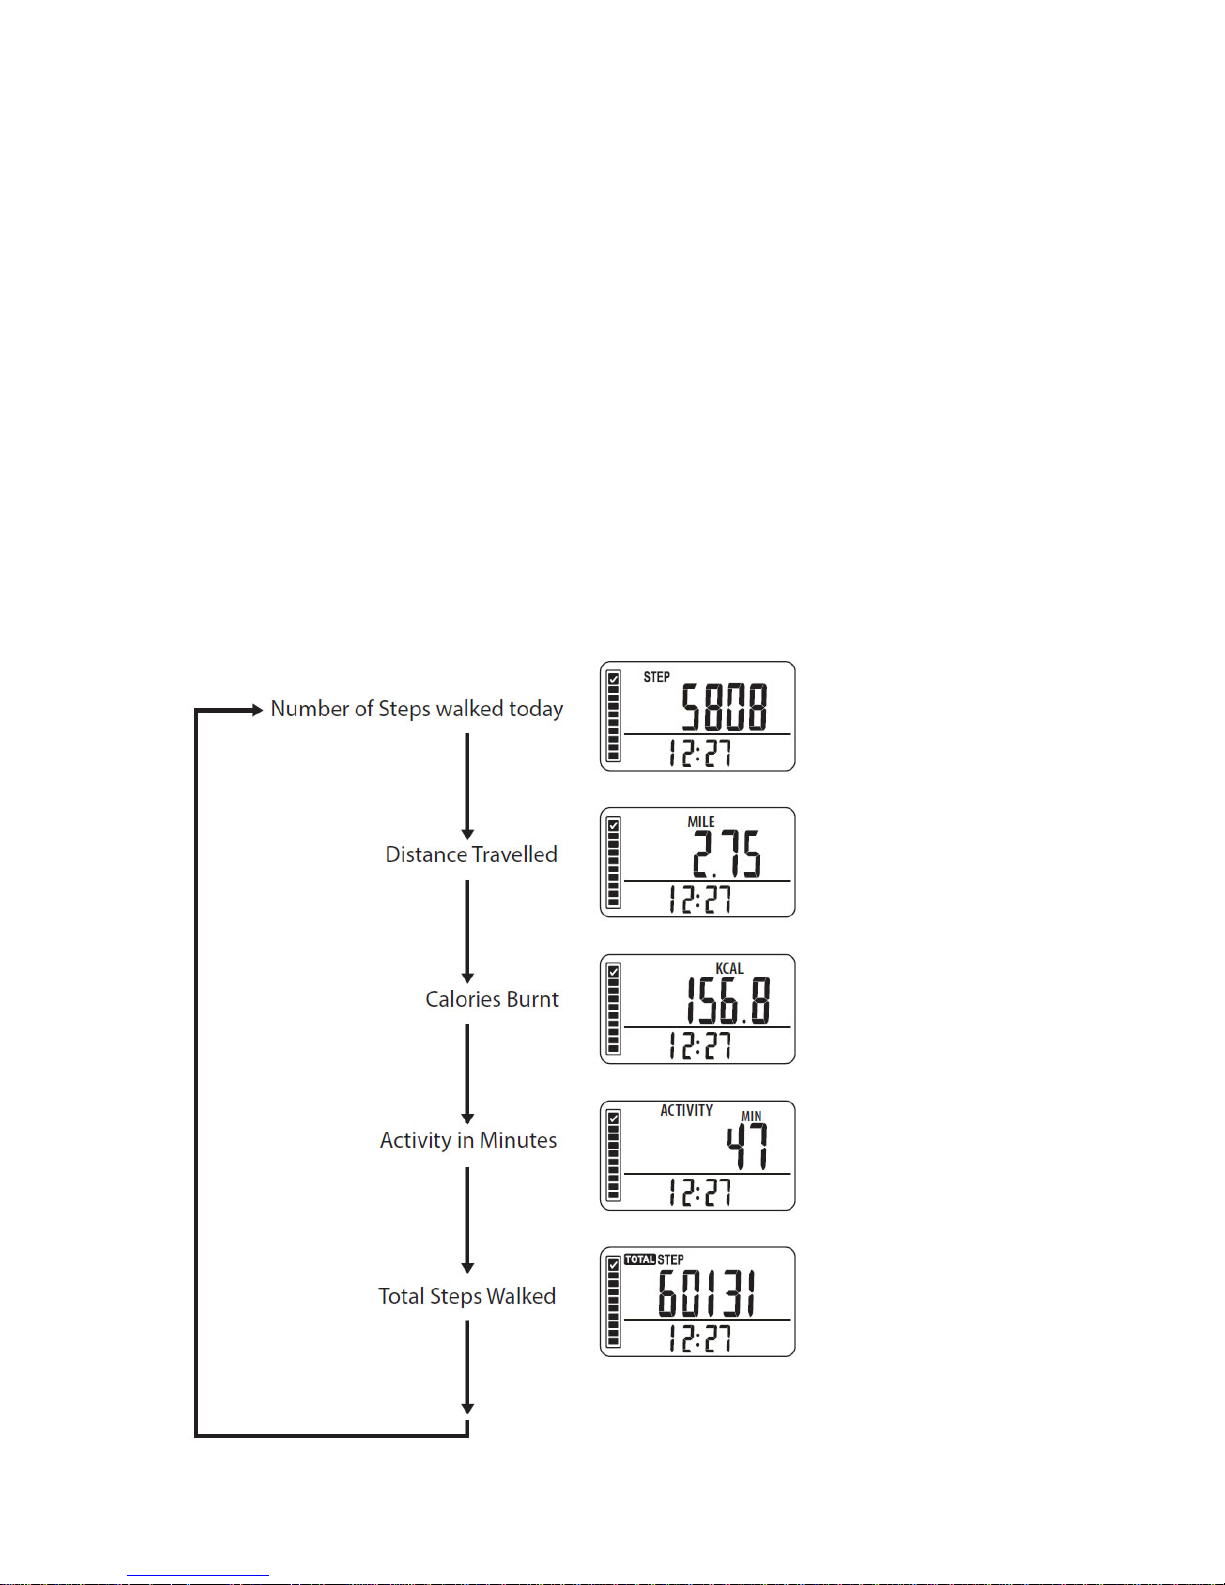
11. CHANGING THE DISPLAY
Press the MODE button to change the display.
Each time you press the MODE button, the display will change:
Page 7
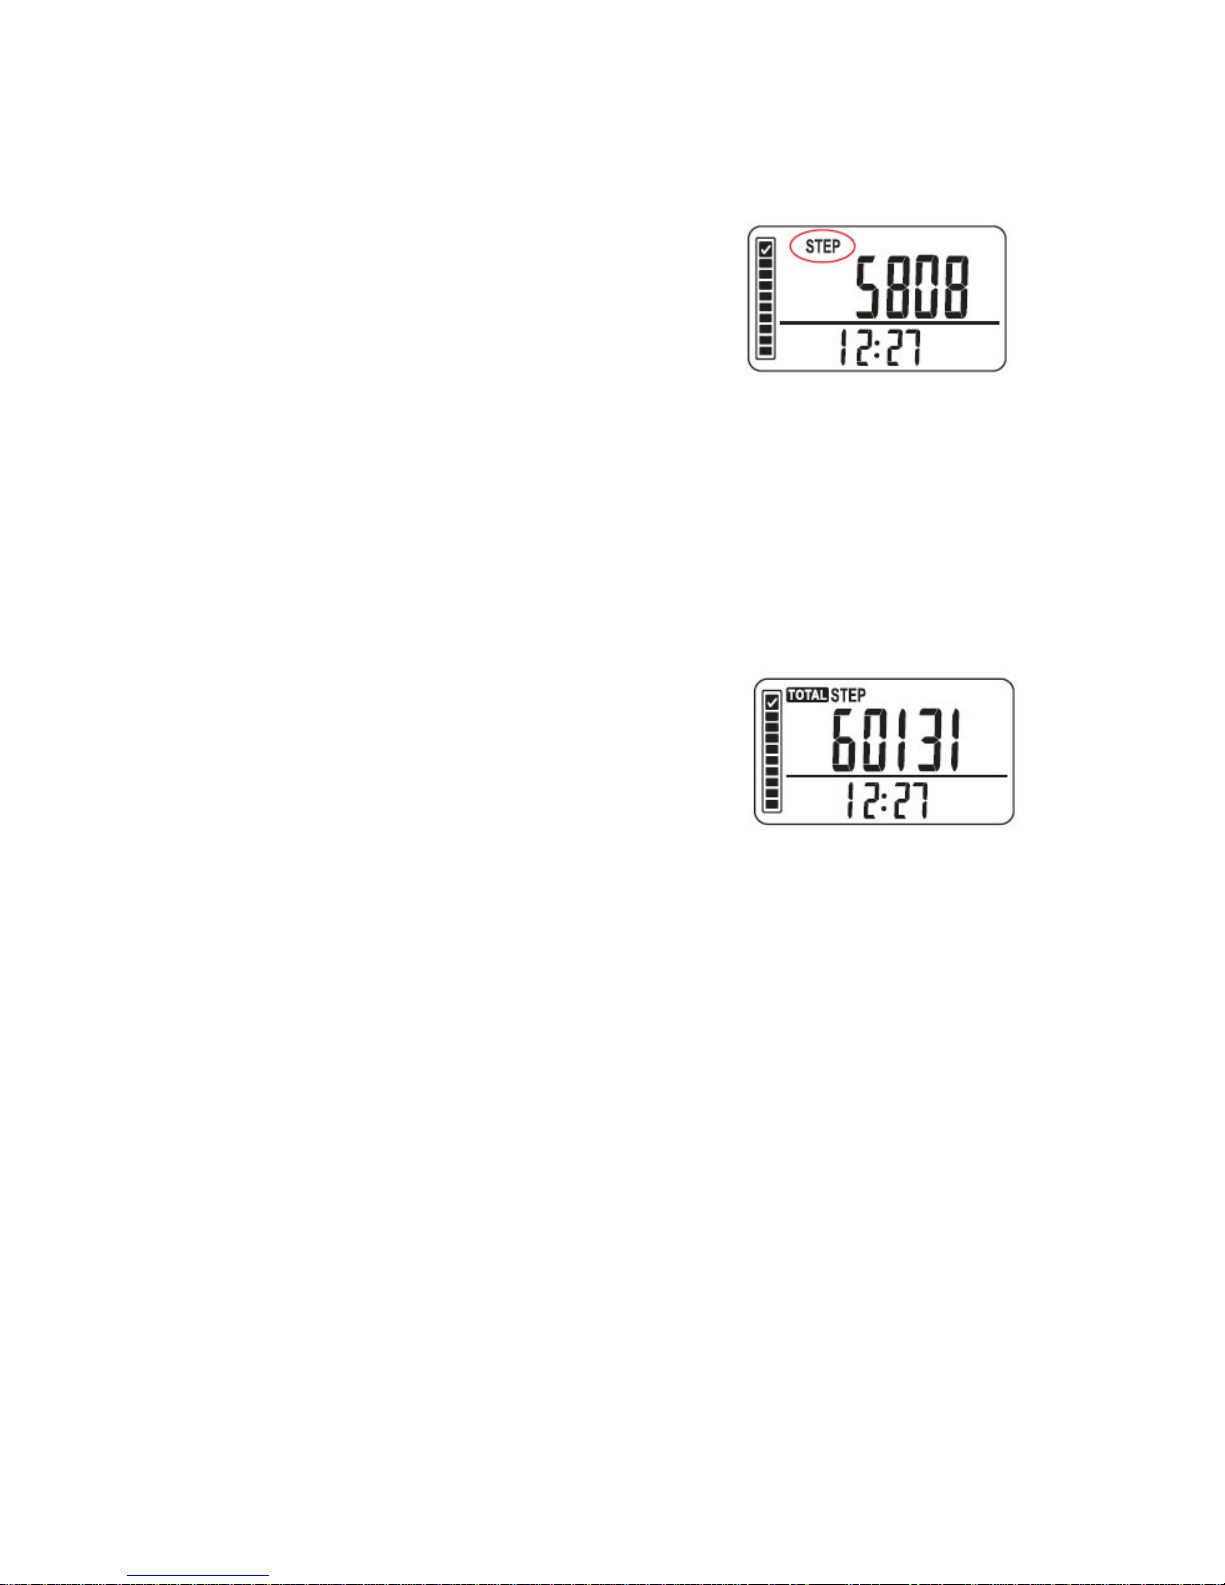
12. STEP FUNCTION
Step counter up to 99,999 steps
Press the MODE button until the top of the display
shows the word “STEP”. This shows the number of
steps walked during the day.
Reset the day step counter: Press and hold the RESET
button until the digits revert back to zero.
WARNING: The pedometer data for the day will be reset to ‘0’. (This however will
not erase the memory or total steps, as described in the TOTAL STEP FUNCTION.)
13. TOTAL STEP FUNCTION
Step counter up to 99,999 steps
Press the MODE button until the top of the display
shows the words “TOTAL STEP”. This shows the total
number of steps accumulated since the last reset of
the pedometer. This is the total number of steps
walked over a period of time.
While in “TOTAL STEP” mode press the SET button repeatedly to view:
Total Distance Walked
Total Calories Burnt Total Time Walked
Reset the Counter: While in “TOTAL STEP” mode press and hold the RESET button
until the digits revert back to zero.
WARNING: All pedometer step data including memory will also be reset to ‘0’.
Page 8
14. MEMORY FUNCTION
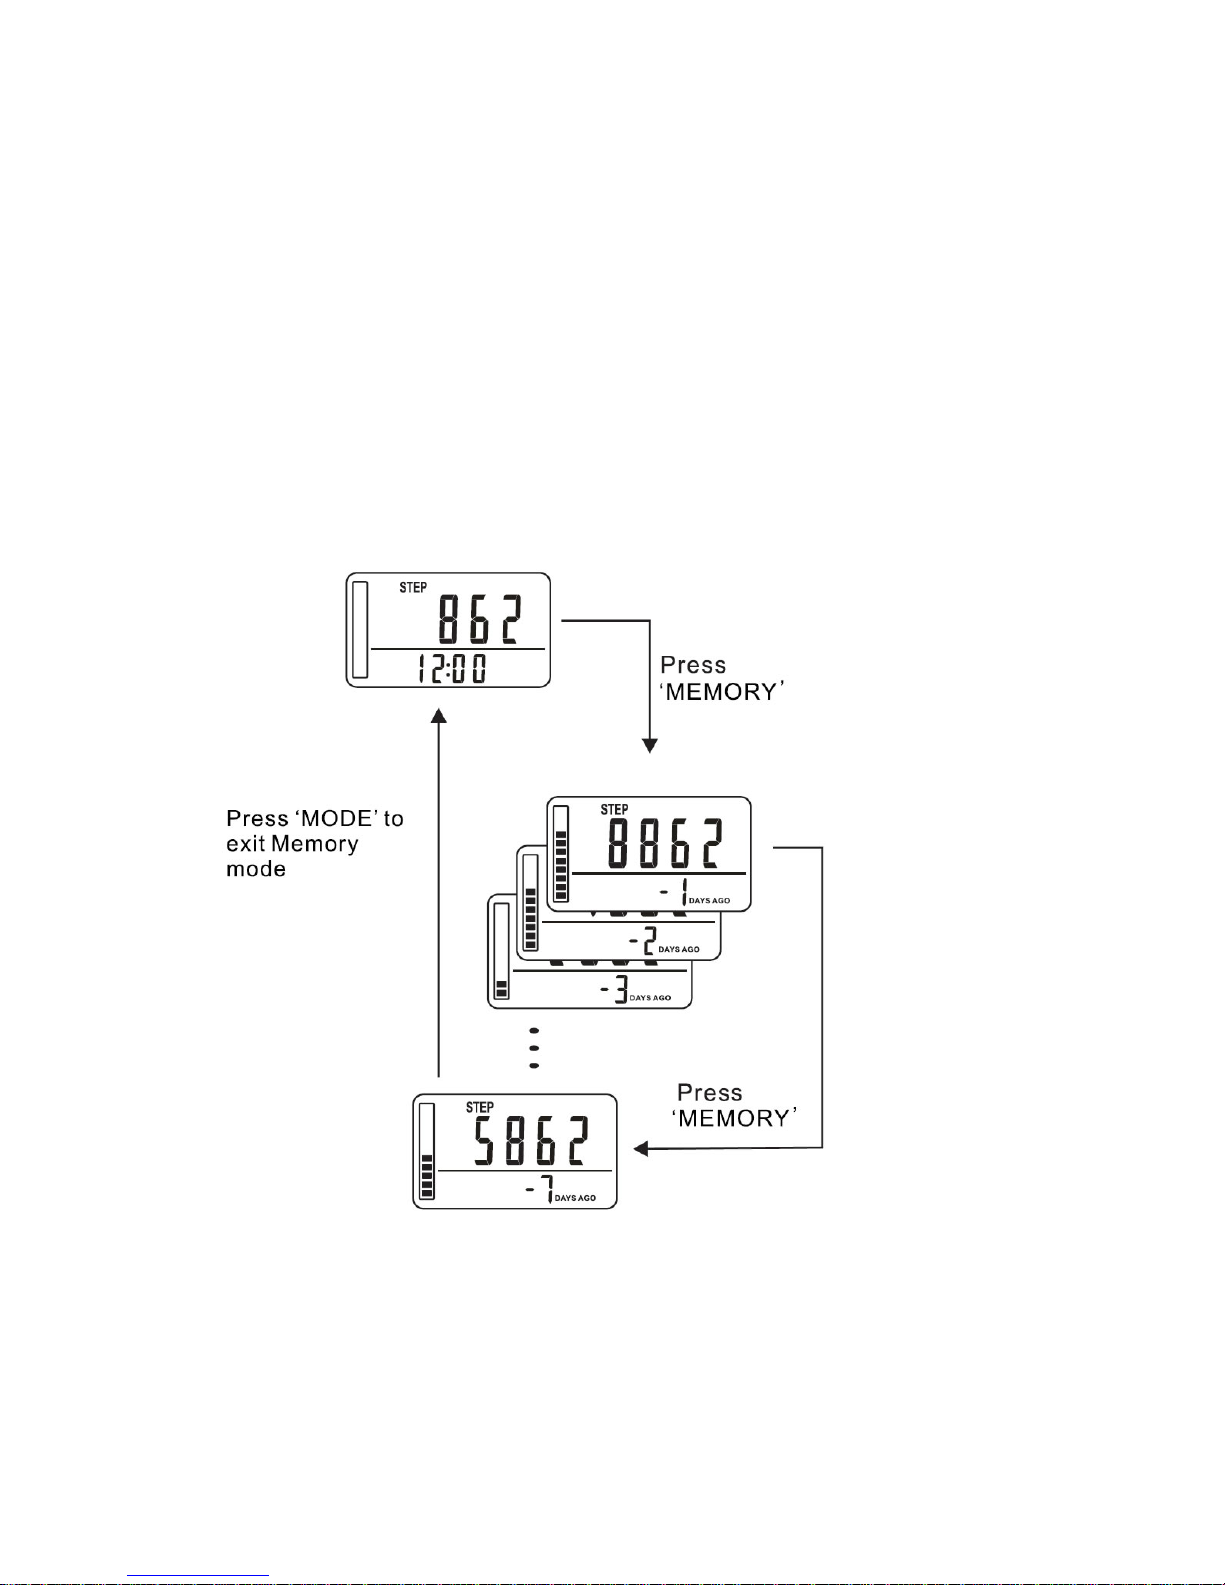
The pedometer can store up to seven days of data for the number of steps walked.
The current day data is automatically stored in memory when the clock time reaches
12:00am midnight. The display will reset to ‘0’ for the new day.
WARNING: Changing the clock time may affect the data stored in the pedometer
memory.
- Press the MEMORY button
- The step data from yesterday is displayed: “-1 DAYS AGO” is displayed
- Continue pressing the MEMORY button for “-2, -3, -4, -5, -6, -7 DAYS
- To exit memory mode, press the MODE button to return to the current day data.
VIEW MEMORY DATA FOR EACH DAY
While viewing a memory day press the SET button repeatedly to view the data for
each day:
Step Count Distance Walked
Calories Burnt Time Walked
Page 9
RESETTING THE MEMORY DATA
To reset all of the Memory data to ‘0’:
Press the MODE button until in “TOTAL STEP” mode
Press and hold “RESET” button until the digits reset
to ‘0’
Note: ALL PEDOMETER DATA INCLUDING MEMORY DATA WILL BE CLEARED!
15. TARGET STEP FUNCTION
The STEP TARGET is the number of steps you would like to walk each day. The
pedometer displays a progress bar to show how many steps you have walked so far
in comparison to your daily step target. This makes it easier for you to make more
informed decisions throughout the day and find ways to walk more steps and
achieve your goal at the end of the day.
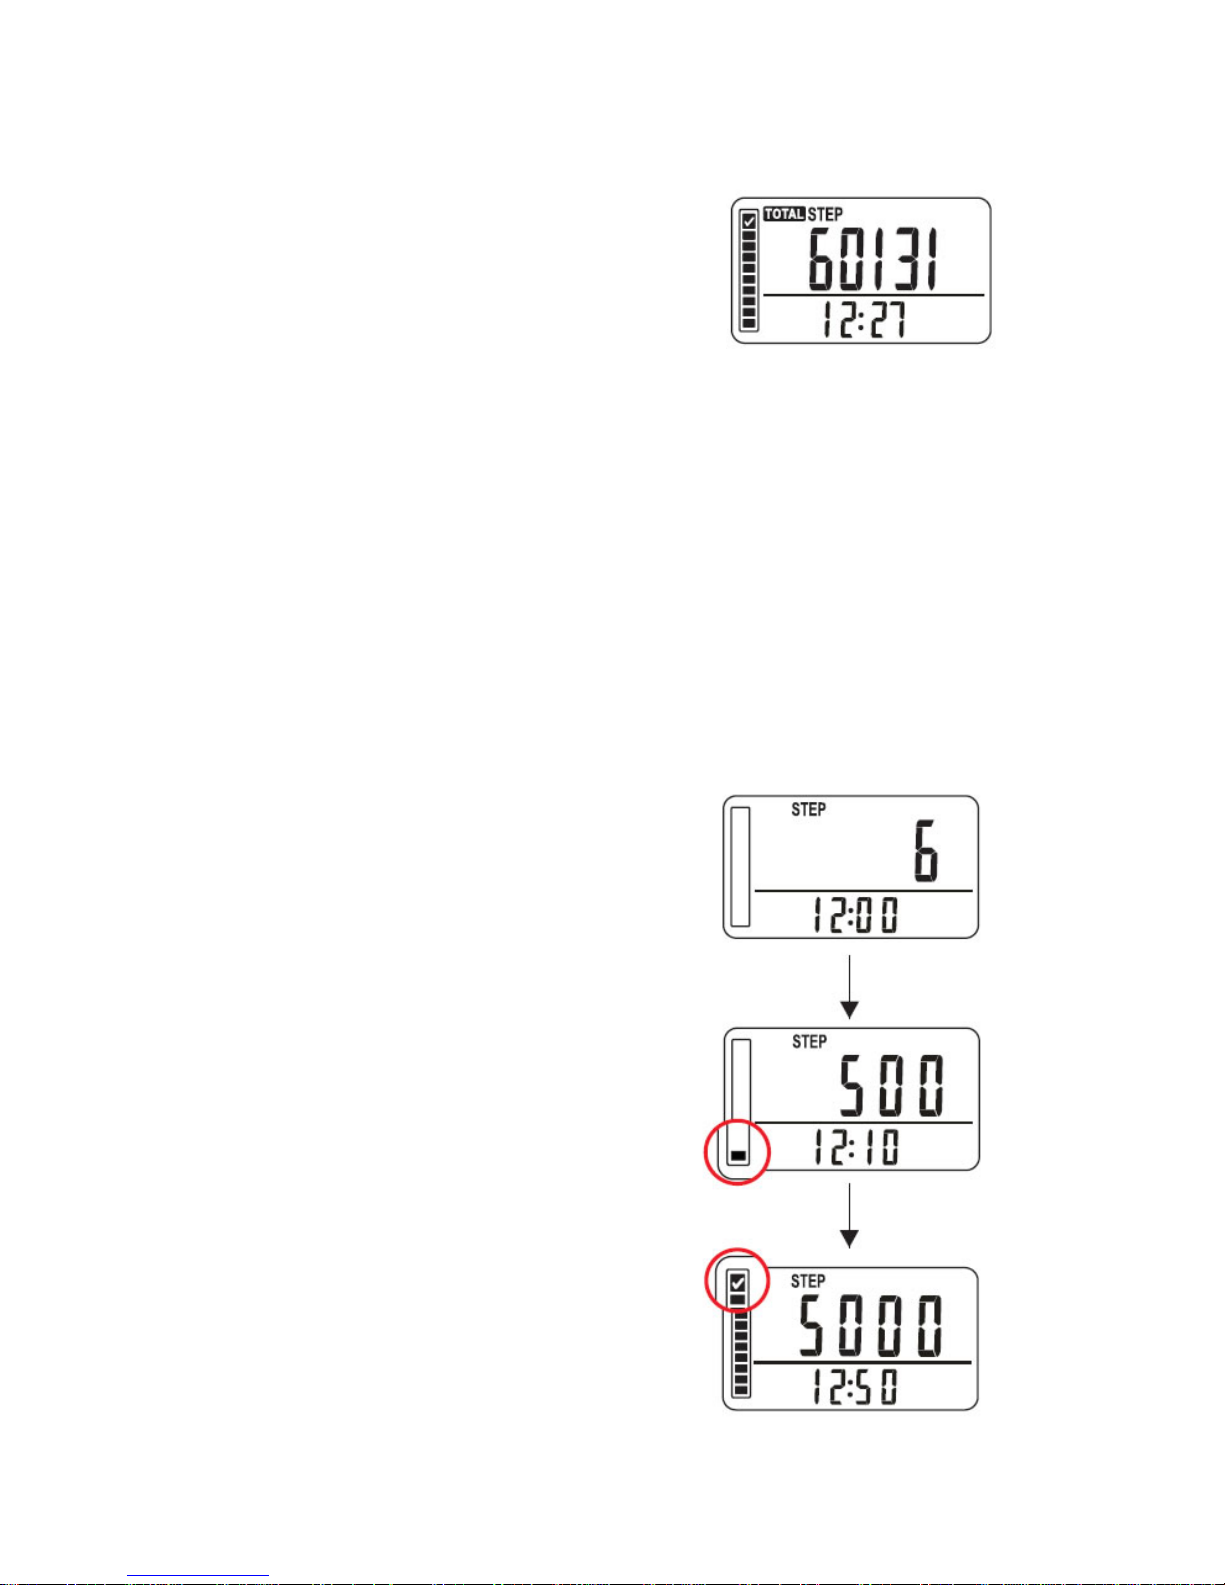
Understanding the “TARGET” progress bar:
For example 5000 steps
At the beginning
After 500 steps (10% target)
- a progress of 1 bar is shown indicating 10% of
target is reached
After 5000 steps (100% target)
- all 10 progress bars are displayed showing
100% of target is reached
Page 10
16. LOW BATTERY INDICATOR
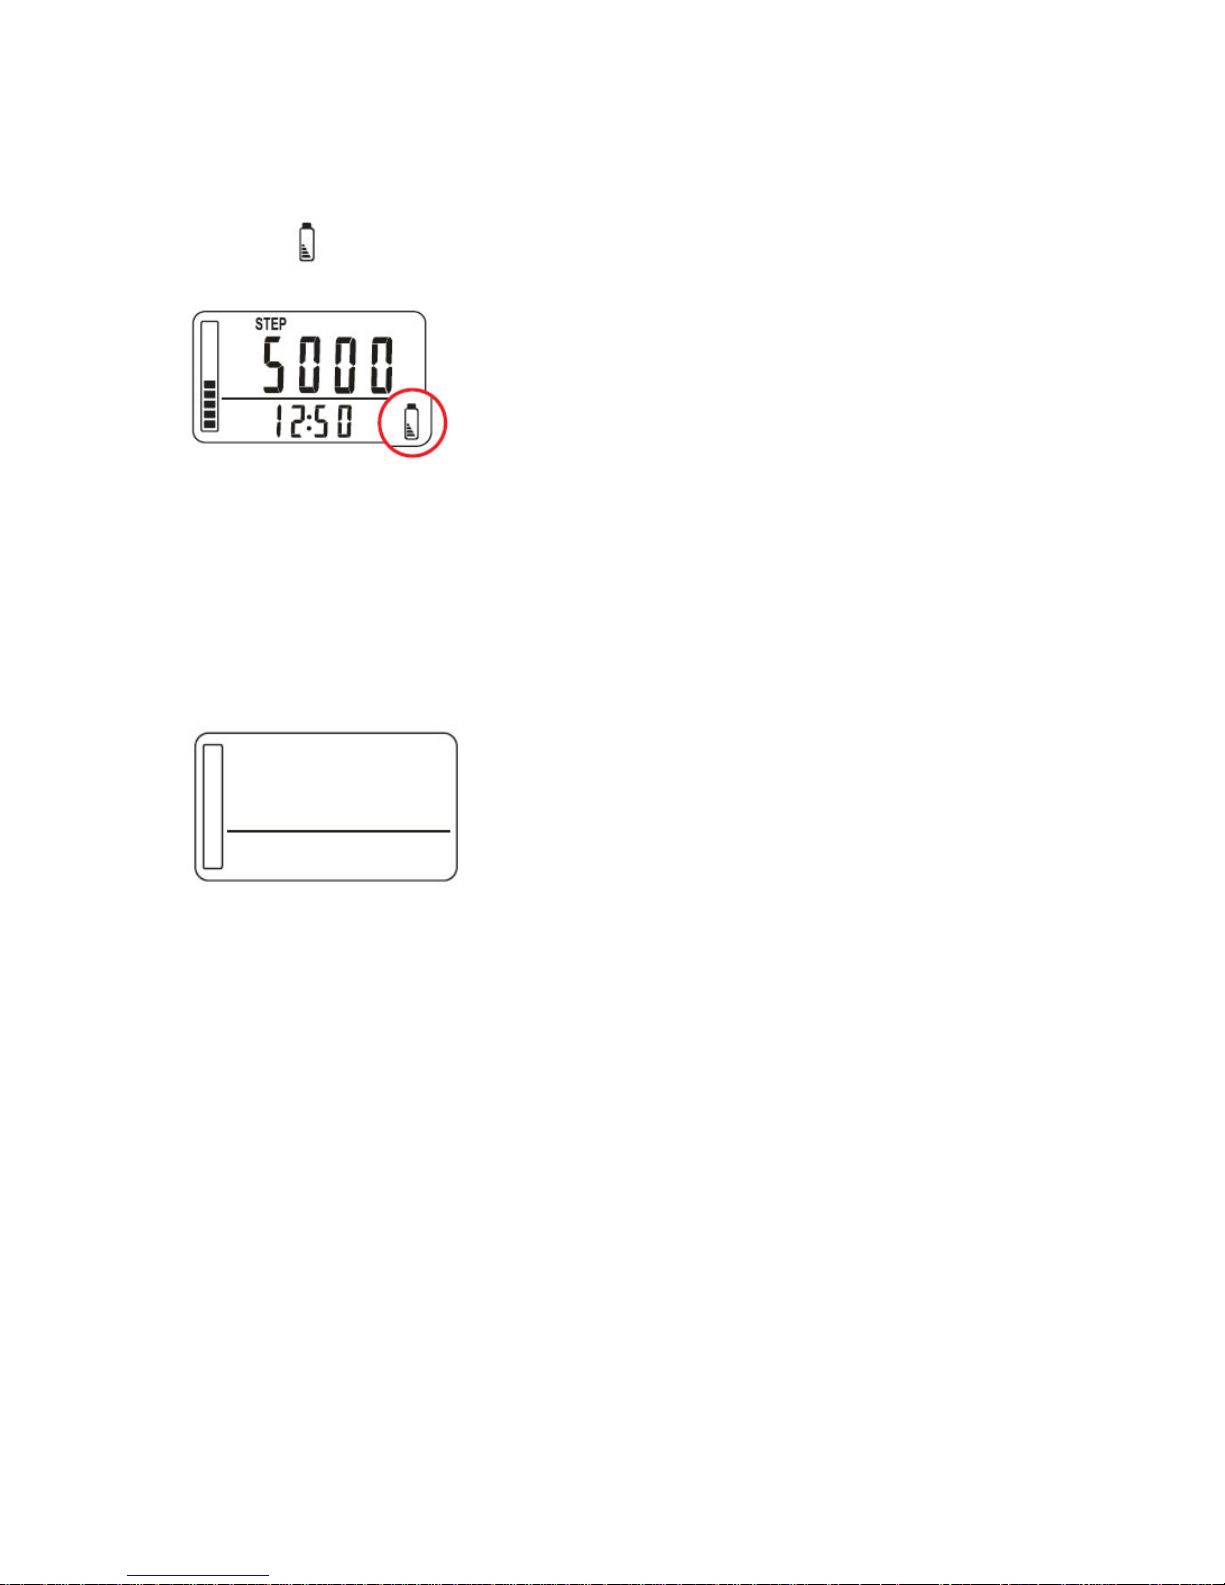
When the battery power has dropped to a certain level, the low battery indicator
icon will show up on the display. It is time to replace with a fresh battery.
17. SLEEP MODE
If the pedometer is left idle for 30 seconds, the LCD display will shut off
automatically. If any movements are detected, the pedometer will wake up from
sleep mode.
Sleep mode: LCD display automatically shut off
18. SYSTEM RESET
Use the SYSTEM RESET function in the following situations:
- When the batteries are being replaced
- When the display becomes unrecognizable
- When pressing any keys have no actions
Press the SYSTEM RESET button on the back of the unit with a paper clip. The display
will revert to its default settings
WARNING: all data stored in MEMORY and the set data (time, weight, and stride
length) will be erased. You will need to set the time, weight and stride length again.
Page 11

19. CHANGING THE BATTERIES
The pedometer uses 1 x CR-2032 button cell battery
- Twist and unscrew the battery door using a coin
- Take out the old battery
- Replace with a fresh battery. Make sure it is inserted in the correct polarity
position
- Screw the battery door back into place
Battery disposal EC Directive 2006/66/EC
Batteries are not a part of your regular household waste. You must return batteries
to your municipality’s public collection or wherever batteries of the respective type
are being sold.
Disposal of electric and electronic devices EC Directive 2012/19/EU
This product is not to be treated as regular household waste but must be returned to
a collection point for recycling electric and electronic devices. Further information is
available from your municipality, your municipality’s waste disposal services, or the
retailer where you purchased your product.
20. SAFETY – PLEASE READ BEFORE EXERCISING
IMPORTANT - Before starting any form of exercise program, consult your doctor or
therapist. If at any time during your exercise you experience discomfort or pain, stop
the exercise immediately and consult your doctor. Always Warm up - Cool down and
stretch before and after exercising. This will help prevent straining muscles.
21. CONTACT CSX
To contact CSX – Competitive Sport Xtreme, please email or send a support ticket to:
[email protected] or www.csxprosupport.com
Made in China
Copyright (c) 2015 Competitive Sport Xtreme
 Loading...