

Page 1
CS108 RFID Sled Handheld Reader
User Manual
CSL: The One-Stop-Shop for RFID Solutions
Page 2

CSL CS101-2 EPC CLASS 1 GEN 2 RFID HANDHELD READER
USER'S MANUAL, VERSION 9
2
1 Contents
1 CONTENTS .................................................................................................................................................... 2
2 REGULATORY REGIONS ................................................................................................................................. 5
2.1 FCC STATEMENT AND IC STATEMENT ............................................................................................................... 5
2.2 EUROPEAN CE ............................................................................................................................................. 7
2.3 HONG KONG OFCA ...................................................................................................................................... 7
2.4 AUSTRALIA AS ............................................................................................................................................. 7
2.5 NEW ZEALAND NZ ....................................................................................................................................... 7
3 INTRODUCTION ............................................................................................................................................ 8
3.1 CS108 RFID SLED HANDHELD READER ............................................................................................................ 8
3.2 PRODUCT PACKAGING ................................................................................................................................. 11
3.2.1 Package Contents ............................................................................................................................. 11
3.3 PRODUCT SPECIFICATIONS ............................................................................................................................ 12
3.4 PRODUCT ACCESSORIES ............................................................................................................................... 14
4 GETTING STARTED ...................................................................................................................................... 15
4.1 INTRODUCTION .......................................................................................................................................... 15
4.2 UNPACKING .............................................................................................................................................. 15
4.3 FEATURES ................................................................................................................................................. 16
4.4 SETTING UP CS108 .................................................................................................................................... 21
4.5 INSTALLING THE BATTERY .............................................................................................................................. 22
4.6 REMOVING THE BATTERY .............................................................................................................................. 24
4.7 POWER UP THE READER .............................................................................................................................. 24
4.8 BLUETOOTH PAIRING WITH MOBILE DEVICES ................................................................................................... 25
4.9 CHARGING THE CS108................................................................................................................................ 25
4.9.1 DIRECT CHARGING CS108 ........................................................................................................................... 25
4.9.2 CHARGING CS108B BATTERY USING AN EXTERNAL CHARGER CS108C .................................................................. 26
4.10 DOWNLOADING APPLICATION SOFTWARE ....................................................................................................... 27
4.11 DOWNLOADING APPLICATION SOFTWARE SOURCE CODES .................................................................................. 31
4.12 TRIGGER BUTTON VS TOUCH SCREEN USAGE ................................................................................................... 32
5 INTRODUCTION .......................................................................................................................................... 33
5.1 SOFTWARE APPLICATIONS ............................................................................................................................ 33
5.1.1 DEMO JAVA SOFTWARE FOR ANDROID.................................................................................................. 34
5.1.1.1 INSTALLING THE DEMO ANDROID JAVA SOFTWARE ....................................................................................... 34
Copyright 2017 © Convergence Systems Limited, All Rights Reserved
Page 3

CSL CS101-2 EPC CLASS 1 GEN 2 RFID HANDHELD READER
USER'S MANUAL, VERSION 9
3
5.1.1.1.1 INSTALLING FROM GOOGLE PLAY .............................................................................................................. 34
5.1.1.1.2 DOWNLOAD APK FROM CSL WEBSITE ....................................................................................................... 35
5.1.1.2 STARTING THE ANDROID JAVA DEMO SOFTWARE ......................................................................................... 38
5.1.1.3 SEARCHING AND CONNECTING TO (PAIRING WITH) THE CS108 .................................................................... 40
5.1.1.4 SETTINGS ............................................................................................................................................. 43
5.1.1.5 RFID INVENTORY .................................................................................................................................. 46
5.1.1.6 BARCODE INVENTORY ............................................................................................................................. 49
5.1.1.7 RFID READ AND WRITE MEMORY BANKS ................................................................................................... 52
5.1.1.8 GEIGER SEARCH .................................................................................................................................... 57
5.1.1.9 FILTER: PRE FILTER ................................................................................................................................. 62
5.1.1.10 FILTER: POST FILTER ............................................................................................................................... 66
5.1.1.11 SECURITY ............................................................................................................................................. 70
5.1.1.12 REGISTER TAG ....................................................................................................................................... 76
5.1.1.13 SPECIAL FUNCTIONS ............................................................................................................................... 77
5.1.1.14 EXITING THE SOFTWARE .......................................................................................................................... 82
5.1.1.15 TRULY EXITING THE SOFTWARE ................................................................................................................. 83
5.1.1.16 SOURCE CODES ..................................................................................................................................... 84
5.1.2 DEMO C# SOFTWARE FOR IPHONE AND ANDROID .................................................................................... 85
5.1.2.1 INSTALLING THE IPHONE AND ANDROID SOFTWARE ...................................................................................... 85
5.1.2.1.1 INSTALLING IPHONE APP FROM APP STORE ................................................................................................. 86
5.1.2.1.2 INSTALLING ANDROID APP FROM GOOGLE PLAY .......................................................................................... 87
5.1.2.2 STARTING THE IPHONE SOFTWARE ............................................................................................................ 88
5.1.2.3 MAIN MENU ........................................................................................................................................ 90
5.1.2.4 SEARCHING AND CONNECTING TO CS108 (PAIRING) .................................................................................... 91
5.1.2.5 SETTINGS ............................................................................................................................................. 94
5.1.2.6 RFID INVENTORY .................................................................................................................................. 98
5.1.2.7 BARCODE INVENTORY ...........................................................................................................................100
5.1.2.8 RFID READ AND WRITE MEMORY BANKS .................................................................................................102
5.1.2.9 GEIGER SEARCH ..................................................................................................................................106
5.1.2.10 RFID FILTER: PRE FILTER .......................................................................................................................109
5.1.2.11 RFID FILTER: POST FILTER .....................................................................................................................110
5.1.2.12 SECURITY ...........................................................................................................................................111
5.1.2.13 REGISTER TAGS ...................................................................................................................................115
5.1.2.14 SPECIAL FUNCTIONS .............................................................................................................................116
5.1.2.15 MULTI BANK INVENTORY.......................................................................................................................117
5.1.2.16 PHASE AND CHANNEL INVENTORY ...........................................................................................................120
5.1.2.17 PERIODIC READ ...................................................................................................................................122
5.1.2.18 EXITING THE SOFTWARE ........................................................................................................................124
5.1.2.19 TRULY EXITING THE SOFTWARE ...............................................................................................................125
Copyright 2017 © Convergence Systems Limited, All Rights Reserved
Page 4

CSL CS101-2 EPC CLASS 1 GEN 2 RFID HANDHELD READER
USER'S MANUAL, VERSION 9
4
5.1.2.20 SOURCE CODES ...................................................................................................................................126
5.2 SOFTWARE ON A PC – CONNECTING VIA USB ................................................................................................127
APPENDIX A. FEDERAL COMMUNICATIONS COMMISSION COMPLIANCE ......................................................128
APPENDIX B: READER MODES (LINK PROFILES) ......................................................................................................129
APPENDIX C: SESSIONS ...........................................................................................................................................130
APPENDIX D: TAG POPULATION AND Q ..................................................................................................................131
APPENDIX E: QUERY ALGORITHM ..........................................................................................................................132
APPENDIX F: TARGET ..............................................................................................................................................133
APPENDIX G: SECURITY ..........................................................................................................................................134
APPENDIX H: MODELS & REGULATORY REGION.....................................................................................................136
APPENDIX I: TECHNICAL SUPPORT .........................................................................................................................137
Copyright 2017 © Convergence Systems Limited, All Rights Reserved
Page 5

CSL CS101-2 EPC CLASS 1 GEN 2 RFID HANDHELD READER
USER'S MANUAL, VERSION 9
5
2 Regulatory Regions
CS108 is offered as various models, using the format of CS108-N where N is of various values,
each covering one or more different regulatory regions.
For example, CS108-2 covers the regulatory region of FCC, which includes USA, Canada,
Mexico and other Latin America Countries that use the FCC frequency range.
The following is a model table with N as index, for CS108-N, and the corresponding frequency
band and regulatory regions:
N=1: 865-868 MHz for Europe ETSI, Russia, Mid-East countries,
865-867 MHz for India
N=2: 902-928 MHz, FCC, for USA, Canada and Mexico. Hopping frequencies locked
N=2 AS: 920-926 MHz, Australia. Hopping frequencies locked
N=2 NZ: 921.5-928 MHz, New Zealand. Hopping frequencies locked
N=2 OFCA: 920-925 MHz, Hong Kong. Hopping frequencies locked
N=2 RW: 920-928 MHz, Rest of the World, e.g. Philippines, Brazil, Peru, Uruguay, and
any other countries that use sub or partial sections of the FCC frequency range
N=4: 922-928 MHz, Taiwan
N=7: 920-925 MHz, China
N=8: 916.7-920.9 MHz, Japan
N=9: 915-921 MHz, Europe Upper Band
Some regulatory regions require the CS108 User Manual to contain some statement. Here are
those statements.
2.1 FCC Statement and IC Statement
FCC STATEMENT
1. This device complies with Part 15 of the FCC Rules. Operation is subject to the following two
conditions:
Copyright 2017 © Convergence Systems Limited, All Rights Reserved
Page 6

CSL CS101-2 EPC CLASS 1 GEN 2 RFID HANDHELD READER
USER'S MANUAL, VERSION 9
6
(1) This device may not cause harmful interference.
(2) This device must accept any interference received, including interference that may cause
undesired operation.
2. Changes or modifications not expressly approved by the party responsible for compliance could
void the user's authority to operate the equipment.
NOTE: This equipment has been tested and found to comply with the limits for a Class B digital device,
pursuant to part 15 of the FCC Rules. These limits are designed to provide reasonable protection
against harmful interference in a residential installation.
This equipment generates uses and can radiate radio frequency energy and, if not installed and used in
accordance with the instructions, may cause harmful interference to radio communications. However,
there is no guarantee that interference will not occur in a particular installation. If this equipment does
cause harmful interference to radio or television reception, which can be determined by turning the
equipment off and on, the user is encouraged to try to correct the interference by one or more of the
following measures:
- Reorient or relocate the receiving antenna.
- Increase the separation between the equipment and receiver.
-Connect the equipment into an outlet on a circuit different from that to which the receiver is connected.
-Consult the dealer or an experienced radio/TV technician for help
IC STATEMENT
IC Notice to Canadian Users
This device complies with industry Canada license-exempt RSS standard(s). Operation is subject to the
following two conditions:
(1) This device may not cause harmful interference
(2) This device must accept any interference received, including interference that may cause undesired
operation of the device.
This device complies with RSS-247 of industry Canada. Operation is subject to the condition that this
Copyright 2017 © Convergence Systems Limited, All Rights Reserved
Page 7

CSL CS101-2 EPC CLASS 1 GEN 2 RFID HANDHELD READER
USER'S MANUAL, VERSION 9
7
device does not cause harmful interference.
This Class B digital apparatus complies with Canadian ICES-003(Cet appareil numérique de classe B
est conforme à la norme NMB-003 du Canada).
This equipment complies with IC radiation exposure limits set forth for an uncontrolled environment. This
equipment should be installed and operated with minimum distance of 5mm between the radiator and
your body. This transmitter must not be co-located or operating in conjunction with any other antenna or
transmitter.
2.2 European CE
In Europe, 865-868 MHz band is allowed in all countries. The upper band of 915-921 MHz is
however only ratified in a subset of the EU countries.
2.3 Hong Kong OFCA
Hong Kong Government requires the frequency of operation to be limited to within the
frequency band allocated in Hong Kong: 920-925 MHz.
2.4 Australia AS
Australia Government requires the frequency of operation to be limited to within the frequency
band allocated in Hong Kong: 920-926 MHz.
2.5 New Zealand NZ
New Zealand Government requires the frequency of operation to be limited to within the
frequency band allocated in Hong Kong: 921.5-928 MHz.
Copyright 2017 © Convergence Systems Limited, All Rights Reserved
Page 8
CSL CS101-2 EPC CLASS 1 GEN 2 RFID HANDHELD READER
USER'S MANUAL, VERSION 9
8
3 Introduction
3.1 CS108 RFID Sled Handheld Reader
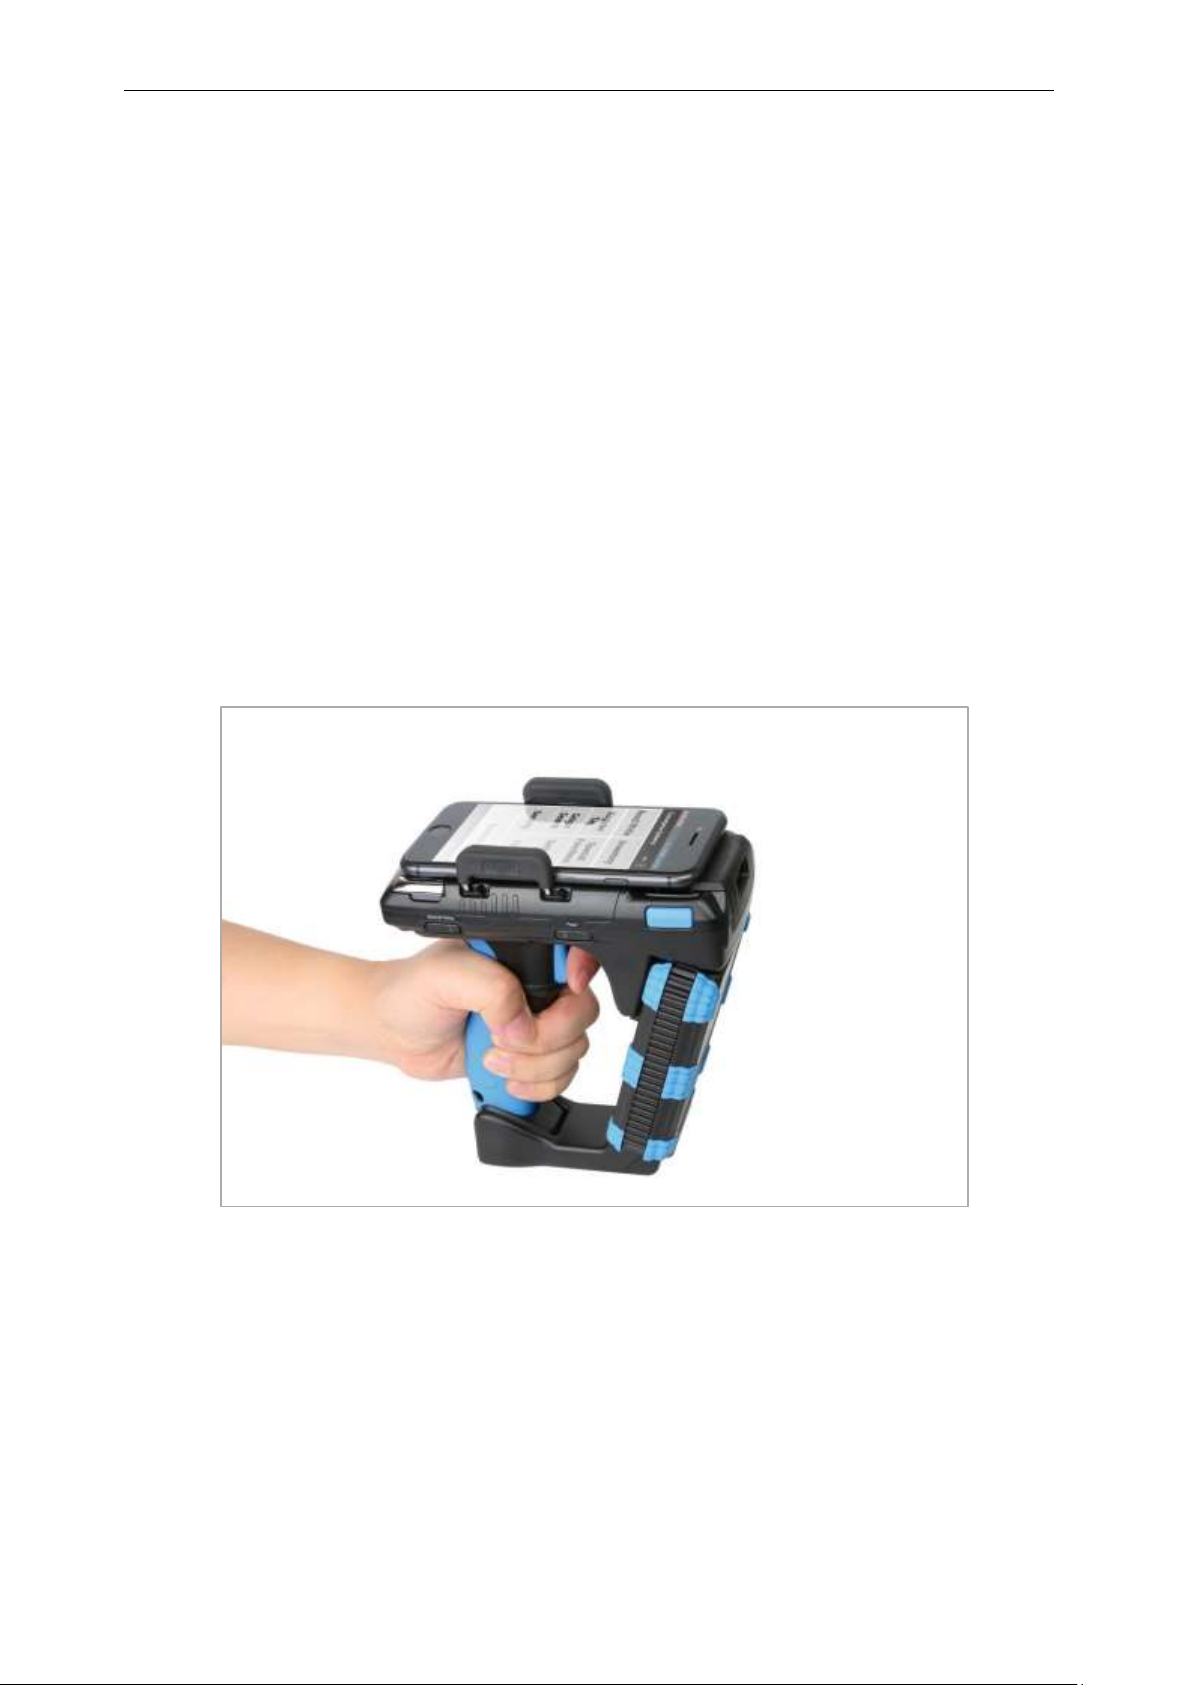
The CS108 RFID sled handheld reader is designed to work with an off-the-shelf smart phone
(such as an iPhone or Android phone) or laptop/tablet via a Bluetooth Low Energy (Bluetooth
4.0/4.1/4.2) connection, where the application on the smart phone/laptop/tablet would control
the CS108 reader to perform RFID tag reading or barcode scanning. The tag data is collected in
the smart phone or laptop/tablet and can then be manipulated or transferred to other locations
on the Internet Cloud for further processing.
Below photo shows the smart phone and CS108 working together during operation:
Note: The Smart phone App directly searches and pairs with CS108. There is no need to first
pair with the CS108 via the normal Bluetooth Device connection page of the OS. Therefore,
install the App on your smart device first and then search and connect the CS108 from inside
the App.
Copyright 2017 © Convergence Systems Limited, All Rights Reserved
Page 9
CSL CS101-2 EPC CLASS 1 GEN 2 RFID HANDHELD READER
USER'S MANUAL, VERSION 9
9
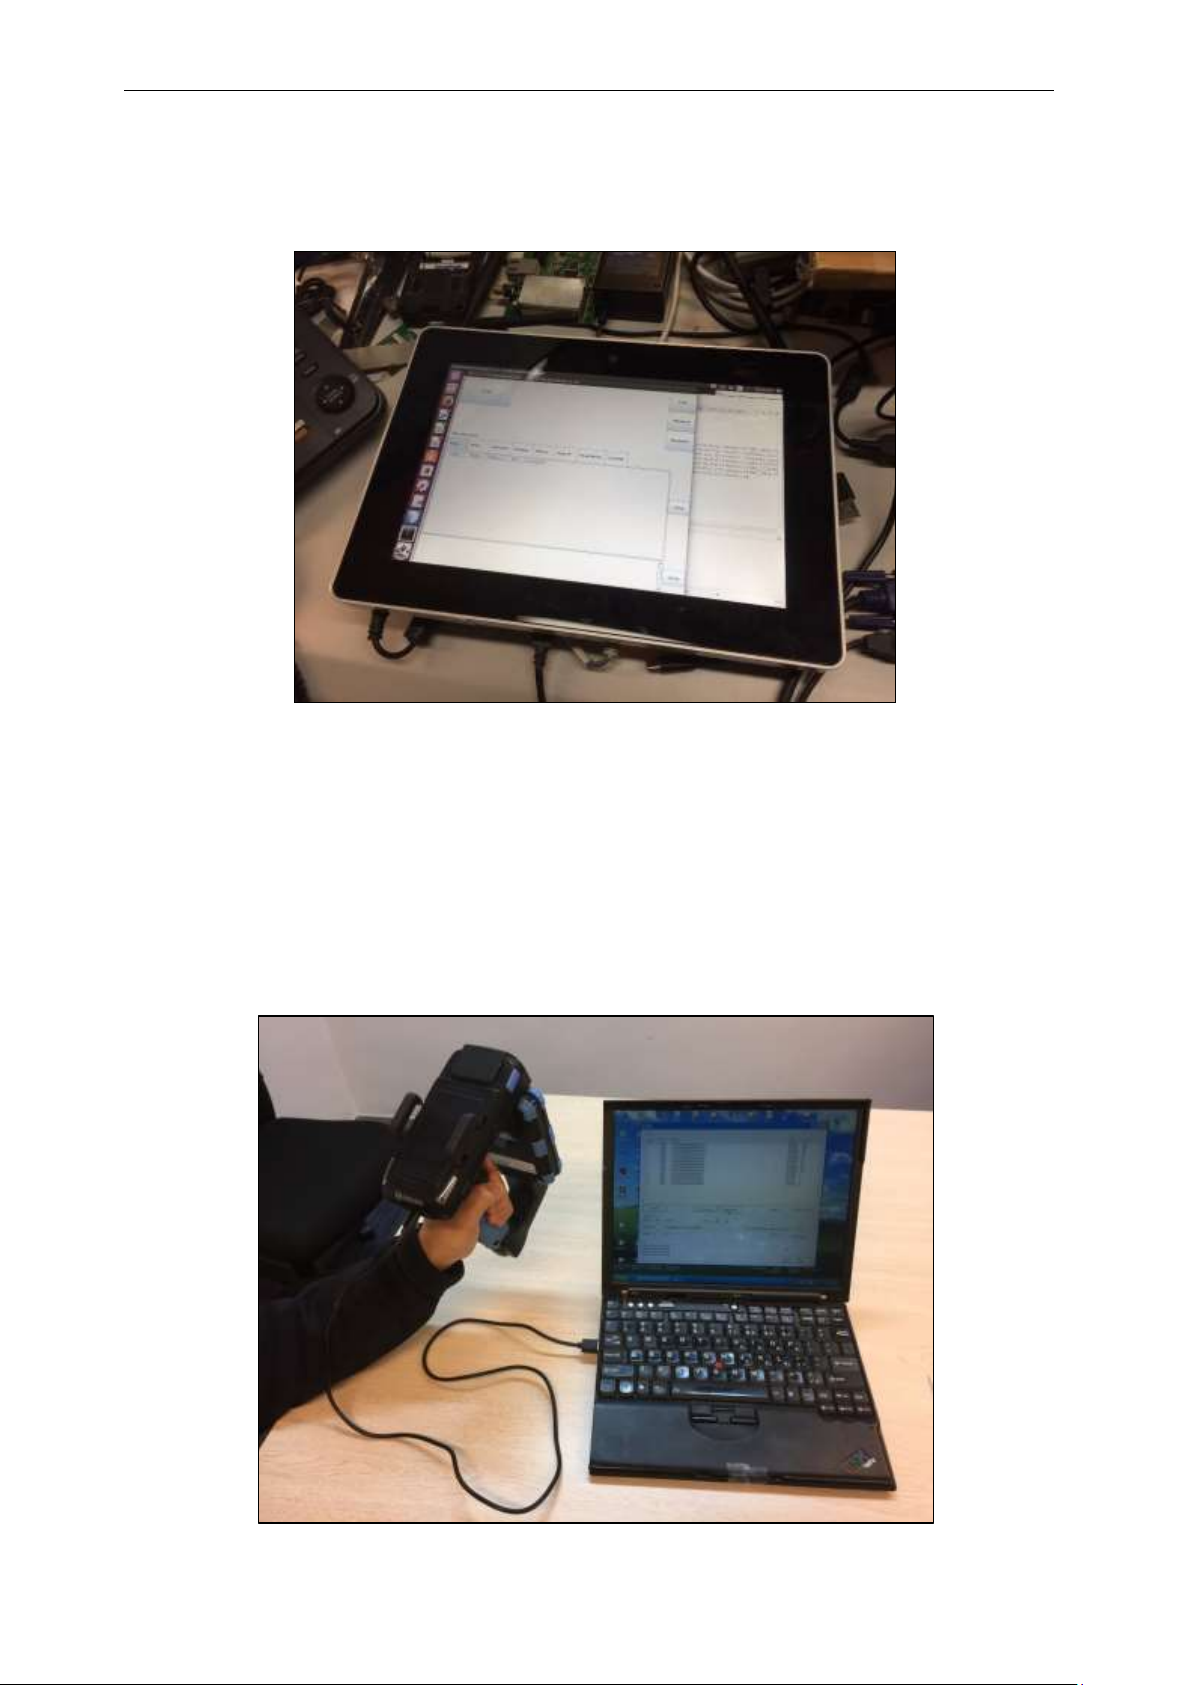
The CS108 can be controlled via Bluetooth 4.0/4.1/4.2 from a laptop or tablet. Below is an
example where it is accessed from a tablet running Linux Operating System:
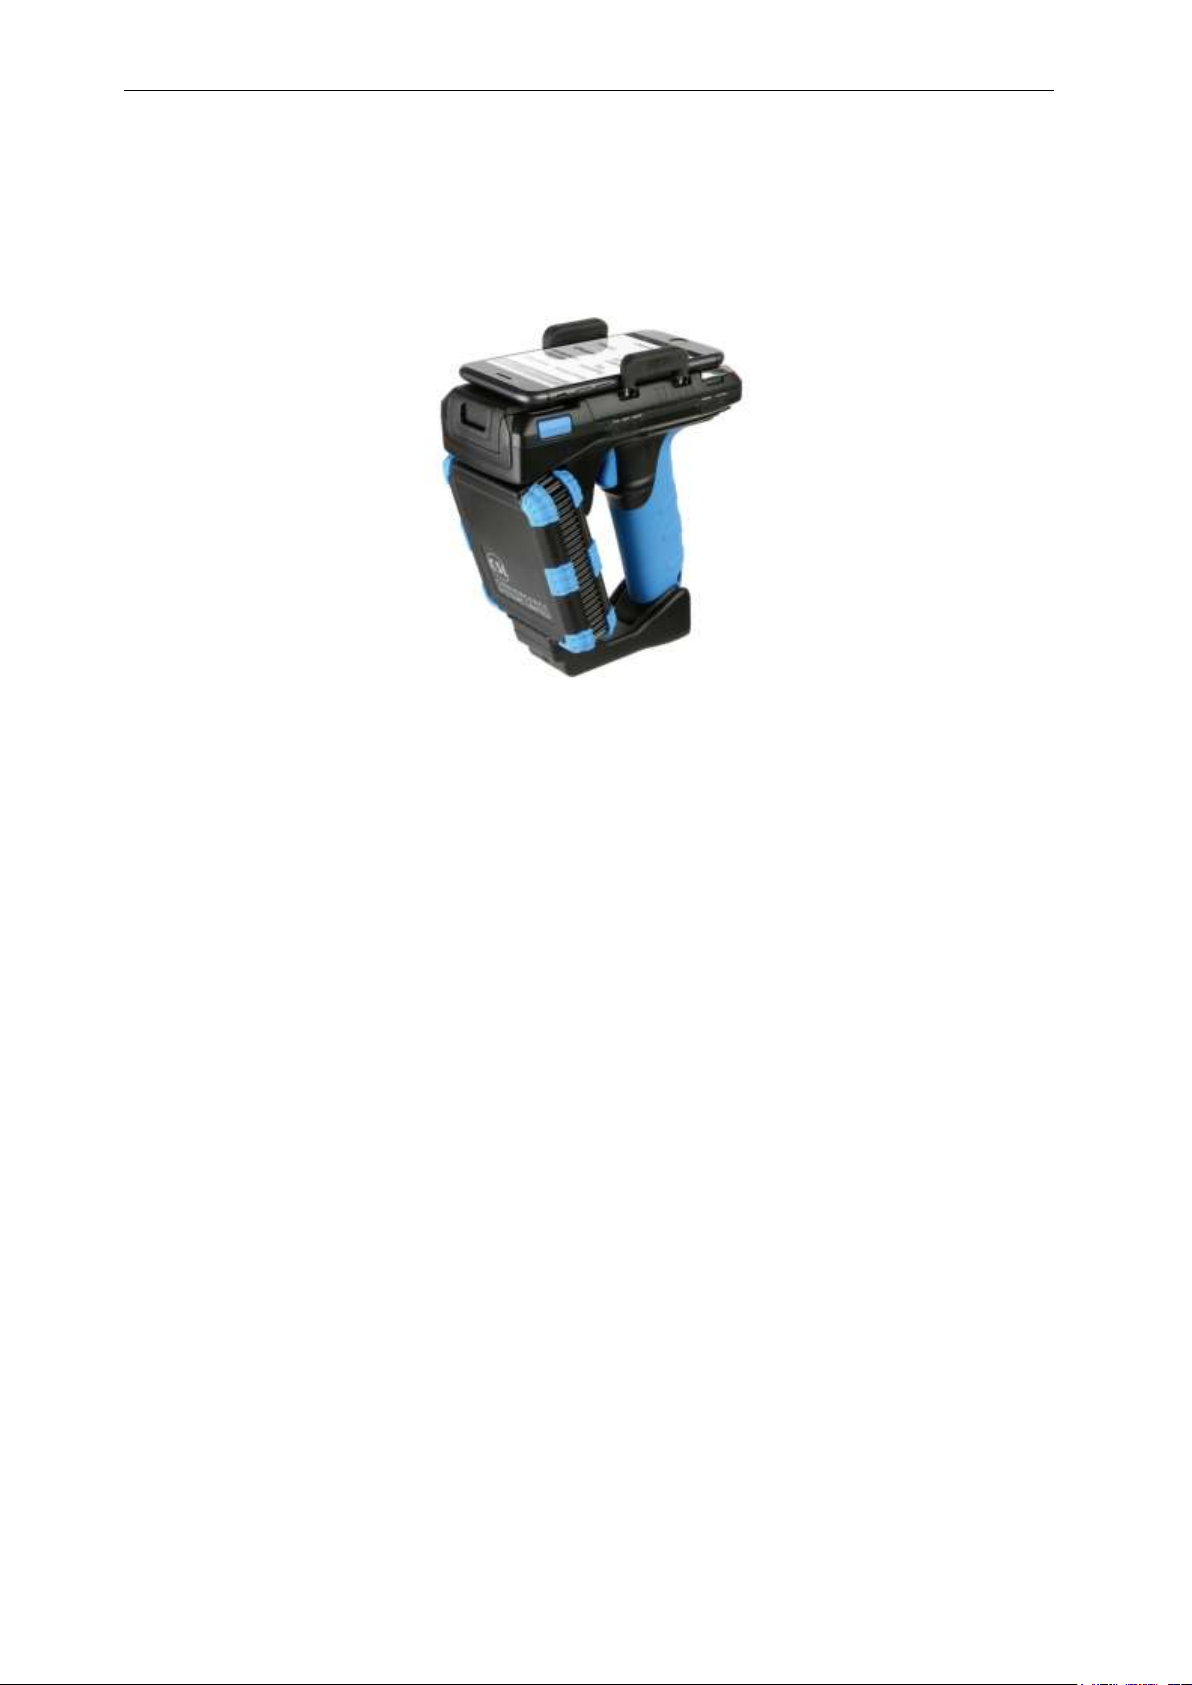
The CS108 can also be controlled via its USB connection by a PC (tethered). In this case, the
Bluetooth connection is not used. The control commands enter via the USB cable. The
application is on the PC.
Photo below shows the CS108 handheld reader connected via USB cable to (and controlled by)
a PC.
Copyright 2017 © Convergence Systems Limited, All Rights Reserved
Page 10

CSL CS101-2 EPC CLASS 1 GEN 2 RFID HANDHELD READER
USER'S MANUAL, VERSION 9
10
Host Platform
Interface Physical Media
Protocol of Host Platform
Apple iPhone
Air
Bluetooth 4.0 or 4.1 or 4.2
Apple iPad
Air
Bluetooth 4.0 or 4.1 or 4.2
Apple iPod Touch
Air
Bluetooth 4.0 or 4.1
Android Phone
Air
Bluetooth 4.0 or 4.1 or 4.2
Android Tablet
Air
Bluetooth 4.0 or 4.1 or 4.2
Windows 10* Laptop with BLE
Air
Bluetooth 4.0 or 4.1 or 4.2
Windows 10* Tablet with BLE
Air
Bluetooth 4.0 or 4.1 or 4.2
Windows 10* Mobile Phone
Air
Bluetooth 4.0 or 4.1 or 4.2
Linux PC or Laptop or Tablet
Air
Bluetooth 4.0 or 4.1 or 4.2
Windows PC or Laptop
USB cable
USB
Linux PC or Laptop
USB cable
USB
Android Phone with OTG
OTG USB cable
USB
Android Tablet with OTG
OTG USB cable
USB
In summary, the following, are the various host platforms and connections combinations.
(BLE is Bluetooth Low Energy, including Bluetooth 4.0, 4.1, 4.2)
*Note that for Microsoft Windows OS platforms, to connect, using Bluetooth Low Energy
(BLE), it needs to be Windows 10 (or later) because the BLE native driver is only available
beginning with Windows 10.
Copyright 2017 © Convergence Systems Limited, All Rights Reserved
Page 11

CSL CS101-2 EPC CLASS 1 GEN 2 RFID HANDHELD READER
USER'S MANUAL, VERSION 9
11
3.2 Product Packaging
3.2.1 Package Contents
The reader package contains 5 items:
1) CS108: Sled Handheld RFID Reader
2) CS108USBCtoACable: USB cable, USB Type C to Type A, 1 pc
3) CS108B: Battery, 3400 mAh, 1 pc
4) CS108QSG: Quick Start Guide
5) CS108RG Regulatory Guide
Copyright 2017 © Convergence Systems Limited, All Rights Reserved
Page 12
CSL CS101-2 EPC CLASS 1 GEN 2 RFID HANDHELD READER
USER'S MANUAL, VERSION 9
12
3.3 Product Specifications
Figure 3-1 CS108 Reader
Features:
ISO 18000-6C – EPC Global Class 1 Gen 2 UHF RFID protocol compliant including
dense reader mode
Ultra-long read range – Best in Class up to 18 meters for Monza R6 Dogbone tag (read
range dependent on tag model, tag IC, reader antenna and environmental conditions)
Robust performance in dense-reading environments
Multiple reader modes (link profiles) with different reader to tag data rate and
tag-to-reader backscatter rate, modulation format, and backscatter type for different
business scenario and physical environment.
Highly Configurable for maximum throughput and optimal performance
Supports all Gen 2 commands, including Write, Lock and Kill
Copyright 2017 © Convergence Systems Limited, All Rights Reserved
Page 13

CSL CS101-2 EPC CLASS 1 GEN 2 RFID HANDHELD READER
USER'S MANUAL, VERSION 9
13
Physical Characteristics:
Length: 16.1 cm (6.3”); Width: 9.0 cm (3.5”);
Height: 16.1 cm (6.3”); Weight: 650 grams (22.9oz)
Weight includes battery
Environment:
Operating Temp: -200C to 500C (-40F to + 1220F)
Storage Temp: -400C to 850C (-400F to + 1850F)
Humidity: 5% to 95% non-condensing
Enclosure: IP-54
Antenna:
2.7 dBi Gain internal patch antenna
RF Power:
Internal conducted power
0 - 30 dBm in 0.1 dB increments.
EIRP Power:
32.7 dBm
RFID Frequency Ranges:
902-928 MHz band and subset
865-868 MHz band and subset
Interfaces
Bluetooth 4.0 (BLE)
USB
Accessories:
USB cable
Restrictions on Use:
Approvals, features and parameters may vary
depending on country legislation and may change
without notice
Specifications:
Copyright 2017 © Convergence Systems Limited, All Rights Reserved
Page 14
CSL CS101-2 EPC CLASS 1 GEN 2 RFID HANDHELD READER
USER'S MANUAL, VERSION 9
14
3.4 Product Accessories
There are 3 accessories for the CS108 RFID sled handheld reader:
1) CS108 Spare Battery
Each CS108 comes with 1 battery in the product shipment box. Additional batteries are
available for purchase. P/N: CS108B
2) CS108 USB C to A Cable
Each CS108 comes with 1 cable in the product shipment box. Additional cbles are available
for purchase. P/N: CS108USBCtoACable.
3) CS108C Charger
A dual slot external battery charger is available for charging additional spare CS108
batteries. P/N: CS108C
Copyright 2017 © Convergence Systems Limited, All Rights Reserved
Page 15

CSL CS101-2 EPC CLASS 1 GEN 2 RFID HANDHELD READER
USER'S MANUAL, VERSION 9
15
4 Getting Started
4.1 Introduction
This chapter explains how to set up CS108 for the first time.
4.2 Unpacking
Open the box, removing all protective plastic bags and save the shipping container for later
storage or shipment.
Check that the following items are in the box:
1. CS108 RFID Sled Handheld Reader
2. CS108B 3400 mAh battery
3. USB Type C to Type A cable
4. Quick Start Guide
5. Regulatory Guide
Copyright 2017 © Convergence Systems Limited, All Rights Reserved
Page 16
CSL CS101-2 EPC CLASS 1 GEN 2 RFID HANDHELD READER
USER'S MANUAL, VERSION 9
16
Barcode Scanner
RFID Reader Antenna Inside
4.3 Features
The CSL CS108 RFID sled handheld Reader is an EPC Global Class 1 Gen 2 compliant
product.
Below is the front view of the CS108 reader. The 2D barcode module is located at the top.
The RFID reader module is in the front, with a forward facing embedded patch antenna..
Copyright 2017 © Convergence Systems Limited, All Rights Reserved
Figure 4-1 CS108 Reader Front View
Page 17
CSL CS101-2 EPC CLASS 1 GEN 2 RFID HANDHELD READER
USER'S MANUAL, VERSION 9
17
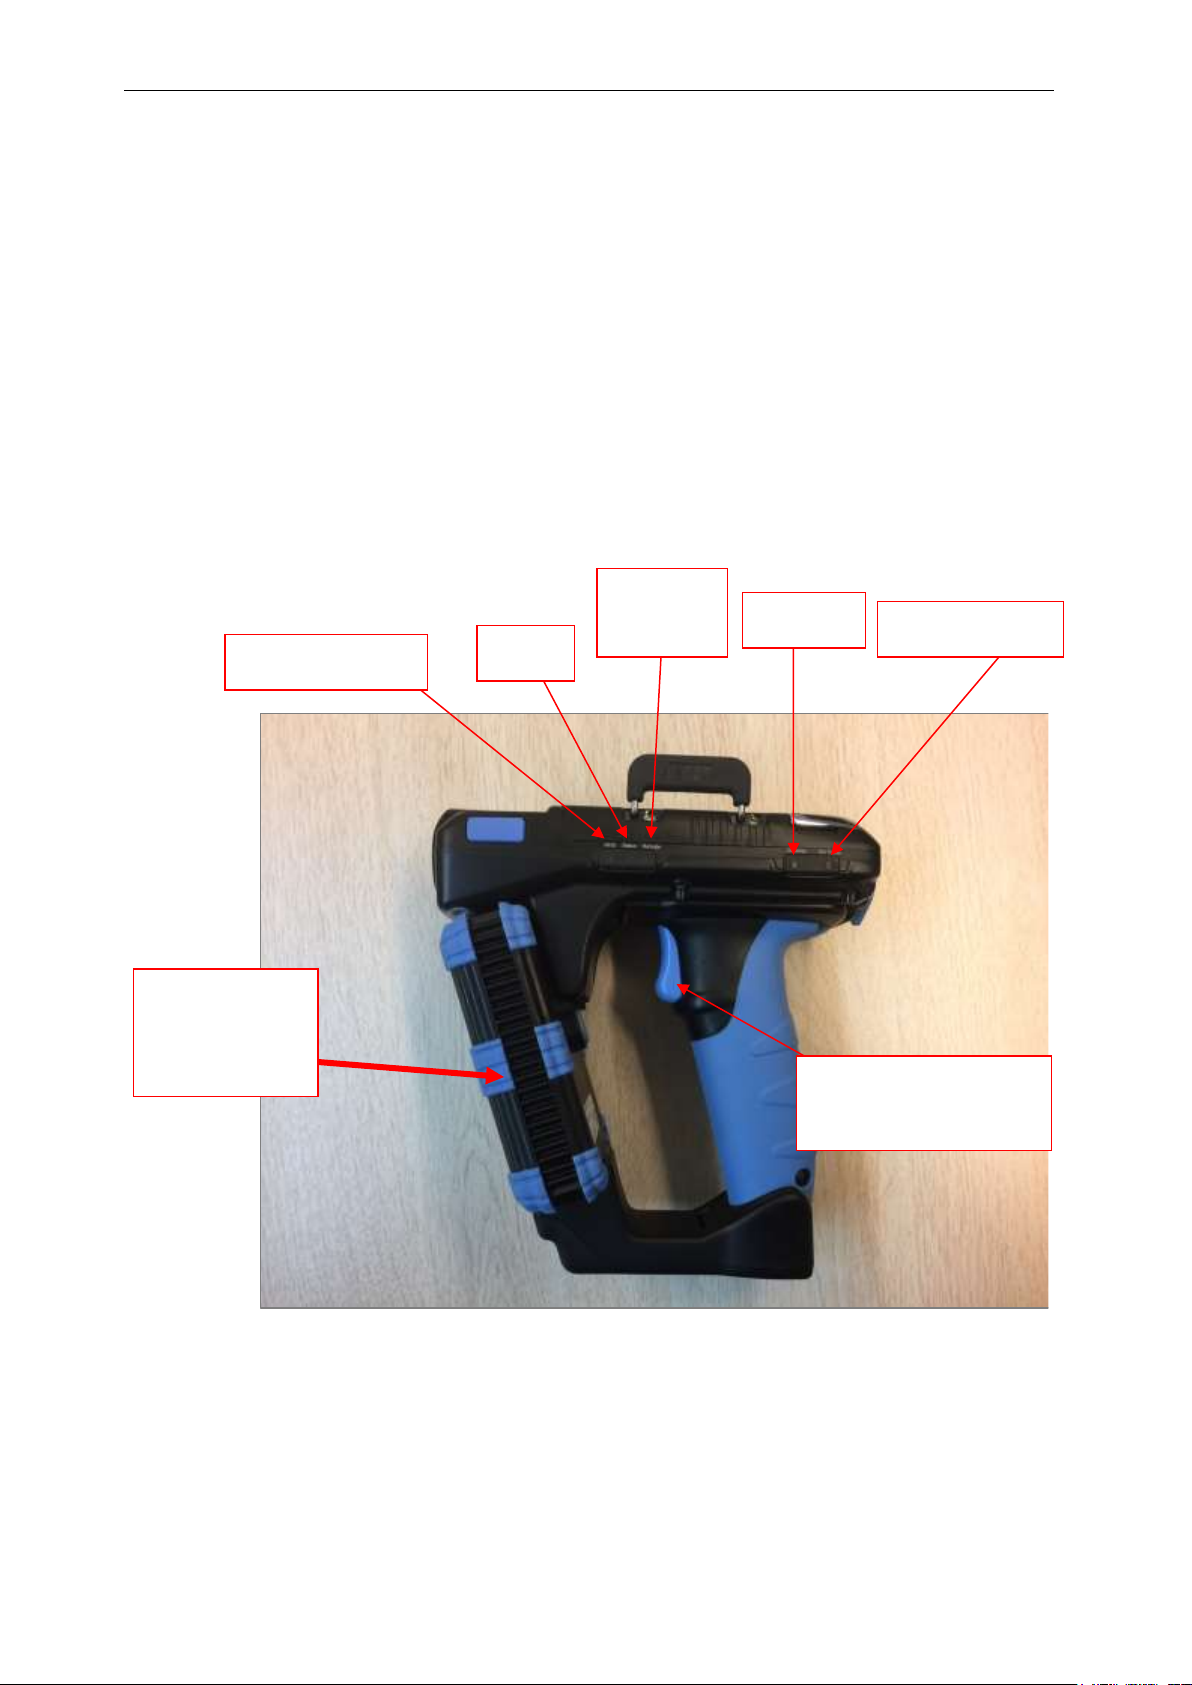
RFID Reader
and Antenna in
this box
RFID Power On
Status
Barcode
Power On
Charging
External Power
Trigger Button to Read
RFID tag or Barcode
Below is the left side view of the CS108 reader. There are 5 LEDs on this side, from left to
right, respectively:
1) RFID Power On
2) Status
3) Barcode Power On
4) Charging
5) External Power connected
On the sled handle, there is a trigger used by the operator to start and stop the reading of RFID
tags or barcodes.
Copyright 2017 © Convergence Systems Limited, All Rights Reserved
Figure 4-2 CS108 Reader Left Side View
Page 18
CSL CS101-2 EPC CLASS 1 GEN 2 RFID HANDHELD READER
USER'S MANUAL, VERSION 9
18
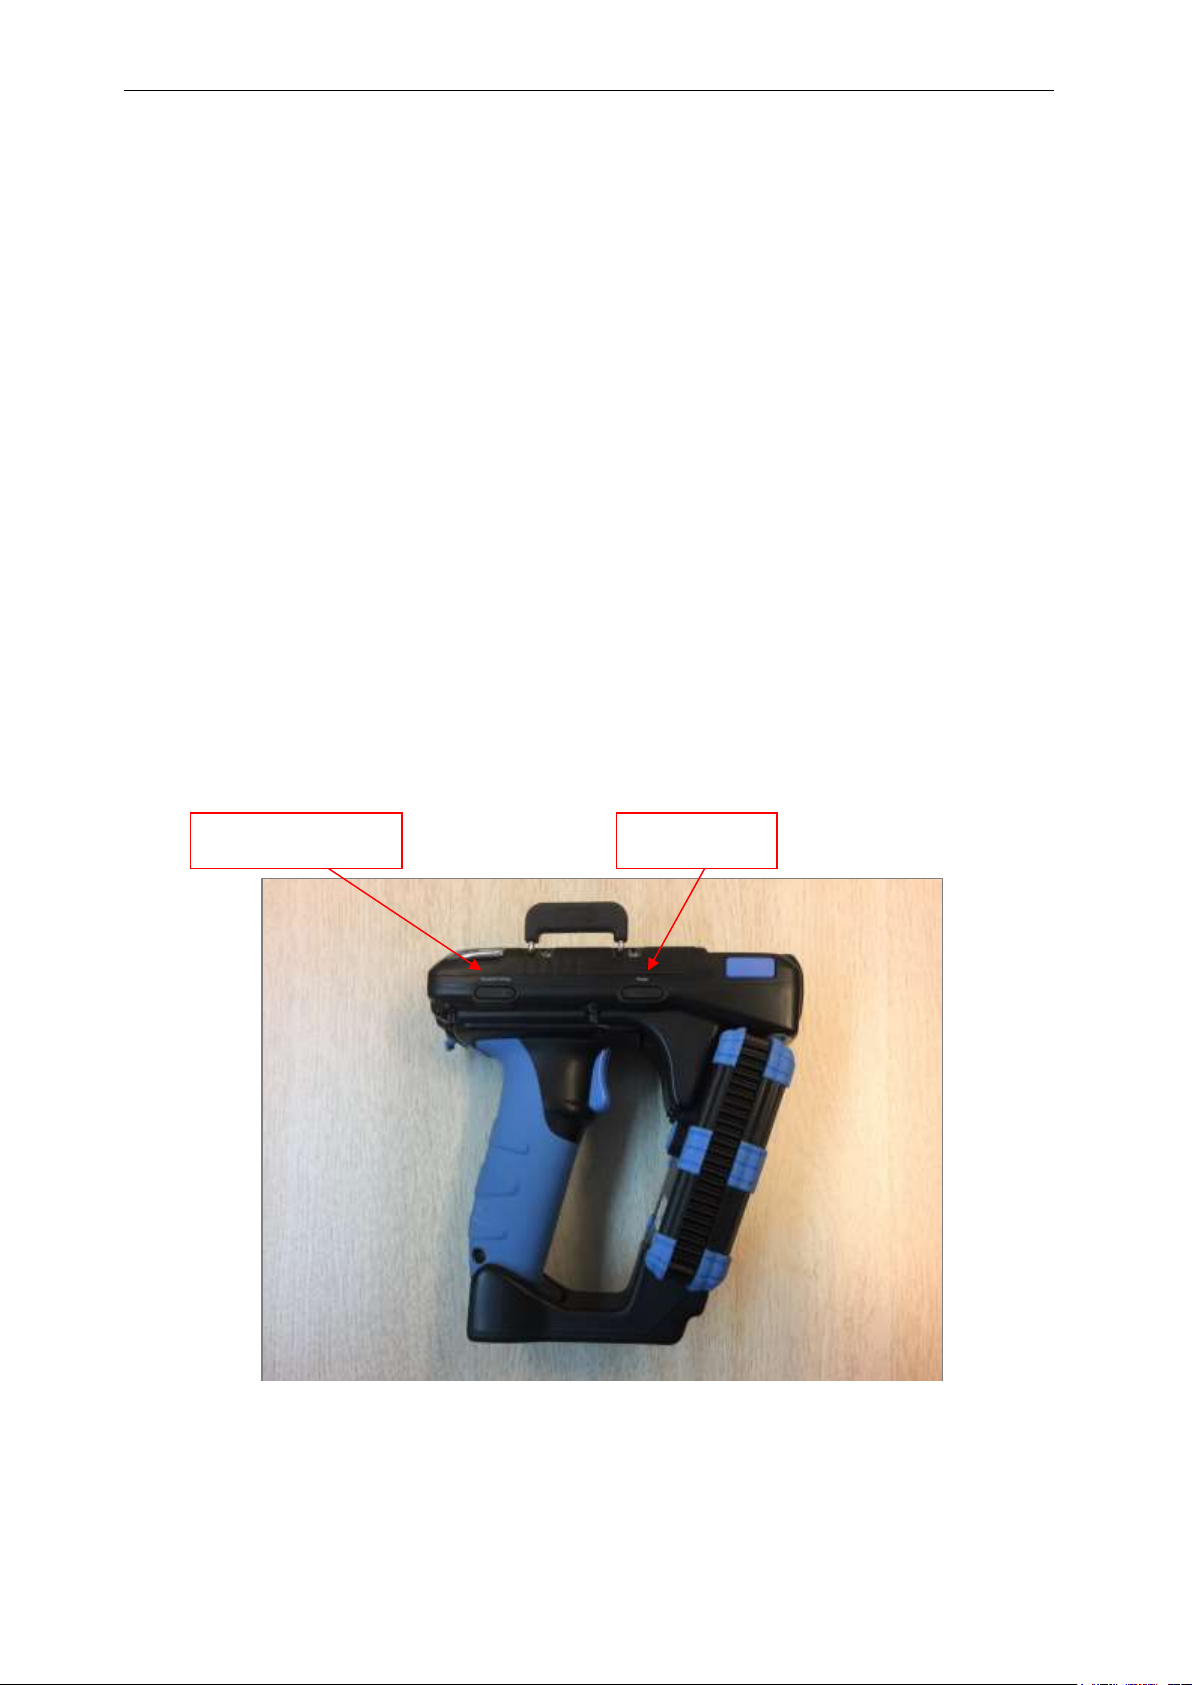
Bluetooth Pairing
Main Power
Below is a view of the right side of the CS108 reader. There are 2 combination button/LED
on this side.
The right button/LED is for the main power and the LED lights up GREEN meaning power is
on. Press the button continuously for 3 seconds, then release to power on (must release before
it powers on). To power off when the reader is on, press the button continuously for 3 seconds,
then release the button to power off.
The left button/LED is for the Bluetooth pairing, and the LED lights up BLUE meaning
Bluetooth is connected. When first powered up, the Bluetooth LED will automatically start
flashing indicating it is now discoverable by a smart device nearby. From the Application on
the smart device, one can then connect to the CS108. After connection, the LED will stop
blinking and remain lit.
At any time, to stop the Bluetooth connection, press the Bluetooth button continuously for 3
seconds until the LED turns off. To restart the Bluetooth and pair with a device, press the
button continuously until the Bluetooth LED starts flashing and reconnect via the application.
Figure 4-3 CS108 Reader Right Side View
Copyright 2017 © Convergence Systems Limited, All Rights Reserved
Page 19
CSL CS101-2 EPC CLASS 1 GEN 2 RFID HANDHELD READER
USER'S MANUAL, VERSION 9
19
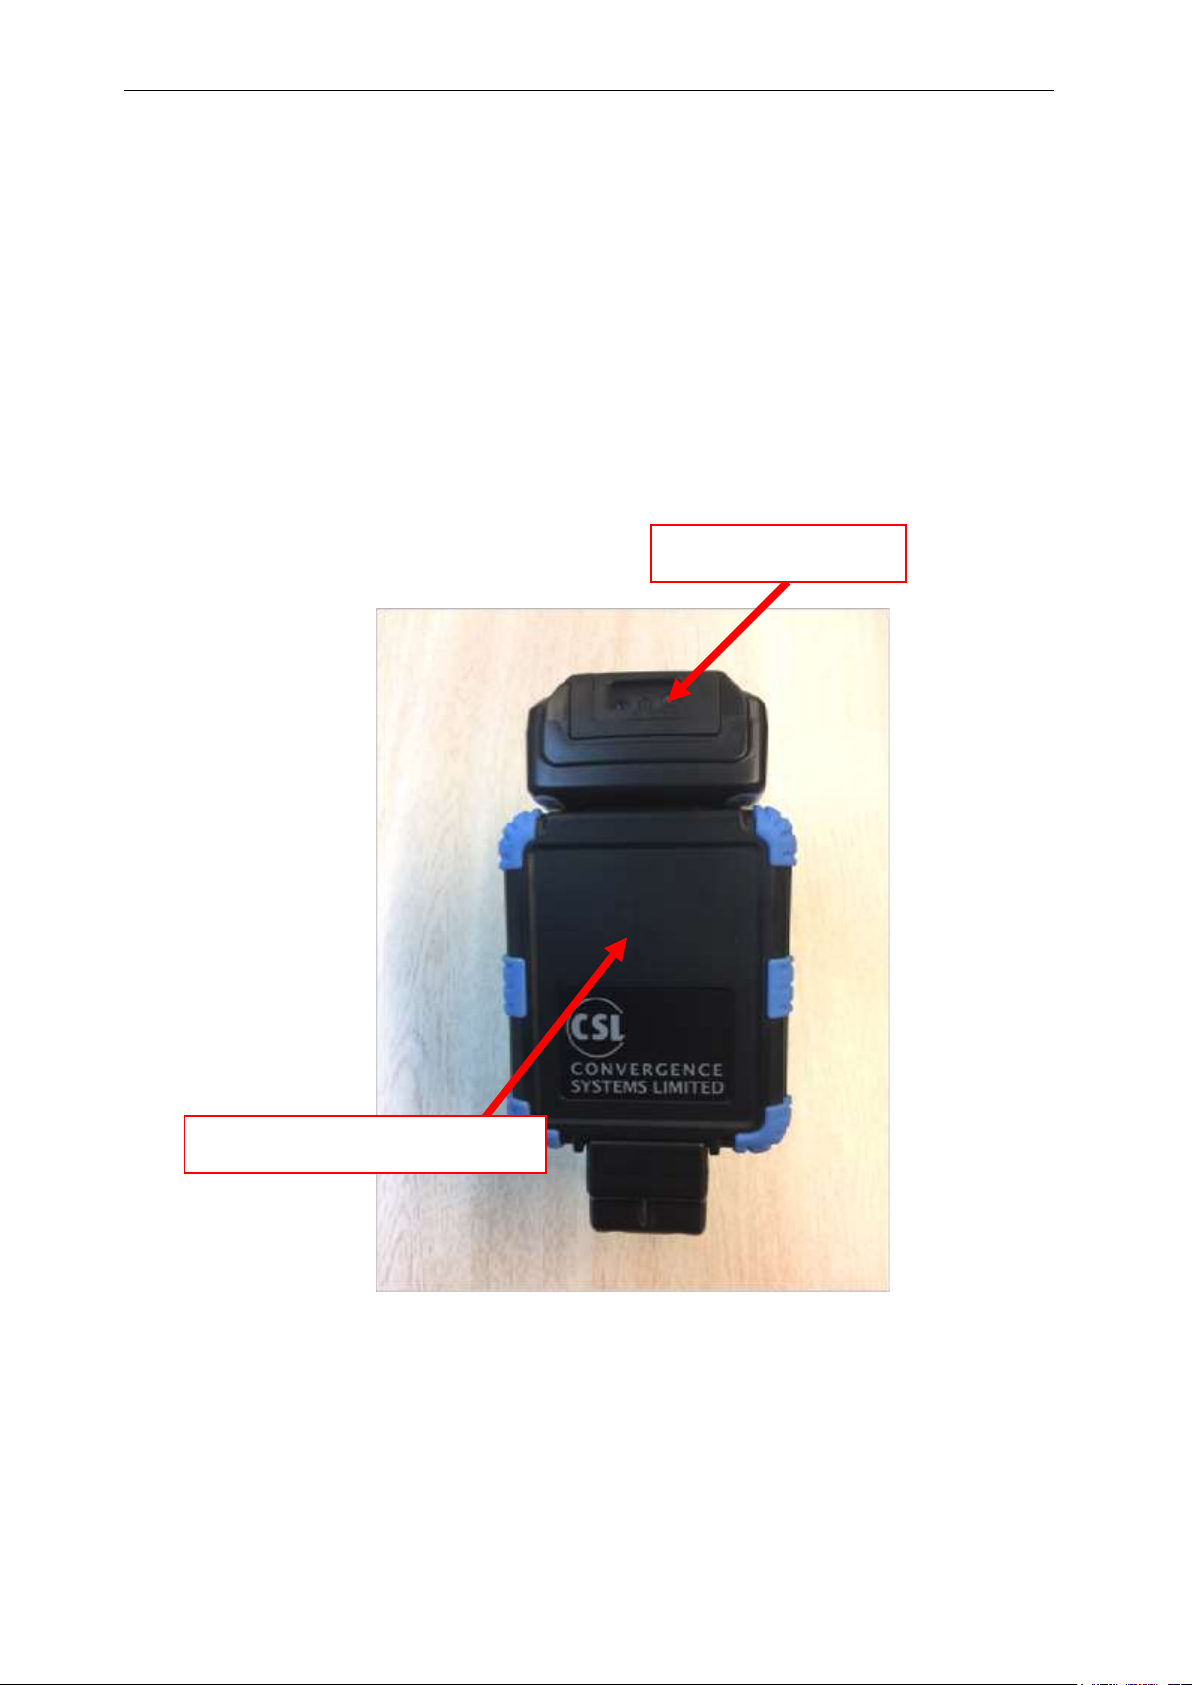
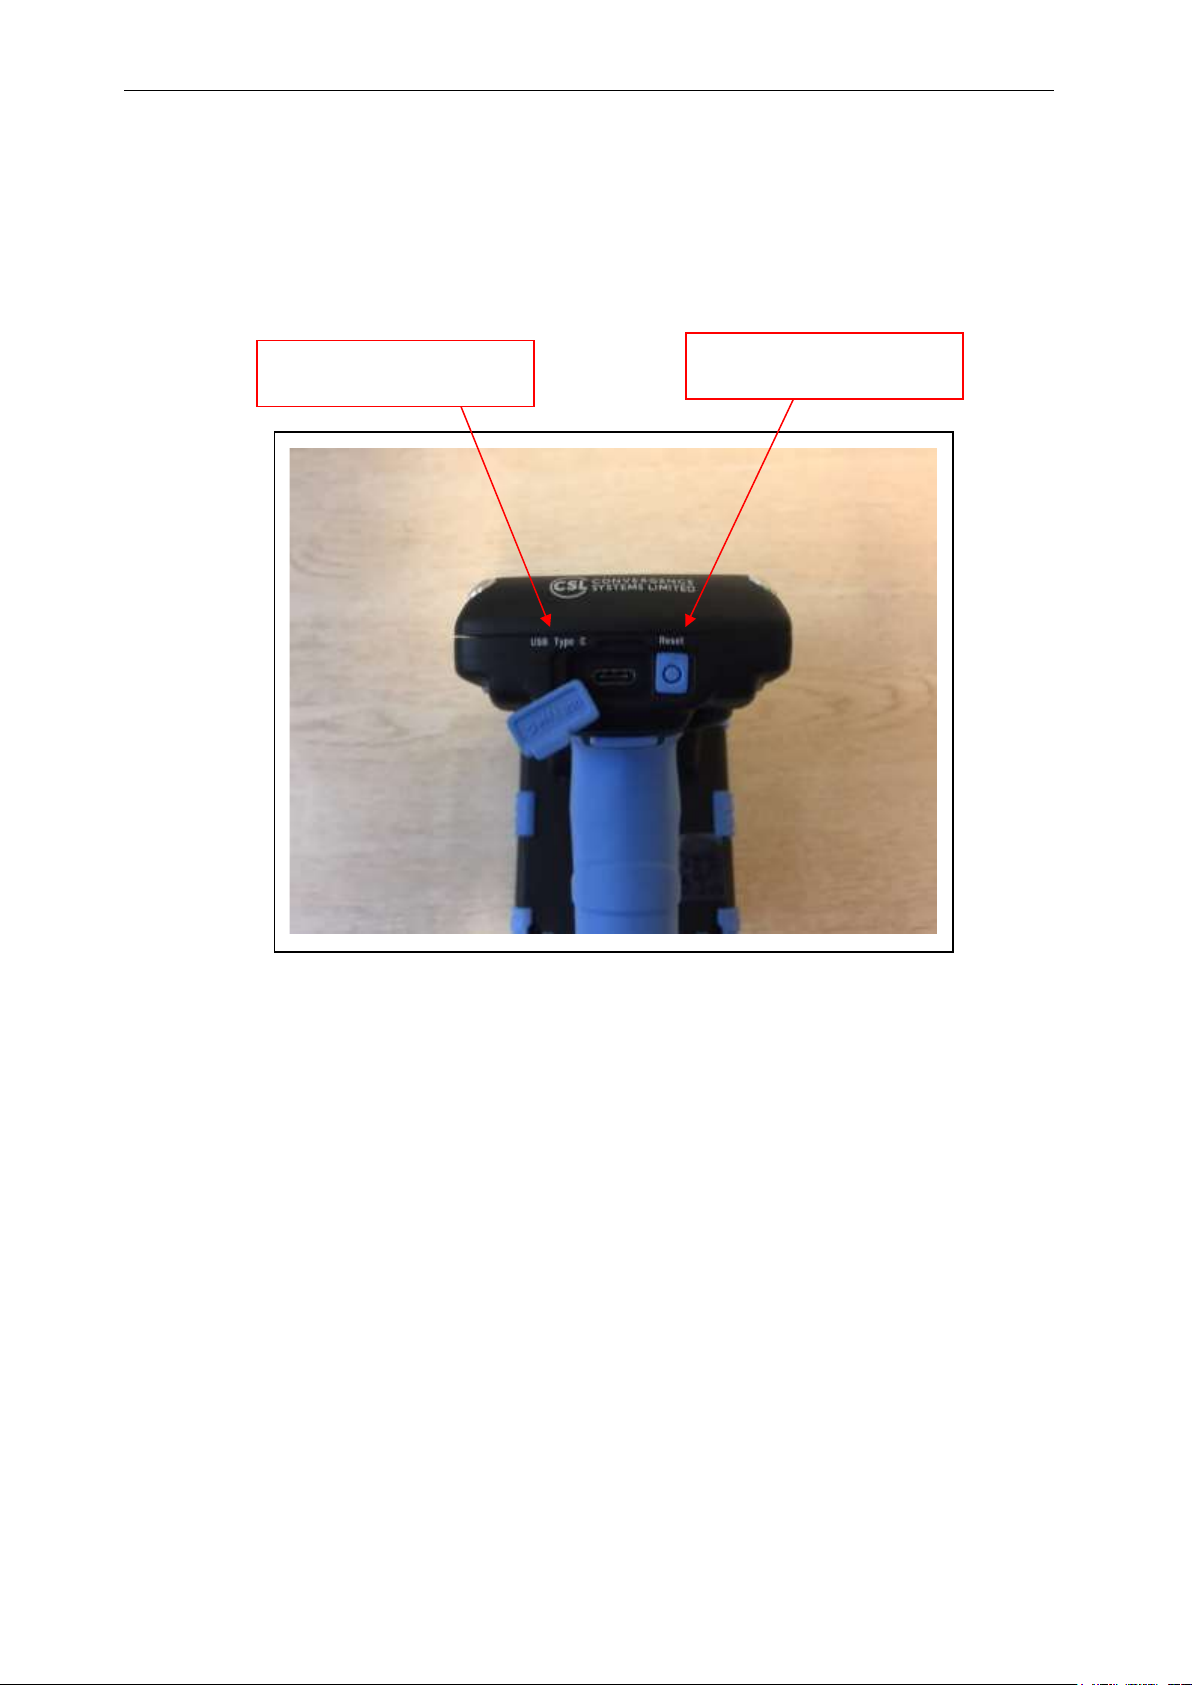
USB Type C Socket
Reset Button
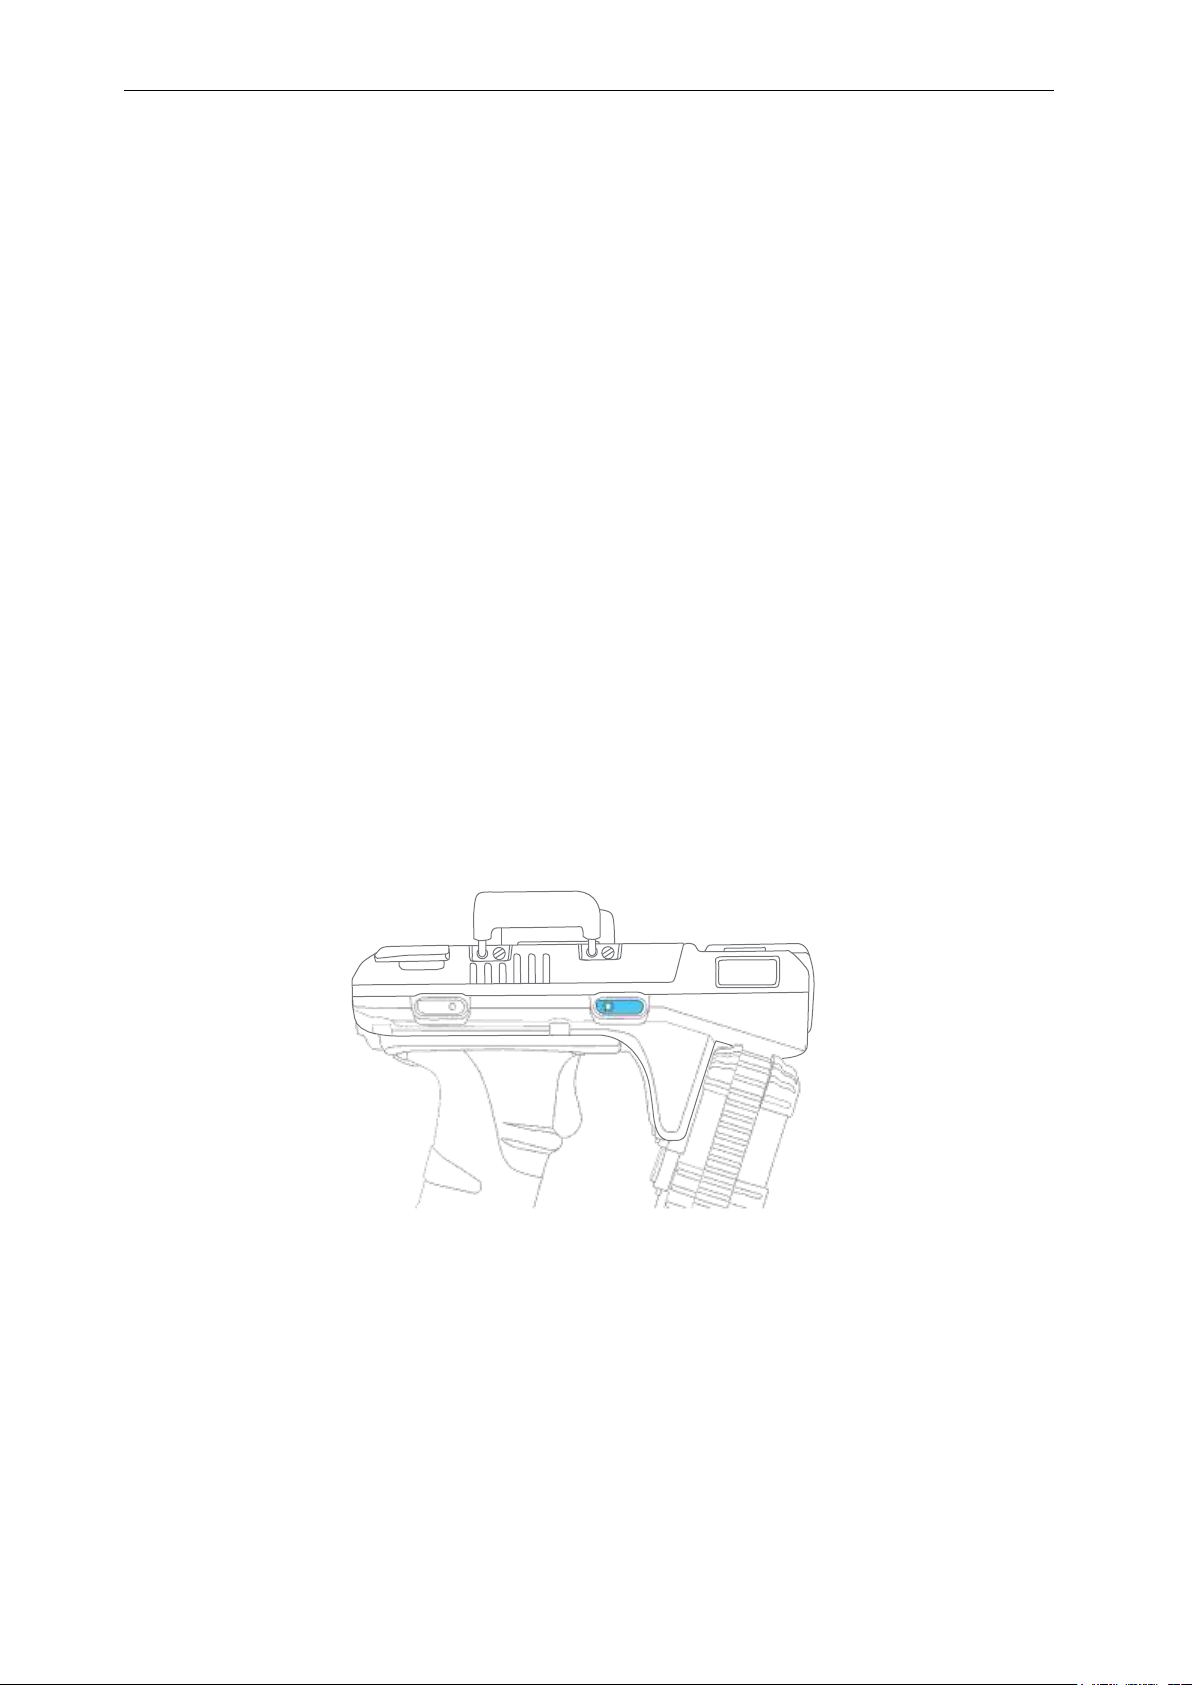
Below is the rear view of the CS108 reader. Here the USB Type C socket is on the left,
allowing the user to connect the CS108 to a PC for control, or to a USB power source to
recharge the battery inside the CS108. On the right side is the Reset button, at this time it has
not been activated to cause a factory reset on the unit.
Figure 4-4 CS108 Reader Rear Side View
Copyright 2017 © Convergence Systems Limited, All Rights Reserved
Page 20
CSL CS101-2 EPC CLASS 1 GEN 2 RFID HANDHELD READER
USER'S MANUAL, VERSION 9
20
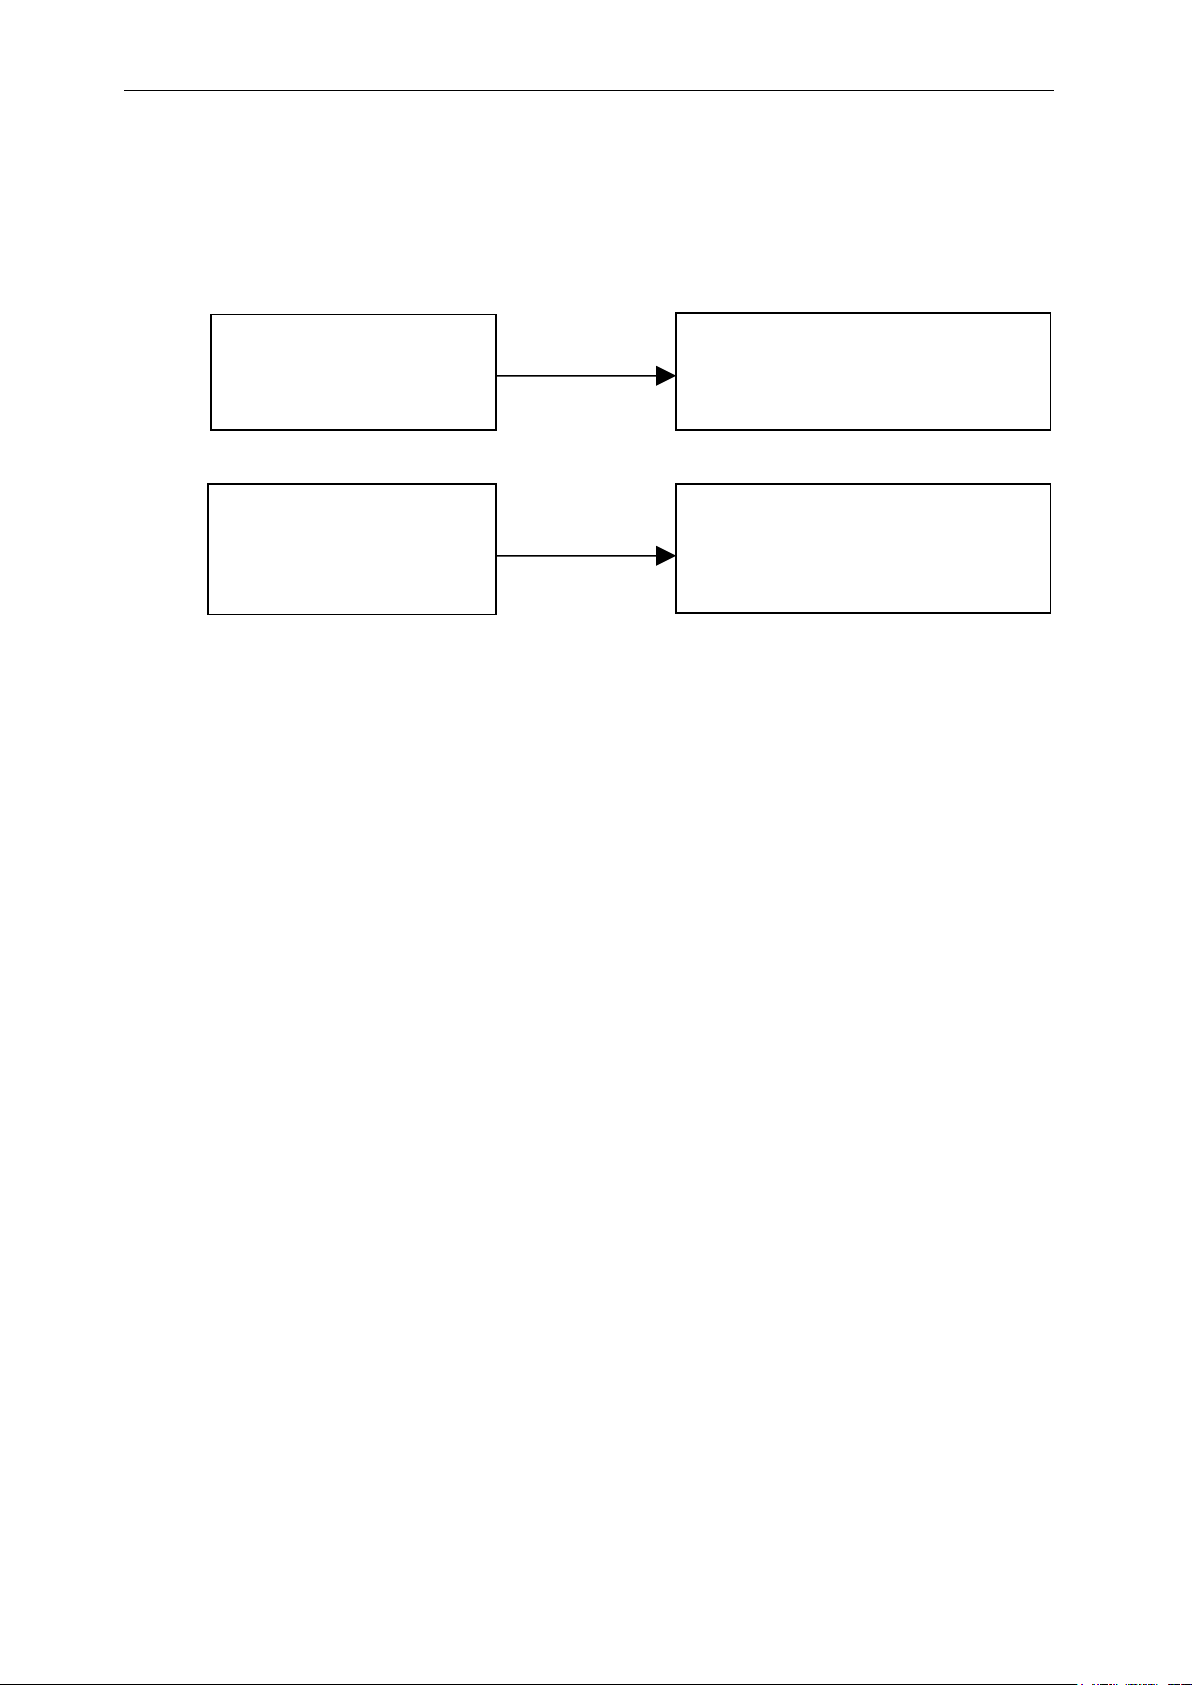
Bluetooth
Windows 10 Mobile
USB
PC, Laptop, Tablet, Android Phone,
Android Pad
One can connect the CS108 to either a smart phone or other smart device, including laptop PC
via Bluetooth for control and data collection, or to a PC via USB cable for control and data
collection.
Smart Phones, Tablets, Laptops, with OS
CS108 READER
such as Android, Linux, Windows 10,
CS108 READER
Copyright 2017 © Convergence Systems Limited, All Rights Reserved
Page 21

CSL CS101-2 EPC CLASS 1 GEN 2 RFID HANDHELD READER
USER'S MANUAL, VERSION 9
21
4.4 Setting up CS108
To use the CS108 for the first time, carry out the steps described in the following sections.
Copyright 2017 © Convergence Systems Limited, All Rights Reserved
Page 22
CSL CS101-2 EPC CLASS 1 GEN 2 RFID HANDHELD READER
USER'S MANUAL, VERSION 9
22
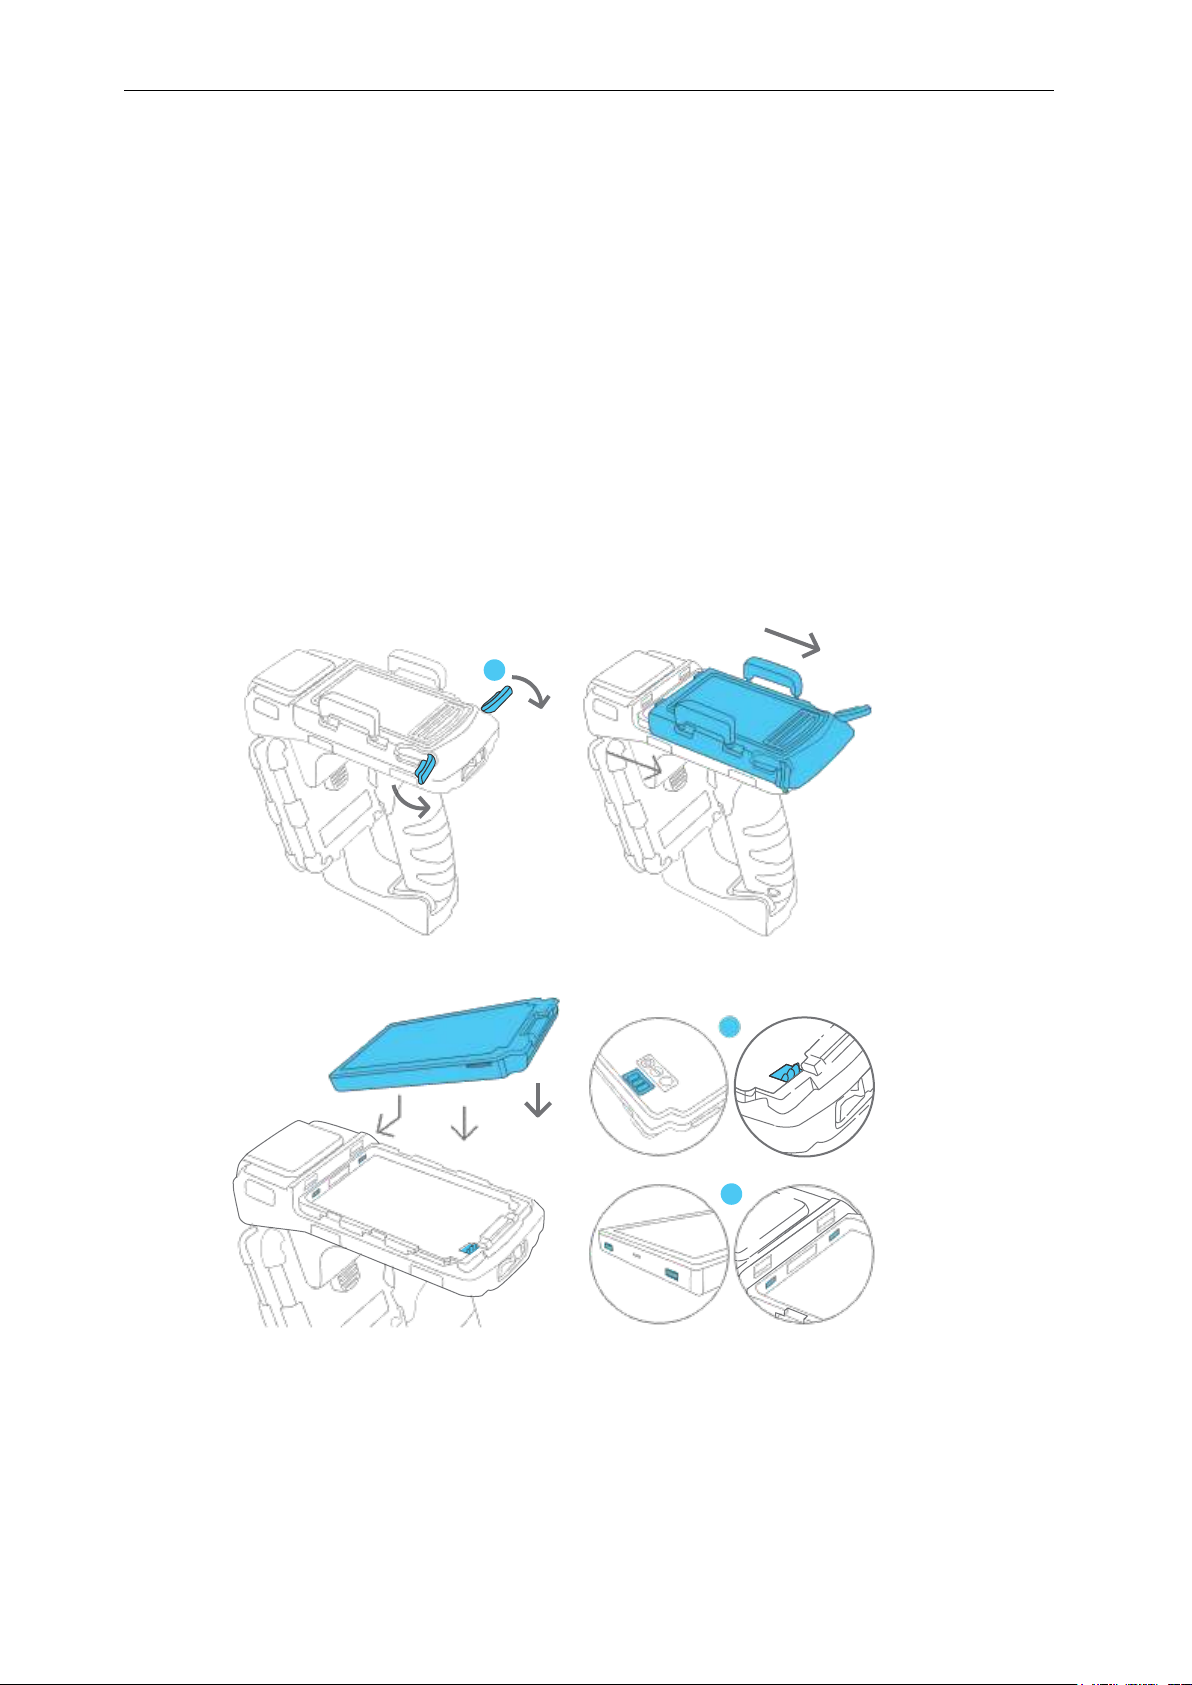
4.5 Installing the battery
To install the battery,
1. Rotate the two silver latches at the back of the top cover.
2. Slide back the cover.
3. Install the battery by inserting the front battery teeth in the corresponding slots at the front
of the battery compartment and aligning the copper connectors at the bottom right section
of the battery with its counter-connectors. Snap it in place making sure it is underneath the
blue locking mechanism.
4. Slide the cover back into place.
5. Rotate the two silver latches until fully closed.
Copyright 2017 © Convergence Systems Limited, All Rights Reserved
Page 23
CSL CS101-2 EPC CLASS 1 GEN 2 RFID HANDHELD READER
USER'S MANUAL, VERSION 9
23
Copyright 2017 © Convergence Systems Limited, All Rights Reserved
Page 24
CSL CS101-2 EPC CLASS 1 GEN 2 RFID HANDHELD READER
USER'S MANUAL, VERSION 9
24
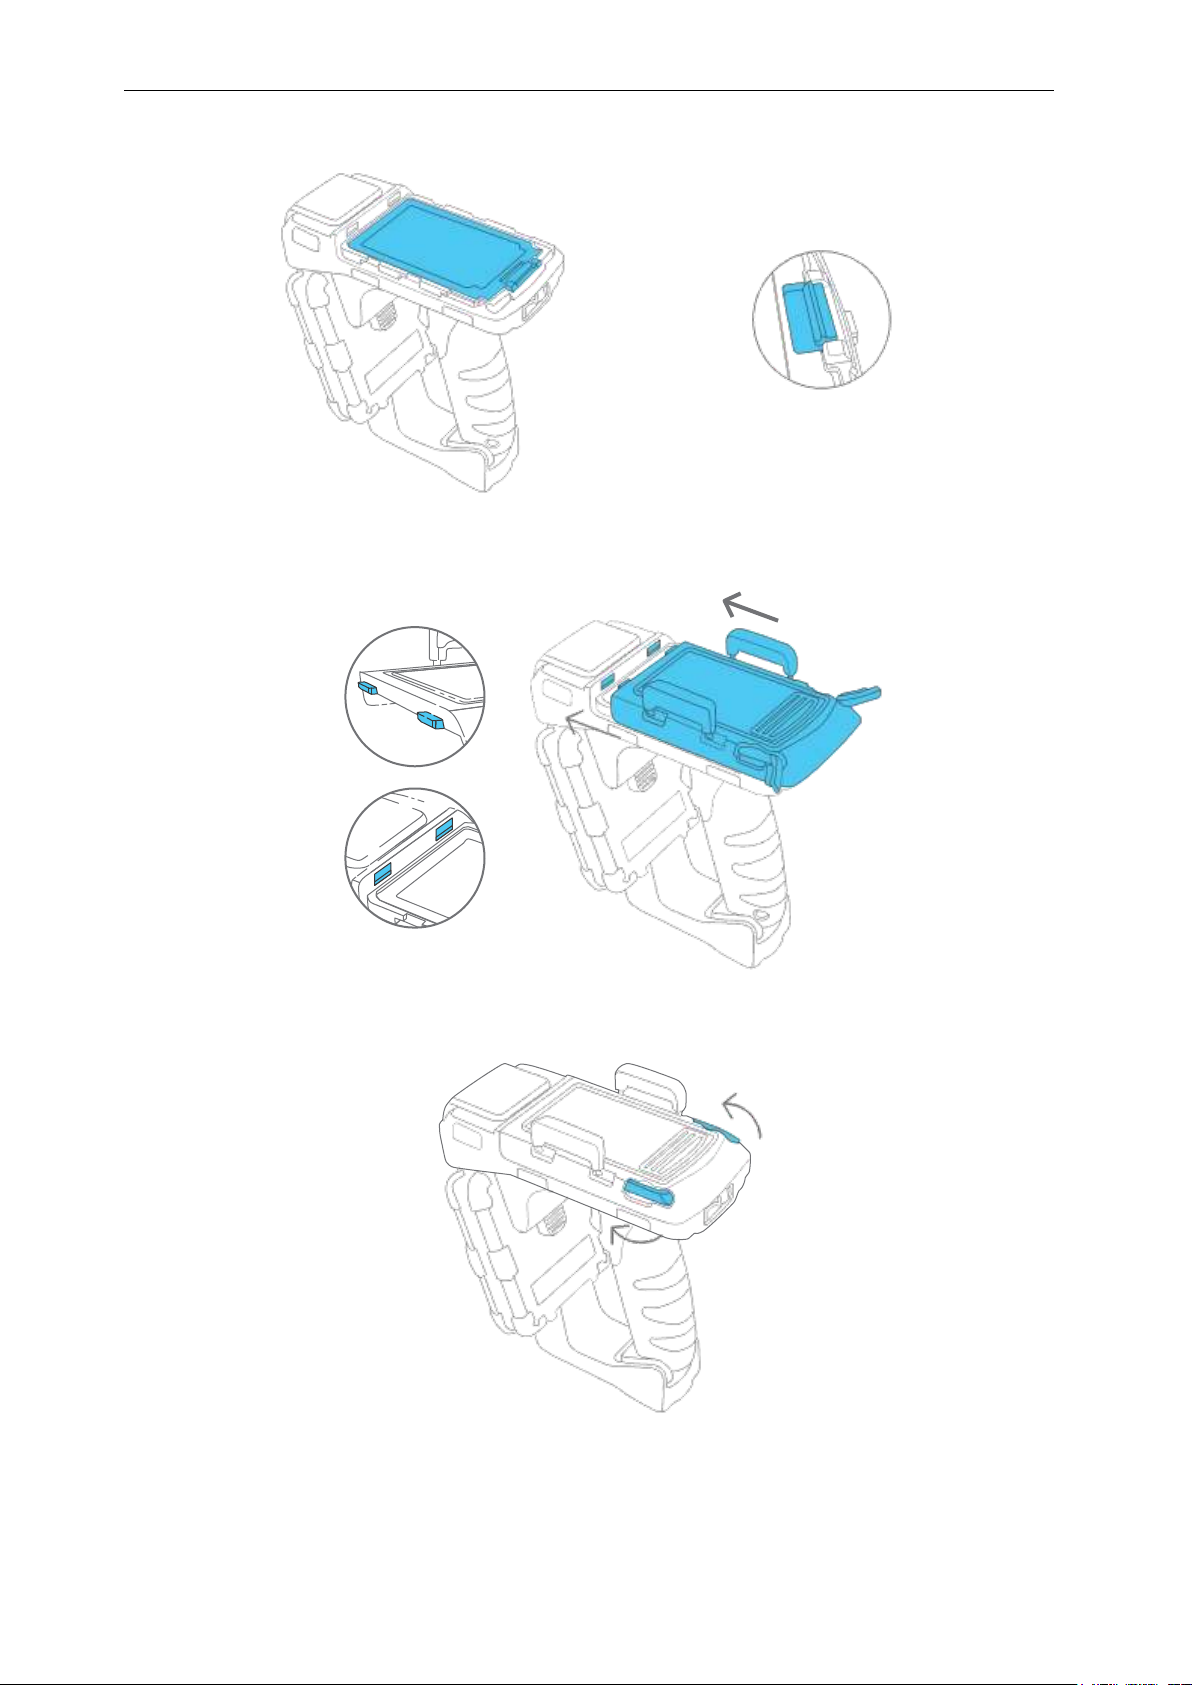
4.6 Removing the battery
1. Rotate fully backwards the two silver latches at the back of the top cover.
2. Slide back the cover.
3. Press down on the blue locking mechanism at the back to pop out the battery.
4.7 Power Up the Reader
1. Make sure the battery is inserted properly and is charged..
2. Press the power button on the right side of the reader continuously for 3 seconds then
release.
3. After you release the button, the Green Power LED will light up and the Blue Bluetooth
LED will begin a slow blink.
4. The reader is now turned on and ready for Bluetooth pairing.
Copyright 2017 © Convergence Systems Limited, All Rights Reserved
Page 25

CSL CS101-2 EPC CLASS 1 GEN 2 RFID HANDHELD READER
USER'S MANUAL, VERSION 9
25
4.8 Bluetooth Pairing with Mobile Devices
1. When you power up the CS108 reader, the Bluetooth LED will automatically flash blue,
meaning it is now discoverable by smart devices nearby. NOTE: the CS108 uses only the
Bluetooth Low Energy protocol, therefore smart devices must have Bluetooth 4.0/4.1/4.2 to
be able to connect to the CS108.
2. With the Bluetooth LED flashing, you can search, discover and connect the CS108 to the
CSL Demo App or customer written app. NOTE that you can only connect to the CS108
via the CSL Demo App or customer written application. You cannot connect the CS108
Bluetooth via the standard Bluetooth pairing function of the OS of the smart device.
4.9 Charging the CS108
4.9.1 Direct Charging CS108
The CS108 can be directly charged by inserting a USB cable with the following plugs:
1) USB Type C plug on one side
2) USB Type A plug on the other side
3) The above Type A plug connecting to a USB charger with the traditional Type A socket.
The charger can be 1A or 2A.
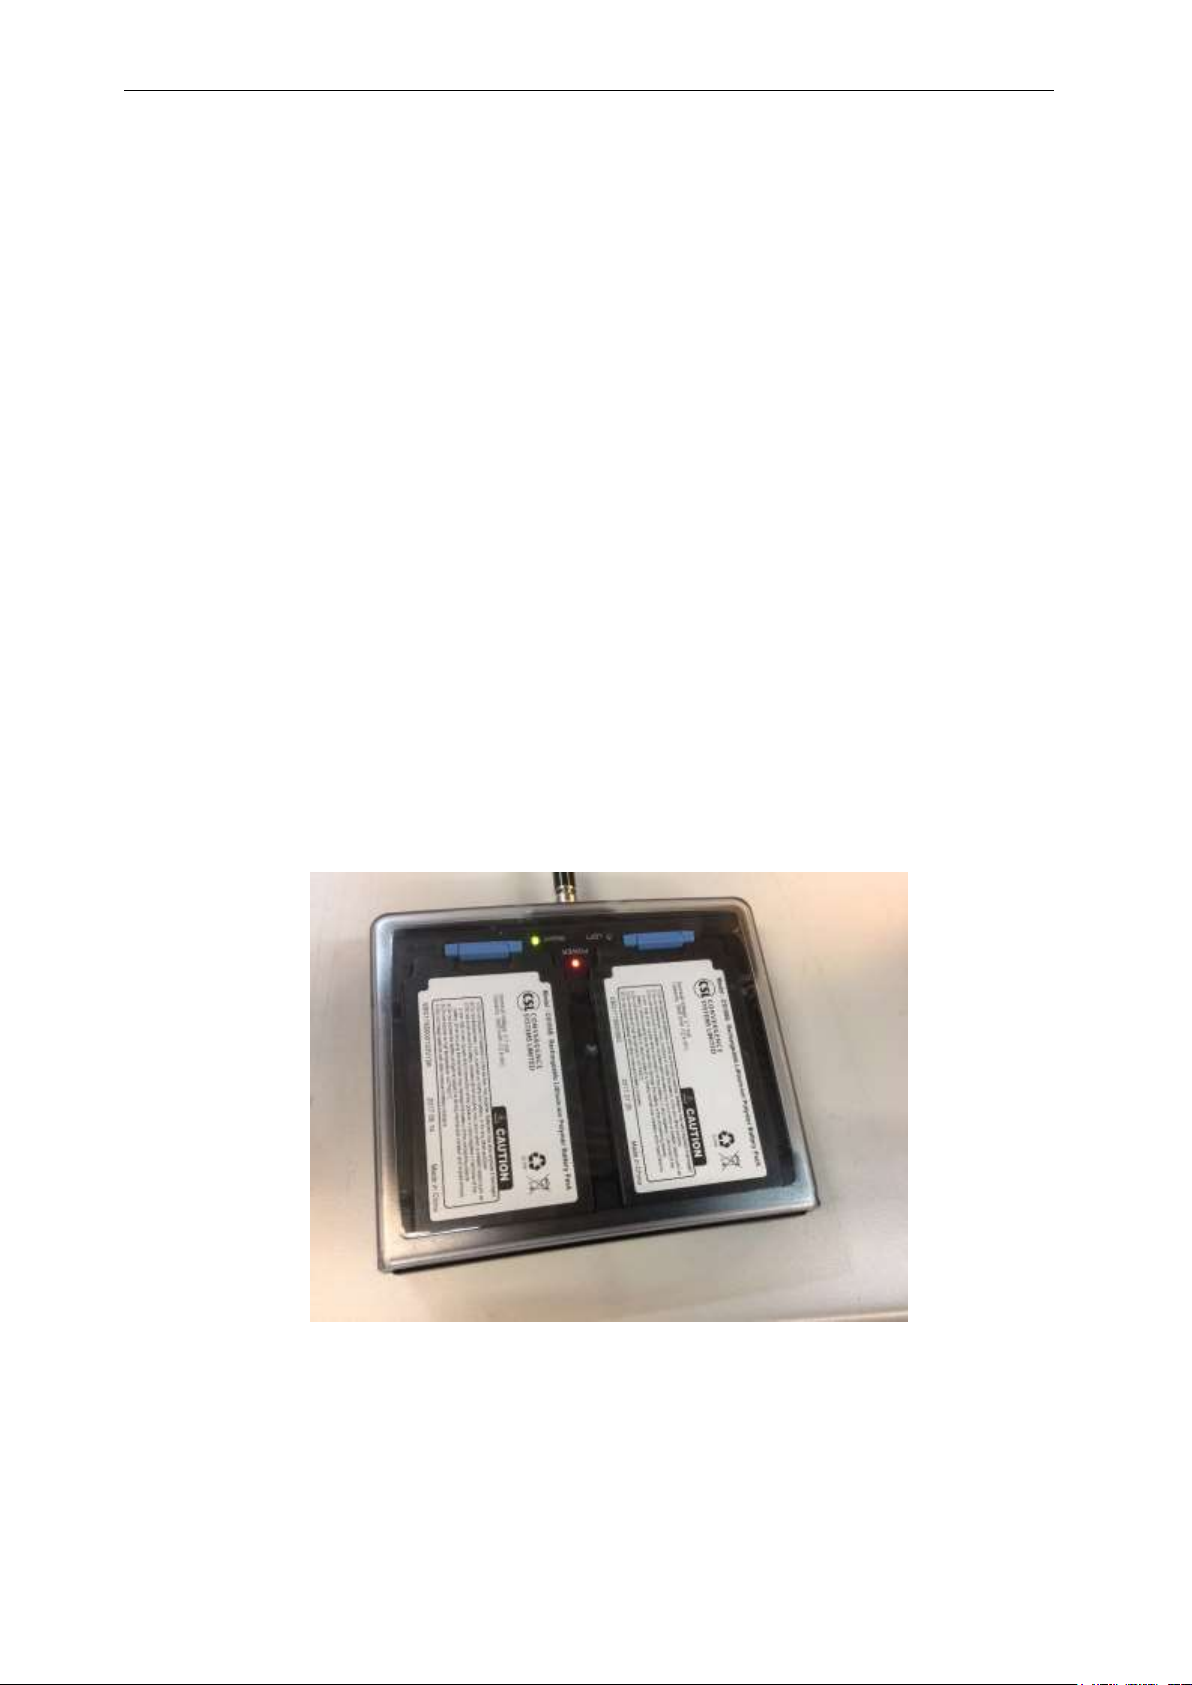
2 LEDs will light up:
1) “Ext. Power” LED: Green LED. Whenever the CS108 is connected to an external power
supply, this Green LED will light up.
2) “Charging” LED: Red LED. When the battery is heavily drained, this red LED will be
bright. When the battery is completely recharged, this red LED will be very dim. Do not be
alarmed if you connect the USB cable and this LED is very dim. It just means the battery is
fully charged
Copyright 2017 © Convergence Systems Limited, All Rights Reserved
Page 26
CSL CS101-2 EPC CLASS 1 GEN 2 RFID HANDHELD READER
USER'S MANUAL, VERSION 9
26
USB Charger
or Charging
Hub
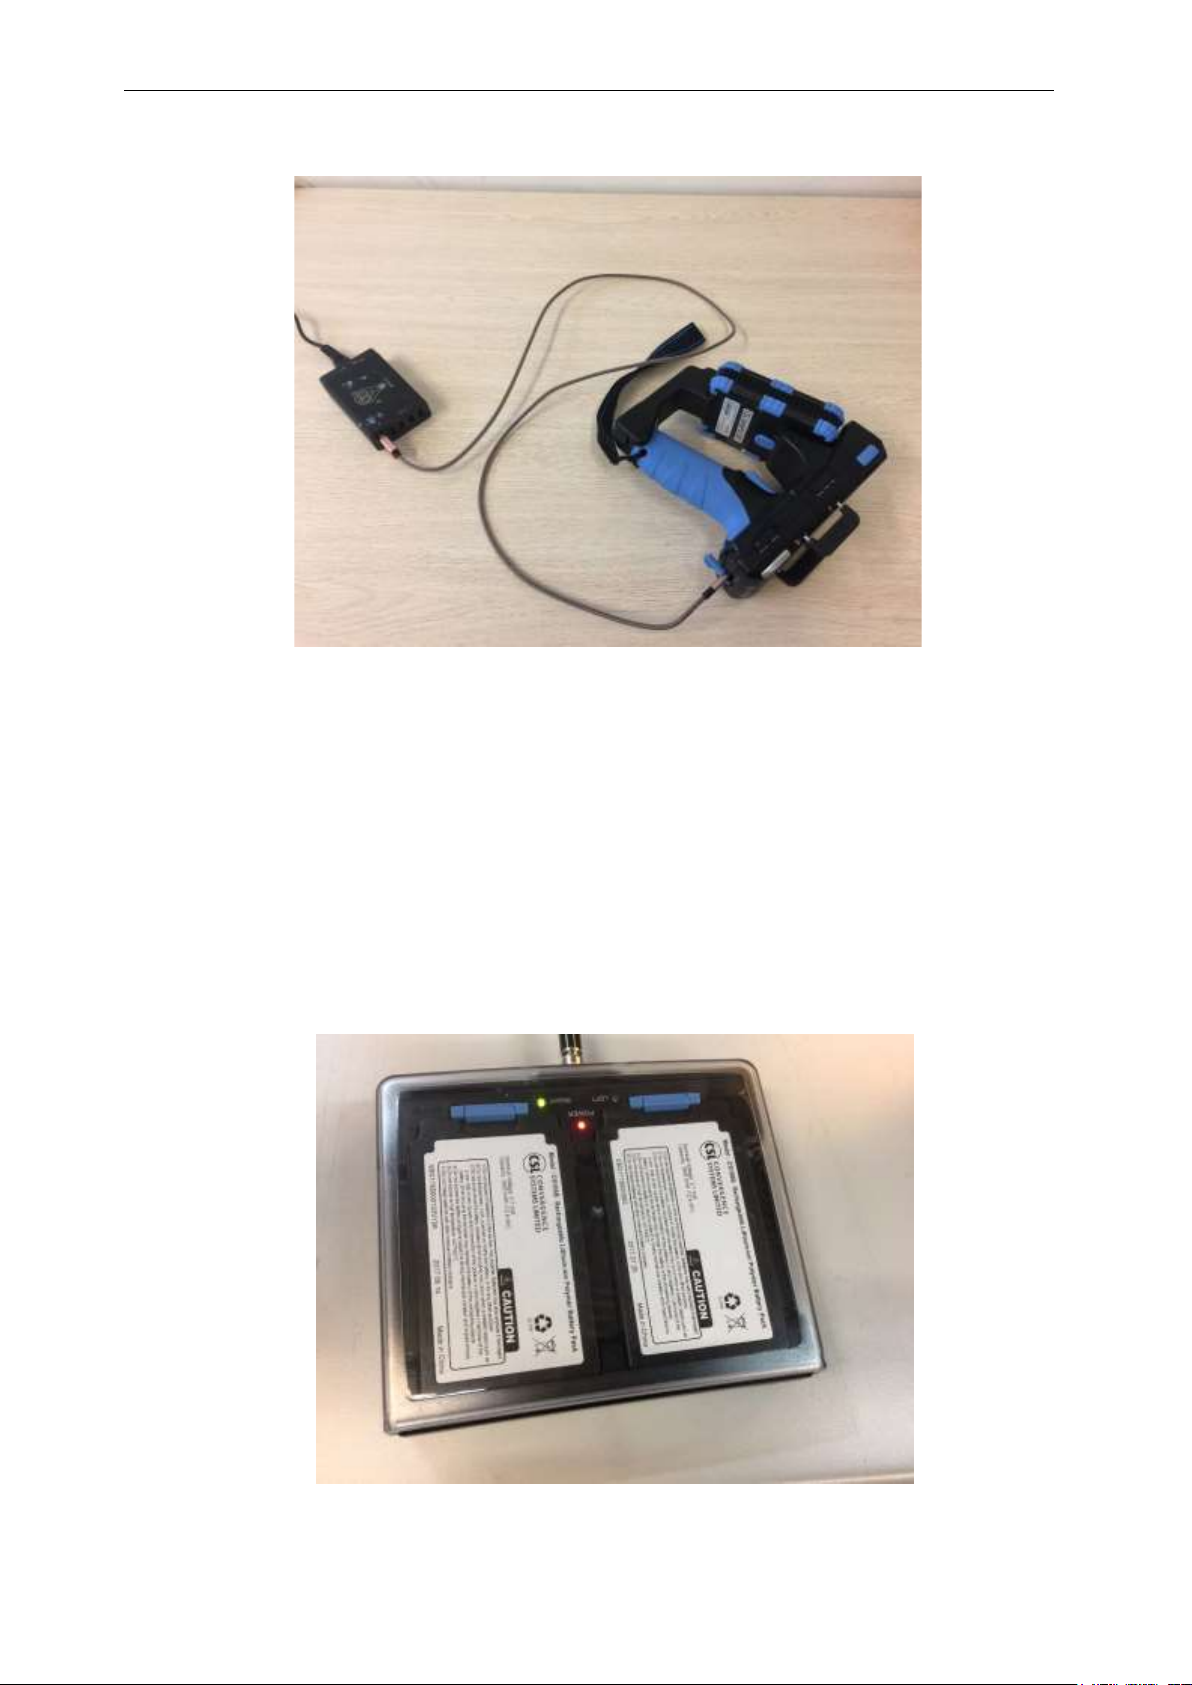
4.9.2 Charging CS108B battery using an external
charger CS108C
For intensive operations, one can purchase the optional CS108C external charger. With this
charger, you can charge 2 CS108B batteries simultaneously:
Copyright 2017 © Convergence Systems Limited, All Rights Reserved
Page 27
CSL CS101-2 EPC CLASS 1 GEN 2 RFID HANDHELD READER
USER'S MANUAL, VERSION 9
27
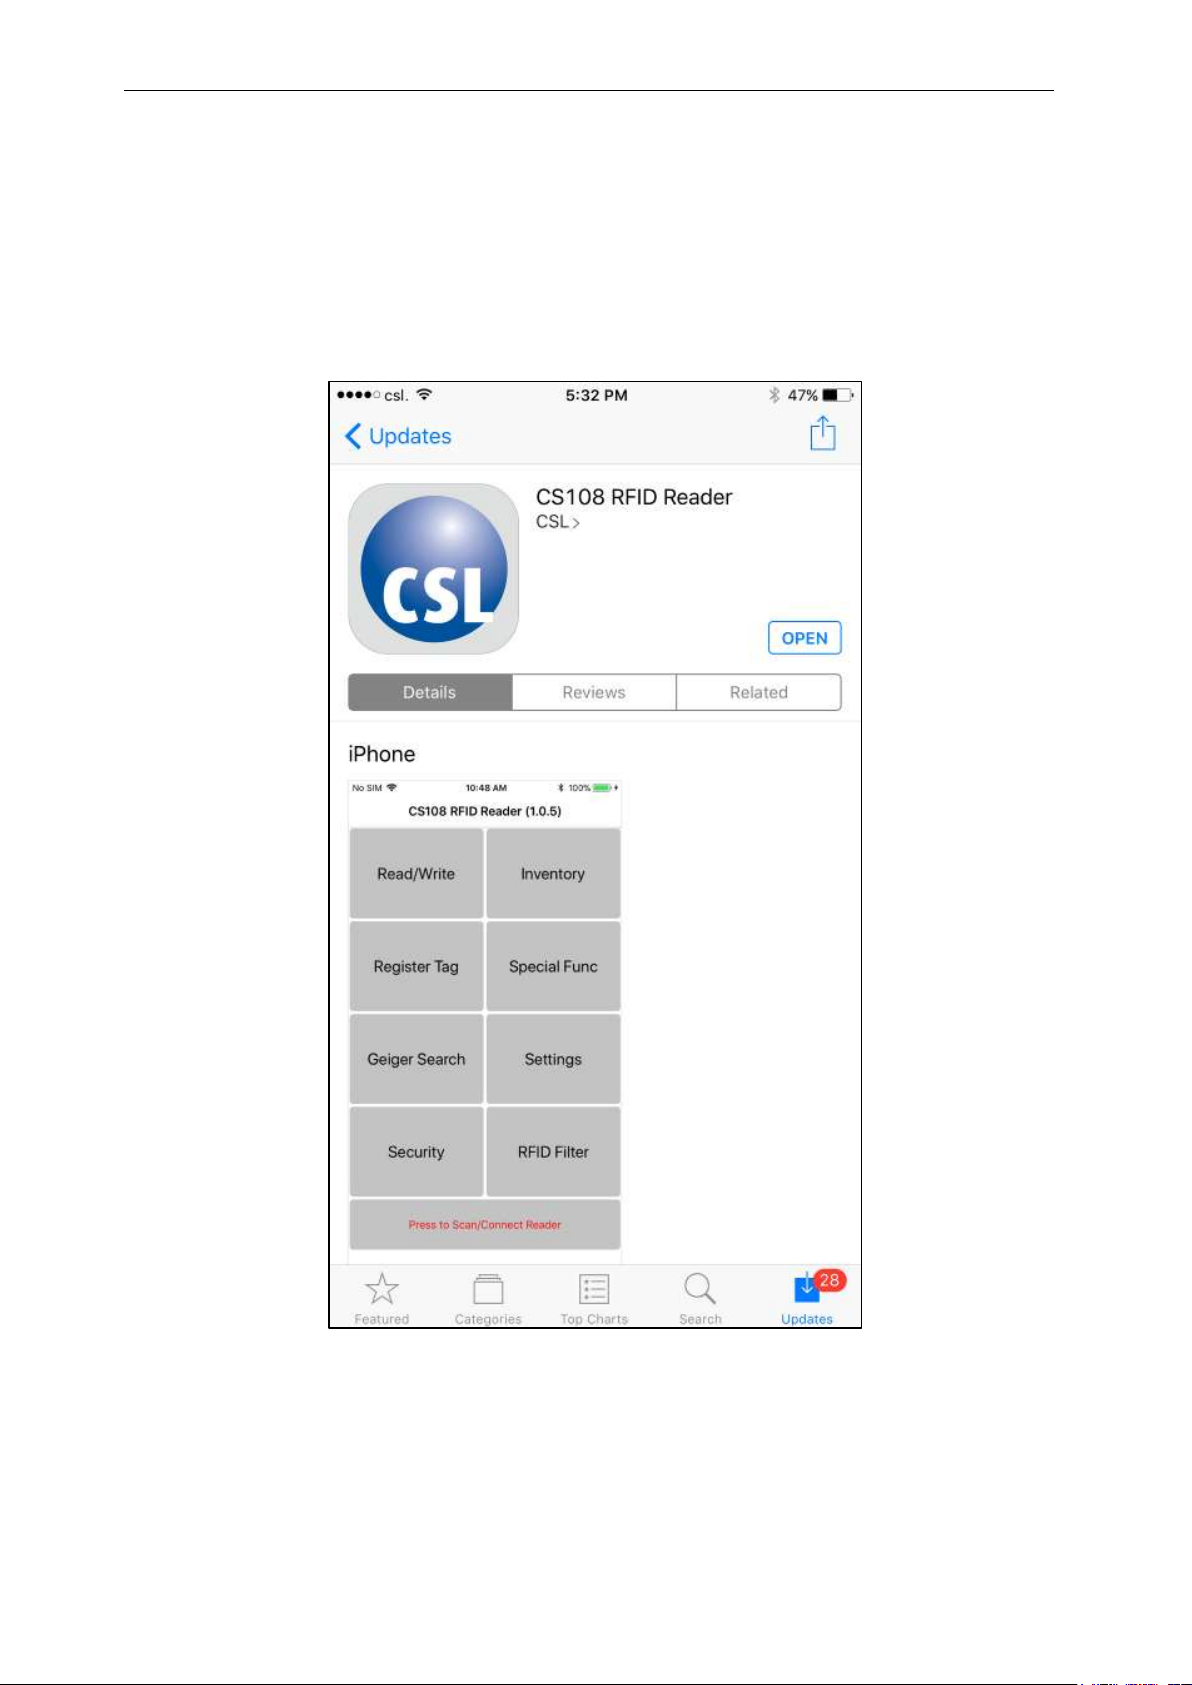
4.10 Downloading Application Software
To download the C# Demo application software for iPhone, please go to the Apple App Store
and search for “cs108 rfid reader”.
Copyright 2017 © Convergence Systems Limited, All Rights Reserved
Page 28
CSL CS101-2 EPC CLASS 1 GEN 2 RFID HANDHELD READER
USER'S MANUAL, VERSION 9
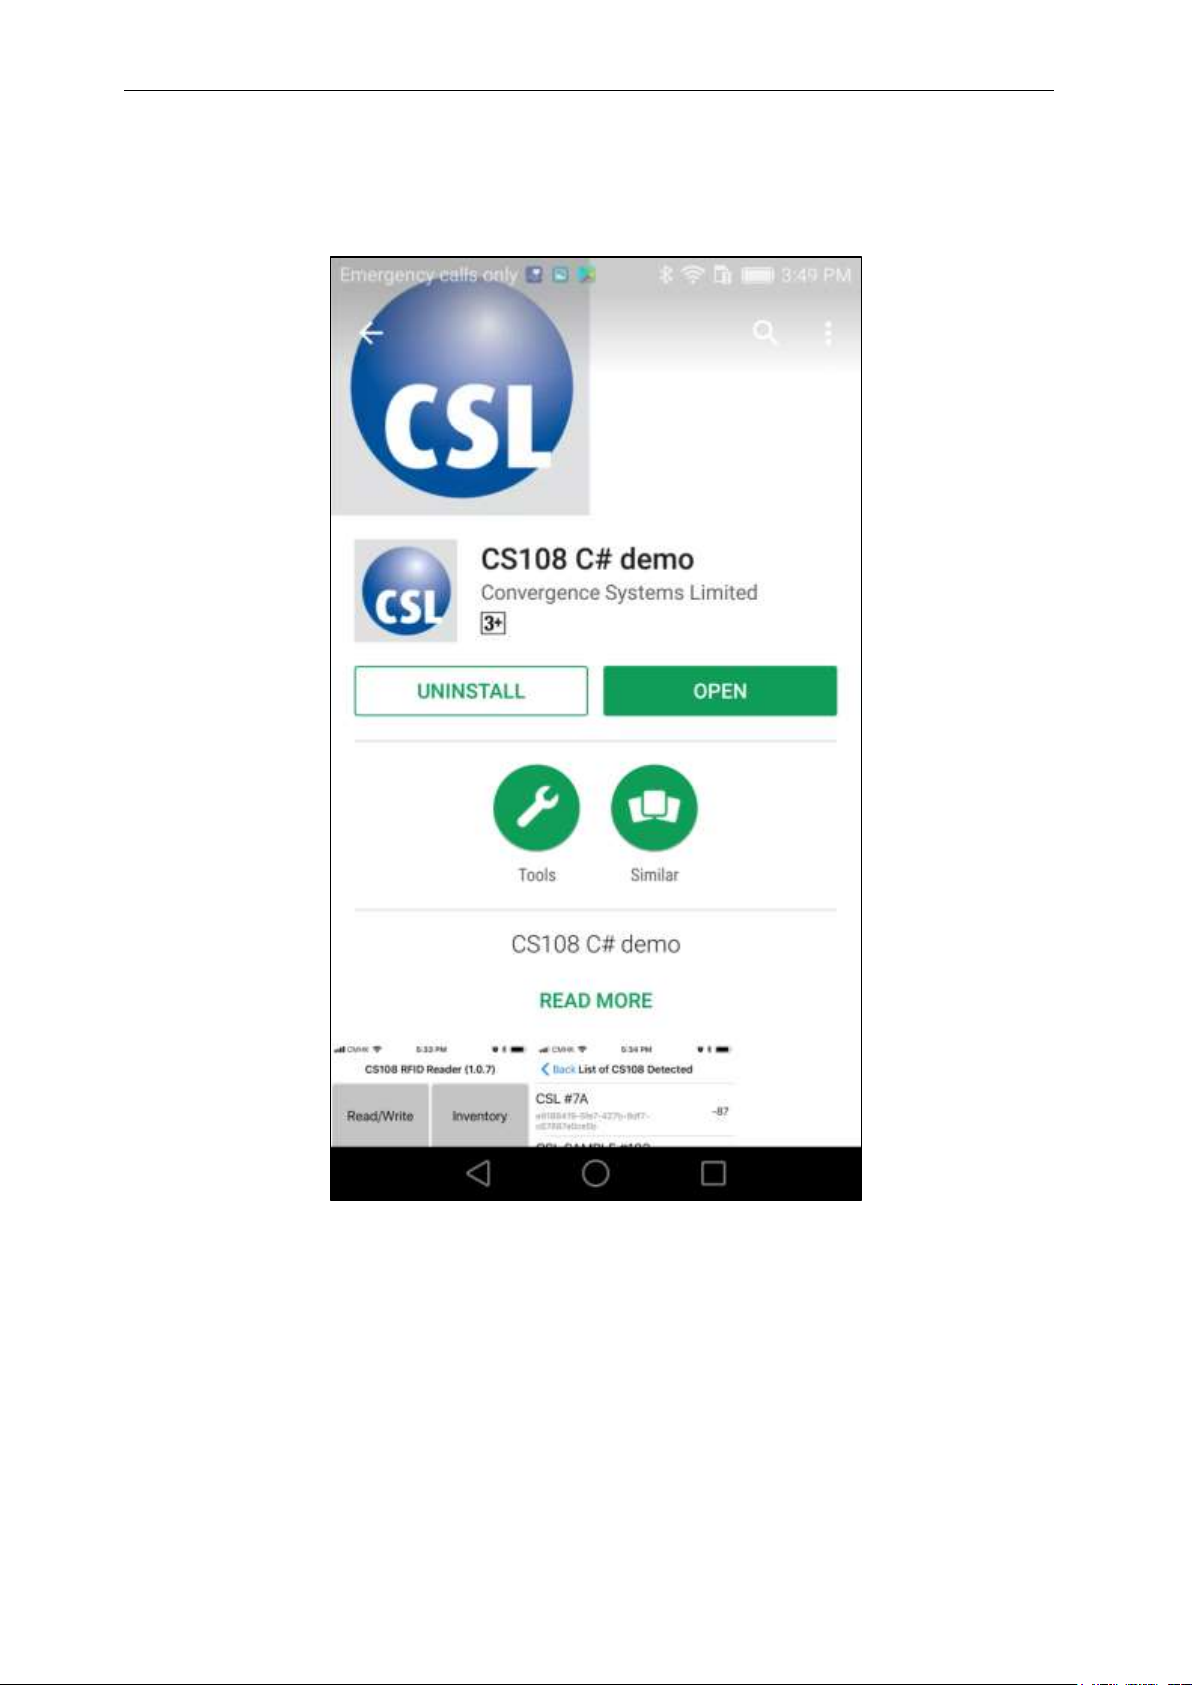
28
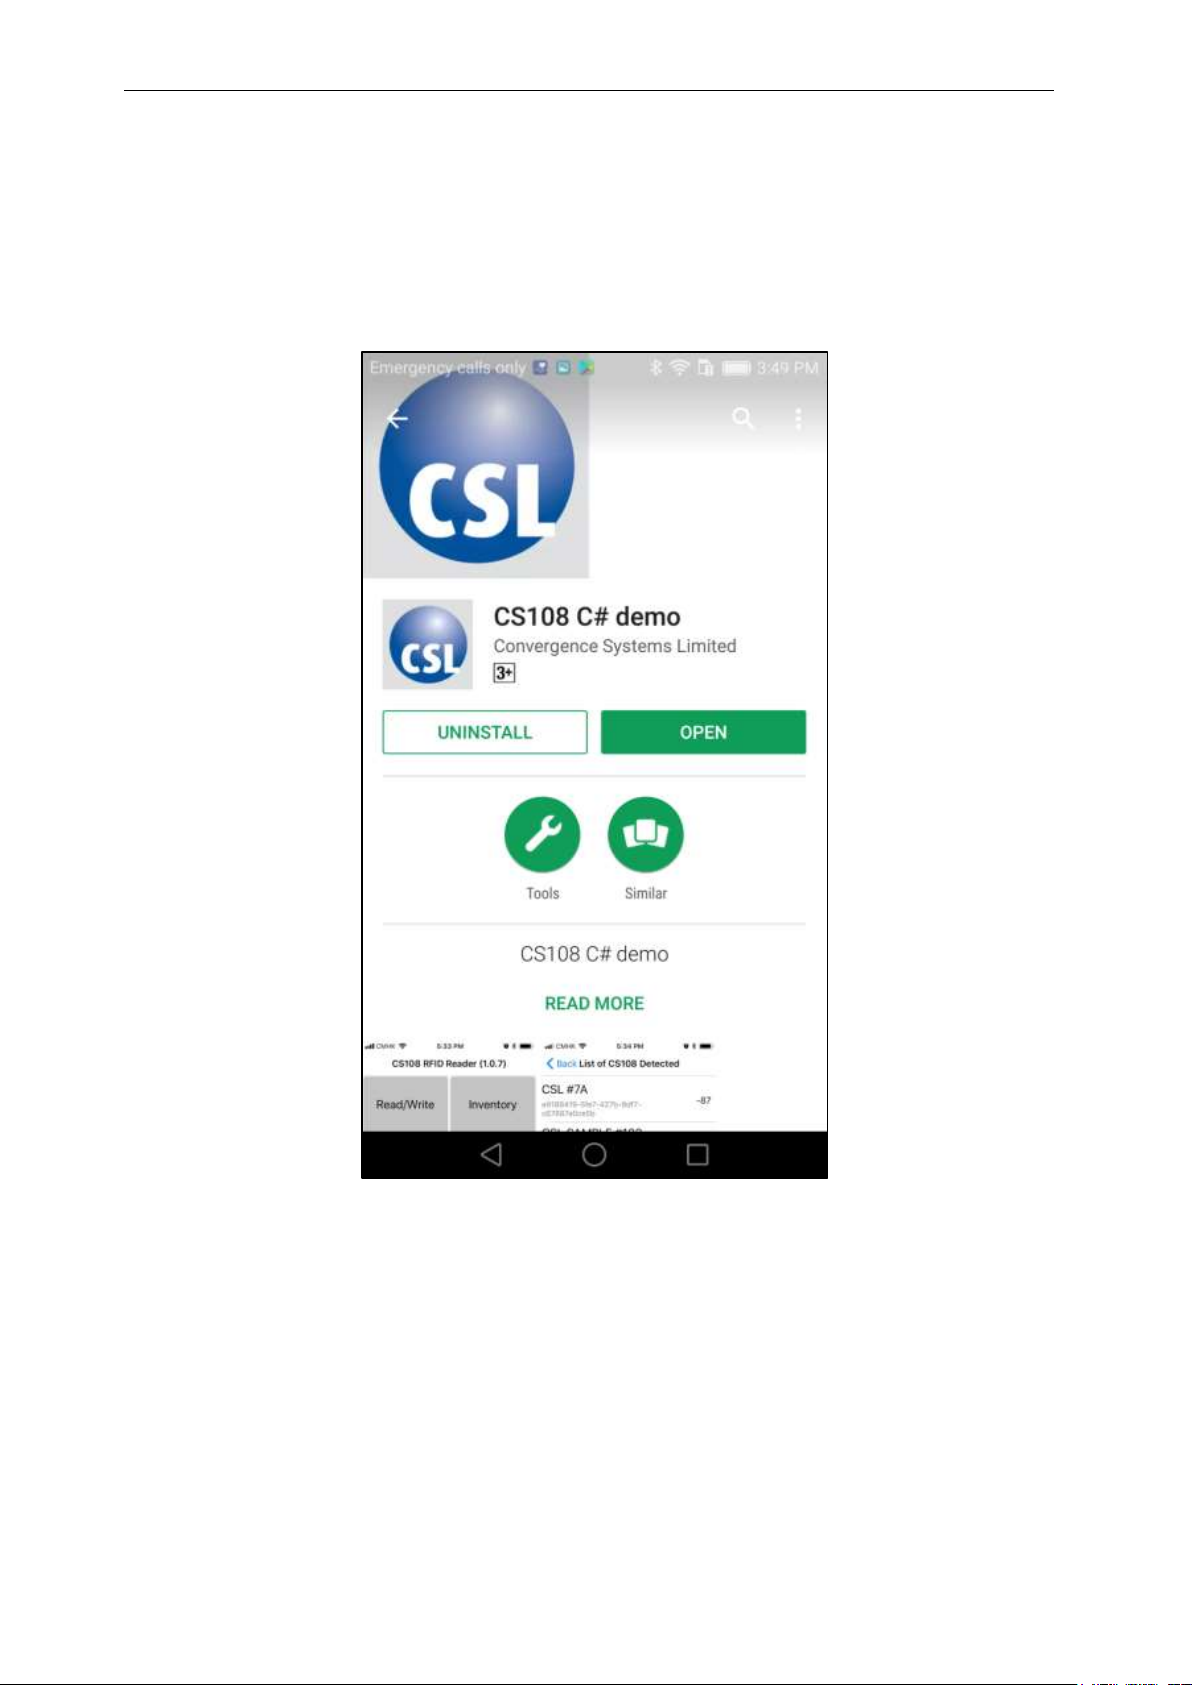
To download the C# Android App, please go to Google Play to download:
Copyright 2017 © Convergence Systems Limited, All Rights Reserved
Page 29
CSL CS101-2 EPC CLASS 1 GEN 2 RFID HANDHELD READER
USER'S MANUAL, VERSION 9
29
To download Android Java App, please go to Google Play to download.
Copyright 2017 © Convergence Systems Limited, All Rights Reserved
Page 30
CSL CS101-2 EPC CLASS 1 GEN 2 RFID HANDHELD READER
USER'S MANUAL, VERSION 9
30
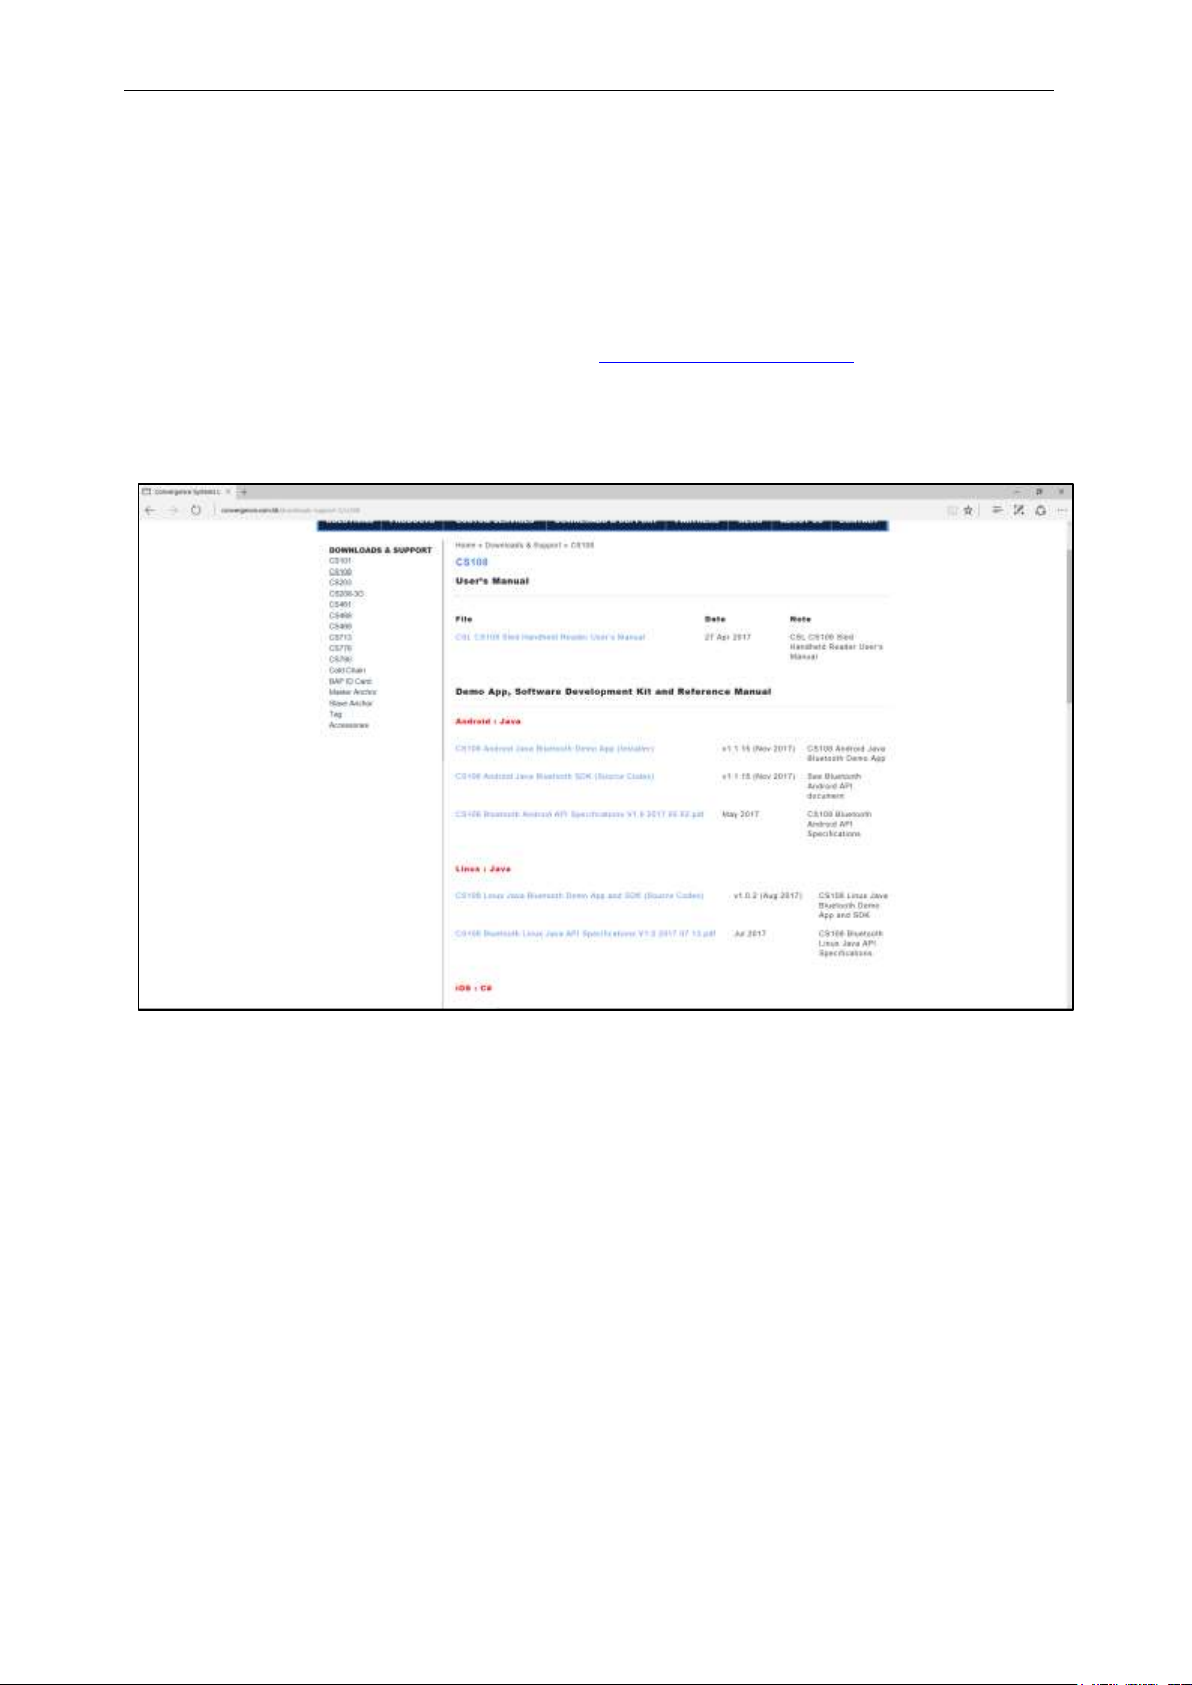
For Linux and Windows App, please go to www.convergence.com.hk “Downloads and Support”
then “CS108 Sled Handheld” to download the respective software and documentation.
Copyright 2017 © Convergence Systems Limited, All Rights Reserved
Page 31
CSL CS101-2 EPC CLASS 1 GEN 2 RFID HANDHELD READER
USER'S MANUAL, VERSION 9
31
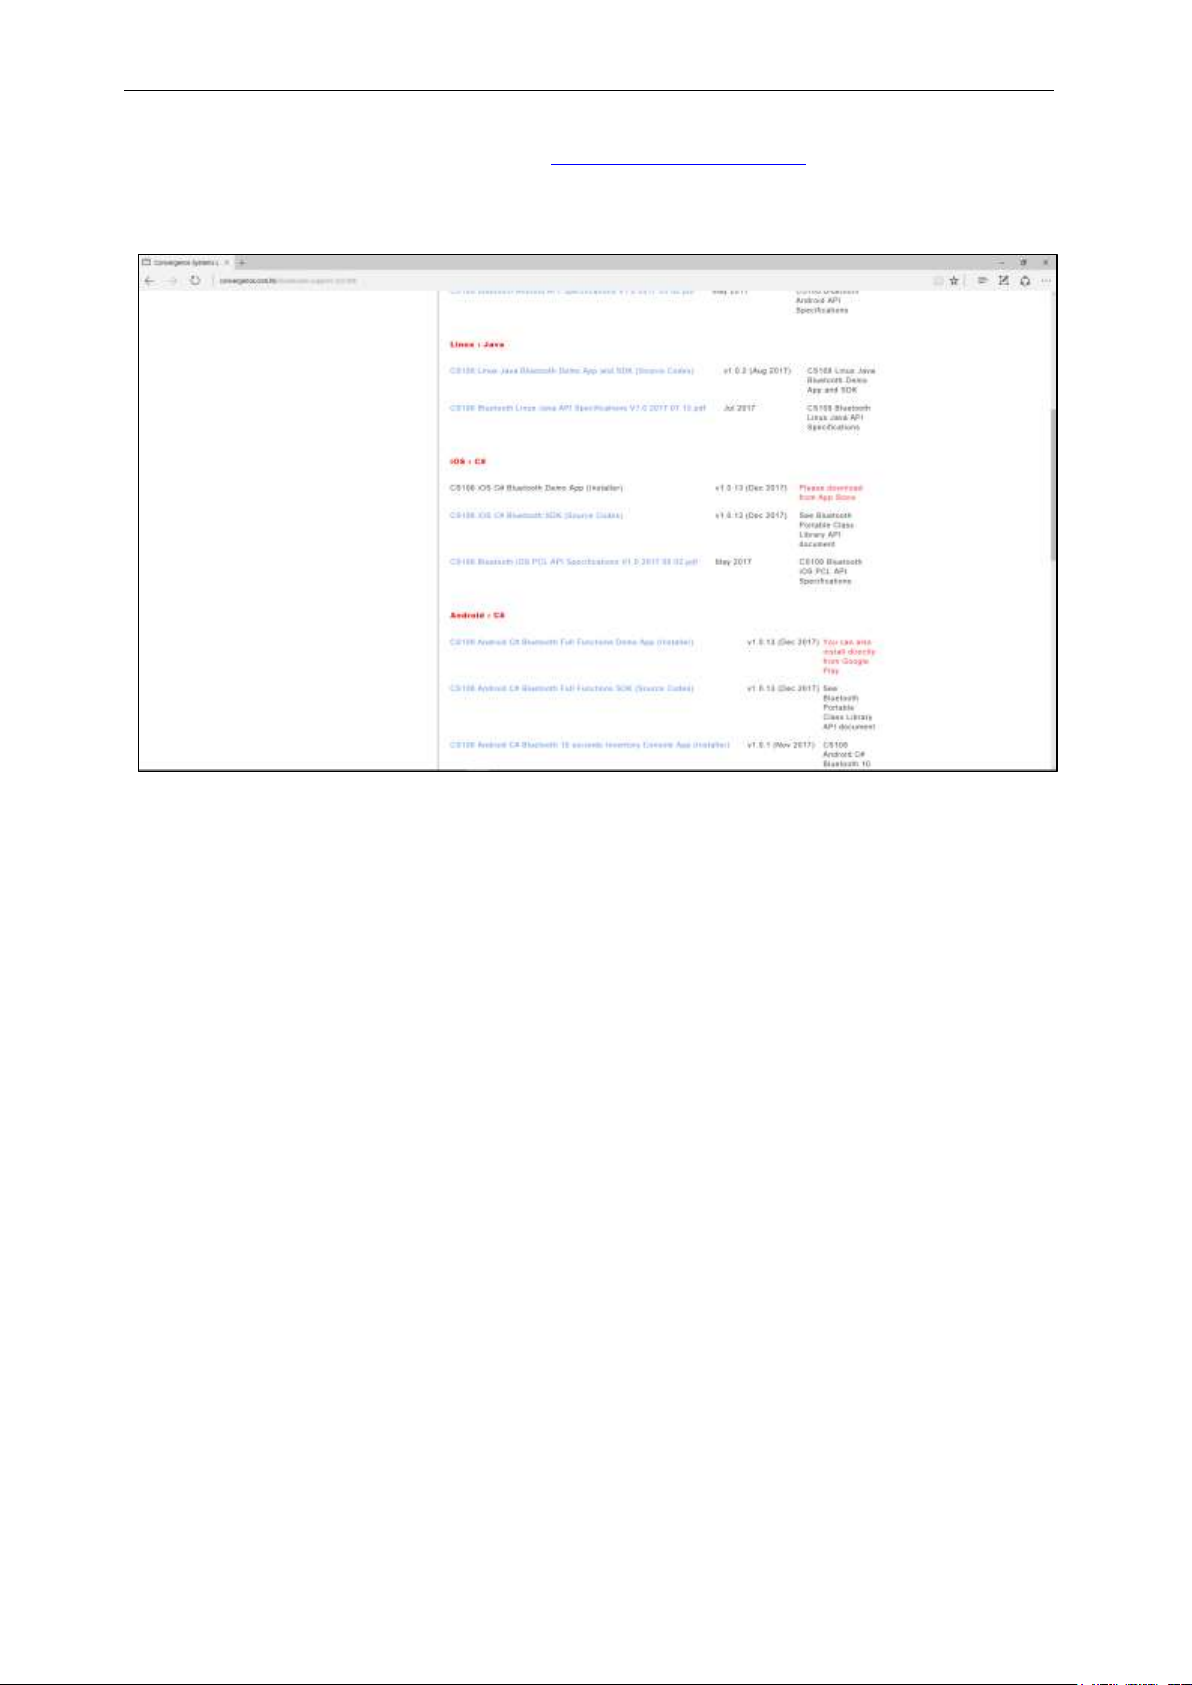
4.11 Downloading Application Software Source
Codes
For developers who need to download source codes and modify those for their own use, they
can go to the Downloads & Support section of www.convergence.com.hk and then choose the
reader CS108 Sled Handheld. There you can download all the source codes, reference manuals
and other information for use.
Copyright 2017 © Convergence Systems Limited, All Rights Reserved
Page 32

CSL CS101-2 EPC CLASS 1 GEN 2 RFID HANDHELD READER
USER'S MANUAL, VERSION 9
32
4.12 Trigger Button vs Touch Screen Usage
Using a Demo App provided by Convergence Systems Limited, one can start and stop an RFID
inventory or Barcode Reading using either the Start/Stop button inside the CSL Demo App via
the LCD touch screen of the smart device, or use the Trigger on the sled handle.
In the CSL Demo Apps, pressing the trigger initiates a continuous RFID or Barcode scanning
process. One can then terminate this process upon releasing of the trigger. You need to press the
Trigger and KEEP PRESSING, for the reader to be continuously reading RFID tags or scanning
barcodes, depending which reading mode you are in. The moment you release the trigger, the
RFID inventory or barcode scanning will stop.
If you do not use the Trigger, you can use the Start/Stop button on the CSL Demo App via the
LCD touch screen of your smart device. When you press the Start button, the CSL Demo App
will start continuous RFID inventory or barcode reading. To stop, just press on the Stop button.
Copyright 2017 © Convergence Systems Limited, All Rights Reserved
Page 33

CSL CS101-2 EPC CLASS 1 GEN 2 RFID HANDHELD READER
USER'S MANUAL, VERSION 9
33
Host Platform
Interface
Physical Media
Protocol of Host Platform
Apple iPhone
Air
Bluetooth 4.0 or 4.1 or 4.2
Apple iPad
Air
Bluetooth 4.0 or 4.1 or 4.2
Apple iPod Touch
Air
Bluetooth 4.0 or 4.1
Android Phone
Air
Bluetooth 4.0 or 4.1 or 4.2
Android Tablet
Air
Bluetooth 4.0 or 4.1 or 4.2
Windows 10* Laptop with BLE
Air
Bluetooth 4.0 or 4.1 or 4.2
Windows 10* Tablet with BLE
Air
Bluetooth 4.0 or 4.1 or 4.2
Windows 10* Mobile Phone
Air
Bluetooth 4.0 or 4.1 or 4.2
Linux PC or Laptop or Tablet
Air
Bluetooth 4.0 or 4.1 or 4.2
Windows PC or Laptop
USB cable
USB
Linux PC or Laptop
USB cable
USB
Android Phone with OTG
OTG USB cable
USB
Android Tablet with OTG
OTG USB cable
USB
5 Introduction
5.1 Software Applications
The CS108 offers standard demo applications with source codes freely downloadable from
Convergence website (www.convergence.com.hk ) for iPhone, iPAD, Android Phone, Android
Tablet, Linux Tablet and Windows 10 PC/laptop. For iPhone and iPAD, you can install the
application from Apple’s App Store. The source code for iPhone and iPAD are available from
www.convergence.com.hk For Android phone and tablet, you can directly download the .apk
install file and also source codes from www.convergence.com.hk. You can also download the
Android Demo App directly from Google Play. You can download the Linux and Windows
10 App, installer and source codes from www.convergence.com.hk
Copyright 2017 © Convergence Systems Limited, All Rights Reserved
Page 34

CSL CS101-2 EPC CLASS 1 GEN 2 RFID HANDHELD READER
USER'S MANUAL, VERSION 9
34
5.1.1 DEMO JAVA SOFTWARE FOR ANDROID
5.1.1.1 Installing the Demo Android Java Software
There are 2 ways to install the Demo Android Java App:
1) Install directly from Google Play
2) Download the APK from Convergence website.
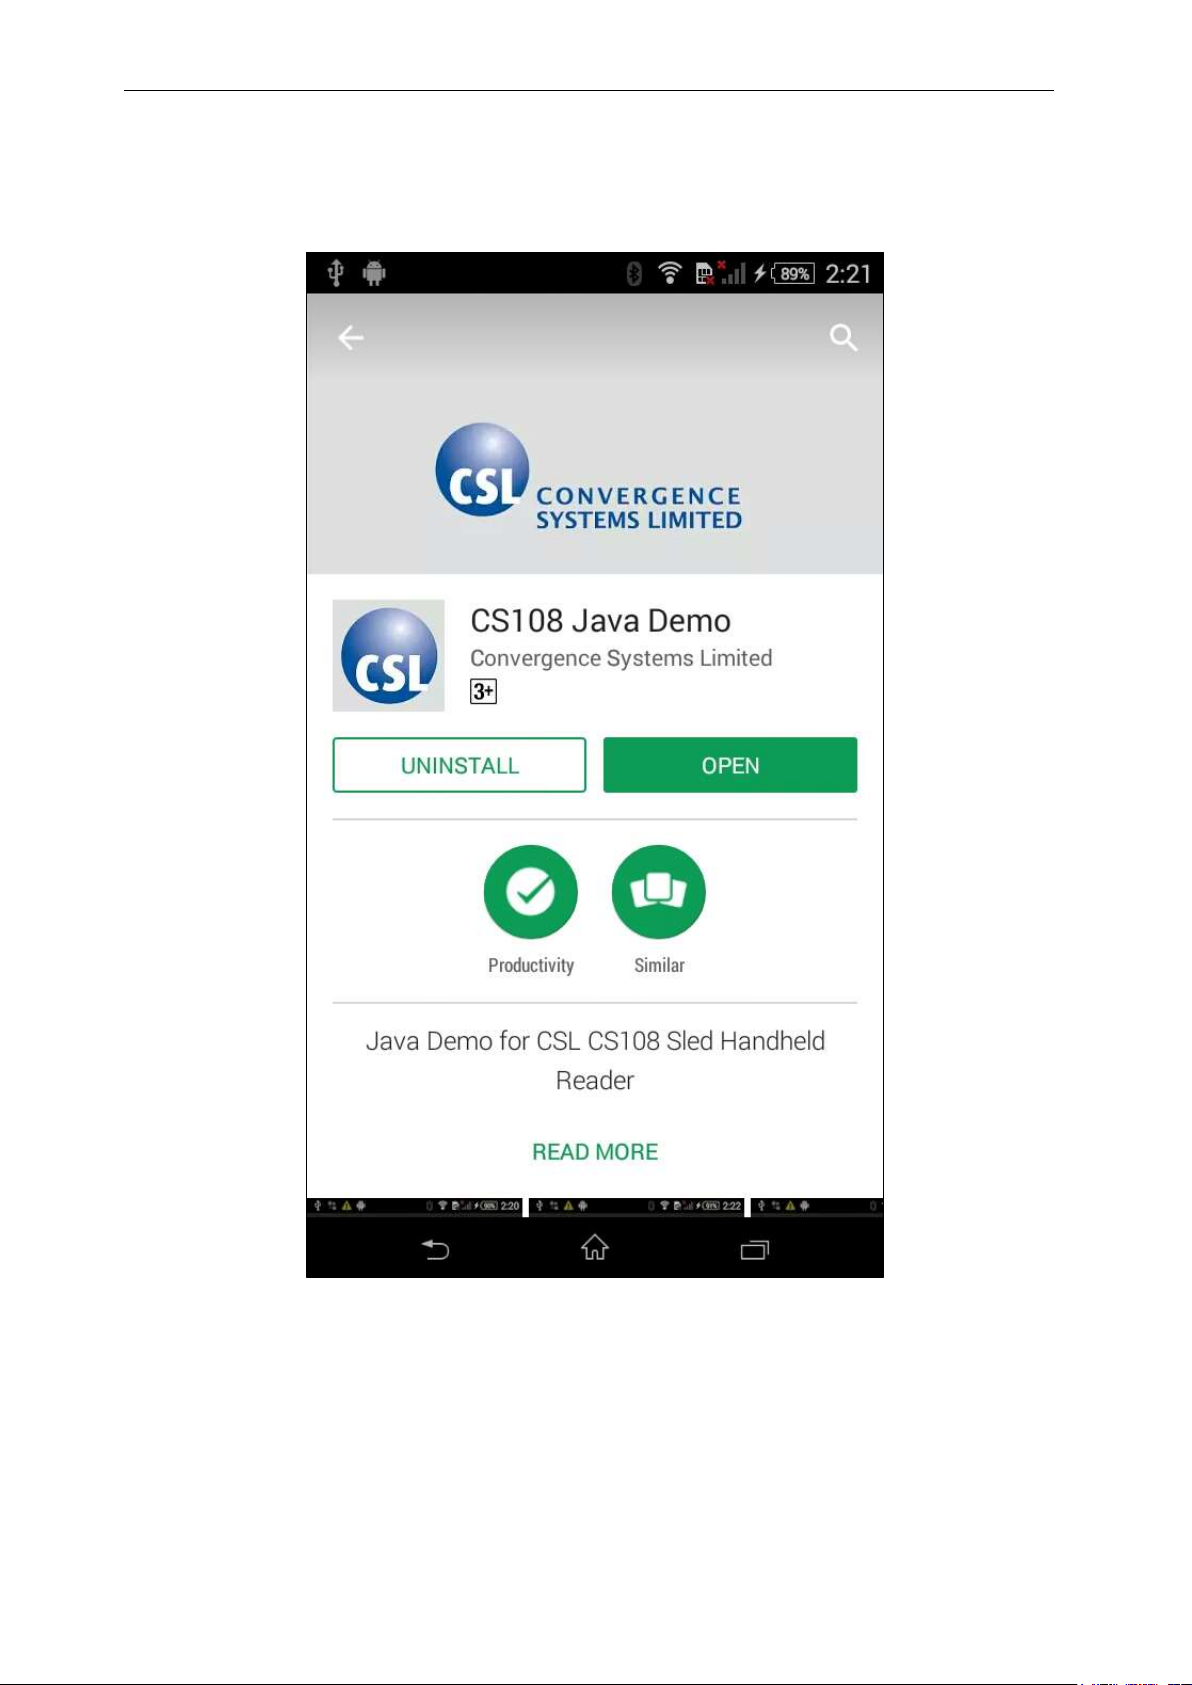
5.1.1.1.1 Installing from Google Play
Copyright 2017 © Convergence Systems Limited, All Rights Reserved
Page 35

CSL CS101-2 EPC CLASS 1 GEN 2 RFID HANDHELD READER
USER'S MANUAL, VERSION 9
35
5.1.1.1.2 Download APK from CSL website
Download the APK from Convergence website. Save the .apk file to the Download folder.
You can directly download that to your Android phone as long as your Android phone is
connected to the Internet.
See below:
Select and press the APK and start the installation process:
Copyright 2017 © Convergence Systems Limited, All Rights Reserved
Page 36

CSL CS101-2 EPC CLASS 1 GEN 2 RFID HANDHELD READER
USER'S MANUAL, VERSION 9
36
Copyright 2017 © Convergence Systems Limited, All Rights Reserved
Page 37

CSL CS101-2 EPC CLASS 1 GEN 2 RFID HANDHELD READER
USER'S MANUAL, VERSION 9
37
Once installed, start the App and you should see the following:
Copyright 2017 © Convergence Systems Limited, All Rights Reserved
Page 38

CSL CS101-2 EPC CLASS 1 GEN 2 RFID HANDHELD READER
USER'S MANUAL, VERSION 9
38
5.1.1.2 Starting the Android Java Demo Software
The CS108 Android Java Demo App icon should appear on your Android device screen as
“CS108ADemo”
Copyright 2017 © Convergence Systems Limited, All Rights Reserved
Page 39

CSL CS101-2 EPC CLASS 1 GEN 2 RFID HANDHELD READER
USER'S MANUAL, VERSION 9
39
Open the Android Java Demo App and you should see the following screen:
Copyright 2017 © Convergence Systems Limited, All Rights Reserved
Page 40

CSL CS101-2 EPC CLASS 1 GEN 2 RFID HANDHELD READER
USER'S MANUAL, VERSION 9
40
5.1.1.3 Searching and Connecting to (Pairing with)
the CS108
To start searching and connecting to (pairing with) a CS108 nearby, press the Connect button at
the bottom of the menu. Please make sure that you have powered ON the CS108 you are trying
to connect with and the blue Bluetooth LED is blinking. Also make sure the Bluetooth on your
Android phone is turned on.
Copyright 2017 © Convergence Systems Limited, All Rights Reserved
Page 41

CSL CS101-2 EPC CLASS 1 GEN 2 RFID HANDHELD READER
USER'S MANUAL, VERSION 9
41
After a few seconds, you should see on the Demo App screen all the CS108 units nearby
available for pairing.
Copyright 2017 © Convergence Systems Limited, All Rights Reserved
Page 42

CSL CS101-2 EPC CLASS 1 GEN 2 RFID HANDHELD READER
USER'S MANUAL, VERSION 9
42
Select the one you want to connect to by pressing on the row of the screen corresponding to the
reader you want to connect with.
After that you should see the check box to the right of the reader name ticked. Press on the
screen again to connect to the chosen reader. If you have multiple CS108 readers they should
be set to different names. (see Settings)
Copyright 2017 © Convergence Systems Limited, All Rights Reserved
Page 43

CSL CS101-2 EPC CLASS 1 GEN 2 RFID HANDHELD READER
USER'S MANUAL, VERSION 9
43
5.1.1.4 Settings
Once connected to the reader, set up the reader’s parameters in the Settings page:
Copyright 2017 © Convergence Systems Limited, All Rights Reserved
Page 44

CSL CS101-2 EPC CLASS 1 GEN 2 RFID HANDHELD READER
USER'S MANUAL, VERSION 9
44
The Settings/Operation menu, has configuration for the Regulatory Region, Frequency Order,
Fixed Channel, Power, Tag Population, Q (override), Session, Target, Query Algorithm, and
Reader Mode/ Link Profile
Please refer to Appendix B, C, D, E, F, for the definitions and uses of Reader Modes/Link
Profiles, Sessions, Tag Population and Q, Query Algorithms, and Target.
Note that it is strongly recommended for the user to select a Tag Population that is close to the
number of RFID tags the reader will see while reading directly in front of it. If inventorying a
warehouse consisting of a large tag population, say 2000, do not set 2000 as the Tag Population,
as the reader cannot “see” all 2000 tags at once. Instead set the Tag Population to 50, 100,
etc.…. The default is 30.
The Power is default set to 300, meaning 30 dBm (1 Watt). This is the internal conducted
power before it enters the antenna. The antenna gain is 2.7 dBi. Depending on environment, a
lower power may get better read results. Experiment with different power settings to see
Copyright 2017 © Convergence Systems Limited, All Rights Reserved
Page 45

CSL CS101-2 EPC CLASS 1 GEN 2 RFID HANDHELD READER
USER'S MANUAL, VERSION 9
45
which one provides best results.
After making changes to the Settings page you must press the SAVE button to apply the
changes.
Copyright 2017 © Convergence Systems Limited, All Rights Reserved
Page 46

CSL CS101-2 EPC CLASS 1 GEN 2 RFID HANDHELD READER
USER'S MANUAL, VERSION 9
46
5.1.1.5 RFID Inventory
To do an inventory of RFID tags, select the “Inventory” button:
Copyright 2017 © Convergence Systems Limited, All Rights Reserved
Page 47

CSL CS101-2 EPC CLASS 1 GEN 2 RFID HANDHELD READER
USER'S MANUAL, VERSION 9
47
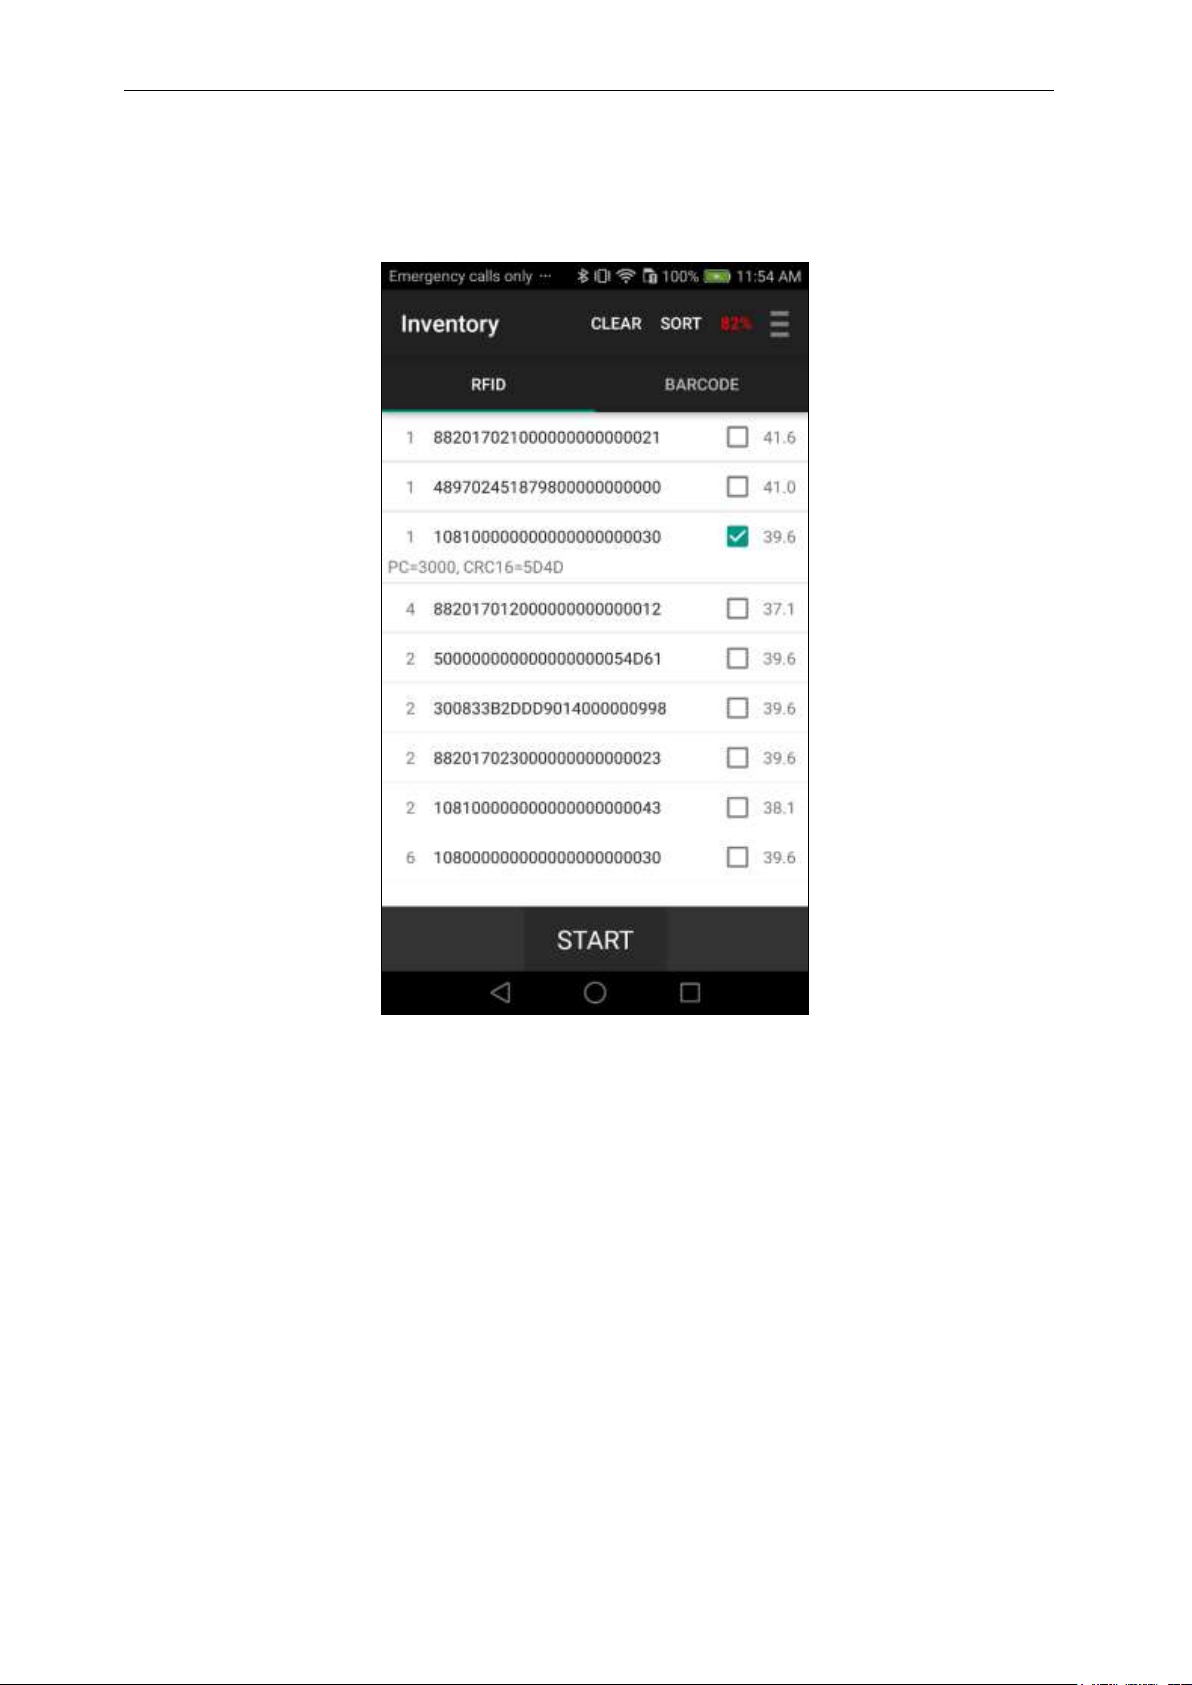
Press the Start button or Press the Trigger to start the inventory and then the ID(s) of the RFID
tags will be listed as shown below. The first column is the number of reads of that tag ID,
second column is the RFID tag EPC ID, the last column is the RSSI of the tag. On the upper
right, you can also see the current battery level in red font.
A high frequency tone will be heard when a new RFID tag is read and a low frequency tone
will be heard when a tag is read again.
A summary of tags read appears at the bottom of the screen: number of Unique Tags, Total
Number of Tags Read, Read Rate, and Run Time.
At any point, if you want to stop reading, just press the Stop button or release the Trigger.
Copyright 2017 © Convergence Systems Limited, All Rights Reserved
Page 48

CSL CS101-2 EPC CLASS 1 GEN 2 RFID HANDHELD READER
USER'S MANUAL, VERSION 9
48
If you stop inventory and start again, the previous list will remain and new tags are added at the
top of the list. If you want to start a new list, press the Clear button at the bottom to clear the
list.
Copyright 2017 © Convergence Systems Limited, All Rights Reserved
Page 49

CSL CS101-2 EPC CLASS 1 GEN 2 RFID HANDHELD READER
USER'S MANUAL, VERSION 9
49
5.1.1.6 Barcode Inventory
To scan a Barcode press the Inventory button:
Copyright 2017 © Convergence Systems Limited, All Rights Reserved
Page 50

CSL CS101-2 EPC CLASS 1 GEN 2 RFID HANDHELD READER
USER'S MANUAL, VERSION 9
50
Then press the BARCODE SCAN button on the upper right hand of the screen:
Press the START button on the touch screen or Pull the Trigger. The red LED of the barcode
reader will light to help you aim the CS108 barcode scanner to the barcode. A focused circular
aiming dot will appear. This indicates the optimal reading distance between the CS108 and the
barcode.
Copyright 2017 © Convergence Systems Limited, All Rights Reserved
Page 51

CSL CS101-2 EPC CLASS 1 GEN 2 RFID HANDHELD READER
USER'S MANUAL, VERSION 9
51
Once the barcode is read, you can press the Stop button or release the Trigger.
Copyright 2017 © Convergence Systems Limited, All Rights Reserved
Page 52

CSL CS101-2 EPC CLASS 1 GEN 2 RFID HANDHELD READER
USER'S MANUAL, VERSION 9
52
5.1.1.7 RFID Read and Write memory banks
To read and write specific memory banks of an RFID tag. Press the Read/Write button:
Copyright 2017 © Convergence Systems Limited, All Rights Reserved
Page 53

CSL CS101-2 EPC CLASS 1 GEN 2 RFID HANDHELD READER
USER'S MANUAL, VERSION 9
53
The screen below appears displaying Bank 0 (Reserved), Bank 1 (EPC), Bank 2 (TID Memory)
and Bank 3 (User Memory) of the EPC tag. Select at least one bank to read or write. Note that
Bank 2, TID bank, can only be read and cannot be written, as defined by EPC Global Standard.
Copyright 2017 © Convergence Systems Limited, All Rights Reserved
Page 54

CSL CS101-2 EPC CLASS 1 GEN 2 RFID HANDHELD READER
USER'S MANUAL, VERSION 9
54
Enter a Tag Pattern to select a specific tag for Read/Write operations.
If you do not input anything, in the Tag Pattern input box, (see circle) the reader will read
whatever tag it sees. You can input a string of hex number to select the specific tag. The whole
EPC ID, or a partial string can be entered for the pattern; the remaining being wild card.
Copyright 2017 © Convergence Systems Limited, All Rights Reserved
Page 55
CSL CS101-2 EPC CLASS 1 GEN 2 RFID HANDHELD READER
USER'S MANUAL, VERSION 9
55
Alternatively, a Tag Pattern for a Read/Write operation can be selected from the Inventory page.
Select a tag by pressing the line of the tag desired, and it will be highlighted.
Copyright 2017 © Convergence Systems Limited, All Rights Reserved
Page 56

CSL CS101-2 EPC CLASS 1 GEN 2 RFID HANDHELD READER
USER'S MANUAL, VERSION 9
56
Return to the Main Menu and select the Read/Write function. The selected Tag ID will be
displayed in the Tag Pattern field.
You can now Read or Write any specific memory banks.
Copyright 2017 © Convergence Systems Limited, All Rights Reserved
Page 57

CSL CS101-2 EPC CLASS 1 GEN 2 RFID HANDHELD READER
USER'S MANUAL, VERSION 9
57
5.1.1.8 Geiger Search
A tag search is done with the Geiger Search function:
Copyright 2017 © Convergence Systems Limited, All Rights Reserved
Page 58

CSL CS101-2 EPC CLASS 1 GEN 2 RFID HANDHELD READER
USER'S MANUAL, VERSION 9
58
Select a tag from the Inventory function or manually enter the tag ID to be searched.
Copyright 2017 © Convergence Systems Limited, All Rights Reserved
Page 59

CSL CS101-2 EPC CLASS 1 GEN 2 RFID HANDHELD READER
USER'S MANUAL, VERSION 9
59
Press Start. Continuous reading will begin showing the RSSI, as well as, a beeping a tone if the
Tone box is selected. The Threshold can be adjusted to limit the tone.
The tag can now be searched for using the beeping sound. If the Tone box is enabled, it will
become faster and faster as the RSSI increases. When you are really close to the tag a long
beep will replace the tone.
Copyright 2017 © Convergence Systems Limited, All Rights Reserved
Page 60

CSL CS101-2 EPC CLASS 1 GEN 2 RFID HANDHELD READER
USER'S MANUAL, VERSION 9
60
Another way to home in on a tag is to first do an inventory of the whole area, without knowing
the exact location of the tag. Then select the tag with the ID you are looking for by selecting
that line.
Then, return to Main Menu and enter the Geiger Search function, the ID will already be in the
Input field, and you can start the Geiger Search:
Copyright 2017 © Convergence Systems Limited, All Rights Reserved
Page 61

CSL CS101-2 EPC CLASS 1 GEN 2 RFID HANDHELD READER
USER'S MANUAL, VERSION 9
61
To stop, press the Stop button, and the search will end.
Copyright 2017 © Convergence Systems Limited, All Rights Reserved
Page 62

CSL CS101-2 EPC CLASS 1 GEN 2 RFID HANDHELD READER
USER'S MANUAL, VERSION 9
62
5.1.1.9 Filter: Pre Filter
A Pre-Filter, i.e. a select filter, to have only a certain group of tags respond to the reader’s
query can be added. To implement this, select the Filters function:
Copyright 2017 © Convergence Systems Limited, All Rights Reserved
Page 63

CSL CS101-2 EPC CLASS 1 GEN 2 RFID HANDHELD READER
USER'S MANUAL, VERSION 9
63
On the Pre-Filter page, enter the Tag Pattern used to filter the desired tag(s) population. The tag
pattern does not need to be from the beginning of the EPC bank. An Offset can be entered, the
default offset is 0. After entering the data, check the Enable filter box and then press the SAVE
button.
Copyright 2017 © Convergence Systems Limited, All Rights Reserved
Page 64

CSL CS101-2 EPC CLASS 1 GEN 2 RFID HANDHELD READER
USER'S MANUAL, VERSION 9
64
Copyright 2017 © Convergence Systems Limited, All Rights Reserved
Page 65

CSL CS101-2 EPC CLASS 1 GEN 2 RFID HANDHELD READER
USER'S MANUAL, VERSION 9
65
Copyright 2017 © Convergence Systems Limited, All Rights Reserved
Page 66

CSL CS101-2 EPC CLASS 1 GEN 2 RFID HANDHELD READER
USER'S MANUAL, VERSION 9
66
5.1.1.10 Filter: Post Filter
Inventoried tags can be further selected using the Post Filter:
On the Post-Filter page, enter the Tag Pattern used to filter the desired tag(s) population. The
tag pattern does not need to be from the beginning of the EPC bank. An Offset can be entered,
the default offset is 0. After entering the data, check the Enable filter box and then press the
SAVE button.
Copyright 2017 © Convergence Systems Limited, All Rights Reserved
Page 67

CSL CS101-2 EPC CLASS 1 GEN 2 RFID HANDHELD READER
USER'S MANUAL, VERSION 9
67
Copyright 2017 © Convergence Systems Limited, All Rights Reserved
Page 68

CSL CS101-2 EPC CLASS 1 GEN 2 RFID HANDHELD READER
USER'S MANUAL, VERSION 9
68
Copyright 2017 © Convergence Systems Limited, All Rights Reserved
Page 69

CSL CS101-2 EPC CLASS 1 GEN 2 RFID HANDHELD READER
USER'S MANUAL, VERSION 9
69
Copyright 2017 © Convergence Systems Limited, All Rights Reserved
Page 70

CSL CS101-2 EPC CLASS 1 GEN 2 RFID HANDHELD READER
USER'S MANUAL, VERSION 9
70
5.1.1.11 Security
Security features, such as Locking or Killing can be added to the EPC of tags. To enable these
features, go to Security page:
Copyright 2017 © Convergence Systems Limited, All Rights Reserved
Page 71

CSL CS101-2 EPC CLASS 1 GEN 2 RFID HANDHELD READER
USER'S MANUAL, VERSION 9
71
You can either Lock or Kill a tag. Here is the procedure for locking a tag:
For locking a tag there are 5 possible actions to choose from,
1) Unchanged (no action)
2) Unlock
3) Permanent Unlock
4) Lock
5) Permanent Lock
Copyright 2017 © Convergence Systems Limited, All Rights Reserved
Page 72

CSL CS101-2 EPC CLASS 1 GEN 2 RFID HANDHELD READER
USER'S MANUAL, VERSION 9
72
You can lock, unlock, permanently lock, and permanently unlock a memory bank of the tag.
The detailed definitions of these 4 operations can be found in the EPC Global standards
document which can be found at the EPC Global website:
https://www.gs1.org/epcrfid/epc-rfid-uhf-air-interface-protocol/2-0-1. On the page, press the
button showing the latest air interface protocol and download the pdf file. More details can be
found on Appendix G.
Copyright 2017 © Convergence Systems Limited, All Rights Reserved
Page 73

CSL CS101-2 EPC CLASS 1 GEN 2 RFID HANDHELD READER
USER'S MANUAL, VERSION 9
73
Click the
latest Air
Interface
Protocol
Copyright 2017 © Convergence Systems Limited, All Rights Reserved
Page 74

CSL CS101-2 EPC CLASS 1 GEN 2 RFID HANDHELD READER
USER'S MANUAL, VERSION 9
74
After a successful operation, the following screen is diplayed.
Reminder: The Lock password must be non-zero for you to be able to implement any security
action. This is an EPC Global Standards definition and requirement.
Copyright 2017 © Convergence Systems Limited, All Rights Reserved
Page 75

CSL CS101-2 EPC CLASS 1 GEN 2 RFID HANDHELD READER
USER'S MANUAL, VERSION 9
75
Pressing KILL at the top of the screen presents the feature for killing a tag. Note it asks you to
enter the Kill password immediately:
After entering the correct password, press KILL button at the bottom of the screen, the tag will
be killed. During the process, the word “KILL” will be changed to “KILLING”, and , if
successful, a “Success” message will pop up above the bar.
Reminder: The Kill password must be non-zero for you to be able to implement any security
action. This is an EPC Global Standard definition and requirement.
Copyright 2017 © Convergence Systems Limited, All Rights Reserved
Page 76

CSL CS101-2 EPC CLASS 1 GEN 2 RFID HANDHELD READER
USER'S MANUAL, VERSION 9
76
5.1.1.12 Register Tag
Register Tag is a section of the CS108 Demo Application page allowing the user to scan a
barcode, and then write that information into a specific memory bank of an RFID tag. That
information is often saved in a certain section of the EPC memory bank, or in the USER
memory bank. This section allows you to select which memory bank and which offset location
to write that information to. Moreover, it allows you to set a tag mask so that it would only
write to tags with a certain tag pattern.
Copyright 2017 © Convergence Systems Limited, All Rights Reserved
Page 77

CSL CS101-2 EPC CLASS 1 GEN 2 RFID HANDHELD READER
USER'S MANUAL, VERSION 9
77
5.1.1.13 Special Functions
This section of the CS108 Demo Application offers user some additional special functions
available with the CS108.
Copyright 2017 © Convergence Systems Limited, All Rights Reserved
Page 78

CSL CS101-2 EPC CLASS 1 GEN 2 RFID HANDHELD READER
USER'S MANUAL, VERSION 9
78
Multibank inventory is a special function that allows the RFID inventory of multiple tag
memory banks at the same time.
Copyright 2017 © Convergence Systems Limited, All Rights Reserved
Page 79

CSL CS101-2 EPC CLASS 1 GEN 2 RFID HANDHELD READER
USER'S MANUAL, VERSION 9
79
Select the bank, offset and size (in words) that you want to inventory. You can choose up to 2
extra banks.
Copyright 2017 © Convergence Systems Limited, All Rights Reserved
Page 80

CSL CS101-2 EPC CLASS 1 GEN 2 RFID HANDHELD READER
USER'S MANUAL, VERSION 9
80
Now you can press the START button:
Copyright 2017 © Convergence Systems Limited, All Rights Reserved
Page 81

CSL CS101-2 EPC CLASS 1 GEN 2 RFID HANDHELD READER
USER'S MANUAL, VERSION 9
81
You will now see the RFID tags’ EPC bank, TID bank, as well as the phase and frequency
channel of reading:
Copyright 2017 © Convergence Systems Limited, All Rights Reserved
Page 82

CSL CS101-2 EPC CLASS 1 GEN 2 RFID HANDHELD READER
USER'S MANUAL, VERSION 9
82
5.1.1.14 Exiting the Software
By pressing the Home button, middle CIRCLE icon on the LCD touch screen at the bottom,
one can exit the software. Note that using this method for exiting the demo application does not
completely stop the application, the application is placed in a sleep mode.
Copyright 2017 © Convergence Systems Limited, All Rights Reserved
Page 83

CSL CS101-2 EPC CLASS 1 GEN 2 RFID HANDHELD READER
USER'S MANUAL, VERSION 9
83
5.1.1.15 Truly Exiting the Software
To truly exit the software, press the SQUARE button, and then you will see the following
screen:
At this point, you can truly exit the software by pressing the ‘X’ to close the app.
Copyright 2017 © Convergence Systems Limited, All Rights Reserved
Page 84

CSL CS101-2 EPC CLASS 1 GEN 2 RFID HANDHELD READER
USER'S MANUAL, VERSION 9
84
5.1.1.16 Source Codes
Source code for this application, tools and manuals are available on Convergence Systems
Limited website:
www.convergence.com.hk
Copyright 2017 © Convergence Systems Limited, All Rights Reserved
Page 85

CSL CS101-2 EPC CLASS 1 GEN 2 RFID HANDHELD READER
USER'S MANUAL, VERSION 9
85
5.1.2 DEMO C# SOFTWARE FOR iPHONE and Android
5.1.2.1 Installing the iPhone and Android Software
The C# code applies to both the iPhone and Android phone. The same code can be deployed to
multiple platforms. This is a powerful development in the world of smart phone Apps. Visual
Studio 2017 was used to compile the applications.
The iPhone version App can be installed from the Apple App Store.
The Android version App can be installed from Google Play.
The Android software can also be installed by downloading the APK file from the CSL
website.
Copyright 2017 © Convergence Systems Limited, All Rights Reserved
Page 86

CSL CS101-2 EPC CLASS 1 GEN 2 RFID HANDHELD READER
USER'S MANUAL, VERSION 9
86
5.1.2.1.1 Installing iPhone App from App Store
The released CS108 C# iPhone App can be installed from the Apple’s App Store:
Copyright 2017 © Convergence Systems Limited, All Rights Reserved
Page 87
CSL CS101-2 EPC CLASS 1 GEN 2 RFID HANDHELD READER
USER'S MANUAL, VERSION 9
87
5.1.2.1.2 Installing Android App from Google Play
The CS108 C# Android App can be installed from Google Play:
The CS108 C# Android App can also be installed by downloading the APK installer from the
CSL website and then copied to the Android phone for installation.
Copyright 2017 © Convergence Systems Limited, All Rights Reserved
Page 88

CSL CS101-2 EPC CLASS 1 GEN 2 RFID HANDHELD READER
USER'S MANUAL, VERSION 9
88
5.1.2.2 Starting the iPhone Software
Since the User Interface is the same for C# Demo App on iPhone and Android, here we will
only focus on the iPhone version:
With the CS108 App for iPhone installed, you will see the following icon on your iPhone:
Copyright 2017 © Convergence Systems Limited, All Rights Reserved
Page 89

CSL CS101-2 EPC CLASS 1 GEN 2 RFID HANDHELD READER
USER'S MANUAL, VERSION 9
89
Press the icon to start the CS108 iPhone App.
Copyright 2017 © Convergence Systems Limited, All Rights Reserved
Page 90

CSL CS101-2 EPC CLASS 1 GEN 2 RFID HANDHELD READER
USER'S MANUAL, VERSION 9
90
5.1.2.3 Main Menu
The Main Menu will launch when you start the CS108 iPhone App. There are 8 function
buttons and 1 connection button. The text color on the connection button indicates whether a
CS108 reader is connected (blue text) or disconnected (red text).
To connect, press the button with text “Press to Scan/Connect Reader” to begin searching and
making a connection to CS108 reader.
Copyright 2017 © Convergence Systems Limited, All Rights Reserved
Page 91

CSL CS101-2 EPC CLASS 1 GEN 2 RFID HANDHELD READER
USER'S MANUAL, VERSION 9
91
5.1.2.4 Searching and Connecting to CS108 (Pairing)
The search and connect screen will search for CS108s nearby and list them. Please make sure
the CS108 Blue LED Bluetooth button is flashing, meaning the CS108 is ready for discovery
by the iPhone. Note: the system Bluetooth device connection is not used to make the
CS108 connection on an iPhone OS. The CS108 Application provides this functionality.
You can refresh the search process by swiping DOWNWARD and then releasing
Copyright 2017 © Convergence Systems Limited, All Rights Reserved
Page 92

CSL CS101-2 EPC CLASS 1 GEN 2 RFID HANDHELD READER
USER'S MANUAL, VERSION 9
92
Once you select a particular reader by pressing your finger onto that selection, then a pop up
window will ask you if you want to connect to that reader. Press “Ok” to connect.
After that, the software will automatically return to main menu screen of the application.
*Note the Reader Name is very useful to distinguish between various readers on the screen. To
change name, go to Settings > Administration and edit the Reader Name field. For help see
section 5.1.2.5 Settings.
Copyright 2017 © Convergence Systems Limited, All Rights Reserved
Page 93

CSL CS101-2 EPC CLASS 1 GEN 2 RFID HANDHELD READER
USER'S MANUAL, VERSION 9
93
After successfully connecting a CS108, the red text in the connection button will change to
blue text and shows the connected reader name.
Copyright 2017 © Convergence Systems Limited, All Rights Reserved
Page 94

CSL CS101-2 EPC CLASS 1 GEN 2 RFID HANDHELD READER
USER'S MANUAL, VERSION 9
94
5.1.2.5 Settings
After connecting, the Settings page allows you to edit the RFID operation parameters and
administration parameters.
Operation Settings:
1. Regulatory Region is the specific area/country where the unit is to be used.
2. Frequency Order is how the frequency channels are to be traversed: Hopping, Fixed or
Agile.
Copyright 2017 © Convergence Systems Limited, All Rights Reserved
Page 95

CSL CS101-2 EPC CLASS 1 GEN 2 RFID HANDHELD READER
USER'S MANUAL, VERSION 9
95
3. Fixed Channel is the specific frequency channel to be used when Frequency Order is set
to Fixed.
4. Power is the conducted power entering the antenna, the value is 10 times the dBm
value desired. For example, 300 means 30 dBm. i.e. (300/10) dBm.
5. Tag Population is the approximate number of tags to be typically inventoried.
6. The Q Override value is automatically set when you enter the Tag Population value. This
value can be overwritten by pressing the “Override” button and editing the Q value. To
return to the default value, press ‘Reset’ Appendix D describes this in detail.
7. Session is the EPC defined session for querying the tags. For detailed explanations of
Session please refer to Appendix C.
8. Target is the EPC defined query target of the tag status flag, A, B, or A/B Toggle. For a
detailed explanation of Target. Please refer to Appendix F
9. Query Algorithm is either DynamicQ or FixedQ. A detailed explanation is found in
Appendix E.
10. Reader Mode or Link Profile is either 0, 1, 2, or 3. Detailed explanation is found in
Appendix B.
After changing parameters, press “SAVE” button. A beep will confirm the successful save.
Copyright 2017 © Convergence Systems Limited, All Rights Reserved
Page 96

CSL CS101-2 EPC CLASS 1 GEN 2 RFID HANDHELD READER
USER'S MANUAL, VERSION 9
96
Administration Settings:
1. Reader Model is the model of the reader, for example, CS108-1 for 865-868 MHz band or
CS108-2 for 902-928MHz
2. Reader Name is an editable name for the reader. You can change the name of the reader for
Copyright 2017 © Convergence Systems Limited, All Rights Reserved
Page 97

CSL CS101-2 EPC CLASS 1 GEN 2 RFID HANDHELD READER
USER'S MANUAL, VERSION 9
97
easier management at sites where you have multiple CS108 units. After the name is
changed, you need to power off and power on the CS108 for the name to be effective.
3. Battery Level Format defines how you want to view the battery level, either in absolute
voltage or in percentage.
4. Inventory Alert Sound enables or disables the sound during inventory. During inventory,
there are 2 different pitches of sound: high pitch means a new unique tag has been read.
Low pitch means a tag that has been read before has been read again. Also, the rate of
beeping is proportional to the rate of tag reads received.
5. Inventory Delay Time is an internal data control. Do not change.
6. Barcode Reset to Continuous Mode is a special function button to reset the barcode to
continuous mode. This button may need to be pressed after firmware upgrades and is an
artifact of this being Demo software for both users and developers. If the barcode has been
inadvertently set to trigger mode, this button resets it.
7. Reset Software/Reader to Default Setting is a special function button to reset the
configuration setting to the default values.
8. Get Serial Number gets the Product Serial Number. It is also on the paper label on the back
of the reader.
9. Shortcut defines the short cut sled trigger timing. The values are in msec. This is short cut
method to select either RFID inventory or barcode reader. When the user is in the main
page already, then this short cut trigger control will work. In this default setting, if the user
continuously presses the trigger for 0 to 500 msec and then releases it, he will jump to the
RFID inventory page. If he keeps on pressing the trigger past 500 msec and releases it
before 10,000 msec (10 seconds), then he will jump to the barcode reading page. The Min
and Max value ranges are 0 and 30,000 msec (30 seconds).
10. The Save Button MUST be pressed to make value changes effective.
Copyright 2017 © Convergence Systems Limited, All Rights Reserved
Page 98

CSL CS101-2 EPC CLASS 1 GEN 2 RFID HANDHELD READER
USER'S MANUAL, VERSION 9
98
5.1.2.6 RFID Inventory
From the Main Menu press the Inventory button to go to the demo Inventory screen. At the
bottom of the screen you can select RFID Inventory or Barcode Scan,
RFID Inventory is the default. Press the sled trigger or press Start on the application screen.
The RFID tags read will be displayed as shown in the second image below.
Copyright 2017 © Convergence Systems Limited, All Rights Reserved
Page 99

CSL CS101-2 EPC CLASS 1 GEN 2 RFID HANDHELD READER
USER'S MANUAL, VERSION 9
99
Total
Unique
Tags
Read
Rate
Elapsed
Time (sec)
A high frequency tone will be heard when a new RFID tag is read and a low frequency tone
will be heard when a tag is read again. NOTE: Make sure the sound part of the iPhone is not
muted and the volume is not set too low.
A summary of tags read appears at the bottom of the screen: Total Unique Tags, Read Rate, and
Elapse Time.
If you stop inventory and start again, the previous list will remain and new tags are added to it
at the top. If you want to start a new list, then you can press the Clear button to clear the list.
Copyright 2017 © Convergence Systems Limited, All Rights Reserved
Page 100

CSL CS101-2 EPC CLASS 1 GEN 2 RFID HANDHELD READER
USER'S MANUAL, VERSION 9
100
5.1.2.7 Barcode Inventory
To inventory Barcodes, select Barcode Scan at the bottom of the screen.
Pull the sled trigger or press Start on the application screen to activate the scanner.
There is a registration/target dot to aim the scanner. A high tone will be heard when a new
Barcode is scanned and a low tone will be heard when a barcode is read again.
Previous scans can be cleared by pressing the Clear text button on the screen.
Copyright 2017 © Convergence Systems Limited, All Rights Reserved
 Loading...