

Page 1
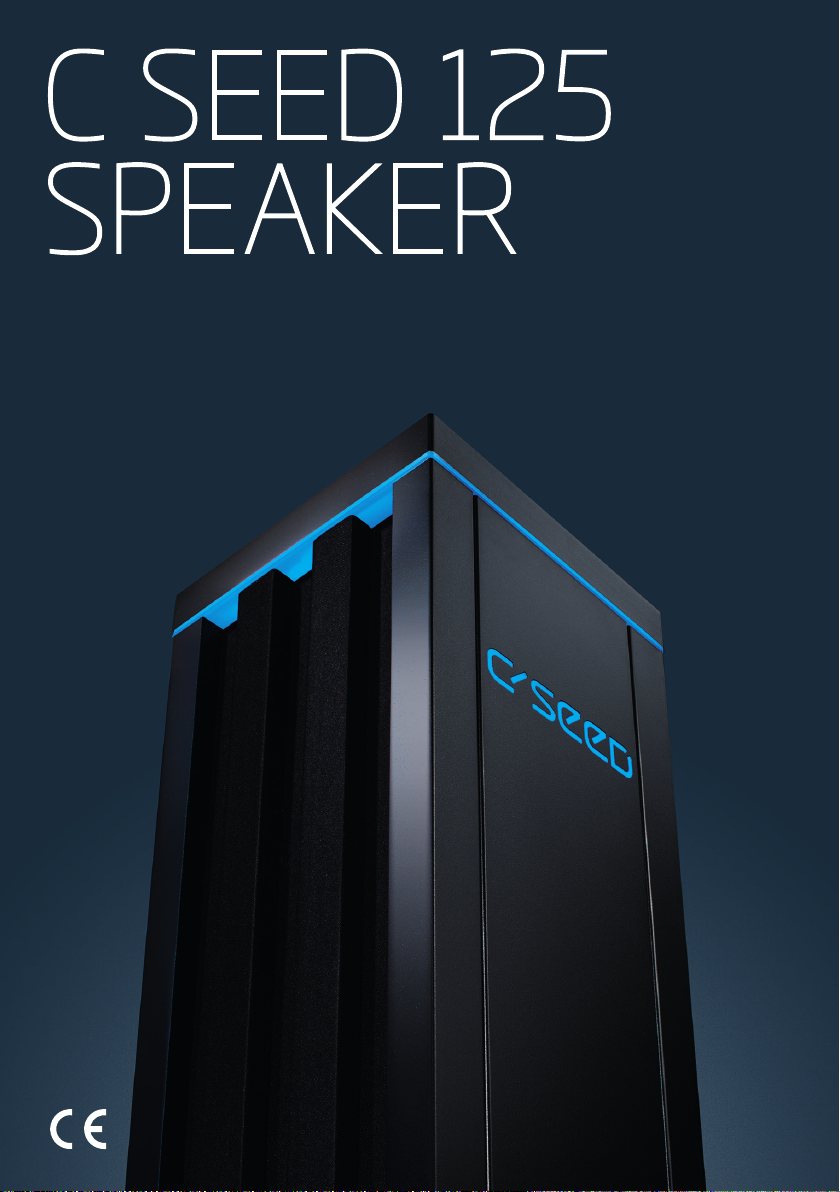
C SEED 125
SPEAKER
USER
INSTRUCTIONS
These are the
original English
instructions
Version 1.0
Page 2

Page 3

C SEED 125 SPEAKER
C SEED 125 SPEAKER
TABLE OF CONTENTS
1. Introduction 4
1.1 Intended Use 4
1.2 Safety symbols used in this manual 4
2. Description of the C SEED 125 speaker 5
2.1 Technical Data 5
2.2 Product elements 6
2.3 Visual signals 6
3. Safety Information 7
3.1 Important safety warnings 7
3.2 Explanation of safety warnings used on the C SEED 125 speaker 8
3.3 Tools to be used 8
4. Installing the speaker 9
4.1 Unpacking and checking the content 9
4.2 How to install the C SEED 125 speaker 10
5. How to set up the audio system 13
5.1 Choosing your conguration (integrated or island conguration) 13
5.2 How to set up the integrated conguration 13
6. How to use the C SEED 125 speaker 15
7. Maintenance and inspections 15
2
Page 4

8. Troubleshooting 16
9. Disposal 17
10. Warranty 17
Appendix I Declaration of conformity 18
Appendix II Recommended speaker setups 20
Appendix III Pin Plan 22
Appendix IV Spare parts 24
Appendix V Installation plan 25
Appendix VI Cable specifications 27
3
Page 5

C SEED 125 SPEAKER
1 INTRODUCTION
Congratulations on the purchase of your new C SEED 125 speaker. You have acquired a high-quality speaker. This
manual is part of this product. The manual is intended for the installer and the user of the C SEED 125 speaker. Please
familiarise yourself with all the included information before using the product. The product must only be used as
described in this manual and for the specied application scenarios.
This manual also refers to the C SEED 125 speaker as „product“ or „speaker“.
For questions, information or ordering user instructions, please contact the manufacturer:
C SEED ENTERTAINMENT SYSTEMS GMBH
Gußhausstraße 21/25
1040 Vienna
T +43 1 2084 100
ofce@cseed.tv
www.cseed.tv
1.1 INTENDED USE
The C SEED 125 speaker is intended to be used as a device for reproducing audio sound. The speaker is intended for
outdoor use only. The speaker should not be used in extreme weather conditions or in locations with the presence of
a corrosive or explosive atmosphere. The speaker is not intended to be used as a device to move objects. Only use the
speaker within the specied performing limits. The speaker must only be used according to the instructions as described
in this manual. All use other than described in this manual is seen as unintended use.
The C SEED 125 speaker must only be used with the following original accessories and components:
• C SEED Speakers App
• LA4X amplier
• C SEED Control Box
• Cables
• Connection between Crestron and amplier (for integrated setup), or:
• Connection between receiver (DENON receiver recommended) and amplier.
1.2 SAFETY SYMBOLS USED IN THIS MANUAL
DANGER!
Danger indicates an
imminently hazardous
situation which, if not
avoided, will result in
death or serious injury.
WARNING!
Warning indicates a
potentially hazardous
situation which, if not
avoided, could result in
death or serious injury.
CAUTION!
Caution indicates a
potentially hazardous
situation which, if not
avoided, could result in
minor or moderate injury.
NOTICE
Notice indicates a
situation which, if not
avoided, could result in
property damage.
4
Page 6

2 DESCRIPTION OF THE C SEED 125 SPEAKER
2.1 TECHNICAL DATA
Device name C SEED 125 speaker
Designation Outdoor Speaker
General description The C SEED 125 speaker is an outdoor speaker. The speaker can be
integrated with an existing audio system, or can be set up as a stand-
alone audio system.
Type Retractable passive 2-way coaxial outdoor speaker system
Warranty 24 months
Technical life span of mechanical parts 10 years
Noise emission motor < 70 dB (A)
Conguration Full range from 2.0 stereo to 9.1 surround sound or custom setup
Speaker type Coaxial
Axisymmetric maximum: 125 dB
Nominal directivity (-6dB) 100 º
Usable bandwidth: (-10dB) 60Hz-20kHz
Power motor 0.75 kW
Voltage/Frequency 110-220 V - 50/60 Hz
Extend/retract drive Remote-controlled electric worm drive
Remote control Proprietary C SEED app on smartphone or tablet
Protection Class IP55
Operating temperature range -10 ºC to + 40 ºC
Relative humidity 10 %~95 % relative humidity
Weight speaker 119 kg
Dimensions (ø x H) Retracted: ø 600 x 1187 mm
Extended (mm): ø 600 x 2104 mm
Mains current 7.3 A
Mains current 150 % (overload 60s) 10.95 A
Line circuit breaker C 16
recommendation Characteristics C = line circuit breaker
tripping between 6-10 times ln
The cross-section of the supply line must be designed according to the
transfer category and maximum permitted current. The contractor
commissioning the device must ensure protection for the power line.
5
Page 7

C SEED 125 SPEAKER
2.2 PRODUCT ELEMENTS
1. TOP COVER
2. MAIN SPEAKER
3. LED STRIP
4. LED LOGO
5. FRONT COVER
6. ELEVATION UNIT/SHAFT
7. PHOENIX CONNECTOR
8. EYE BOLT/PLACE FOR SCREW DISC
2.3 VISUAL SIGNALS
Signal Meaning
LED strip ashes Indication that the control
box has been started.
1
2
8
7
3
4
5
6
6
Page 8

3 SAFETY INFORMATION
3.1 IMPORTANT SAFETY WARNINGS
WARNING! Read and understand all safety instructions.
• Follow all the instructions. This will avoid re, explosions, electric shocks or other hazards that may result in damage
to property and/or severe or fatal injuries.
• The product must be only used by person who have fully read and understand the contents of this user manual.
• Ensure that each person who uses the speaker has read these warnings and instructions and follows them.
Keep all safety information and instructions for future reference and pass them on to subsequent users of the speaker.
•
• The manufacturer is not liable for cases of material damage or personal injury caused by incorrect handling or non
compliance with the safety instructions. In such cases, the warranty will be voided.
• This product is not intended for use by persons (including children) with restricted physical, sensory or intellectual
capability or lack of experience and/or knowledge, unless they are supervised by a person who is responsible for their
safety or provides them with instructions on how to use the product.
• DANGER! Not for use in potentially explosive environments.
• Keep children away from the speaker to prevent injury.
• Children should be supervised in order to ensure that they do not play with the product.
• DANGER!
• DANGER! Be vigilant at all times, and always be careful what you are doing. Do not use the product if you are
• Always make sure that the speaker is xed during transportation, so there is no possibility of sudden movements and
• Make sure to use lifting gear when moving the product.
• The speaker must only be installed by a quali ed and trained person.
• Two people are always required for the installation process.
• Only a quali ed electrician may carry out the electrical installation and the initial activation. All local regulations
• Check the product and the cables for damage before installation and every use. If there is any visible damage, a strong
• Lay the cables in such a way that they cannot be stretched, squashed or kinked, and that no one can trip over them.
• If the speaker is not installed and used in accordance with this manual, it may cause harmful interference with radio
• Do not use the speaker close to radio equipment. This may cause harmful interference.
• Use the speaker only within the speci ed performance limits.
• WARNING! The speaker contains moving parts! Keep away from clothing, ngers, hair etc. to prevent strangulation
• In case of damages of the speaker, the device must not be used anymore.
• The product has to be switched off and retracted after each usage.
• Keep the speaker at a safe distance from your ears to prevent the risk of hearing loss.
• Ensure that there are no people or objects in the range of motion when you extend or retract the speaker. Otherwise
Never leave children unattended with the packaging material. The packaging material represents a danger of
suffocation. Children frequently underestimate the dangers. Always keep children away from the packaging material.
lacking in concentration or awareness, or are under the in uence of drugs, alcohol or medication. Even a moment of
inattentiveness can lead to serious accidents and injuries when using the product.
or instability.
must be followed.
odour or excessive heating of components, disconnect the power supply immediately and do not use the product.
or television reception or affect other electronic devices in residential areas.
and jamming.
injury or damages may occur.
7
Page 9

C SEED 125 SPEAKER
• DANGER! Close the speaker when the wind picks up or when stormy weather approaches.
• Close the speaker when it is snowing, raining, during sandstorms or thunderstorms.
• Do not use the speaker during extreme weather conditions, like sandstorms, rain and thunderstorms.
• In case of ooding of the shaft, switch off the mains power supply immediately. Contact the re department. When
there is no risk anymore, contact a quali ed and trained person to fully inspect the system.
• The speaker is not intended to be used as a device to move objects. Do not stand on the speaker!
• Do not use the speaker after an earthquake. Keep a safe distance from the speaker until the speaker has been fully
inspected by a quali ed and trained person.
• In case of an error, stop using the product and follow the instructions in the user instructions or contact your dealer.
• In case of an accident, stop using the product and consult a doctor if necessary.
• Maintenance and inspection should be done on a frequent basis. If there is any visible damage, a strong odour or a
excessive overheating of components stop using the product.
• Do not attempt to open, modify or repair the speaker. This will expire the warranty.
• Use only original accessories and spare parts.
• Alterations to the speaker and technical modi cations are not permitted.
• The speaker must only be disassembled and stored by a quali ed and trained person.
3.2 EXPLANATION OF SAFETY WARNING USED ON THE PRODUCT
Image
WARNING! KEEP HANDS OUT. RISK OF TRAPPED HANDS
3.3 TOOLS TO BE USED
Tool Function
Crimping tool For connecting the electrical cable to the Phoenix plug
Level For levelling the speaker horizontally/vertically
Lifting gear (crane or fork-lift truck) For moving and lifting the speaker
General tools for installation
and electrical installation
8
Page 10

4. INSTALLATION OF THE SPEAKER
WARNING! The speaker must only be installed by a qualied and trained person.
4.1 UNPACKING AND CHECKING THE CONTENTS
Before you install the product for the rst time, you should check it for damage. If damages have occurred during
transport, please inform the transport service provider immediately. The device was tested to ensure proper function
before delivery.
CHECK TO ENSURE THE PACKAGE CONTAINS THE
FOLLOWING ITEMS:
• Speaker
• 2 x Phoenix plug (1x 16 pins; 1 x 24 pins)
• Screws and seal for Phoenix plug
• 2 x eye bolts (attached)
• 2 x screw disc
• 1 x SpeakOn plug
• Instructions for installation and use
Options:
• Cable (50m or 100m)
• LA4X Amplier
• Control Box
• Receiver (for island conguration)
• Subwoofer
• Network cables
• XLR cable <-> Home audio connection
• ø 32 mm conduit
9
Page 11

C SEED 125 SPEAKER
4.2 HOW TO INSTALL THE C SEED 125 SPEAKER
WARNING!
• READ ALL SAFETY INSTRUCTIONS CAREFULLY AND MAKE SURE THAT YOU HAVE UNDERSTOOD THEM BEFORE YOU
INSTALL THE PRODUCT.
• Only a qualied electrician may carry out the electrical installation. All local regulations must be followed.
Before you start:
1. Choose one of the recommended speaker setups (see also Appendix II). Make sure you have all components for the
chosen set up.
2. Make sure you have all tools needed for (electrical) installation, including a crimping tool, level, sling and lifting gear.
10
Page 12

To install the speaker:
1. Attach the sling to the eye bolts (8). Attach the sling to the lifting
gear (crane or fork-lift truck). Place the speaker next to the desired
location.
2. Use a screwdriver to mount the Phoenix connector (7) to the shaft
(6). Place the seal between the Phoenix connector (7) and the
shaft (6).
3. Mark the route from the desired location of the speaker to the
location the control box (e.g. in the AV room).
4. Dig the trench for the cable. All local regulations must be followed.
5. Dig the speaker hole. See Appendix V for the installation drawings.
6. Put 200 mm gravel on the bottom of the hole for drainage.
7. Drive a conduit in the trench for the cable.
8. Run the cable through the conduit.
9. Continue running the cable through the house to the location of
the control box.
10. Place the speaker in the hole. Make sure to use lifting gear when
moving the speaker.
11
Page 13

C SEED 125 SPEAKER
11. Use a crimping tool to connect the speaker end of the cable to the
Phoenix plug. See Appendix III for the pin plan.
12. Use a crimping tool to connect the other end of the cable to the
other Phoenix plug and to a speakOn plug. See Appendix III for
the pin plan.
13. Connect the Phoenix plug to the Phoenix connector (7) on the
speaker.
14. Use a level to level the speaker. Fill up the speaker hole.
15. Remove the eye bolts (8).
16. Place the screw discs by placing a sharp tool in the two holes of
the screw disc and turning clockwise.
17. Clean the speaker. Make sure that the speaker, in particular
the top cover (1), is free from obstacles and dirt. Remove any
obstacles and dirt.
1
2
1
2
12
Page 14

5. HOW TO SET UP THE AUDIO SYSTEM
WARNING! The speaker must only be installed and connected by a quali ed and trained person.
5.1 CHOOSING YOUR CONFIGURATION (INTEGRATED OR ISLAND CONFIGURATION)
The C SEED 125 speaker can be integrated with an existing sound system (integrated setup) or can be used as a
stand-alone system (island setup). For the island setup you need a receiver. For the integrated setup, you can connect
the control box and the ampli er to the existing home audio system.
5.2 HOW TO SET UP THE INTEGRATED CONFIGURATION
To set up the integrated confi guration:
1. Make sure you have installed the speaker(s) according to the instructions (see “How to install the C SEED 125
Speaker”).
2. Make sure you have all components for the chosen set up.
3. Place the control box and amplifi er (e.g. in the AV room).
4. Connect the Phoenix plug to the Phoenix connector on your control box.
5. Connect the audio cable with the speakOn plug to the amplifi er.
6. Connect the amplifi er with the control box using a network cable.
7. Connect the amplifi er to the home audio system (e.g. the Crestron) using an XLR cable for each channel separately.
8. Connect the amplifi er and control box to a suitable and easily accessible wall socket.
9. Connect the control box to your home network with a router. Con gure the router. Note: if you don’t have internet/wi
the system can still be used. The control box sends out a wi signal. This signal can be detected by a mobile phone.
By using the app on your mobile phone you can control the speakers through the control box.
Network cable
Network cable
Router
POWER cable 3x2,5mm²
DATA cable 18x0,5mm²
AUDIo cable 4x4mm²
4x4mm² AUDIO
4x4mm² AUDIO
POWER cable 3x2,5mm²
DATA cable 18x0,5mm²
AUDIo cable 4x4mm²
13
Page 15

C SEED 125 SPEAKER
5.3 HOW TO SET UP THE ISLAND CONFIGURATION
Network cable
Network cable XLR cables
POWER cable 3x2,5mm²
DATA cable 18x0,5mm²
AUDIo cable 4x4mm²
4x4mm² AUDIO
4x4mm² AUDIO
POWER cable 3x2,5mm²
DATA cable 18x0,5mm²
AUDIo cable 4x4mm²
To set up the island confi guration:
1. Make sure you have installed the speaker(s) according
to the instructions (see “How to install the C SEED 125
Speaker”).
Make sure you have all components for the chosen set
2.
up.
3. Place the control box and amplifi er (e.g. in the AV
room).
4. Place the receiver on an easily accessible location
(e.g. the living room).
5. Connect the Phoenix plug to the Phoenix connector on
your control box.
6. Connect the audio cable to the amplifi er.
7. Connect the amplifi er with the control box using a
network cable.
8. Connect the amplifi er to the receiver using an
XLR<->cinch cable for each channel separately.
Connect
9.
control box
to the
receiver
using a
network
cable.
10. Connect the amplifi er, control box and receiver to a
suitable and easily accessible wall socket.
11. Connect your audio source (e.g. USB, TV or airplay)
to the receiver.
12. Connect the control box to the router. Con gure the
router. Note: if you don’t have internet/wi the system
can still be used. The control box sends out a wi
signal. This signal can be detected by a mobile phone.
By using the app on your mobile phone you can control
the speakers through the control box.
14
Page 16

6. HOW TO USE THE C SEED 125 SPEAKER
WARNING!
• Clean the speaker before use! Make sure that the speaker, in particular the top cover, is free from obstacles and
dirt. Remove any obstacles and dirt.
• Before you use/extend the speaker, make sure that everybody is at a safe distance from the speaker.
To use the speaker:
1. Download and install the C SEED Speakers app from
the App Store.
2. Open the C SEED Speakers app.
3. Tap the Extend button to rise up the speakers.
4. Control the speakers using:
a. The Input Selection menu for choosing your audio
source (for island setup only).
b. The Master Volume slider to adjust the volume.
c. The Mute button to mute the volume.
5. Set up the speakers from the menu, using:
a. The Volume Delta (dB) to adjust the volume of the
individual speakers.
b. The Delay Delta (ms) to adjust to the audio delay.
c. The Maximum Volume (dB) to limit the maximum
volume of the speaker.
d. Adjust the light of the LED strip.
6. Tap the Retract button to stop using and rising down
the speakers.
7. MAINTENANCE AND INSPECTIONS
CAUTION! Do not use cleaning tissues or chemical substances which might damage the surface.
Task Frequency
Check if the speaker, in particular the top cover (1), is free from obstacles,
sand and dirt. Remove any obstacles, sand and dirt.
Check if the speaker rises up correctly. Always before you use the product
Check the speaker for visible damage and rust. Reparations must be done by a
qualied and trained person.
Clean the tower and top cover of the speaker with lukewarm water, mild
detergent and a sponge.
Check if residues of vermin are visible near the speaker. If so, take appropriate
measures (e.g. bait, traps or rat fright).
Check if residues of vermin are visible near the speaker. If so, take appropriate
measures (e.g. bait, traps or rat fright).
Always before you use the product
Always before you use the product
Monthly and if necessary
Monthly and if necessary
Always before you use the product
15
Page 17

C SEED 125 SPEAKER
8. TROUBLESHOOTING
WARNING! Always contact your dealer when the product is not operating correctly. Do not attempt to open, modify or
repair the speaker yourself. Reparations must be done by a qualied and trained person. You nd the spare part list
in Appendix IV. Only use original spare parts.
Error Cause Solution
No LED lights on speaker C SEED control box Plug and switch on the C SEED control box
No movement Wi connection Check if connected to your wi
Wi connection Check if movement happens when manually driven
from C SEED control box
Wi connection Restart Router
Wi connection Check router settings
No movement Mechanical error Contact a qualied and trained person for inspection
Just one speaker moving C SEED control box Restart the control box
Different color on speakers C SEED speakers app Adjust the color in the app
No sound owner’s audio source Check the audio source
owner’s audio source Unmute the audio source
C SEED amplier Plug and switch on the C SEED amplier
C SEED amplier Unmute in the app
owner’s cabling Check cabling between audio source and C SEED
amplier
16
Page 18

9. DISPOSAL
The symbol on the product, the accessories or packaging indicates that this device must not be treated
as unsorted municipal waste, but must be collected separately! Dispose of the device via a collection
point for the recycling of waste electrical and electronic equipment if you live within the EU and in
other European countries that operate separate collection systems for waste electrical and electronic
equipment. By disposing of the device in the proper manner, you help to avoid possible hazards for the
environment and public health that could otherwise be caused by improper treatment of waste equipment. The recycling
of materials contributes to the conservation of natural resources. Therefore do not dispose of your old electrical and
electronic equipment with the unsorted municipal waste.
The packaging is made of environmentally friendly materials, which may be disposed through your local recycling
facilities. By disposing of the packaging and packaging waste in the proper manner, you help to avoid possible hazards
for the environment and public health. The symbol on the packaging indicates that the packaging is made of PAP.
10. WARRANTY
Contact your C SEED dealer before returning the product.
The warranty covers 24 months from the date of purchase. The defective ampli er, Control Box or receiver must be sent
to the dealer within 2 weeks. In case of a defective speaker, the dealer will inspect the speaker on site. The warranty will
be void in the following cases:
• External force
• Improper maintenance
• Failure to comply with operating instructions
• Damage caused by lightning
17
Page 19

C SEED 125 SPEAKER
APPENDIX I - DECLARATION OF CONFORMITY
EC declaration of conformity (DoC) of the machinery
Declaration according to Directive 2006/42/EC, as amended (hereafter called Machinery Directive). This language
version of the declaration is veried by the manufacturer (original declaration).
We (manufacturer):
Business name: C SEED Entertainment Systems GmbH
Address: Gußhausstraße 21/25, 1040 Vienna
Country: AUSTRIA
Declare under our sole responsibility for the following machinery:
Generic denomination: Outdoor speaker
Function: Audio play
Model: C SEED
Type: 125
Serial number: CS0117.25.10101S
Commercial Name: C SEED 125
that all the relevant provisions of the Machinery Directive are fulfilled;
that the machinery also complies with the provisions of the following European Directives:
• (example) DIRECTIVE 2014/30/EU relating to electromagnetic compatibility
• (example) DIRECTIVE 2014/35/EU relating to electrical equipment designed for use within certain voltage limits
that the machinery is in conformity with the following standards and/or other normative documents:
• (example) EN ISO 12100:2010 Safety of machinery - General principles for design - Risk assessment and risk
reduction (ISO 12100:2010)
• (example) EN 349:1993+A1:2008 Safety of machinery - Minimum gaps to avoid crushing of parts of the human body
and that the following Notified Body performed the intervention as described below and issued the EU-type
examination certificate:
Notied Body name: TÜV Austria Services GmbH
Address: Deutschstraße 12, 1230 Vienna
Country: AUSTRIA
Identication number: 0408
Description of intervention: DoC
Number EU-type
examination certicate: MG17-00269
Date EU-type
examination certicate: 03.03.2017
Duration and conditions of validity
of the examination certicate: no exipration
18
Page 20

that the machinery is designed and constructed in accordance with the system of full quality assurance approved by:
Notify Body name: TUV Austria Services GmbH
Address: Deutschstraße 12, 1230 Vienna
Country: AUSTRIA
Identi cation number: 0408
that the following natural or legal person established in the Community is mandated in writing to perform all or part
of the obligations and formalities connected with the Machinery Directive:
Business name: TUV Austria Services GmbH
Address: Deutschstraße 12, 1230 Vienna
Country: AUSTRIA
Name: Ing. Michael Lager
Position: Maschinen -und Gerätesicherheit
and that the following natural or legal person established in the Community is authorized to compile the technical fi le:
Business name: C SEED Entertainment Systems GmbH
Address: Gußhausstraße 21/25, 1040 Vienna
Country: AUSTRIA
Name: Jakob Odgaard
Position: CEO
Place and date of issue (of this DoC): Vienna, 03.03.2017
Signed by or for the manufacturer:
Name: Jakob Odgaard
Title: CEO
19
Page 21

C SEED 125 SPEAKER
APPENDIX II - RECOMMENDED SPEAKER
SETUPS
20
Page 22

Required components
Integrated Island
2.0 2 speakers
Control box
Amplier
Home Audio System
Cable
ø 32 mm Conduit
2 network cables
XLR<->plug for connection to home
audio system
2.1 2 speakers
1 subwoofer
Control box
Amplier
Home Audio System
Cable
ø 32 mm Conduit
2 network cables
XLR<->plug for connection to home
audio system
5.1 5 speakers
1 subwoofer
Control box
Amplier
Home Audio System
Cable
ø 32 mm Conduit
2 network cables
XLR<->plug for connection to home
audio system
7.1 7 speakers
1 subwoofer
Control box
Amplier
Home Audio System
Cable
ø 32 mm Conduit
2 network cables
XLR<->plug for connection to home
audio system
2 speakers
Control box
Amplier
Receiver
Cable
ø 32 mm Conduit
2 network cables
XLR<->cinch cable
2 speakers
1 subwoofer
Control box
Amplier
Receiver
Cable
ø 32 mm Conduit
2 network cables
XLR<->cinch cable
5 speakers
1 subwoofer
Control box
Amplier
Receiver
Cable
ø 32 mm Conduit
2 network cables
XLR<->cinch cable
7 speakers
1 subwoofer
Control box
Amplier
Receiver
Cable
ø 32 mm Conduit
2 network cables
XLR<->cinch cable
21
Page 23

C SEED 125 SPEAKER
APPENDIX III - PIN PLAN
PIN PLAN BARREL SPEAKER
1 230 V (L)
2 230 V (N)
3 PE (earth)
4 24V +
5 LED red
6 LED green
7 LED blue
8 limit switch TOP
9 24+ limit switch TOP
10 0V limit
11 signal UP
12 signal DOWN
13 0V
14 limit switch BOTTOM
15 24+ limit switch BOTTOM
16 0V limit switch
17
18
19
20
21 AUDIO 1+
22 AUDIO 1-
23 AUDIO 2+
24 AUDIO 2-
10
12
1
2
3
4
5
6
7
8
9
13
14
15
16
17
18
19
20
21
22
11
23
24
22
Page 24

PIN PLAN CONTROL BOX
1
2
3
4
5
6
7
8
9
10
11
12
13
14
15
16
17
18
19
20
21
22
23
24
1 230 V (L)
2 230 V (N)
3 PE (earth)
4 24V +
5 LED red
6 LED green
7 LED blue
8 limit switch TOP
9 24+ limit switch TOP
10 0V limit
11 signal UP
12 signal DOWN
13 0V
14 limit switch BOTTOM
15 24+ limit switch BOTTOM
16 0V limit switch
PIN PLAN AMPLIFIER
1 AUDIO 1+
2 AUDIO 1-
3 AUDIO 2+
4 AUDIO 2-
1
2
3
4
5
6
7
8
1
2
9
10
11
12
13
14
15
16
4
3
23
Page 25

C SEED 125 SPEAKER
APPENDIX IV - SPARE PARTS
Name Specifications Art. no
Screw Disc CS.000.011
Inductive sensor CS.000.015
tower brushes CS.000.016
trapezoid nut CS.000.007
LED band top CS.000.002
LED band logo 1 CS.000.003
LED band logo 2 CS.000.004
front fabric cover CS.000.005
24
Page 26

APPENDIX V - INSTALLATION PLAN
25
Page 27

C SEED 125 SPEAKER
APPENDIX V - INSTALLATION PLAN
26
Page 28

APPENDIX VI - CABLE SPECIFICATIONS
LAPP ÖLFLEX CLASSIC 110 CY No. of cores and mm2 Outer diameter Art. no
Audio 4 G 4 13.4 1135504
Power 3 G 2.5 10.3 1135403
Data 18 G 0.5 13.3 1135018
27
Page 29

C SEED 125 SPEAKER
28
Page 30

29
Page 31

Page 32

WWW.CSEED.TV
 Loading...