

Page 1
truFreeze
®
Active Venting Set-up Instructions
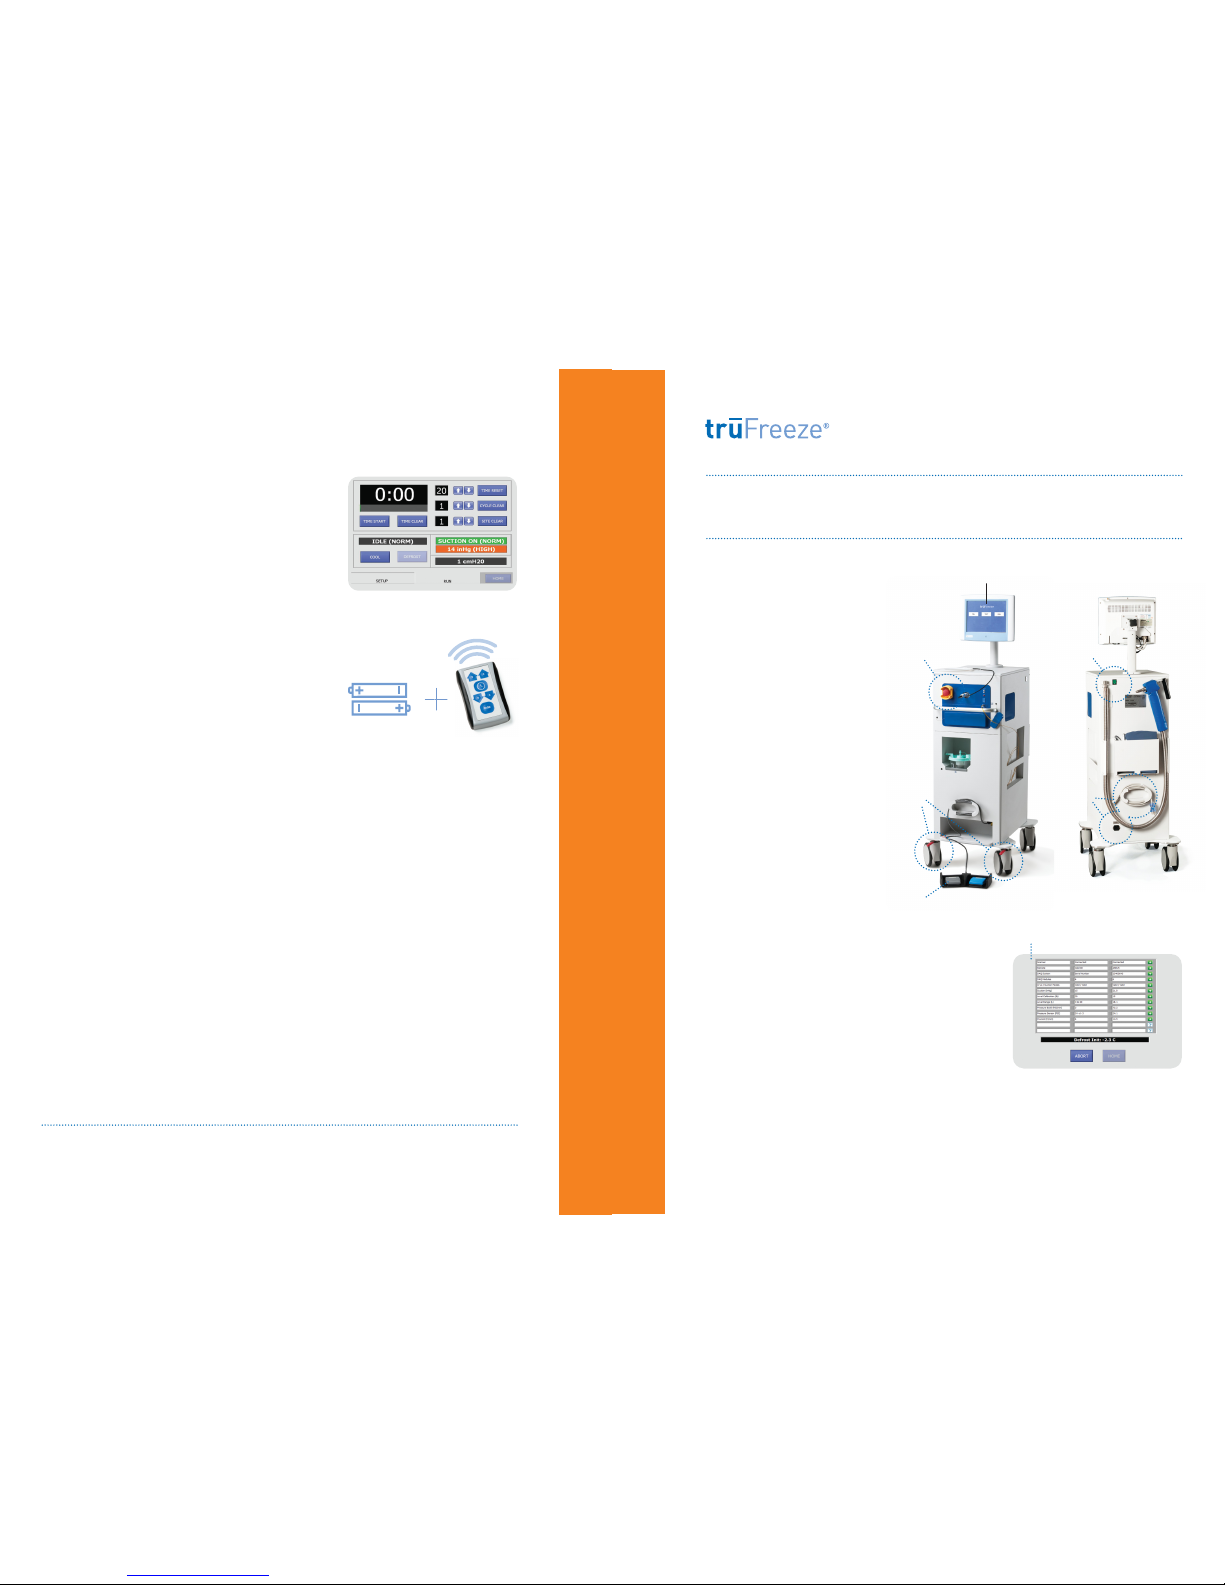
1. Position the console as
desired for procedure and
lock the wheels by pushing
the red lever to either side.
2. Remove the power cord from
the holder and plug into
standard wall power. Ensure
the power cord is connected
to the console.
Make sure the power cord
is dry.
3. Power on the console using
the green switch on the back
of the device.
4. Ensure that the red
emergency stop button is off
(NOT lit).
3
1
6
2
4
truFreeze
®
Active Venting Set-up Instructions
16. If using the remote, ensure the remote control
has two (2) working AA batteries installed by
selecting the run tab and attempting to adjust
the site counter. Reset site to “1”.
5. The computer will run a series of built-in tests
(BIT). Note: the device must have adequate
liquid nitrogen to pass the BIT.
P
See separate tank filling instructions.
6. While the BIT is running, position the foot pedals
on the floor as desired, ensuring the foot pedal
cord is plugged into the console.
Avoid touching the pins of the foot pedal
connector.
5
CSA Medical, Inc.
For service, call: 866.481.7786
www.csamedical.com
© 2014 CSA Medical, Inc. All rights reserved.
truFreeze is a registered trademark of CSA Medical, Inc.
15-00292-00
Active Venting Set-up
Liquid nitrogen expands more than 700 times when changing to a gaseous state. It is
imperative for patient safety that adequate ventilation is ensured.
note: some consoles also
display a shutdown button.
15. To ensure the suction system has been set up
correctly, depress the gray suction pedal and
verify that the tubing draws suction. Then
press the suction pedal again to turn off
suction prior to the start of the procedure.
Please read the Instructions For Use and Operator’s Manual for complete
information about the truFreeze System.
Page 2
truFreeze
®
Active Venting Set-up Instructions
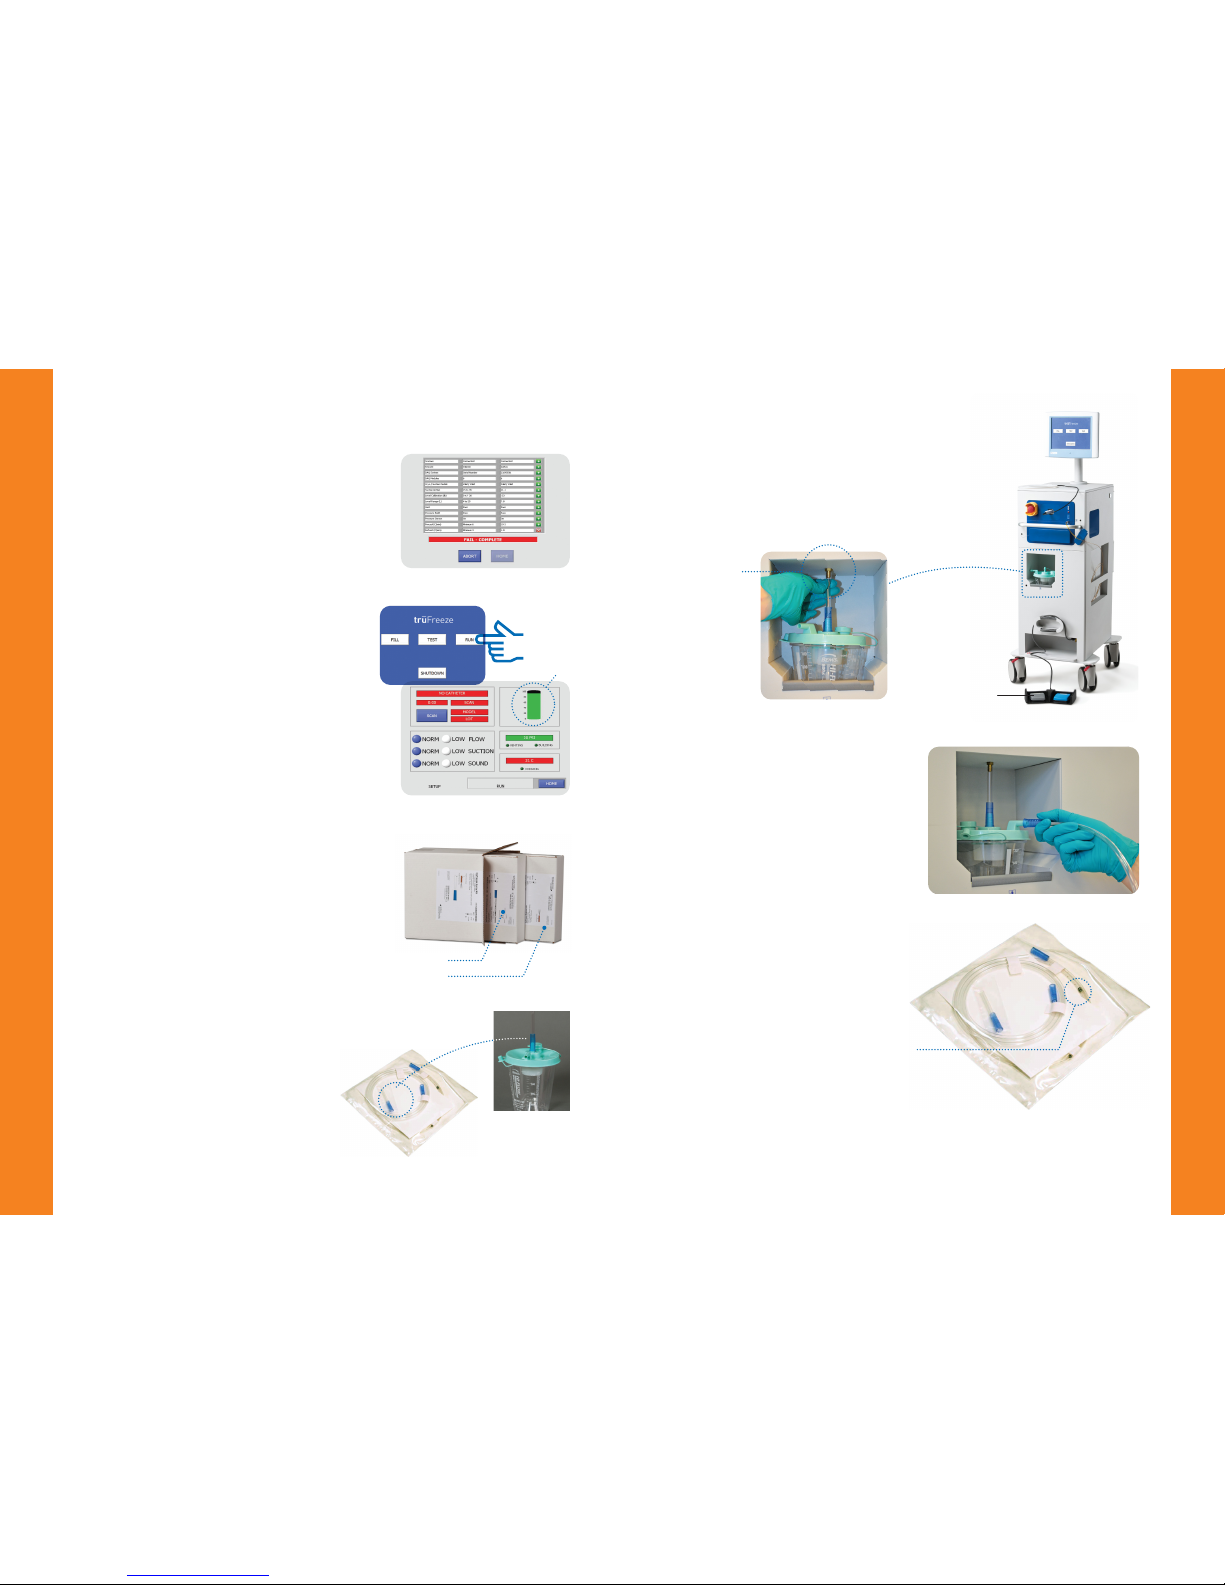
11. Remove the 4 inch connector piece from the
suction tubing package and connect the blue end
to the top port of the Bemis suction canister.
12. Place the canister in the front of the console.
Attach the clear end of the 4 inch accessory
tubing to the suction port on the console above
the canister. Ensure a tight seal.
13. Remove the long section (72 inches) of
accessory tubing and attach the blue end
to the front port of the canister. The other
end will be attached to the cryodecompression tube (CDT) AFTER it is placed in
the patient by the physician.
truFreeze
®
Active Venting Set-up Instructions
10. Locate the sterile truFreeze catheters
and cryodecompression kits.
Make sure the catheters and cryodecompression
kits have not passed their expiration dates.
cryodecompression kit
catheter kit
12
gray suction
pedal
suction port
8. Select the “run” screen.
9
9. Confirm that the device has sufficient
liquid nitrogen via the indicator on screen
(in the setup tab).
If the tank indicator displays orange or red,
the device must be filled prior to use.
Filling is recommended but not required if the
indicator is yellow.
P
See separate tank filling instructions.
7. If the BIT fails, a red “x” and “fail – complete”
will display. Press the test button at the home
screen and let the system repeat the BIT.
If the system fails BIT two (2) times with the
same error, please call service at 866.481.7786
cdt tubing
(note black bands)
14. Leave the CDT (the tube with the black
bands) in the packaging until it is
requested by the physician.
 Loading...