

Page 1

Page 2
DEFAULT CONTROLS 2
GETTING INTO THE GAME 6
GAME SCREEN 8
INVENTORY 10
WEAPONS 11
BIO-AUGMENTATIONS 13
THE SNOWBLIND EFFECT 14
VITAL TASKS 14
HACKING 15
REPUBLIC SECURITY SYSTEMS 15
VEHICLES 15
COLLECTIBLES 16
SAVING GAME DATA 17
PAUSE MENU 17
XBOX
LIVE
™
18
ONLINE MULTIPLAYER GAMES 20
HOSTING A GAME 23
SYSTEM LINK 23
MULTIPLAYER GAMES
FRIENDS LIST 24
STATS 25
CLANS 26
FPO
Liberty Coalition Army 2nd Lieutenant
Nathan Frost has been transformed.
There was that last searing blast from
the bomb, an excruciating gurney
ride into the surgery unit — Frost
wondering if he even had a face left
— some strange talk about BP, pulse
and…scarecrows?
Now he is alert, standing, disoriented a little,
but stronger than before.A sense of extreme
power is coursing through him and he sees
apprehension in the eyes of all who pass.
Frost has been transformed into the
prototype. He is the first-born in a top
secret program to create
a bio-augmented
super-soldier.
Now that joke
about a oneman army
is true...
Page 3
3
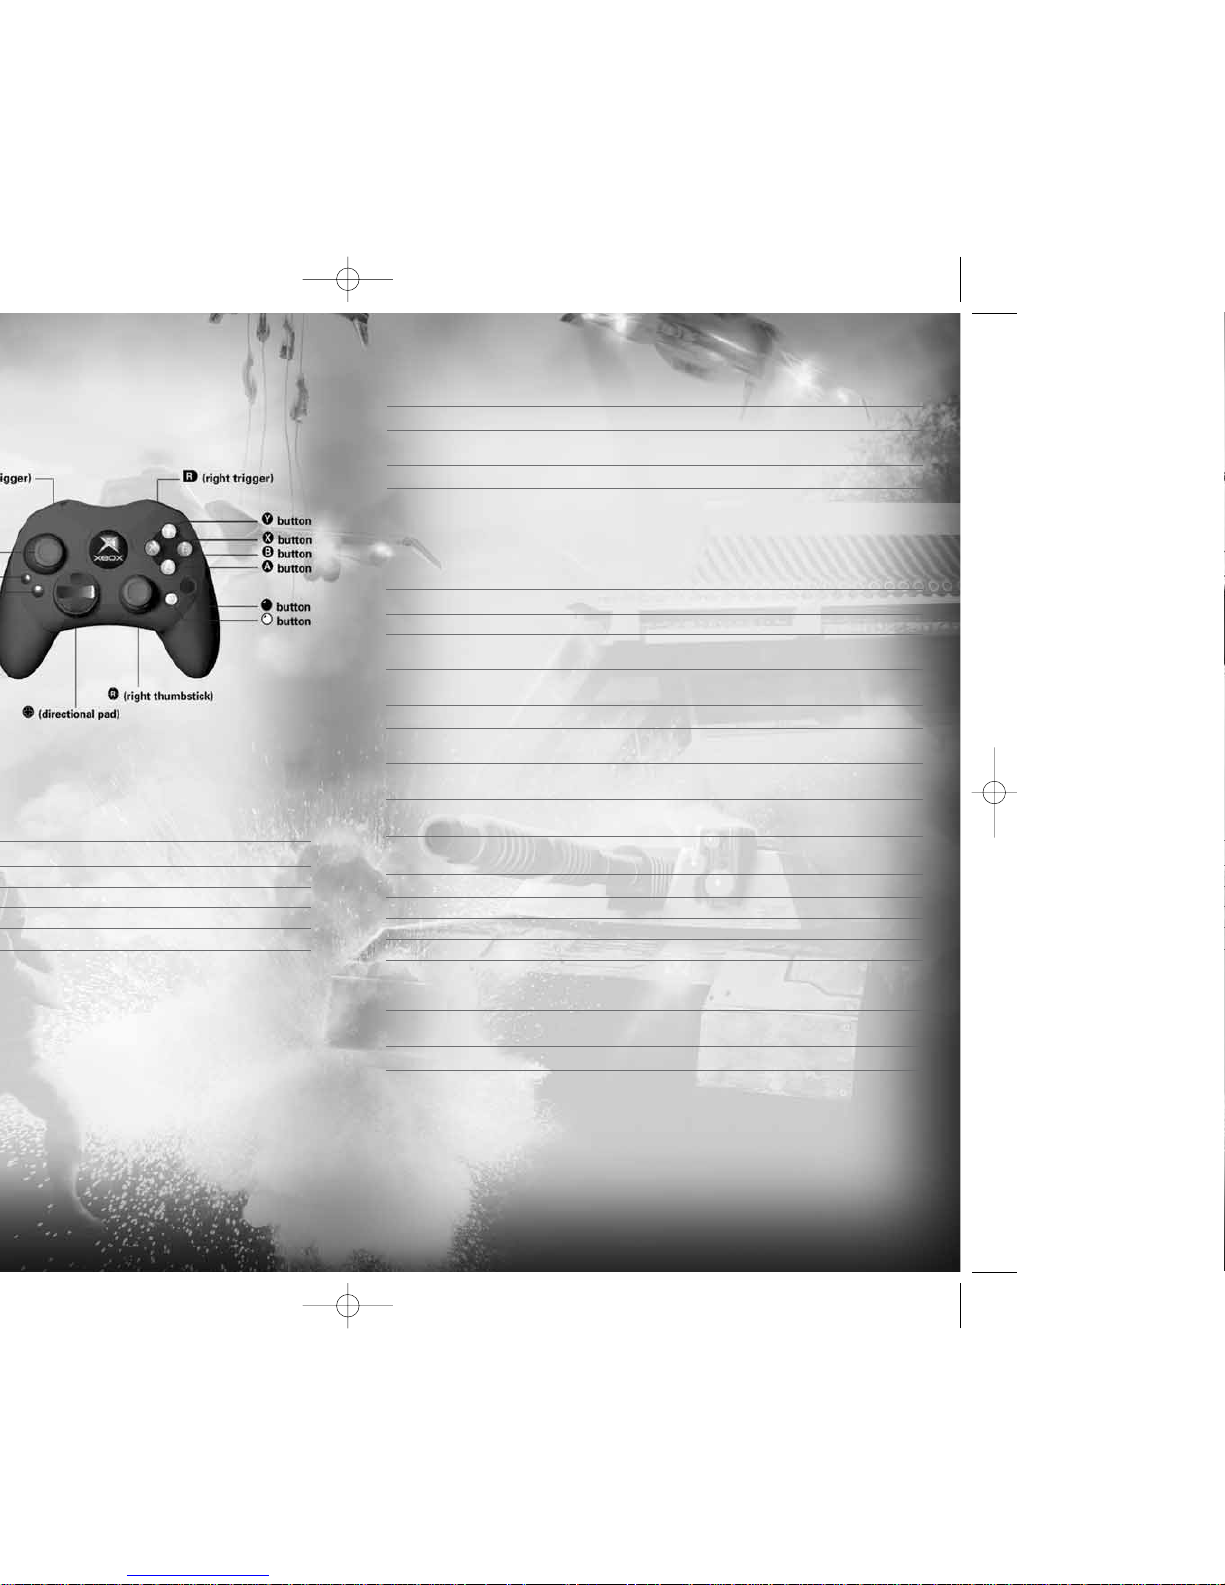
MENU CONTROLS
>
L
or
?
1/2
L
or
?
4/3
A
or
>
B
INVENTORY CONTROLS
Open inventory
c
(hold)
Select inventory section/item
c
(hold) + Lor
?
(with inventory open)
Equip selected item Release
c
Note: You can also select items with the inventory closed. See On Foot Controls below.
ON FOOT CONTROLS
Move
L
Look/Aim
R
Fire primary weapon/Throw held object/
r
Charge Kinetic Kicker
Use secondary weapon/Quick detonate
b
grenade after throwing/Activate riot wall
Toggle to previous primary weapon
c
(tap)
Cycle through primary weapons
?
1/2
(with inventory closed)
Cycle through secondary weapons
?
3
(with inventory closed)
Cycle through augmentations
?
4
(with inventory closed)
Alt Fire (primary weapon)/Push object
l
(with Kinetic Kicker)
Punch/Melee attack
L
(click)
Use/Cancel selected bio-augmentation
Y
Crouch
B
Jump
A
Reload primary weapon/Talk/Interact
X
with object/Open unlocked door/Climb
or descend ladder
Precision aim/Close look
R
(click)
(primary weapon)
Toggle Navigational Display mode
<
Page 4

5
IN VEHICLE CONTROLS
X
L
A
or
L
1
X
or
L
2
r
l
R
B
OGRE CONTROLS
L
R
Y
r
l
SINGLE PLAYER HACKING CONTROLS
Fire icepick into panel/Hack panel
r
Select option from hacked panel display
L
or
?
1/2
Execute selected option
A
Aim/Control gun turret
R
Fire gun turret
r
Pan surveillance camera
R
Zoom camera in/out
L
Exit hacked panel display
B
MULTIPLAYER HACKING CONTROLS
Select hack tool/Execute hack
X
EMPLACEMENT CONTROLS
Use emplacement
X
Fire emplacement
r
Emplacement control/Aim
R
Auto level emplacement
Y
Exit emplacement
B
Page 5
7
WHO ARE YOU?
You are Nathan Frost, a bio-enhanced super soldier. In addition to weapons expertise
with firearms and explosives, you can use specialized bio-augmentations. These
bio-augmentations were surgically hard-wired into your body.You now have lethal
combat skills never before seen on the battlefield.
But there is a tactical downside.You are vulnerable to EMP (Electro Magnetic Pulse),
which can disrupt your onboard electronics and render you momentarily
or permanently helpless. Your bio-augmentations begin to fail and you become
snowblind until your systems recover.
MISSIONS
You must complete missions as issued by Coalition Command. In every mission
you must complete all primary objectives (objectives are added as the mission
proceeds), protect yourself and protect your men.You will undertake two different
mission types:
L
Firefight missions
that are all-out urban warfare.
L
Stealth missions
where you attempt to infiltrate key areas before attacking
the objective. Discovery in this type of mission makes the job much tougher.
MISSION OBJECTIVES
Your orders are assigned as mission objectives.
L Mission objectives appear as yellow circles on the Radar. (See page 8.)
L Press
>
to see primary and secondary objectives (on the Pause screen)
during play.
L Press
<
to toggle Navigational Display mode, which marks the direction
to the next objective.
L Coalition Command will be in contact via radio with objective updates and intel.
Depending on the mission, you will fight alone
or lead a Coalition squad.
Play online with up to 15 other Internet
players (16 players total).
up to 16 Xbox consoles.
L
Controls
— Select a control scheme.
L
Invert V ertical Axis
— Toggle the camera
view on (inverted) or off (normal).
L
Look Sensitivity
— Adjust the camera
response time.
L
Volume
— Adjust the volume of SFX (sound
effects), Music and Xbox Communicator
(multiplayer only).
L
Brightness
— Adjust the brightness of your
TV screen.
L
Vibration & Subtitles
— Turn the controller’s
vibration function and game subtitles
on/off.
L
Voice Sound
— Toggle players’ voices
to be heard over the Xbox Communicator
or speakers.
Page 6
9
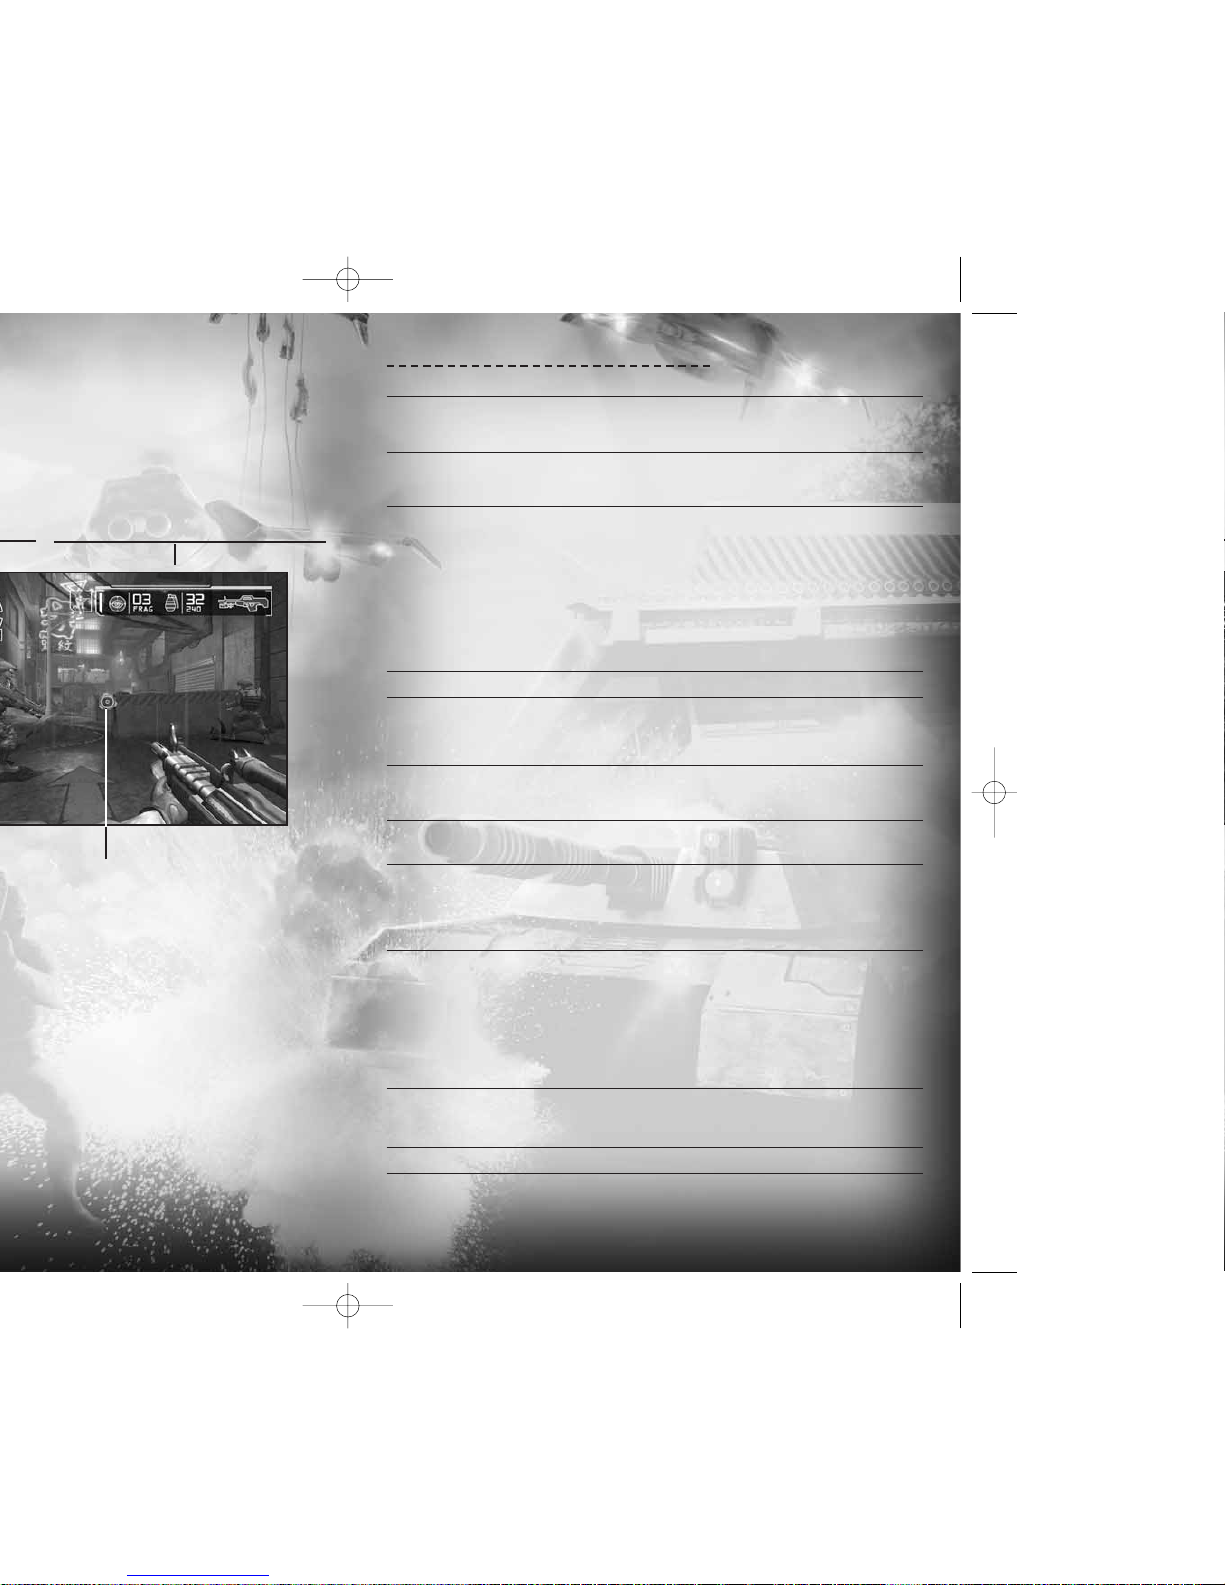
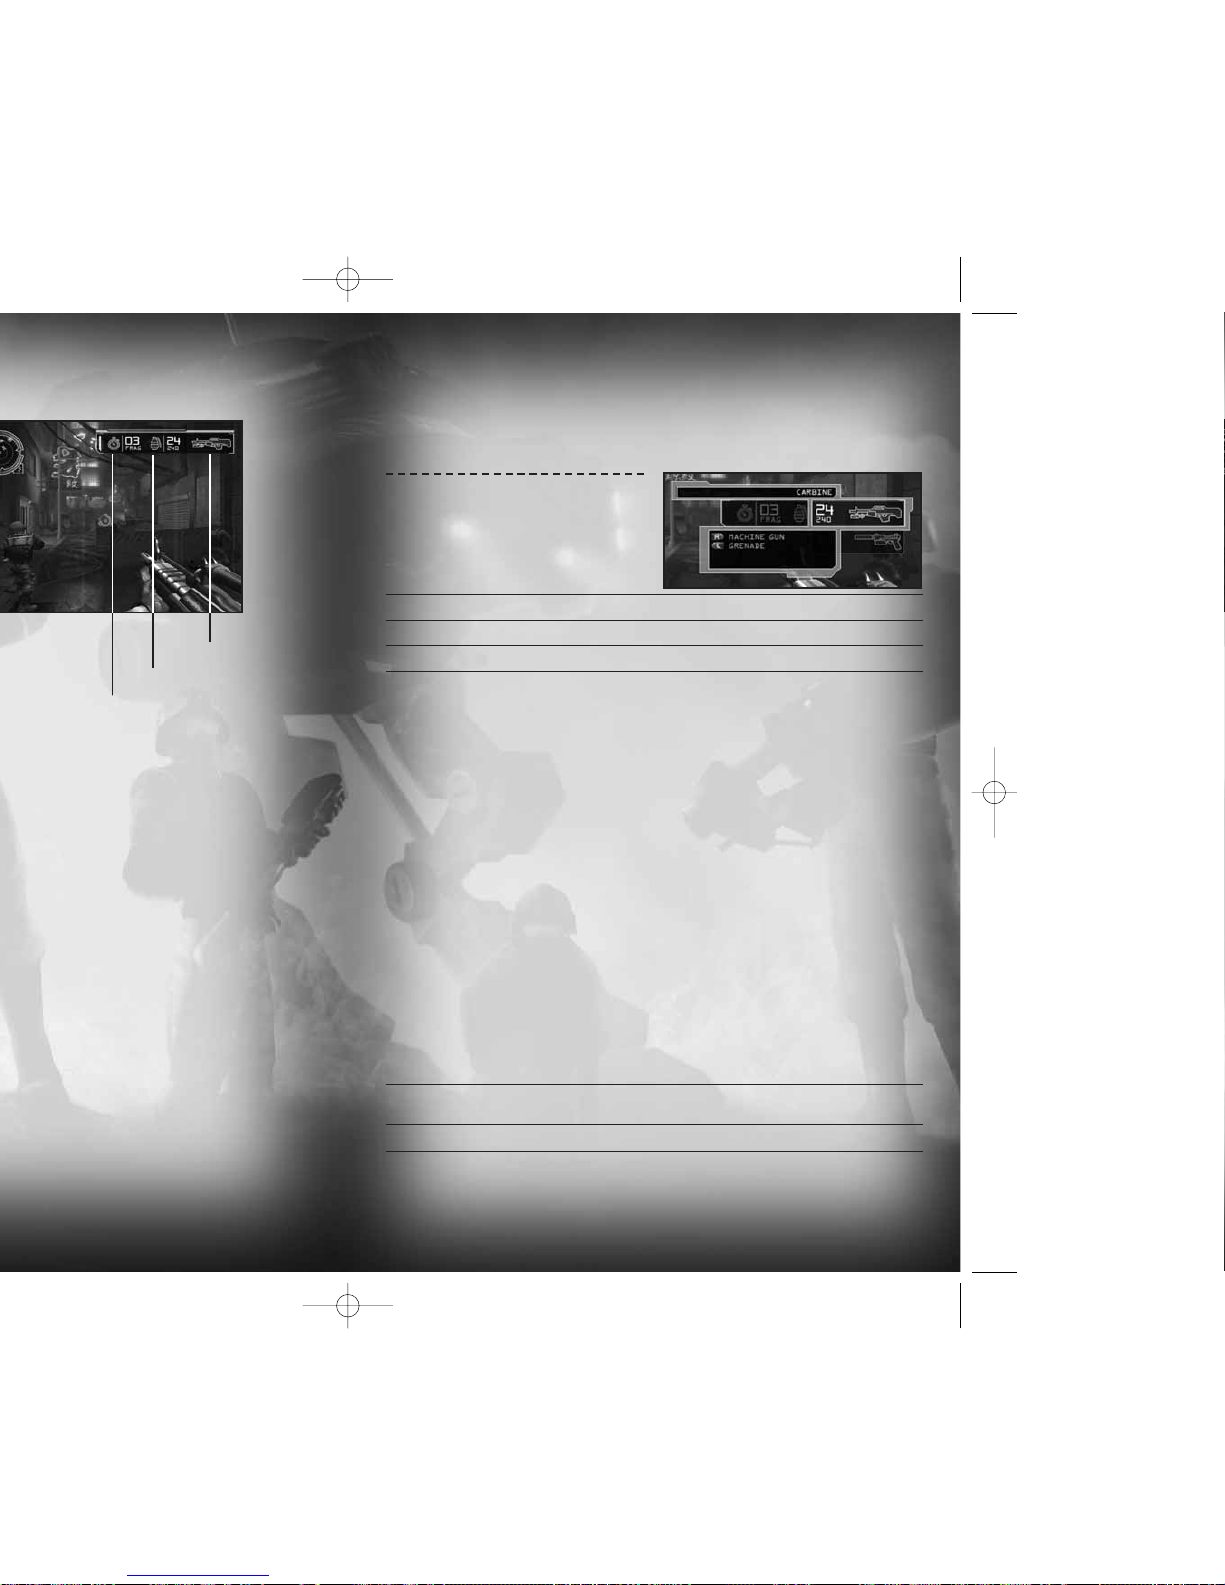
GAME SCREEN INDICATORS
HEALTH LEVEL Each time you take a hit, the red decreases in the meter.
When you get to a critical state the meter flashes white
and an alarm sounds.
BIO-ENERGY LEVELS This blue meter powers your bio-augmentations. Hatching
indicates the amount of energy required to activate the selected
bio-augmentation. Using bio-augmentations depletes the meter.
RADAR/COMPASS L
Single Player
— Shows enemy locations (red blips), fr iendly
locations (green blips), neutral bot/unarmed human locations
(white blips) and mission objectives (yellow circles).The solid
arrow around the radar represents
North
on the compass.
When an alarm is activated the radar flashes red.
L
Multiplayer
— Shows Ammo Station (light blue blips) and First
Aid Stations (green blips). Walk up to these and press
X
to load
up on ammo or replenish health. During Capture the Flag
games, also shows flag positions (large red or blue blips), flags
in transit (team colors) and mission objectives (yellow blips).
PRIMARY WEAPON The primary weapon you currently hold.
AMMO REMAINING Large number indicates rounds remaining in clip or magazine of
your selected weapon. Small number indicates total rounds you
have. Empty the weapon and you auto reload. Manually reload
by pressing
X
.
SECONDARY WEAPON The secondary weapon you currently hold. Throw it by pressing
b
.
Press
b
again to detonate/activate the weapon after throwing it.
Its name and number remaining appear next to its icon.
SELECTED The bio-augmentation you will use when you press
Y
.
BIO-AUGMENTATION
AUGMENTATION METER Shows the bio-augmentation energy consumption during use
of a skill. When the reserve runs out, the skill terminates and the
reserve recharges to optimum if you have enough bio-energy.
Audio alerts tell you both when the reserve is optimum and when
it is approaching zero.
RETICLE Use the reticle to aim a weapon:
L The reticle turns red when over a hostile.
L It turns green when over a friendly.
L Watch the Ammo Gauge Circle to see ammo remaining before
you need to reload.
L With some primar y weapons , pull and hold
r
and watch the
charge level in the reticle to insure max power before releasing
the button to fire the shot.
CROUCHED ICON When you press
B
to crouch, this icon appears. You move slowly
in this position but present a smaller target. Press
B
again
to stand upright; you’re now able to move faster.
AMMO ICON (Not shown.) Appears when you pick up or walk over ammo.
Reticle
4 Crouched Icon
5 Augmentation Meter
6 Selected Bio-augmentation
7 Secondary Weapon
8 Ammo Remaining
9 Primary Weapon
4 56 7 8 9
Page 7
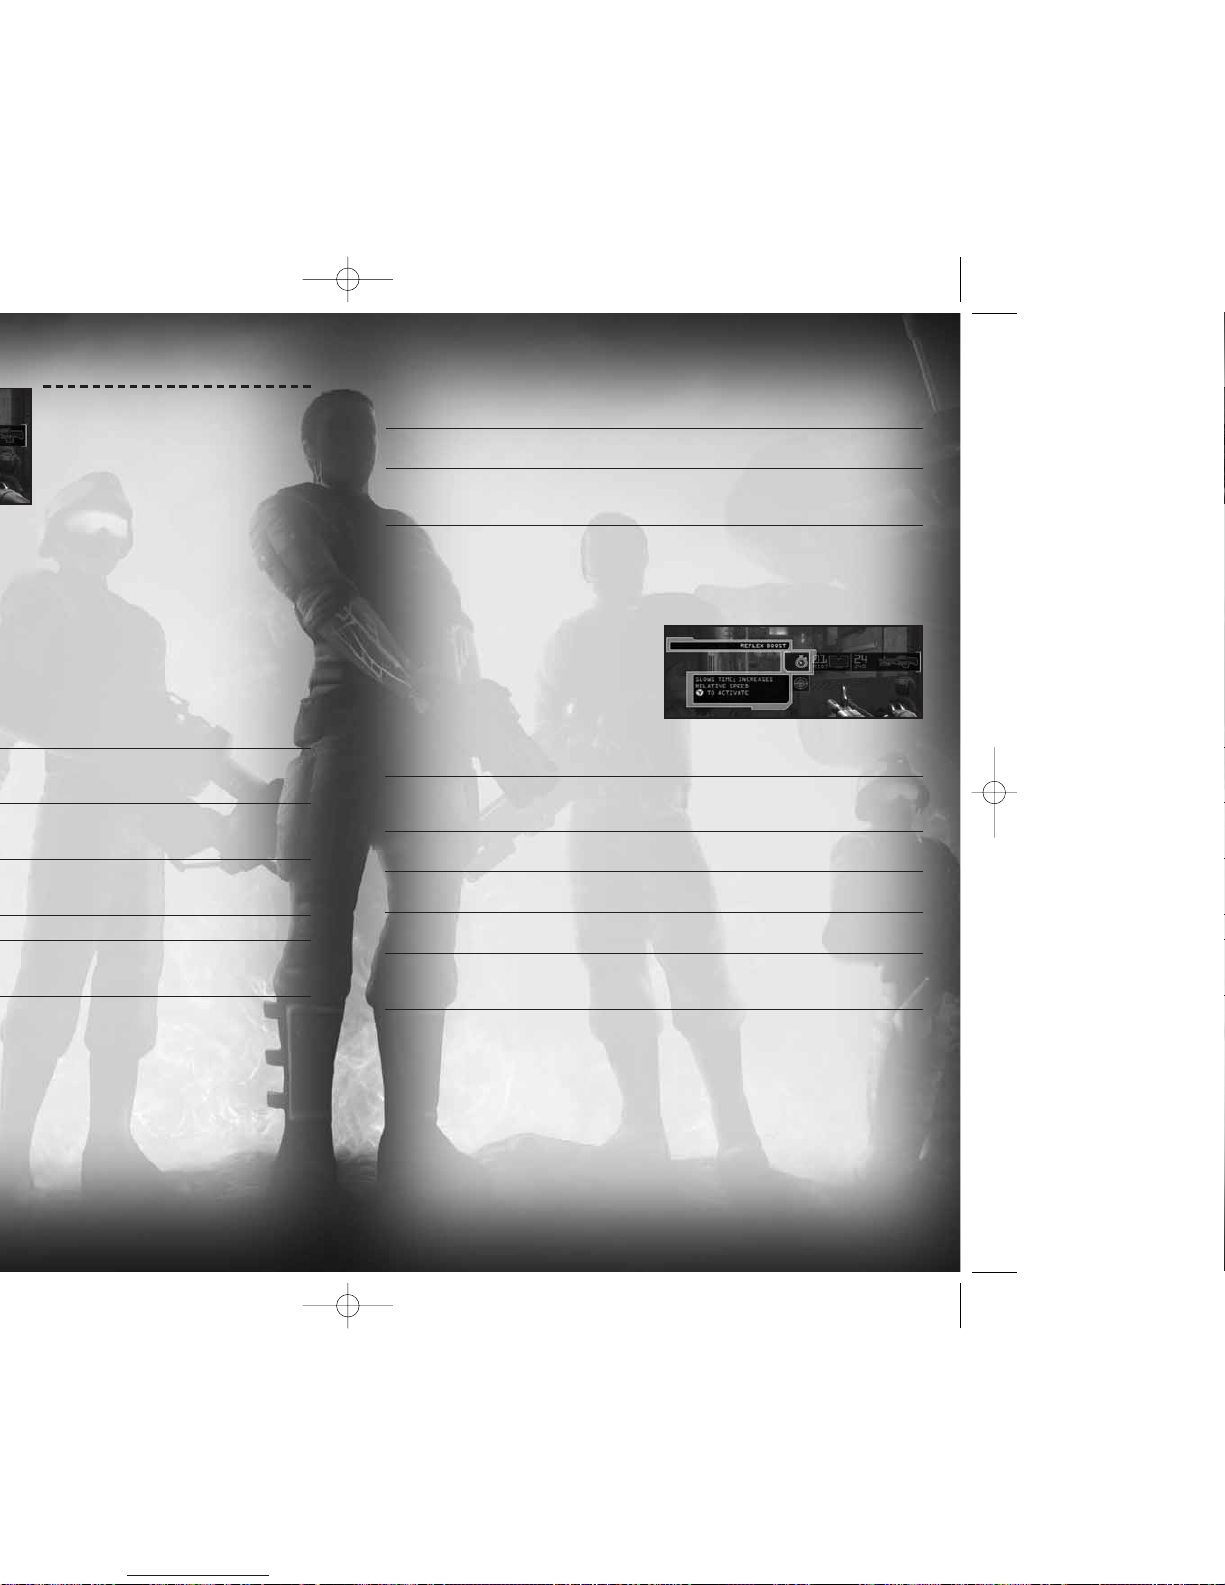
A briefing appears when you acquire a weapon. Study this to understand
the weapon’s full capabilities.
PRIMARY WEAPONS
BASIC PRIMARY WEAPONS
These are your three basic primary
weapons. You will find more awesome
firepower as you progress through battle.
PISTOL Silenced close-range weapon perfect for stealth.
CARBINE Standard militar y issue automatic r ifle, highly effective during firefights.
SHOTGUN Lethal weapon for close combat.
AIM & FIRE
Use Rto aim your weapon and pull rto fire (pull and hold for automatic
weapons).
L The reticle turns red when aimed at an enemy. It projects a red pointer if you’ve
taken damage from that enemy.
L The reticle turns green when positioned over a friendly.
PRECISION AIM
Click Rto toggle zoom in/out.
L The sniper rifle has 2x and 4x scope magnification.
L The weapon automatically disengages from precision aim when reloading.
ALT FIRE
Primary weapons have an alternate fire mode. To use it, pull l.
NOTE: Check the weapon briefing when you acquire the weapon to view special
alt-fire characteristics. You can also see weapon use details by selecting the weapon
in inventory.
SPECIAL TOOLS
These special non-weapon tools also reside in the primary weapons inventory:
KINETIC KICKER Tool used to push or pull objects, and to collect ammo or other
collectible items. (See page 14.)
ICEPICK Hack tool for several types of electronic equipment.(See page 15.)
11
Primary Weapons,
and
Bio-augmentations
. All inventory items
c
to open the inventory.
c
, use Lor ?to select a category and item.
INVENTORY
WEAPONS
Primary Weapons
Secondary Weapons
Bio-augmentations
Page 8
13
SECONDARY WEAPONS
To use the selected secondary weapon,
press
b
.
THROW/AIM
When using a grenade or riot wall,
move
R
to aim your throw,
then press
b
to throw.
b
a second time to create
Bio-augmentations are the special
combat capabilities that were surgically
implanted during your transformation.
They draw power from your bio-energy.
Press
Y
to invoke the equipped
bio-augmentation. The Reserve gauge
begins to discharge as you use the power. When the gauge empties or you press
Y
again, the bio-augmentation terminates and you return to normal.
ENHANCED VISION Enhanced vision causes all enemies and cloaked mines to stand
out from their environment. It makes dark areas brighter for easier
navigation, and allows you to see enemies through walls.
CLOAK Walk undetected within inches of the enemy. This bio-augmentation
disengages if you open fire with a primary or secondary weapon.
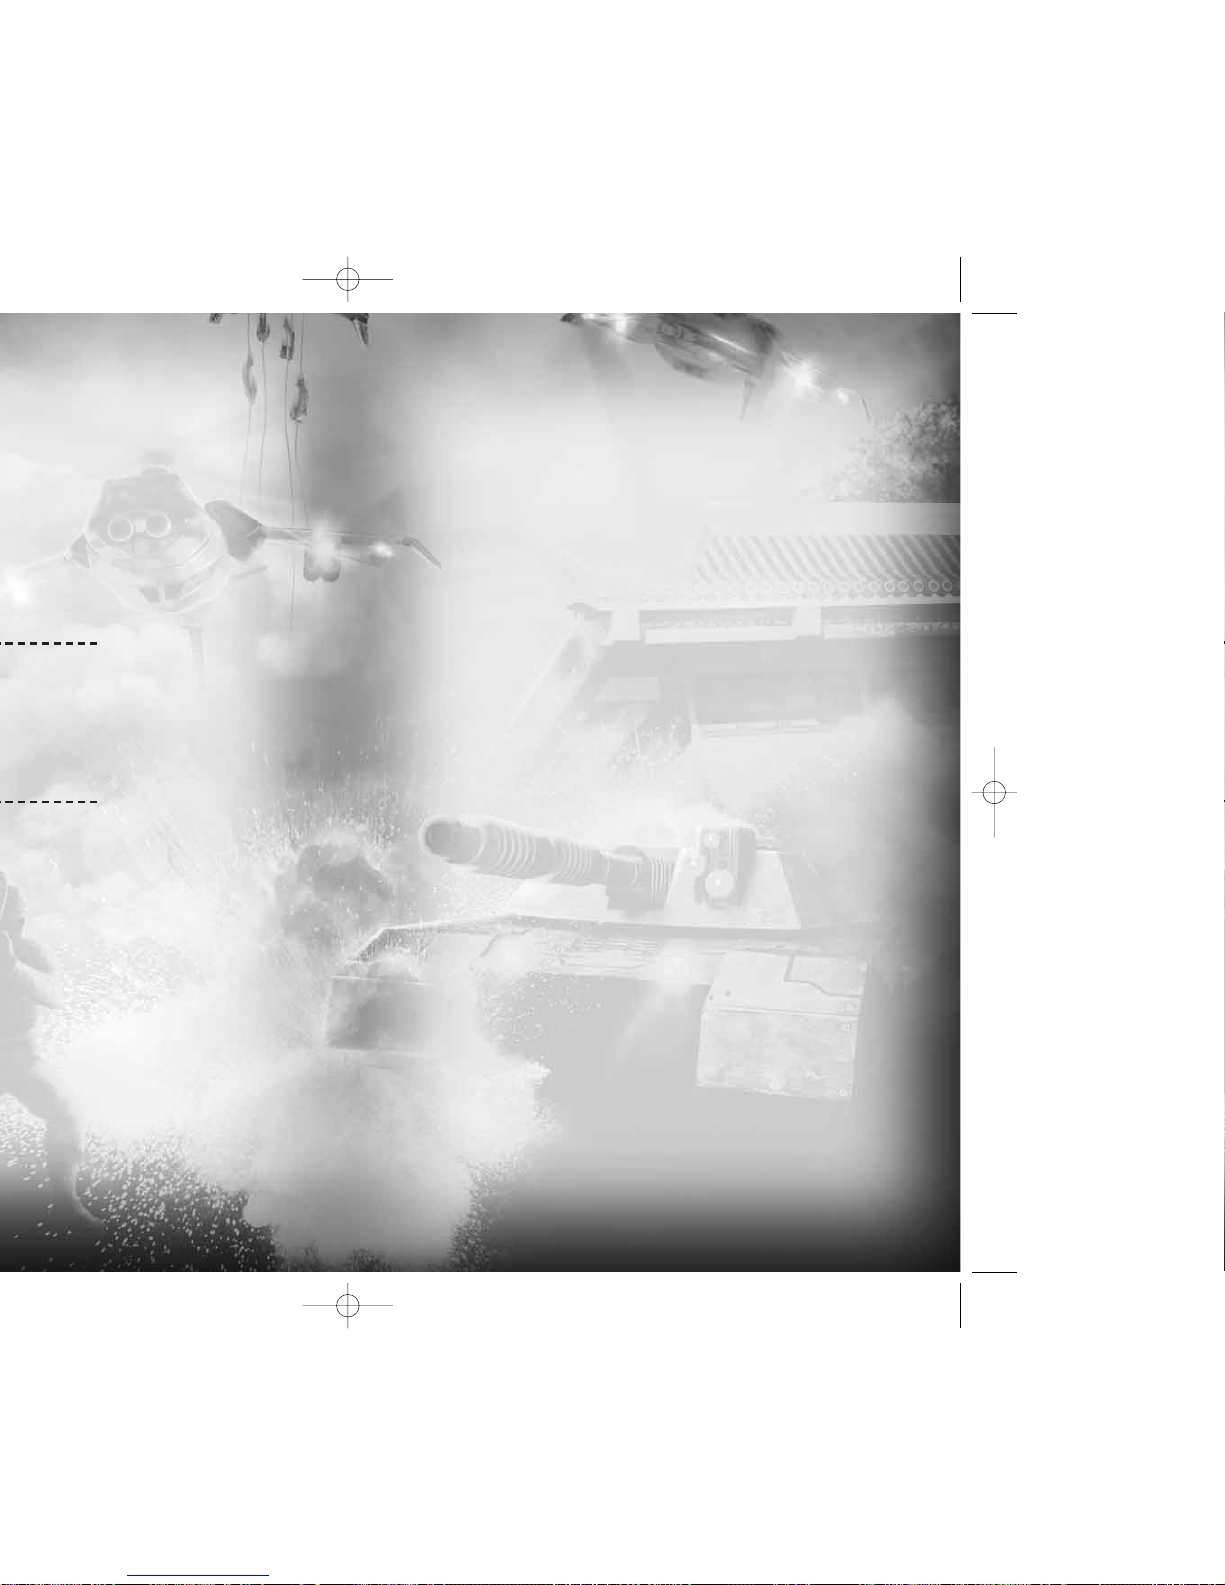
REFLEX BOOST This slows the perception of time, allowing you to react more
quickly to enemy actions.
ELECTRICAL STORM Discharge a potentially fatal high-voltage electrical jolt in front
of you.
BALLISTIC SHIELD This protective force field surrounds you and absorbs the damage
of attacks. As it absorbs attack, your augmentation meter drains
from the effects of the attack and time.
BIO-AUGMENTATIONS
SPECIAL TOOL
This special non-weapon tool also resides in the secondary weapons inventory:
NANO BOOST This device will completely heal you, recharge your bio-energy,
rescue you from the brink of death and reverse the Snowblind effect.
RIOT WALL Thrown device that unfolds into a temporary barrier you can use as cover.
Deploy this force field to create a protected position anywhere
on the battlefield.
Page 9
15
EFFECT
HACKING
Perform your hacking skills on electronic equipment using the icepick
(from the primary weapons inventory). You can hack:
L Security panels.
L Computer panels.
L All types of auto turrets.
L All types of bots.
NOTE: The Ogre is not hackable. It is a vehicle piloted by a human.
HOW TO HACK
With the icepick equipped, point and shoot at an electronic object. Once
the icepick deploys by unfolding with an audible clack,you are ready to execute
the hack:
L Point at the hacked security panel and pull
r
to bring up the Hack Panel
options. Use
L
or ?to select an option. Press Ato execute the selected
option. Press
B
to hide the Hack Panel options display.
L Hacked security panels can be re-accessed (by pressing
A
).
L If you are attacked while performing a hack, the hacking process stops.
L A misfired icepick is reusable (successfully fired icepicks are spent).To recover
a misfired icepick, move within pickup range and press
A
to return it
to your inventory.
REPUBLIC SECURITY SYSTEMS
You will encounter auto turrets,security cameras and tr ip lines set by the enemy.
Some of these systems are activated when the enemy presses an alarm switch.You
can override certain systems from panels. Turrets and cameras can be disabled,
destroyed or turned against the enemy by using your hacking skills.
VEHICLES
Use Phoenixes, Hydras, Titans and Ogres to move quickly or attack the opposition.
Hydras, Titans and Ogres give you massive firepower. Even though a Phoenix may
be unarmed, you can use it as a ramming weapon.
IMPORTANT: The turret part of the vehicle moves independently from the body.
For example, when you move the Ogre’s upper body to aim the guns (
R
),
the legs remain pointed in the direction you are walking (
L
).
A
.
A
.
r
to throw it.
r
to charge
l
.
Page 10
17
SAVING GAME DATA
A
to collect it. (If this
for instant first aid. Available in large
to increase your
to restore your bio-energy
to increase
You can save your game by:
L Selecting
Yes
when prompted at the completion
of a key objective,to bring up the Save Game
screen.
L Using
save points
found in out-of-the-way rooms.
Look for the Save Point icon on doors that lead to
a save point. Pass through the doors, approach the
save point and press
X
to bring up the Save
Game screen.
On the Save Game screen, press
L
1/2 to select a
data file to save to. Press
A
. When prompted to overwrite the current file,
select
Yes
and press A.
NOTE: Selecting
YES
will overwrite older data in a save file. Once you overwrite data,
it cannot be restored.
PAUSE MENU
Press >to open the Pause Menu. From here you can view both primary and
secondary objective assignments and status, load a saved game, and change
game options.
RESUME GAME Resume your current game.
LOAD GAME Load save game data to continue the g ame from the point
where it was saved.
OPTIONS Adjust various game settings, including:
L
Controls
— Select a control scheme.
L
Invert V ertical Axis
— Toggle the camera view on (inverted) or off
(normal).
L
Look Sensitivity
— Adjust the camera response time.
L
Volume
— Adjust the volume of SFX (sound effects), Music and Xbox
Communicator (multiplayer only).
L
Brightness
— Adjust the brightness of your TV screen.
L
Vibration & Subtitles
— Turn the controller’s vibration function and game
subtitles on/off.
L
Voice Sound
— Toggle players’voices to be heard over the Xbox
Communicator or speakers.
QUIT Return to the Main Menu.
Page 11

3. CREATE YOUR ACCOUNT
Insert an Xbox
Live
Starter Kit disc or the Xbox
Live
-enabled game disc into
the Xbox disc drive. On the Home screen, select
Xbox Live.
Once you’re online,
create your Xbox
Live
account by following the on-screen instructions and
entering your subscription code when prompted. If you are unable to go online
automatically,use the Network Setup in the Xbox Dashboard to enter your
network settings. If you do not have the required information, contact your
broadband service provider.
IMPORTANT: Do not disassemble, service, or modify the Xbox console or peripherals.
Doing so will void your warranty and could result in serious injury. For further
assistance see www.xbox.com/live.
4. SIGN ON
Once you’re set up to go online, select
Go Xbox Live
on the Home screen.
Choose the account you want to sign into and enter your pass code.On the
Network Selection screen, wait briefly while your network is verified and you are
logged in.
DOWNLOADING NEW CONTENT
Xbox
Live
gives you access to the latest downloadable content for
PROJECT:
SNOWBLIND
™
and allows you to play various online modes with other Xbox
Live
gamers. To view available downloadable content for
PROJECT: SNOWBLIND
™
, select
Xbox Live
from the Main Menu, wait for the connection and select the valid profile.
Select the
Download Content
option from the next menu.
USING THE XBOX COMMUNICATOR
Connect the Xbox Communicator to talk to other players during play. The Xbox
Communicator is voice-activated.
LOBBY MENU
FIND GAMES Select this to view the active games and start playing.
HOST GAME Create an online game according to your own parameters.
FRIENDS Search for active games that include your friends.
CLANS View the Clan Homepage.
STATS View game play stats for yourself and other online players.
19
™
™
Live
subscriber, you can download
Live
,
you need to connect your Xbox
Live
service. To determine if Xbox
Live
is
account.
Live
account and play online.
Live,
including
XBOX
LIVE
™
Page 12
ON
, select this to mute a specific player.
GAMES
XBOX
LIVE
/SYSTEM LINK GAME TYPES
ONLINE MODES
DEATHMATCH Destroy all opponents. At the end of play, the player with most
kills wins.
HUNTER The hunter is an invisible stalker who tracks down and kills other
players. The hunter has more health than the other players, all
weapons and bio-augmentations, permanent invisibility,and does
more damage. Become the hunter by finding the hunter token
placed somewhere on the battlefield. If you are killed while the
hunter,you drop the token. Player with the most points at the end
of the match wins.
TEAM MODES
TEAM DEATHMATCH Destroy the opposing team.At the end of play, the team
with most kills wins.
CAPTURE THE FLAG Each team has its own colored flag located within a defensible
base. Fight your way to the enemy flag and take possession of it
to win. You can recapture your own team flag and return it to your
base. You must have your own flag at your base when capturing
the enemy flag to score. Use flag icons at the lower left of the
screen to check flag status:
L When you have the enemy flag, an opposition flag icon appears
over your team icon.
L When a flag is in transit, its icon pulses and a yellow circle
with the team color appears on the radar.
FAST FLAG CAPTURE Bring your opponents’ flag to your base to score. Your flag does not
have to be at your base in order for you to score.
TACTICAL ASSAULT Defend your team’s generator and destroy the opposition’s
generator after disabling their generator shields. To disable the
shields, hack into the opposition nodes (only the forward node is
vulnerable). First team to destroy the opposition generator wins.
L Nodes appear on the radar and are linked in sequential order
from one base to the next.
DEMOLITION Team play. Find a bomb at a spawn point and transport it to
designated targets inside the opposition base. Disarm a bomb on
your own base by approaching it and pressing
X
. The bomb is on
an auto timer.When it blows, the base is destroyed, the round ends
and the opposition gets a point. At the end of play,the team with
the most points wins. Check the bomb icon at the lower left of the
screen to see which team has the bomb.
L
Red
is the Republic.
L
Blue
is the Coalition
L
White
means no team has the bomb.
QUICK DEMOLITION Same as Demolition except that the bomb timer only pauses
when defused; it does not reset.
NOTE: In both
Demolition
and
Quick Demolition,
use Xto hack.
See page 22 for details.
21
Page 13
23
X
to use it. Both types of stations appear on
X
again to execute the hack.
Demolition
and
Quick Demolition,
hack
Tactical Assault
games.
To host a game, access the Host menu, set the specifics for your game, and select
Start Game.
Host menu options are:
SELECT A MAP Choose an environment for your game.
GAME OPTIONS Set specific game parameters:
SERVER NAME By default the server name is your screen name.
GAME TYPE Choose a game type. (See page 21.)
ARMS RACE MOD Players take the loadout (including weapons and bio-
augmentations) of their victims’ class. Players keep these added
items until they are killed or the game ends.
GAME LOADOUT Designate the loadout for all players joining your game. Select
All
to allow players to select their own class and loadout.
(See page 20.)
TIME LIMIT Set the game time limit from 5 minutes to infinity.
SCORE LIMIT The game ends when a player reaches the score limit you set here.
MAX PLAYERS You can allow up to 15 other players (16 players total) to join
your game.
FRIENDLY FIRE When set to
On,
you can accidentally kill a teammate.
SESSION TYPE Toggle to
Private
to host a private game session that only invited
friends can join.
VOICE Decide if you want players to communicate via the Xbox
Communicator.
HOSTING A GAME
System Link gameplay is the same as the online game with the following
requirements:
L Each Xbox console must be connected to its own television and to a System Link
via Ethernet. Each Xbox console supports one player.
L You can also connect two Xbox consoles with a crossover cable.
L One player must host the System Link game.
SYSTEM LINK
MULTIPLAYER GAMES
Page 14

25
Browse Friends List
to view a list of
PROJECT: SNOWBLIND
™
game.
to add someone as your friend.
Friend Invitations
icon will appear next to the
Established Friends
icon.
Browse Friends List
, select
icon) and accept the offer.Once you
Established Friends
icon. To
on a pending invitation. This cancels the
Players
option, then select
to send quick invitations to active
Use the Statistics Menu to view various details about yourself,your friends, and your
clan.Viewable stats include the Kill-Death Ratio, Wins , Losses, and overall score
(calculated from various statistics).
Visit http://www.projectsnowblind.com/stats on your computer for more detailed
statistics.
L View any player’s statistics by selecting
Player
and entering the player's name on
the virtual keyboard.The player's name will be displayed between the seven
immediately higher-scoring and seven immediately lower-scoring players.
L To view the top tier players in
PROJECT: SNOWBLIND
™
, select
Top 15.
Select
Friends
to view the best 15 players in your Friends List.
L If you have joined a clan,select
Clan
to view the top 15 players in your clan and
see who's the MVP!
STATS
Page 15

27
Clans
to open the Clan
Create Clan
and create a clan nickname
and
Recruit
to ask other players to join your
Sent Invites
, selecting a player,
to confirm the retraction.
Clans,
then
Invitations
and then
Invitations
again
and select
Yes
to accept the invitation. To let
. Change your mind by selecting it again.
Notices
and write up to four
Notices
when
Notices
option.
to see the online status of all clan members.
CLANS
NOTES
Page 16

FPO
Inside Back Cover
Placeholder
NOTES
 Loading...