

Page 1
CR-1 & CR-2 Countertop Chilled Sparkling Water Dispenser
Quick Installation Guide Instructions
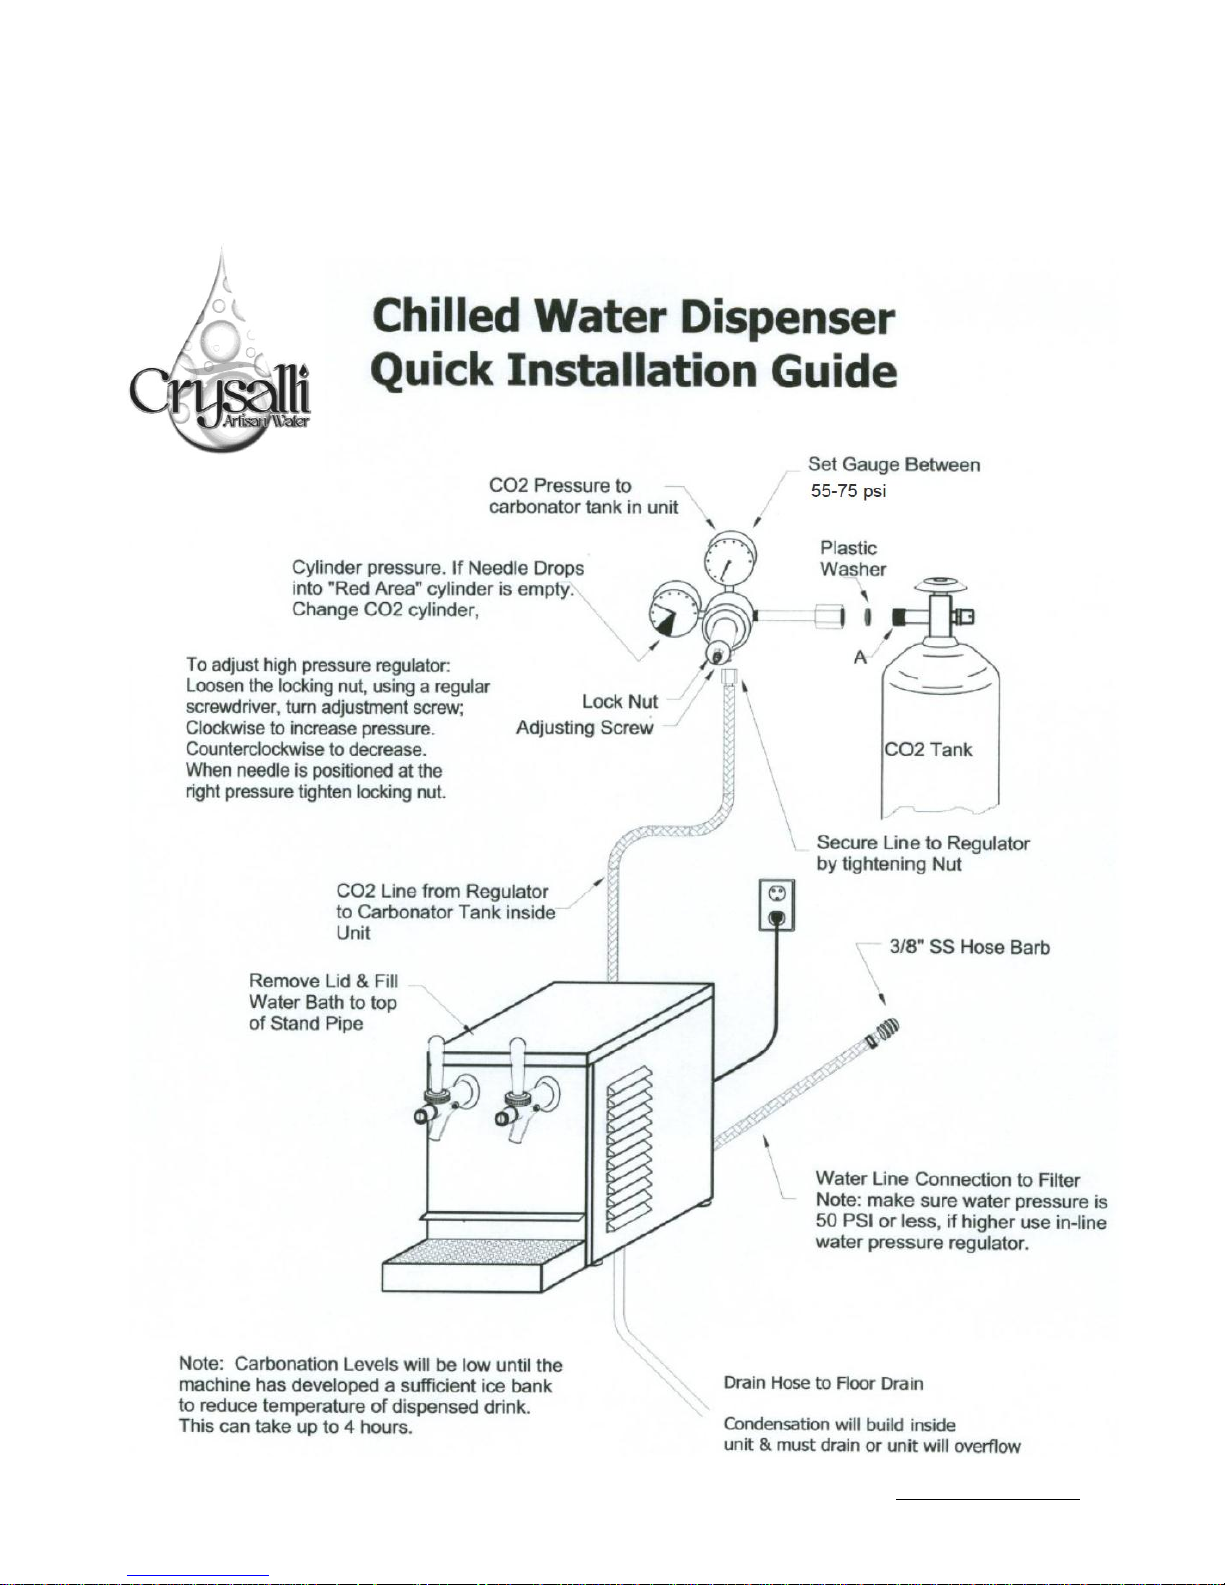
1. Select a location for you chilled water dispenser keeping in mind the unit needs air
space behind it and to the sides. Place unit as close as possible to water filter
connection & 120-volt electrical outlet.
2. Connect water inlet line from unit (3/8” braded line labeled “water”) to your water
filter system. When using the Everpure filter system, the inlet and outlet fittings are
¾” fpt, reduce down to accommodate your line and fitting sizes. If using a water
pressure regulator or back flow preventer, plumb after the filter system. Set Water
Pressure Regulator to 50 PSI.
3. Connect a High Pressure CO2 regulator (CR-3741) to CO2 cylinder then connect CO2
line from unit to regulator. CO2 braided line has a stainless steel nut on it.
4. Turn on Water. Check connections for leaks.
5. Open CO2 by turning knob on tank. Adjust regulator between 55-75 PSI. And check
for leaks.
6. Run clear overflow drain hose to floor drain or other waste drain.
7. Fill Water Bath: Remove lid and fill water bath with non-filtered tap water, fill up no
less than ¼” to top of white standpipe. This is the vertical white tube in the water
bath that is connected to the clear overflow hose.
8. Plug unit power cord into 120-volt outlet. Toggle the ON/OFF rocker switch to the ON
position. Fan and compressor will turn on. Fan and Compressor will automatically turn
off when a complete ice bank is made and cycle on and off to maintain it.
9. Unit will take between 3 & 4 hours to make a complete ice bank.
10. Pull open the still water and sparkling water faucets to run water through the system.
You will need to run the sparkling water faucet for several minutes to cycle the
carbonation system before full sparkling water will dispense.
11. Once unit has built the ice bank you are ready to dispense chilled still and sparkling
water.
1
Crysalli/Western Pacific – 1739 Sabre Street Hayward, CA 800-229-4410 www.crysalli.com
Page 2
CR-KIT-CT Install Kit is available, which includes barb fitting clamps, extra hose, a back flow
preventer, water pressure regulator and other items for install ease.
CR-3741 High Pressure CO2 Regulators are available. CO2 tank must be sourced locally.
Owner’s Manual and Warranty Bond can be found on line www.crysalli.com
2
Crysalli/Western Pacific – 1739 Sabre Street Hayward, CA 800-229-4410 www.crysalli.com
Page 3
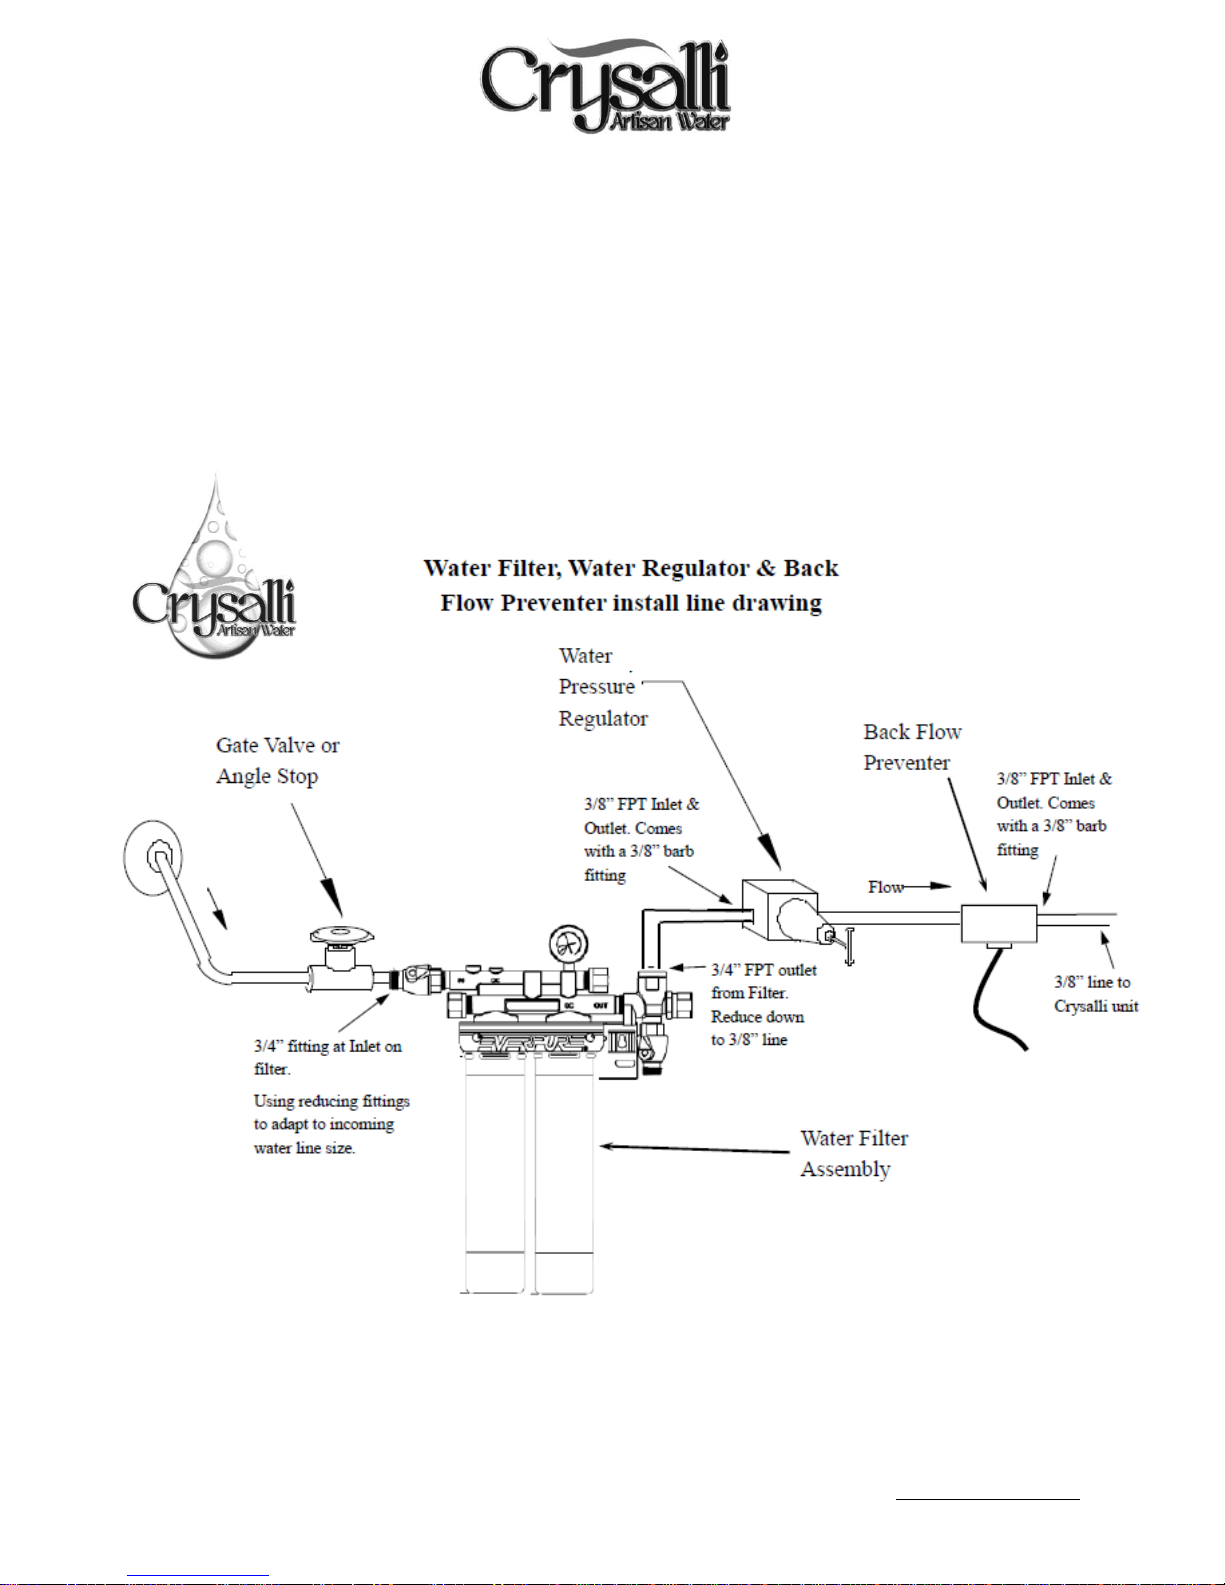
Sample Install Layout of Filter System
With Water Pressure Regulator and Back Flow Preventer
(Water Pressure Reg and Back Flow Preventer are supplied in the CR-KIT-CT Install kit).
Always reference local plumbing code for local standards about Back Flow Preventers
such as need, installation placement and type of back flow preventer required.
Use water regulator when water pressure is above 70 PSI. Always regulate the water
pressure after the Water Filter System. Set Water Regulator to 50 PSI.
3
Crysalli/Western Pacific – 1739 Sabre Street Hayward, CA 800-229-4410 www.crysalli.com
Page 4
4
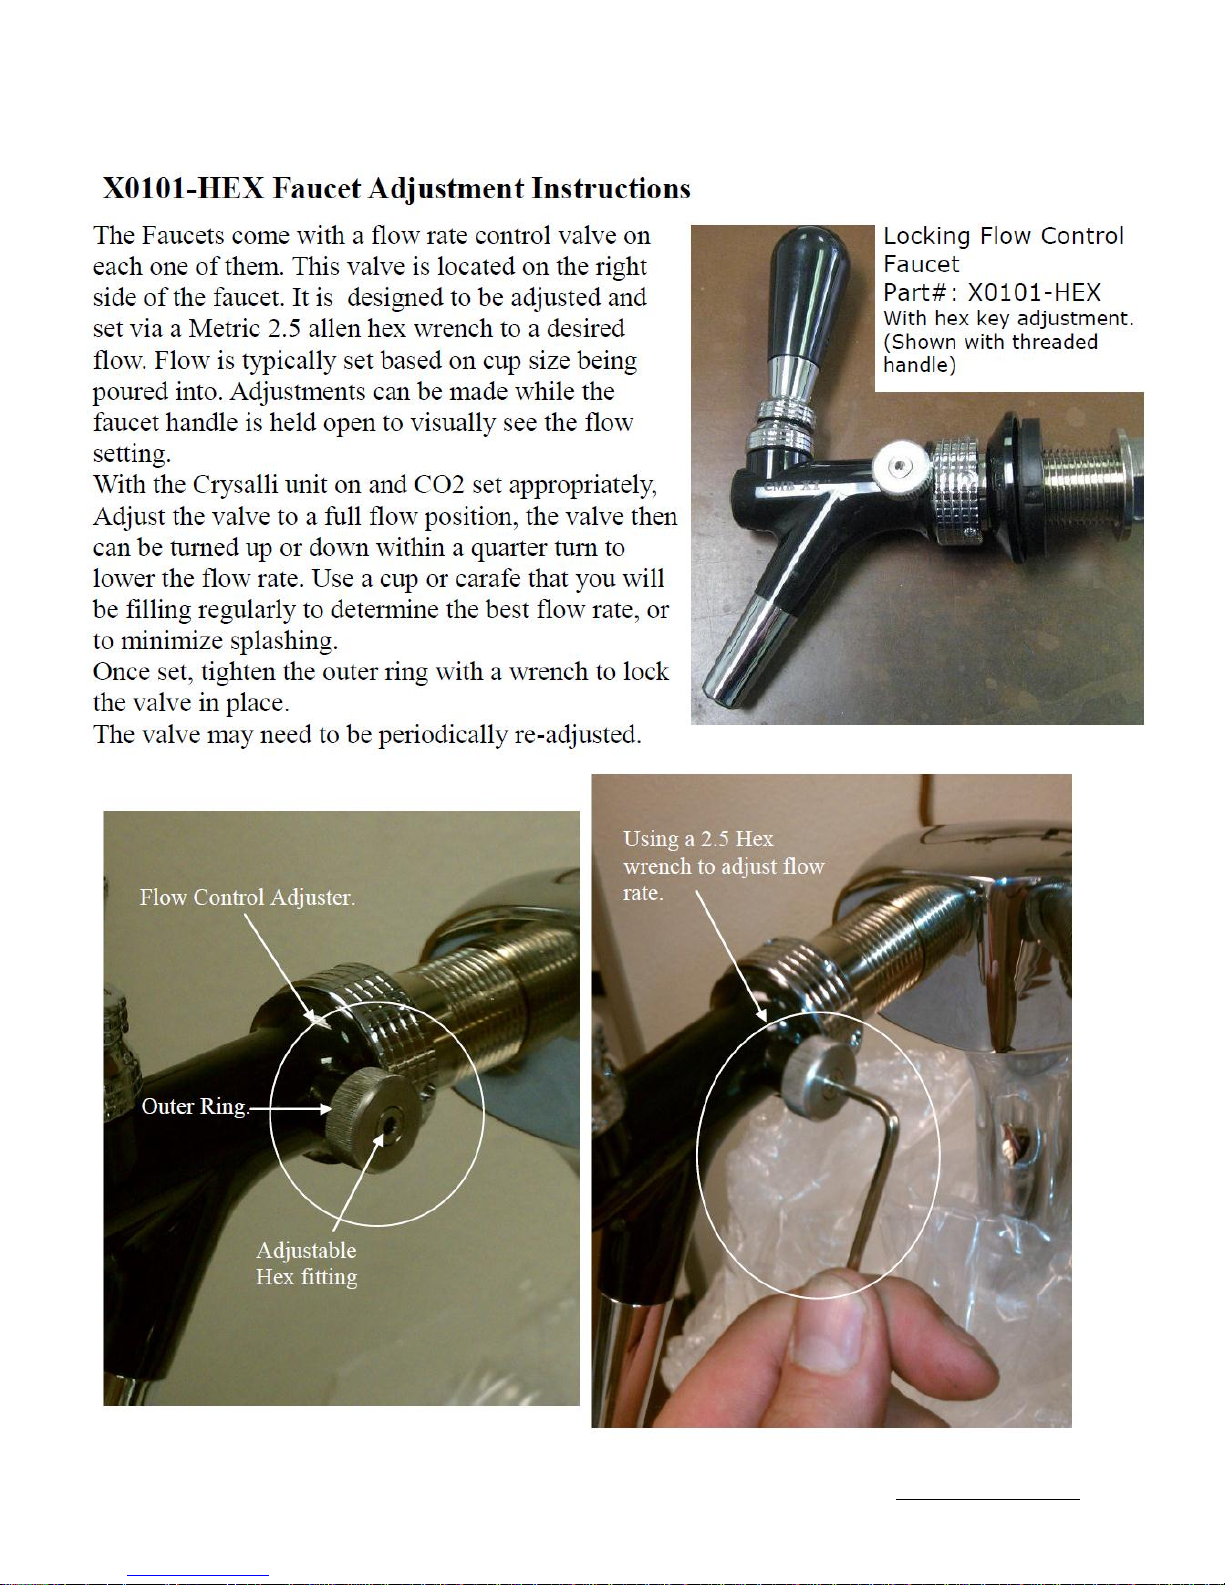
Optional X0101-HEX Faucets. For use in Self-Serve Applications
Crysalli/Western Pacific – 1739 Sabre Street Hayward, CA 800-229-4410 www.crysalli.com
Page 5
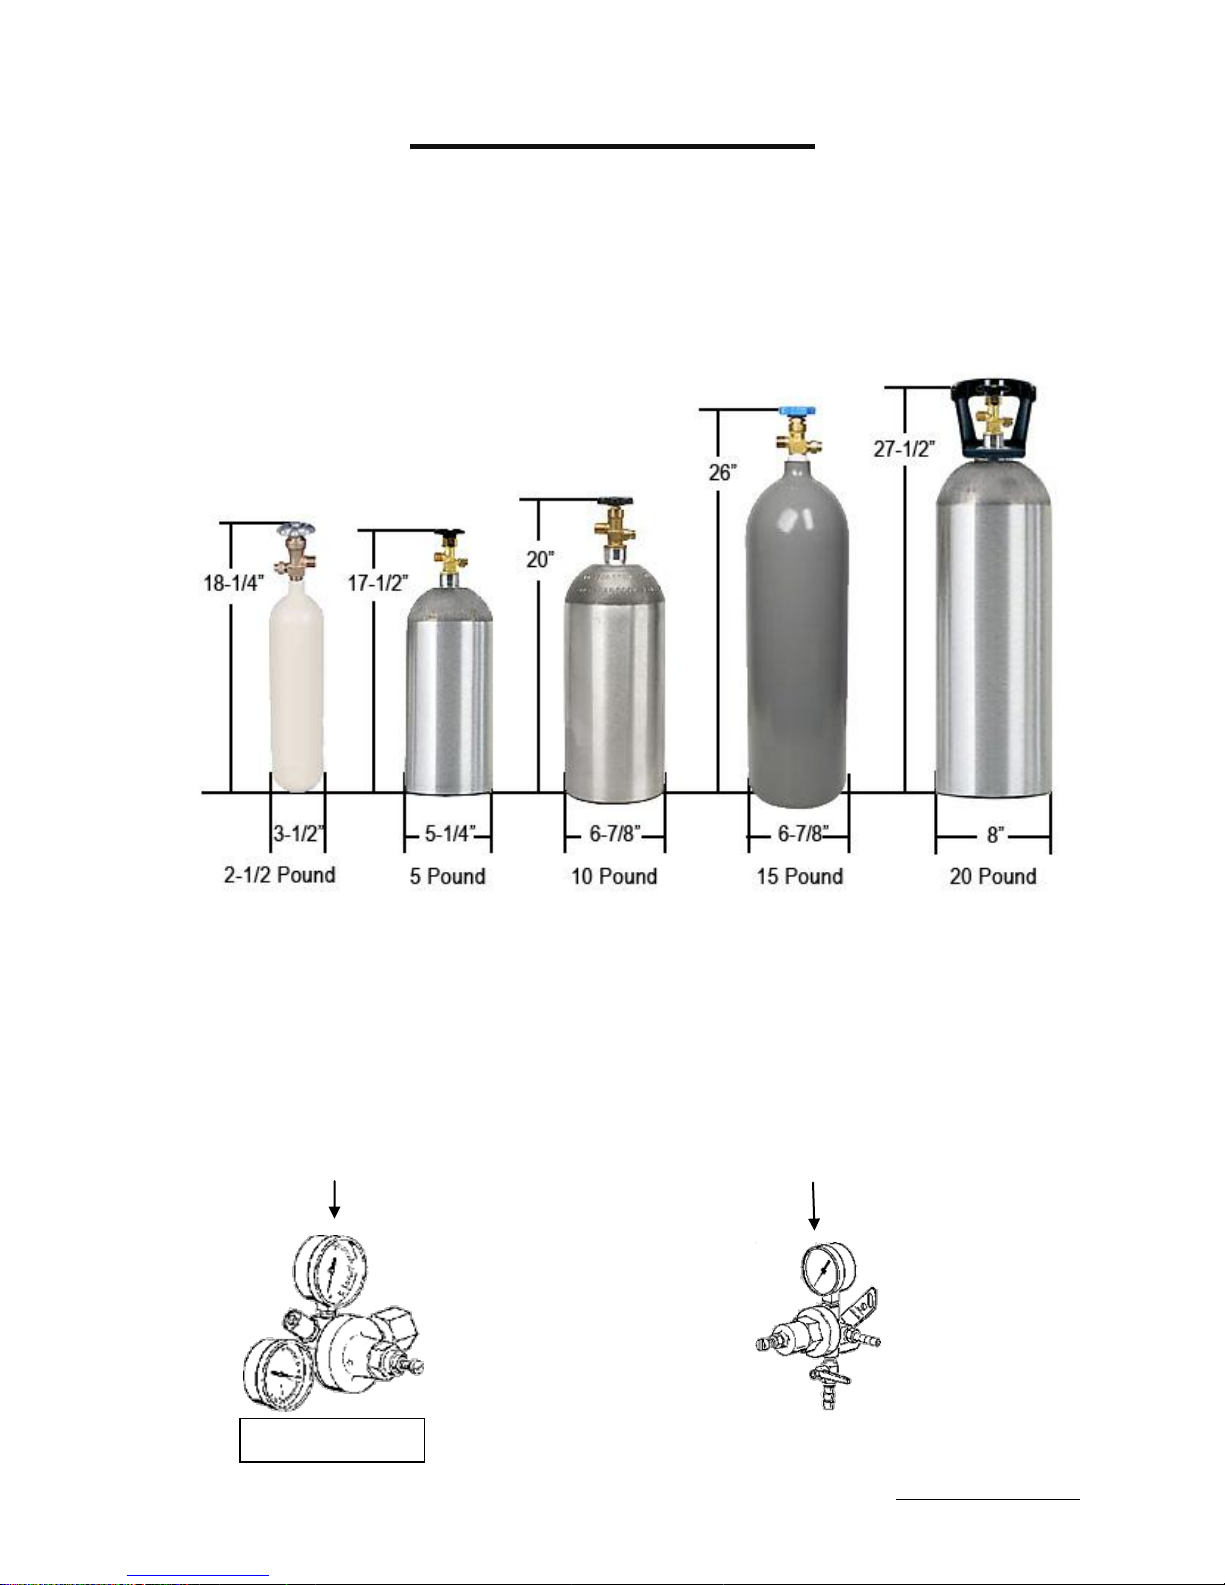
CR-3741
CO2 information
CO2 Tanks can be sourced from local Beverage CO2 Companies or
Welding Supply companies. Many Beverage CO2 companies provide pick-up
of empty and drop off of full CO2 Cylinders.
Common CO2 Cylinder Sizes: 20 lbs tanks will usually fit undercounters
5
-----------------------------------------------------------------------------------------------------------------------------------------------
Use High Pressure CO2 Regulators 0-160 PSI:
(Note: Low Pressure Beer Regulators 0-50 psi, will not work properly).
Primary or Secondary
For CO2 tanks For adding in line to existing CO2 systems
Crysalli/Western Pacific – 1739 Sabre Street Hayward, CA 800-229-4410 www.crysalli.com
 Loading...