

CRYOMAGNETICS LM-500 Quick Manual

Model LM-500 Liquid Cryogen Monitor - Quick Guide
I. Start-Up
Step 1: Connect the liquid level sensor to the “Sensor(s), I/O port” (DSUB15Pin connector on
the rear panel of the monitor).
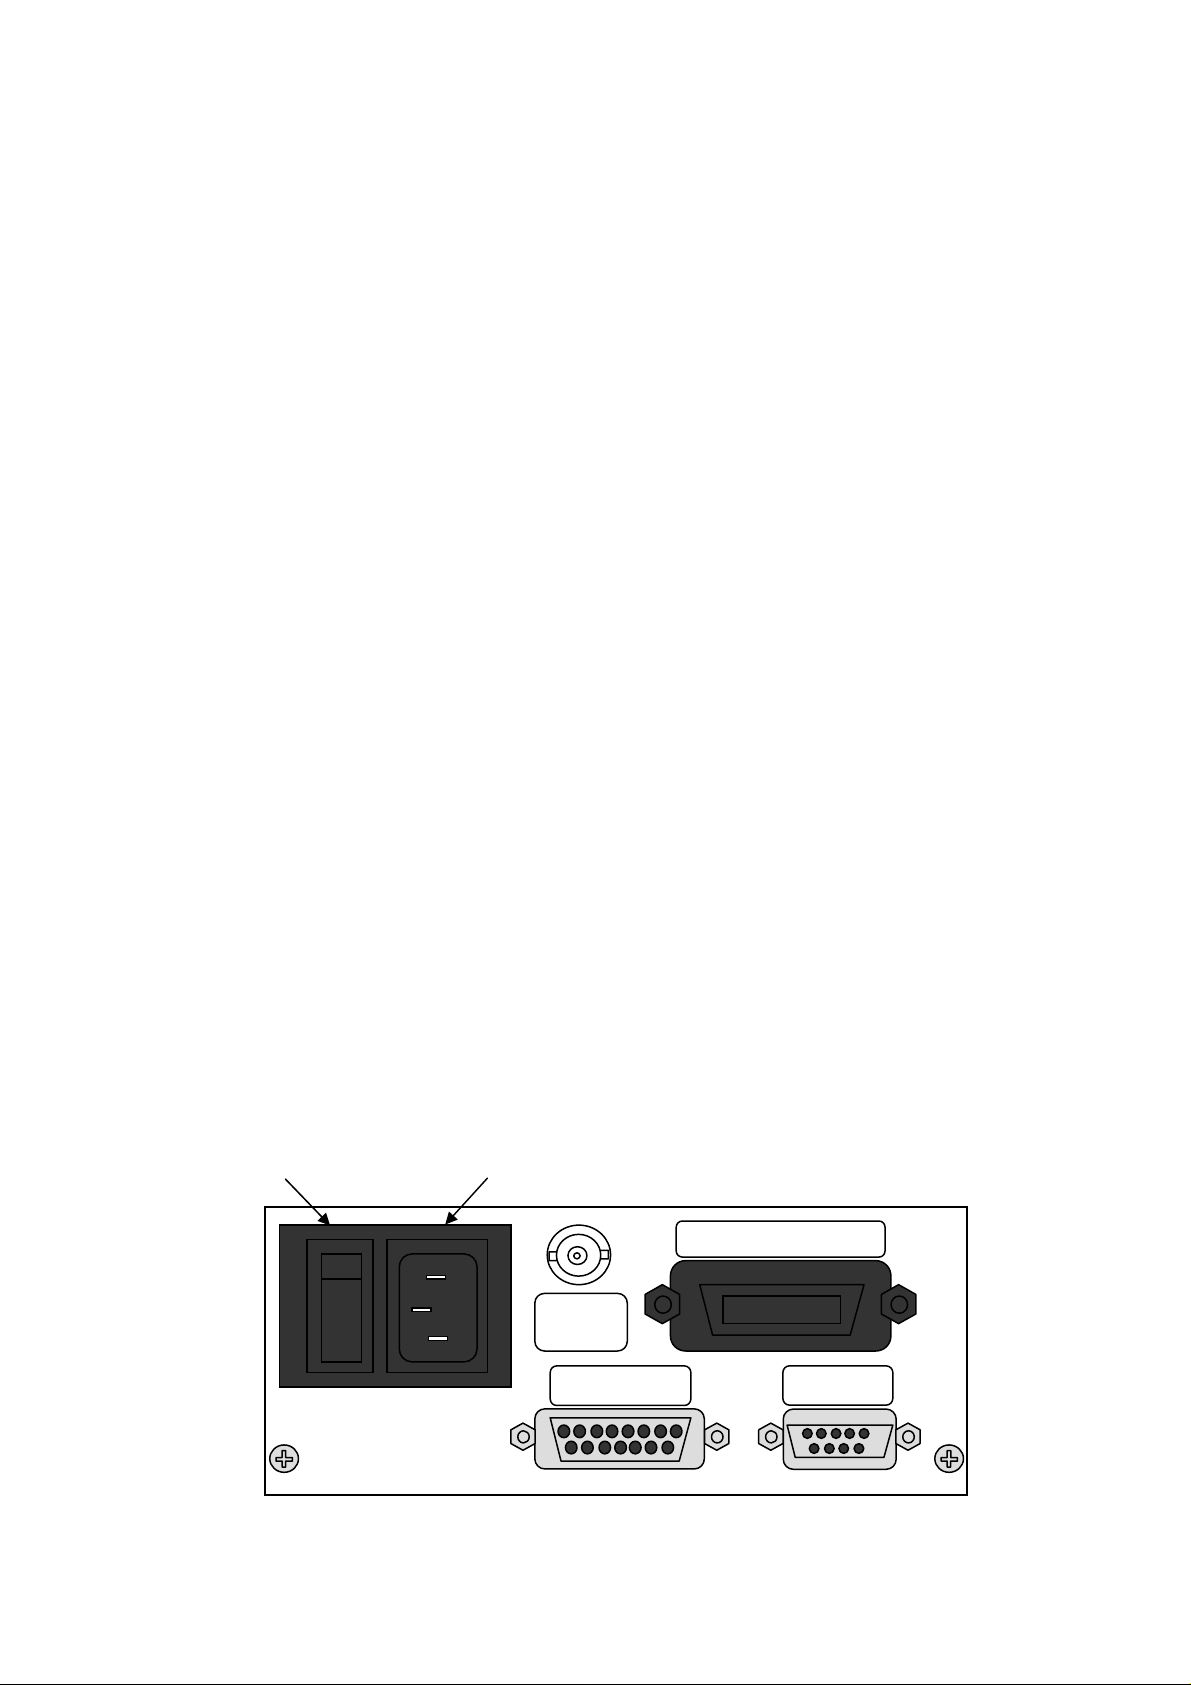
Step 2: Insert the power cable plug into the power socket (rear panel).
II. Measurement of Liquid Level
Step 1: Turn on the power switch (rear panel). → The liquid level will be displayed on the
screen.
III. Sample/Hold and Continuous Modes
1. Sample/Hold Mode
The level of liquid He is measured/updated by pressing the Enter key or at pre-programmed
intervals (Intvl menu). Unless the Enter key is pressed, the last measurement result is
displayed.
2. Continuous Mode
The level of liquid He is measured continuously and kept up-to-date. Please note that in this
mode measurements may be performed more often than necessary.
3. Switching Modes
Step 1: Press the Menu key to display the Menu screen.
Step 2: Highlight the “Mode” using △ or ▽key.
Step 3: Press the Enter key and choose either “Sample/Hold” or “Continuous.”
Step 4: Press the Menu key while the selected mode is displayed to go back to the display
screen.
4. Measurement Operation
Sample/Hold mode: Press the Enter key. →The level of liquid He is measured and the value
is updated.
Continuous mode: The level of liquid He is measured/updated automatically.
IV. Finishing-Up
Step 1: Turn off the power switch.
Liquid Cryogen Level Monitor
Model LM-500
ENTERMENU
FRONT PANEL
I nput Power: 100V
S/N
230V
(
50/60 H z)115V
Sensor(s),I/O
IEEE-488.2Interface
-
A
nalog
Output
V. Menuing System
1. Mode
You can configure the mode settings to measure the level of liquid He. Choose either
“Sample/Hold” or “Continuous.”
2. Limits
The Limits menu configures the alarm feature and the liquid level set points for the external
signal for automatic refill.
3. Fill
The Fill menu can configure the automatic refill feature.
4. Intvl
The Intvl menu is used to configure the settings for measurement intervals. Keep pressing the
△ or ▽key until the desired interval is displayed.
5. Units
With the Units menu, you can choose a measurement unit from “cm,” “%,” and “in.”
6. Boost
The Boost menu is used for the sensor defrost mode setting. (This mode sends a stronger
electric current when the sensor gets frozen.)
7. Ports
The Ports menu can configure the parameters for RS-232, GPIB, and analog output port.
8. Cal
The Cal menu is utilized as a calibration parameter to configure the settings for sensor length,
characteristic resistance, and wiring resistance.
VI. Menu Operation
1. Press the Menu key.
2. Highlight the desired menu item using △ or ▽key and press the Enter key.
3. Press the Menu key to exit.
Power Switch Power Outlet
**** 2
REAR PANEL
 Loading...