

Page 1
Rev. 060613
REAR-VIEW INTEGRATION CAMERA FOR HONDA CIVIC 2012-UP WITHOUT NAVIGATION OPTION
RVCHN-76c
HONDA:
2012 - 2013 Civic
We recommend reading this installation guide rst before starting any
work. Following these instructions from “Start” to” Finish” will ensure
a smooth and hassle free installation. We oer telephone support M-F
9:00 AM – 5:00PM PDT at 1 (855) 822-1348. We are here to help.
PARTS INCLUDED:
(1) Rear Camera (HN-76c)
(1) 15 ft. Extension
(1) HN-76c Harness
(1) Instruction
Camera Specications:
- Lens Angle 170 Degrees
- Resolution 420 TV Lines
- Min. Illumination 0.2Lux
- Voltage 12v
- Operating Temp. -22˚F - 176˚F
- NTSC
- Reference Lines
- Shutter Speed 1/60s - 20us
- Waterproof
- Pixels 656 x 492
PRECAUTIONS:
- Remove the negative side of the battery to avoid any short circuits
durring the installation.
- Do not install the interface near any major components or near the
HVAC system. This may cause damage or overheating to the vehicle.
- Do not disconnect the airbag connection behind the radio panel.
PRELIMINARY:
Please read the entire manual before installing this interface.
TOOLS NEEDED:
- Drill Gun
- Panel Remover
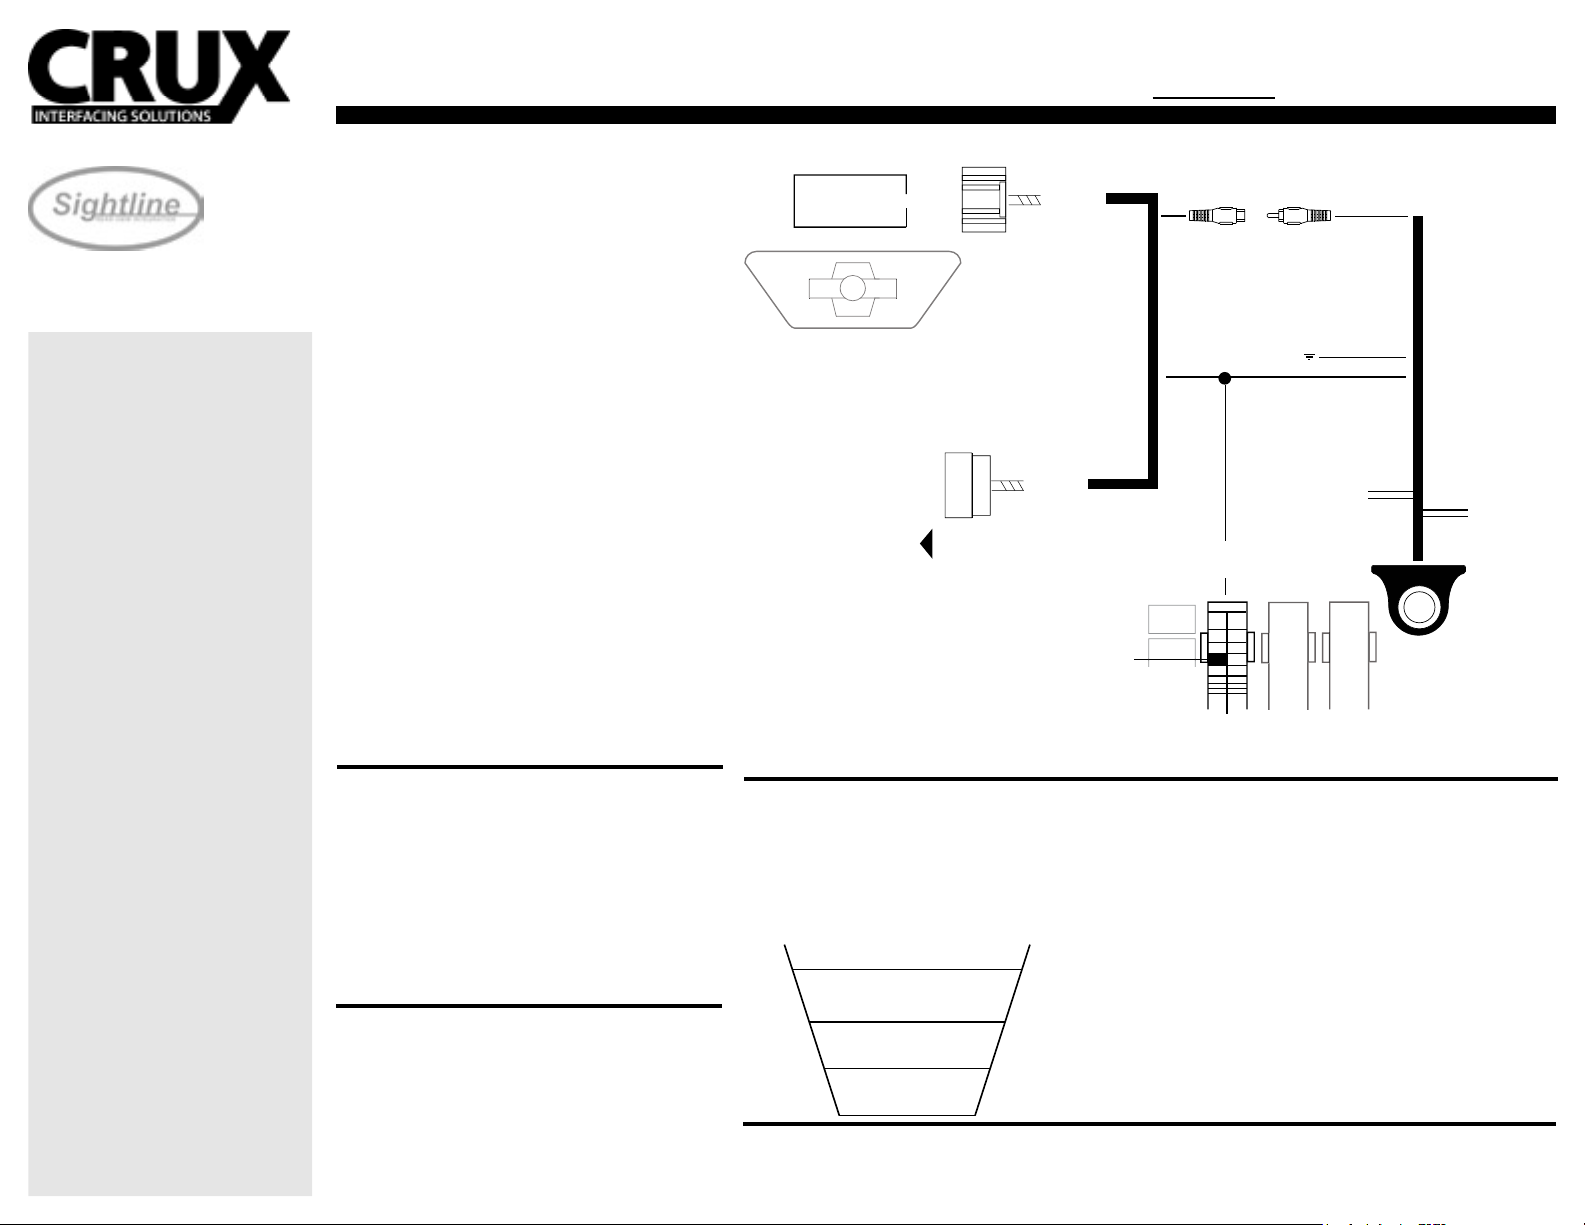
CAMERA CONNECTIONS OVERVIEW
SEPERATE SCREEN
COMPATIBLE RADIO
TO FACTORY
HARNESS
32-PIN
(male plug)
ORANGE/REV TRIGGER
32-PIN
(female plug)
PIN 4
(Reverse Trigger)
CONNECT FOR 12V TRIGGER
(at fuse panel/ driver’s left kick panel)
VIDEO
CONNECTION
ORANGE
CONNECT TO REVERSE
BROWN/SILVER DOTS
REVERSE TRIGGER
GREEN CONNECTOR
TAP TO ACTIVATE TRIGGER
(extention)
WHITE
(Reverse Image)
15 ft
BLACK/ GROUND
RED/ 12V TRIGGER
GREEN
(Parking Grid)
CONNECT TO ACTIVATE
INSTALLING THE CAMERA AND CABLE
1. Remove the rear panel with Honda emblem. Trunk lip.
2. Drill 5/8 hole in the proper location. recommend driver side of panel.
3. Insert and secure the camera using the included bolt.
4. Fish the wires throught a drilled hole and through the passthrough
into the trunk/cargo area.
5. Route cables to the front of the vehicle towards the factory radio.
6. Remove the factory radio to gain access to the factory display.
7. Route the wires towards the display and make the power and video
connections. For powering up the camera, use the 12v output from
the 32-Pin factory connector. (See overview).
8. Secure all connections and make sure revesre gear triggers the
camera source. If so, re-install all factory dash panels.
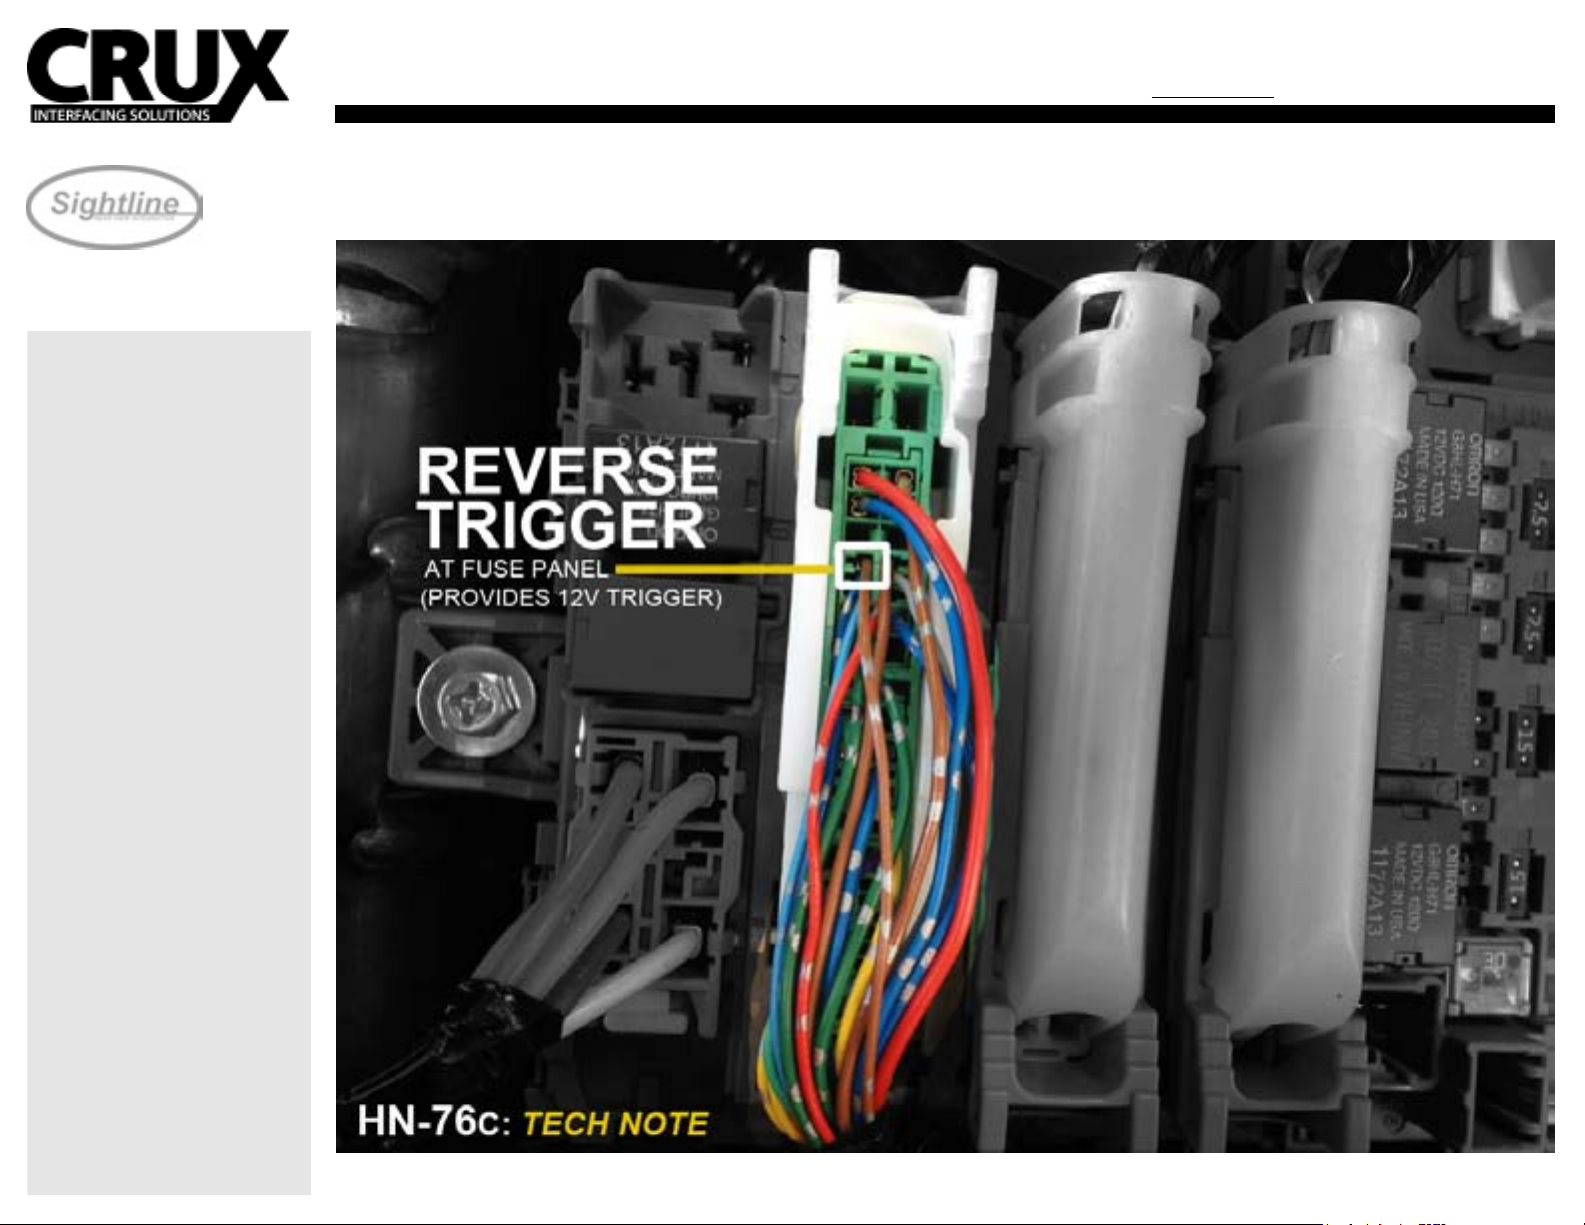
CONNECTING THE REVERSE INPUT
To connect the reverse camera input you must have access to the back
of the factory display, above the radio.
1. Tap the Orange wire to the BROWN/SILVER wire (Pin-4) at the
driver’s side fuse panel for 12v ACC power. You can also use this
same 12v wire for the camera 12v turn on. (See overview)
PARKING LINE
The parking lines are there to assist you while reversing.
What the lines mean:
Yellow Line: CLEAR
Purple Line: GETTING CLOSE
Red Line: WARNING - VERY CLOSE
To remove the parking lines simply cut the GREEN wire located near
the 4 pin tail connector in the truck.
REVERSE IMAGE
If the camera angle is inverted (upside down), please cut the WHITE
wire located near the pin tail connector in the trunk.
YELLOW
PURPLE
RED
TROUBLE SHOOTING
1. No video display while in reverse.
- Make sure the trunk is closed, as this will dis-engage the camera while in reverse.
Page 2
REAR-VIEW INTEGRATION CAMERA FOR HONDA CIVIC 2012-UP WITHOUT NAVIGATION OPTION
RVCHN-76c
HONDA:
2012 - 2013 Civic
CONNECTING THE REVERSE INPUT
To connect the reverse camera input you must have access to the back of the factory display, above the radio.
1. Tap the provided Orange wire from the Honda Harness to the BROWN/SILVER wire (Pin-4) at the driver’s side fuse panel for the 12v Trigger wire.
You can also use this same 12v trigger wire to power the camera 12v turn on. (See overview)
 Loading...